
Your water bill showed up last month and you winced. Your trash bin is overflowing with vegetable peelings and cardboard. Your neighbor’s garden looks like a Pinterest board and yours looks like a crime scene. I’ve been there — trust me, the summer my zucchini took over the entire ZIP code taught me more about restraint and resourcefulness than any gardening book ever could.
The good news: gardening sustainably and gardening cheaply are almost the same thing. Most eco-friendly practices exist because they save money. Compost replaces bought fertilizer. Rainwater replaces tap water. Mulch replaces endless weeding labor. Once I figured that out, my whole approach changed. These 13 ideas are ones I’ve personally tested, tweaked, and leaned on — and I’m sharing the ones that give you the most green for your shilling (or dollar, or euro — the soil doesn’t care).
1. Start a Compost Bin Using Free or Nearly Free Materials
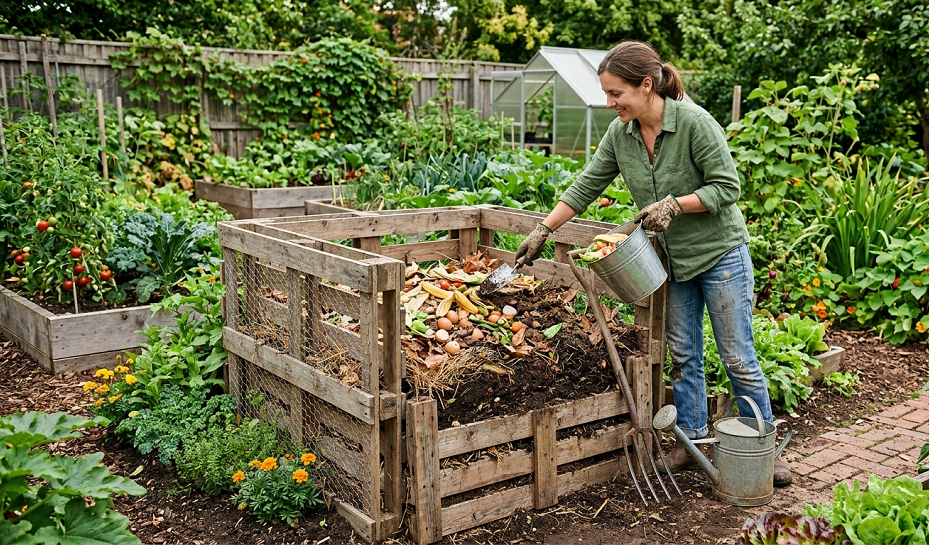
This is, without question, the single best thing you can do for your garden and your wallet. I’m not going to sugarcoat it — composting feels weird for the first two weeks and then it becomes an obsession. You’ll start eyeing your banana peels differently.
You don’t need a fancy tumbler that costs $150 and looks like a UFO landed in your backyard. A pile in the corner works. A wooden pallet enclosure works better and costs nothing if you ask around at hardware stores or marketplaces — most places want to get rid of pallets. Four pallets wired together make a perfectly functional three-bay composting system. I built mine on a rainy Saturday afternoon and it’s been running for six years.
What goes in: fruit and vegetable scraps, coffee grounds, eggshells, cardboard (torn up), grass clippings, dried leaves, shredded newspaper. What stays out: meat, dairy, cooked food, and anything that’ll attract rats. The ratio you want is roughly 3 parts “browns” (dry carbon material like cardboard, straw, dried leaves) to 1 part “greens” (fresh nitrogen-rich stuff like kitchen scraps and grass). Mess that up and you’ll know — it either smells like ammonia (too many greens) or just sits there doing nothing (too many browns).
In 3–6 months you have finished compost that is, genuinely, better than most bagged fertilizers. Work it into your soil before planting, use it as a top dressing in spring, or brew it into “compost tea” (just steep some in water for 24 hours and water your plants with it). Zero cost. Zero waste. Pure garden gold.
2. Collect Rainwater With a DIY Rain Barrel System
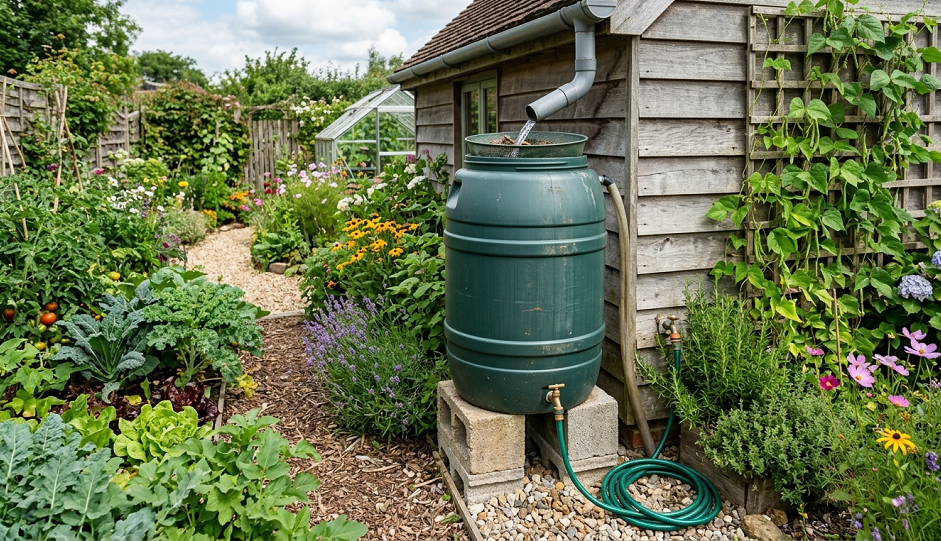
Water is where a lot of gardeners lose money — and it’s also one of the easiest things to fix. Tap water costs money, often contains chlorine and fluoride that plants don’t love, and using it excessively during dry spells puts strain on local water supplies. Collecting rainwater solves all three problems at once.
A basic rain barrel setup costs almost nothing if you’re willing to be creative. An old food-grade barrel (available from car washes, pickle factories, juice manufacturers — seriously, just ask around) with a hole cut at the top, a spigot drilled at the bottom, and a piece of mesh screen over the opening to keep out mosquitoes and debris is all you need. Connect it to your downspout with a diverter kit (about $15–20 from any hardware store) and you’re collecting water every time it rains.
I have four barrels daisy-chained together on the side of my house. On a good rainy day, I collect over 800 liters. That gets me through most of a dry week without touching the tap at all. In my first year with this system, my water bill dropped noticeably during summer — enough to more than pay for the setup.
One thing people get wrong: they set up the barrel and forget to maintain it. Empty it regularly during dry stretches (stagnant water breeds mosquitoes even through screen), clean it out once a year, and make sure the overflow pipe points away from your foundation. Treat it like a tool, not a set-and-forget installation.
3. Make DIY Liquid Fertilizer From Weeds and Kitchen Scraps
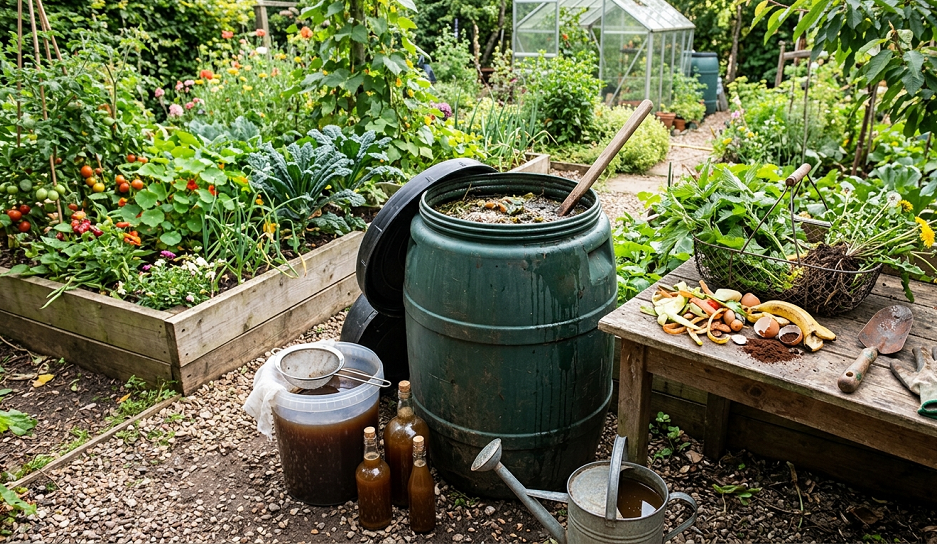
Here’s one most gardeners don’t know about, and once you try it, you’ll feel like a proper herbalist. Comfrey, nettles, yarrow, and even dandelions — all those plants you’ve been pulling out and chucking — are absolutely packed with nutrients. Steep them in water for 2–4 weeks and you get a potent liquid feed that rivals commercial fertilizers.
The process: stuff a bucket with weeds (comfrey is the gold standard — it’s high in potassium and nitrogen), fill it with water, weigh the plant matter down with a brick or stone, cover loosely, and wait. It will smell absolutely terrible. I cannot stress this enough. Do this away from your house, ideally downwind of a neighbor you don’t like. After a few weeks, strain the liquid, dilute it about 1:10 with water until it looks like weak tea, and water your plants with it.
This costs nothing if the weeds are already in your garden. Even if you plant comfrey specifically for this purpose (root cuttings are dirt cheap), you’ll spend maybe $2–3 and have an ongoing supply for years. Comfrey grows like mad and you can cut it down several times a season for more material.
A quick note on nettles: they’re particularly good for leafy crops and brassicas because they’re high in nitrogen. I grow a patch specifically in a corner where nothing else wants to grow anyway, and I harvest from it all season. Your gloves matter here — learn from my impatient mistakes.
4. Use Sheet Mulching (Lasagna Gardening) to Build New Beds for Free
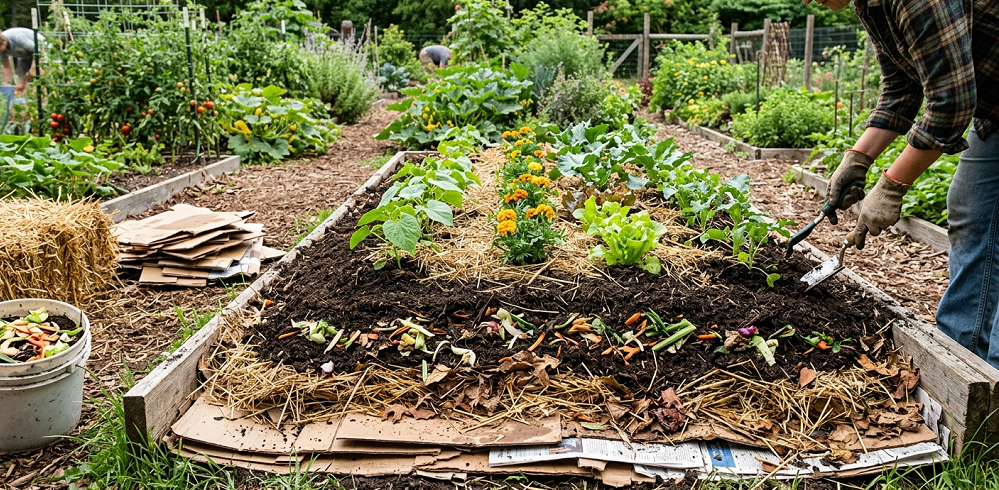
If you want to create a new raised garden bed without digging, buying topsoil, or spending a weekend with a back brace, sheet mulching is your answer. The idea is simple: smother whatever’s currently on the ground with layers of material, and let soil organisms do the work of breaking it all down into rich planting medium.
The base layer is cardboard or thick newspaper — uncoated, no glossy pages. Lay it down with generous overlaps (at least 6 inches at the seams), wet it thoroughly, and that’s your weed barrier. On top, alternate layers of “browns” and “greens” just like composting: straw, wood chips, compost, grass clippings, more straw, more compost. The whole pile should end up 30–45cm deep. The cardboard smothers existing weeds; the layers break down over months into a fluffy, worm-rich growing medium.
My first lasagna bed cost me absolutely nothing. I collected cardboard from a local appliance shop, grabbed a trailer-load of autumn leaves from the roadside, asked a tree surgery company for wood chips (most will dump them for free if you ask — they pay to get rid of them otherwise), and topped it with my own compost. I planted squash through it that first season while it was still breaking down, and got an absurd harvest.
The one real drawback: it takes time. Start in autumn for spring planting. If you try to rush it and plant in a bed that hasn’t broken down yet, you’ll be planting into a pile of straw and cardboard and wondering why nothing’s growing properly. Patience is the investment here.
5. Save Seeds From Your Best Plants Each Year
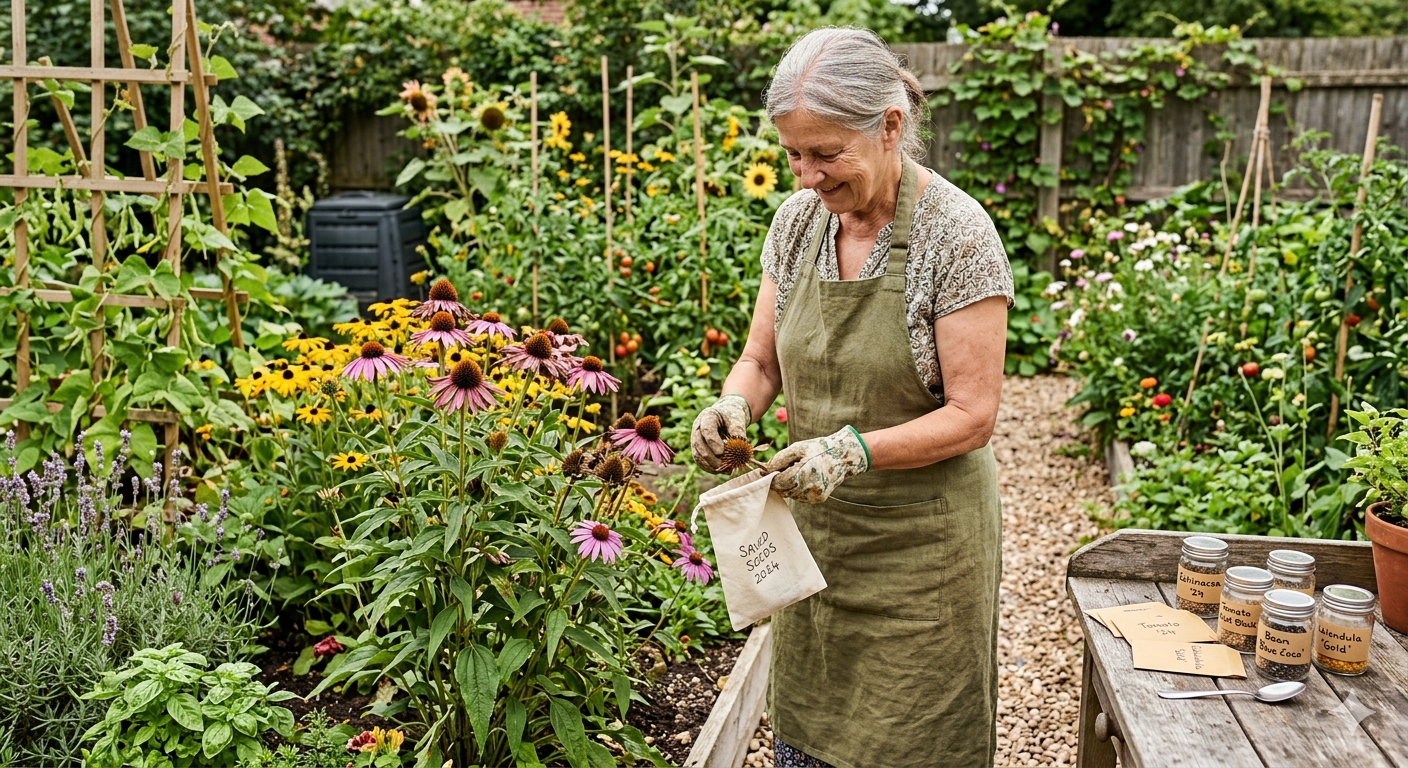
This is the single most underrated budget gardening move there is. Most vegetables and many flowers will give you next year’s seeds for free if you let a few of them go to seed rather than harvesting everything. I saved seeds for the first time about eight years ago, almost by accident (I forgot about a lettuce plant), and now I buy maybe 20% of what I used to buy in seeds every year.
The easiest seeds to save: tomatoes, beans, peas, squash, courgette, peppers, and most flowers. The ones that are trickier (hybrid varieties, plants that cross-pollinate easily like corn and brassicas) take a bit more understanding but aren’t impossible. For beginners, start with beans and peas — they self-pollinate, the seeds are big and easy to handle, and they dry beautifully right in the pod.
To save tomato seeds properly, you need to ferment them briefly. Scoop seeds and gel into a jar of water, leave for 2–3 days until mold forms on top (that’s normal and good — it removes the germination inhibitor from the gel), rinse, and dry on a plate. Store in a paper envelope in a cool, dry, dark place labeled with the variety and year. They’ll last 3–5 years with no trouble.
The compounding effect here is real. Year one, you save seeds from one plant. Year two, you grow a dozen plants from those seeds and save seeds from the best three. Within a few seasons, you have adapted, locally-selected varieties that are used to your specific soil and climate. Commercial seeds can’t compete with that.
6. Build a Worm Farm (Vermicomposting) From Reclaimed Containers
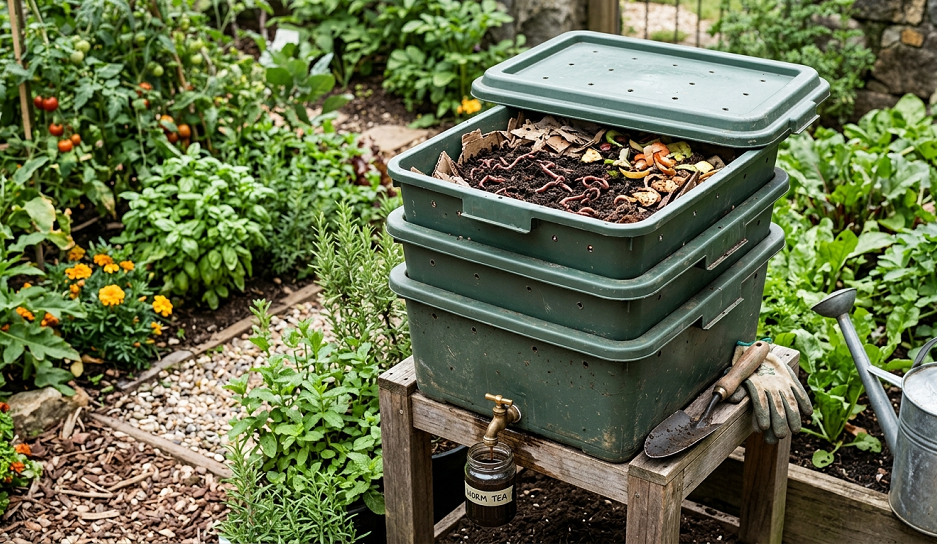
A worm farm is composting on turbo mode, and it fits on a balcony, in a shed, under a kitchen sink, or in a corner of a garage. Red wigglers (Eisenia fetida, if you want to sound impressive at dinner parties) process kitchen scraps into worm castings — essentially the finest, most biologically active fertilizer you can put on a plant.
You don’t need to buy a branded worm farm system. A stack of old plastic storage bins works perfectly. Drill small holes in the bottom of two or three bins for drainage and aeration, set them up nested with small spacers between each level, put your worms in the top bin on a bedding of damp shredded newspaper, and start feeding them kitchen scraps in small amounts. Move feeding spots around so they follow the food and process it evenly.
The liquid that drains into the bottom bin is called worm tea, and it’s incredibly potent — dilute it heavily (1:20) before applying it to plants. The castings that build up in the bins go directly into potting mix or top-dress around established plants. My worms have been running for four years now, and the only things I’ve bought since starting are the original worm starter pack (about $15–20) and a bag of coir for bedding (about $5). Everything else was reclaimed.
Avoid feeding them citrus, onions, spicy foods, and anything salty or oily. Go easy on the amount — a small farm can get overwhelmed quickly, and a smelly, waterlogged worm bin is demoralizing. Less food, more often, is the rule I follow.
7. Plant Companion Plants Instead of Buying Pesticides
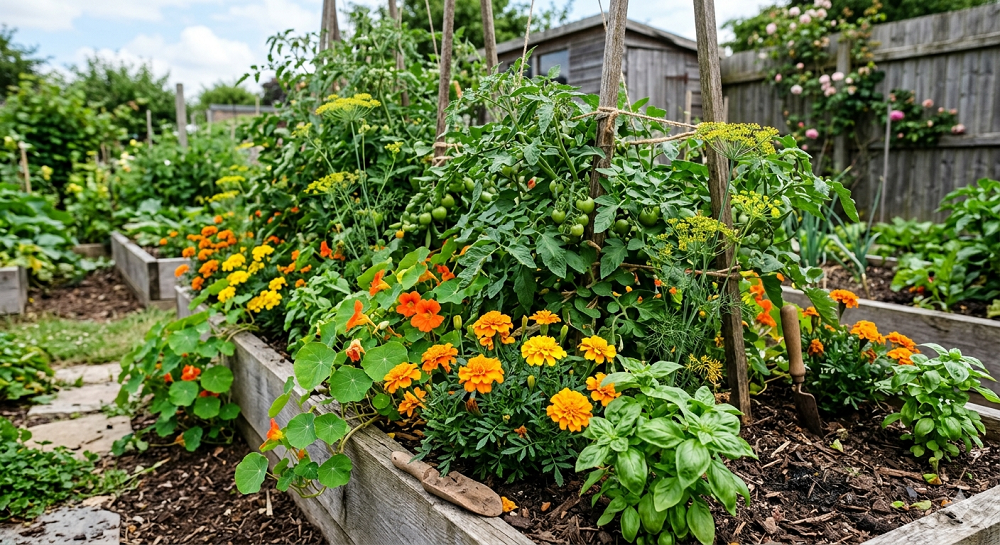
Chemical pesticides are expensive, they kill beneficial insects alongside the bad ones, and they end up in your soil and water. Companion planting — growing specific plants together that help each other — solves a lot of pest problems for free, using plants you’re often growing anyway.
The classic combinations I use every single year: basil next to tomatoes (repels aphids and whitefly and probably makes the tomatoes taste better — I have no science for that second part but I believe it deeply), marigolds along bed edges (their scent confuses aphids and deters nematodes), nasturtiums as a “trap crop” for aphids (aphids adore them and will cluster on nasturtiums instead of your vegetables, where you can spot and deal with them easily), and borage near strawberries and squash to attract pollinators.
French marigolds in particular are cheap from seed, easy to start, and I scatter them throughout the vegetable garden without any particular plan. They’re cheerful, attract hoverflies whose larvae eat aphids, and even after all these years I’m finding new companion planting combinations that surprise me.
The caveat: companion planting is not a silver bullet. It reduces pest pressure; it doesn’t eliminate it. If you have a serious aphid infestation, a few marigolds nearby won’t save you. Think of it as one layer of a multi-layer approach: good soil, appropriate watering, biodiversity, and companions working together is the actual strategy.
8. Make Your Own Eco-Friendly Pest Spray With Household Ingredients
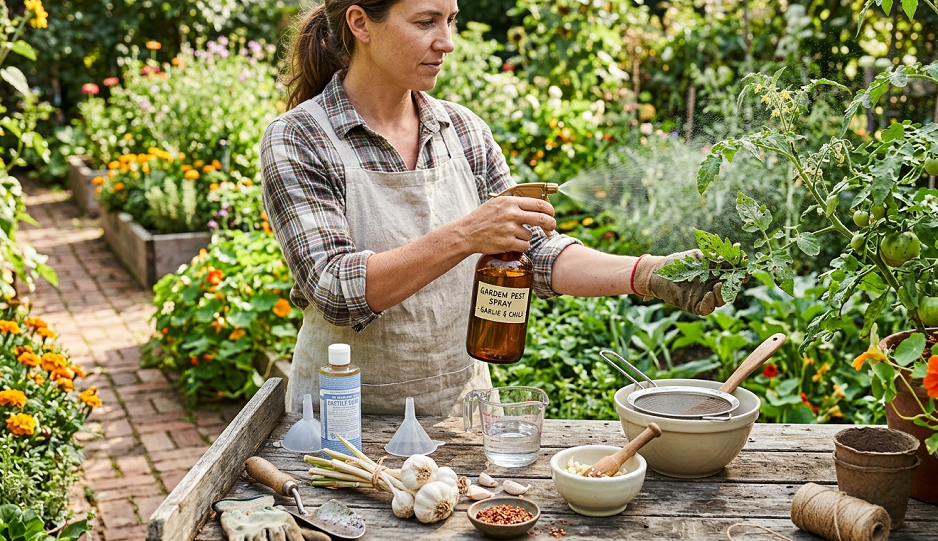
Before you reach for the spray can with the warning symbols all over it, try the stuff that’s already in your kitchen. I’ve had good results with these homemade sprays that cost almost nothing and won’t harm beneficial insects when used carefully.
Soap spray for soft-bodied insects (aphids, spider mites, whitefly): Mix 1–2 teaspoons of pure liquid castile soap (or dishwashing liquid, but go easy) with 1 liter of water. Spray directly on affected plants, coating the undersides of leaves where pests hide. The soap disrupts the insects’ cell membranes and dehydrates them. Reapply every few days and after rain. Don’t spray in full sun or the soap residue can scorch leaves.
Baking soda spray for fungal issues (powdery mildew): Mix 1 teaspoon of baking soda, a few drops of soap, and 1 liter of water. Spray on affected leaves weekly. It changes the pH on the leaf surface and inhibits fungal growth. I’ve used this on squash and cucumbers for years with decent results.
A quick side note on neem oil: it works, but I’ve found the smell makes me vaguely nauseous for the rest of the afternoon and it’s not as cheap as the alternatives above. For really stubborn infestations, it’s worth it. For everyday pest management, soap spray gets the job done.
9. Grow From Cuttings, Divisions, and Swaps Instead of Buying Plants
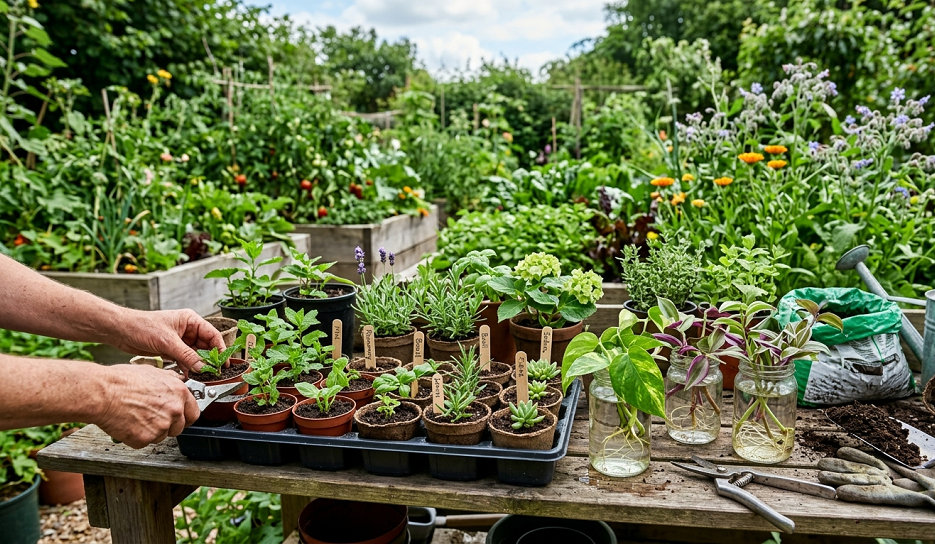
Plants are expensive. This is a fact gardeners accept too readily. Most of the perennials, herbs, and shrubs in my garden cost me nothing because I grew them from cuttings, divided established clumps, or swapped with neighbors.
Taking cuttings is genuinely easy once you do it a few times. Rosemary, lavender, sage, mint, lemon balm, most geraniums, fuchsias, hydrangeas, and dozens of shrubs root readily from 10–15cm stem cuttings. Cut just below a leaf node, strip lower leaves, dip in honey (yes, honey — it works as a rooting hormone and costs less than rooting powder), and insert into a small pot of damp perlite or coir. Cover with a clear plastic bag or cut bottle to keep humidity high, put somewhere bright but out of direct sun, and wait 3–6 weeks.
Dividing established perennials in spring or autumn is even simpler. Dig up a clump, separate it into sections with a fork or spade, and replant. One plant becomes four or six. I’ve done this with hostas, daylilies, agapanthus, ornamental grasses, and dozens of others over the years.
Then there’s swapping. If you’re not part of a local seed or plant swap group, find one or start one. A Facebook group for local gardeners, a neighborhood community board, or even just leaving excess plants at the end of your driveway with a “free, please take” sign will get you more garden goodwill than money ever could.
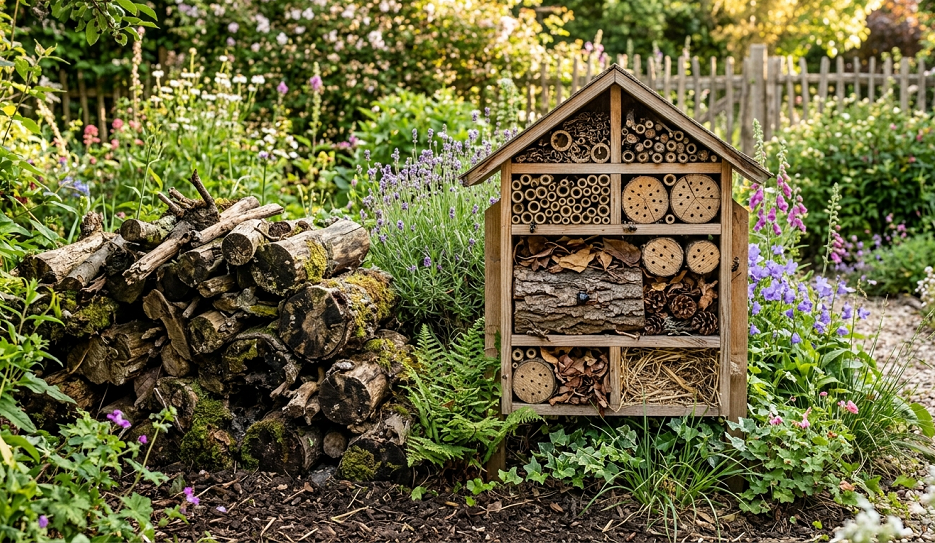
10. Create Wildlife Habitat With a DIY Bug Hotel and Log Pile
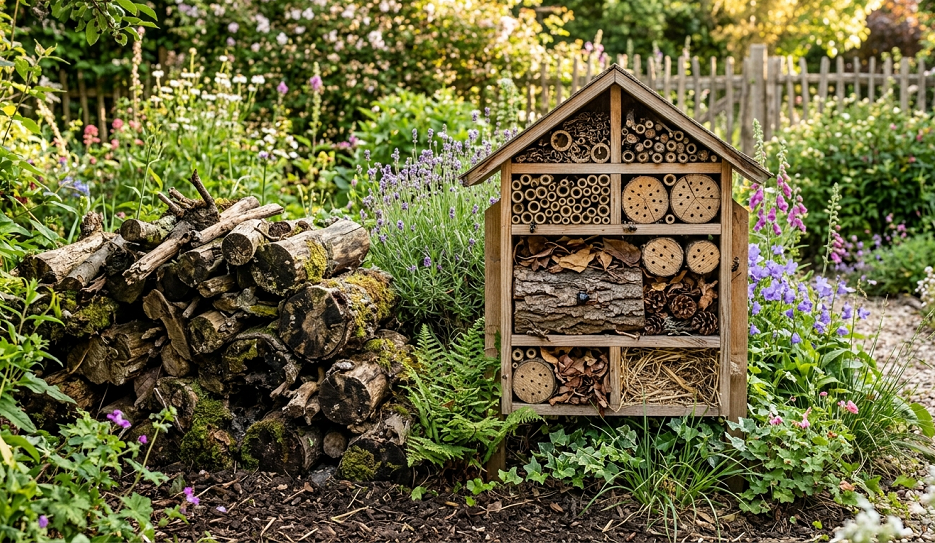
Biodiversity is the most underappreciated tool in sustainable gardening. A garden full of different insects — beetles, lacewings, ground beetles, solitary bees, hoverflies — is a garden with its pest problems largely managed for free by nature. A log pile in a shady corner and a simple bug hotel made from reclaimed materials can make a massive difference.
A bug hotel doesn’t have to be the architectural masterpiece you see on Instagram. Mine is a wooden pallet frame stuffed with: hollow bamboo canes cut to length, pinecones, dry straw, chunks of bark, rolled corrugated cardboard, and terracotta pots stuffed with dry moss. Solitary bees use the hollow canes for nesting; beetles and woodlice use the bark and wood sections; lacewings — voracious predators of aphids — use the straw and cardboard. Total cost: basically zero, assembled from garden waste.
The log pile is even simpler. Stack some old logs in a corner where they’ll stay damp. Beetles and ground beetles colonize rotting wood; slow worms love to shelter under logs; hedgehogs may set up house if you’re lucky. These creatures eat slugs, grubs, and aphids at a rate that no pesticide can match.
The payoff takes a season or two to arrive — you’re building a habitat, not buying a solution. But once you have a healthy beetle population in your log pile, your slug problem will quietly reduce itself.
11. Use No-Dig Gardening Methods to Save Effort and Improve Soil
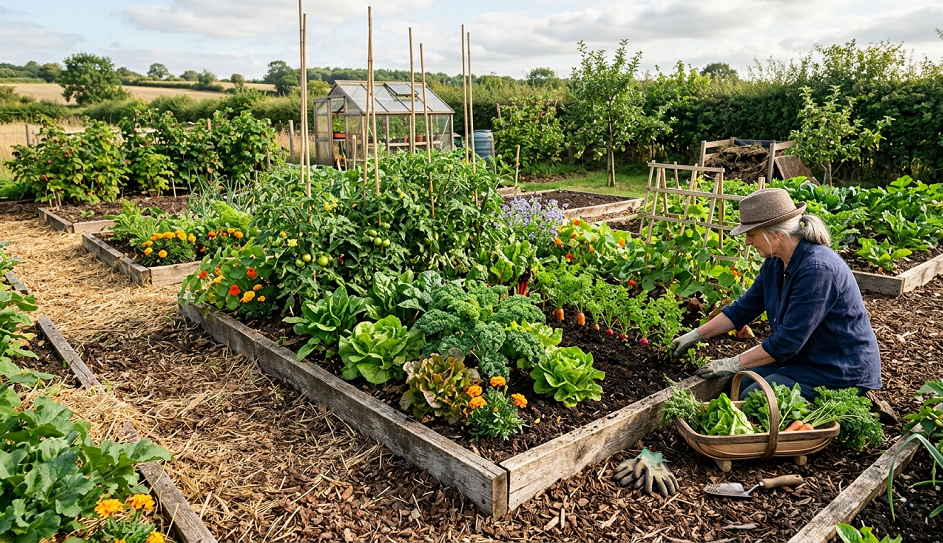
Digging is overrated. I know that’s a slightly alarming thing for a gardener to say, but after switching to no-dig methods six years ago, my soil is healthier, my weed pressure is lower, and I do less physical work in the garden. Charles Dowding has been evangelizing this approach for years and the evidence is now overwhelming.
The principle: soil has a structure, a web of fungal networks, worm channels, and microbial communities that digging destroys. Instead of digging compost into the soil, you apply it on top as a mulch layer each year. Worms and soil organisms pull it down. Weeds are smothered rather than dug in. The soil surface is never left bare and exposed to erosion.
In practice, this means: in autumn or early spring, spread a 5–10cm layer of finished compost over your existing beds. That’s it. Plant through it in spring, whether seeds or transplants. Weeds that do appear come out easily because the surface layer is loose and not compacted. I spend maybe a third of the time I used to spend on bed maintenance.
The upfront cost is just compost — which, if you’ve been following the earlier advice in this article, you’re already making for free. A garden entirely on no-dig methods with homemade compost is essentially a self-sustaining system.
12. Grow Nitrogen-Fixing Cover Crops to Fertilize for Free
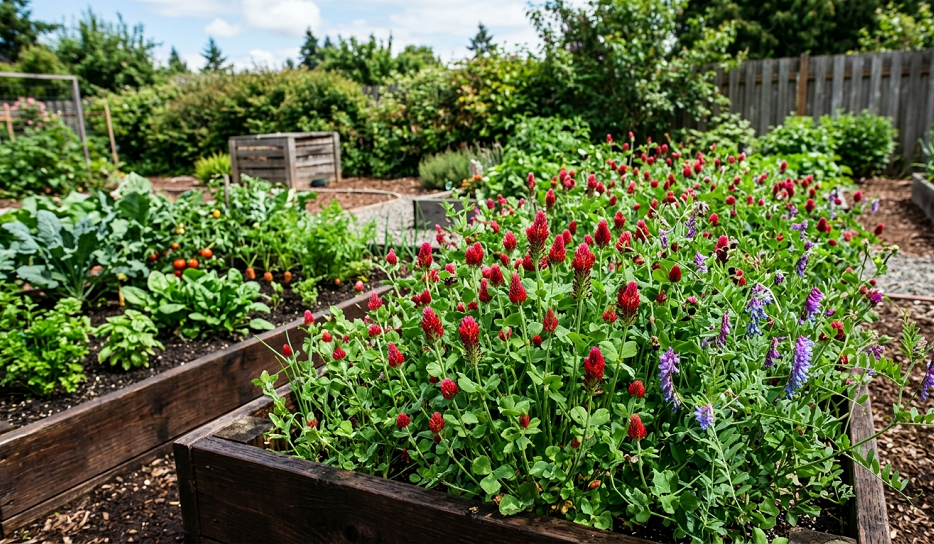
Bare soil between growing seasons is a missed opportunity. Nitrogen-fixing cover crops — clover, vetch, phacelia, field beans, winter rye — planted after your main crops are harvested do three things: protect the soil surface from erosion and compaction over winter, suppress weeds, and in the case of legumes (clover, vetch, beans), fix atmospheric nitrogen into the soil via their root nodules.
The seeds are cheap — a 500g packet of white clover or crimson clover runs about $3–5 and covers a surprising amount of ground. Sow them thickly in late summer or early autumn after your main crops come out. Let them grow over winter. Then, in spring, either chop and drop them (cut them down and leave the material on the soil surface as mulch) or dig them in as green manure a few weeks before planting to give them time to break down.
Phacelia is my personal favorite cover crop and I use it heavily. It’s not a nitrogen-fixer, but it grows quickly, has extraordinary purple-blue flowers that absolutely mob pollinators in spring, and breaks down rapidly when cut. I use it as a “bridge” crop — quick, beautiful, beneficial, and inexpensive. My bees love me for it.
13. Build a Keyhole Garden Bed for Maximum Efficiency With Minimum Resources
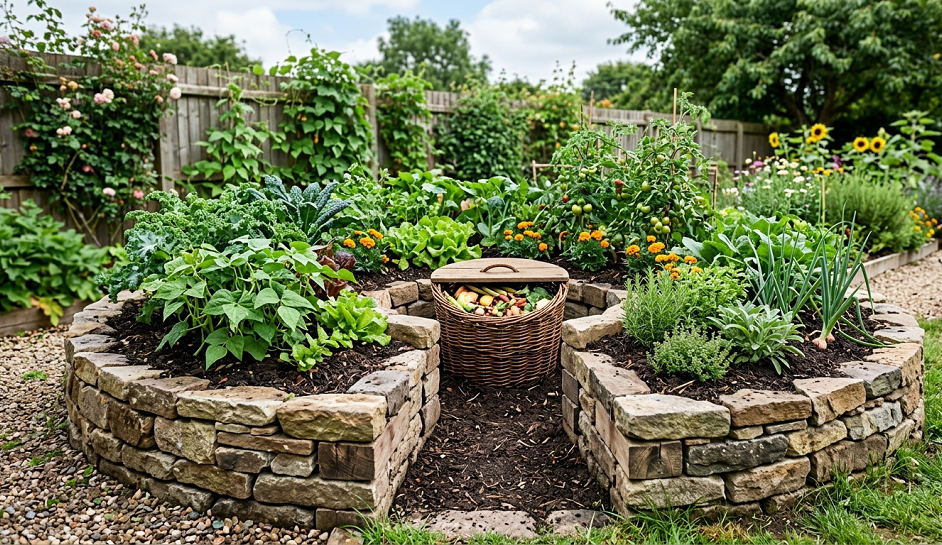
A keyhole garden is a circular raised bed with a narrow path cut into the center — like a keyhole shape from above — so you can reach every part of the bed from the central path without stepping on the soil. It’s a simple design concept borrowed from permaculture and African food garden traditions, and it’s brilliant.
The central feature is a compost basket built into the middle of the bed. You fill this basket — made from wire mesh, bamboo canes, or any open-weave material — with kitchen scraps and organic matter. As you water the bed, you water through the basket, which both composts the material and sends nutrient-rich water radiating outward to the plant roots.
Building one costs almost nothing. A circle of chicken wire or old pallets for the outer wall (if raised is your preference), a cylinder of wire mesh for the compost basket in the center, and filled with any combination of the materials we’ve already discussed: cardboard, compost, straw, wood chips. I built mine in an afternoon using materials that cost me under $10, plus free wood chips from a tree surgeon.
The keyhole design maximizes growing area while minimizing the footprint you need to walk on. In a small garden, that’s genuinely transformative. One keyhole bed can produce a remarkable amount of salad greens, herbs, or flowers in a very small space.
Real Talk: What’s Not Worth the Effort (And What Can Go Wrong)
Now that I’ve given you 13 genuinely useful ideas, let me be straight with you about the stuff that sounds great and disappoints in practice.
Expensive “eco-friendly” soil amendments: Products marketed as “organic superfood soil activators” are, in my experience, a total waste of money. If your compost is good and your soil biology is healthy, you don’t need them. Save your money.
Fancy worm farm systems: The commercially sold stacking worm farms with the cute branding are fine, but they’re not better than the DIY version I described. I’ve watched people spend $80–120 on a branded system when a stack of $3 storage bins does the same job.
Planting too many companion plants at once: I made this mistake in year two. I planted so many “beneficial companion” plants that I had no room for the actual vegetables. Companions are a support crew, not the main act. Don’t let them crowd out what you’re actually trying to grow.
Rainwater collection in urban areas: Check your local regulations first. In some places and regions, collecting rainwater from rooftops is restricted or regulated. It seems absurd, but it’s real.
Rushing compost: If your compost isn’t finished (it should look and smell like dark, earthy soil — not rotting food), adding it to your beds introduces an anaerobic mess that can harm plant roots and tie up nitrogen as it finishes decomposing. Give it the time it needs.
The bigger trap, honestly, is trying to do all 13 of these at once in your first season. That’s how I burned out in year three and let the whole garden go to weeds for six weeks while I ate ready meals and felt guilty. Pick three to start. Master them. Add more the following year.
Parting Wisdom
Eco-friendly gardening on a budget isn’t about sacrifice or deprivation. It’s about working with the systems that already exist — nutrient cycles, water cycles, ecological relationships — instead of constantly fighting against them and paying for the privilege.
The most expensive garden I ever saw was owned by a neighbor who bought everything new every year, used chemical fertilizers and pesticides on a schedule, and ripped everything out each autumn to start fresh. Her garden looked fine. Mine, cobbled together from pallets and saved seeds and compost and worm castings and rainwater, produces three times more food for a fraction of the cost. The soil improves every year. The pest problems have genuinely reduced over time. The birds and bees show up reliably.
That’s the real payoff — not just the money saved, but the feeling that your small patch of earth is getting healthier rather than more depleted, season by season.
Start with a compost bin. Build or buy nothing else until that’s running. Everything else grows from there.
Now it’s your turn: Which of these ideas are you already doing, or which one are you most curious to try first? Have you found something that works brilliantly in your eco-garden that I haven’t mentioned here? Drop your questions and suggestions in the comments below — I read every one and I genuinely love hearing what’s working in different climates and soil types. Let’s figure this out together.

About Syprose Kiche
Syprose Kiche is the creator and writer behind My Besuited Home, a practical home and garden website covering DIY projects, gardening, lawn care, landscaping, home improvement, and outdoor living. She focuses on turning everyday homeowner questions into clear, practical guides backed by careful research and useful real-world considerations.