
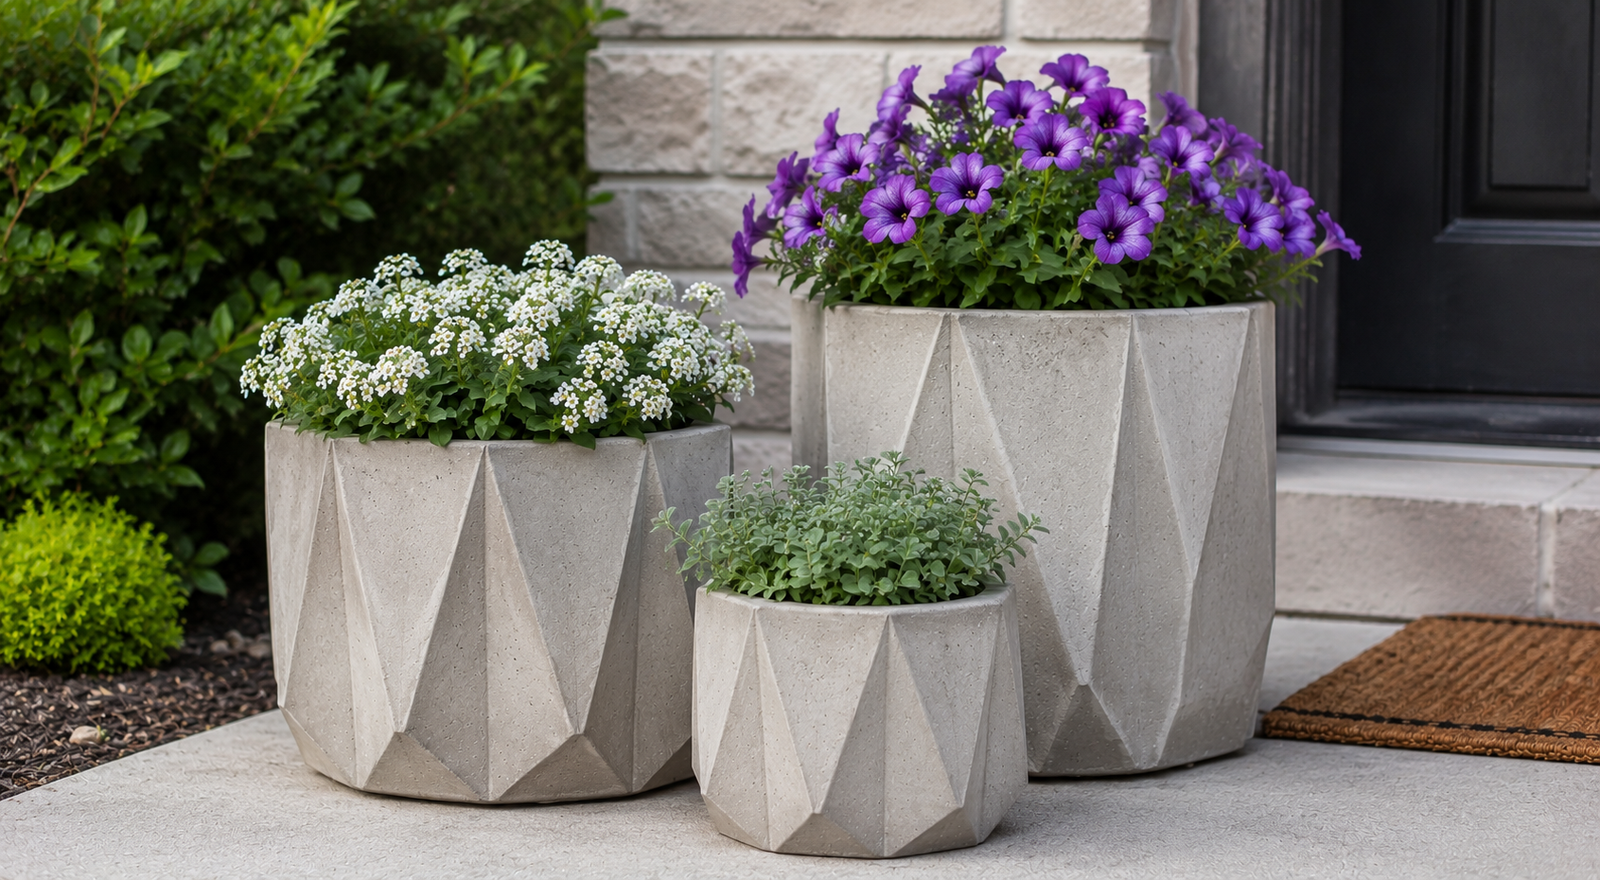
My third summer of gardening, I bought six “weatherproof” resin planters from a big box store. By October, two had cracked down the side from a single Kansas hailstorm, and by January, the other four were basically confetti after one hard freeze. I stood in my driveway holding a piece of broken plastic shaped like a planter and thought, there has to be something better.
Turns out there is. Cement.
I know what you’re picturing: gray, heavy, boring. But cement planters can take a beating that would destroy anything plastic, ceramic, or even wood. They shrug off freeze-thaw cycles, they don’t fade in brutal sun, and they get better looking with age instead of worse. If you’ve got a dog who thinks every pot is a chew toy, or a climate that swings from 100 degrees to below freezing, cement is the answer nobody tells you about at the garden center.
Below are seven DIY cement planter projects I’ve actually built, including the two that flopped before I figured out what I was doing wrong. Grab some gloves, because we’re about to get our hands dirty in the best way.
Why Cement Planters Outlast Everything Else in Your Yard
Before we get into the projects, let’s talk about why this material works so well outdoors.
Cement (technically we’re using concrete mix, which is cement plus sand and gravel) is porous but incredibly dense once cured. That density is what makes it resistant to cracking from freeze-thaw cycles, as long as you mix it right and let it cure properly. Unlike terracotta, which practically begs to crack the first time water gets trapped inside and freezes, a well-made concrete planter has enough internal strength to handle that expansion without falling apart.
It’s also heavy, which sounds like a downside until a windstorm rolls through and every plastic pot on your porch ends up in the neighbor’s yard while your concrete ones haven’t budged an inch.
And here’s the part I really love: concrete takes color and texture beautifully. You can dye it, stamp it, stud it with pebbles, or leave it raw and industrial. It’s basically a blank canvas that happens to be nearly indestructible.
What You’ll Need Before Starting Any of These Projects
A few supplies show up in almost every project on this list, so let’s cover them once.
Materials:
- Quikrete or another all-purpose concrete mix (not just “cement,” which is only one ingredient in the mix)
- Mixing container or wheelbarrow
- Water
- Mold materials (varies by project, covered below)
- Cooking spray or mineral oil for mold release
- Rebar mesh or wire mesh for larger planters (this is not optional if you want your planter to survive a Chicago winter)
Tools:
- Rubber gloves, and I mean real ones, not the flimsy kind
- Safety glasses
- A dust mask when you’re working with dry mix
- A trowel or old spoon for smoothing
- A drill with a masonry bit, for drainage holes later
One quick side note before we start: buy more mix than you think you need. I have never once finished a project with concrete left over, and running out mid-pour means your planter ends up with a visible seam where the old batch met the new one.
Project 1: The Classic Nested Bucket Planter
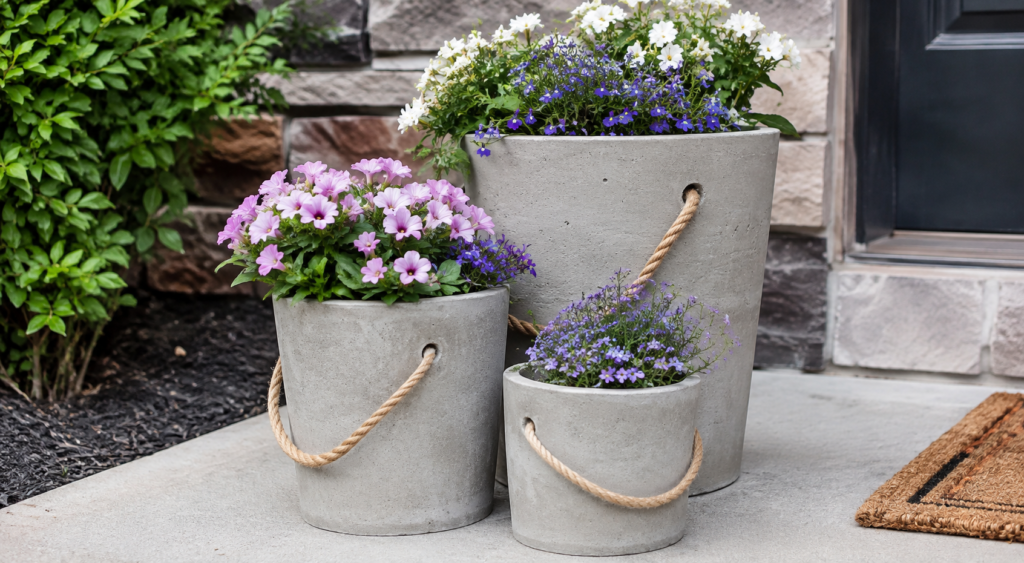
This is the project I tell every beginner to start with, because it’s nearly foolproof.
You’ll need two plastic buckets, one that fits inside the other with about a 1.5 to 2-inch gap all the way around. Dollar store buckets work fine for this. Coat the inside of the larger bucket and the outside of the smaller one with cooking spray so the concrete releases cleanly later.
Mix your concrete to a consistency similar to thick pancake batter. Pour a layer into the bottom of the large bucket, about 2 inches deep, and let it firm up for 20 minutes. This bottom layer is what your plant will actually sit in, so don’t skip it.
Once that base layer has set slightly, place the smaller bucket inside, centered, and weigh it down with rocks or sand so it doesn’t float up as you pour the rest of the concrete around it. Fill the gap between the buckets with your remaining mix, tapping the sides frequently to release air bubbles. Trapped air is the number one reason DIY concrete planters crack later, so don’t rush this step.
Let it cure for 24 to 48 hours before removing the buckets, then let the planter cure for a full week before drilling drainage holes or planting anything in it. I’ve found that people get impatient here and plant too early, and the roots end up sitting in a still-damp, chemically active environment that isn’t great for them.
Project 2: Fabric-Draped Concrete Planters (The “Draped Cloth” Look)
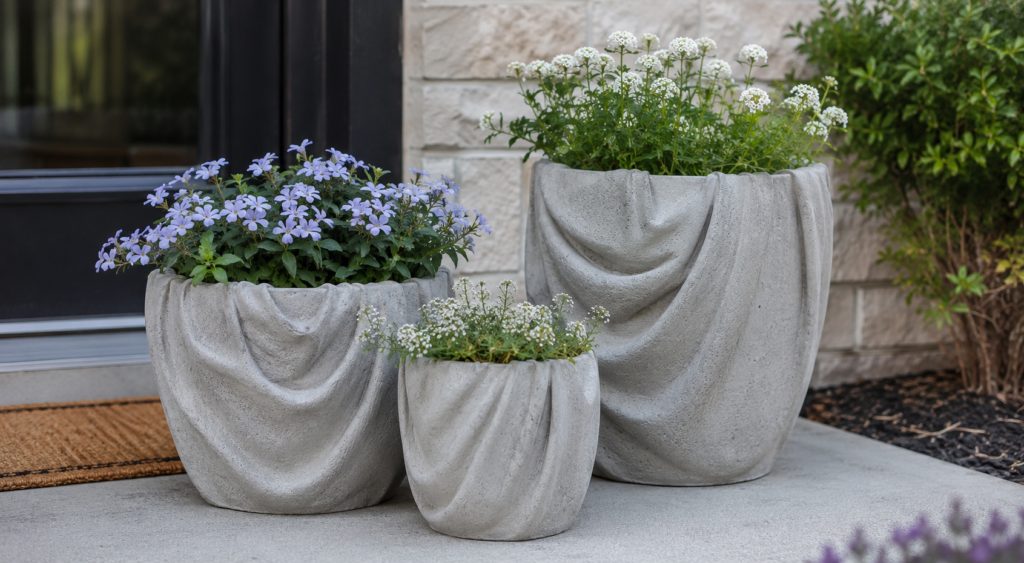
This one gets me the most compliments, and it’s shockingly simple once you understand the trick.
Take an old towel, burlap sack, or heavy cotton fabric and soak it in a concrete slurry, which is just your mix with extra water added until it’s the consistency of thin pancake batter. You want the fabric fully saturated, not just damp.
Drape the soaked fabric over an upside-down bucket, trash can, or even a large ball, depending on the shape you want. Let gravity do the work here. Adjust the folds so you get those soft, draped waves that make it look like fabric even though it’ll be rock solid in a day.
Leave it completely undisturbed for at least 24 hours. This is not the project to check on every hour out of excitement. Every time you touch it, you risk flattening a fold you liked.
Once it’s cured enough to hold its shape, carefully lift it off the mold. It’ll still be a bit soft at this stage, so handle it like a sleeping baby, not a bag of mulch. Let it finish curing for another 5 to 7 days before moving it to its final spot. The draped look works especially well grouped in threes at different heights on a porch or patio.
Project 3: Hypertufa Planters for a Lightweight, Stone-Like Finish
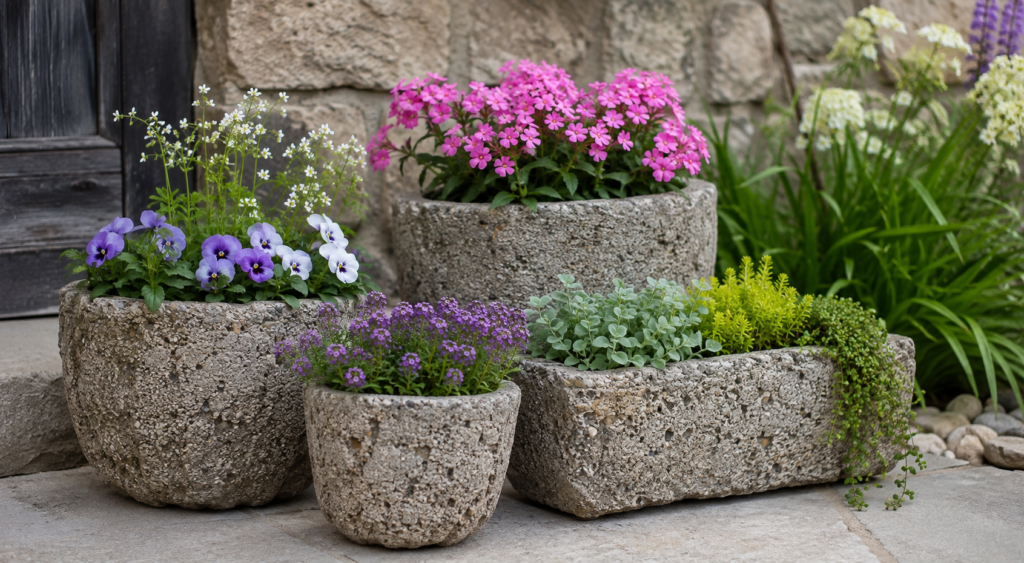
If regular concrete feels too heavy or too “concrete parking garage,” hypertufa is your answer. It’s a mix of Portland cement, peat moss, and perlite that cures into something that looks uncannily like natural stone but weighs a fraction as much.
Mix one part Portland cement, one and a half parts peat moss, and one and a half parts perlite. Add water gradually until the mixture holds together when squeezed, similar to how you’d test cookie dough. Too wet and it’ll slump; too dry and it won’t bond.
Pack the mixture into a mold, which can be as simple as two cardboard boxes nested inside each other, or two plastic containers of different sizes. Press firmly into corners and edges so you don’t end up with weak spots. Hypertufa is more fragile than straight concrete while it’s curing, so this step matters more here than in other projects.
Let it cure in the mold for 48 hours, then remove and let it air dry for two to three weeks. Yes, weeks, not days. Hypertufa needs that long slow cure to develop its strength. I made the mistake of planting in mine after five days once, and the whole thing crumbled at one corner when I picked it up.
The payoff is worth the wait, though. Hypertufa planters develop moss and a weathered patina over time that makes them look like they’ve been in your garden for decades, even when they’re brand new.
Project 4: Stamped Leaf-Impression Planters
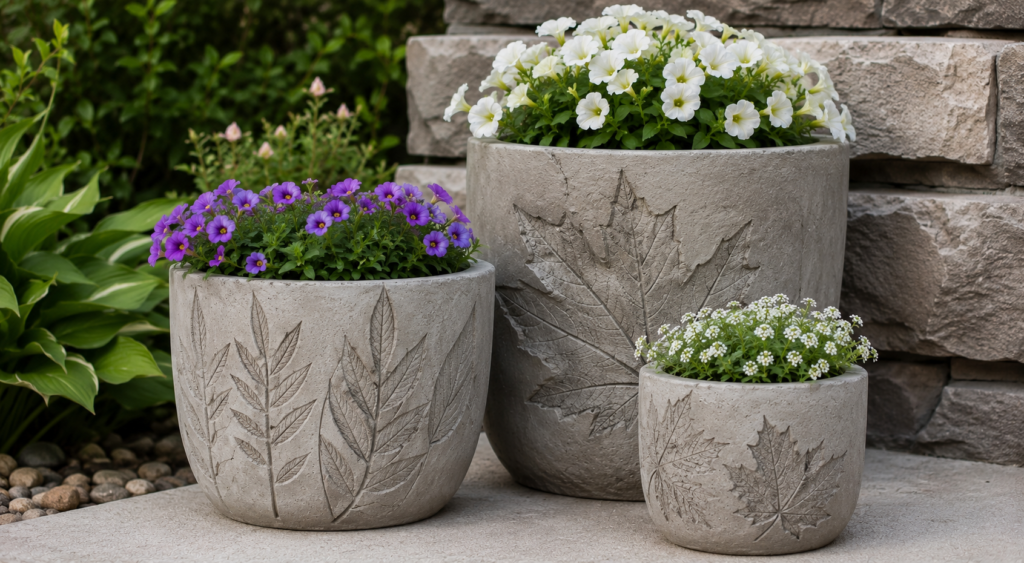
This is my favorite for adding personality without any painting or dye involved.
Use the nested bucket method from Project 1, but before the outer layer fully sets, press large, sturdy leaves (hosta and rhubarb leaves work great) into the still-wet concrete surface. Press firmly and evenly so the vein pattern transfers.
Let everything cure as normal. Once it’s fully hardened, peel the leaves away, and you’re left with a permanent, botanical texture pressed right into the surface.
You can also use this technique on flat concrete “coasters” for the base of the planter, or on decorative concrete leaves you scatter around the base of the pot for a cohesive garden bed look. It’s a small detail, but it’s the kind of thing that makes people stop and ask where you bought it.
Skip synthetic or waxy leaves here. They don’t hold enough moisture or texture to leave a good impression, and some can react oddly with the wet cement.
Project 5: Geometric Wood-Form Planters
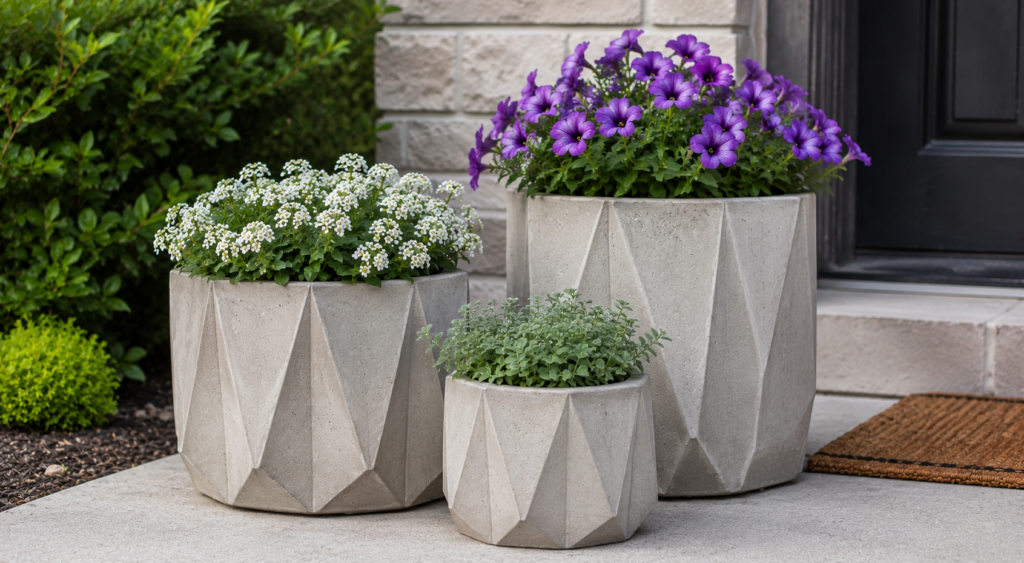
If your style leans more modern than cottagecore, this project delivers clean, sharp-edged planters using wood forms instead of buckets.
Build a simple box mold from scrap plywood, sized to whatever dimensions you want your finished planter to be. Build a second, smaller box to nest inside, leaving a consistent gap on all sides (2 inches is a solid standard for smaller planters, 3 inches for anything over 18 inches wide).
Line the wood with a thin layer of cooking spray or a purpose-made concrete release agent, since wood grips concrete more stubbornly than plastic does. Pour your mix into the gap, tapping the sides of the form regularly to knock out air bubbles, which show up as ugly pockmarks on a flat concrete surface if you skip this.
For anything larger than about a 12-inch cube, add a layer of rebar mesh or heavy-gauge wire partway through the pour. Skipping this on larger builds is how you end up with a planter that cracks in half the first time you move it. Trust me, I’ve paid to replace a patio slab because I didn’t think reinforcement mattered on a “small” project.
Let cure for a full 7 days before disassembling the wood form. The sharp, architectural lines on this style look incredible against softer, wilder plants like ornamental grasses or trailing petunias.
Project 6: Textured “Faux Rock” Planters
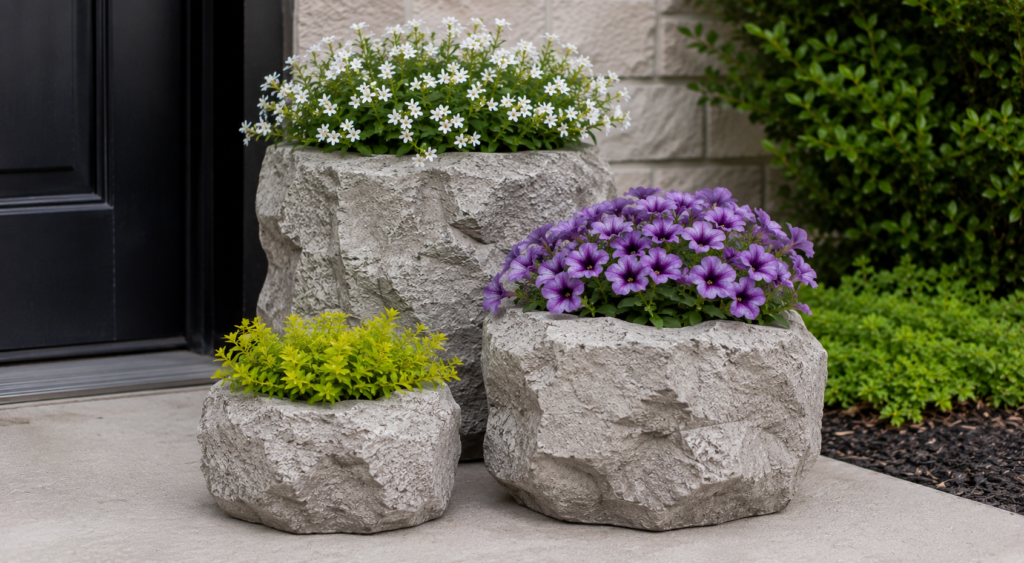
For anyone wanting their planters to disappear into a naturalistic landscape rather than stand out, this technique mimics real stone.
Start with the nested bucket or wood-box method for your base shape. While the outer layer is still workable but starting to firm up (usually 45 minutes to an hour in, depending on your climate), take a stiff-bristled brush or even a rock, and press and drag it across the surface in irregular patterns.
Work in sections and vary your pressure. Real stone doesn’t have uniform texture, so resist the urge to make every inch match. The imperfection is the whole point.
Once cured, a light wash of diluted concrete stain in grays, browns, or greenish tones settles into the texture grooves and dramatically boosts the illusion. I’ve found that a single coat of stain, applied unevenly on purpose, looks far more convincing than a perfectly even one. Nature doesn’t do perfectly even.
These planters work especially well tucked into a rock garden or along a dry creek bed feature, where they blend in rather than compete for attention.
Project 7: Mosaic-Studded Concrete Planters
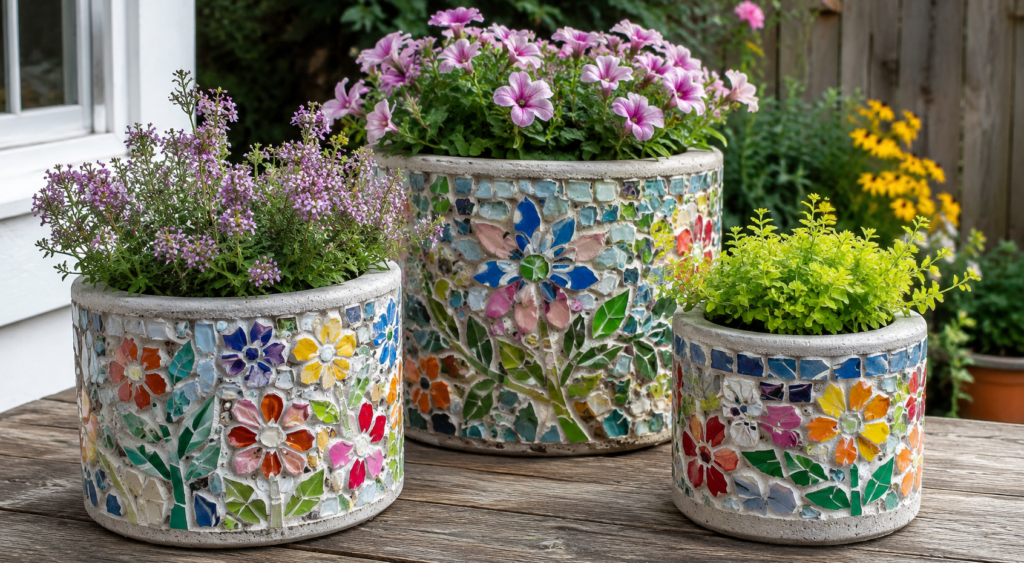
My last project on the list, and honestly, it’s the one I get the most questions about at neighborhood get-togethers.
Follow the nested bucket or box method to create your base planter shape. Before the outer layer fully cures, while it’s still tacky (roughly 30 to 60 minutes after pouring, again depending on temperature and humidity), press in broken tile pieces, sea glass, marbles, or small pebbles in whatever pattern you like.
Push each piece in firmly enough that at least half of it is embedded in the concrete. Anything less than that and pieces will pop loose within a season or two, especially through freeze-thaw cycles.
Let the planter cure fully, then use a damp sponge to clean any concrete haze off the surface of your inlaid pieces. This step makes a bigger visual difference than people expect. Skip it, and your beautiful mosaic looks dusty and dull instead of vibrant.
This is a great project for using up broken pottery, leftover tile samples, or even sentimental objects, like the sea glass a friend or family member collected on a trip. It turns a planter into something with a story, not just a container for dirt.
Real Talk: What Can Go Wrong (and What’s Not Worth the Effort)
Concrete planters aren’t magic, and I’d be doing you a disservice if I didn’t tell you where people (myself included) mess these projects up.
- Cracking from improper curing is the number one issue. Concrete needs to cure slowly and stay damp for the first few days, ideally covered loosely with plastic sheeting. If it dries out too fast, especially in direct sun or a hot garage, it cures unevenly and gets weak spots that crack later, sometimes not until the following winter.
- Skipping reinforcement on big planters is a mistake I made exactly once. Anything wider than about 15 inches across really needs mesh or rebar in the middle layer. I didn’t do this on an early attempt, and the whole thing split in half when I tried to move it three weeks later. Not fun to clean up.
- Forgetting drainage holes ruins more DIY planters than any structural issue. You have to drill these after curing, using a masonry bit, and you need at least one hole for every 8 to 10 inches of planter width. Skip this and your plants will sit in standing water and rot no matter how tough the container itself is.
- Painting concrete instead of staining it is something I’d genuinely steer you away from. Paint peels off concrete outdoors within a year or two because the surface is too porous for regular paint to bond well long-term. Concrete stain penetrates the surface instead of sitting on top, so it holds up to weather far better. I know the color options for stain feel more limited, but it’s worth the trade-off.
- Trying to move large planters alone deserves a mention too. A finished 18-inch concrete planter can weigh 80 pounds or more. Plan for a friend, a hand truck, or a very good reason to leave it exactly where you poured it.
Final Thoughts (And a Question for You)
Cement planters take more patience than a trip to the garden center, no question. But once you’ve got one sitting on your porch that’s shrugged off three winters, a hailstorm, and a dog who used to think every pot was fair game, you’ll understand why I haven’t bought a plastic planter since that Kansas hailstorm.
Start with the nested bucket method if this is your first attempt. It’s forgiving, it’s cheap to practice on, and it teaches you the fundamentals you’ll use in every other project on this list.
Which one of these are you trying first? Or if you’ve already made concrete planters before, what’s a trick you picked up that I didn’t mention here? Drop it in the comments below. I read every single one, and I’m always looking for new techniques to try in my own backyard

About Syprose Kiche
Syprose Kiche is the creator and writer behind My Besuited Home, a practical home and garden website covering DIY projects, gardening, lawn care, landscaping, home improvement, and outdoor living. She focuses on turning everyday homeowner questions into clear, practical guides backed by careful research and useful real-world considerations.