

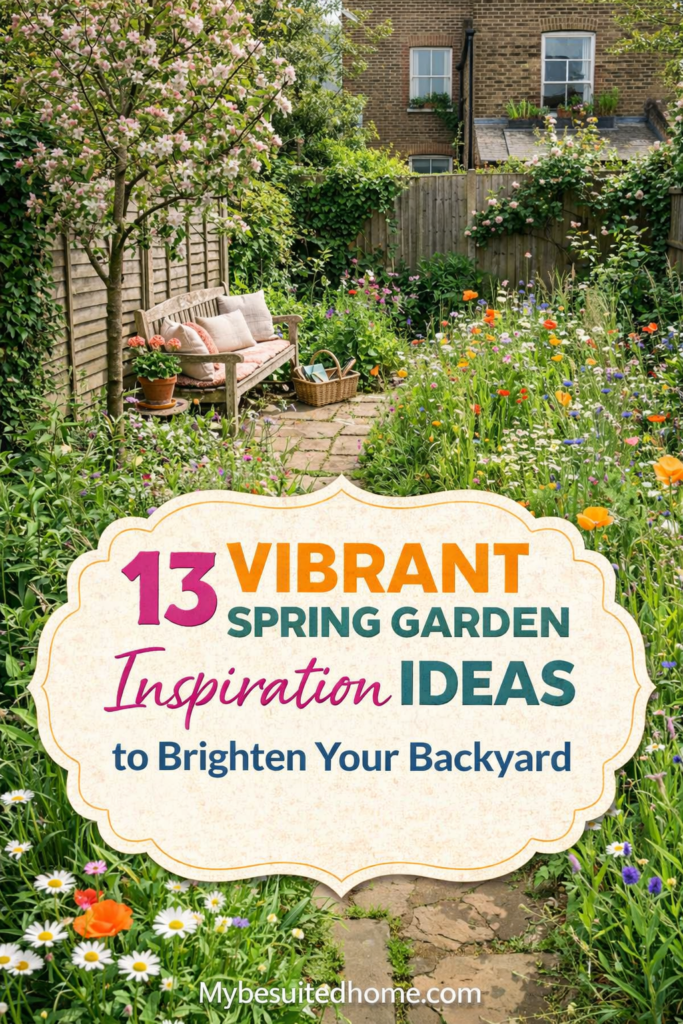
Spring is that magical, frantic window of time where every gardener I know starts acting like they’ve had four espressos. One day you’re staring at a patch of brown mud, and the next, you’re drowning in seed catalogs and feeling the itch to buy every flat of pansies at the local nursery. I get it. I’ve been the person who spent $200 on “trendy” succulents only to watch them melt in a surprise April frost because I got over-excited.
The problem with most “spring inspiration” is that it’s all fluff and no shovel. You see a gorgeous photo of a cottage garden and think, I want that, but nobody tells you that the person in the photo is likely battling a three-front war against aphids, powdery mildew, and a neighbor’s wandering cat. I’ve spent fifteen years making mistakes so you don’t have to—like the time I planted “mint” directly in the ground and spent the next three summers digging it out of my lawn, my driveway, and probably my nightmares.
This year, let’s skip the Pinterest-perfect headaches and focus on what actually works. Whether you have a massive backyard or a balcony the size of a postage stamp, these ideas are designed to get your hands dirty without breaking your back (or your bank account).
1. Low Maintenance Perennial Flowers for Early Spring Color
If you aren’t planting perennials, you’re essentially signing up for a lifetime of subscription-based gardening where you pay the nursery every single May. I used to be an “annuals only” person because I loved the instant gratification, but after the third year of sweating over petunias that fizzled out by July, I wised up. Perennials are the backbone of a garden that actually loves you back.
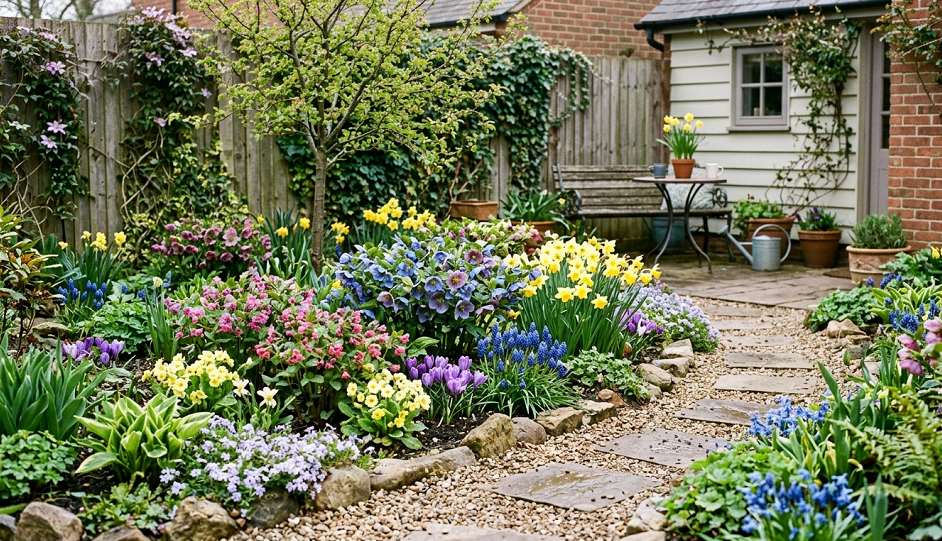
I’m talking about the heavy hitters like Hellebores (Lenten Roses) and Bleeding Hearts. Hellebores are my personal heroes because they’ll literally bloom while there is still snow on the ground, mocking the cold. I once had a patch of these survive a freak ice storm that took out my power lines, and they didn’t even drop a petal. They come in these moody, deep purples and dusty pinks that make your garden look sophisticated even if you haven’t weeded in a month.
When you’re looking for spring color, focus on plants that handle “the swing.” Spring weather is notoriously bipolar. You want things like Creeping Phlox. It forms this literal carpet of neon purple or pink that smothers weeds. I’ve found that planting it along stone edges is the best move; it softens the hard lines and makes it look like you’ve hired a professional landscaper when really, you just plopped a $6 plant in the dirt and walked away.
The key to success here is soil prep. Don’t just dig a hole in the clay and hope for the best. I always mix in a shovelful of compost. I call it “garden gold,” and if you aren’t making your own, go buy the bagged stuff. Your plants will thank you by not dying the moment the sun comes out.
2. Best Vegetables to Plant in Spring for High Yields
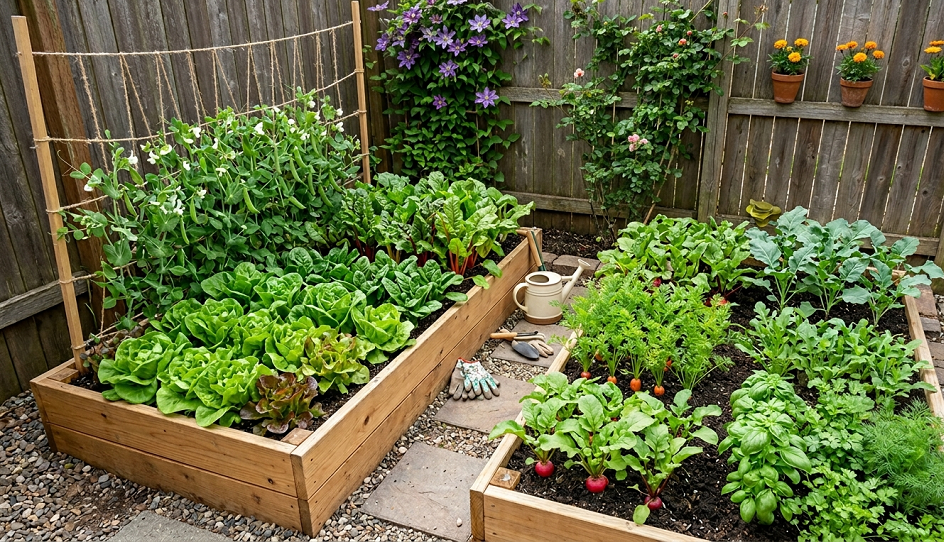
Every beginner wants to plant tomatoes in April. Don’t do it. I’ve lost more tomato starts to “early bird syndrome” than I care to admit. Instead, lean into the cool-weather crops that actually thrive when the air is crisp. Sugar snap peas are my absolute favorite because they’re basically garden candy. I like to grow them up a simple twine trellis.
Radishes are another win. They are the ultimate “instant gratification” vegetable. You can go from seed to salad in about 25 days. I usually plant a row of radishes every week for a month so I have a steady supply. One year, I grew so many that I was forcing them on my mail carrier. They’re great because they loosen up the soil for the heavier feeders you’ll plant later in the summer.
Kale and Swiss Chard are the workhorses of the spring garden. People think kale is just for smoothies, but it’s actually a beautiful ornamental plant too. The “Lacinato” or Dinosaur kale has these deep blue-green, crinkly leaves that look stunning next to bright yellow daffodils. It’s tough as nails, too. I’ve had kale survive temperatures that would make a polar bear shiver.
If you want a high yield, you have to feed these guys. I’m a big fan of fish emulsion. It smells like a harbor at low tide and will definitely make your dogs try to dig up the garden, but the nitrogen boost is unparalleled. Use it every two weeks, and you’ll have greens coming out of your ears before the first heatwave hits.
3. DIY Raised Garden Bed Ideas for Small Spaces
If your backyard is basically a concrete slab or a patch of stubborn clay, stop fighting it and go up. Raised beds saved my sanity. I used to spend hours tilling, which is a total waste of time and destroys the soil structure. Now, I just build a box, fill it with good dirt, and call it a day.
I’ve built beds out of everything: cedar, old fence pickets, even galvanized stock tanks. If you’re on a budget, heat-treated pallets are a solid choice, but make sure they have the “HT” stamp on them. You don’t want chemically treated wood leaching “mystery juice” into your lettuce. I once tried to build a bed out of some “free” wood I found on the curb, and it rotted into a mushy mess within six months. Learn from my cheapness—buy cedar or use stone if you want it to last.
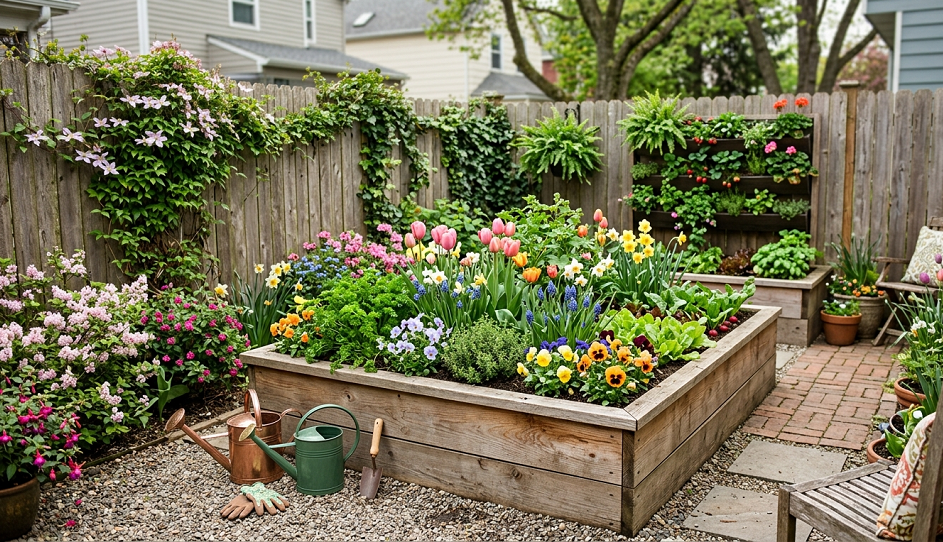
The secret to a great raised bed is the height. I like mine at least 12 inches deep. This gives the roots plenty of room to roam and means I don’t have to bend over quite as far. As I get older, my back appreciates every inch of height I can give it. Plus, raised beds warm up faster in the spring than the ground does, meaning you can get your seeds in the dirt a week or two earlier.
For the “soil” inside, don’t just use “topsoil” from the hardware store. It’s usually just screened fill dirt that turns into a brick the moment it gets wet. I use a mix of one-third compost, one-third peat moss or coco coir, and one-third vermiculite. It’s light, fluffy, and drains perfectly. You can literally push your finger all the way into the dirt without any resistance. That’s the dream.
4. Creative Herb Garden Layouts for Your Kitchen
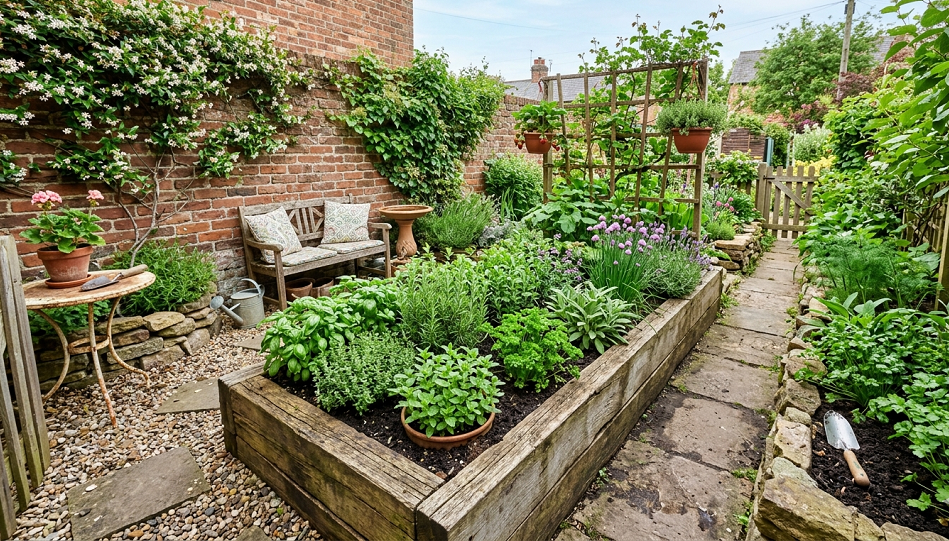
Nothing makes you feel more like a gourmet chef than walking outside and snipping fresh basil for a pizza. But most people just shove a few pots on the porch and call it a day. I think we can do better. One of the best layouts I ever tried was a “herb spiral.” It’s basically a mound of dirt held in place by stones in a spiral shape.
The logic is brilliant: the top of the spiral is dry and sunny (perfect for rosemary and thyme), while the bottom stays cooler and moister (perfect for parsley and chives). It’s permaculture at its finest, and it looks like a piece of art in your yard. I built mine over a weekend using rocks I cleared from a different part of the garden. It cost me zero dollars and remains the most talked-about part of my yard.
If you’re tight on space, go vertical. I’ve used old wooden ladders to hold small terracotta pots. It’s a great way to keep your mint contained. Like I mentioned earlier, mint is a garden thug. If you plant it in the ground, it will eventually own your mortgage. Keeping it in a pot on a ladder keeps it in its place.
Whatever you do, plant your herbs as close to the kitchen door as possible. If I have to put on boots and trek across a muddy yard to get rosemary, I’m probably just going to use the dried stuff in the cabinet. Convenience is the key to actually using what you grow. I’ve found that a “window box” herb garden is the gold standard for lazy (smart) gardeners like me.
5. Natural Weed Control Methods for a Chemical-Free Yard
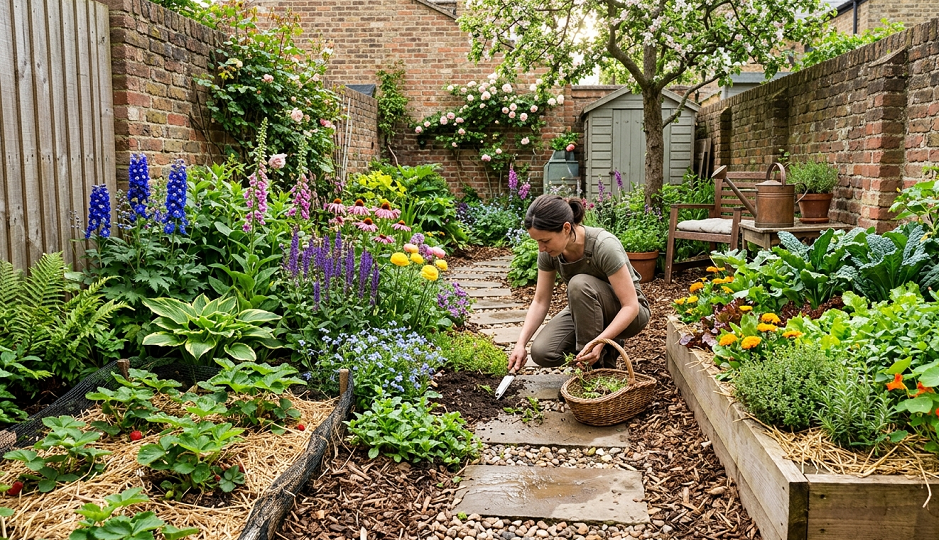
I hate weeding. I hate it with a passion that borders on the irrational. But I also hate spraying toxic chemicals where my kids and dogs play. Over the years, I’ve perfected the art of “smothering.” Instead of pulling weeds, I just make it impossible for them to breathe.
Cardboard is your best friend here. If you have a patch of grass you want to turn into a garden, don’t dig it up. Lay down sheets of plain brown cardboard (remove the tape!), soak it with a hose, and then dump six inches of mulch on top. This is called “sheet mulching,” and it’s a game-changer. I did this to my entire front yard three years ago, and I haven’t had to pull a serious weed since.
For the weeds that do pop up in the cracks of your sidewalk, skip the Roundup. I use a mixture of high-strength vinegar, a handful of salt, and a squirt of dish soap. Spray it on a sunny day, and those weeds will be toasted by dinner time. Just be careful—this stuff doesn’t discriminate. If you spray it on your prize roses, they’re toasted too.
Another trick I love is using “living mulch.” This just means planting things so densely that there’s no room for weeds to grow. I use groundcovers like Thyme or Sweet Woodruff under my taller shrubs. It looks lush and green, and it saves me from having to buy bags of wood chips every year. It’s about working smarter, not harder.
6. Spring Bulb Planting Guide for Continuous Blooms

Most people think bulb season is just for the fall, but spring is when you see the results of your (hopefully) previous labor. However, if you missed the boat on planting in October, you can actually buy “pre-chilled” bulbs or potted bulbs at the nursery right now to fill in the gaps.
I’m a huge fan of the “Lasagna Method” for bulb containers. You take a big pot and layer bulbs at different depths. Tulips go deep, daffodils in the middle, and crocuses near the top. They’ll bloom in waves, giving you a solid month of color in a single pot. One year, I did this with all-white flowers, and it looked so classy I felt like I lived in a manor house instead of a suburban ranch.
The biggest mistake people make with bulbs is cutting the leaves back too early. I know, I know—once the flower dies, the yellowing leaves look ugly. But those leaves are like solar panels. They’re busy sending energy down to the bulb for next year’s flower. If you cut them off, your bulbs will be “one-hit wonders.” I usually hide the dying foliage by planting fast-growing perennials like Hostas or Daylilies right in front of them.
And let’s talk about squirrels. Those little furry monsters love to dig up tulip bulbs. I’ve found that sprinkling some red pepper flakes in the hole or covering the area with a bit of chicken wire stops them in their tracks. I’ve tried the “ultrasonic” repellers, and honestly, the squirrels in my neighborhood just seemed to treat them like background music for their lunch.
7. Water-Saving Irrigation Tips for Gardeners

Watering is the most tedious part of gardening, and it’s also where most people mess up. If you’re standing out there with a hose for five minutes every evening, you aren’t actually helping. You’re just wetting the surface and encouraging shallow roots. Shallow roots mean your plants will keel over the first time it hits 90 degrees.
I switched to drip irrigation five years ago, and I’ll never go back. It sounds intimidating, but it’s basically just a hose with tiny holes in it. You snake it through your garden, hook it to a timer, and let it do the work for you. It delivers water directly to the roots, which means less evaporation and—bonus—fewer weeds, because you aren’t watering the empty spaces between plants.
If you can’t afford a fancy system, at least get a rain barrel. It’s free water falling from the sky; you might as well catch it. I have three hooked up to my gutters. Just make sure they have a screen on top, or you’ll be breeding enough mosquitoes to carry away a small dog. I learned that the hard way during a particularly humid June.
The “Finger Test” is the only watering tool you actually need. Stick your finger two inches into the dirt. If it feels dry, water. If it’s damp, put the hose down. I’ve seen so many people “drown” their plants because they thought they were being helpful. Most plants actually prefer to dry out a little bit between waterings; it makes them tough.
8. Best Fruit Trees for Small Backyards and Patios
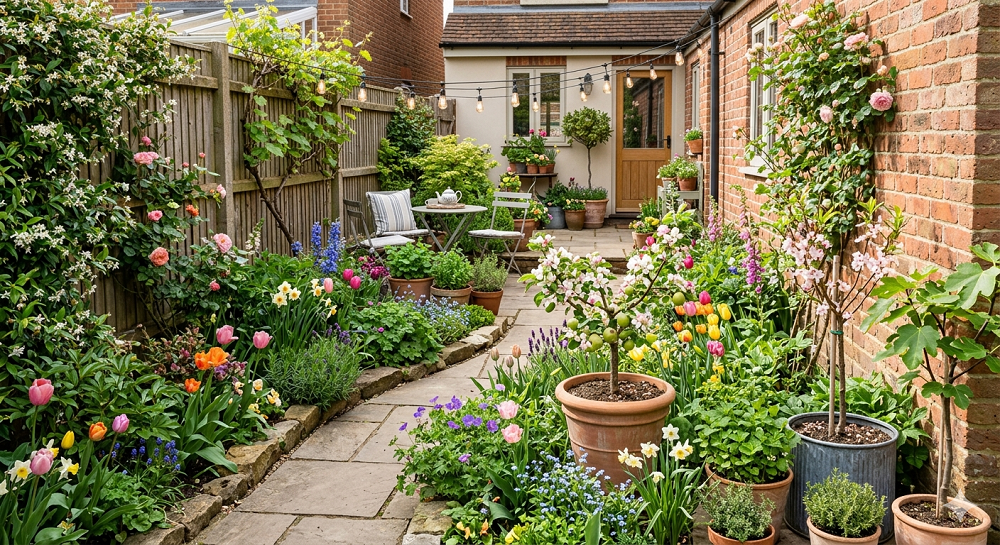
You don’t need an orchard to grow your own fruit. These days, “columnar” apple trees are a thing, and they’re amazing. They grow straight up like a pillar and stay about two feet wide. You can grow them in a pot! I have two on my patio, and last year I got about 15 apples off each. They weren’t giant supermarket apples, but they tasted a thousand times better.
Dwarf citrus is another great option if you have a sunny spot. I grow a Meyer Lemon in a large pot. In the spring, the blossoms smell like heaven. I do have to bring it inside during the winter because I don’t live in Florida, but it’s worth the effort. There’s something incredibly satisfying about picking a lemon for your tea while it’s snowing outside.
If you want something really low-maintenance, go for blueberries. They’re basically a flowering shrub that happens to give you snacks. The trick with blueberries is that they need acidic soil. I always mix a bunch of peat moss and pine needles into their planting hole. And you need two different varieties for pollination, or you won’t get any fruit. I once waited three years for berries on a lone bush before a neighbor pointed out my mistake.
Strawberries are the ultimate “small space” fruit. I grow mine in hanging baskets. It keeps the berries off the ground (no rot!) and away from the slugs. Plus, it looks beautiful to have red berries dangling down among the green leaves. Just remember to water baskets every day; they dry out faster than a sponge in a desert.
9. Budget-Friendly Garden Decor and Lighting Ideas
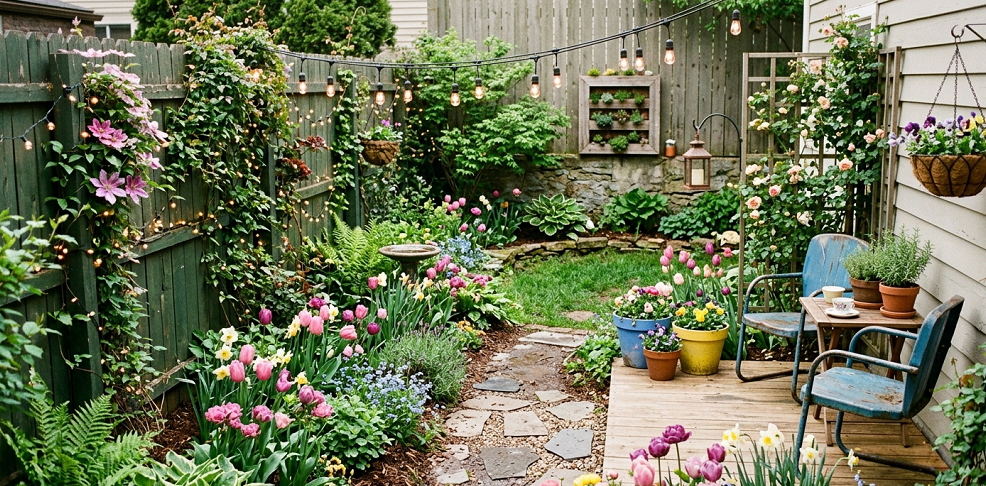
A garden should be a place where you actually want to sit and have a beer, not just a place where you work. But garden centers charge a fortune for “decor.” I’m a big fan of the “found object” aesthetic. Old galvanized buckets, rustic wooden crates, even an old pair of work boots can be turned into planters.
For lighting, skip the expensive hard-wired stuff. Solar lights have come a long way. I use string lights (the “Edison” style) draped through my trees. It gives the yard this soft, magical glow that hides the fact that I haven’t mowed the lawn in ten days. I also like to put small solar “puck” lights inside my larger planters to highlight the foliage at night.
Don’t buy those plastic garden gnomes unless you genuinely love them. Instead, look for architectural interest. A simple birdbath can be a focal point. I made one out of a large terracotta saucer perched on top of an upside-down pot. Total cost: about $12. The birds love it, and it adds a bit of height to a flat garden bed.
The “bonus” tip here is mirrors. If you have a small, dark corner of the yard, hang an old mirror on the fence. It reflects light and makes the space feel twice as big. Just make sure it’s angled so it doesn’t accidentally start a fire with reflected sunlight—and yes, I’ve heard horror stories about that happening, so keep it in the shade!
10. Native Plants for Pollinators and Wildlife

If you want a garden that feels alive, you have to invite the bugs in. Not the bad bugs—the good ones. Bees, butterflies, and ladybugs are your best friends. The easiest way to attract them is to plant what’s native to your area. Native plants are adapted to your climate and soil, so they’re usually the toughest things in the yard.
Milkweed is a must for Monarch butterflies. People used to think of it as a weed (hence the name), but the new varieties like “Cinderella” are actually quite pretty. I have a patch in the corner of my yard, and watching the caterpillars turn into butterflies is better than anything on Netflix.
Coneflowers (Echinacea) and Black-Eyed Susans are other pollinator magnets. They’re basically indestructible. I’ve seen coneflowers growing in the middle of abandoned parking lots; they can definitely survive your backyard. They bloom for a long time and provide seeds for the birds in the winter if you don’t deadhead them.
Try to avoid “double-flowered” varieties of plants. They look pretty, but often the extra petals make it impossible for bees to reach the nectar. It’s like trying to eat dinner through a mountain of decorative pillows. Stick to the simple, single-petal flowers. The bees will thank you, and your garden will be buzzing with life.
11. Creating a Privacy Screen with Fast-Growing Shrubs
Nobody wants to feel like their neighbors are watching them eat a burger on the patio. I’ve spent a lot of time figuring out how to block out the world without building a giant, ugly fence. My favorite solution is the “Arborvitae,” but specifically the ‘Green Giant’ variety. They grow like weeds—up to three feet a year.
If you want something a bit more colorful, look at Lilacs or Mock Orange. They provide a dense screen and smell incredible in the spring. I planted a row of lilacs along my property line, and now, for two weeks in May, I don’t even care that my neighbor has three rusted cars in his driveway because the scent is so distracting.
For a smaller space, use a trellis with a fast-growing vine. Clematis is a classic. It has these massive, dinner-plate-sized flowers and will cover a fence in no time. Just remember the old saying about Clematis: “First year they sleep, second year they creep, third year they leap.” Be patient; it’s worth the wait.
The “Quick Side Note” here: Avoid “Running Bamboo” at all costs. I don’t care how much you want a tropical look. Running bamboo is a biological weapon. It will go under your fence, under your house, and probably come up in your bathtub. If you must have bamboo, get the “clumping” kind, or better yet, just plant some tall ornamental grasses like Miscanthus.
12. Spring Garden Maintenance Checklist and Cleanup
Before you start planting the fun stuff, you have to do the “grunt work.” This is the part everyone skips, and it’s why their gardens look like a mess by June. First, clean your tools. I’m guilty of leaving my pruners out in the rain, but a quick scrub with some steel wool and a bit of oil makes them feel like new. Dull tools tear the plants, which leads to disease.
Next, get the dead stuff out. Cut back your ornamental grasses and any perennial stalks you left standing for the birds. But don’t be too tidy. I wait until the temperature is consistently above 50 degrees before I do a deep clean. Why? Because lots of beneficial insects (like native bees) are still sleeping in those hollow stems and leaf piles. If you throw them in the compost too early, you’re killing your garden’s best helpers.
Check your soil pH. You can get a cheap kit at any garden store. I used to think this was “science-y” nonsense until I realized my hydrangeas were struggling because my soil was way too alkaline. A little bit of sulfur or lime can fix your soil’s attitude in a heartbeat.
Lastly, sharpen your lawnmower blades. A dull blade shreds the grass instead of cutting it, which makes your lawn look brown and sickly. I take mine to the local hardware store every March. It costs $10 and makes a world of difference. A clean-cut lawn makes even a messy garden look “intentional.”
13. Bonus Idea: The “Lazy” Flower Meadow
If you have a big patch of lawn that you hate mowing, turn it into a wildflower meadow. This was the best decision I ever made for my back 40. I bought a big bag of regional wildflower seeds, raked up the dirt, and scattered them. Now, instead of a boring patch of grass, I have a sea of colors that changes every month.
The trick here is to buy a mix that doesn’t have a ton of “filler” (usually just cheap grass seed). You want pure flower seeds. It takes a year or two to really establish, but once it’s going, you literally do nothing. No mowing, no fertilizing, no watering. It’s the ultimate lazy gardener’s dream.
I’ve found that adding some “Yellow Rattle” seed to the mix helps. It’s a parasitic plant (sounds scary, I know) that feeds on grass roots. It keeps the grass from outcompeting the flowers. It’s like having a tiny, invisible gardener working for you underground.
This is a great project for kids, too. My niece loves going out there to see what new flowers have popped up. It’s a messy, wild, beautiful way to garden that feels a lot more natural than a perfectly manicured rose bed.
The Real Talk: What’s Not Worth Your Effort
Let’s get real for a second. There are things you’ll see in magazines that are a total scam for the average person. Top of the list? Perfectly manicured boxwood hedges. Unless you have a professional gardener or a lot of free time and a pair of electric shears you’re obsessed with, they’re a nightmare. They get “boxwood blight,” they turn brown if the wind blows too hard, and they grow slow as molasses.
Another waste of money? Fancy “Garden Gadgets.” You don’t need a Bluetooth-enabled soil moisture sensor or a $50 “ergonomic” trowel. I’ve been using the same $5 wooden-handled trowel for a decade. Most of those gadgets are designed to catch your eye in the store, not actually help you in the dirt. Spend that money on better compost instead.
Finally, don’t over-buy at the nursery. I call it “Nursery Fever.” You go in for one bag of mulch and come out with six “clearance” plants that look like they’re on their deathbeds. Unless you are a plant whisperer with a lot of spare time, those clearance plants will die in your trunk. Buy healthy, vigorous plants. They’ll establish faster and save you the heartache of watching a “bargain” turn into a brown stick.
Parting Wisdom
If there is one thing I want you to take away from my years of dirt-covered trial and error, it’s this: The garden is never “finished.” You’re going to plant things that die. You’re going to have a year where the slugs win. You’re going to realize that the “perfect” spot for that peony is actually three feet to the left. That’s okay. That’s the whole point.
A garden is a conversation between you and the earth, and sometimes the earth says “no.” Don’t take it personally. Just compost the failures and try something else. The most beautiful gardens I’ve ever seen aren’t the ones that are perfect; they’re the ones that are loved.
What are you planning to put in the ground this spring? Is there a plant you’ve struggled with in the past that you’re determined to grow this year? Let me know in the comments below—I’d love to help you troubleshoot your garden!