
Trying to enjoy a morning coffee on your patio while your neighbor stares at you from five feet away is the quickest way to ruin a Saturday. If you have a small garden, you know the struggle: you want to feel tucked away in a private sanctuary, but you don’t want to feel like you’re trapped in a wooden box.
I’ve spent fifteen years trying to find that sweet spot between “secluded retreat” and “claustrophobic cage.” I once tried to plant a row of Leylandii trees in a space no bigger than a parking spot. By year three, they hadn’t just blocked the neighbor; they had swallowed my shed and were actively trying to enter my kitchen window. I’ve made the expensive mistakes so you don’t have to.
Here is the real-world guide to outdoor divider privacy screen ideas that actually work for tight spaces without making your backyard feel like a high-security prison.
1. Modular Metal Privacy Panels for Modern Yards
If you want a look that says “curated designer space” rather than “I bought this at a hardware store clearance sale,” laser-cut metal panels are my top pick. These aren’t the flimsy tin sheets you see in big-box stores; I’m talking about heavy-duty corten steel or powder-coated aluminum. They provide a structural element that acts as a piece of art while simultaneously blocking the view of the street.
I love these because they have a small footprint. In a tiny garden, every inch of soil is precious. You can’t always afford to lose two feet of width to a bulky hedge. These panels are often less than two inches thick, meaning you get your privacy without sacrificing your walking path. I installed a set of black geometric panels last summer, and they turned a boring concrete slab into a high-end lounge area in about two hours.
The best part about metal is the longevity. I’m tired of staining wood every two years while the mosquitoes eat me alive. Metal panels are a “set it and forget it” solution. You bolt them down, and they stay there. If you choose corten steel, it develops a beautiful rust-orange patina over time that looks incredible against deep green foliage. It provides a contrast that you just can’t get with traditional fencing.
One quick tip: make sure you anchor these properly. I once saw a “free-standing” metal screen turn into a sail during a thunderstorm. It ended up three yards over, leaning against a neighbor’s Lexus. Don’t be that person. Use concrete footings or heavy-duty deck bolts, and you’ll sleep much better when the wind starts howling.
2. Tall Ornamental Grasses in Narrow Planters
Sometimes the best screen isn’t a wall at all—it’s something that moves. I’m a huge advocate for using tall ornamental grasses like Miscanthus or Calamagrostis (specifically ‘Karl Foerster’) to create a living “veil.” When you plant these in narrow, elevated troughs, you get eye-level privacy that still lets light and air filter through. It’s the difference between standing behind a brick wall and standing behind a sheer curtain.
I vividly remember the year I tried to use giant bamboo for this. My intentions were pure, but bamboo is a monster. Within two seasons, it had cracked my expensive ceramic pots and started popping up in the middle of my lawn like a scene from a horror movie. Learn from my trauma: stick to clumping grasses or non-invasive species. They stay where you put them and don’t require a backhoe to remove.
The sound is the hidden benefit here. In a small city garden, you’re usually dealing with the hum of traffic or the drone of an air conditioner. When the wind catches tall grasses, they make a soft, shushing sound that creates a “white noise” effect. It’s incredibly grounding. I’ve sat in my garden and completely forgotten I was in the middle of a suburb just because the grass was whispering in my ear.
Maintenance is a breeze, too. You basically ignore them all summer, and then in late winter, you hack them down to the ground. That’s it. They grow back faster than my kids’ hair, reaching full height by mid-summer. If you’re looking for a low-cost, high-impact way to hide a neighbor’s ugly trash cans, this is the way to do it without breaking the bank.
3. Horizontal Slat Wood Fencing for a Wider Feel
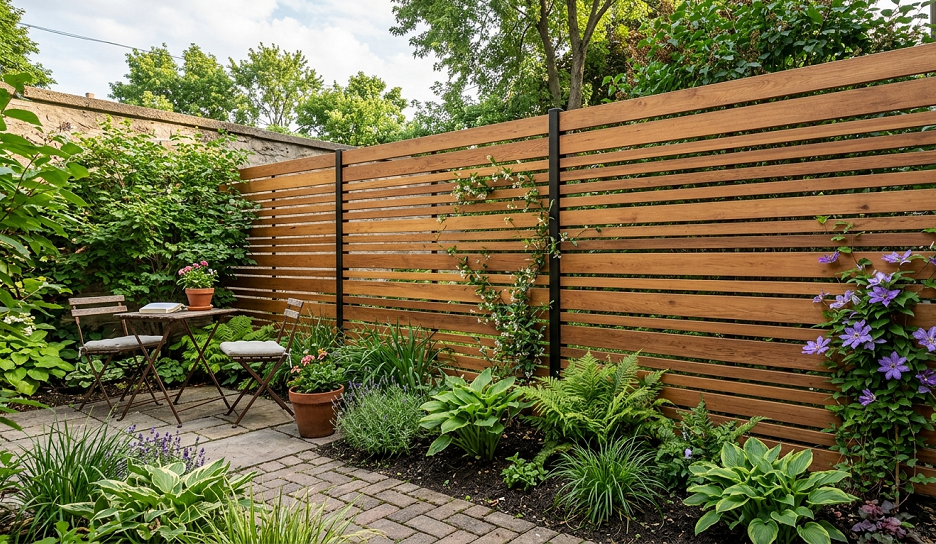
If you must go with wood, please stop building vertical picket fences. In a small garden, vertical lines make the space feel like a well. Horizontal slats, however, draw the eye outward, creating the illusion that your yard is much wider than it actually is. It’s an old interior design trick that works perfectly outdoors.
I once built a vertical fence out of cheap pressure-treated pine because it was on sale. Big mistake. It looked like a DIY project gone wrong, and it made my small patio feel like a dungeon. Two years later, I tore it down and replaced it with horizontal cedar slats with half-inch gaps between them. The difference was night and day. The gaps let the breeze through so the patio doesn’t get sweltering, but because of the angle of the eye, people can’t actually see in.
When choosing wood, I always tell people to spring for cedar or ipe if the budget allows. Pressure-treated wood has its place, but it tends to warp and twist like a pretzel as it dries out. In a horizontal design, a warped board sticks out like a sore thumb. Cedar stays relatively straight and smells like a spa, which is a nice bonus when you’re trying to relax after a long day.
Spacing is the secret sauce here. If you make the gaps too wide, you aren’t getting privacy; you’re just making a ladder for burglars. If you make them too tight, you lose the “airy” feel. I’ve found that a 1/2-inch to 3/4-inch gap is the sweet spot. It provides about 90% visual blockage while still feeling light and contemporary.
4. DIY Freestanding Trellis with Fast-Growing Vines
For the budget-conscious gardener, a freestanding trellis is the ultimate “instant” fix. You can pick up a basic lattice or a wire mesh panel for peanuts. The magic happens when you pair it with the right climbing plants. I’m talking about things like Clematis, Honeysuckle, or even Hops if you want something that grows at a terrifyingly fast rate.
I once tried to grow Wisteria on a light wooden trellis. That was a hilarious oversight. Wisteria is essentially a woody boa constrictor. Within four years, it had crushed the trellis into splinters and started pulling the gutters off my house. If you’re going for a heavy vine, you need a heavy-duty support. For a small garden, I prefer something lighter and more manageable like Clematis viticella. It’s beautiful, easy to prune, and won’t try to eat your home.
The beauty of a freestanding trellis is that you can move it. If you realize your neighbor’s new second-story window looks right into your hot tub, you can just shift the screen a few feet. It gives you flexibility that a permanent fence doesn’t. I like to secure mine in large, heavy planters filled with stones at the bottom so they don’t tip over when the vines get top-heavy.
Vines also give you “vertical interest.” In a small garden, you run out of floor space quickly. By growing up, you’re adding a massive amount of greenery without taking up more than a few square inches of dirt. It’s like adding a living wallpaper to your outdoor room. Just make sure you stay on top of the pruning, or your “privacy screen” will eventually become a “jungle that hides your back door.”
5. Outdoor Fabric Curtains for a Soft Look
Not every privacy screen needs to be made of hard materials. I’ve found that high-quality outdoor curtains can create a “cabana” vibe that feels incredibly luxurious. This is especially useful if you already have a pergola or a porch overhang. You just hang a rod, slide on some weather-resistant panels, and suddenly you have a private room.
I used to think curtains were “too fussy” for a garden until I spent a summer in a rental that had them. The ability to pull them shut when the sun is hitting you at a weird angle—or when the neighbors start their leaf blower—is a game changer. When you don’t need them, you tie them back, and they take up zero visual space. It’s the most flexible privacy solution on this list.
The trick is to use weighted hems. I didn’t do this the first time, and every time a light breeze blew, the curtains would fly into my face or wrap themselves around my wine glass. I ended up sewing some fishing weights into the bottom edge, and that solved it instantly. Also, stick to “Sunbrella” or similar acrylic fabrics. Cheap polyester will bleach out in the sun and look like a tattered rag within two months.
Color choice matters here. I prefer light, neutral tones like sand or light grey. Dark colors absorb heat and can make a small, enclosed space feel like an oven. Light colors reflect the sun and keep the area feeling cool and breezy. Plus, they look great against the green of your plants.
6. Living Walls and Vertical Garden Planters
If you’re a plant nerd like me, a privacy screen is just more real estate for your collection. Vertical garden systems—whether they are felt pockets, wooden troughs, or plastic “stackers”—allow you to create a solid wall of foliage. You can grow herbs, succulents, or even small ferns depending on your light levels.
I once built a massive “living wall” using those cheap felt pockets. It looked great for exactly three weeks. Then the water started dripping unevenly, the bottom plants drowned, and the top plants turned into crispy hay. If you go this route, invest in a proper irrigation drip line. Trying to hand-water forty individual pockets every morning is a one-way ticket to giving up on gardening forever.
The density of a living wall is its greatest strength. It provides a complete visual block and even acts as a sound insulator. Soil and leaves are excellent at absorbing high-frequency noises. If you have a noisy street nearby, a thick wall of plants will do more for your peace of mind than a wooden fence ever could.
Don’t feel like you have to cover the whole thing in expensive tropicals. I’ve seen stunning living walls made entirely of common kitchen herbs like mint, rosemary, and thyme. Not only do you get privacy, but your garden also smells like a five-star restaurant every time the wind blows. Just be careful with mint—it’s the “glitter” of the plant world. Once it gets into your main garden beds, you will be finding it in your lawn until the end of time.
7. Faux Ivy Panels for “Instant” Results
I know, I know. “Artificial” is a dirty word for some gardeners. But hear me out. Sometimes you need privacy right now, and you don’t have three years to wait for a hedge to grow. Faux ivy panels have come a long way. The good ones look surprisingly realistic from a few feet away, and they provide 100% coverage the second you zip-tie them to your railing.
I used these on a balcony project for a friend who lived in a high-rise. She had a glass railing that made her feel like she was on display for the whole city. We covered it in high-density faux boxwood panels, and it instantly felt like a private garden. It didn’t require water, it didn’t drop leaves, and it looked green even in the middle of January.
The mistake people make is buying the cheapest version available. The bargain-bin stuff looks like neon green plastic and will turn a weird blue color after a month in the sun. If you’re going to do this, buy the UV-rated panels. They are designed to withstand the elements and maintain their color for years.
I like to use these as a “backing” for real plants. If you have a sparse-looking trellis, zip-tie some faux ivy to it and then plant a real vine in front. The artificial leaves provide the privacy while the real vine provides the texture and growth. It’s a “best of both worlds” scenario that solves the privacy problem instantly while still allowing you to enjoy real gardening.
8. Corrugated Metal Sheets for an Industrial Edge
If you like a more “rustic” or “industrial” look, corrugated metal roofing sheets make incredible privacy screens. They are cheap, durable, and provide a totally opaque barrier. When framed with dark-stained wood, they look like something out of a high-end architectural magazine.
I used these to block off a side yard where I keep my compost bins and garden tools. It’s the messiest part of my yard, and I didn’t want to see it while I was grilling. The metal sheets were incredibly easy to install, and because they reflect light, that dark side alley actually felt brighter than it did with a wooden fence.
One thing to watch out for: heat. Metal gets hot. If you have delicate plants leaning right up against it, they will cook like they’re in a microwave. I always leave a few inches of “air gap” between the metal and any foliage. Also, if you live in a very windy area, make sure you secure these tightly. Corrugated metal can make a “booming” sound when it rattles, which is the last thing you want to hear at 2:00 AM.
For a more custom look, you can buy “aged” galvanized steel or even paint it with a matte outdoor spray paint. I’ve seen people use a deep charcoal grey on corrugated metal, and it looks incredibly sophisticated. It’s a great way to get a lot of coverage for very little money.
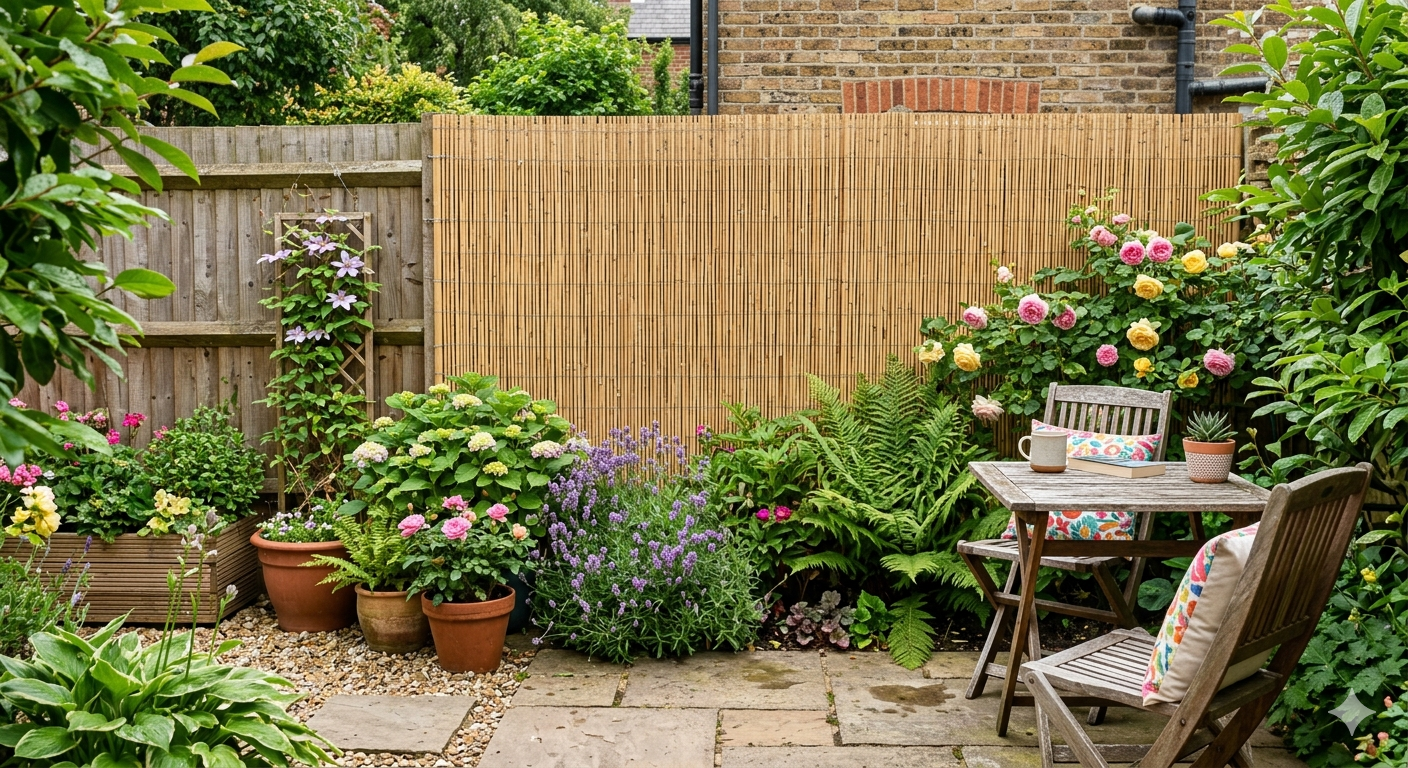
9. Bamboo Fencing Rolls for a Quick Fix
This is the “go-to” for renters or anyone on a tight timeline. You can buy rolls of bamboo fencing (the kind held together with galvanized wire) and just roll it out over an existing chain-link fence or balcony railing. It’s fast, it’s relatively cheap, and it adds a natural texture that feels much warmer than cold metal or plastic.
I’ve used this many times over the years. My biggest piece of advice? Don’t buy the thin “matchstick” bamboo. It falls apart if you look at it funny. Go for the “full pole” bamboo rolls. They are much sturdier and will last several seasons before they start to grey out and get brittle.
Bamboo has a very specific aesthetic. It works great if you’re going for a tropical or Zen garden look, but it can look a bit out of place if the rest of your house is very traditional. I like to frame the bamboo rolls with 2x4s to give them a finished “paneled” look. It takes it from “temporary fix” to “permanent feature.”
Just a quick side note: because bamboo is a natural product, it will eventually rot if it’s sitting directly on damp soil. I always try to keep the bottom of the roll an inch or two off the ground. This allows for airflow and prevents the bottom from soaking up moisture and turning into mush.
10. Tiered Planter Boxes with Built-in Screens
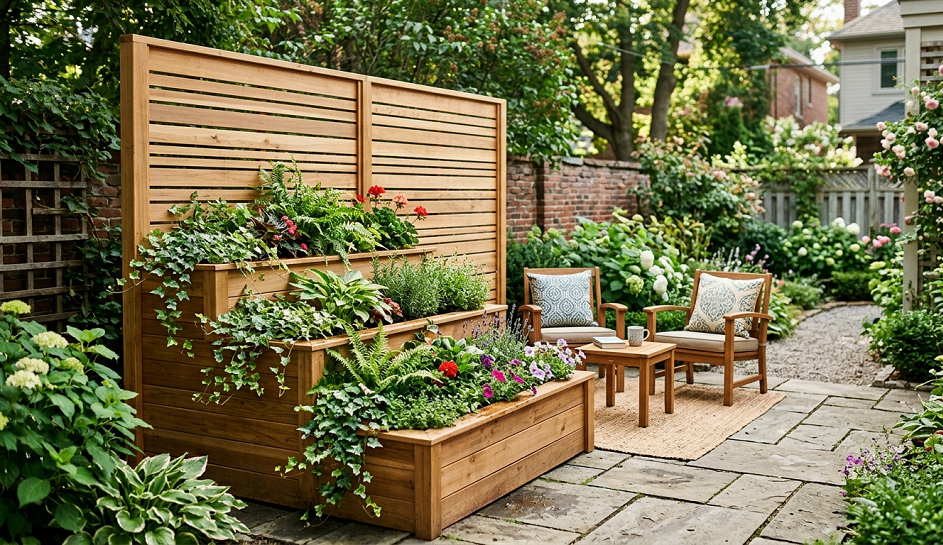
If you’re starting from scratch, a “planter-screen combo” is one of the smartest things you can build. It’s essentially a large, heavy wooden planter box with a tall trellis or slat wall attached to the back. This provides a massive amount of weight at the base, making it virtually tip-proof, while the screen provides the privacy you need.
I built a set of these for my daughter’s small townhouse patio. We filled the planters with a mix of evergreen shrubs and trailing flowers. The shrubs provided year-round privacy at the bottom, and the wooden slats provided privacy at the top. It was like a “privacy sandwich.” It also meant she didn’t have to drill into the walls of her rental, which kept her landlord happy.
The key here is drainage. People always forget to drill enough holes in the bottom of their planter boxes. If the water can’t get out, your plants will rot, and the wood will decay prematurely. I always line my wooden planters with heavy-duty plastic (with holes poked through) to keep the wet soil from being in constant contact with the wood.
This is also a great place to add some “bonus” lighting. You can easily run some solar-powered LED strips along the top of the screen or tuck some “puck” lights inside the planter. It makes the garden feel like a high-end hotel lounge at night.
11. Large Potted Trees for a “Forest” Feel
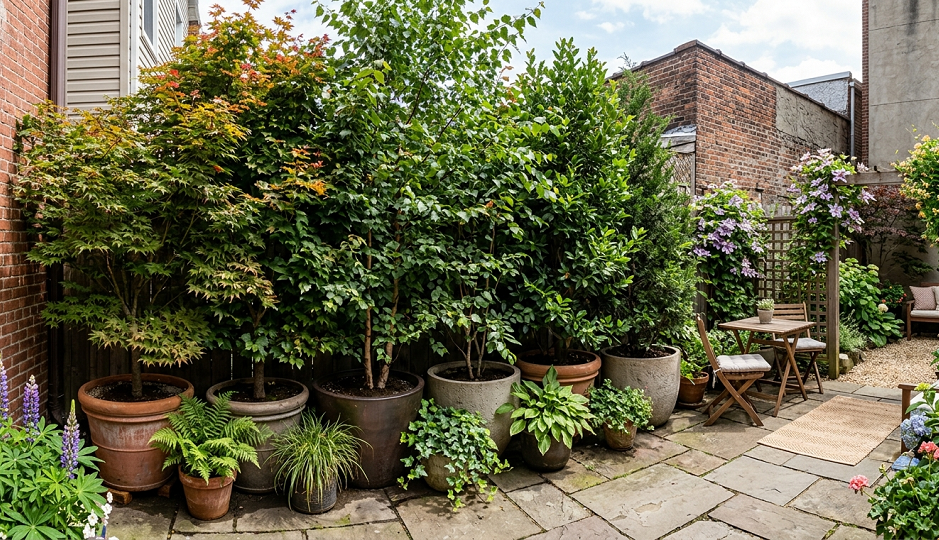
If you have a bit more room in the budget, nothing beats the look of a few large, specimen trees in oversized pots. I’m talking about things like Japanese Maples, Italian Cypresses, or even certain types of Magnolia. These aren’t just screens; they are focal points.
I have a pair of “Skyrocket” Junipers in large terracotta pots that I’ve moved around my garden for five years. They are tall, skinny, and provide a dense wall of green. Because they are in pots, I can control their size. If they were in the ground, they’d eventually get too big for my space, but in a container, their growth is naturally stunted.
Quick side note: Make sure your pots are heavy. A tall tree in a plastic pot is just a sail waiting for a gust of wind. I use heavy ceramic or concrete pots and even add a layer of bricks at the bottom for extra ballast. If you live in a cold climate, make sure the pots are “frost-proof,” or they will crack like an egg during the first deep freeze.
The beauty of trees is that they change with the seasons. A fence is a fence 365 days a year. A tree gives you spring blossoms, summer shade, and autumn color. It makes your garden feel like a living thing rather than just a room. Just be prepared to water them—trees in pots dry out much faster than trees in the ground.
The “Real Talk”: What’s Not Worth the Effort
I’ve tried almost every “life hack” for privacy screens, and some of them are just plain garbage. Here’s my “avoid at all costs” list:
- Cheap Reed Fencing: It looks like a straw broom and will literally disintegrate within one season. Pieces of straw will be blowing around your yard for years. It’s a waste of $30.
- Hedge-in-a-Box (Non-UV): Those cheap plastic “boxwood” tiles you see on discount sites? If they aren’t UV-rated, they will turn a sickening shade of neon blue-purple within two months of sun exposure. You’ll look like you’re trying to grow a Muppet in your backyard.
- Massive Trees in Tiny Spaces: Don’t buy a “baby” tree that is destined to be 60 feet tall. You will spend the rest of your life pruning it, or it will eventually lift your patio stones and crack your foundation. Right plant, right place.
- Painting Treated Wood Too Soon: If you build a wood screen, don’t paint it the next day. The wood needs to “gas out” and dry for a few months. If you paint it wet, the paint will bubble and peel off in sheets by next spring.
The Wrap-Up
Creating privacy in a small garden is all about finding the balance between “closed off” and “open to the sky.” Whether you choose the industrial look of corrugated metal or the soft, swaying beauty of ornamental grasses, the goal is to make your outdoor space feel like yours. Don’t let the fear of a small footprint stop you from creating a sanctuary.
My final piece of “parting wisdom”? Start small. You don’t have to screen the entire perimeter in one weekend. Pick the one spot where you feel the most exposed and fix that first. You’ll be surprised at how much more you use your garden once you know the neighbors aren’t watching you eat your morning toast.
What’s the biggest privacy headache in your garden right now? Is it a neighbor’s window or a noisy street? Drop a comment below and let’s figure out a solution—I’ve probably already made the mistake you’re trying to avoid!