
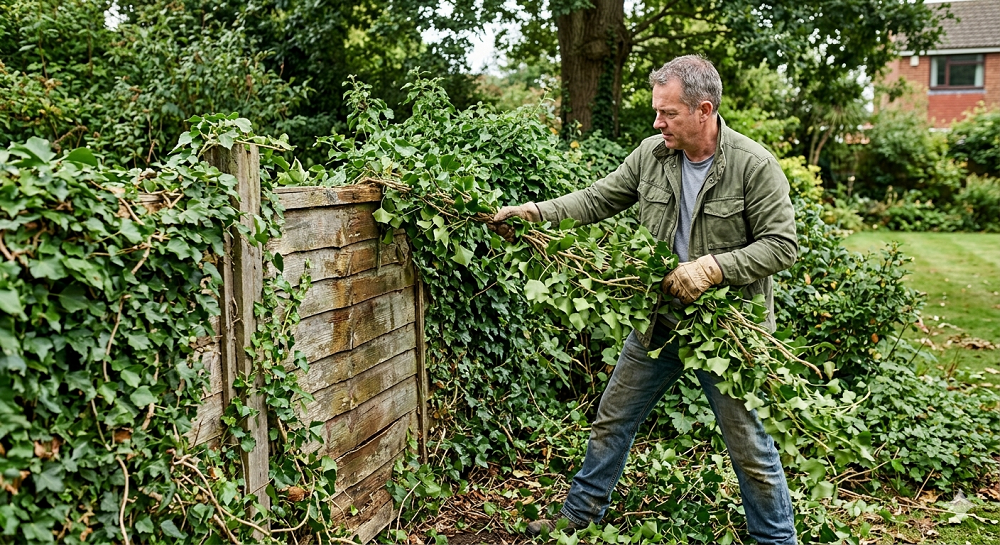
If you’ve ever looked at your wooden fence and realized it’s slowly being swallowed by a green monster, you’re in the right place. I’ve been there—standing in the yard with a pair of rusty shears, wondering if the ivy is actually the only thing holding the slats together. English Ivy looks charming on a British cottage, but on a backyard fence, it’s a structural nightmare waiting to happen. It traps moisture, invites rot, and hides the very termites that want to turn your fence into a snack.
I remember the summer I decided to “let it go” because I liked the “secret garden” vibe. By September, the weight of the vines had literally snapped a 4×4 post during a mild thunderstorm. I spent the next three weekends digging out roots while my neighbor watched from his porch, probably laughing at my struggle. Since then, I’ve learned exactly how to kill ivy without killing my back—or my bank account.
The Best Tools for Removing Ivy from Wooden Fences
Before you even touch a vine, you need the right gear. I used to try and pull ivy with my bare hands, which led to a nasty case of contact dermatitis and a week of wishing I’d never been born. Ivy isn’t just stubborn; it’s often a hiding spot for spiders, wasps, and skin irritants. You need a “battle kit” that actually works.
First, get a pair of heavy-duty, leather-palmed gloves. Forget those cute floral cotton ones you see at the big-box stores; ivy will tear through those in five minutes. You also need a pair of sharp, bypass loppers. I prefer the ones with geared handles because they give you extra leverage for those thick, woody stems that have been growing for a decade. If the ivy is really old, you might even need a small hand saw.
Don’t forget a sturdy garden fork and a pry bar. The pry bar is my “secret weapon” for gently lifting vines off the wood without splintering the fence boards. It sounds overkill, but when you’re staring down fifty feet of overgrown fence, you’ll thank me. I once tried to use a screwdriver to pry vines, and I ended up stabbing myself in the thigh when it slipped. Use the right tools.
Finally, have a heavy-duty tarp ready. Ivy is heavy, and once you cut it down, it doesn’t just disappear. You need a way to haul it to the curb or the compost pile without leaving a trail of debris that will just re-root itself. I’ve found that heavy-duty contractor bags are also a lifesaver for the smaller bits that break off during the “tug-of-war” phase.
How to Kill Ivy Roots So They Never Come Back
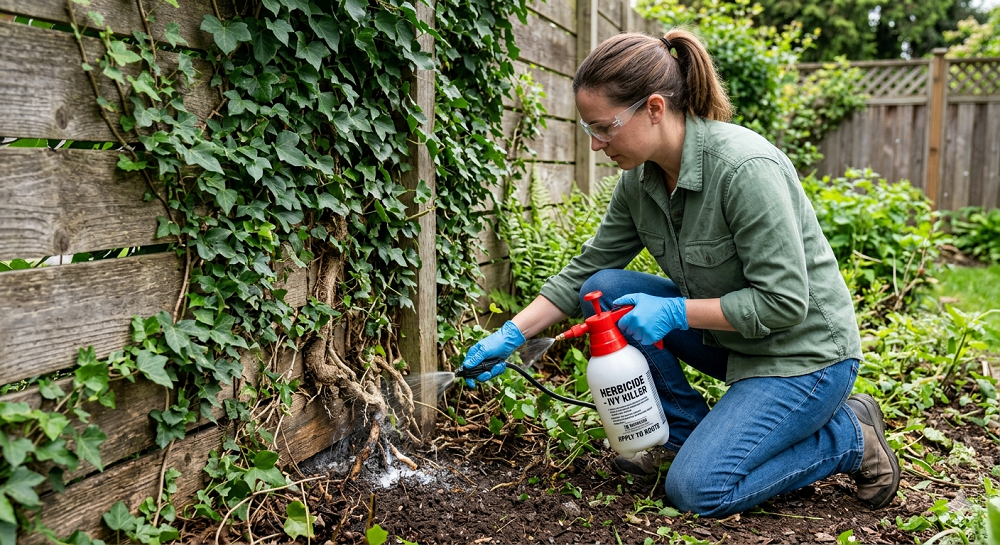
The biggest mistake I see people make is cutting the vines at the top and ignoring the ground. Ivy is like a hydra; if you don’t kill the “brain” (the root system), it will be back before you’ve even finished your victory beer. You have to be aggressive with the base of the plant if you want a permanent solution.
Start by finding the “mother vines.” These are the thick, trunk-like stems coming out of the dirt at the base of your fence. I take my loppers and cut a two-foot section right out of the middle of these trunks. This creates a “dead zone” where the top of the plant is completely severed from its water source. It’s incredibly satisfying to see that gap and know the ivy’s days are numbered.
Once you’ve severed the connection, you have to deal with the stump. You can dig it out, but ivy roots can go deep. If I’m feeling particularly fed up, I’ll drill a few holes into the fresh-cut stump and pour in some high-concentration vinegar or a specialized root killer. I’m not usually a fan of harsh chemicals, but ivy is the one exception where I’ll break out the “big guns” because it’s so incredibly resilient.
If you prefer a natural route, boiling water works surprisingly well for smaller patches. I’ve spent many a morning hauling a tea kettle out to the fence line. It cooks the roots and prevents them from pushing out new shoots. Just be careful not to splash your feet. I did that once while wearing flip-flops, and let’s just say my yelling was loud enough to wake the dead.
Safe Ways to Pull Ivy Off Fence Slats Without Damage
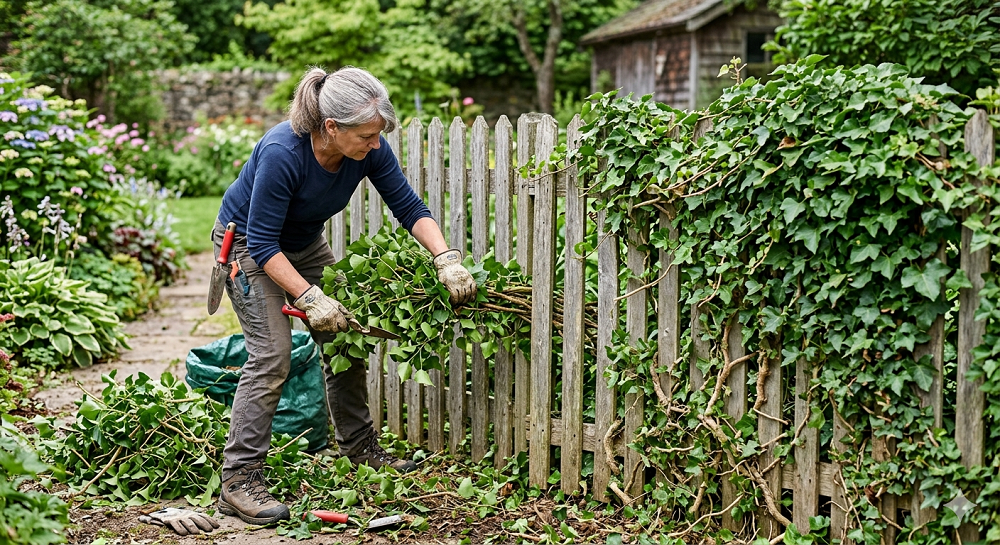
This is the part where most people ruin their fences. If you just grab a vine and pull with all your might, you’re going to take chunks of wood with it. Ivy attaches itself using “aerial rootlets” that act like superglue. If the wood is already a bit soft, the ivy will win the fight. You have to be tactical about the “unpeeling” process.
I always wait until the vines have started to wilt. After you’ve cut the base (as mentioned above), wait about two weeks. The leaves will turn brown, and the vines will lose their “grip” as they dry out. It’s much easier to pull a dead, brittle vine than a juicy, living one. I’ve found that a light misting with a garden hose right before you pull can actually help soften the adhesive discs just enough to let go.
When you start pulling, work from the top down. Use your pry bar or a flat-head screwdriver to gently nudge the vine away from the wood. Don’t yank. If you feel resistance, stop and cut the vine into smaller sections. I’ve spent hours meticulously “surgical-cutting” ivy off a cedar fence, and while it’s tedious, it’s cheaper than replacing the whole fence.
One quick side note: If your fence is made of chain link, you can be way more aggressive. I’ve actually used a blowtorch (very carefully!) to singe the tiny rootlets off metal wire. But on wood? Slow and steady wins the race. I once saw a guy try to pull ivy off his fence by tying it to the back of his truck. He didn’t get rid of the ivy, but he did succeed in relocating his entire back fence into the middle of the street.
Cleaning the Sticky Residue and “Feet” Left Behind
Even after the vines are gone, you’re left with these ugly, hairy little “feet” stuck to your wood. They look like fuzzy caterpillars and they are a magnet for dirt and mold. Most people leave them, but if you want your fence to look good and last longer, you’ve got to clean that gunk off.
A stiff-bristled nylon brush is your best friend here. Don’t use a wire brush, as that will scratch the wood and leave it vulnerable to rot. I use a bucket of warm water mixed with a little bit of dish soap and a splash of oxygen bleach. Scrubbing in the direction of the grain will usually pop those little rootlets right off. It’s a workout, but it’s the best way to prep the surface for a fresh coat of stain.
If the “feet” are really stuck, you might need a pressure washer, but be extremely careful. I have a love-heavy relationship with my pressure washer. It’s great for cleaning, but if you get too close or use too much pressure, you’ll “fuzz” the wood or even cut right through a picket. Keep the nozzle at least 12 inches away and use a wide-angle tip.
After scrubbing, let the wood dry completely—usually 48 hours of sunshine. This is the perfect time to inspect the fence for any damage the ivy might have hidden. Check for soft spots or holes. If the ivy was there for years, there’s a good chance some of the wood has started to decay. I always keep a tub of wood filler and some sandpaper handy during this phase to patch up the “battle scars.”
Stopping Ivy Regrowth in Your Garden Bed
You’ve cleared the fence, you’ve scrubbed the wood, and you’re feeling great. But if you don’t manage the soil, that ivy will be back on your fence by next season. Ivy grows several feet a year, and it’s constantly looking for something to climb. You have to turn your garden bed into a “no-fly zone” for vines.
Mulching is the most effective way to keep ivy at bay. I like to lay down a thick layer of cardboard (remove the tape first!) and then cover it with 3 to 4 inches of wood chips. This “smothering” technique prevents any leftover root fragments from getting the sunlight they need to sprout. Plus, it makes the yard look finished and professional.
I’m also a big fan of “trenching.” I’ll dig a small, narrow trench (about 6 inches deep) between where the ivy lives and the fence. This makes it easier to spot any runners trying to make a break for the wood. Every time I’m out gardening, I just glance at the trench. If I see a green “arm” reaching across, I snip it immediately. It takes ten seconds but saves hours of work later.
Quick side note: If your neighbor is the one growing the ivy and it’s coming over the fence, you’ve got a different problem. I’ve found that a polite conversation works 50% of the time. The other 50% of the time, I just keep my side of the fence “dead-headed” and clear. You can’t control their yard, but you can certainly defend your perimeter like a botanical border guard.

Real Talk: When Is It Not Worth the Effort?
Let’s get real for a second. Sometimes, the ivy has already won. If you walk up to your fence and you can move the whole thing back and forth with one hand, or if you see the vines growing through the wood rather than just on top of it, your fence is toast. I’ve seen fences where the ivy was literally the only thing providing structural integrity. If you pull that ivy off, the fence is going to crumble like a stale cookie.
In these cases, trying to “save” the fence is a total waste of money and time. You’ll spend $100 on cleaning supplies and loppers only to realize you need to spend $3,000 on a new fence anyway. If the wood is punky and soft, save your energy. Cut the ivy at the ground, wait for it to die, and then tear the whole mess down—fence and all—and start fresh.
Also, don’t bother with those “miracle” spray-on ivy killers you see in late-night infomercials. Most of them are just overpriced salt water or weak herbicides that won’t touch a mature ivy plant. Ivy has a waxy coating on its leaves that shrugs off most liquids. Unless you’re planning on painting every single leaf with a brush, spraying is usually just a way to kill your grass and make the ivy slightly annoyed.
Lastly, don’t try to compost the ivy unless you have a “hot” compost pile that reaches high temperatures. If you just throw ivy vines in a cold backyard bin, you’re not making fertilizer; you’re just giving the ivy a comfortable place to plan its next invasion. I’ve made the mistake of using “half-done” ivy compost in my vegetable garden, and I spent the next three years weeding vines out of my tomatoes. Bag it and trash it.
Wrap Up
Taking down ivy is a rite of passage for many homeowners, and while it’s a pain, your fence will thank you for the extra years of life. It’s all about being more patient than the plant. Sever the base, let it die, peel it gently, and then guard that dirt like your life depends on it.
What’s the most stubborn weed you’ve ever had to fight in your yard? Did you win, or is it currently winning? Drop your stories or questions in the comments below—I’d love to hear your “battle reports” from the garden!