

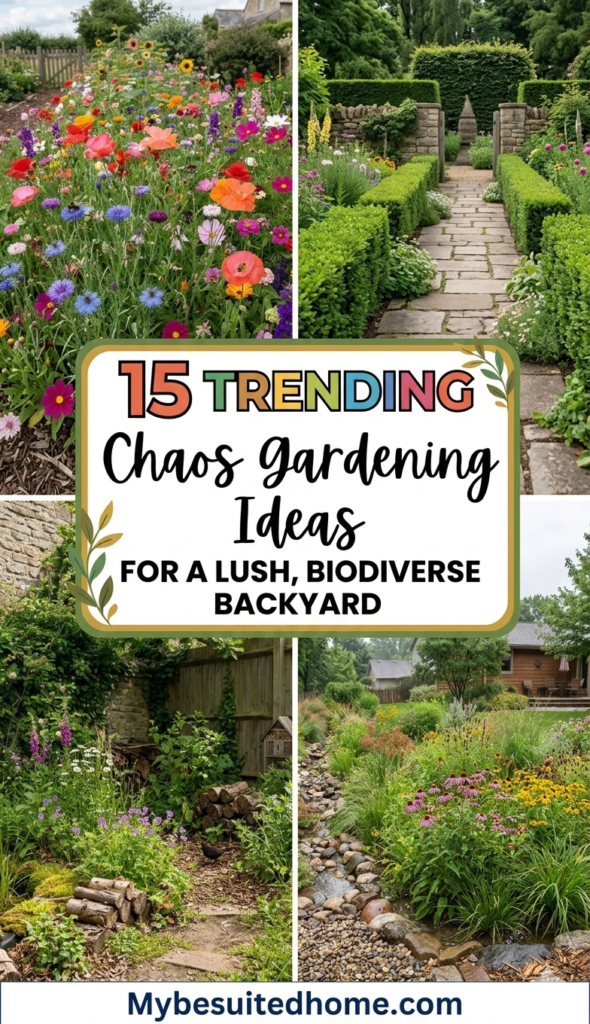
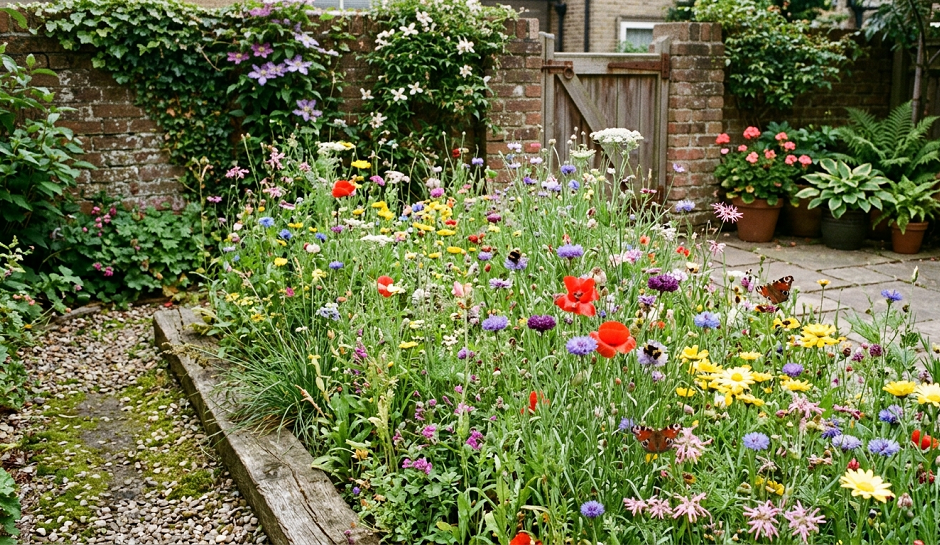
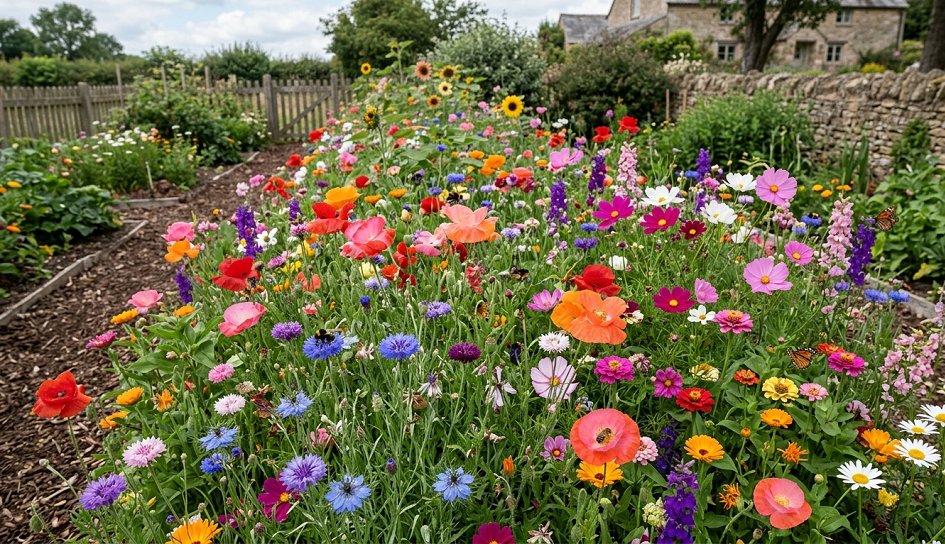
My neighbor once walked past my front yard, stopped dead in her tracks, and asked if I’d “given up.” I told her I’d evolved. That’s chaos gardening in a nutshell — a wild, intentional mess that looks like nature did the landscaping while you were on vacation. Except it’s not an accident. Every “accidental” patch of self-seeding cosmos and every sprawling clump of borage is part of a philosophy that’s slowly replacing the rigid, labor-intensive gardens I spent my first decade building — and then desperately trying to maintain.
If you’ve been googling “low maintenance wildflower garden” or “naturalistic planting ideas” and feeling vaguely guilty about wanting to just let things grow, this article is your permission slip.
What Is Chaos Gardening, Really? (And Why It’s Actually Smart Horticulture)
Chaos gardening is the practice of planting densely, mixing species freely, letting self-seeders do their thing, and generally allowing your garden to evolve on its own terms. It borrows from rewilding principles, cottage garden traditions, and the hard-won realization that fighting your soil and climate is a losing battle.
It is NOT just dumping a wildflower mix on bare dirt and walking away. That’s what I did in year one. I ended up with a glorious crop of annual ryegrass and three lonely poppies. Real chaos gardening has a method behind the madness. You choose plants that work together, you prepare the ground properly, and then — critically — you step back.
The trend has exploded in recent years, and for good reason. Water costs are up, pollinators are struggling, and frankly, more people are exhausted by the idea of spending every Saturday edging a lawn that will just need edging again next week.
1. The Seed Bomb Scatter Method for Bare Patches
This is where most people start, and it’s genuinely one of the best chaos gardening techniques for filling dead zones fast. Seed bombs — those compact little balls of clay, compost, and mixed seed — can be scattered across a bare patch, a neglected strip along the fence, or even chucked over a wall into an abandoned corner.
The key is choosing the right seed mix. I’ve found that a blend of phacelia, California poppy, and nigella is nearly impossible to fail with. They germinate at different rates, bloom at different times, and all three self-seed so aggressively that by year two, you’ll barely need to do anything.
Don’t bother making your own seed bombs if you’re starting out. Every DIY tutorial makes them look adorable, and they’re fun to make with kids, but store-bought ones are more reliably proportioned. I spent an afternoon making hand-rolled seed bombs that mostly crumbled before they hit the ground.
One thing nobody tells you: scatter them in fall, not spring. They need cold stratification to germinate properly, and autumn rain does the hard work of pressing them into contact with the soil.
2. No-Dig Lasagna Bed Building for a Naturalistic Garden
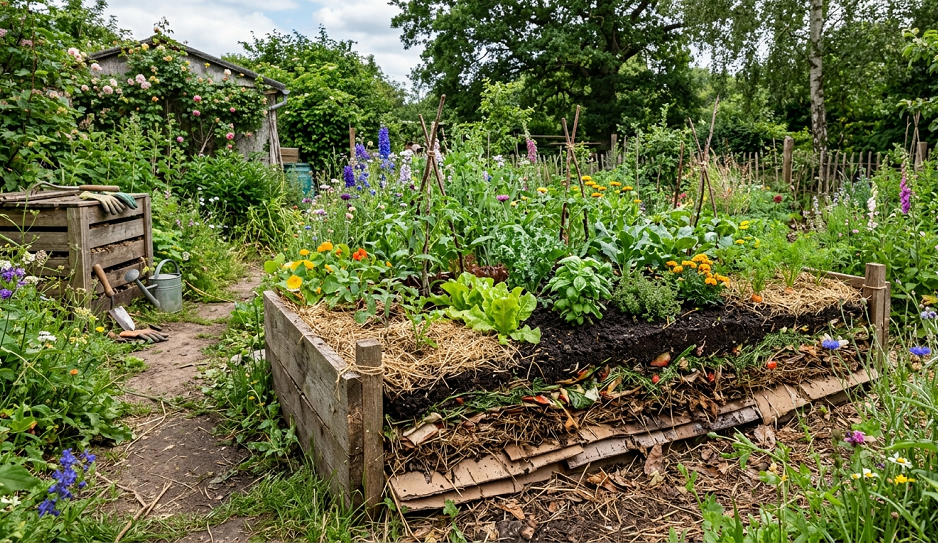
No-dig gardening is the backbone of any chaos garden because it respects the soil food web that makes self-sufficient planting possible. The lasagna method — layering cardboard, compost, and organic mulch directly over grass or weeds — creates a planting bed without tilling, without destroying fungal networks, and without a weekend of backbreaking labor.
My first lasagna bed was built over a patch of bindweed so stubborn it had probably survived multiple ice ages. I layered cardboard six sheets thick, topped it with four inches of compost and three inches of wood chip mulch, and planted through it immediately using a trowel to push down to the soil below. The following summer, that bed was the most productive patch in my entire garden.
For a true chaos aesthetic, plant your lasagna beds with a mix of structural plants (like bronze fennel or angelica) alongside aggressive self-seeders (like honesty and aquilegia). The structural plants hold the composition while the self-seeders fill in the gaps with gorgeous unpredictability year after year.
The one thing that will kill this whole approach: going thin on the cardboard layer. I once tried to stretch supplies and used a single layer. The grass came right through within eight weeks. Go thick, overlap your edges generously, and wet it down before laying compost.
3. Guerrilla Gardening Techniques for Neglected Spaces
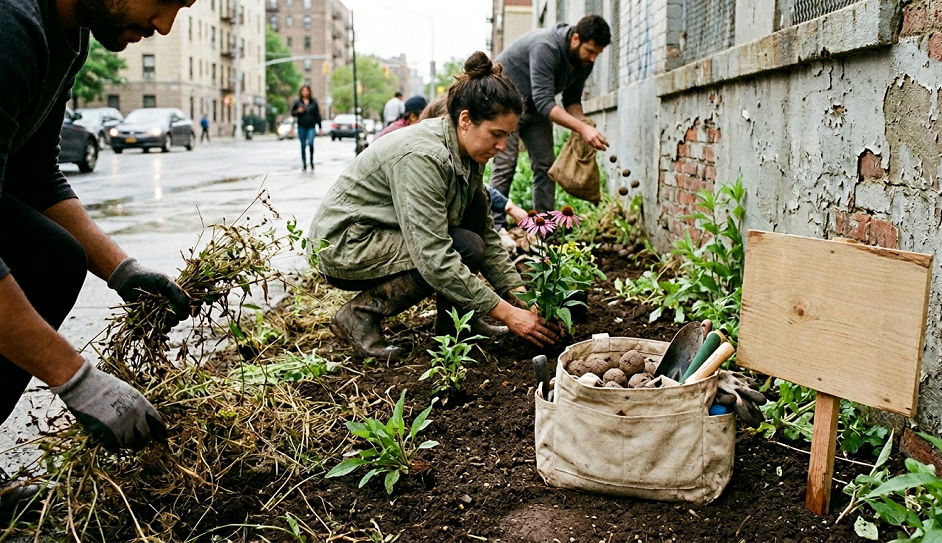
Guerrilla gardening — planting in public or neglected spaces without official permission — is technically edgy, but in practice, most municipalities quietly appreciate it. I’ve planted three roadside verges in my neighborhood. Nobody has ever complained. Two people have stopped to ask where they can buy the plants.
For roadside chaos planting, stick to tough natives and robust non-invasives that can handle vehicle pollution, compacted soil, and zero irrigation. Yarrow, wild carrot, red valerian, and ox-eye daisies are my go-to roadside warriors. They’ll bloom in their first summer, draw pollinators, and need almost no intervention.
If you’re nervous about being too visible, go with a “scatter and walk” approach at dusk using pre-moistened seed packets. Sounds dramatic, but honestly it’s just efficient. The seeds germinate on their own schedule and by the time anything’s blooming, nobody remembers who planted it.
The guerrilla gardening movement has a real community online, with forums dedicated to mapping planted spaces and sharing what works in different climates. Worth exploring if this concept appeals to you — there’s something quietly radical about turning a dead strip of council grass into a pollinator corridor.
4. Companion Planting Combinations for a Self-Regulating Garden

Chaos gardening done well is really sophisticated companion planting — using plant relationships to reduce pest pressure, improve soil, and eliminate the need for intervention. The three sisters planting method (corn, beans, squash) is the most famous example, but it barely scratches the surface of what’s possible.
My favorite combination for a truly self-managing bed: borage with tomatoes and basil. The borage repels tomato hornworm, the basil improves tomato flavor (yes, I know that sounds like folk wisdom — but after eight years I’d rather keep doing it), and both self-seed prolifically enough that you’ll find them popping up around the garden for years without replanting.
For the chaos aesthetic specifically, mixing flowers with vegetables makes the whole system more resilient and infinitely more beautiful. Calendula between brassicas confuses aphids. Sweet alyssum under squash draws predatory wasps that control whitefly. Nasturtiums act as trap crops for aphids — I sacrifice them willingly every year to keep my runner beans clean.
Don’t be tempted by companion planting charts that promise very specific combinations. Most of the research is thin. What I can tell you from experience is that diversity itself is the real protection. A monoculture — even a very carefully managed one — is always more vulnerable than a mixed planting.
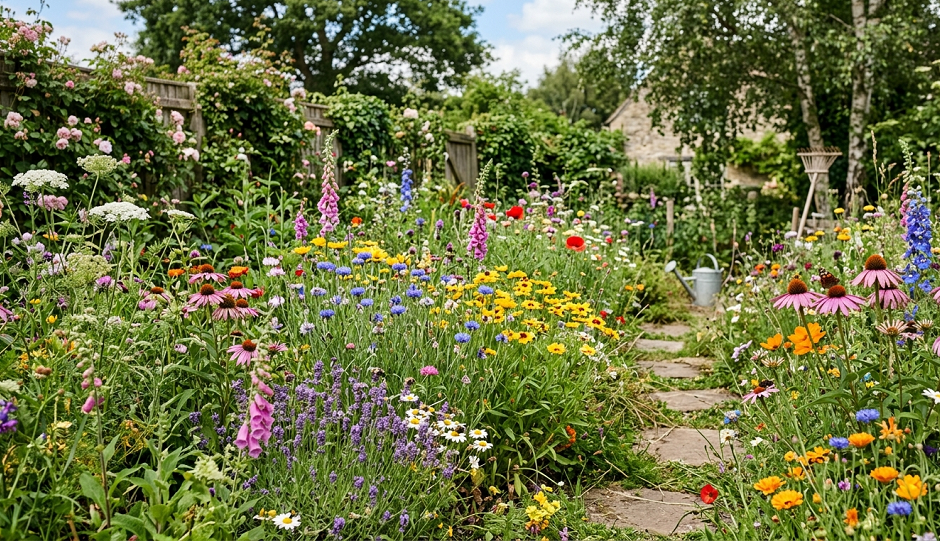
5. Wildflower Meadow Gardening in Small Spaces
You do not need an acre. The summer my front strip — all of four feet by thirty feet — turned into a proper wildflower meadow, I counted eleven species of bee visiting on a single afternoon. Small wildflower patches work, sometimes better than large ones, because you can give them the intense ground preparation they need.
The most important step — and the one most people skip — is removing existing vegetation completely before sowing. Wildflowers evolved to compete with grass on poor, open soil. If you sow into established turf, the grass wins every time. Either use the no-dig lasagna method, solarize with clear plastic for six weeks in summer, or strip the turf entirely.
Sow at very low density. This is where beginners consistently go wrong. The instinct is to scatter seeds heavily and hope some take. But wildflowers need space to establish root systems, and dense sowing creates competition that weakens all of them. Thin, even coverage over well-prepared bare soil is the goal.
For a realistic small-space meadow mix in a temperate climate, I’d go with: corn poppy, cornflower, ox-eye daisy, field scabious, and yellow rattle. Yellow rattle is the magic ingredient — it’s semi-parasitic on grass roots and actually weakens turf over time, gradually shifting the balance in favor of wildflowers without any further intervention from you.
6. Self-Seeding Perennial Garden Design for Effortless Color
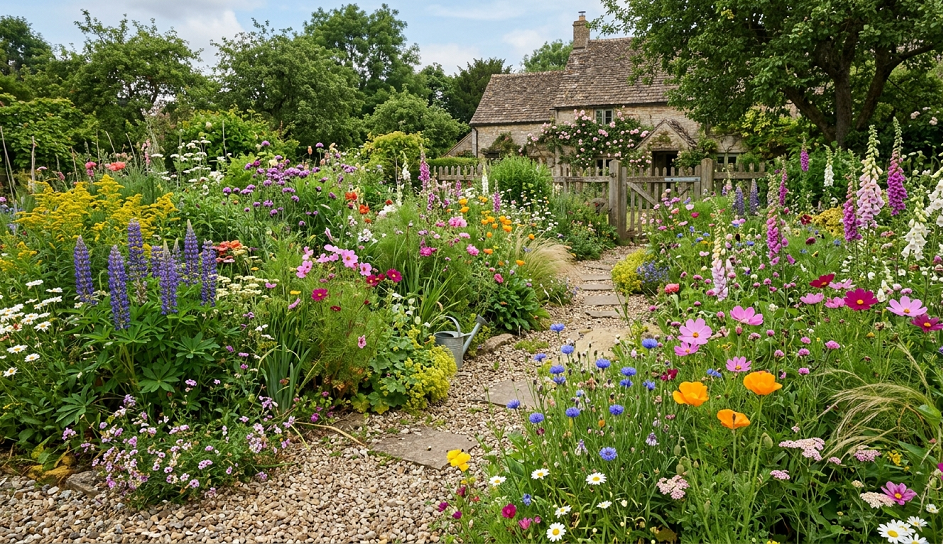
The single best investment in a chaos garden is building a core of self-seeding perennials that return and multiply without being asked. This is the difference between a chaos garden that gets better every year and one you have to replant annually.
My non-negotiable self-seeders: aquilegia, foxglove, verbena bonariensis, teasel, and Welsh poppy. Plant one of each in your first year and within three years you’ll have dozens. They pop up in cracks, between paving stones, through gravel — everywhere you’d least expect and most appreciate them.
The trick is knowing which self-seeders are “good chaos” and which are “pure chaos you’ll regret.” Verbena bonariensis is good chaos: it’s airy, pollinators adore it, and it’s easy to remove if it grows somewhere inconvenient. Three-cornered leek is bad chaos: it’s invasive, it smells of onion when you disturb it, and you will be pulling it out of every bed you own for the next decade. I learned the bad-chaos lesson the hard way.
Learn to recognize seedlings of your chosen plants so you can weed out the actual weeds while leaving your self-seeders to develop. This is the one skill that separates a beautiful chaos garden from a genuinely unmanaged mess.
7. Pollinator Garden Planting Strategies for Maximum Biodiversity
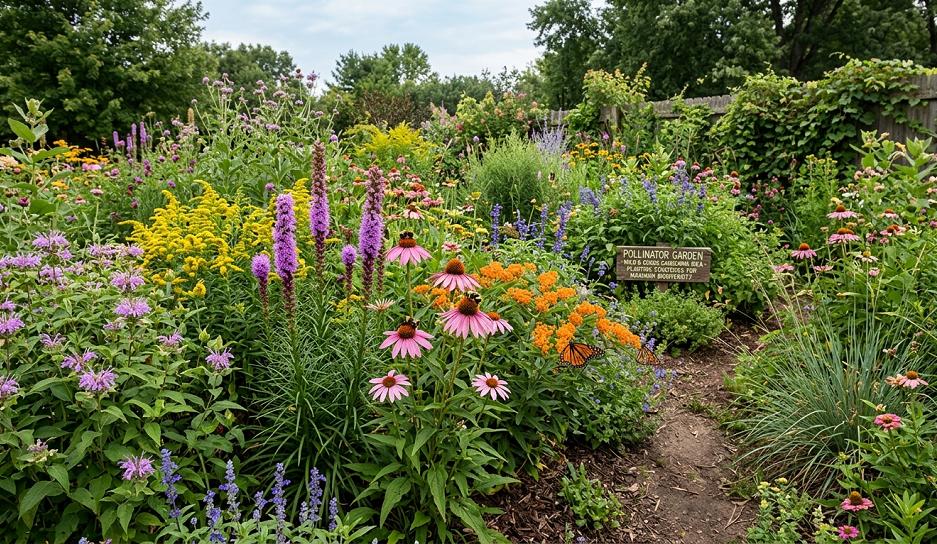
Every chaos garden should be doing double duty as a pollinator refuge, and the good news is that the planting approach is nearly identical: diverse species, long bloom seasons, and minimal intervention.
The three things pollinators need that most conventional gardens lack are: flowers from early spring to late autumn (most gardens peak in summer and go quiet at both ends), open-faced blooms that allow access to pollen and nectar, and bare or loosely mulched ground for ground-nesting bees.
For early season, plant hellebores, pulmonarias, and single-flowered clematis. For the summer peak, catmint, echinops, and single dahlias are all exceptional. For late season — which is genuinely critical and often ignored — ivy flowers and Verbena bonariensis are still blooming in October when almost everything else has shut down.
Skip the double-flowered cultivars. I know they look lush and they’re all over Instagram, but a double flower is essentially a mutant — the reproductive structures have been bred into extra petals, leaving pollinators with nothing. The blowsy double peony your grandmother grew is a dead end for bees. A single-flowered species peony is a banquet.
8. Natural Mulching Methods Using What Your Garden Produces
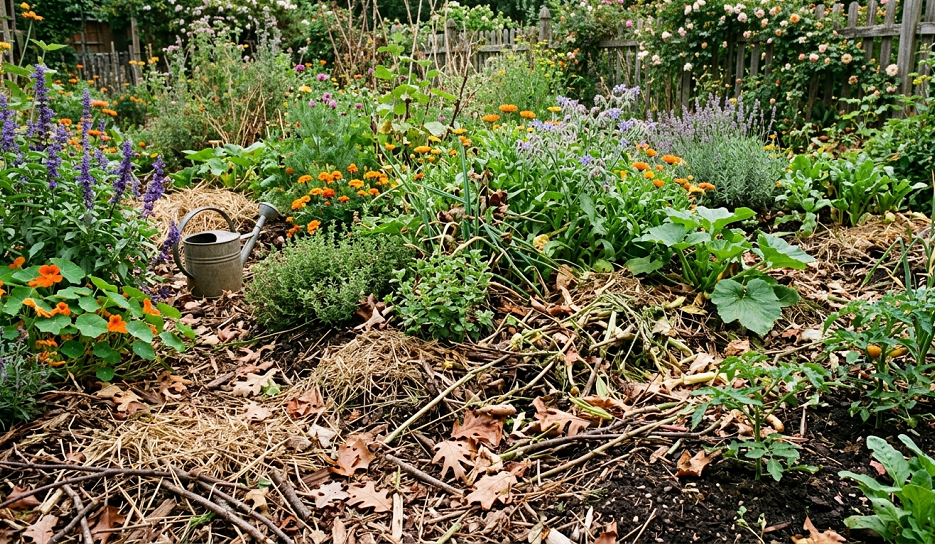
One of the great self-reinforcing loops in chaos gardening is that a mature, diverse planting generates its own mulch through leaf drop, dying stems, and cut-back material. Rather than bagging this “waste,” using it as chop-and-drop mulch is one of the most effective things you can do for soil health and moisture retention.
Comfrey is my single most-used plant in the garden for exactly this reason. It produces enormous leaves three or four times per season that can be cut and laid directly around any plant as a liquid fertilizer and mulch. It’s basically a free, perpetual fertilizer machine. I’ve planted it in a corner of every garden I’ve had for the past eleven years.
For paths and open ground, wood chip mulch is unbeatable. Free if you befriend a tree surgeon — and they’re almost always happy to drop a load rather than pay to dispose of it. A deep layer of wood chip suppresses weeds, regulates soil temperature, and feeds fungi that will ultimately feed your plants.
The one mulch I’ve stopped using entirely is fresh grass clippings directly on beds. They mat down, go anaerobic, smell terrible, and create the perfect conditions for slug breeding. Composted grass clippings are fine; fresh ones directly on beds are a mistake I’ve made enough times to be opinionated about.
9. Rain Garden Design for a Water-Smart Chaos Planting

A rain garden — a shallow depression planted with water-tolerant species that captures and filters runoff — is one of the most genuinely functional things you can add to a chaos-style garden. It manages stormwater, eliminates a boggy problem area, and looks spectacular when planted well.
The design principle is simple: site it at the lowest point of your garden where water naturally collects, dig it down by about 12 inches, amend the soil with grit and organic matter to improve percolation, and plant with species that tolerate both periodic inundation and summer drought.
My favorite rain garden plants are: astilbe, Iris pseudacorus, Joe Pye weed, and native sedges. All of them thrive in the feast-or-famine conditions a rain garden creates, and all of them provide excellent wildlife habitat. The Joe Pye weed in particular is stunning in late summer — six feet tall, topped with dusty pink flowers that monarchs absolutely swarm.
Rain gardens are genuinely low maintenance once established, but the establishment period matters. Water new plantings through the first summer even if conditions are wet elsewhere — plants establishing roots in a newly disturbed site need support regardless of rainfall.
10. Vertical Chaos Gardening with Climbing Plants
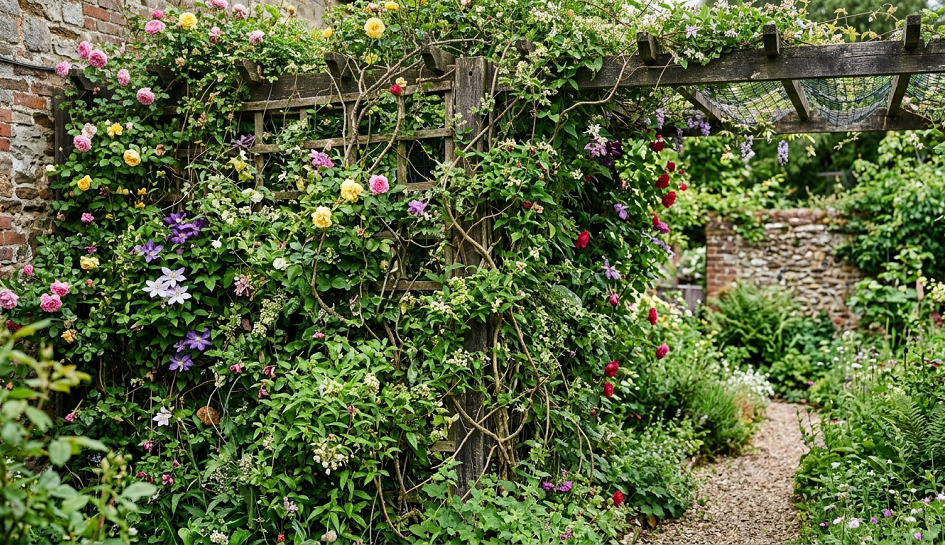
Vertical space is the most underused dimension in most gardens, and for chaos gardening purposes, climbing plants are extraordinary tools. A single clematis can cover twelve square feet of fence in a season. Annual climbers like morning glory and black-eyed Susan vine transform bare structures in weeks.
My approach to vertical chaos planting: let annual climbers scramble through established perennials rather than always directing them to purpose-built supports. A nasturtium winding through a rose is genuinely beautiful. Cobaea scandens (cup-and-saucer vine) scrambling up a dead tree stump looks intentional and dramatic in a way that’s very hard to replicate with any other plant.
For permanent structure, I use a combination of vigorous clematis (specifically C. tangutica and C. viticella, which are both easy, late-flowering, and extremely wildlife-friendly) and climbing roses trained very loosely — almost allowed to arch and self-direct rather than being trained in strictly.
The “never do this” of vertical chaos gardening: planting Japanese honeysuckle (Lonicera japonica) if you live in North America. It’s invasive, it will escape, and it has colonized millions of acres of native habitat. Native coral honeysuckle (L. sempervirens) is equally beautiful and completely well-behaved.
11. Gravel Garden Planting for a Drought-Tolerant Chaos Aesthetic
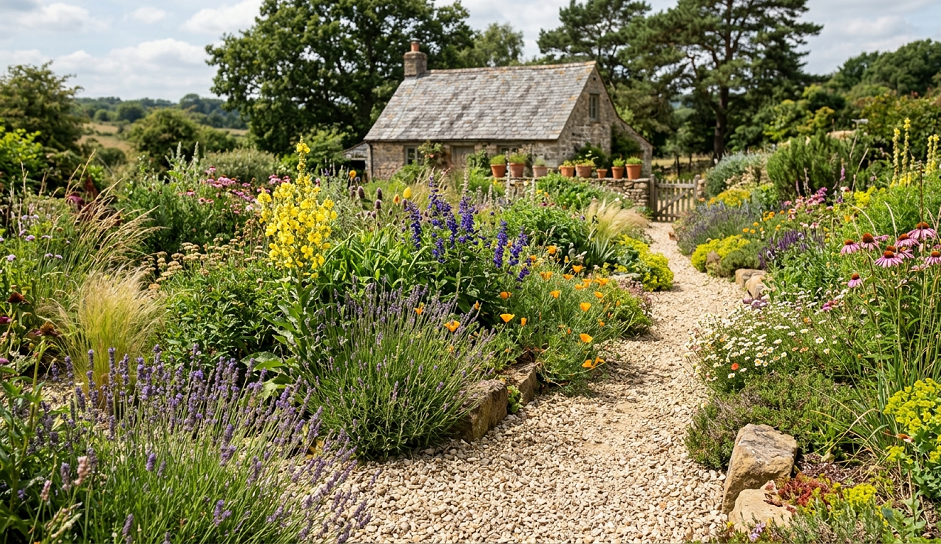
The Mediterranean gravel garden is one of the most beautiful and least understood styles in chaos gardening. Strip the turf, lay down a deep gravel mulch, and plant drought-tolerant species that thrive in free-draining, nutrient-poor conditions. The result is a garden that needs almost no watering, almost no feeding, and delivers flowers from April to October.
The critical mistake people make with gravel gardens: they add compost to the planting holes. This is exactly wrong. Rich soil in a gravel garden encourages lush, soft growth on plants that evolved to be lean and tough. They look wrong, they’re vulnerable to slug damage, and they often die over winter. Plant directly into poor soil or grit-amended soil only.
My non-negotiable gravel garden plants are: cistus, phlomis, salvia nemorosa, erigeron karvinskianus (the Mexican daisy that seeds into every crack and never stops flowering), and various alliums. These planted together in loose drifts create an informal, almost wild tapestry that looks better every year.
Erigeron karvinskianus deserves its own paragraph, honestly. It’s the perfect chaos garden plant: tiny, tidy enough to not look unkempt, but abundant and free-flowering to the point where it genuinely changes the character of whatever space it’s growing in. I’ve recommended it to more people than any other plant in my garden.
12. Herb Spiral and Forest Garden Ideas for Edible Chaos
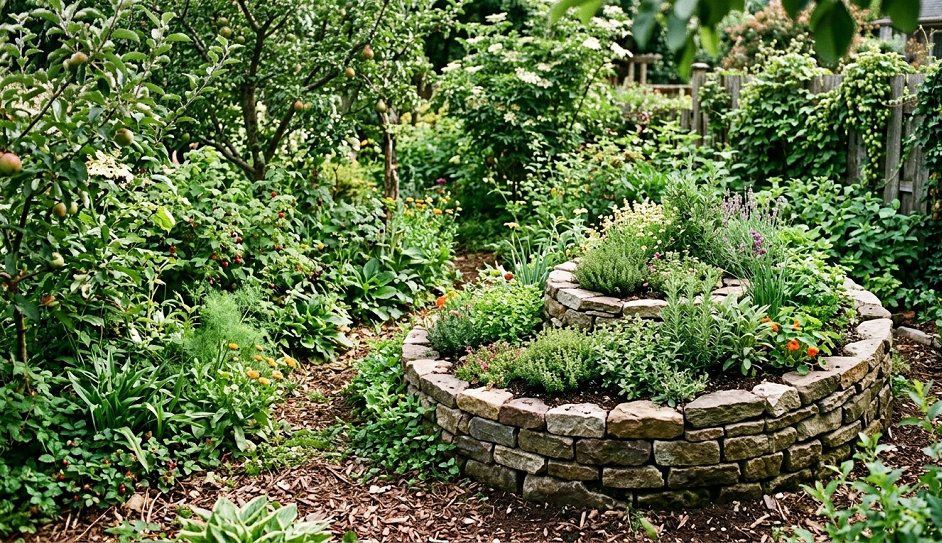
An herb spiral — a raised, snail-shaped bed that creates multiple microclimates in a small space — is a genuine permaculture classic and one of the few ideas from that world that I think lives up to its reputation. The top is dry and free-draining (perfect for Mediterranean herbs), the middle is moderate, and the base stays moist (perfect for mint and chives). Three feet of diameter, twelve different herbs.
The forest garden concept takes this further, mimicking the structure of a woodland edge: tall fruit trees as a canopy layer, smaller fruit bushes at mid-height, perennial vegetables and herbs at ground level, and ground cover plants filling every gap. It’s dense, complex, and largely self-managing once established.
I’ve had a small forest garden section — about 200 square feet — for seven years. In the first two years it needed regular intervention. By year four, I was mostly just harvesting. It grows, it self-mulches with leaf fall, and the companion planting between layers means pest pressure is very low. It’s the best return on initial effort of anything I’ve ever planted.
The hard truth about forest gardens: they look rough in the first two years and require faith. Every autumn of year one, a neighbor will ask if you’re planning to do something with “that patch.” Stay the course.
13. Rewilding Garden Corners for Local Wildlife Habitat
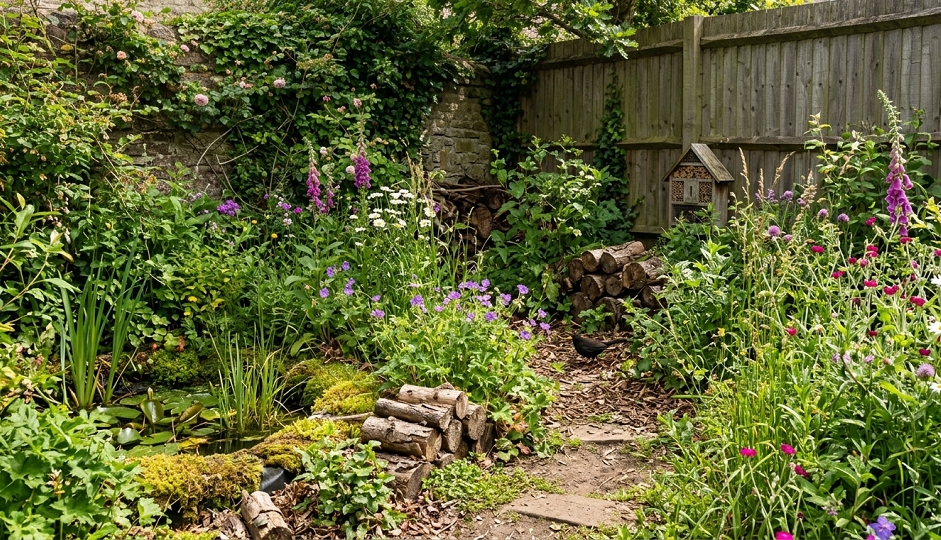
Dedicating a corner of your garden to true rewilding — minimal intervention, native plants, structural debris — is one of the highest-impact things a domestic gardener can do for local biodiversity. A log pile in a shaded corner creates habitat for beetles, slow worms, and hedgehogs. A pile of last year’s stems left standing through winter houses overwintering insect eggs and larvae.
The rewilding corner philosophy runs counter to every conventional gardening instinct about neatness, but the evidence for its value is overwhelming. Research consistently shows that even a small patch of managed wild habitat in a domestic garden can significantly increase local invertebrate diversity.
My rewilded back corner has a log pile, a patch of stinging nettles (which I manage to keep to about six square feet), a section of standing dead stems from the previous season, and a pile of fallen leaves I push against the fence each autumn. It looks, frankly, like a neglected corner. But a slow worm lives there, a hedgehog visits regularly, and last spring I counted more than twenty species of invertebrate on the nettles alone.
The stinging nettles are non-negotiable for me. They’re the larval food plant for several of our most beautiful butterflies — red admirals, painted ladies, small tortoiseshells — and the benefits to the garden ecosystem dwarf the minor inconvenience of wearing gloves nearby.
14. Annual Wildflower Rotation for Constant Color and Pollinator Support
While self-seeding perennials are the backbone of a chaos garden, an annual rotation layer adds flexibility, color, and the ability to fill gaps in any bed quickly. Unlike perennials, annuals complete their life cycle in one season — which means if something doesn’t work, you’re only committed for that year.
My favorite annuals for rotation are: bishop’s flower (Ammi majus), cosmos ‘Purity’ and ‘Dazzler’, borage, and pot marigold (Calendula). All of them self-seed aggressively enough that after year one, they basically manage the rotation themselves. New plants emerge in spring, bloom through summer, drop seed, and you never need to buy them again.
Bishop’s flower is criminally underplanted. It’s the wild-looking white umbellifer that adds an ethereal, floating quality to any planting — incredibly elegant for something you can buy for a pound a packet. It combines beautifully with deep-colored dahlias and purple salvias in late summer.
The rotation principle I follow: when an annual finishes blooming, I dead-head perhaps sixty percent of the flowers to encourage continued flowering, then let the remaining forty percent set and drop seed. I never clear the bed completely in autumn. The seed already in the soil is the best resource you have, and disturbing it reduces next year’s display significantly.
15. Night Garden Planting for After-Dark Chaos
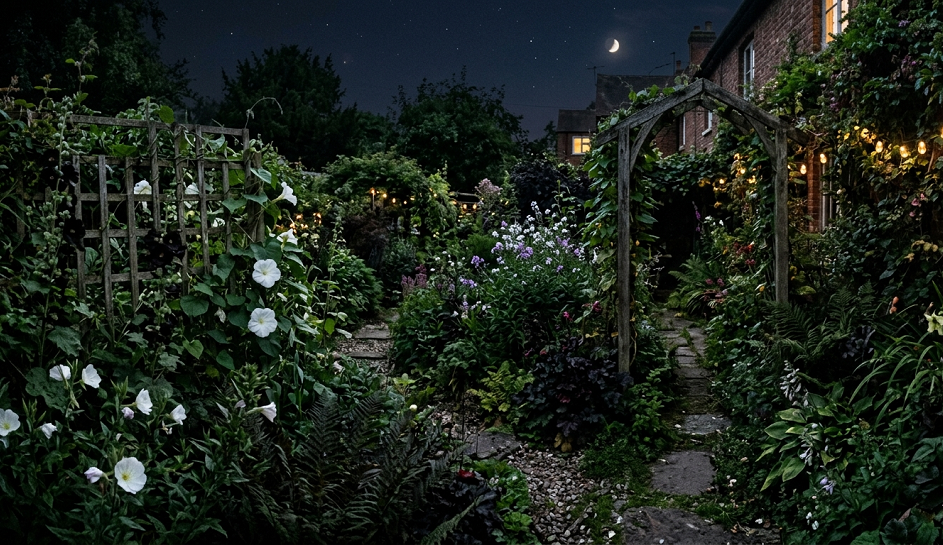
Quick side note on this one because it genuinely surprises people: chaos gardens don’t have to be purely daytime affairs. White and pale-flowered plants glow in low light, and night-scented species like evening primrose, night-scented stock, and white tobacco plant (Nicotiana sylvestris) transform a garden into something magical from dusk onwards while simultaneously supporting moths — which are every bit as important as bees for pollination and infinitely more overlooked.
White cosmos, white Nicotiana, pale Verbena bonariensis, and white Japanese anemone together create a luminous late-season display that’s genuinely spectacular in the evening. I planted my first night-focused border five years ago mostly for my own enjoyment — my garden faces west and catches the evening light — and it has become the section I’m most proud of.
Night-scented stock is a total waste of money if you plant it somewhere prominent during the day. It looks like small, boring lavender. At night, it smells extraordinary and draws hawkmoths. Plant it somewhere you’ll pass after dinner, not where people will look at it from the kitchen window at noon.
Real Talk: What Can Go Wrong with Chaos Gardening (And What Isn’t Worth the Effort)
Let me be straight with you about the pitfalls, because every chaos gardening article I’ve ever read presents it as a gentle drift toward effortless abundance. It isn’t. There’s a learning curve, some real failures, and a couple of approaches that are, frankly, not worth the hype.
Invasive species disguised as “wildflowers.” Some seed mixes sold as wildlife-friendly contain plants that are genuinely invasive in certain regions. Himalayan balsam appears in several commercial mixes and is considered an invasive weed across much of the UK and North America. Always check every species in any mix against your regional invasive species list before planting.
The “just let it go” failure mode. Chaos gardening requires observation and light management, not zero management. A bed that’s genuinely abandoned will be dominated by the most aggressive species within two seasons — usually docks, brambles, or bindweed — and recovering it is much harder than keeping a light hand on it from the start.
Slug pressure in dense plantings. Dense, moist chaos plantings are fantastic slug habitat. I deal with this by using nematodes in spring (effective, wildlife-safe, genuinely worth the cost), encouraging hedgehogs, and being realistic about which plants need protection in their first year.
Seed bomb kits sold online are largely theatrical. The prettily packaged ones with instructions to press against glass and watch germinate are a total waste of money, even if they look pretty on Pinterest. Seed bombs work because of the clay ratio and the seed selection; most commercial kits get both wrong. Make your own or use a reputable conservation supplier.
The expectation that year one will look good. It usually won’t. Year one in a chaos garden is mostly about establishment. Year two gets interesting. Year three is often genuinely breathtaking. Managing that expectation — yours, your partner’s, your neighbors’ — is the real first-year challenge.
Parting Wisdom: The Real Secret to Chaos Gardening
Every mistake I’ve made in over a decade of chaos-style planting has taught me the same lesson: the garden knows more than you do. Your job isn’t to impose order on a piece of land. It’s to set up conditions that allow the right plants to thrive, then pay enough attention to recognize what’s working and let it spread.
The most beautiful patches in my garden are the ones I planned least. The corner where verbena bonariensis and erigeron karvinskianus seeded themselves into the gravel path. The log pile corner that’s become a genuine habitat. The apple tree that a bird planted, which is now ten years old and covered in blossom every May.
Chaos gardening will make you a better gardener because it forces you to observe rather than just manage. You start watching where the bees actually go, which plants come back without being asked, where moisture collects in a dry summer. That knowledge is worth more than any technique.
Now I want to hear from you: which of these ideas are you planning to try first? And if you’re already chaos gardening, what’s been your biggest success or your most spectacular failure? Drop it in the comments below — the community learns best from real gardens, real mistakes, and real results.