
My first fire pit setup was a disaster. I plopped a cheap bowl-style pit in the middle of the lawn, dragged out some mismatched lawn chairs, and called it a “backyard gathering space.” It looked like a yard sale. The grass died in a perfect circle underneath it, the smoke blew directly into everyone’s faces no matter where they sat, and my neighbor — bless her — walked over one evening and said, “Is that… intentional?”
It was not intentional.
Since then, I’ve redesigned fire pit areas in my own yard three times, helped friends redo theirs, and made enough mistakes to fill a book. What I’ve learned is that a fire pit without intentional landscaping is just a hazard with seating. But when you get the design right? That corner of your yard becomes the place everyone wants to be from September through April.
Here are 13 fire pit landscaping ideas that actually work — some classic, some unexpected, all tested in the real world.
1. Sunken Fire Pit Patio: The “Conversation Pit” That Never Goes Out of Style
If you want one design that makes a dramatic impact and also solves the smoke-in-your-face problem, go sunken. A sunken fire pit area — where you drop the seating platform 12 to 18 inches below grade — is my personal favorite of everything on this list.
The first time I saw one done well, it was at a friend’s place in the hill country. She’d hired a landscaper who dug out a circular area about 12 feet in diameter, lined it with stacked limestone retaining walls, and added bench seating built right into the walls. The fire pit sat at ground level in the center. The whole thing felt like sitting around a campfire inside a well-designed room.
The practical benefits go beyond aesthetics. Dropping below grade naturally blocks wind at seat level, which means the fire burns more steadily and the smoke rises up and away from you instead of chasing you around the circle. It also creates a natural boundary that keeps kids and pets from wandering in accidentally, and it defines the space without needing a single fence post.
The downside: this is not a weekend warrior project. You’re talking excavation, drainage planning (critical — a sunken pit becomes a pond in a rainstorm if you don’t plan for it), and retaining wall construction. Budget accordingly and hire an engineer or experienced landscape contractor if you’re dealing with any kind of slope. I tried to DIY mine and hit a buried irrigation line on day one. Do the call-before-you-dig thing. Learn from me.
2. Flagstone Patio With Fire Pit: Timeless and Forgiving
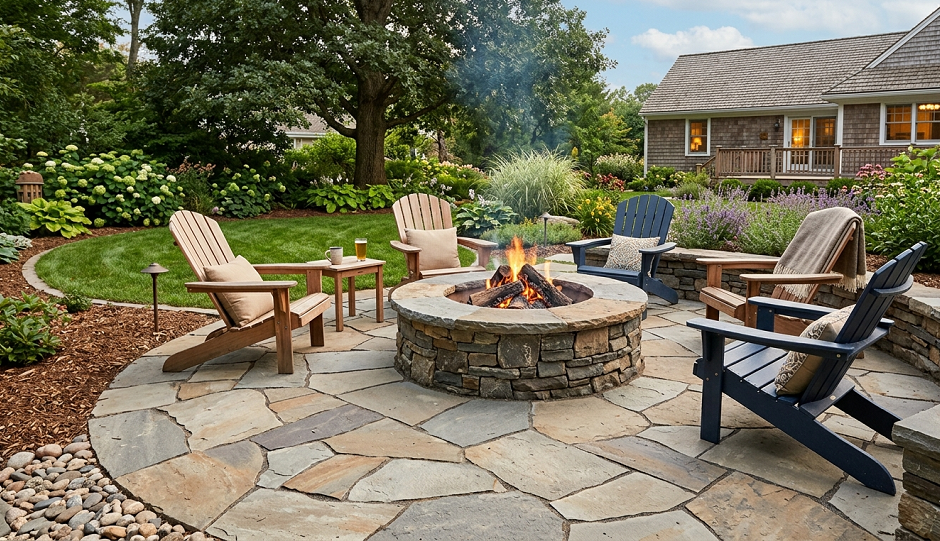
Flagstone is the workhorse of fire pit landscaping, and for good reason — it handles heat well, it looks great with almost any home style, and it’s forgiving enough that even a mediocre DIY installation looks intentional.
The key to making a flagstone fire pit patio feel designed rather than just “rocks on the ground” is the joint filler and the edge treatment. I’ve found that polymeric sand in the joints looks sharp for about two seasons before it starts cracking and weeding. My go-to now is a dry-mortar mix for the joints and a clean cut-stone border around the perimeter. It takes an extra day but it holds up for years.
For size, most people go too small. A fire pit patio should be at least 12 feet in diameter for a standard 36-inch fire pit bowl, and ideally 15 to 18 feet if you want comfortable chair placement with safe clearance from the flames. The general rule is a minimum of 7 feet from the pit edge to any combustible material, which includes wooden furniture, so plan your square footage accordingly.
One design trick I swear by: extend the flagstone out from the pit in at least one direction — toward the house, toward a garden bed, something — to create a visual connection. An isolated circle of flagstone in the middle of a lawn looks like a helicopter pad. Give it a tail and it looks like a place.
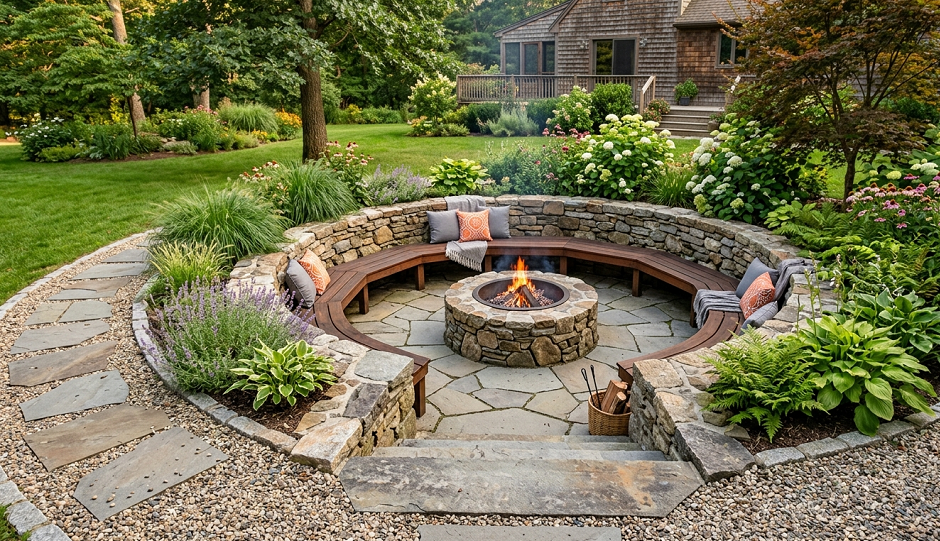
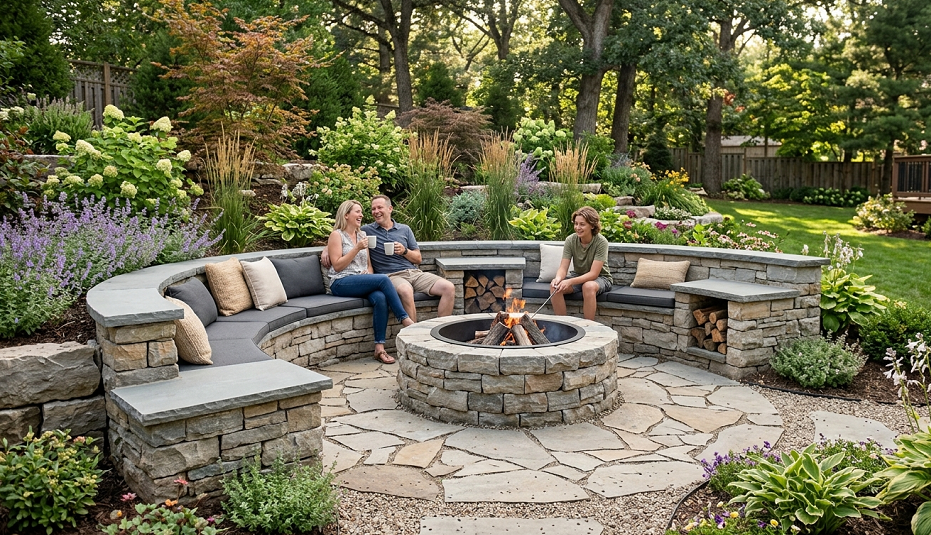
3. Fire Pit With Built-In Seating Walls: Stop Hauling Chairs

The number of times I’ve dragged Adirondack chairs across the yard in the dark, stubbed my toe, and knocked over a drink — I can’t count them. Built-in seating walls around a fire pit are one of those upgrades that sound like a luxury but are really just common sense.
Built-in seating walls are typically 18 inches tall (standard seat height) and anywhere from 16 to 20 inches deep. You can build them from the same material as your patio — concrete block with a stone veneer, natural stacked stone, brick, or even poured concrete with a wood cap. The wood cap is my preference because it adds warmth to the look and can be easily replaced when it weathers.
The design benefit is that built-in walls create an automatic sense of enclosure that makes the space feel intentional. They also function as a windbreak. And from a practical standpoint, they’re always in the right spot — no chairs to shuffle, no furniture to store in winter, no tripping hazards.
The one thing people underestimate with seating walls is drainage. If your wall is anywhere near the low point of your yard, water will pool in front of it and you’ll have wet feet all season. Slope your patio surface at least 1/8 inch per foot away from your seating.
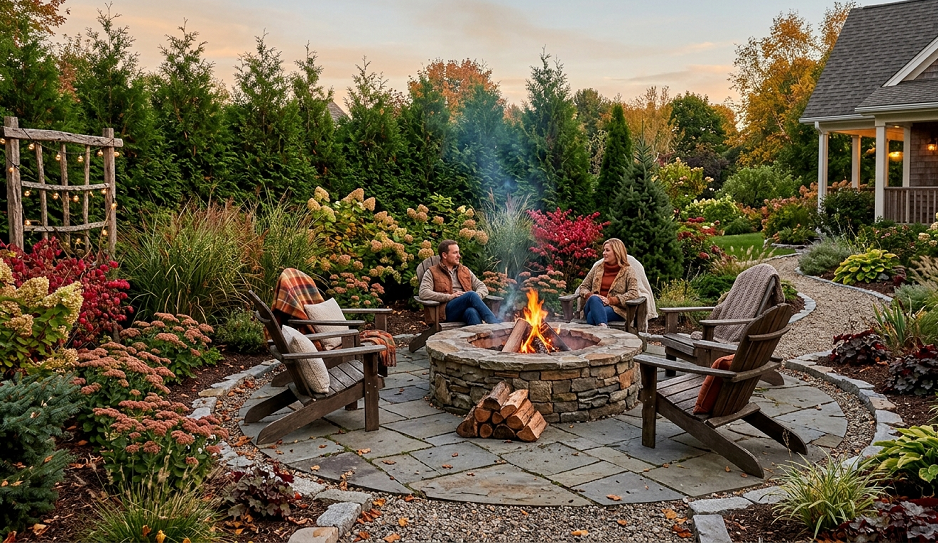
4. Fire Pit Garden Bed Surround: Soften the Hardscape
Pure hardscape around a fire pit — all stone, all concrete, no plants — can feel cold and industrial even when the fire is going. Incorporating garden beds into your fire pit landscaping design softens the edges and makes the whole area feel more intentional.
The trick is plant selection. You want things that are heat-tolerant, not easily ignited, and low-maintenance enough that you’re not crawling around pruning shrubs while your guests are trying to enjoy a drink. My go-to plants for fire pit borders are ornamental grasses (planted at least 6 feet from the pit edge), lavender, black-eyed Susan, and Russian sage. All drought-tolerant, all low-flammability, all gorgeous in the evening light.
What I’d avoid: anything with fine, dry foliage close to a fire source. Ornamental juniper, arborvitae, and rosemary look great but are essentially kindling once they dry out in summer. I’ve also seen people plant ornamental grasses in gorgeous sweeping arcs around fire pits, only to realize in August that dried ornamental grass is extremely flammable. Keep the grasses and keep them back.
For the bed shape, curved beds that arc around one or two sides of the fire pit patio create the best visual effect. Straight rectangular beds next to a circular pit always look a little awkward, like you couldn’t decide on a design language.
5. Gravel Fire Pit Area: Low Maintenance and Surprisingly Good-Looking
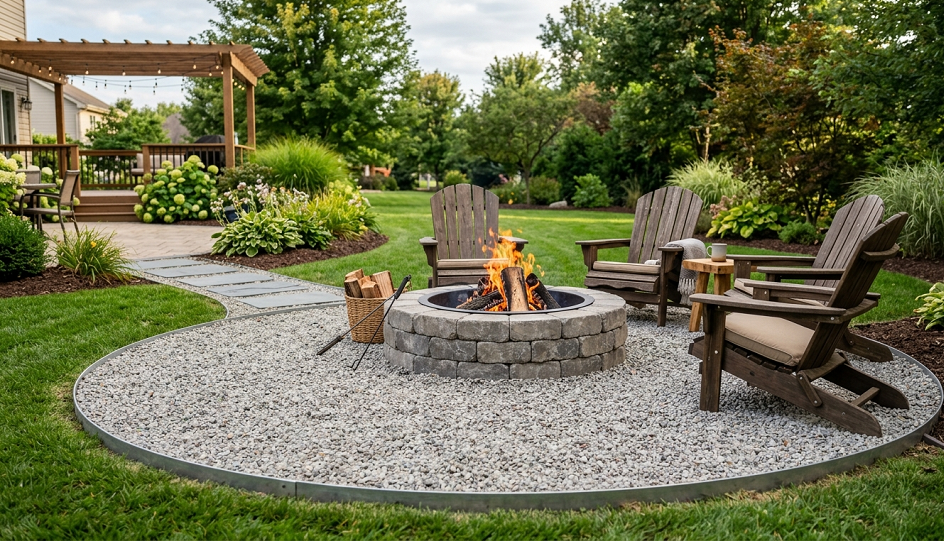
When people ask me for the easiest fire pit landscaping setup to install and maintain, I tell them gravel. Every time. It’s not the sexiest answer, but a well-executed gravel fire pit area is genuinely attractive and takes a fraction of the time and money of a paved patio.
The non-negotiables for gravel to look good: proper edging, weed barrier fabric underneath, and the right gravel size. I’ve found that 3/8-inch crushed gravel or pea gravel in a neutral tone (gray, tan, or buff) looks the most intentional. Anything larger than 3/4 inch is uncomfortable to walk on in sandals. Anything too small tracks into the house constantly.
Steel edging is my preferred border — it stays put, it doesn’t rot, and it gives a clean line that makes the gravel feel contained and designed. Plastic edging buckles within a couple seasons and starts looking sloppy. The extra cost for steel is worth it.
One thing people don’t account with gravel: sound. There’s something genuinely pleasant about the crunch of gravel underfoot around a fire pit that feels more organic and relaxed than hard paving. I’ve had multiple guests comment on it. Weird detail, but real.
6. Wood Deck Fire Pit Integration: Doable, but Do It Right
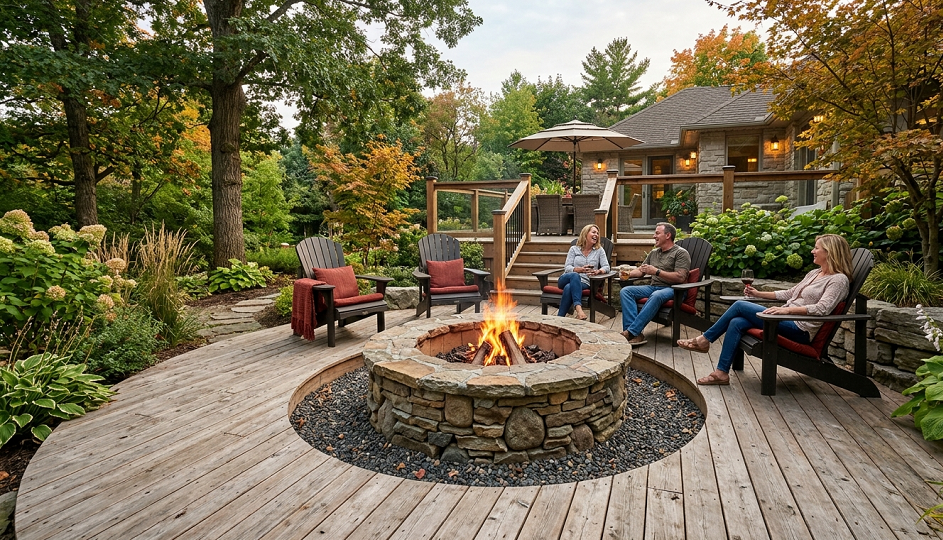
Adding a fire pit to an existing wood deck is the landscaping idea that makes every responsible homeowner nervous — and for good reason. But it’s absolutely doable when you follow the right steps, and the result is one of the most seamless, luxurious-feeling setups you can create.
The key is using a propane or natural gas fire pit table rather than a wood-burning pit on or near a wood deck. Wood-burning fires on decks are a fire code violation in most municipalities and a genuine hazard regardless of legality. If you want that crackling fire experience near your deck, position the wood-burning pit on a non-combustible pad at least 10 feet from the deck structure and run a stone or gravel path connecting the two areas.
Gas fire pit tables, on the other hand, can be integrated directly into a deck layout with the right setup — a non-combustible surface pad under the table, no overhanging structures within the manufacturer’s clearance guidelines, and a properly sized gas line run by a licensed plumber. I’ve had a gas fire table on my composite deck for four years with zero issues.
The design approach that works best is to treat the fire pit table as the anchor of an outdoor living room layout: orient the deck furniture toward it, keep sightlines clear from the house, and use deck lighting (string lights, post cap lights, step lights) that create a layered glow that complements the fire.
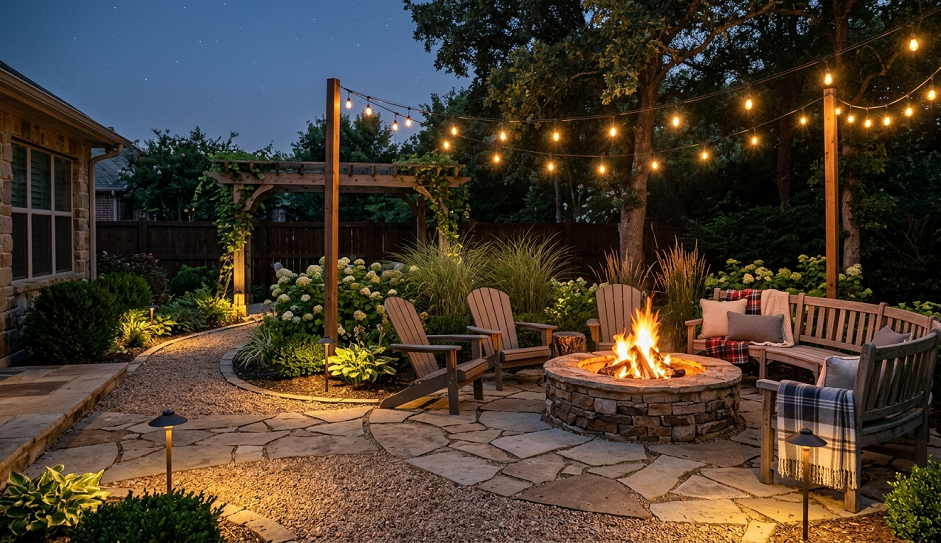
7. Fire Pit With Pergola: Create a Destination
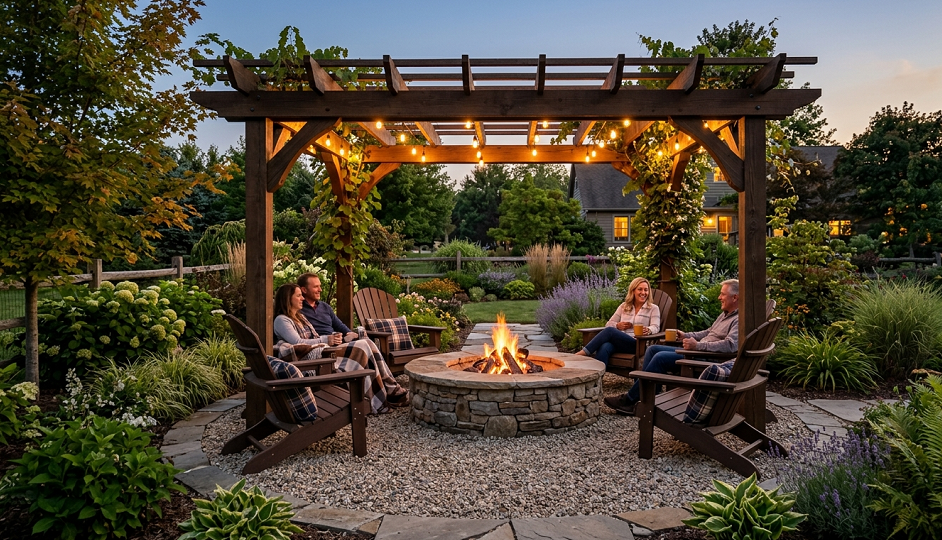
A pergola over a fire pit area transforms a patch of the backyard into an actual outdoor room. This is the landscaping idea that consistently gets the most “wow” from people who see it done well, and it’s more achievable than it looks.
The pergola doesn’t have to cover the fire pit itself — in fact, from a fire safety standpoint, the open area directly above the pit should remain unobstructed. The pergola works best when it covers the seating area, framing the space and giving it walls without enclosing it. Think of the fire pit as the hearth of an outdoor room, and the pergola as the ceiling above the sitting area.
For materials, I’ve always preferred a cedar or redwood pergola over pressure-treated lumber when budget allows. The natural weathering of cedar to a silver-gray is genuinely beautiful and doesn’t require painting or staining to look intentional. Pressure-treated lumber is fine structurally, but it needs a stain to look good, and that’s ongoing maintenance.
One detail that elevates a pergola-over-fire-pit setup dramatically: climbing plants. I’ve grown Virginia creeper and climbing hydrangea up pergola posts and the result after a few seasons is a space that looks like it belongs in a garden magazine. Just make sure the vines are well-trained away from the fire side and pruned back if they start encroaching over the open pit area.
8. Natural Stone Fire Pit Ring With Boulder Seating: Rustic Done Right
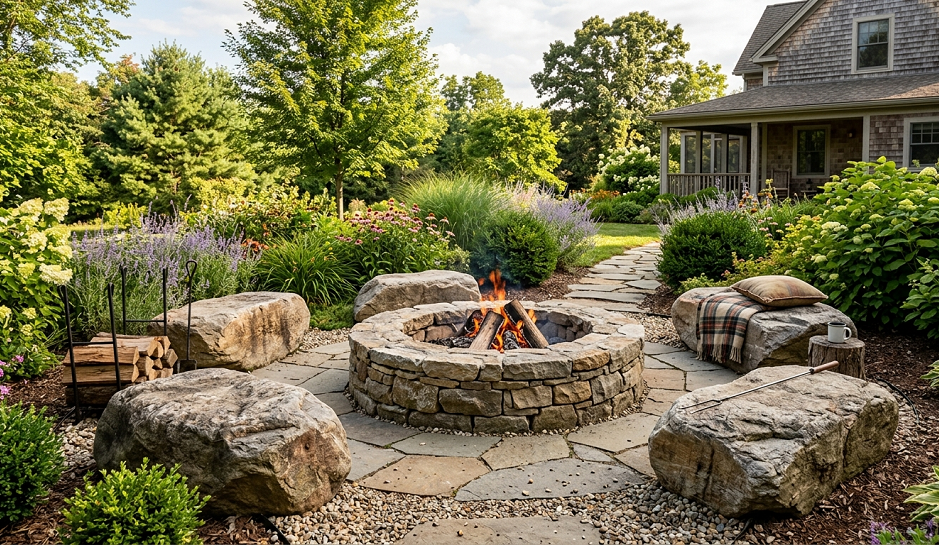
If you’re going for that “found in nature” campfire aesthetic rather than a formal patio look, nothing beats a natural stone fire ring with boulder seating. I’ve built three of these and the hardest part every time is sourcing the boulders.
The fire ring itself should be constructed from non-combustible, non-porous stone — granite, basalt, or sandstone. Do not use river rock or any stone that’s been sitting in water. Wet stone trapped inside a fire pit can heat rapidly, trap steam, and crack explosively. I learned this from experience and it was genuinely alarming.
For boulder seating, work with a local stone yard rather than big box stores. Stone yards often have landscape-quality boulders that you can actually sit on — flat-topped, stable, interesting shapes — at much better prices than retail. Budget for delivery and placement equipment; even a 300-pound boulder is not a DIY-with-your-truck situation.
Surround the whole setup with wood chip mulch or a groundcover plant like creeping thyme, and you get a space that looks like it grew there organically. Add a few low-growing native plants around the boulder perimeter and the whole thing reads as completely natural.
9. Tiered Backyard Fire Pit Landscaping: Use Your Slope
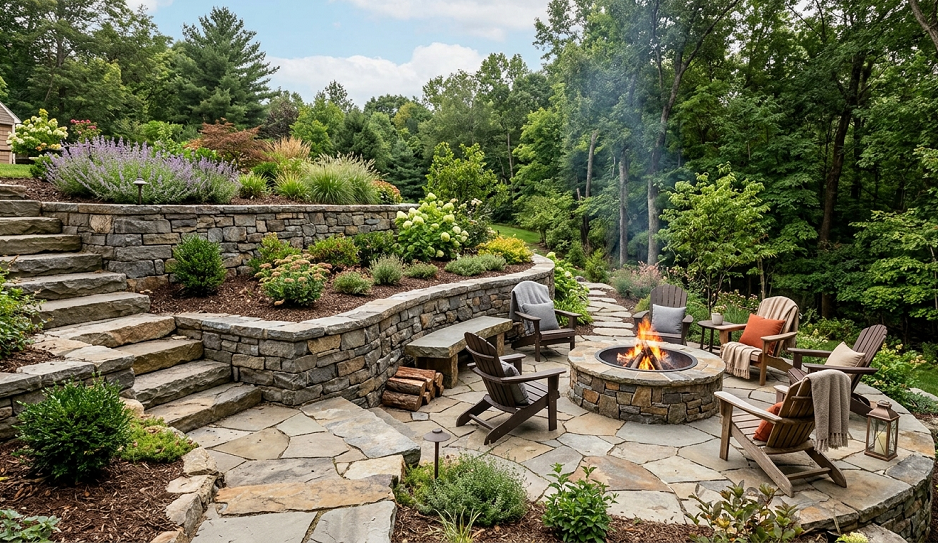
If your yard has a slope that you’ve been fighting against, a tiered landscape design with a fire pit on one of the levels is one of the best ways to turn the problem into a feature.
The most common configuration is a main lawn or garden on the upper level, a set of steps leading down to a lower fire pit terrace, and retaining walls that create the visual separation between tiers. This layout works beautifully because it gives the fire pit area a sense of privacy and destination — you literally descend into the fire pit space, which feels intentional and immersive.
Retaining wall material choices matter here beyond aesthetics. Interlocking concrete block is the most DIY-friendly and structurally reliable for walls under 4 feet. Natural stone is gorgeous but requires more skill to lay correctly and will move over time without proper footings. For anything taller than 4 feet, get a geotechnical engineer involved — I’m not being dramatic, that’s a genuine structural situation.
The steps connecting tiers are also a design opportunity, not just a functional necessity. Wide, shallow steps in stone or concrete with integrated lighting look excellent and are far safer at night than steep narrow stairs. I like to plant the step risers with creeping thyme or moss — it softens the hardscape and smells amazing when you walk on it.
10. Fire Pit With Outdoor Kitchen Integration: Level Up Your Entertaining
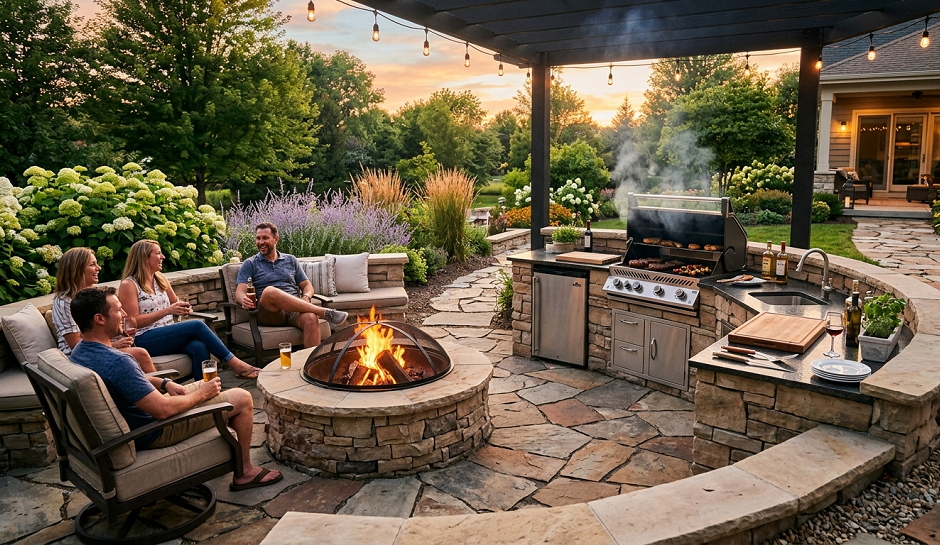
Once you’ve committed to a fire pit patio, it’s a small logical leap to incorporate an outdoor kitchen or grill station into the same hardscape footprint. These two functions complement each other perfectly for outdoor entertaining, and designing them together from the start saves a lot of expensive retrofitting.
The layout that works best places the fire pit and the outdoor kitchen/grill on opposite ends of the same paved area, with seating between them. This way the fire pit anchors one end as the gathering and warmth zone, the kitchen anchors the other as the food prep zone, and the seating area in the middle serves both. Traffic flows naturally without people crossing in front of the fire.
For outdoor kitchen materials, concrete block with a stone or tile veneer is the most durable and weather-resistant option. Pre-cast outdoor kitchen modules have gotten significantly better in recent years and are a legitimate option if you want to skip the masonry work. I’ve found the pre-cast systems are a total waste of money if you live somewhere with hard freezes — they crack. In mild climates they’re fine.
Keep the countertop material heat-resistant: granite, concrete, porcelain tile, or quartzite all work well. Standard quartz (engineered stone) is often marketed as heat-resistant but can discolor with prolonged heat exposure, and I’ve seen it crack in cold climates when outdoor counters freeze.
11. Linear Gas Fire Pit in a Modern Landscape Design
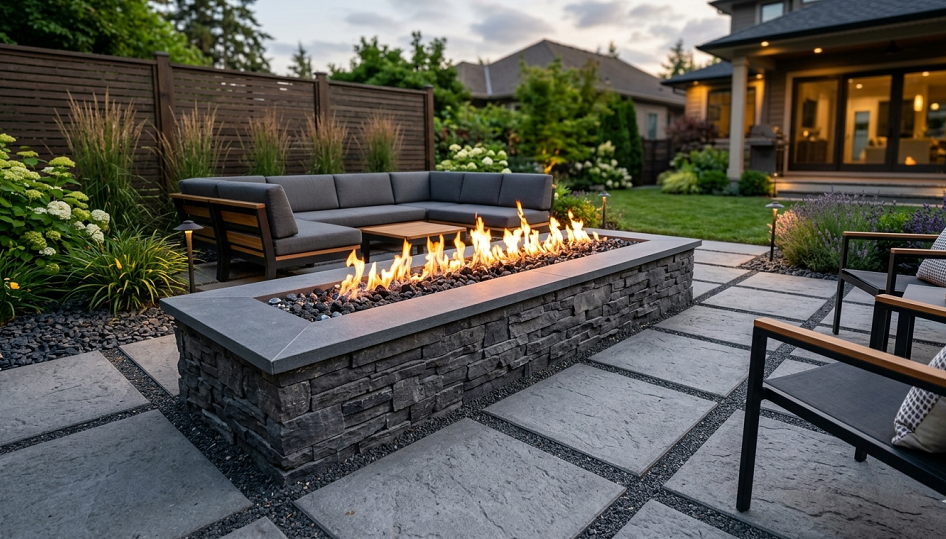
The traditional round wood-burning fire pit is a classic for good reason, but it isn’t the right fit for every yard. If your home has a modern or contemporary architectural style — clean lines, minimal ornamentation, geometric hardscape — a linear gas fire pit is far more cohesive.
Linear fire pits are typically rectangular troughs, anywhere from 2 to 6 feet long, fueled by propane or natural gas, with a glass or stone fire media bed. They look like a piece of outdoor furniture as much as they look like a fire feature, and that’s exactly the right visual for a modern landscape.
The installation consideration that trips people up: linear fire pits require a clean, level surface and a gas line. Running a gas line is a licensed plumber job in virtually every jurisdiction — budget for it and don’t let anyone tell you it’s a DIY situation. Proper installation also means a shutoff accessible within 6 feet of the unit and a correctly sized gas line for the BTU load.
Design-wise, linear fire pits look best when they’re integrated into a built-in bench or low wall, so the seating flanks the length of the fire on both sides. Pair with large-format concrete or porcelain paver patio surfaces and minimal, architectural plantings (ornamental grasses, agave, miscanthus) and the result is genuinely magazine-worthy.
12. Fire Pit Focal Point With Lighting Design: The Detail Everyone Forgets
This one sounds like a filler tip but it’s one of the highest-impact upgrades you can make to an existing fire pit area without touching the hardscape at all. Layered outdoor lighting around a fire pit transforms the space from “functional” to “intentional destination.”
The reason this matters: firelight is beautiful but directional. It lights faces and the immediate circle, but it creates dense shadows beyond the seating area. That contrast between lit circle and dark yard beyond actually makes a fire pit space feel smaller and less inviting, even though the fire is doing its job.
The solution is low-level ambient lighting that wraps the perimeter of the fire pit area — landscape path lights, in-ground uplights on nearby trees or structures, string lights overhead on a pergola or between posts. The goal isn’t bright illumination. It’s a soft glow that bridges the transition from firelight to darkness and makes the edges of the space visible without washing out the fire’s ambiance.
My personal setup uses 3000K warm LED path lights along the edge of the flagstone, a string of Edison-style outdoor lights on the pergola overhead, and two uplights on the flanking arborvitae. The total install cost was under $400 in materials and it made more difference to how the space feels at night than the $1,200 pergola stain I did the same year.
13. Four-Season Fire Pit Landscaping With Windbreak Plantings

Most fire pit landscaping is designed for use in comfortable weather. But if you actually want to use your fire pit in fall, winter, and early spring — which is, let’s be honest, when a fire is most appealing — you need to think about windbreaks.
A windbreak planting on the prevailing wind side of your fire pit area is the most underutilized tool in fire pit landscape design. Evergreen shrubs or a hedge on the north or northwest side (prevailing wind direction in most of the U.S.) can drop the perceived wind chill in the seating area dramatically and keep the fire burning evenly instead of sideways.
Good windbreak plants for this application: Emerald Green arborvitae (narrow, fast-growing, deer-resistant in most areas), Sky Pencil holly (tight columnar form, great for narrow spaces), or a dense mixed evergreen hedge of boxwood and yew. Plant them 6 to 8 feet from the seating area and they’ll read as a designed garden element rather than a windscreen.
Bonus tip: A heavy-duty outdoor patio rug under the seating area — the kind rated for outdoor use, not an indoor rug set outside — makes an enormous difference in perceived warmth during cool-weather use. Cold hardscape radiates chill upward even when you’re not cold from above. I discovered this accidentally one October and now it goes out every September without fail.
Real Talk: What’s Not Worth the Effort (and What Goes Wrong)
Let me be direct about a few things I see constantly in fire pit landscaping projects.
Pre-made “fire pit kits” from big box stores are almost universally a waste of money. The fire bowl deteriorates in two seasons, the included “patio blocks” are the wrong size for any meaningful patio, and the whole thing screams “I bought this on impulse.” Save up and do one thing well.
Concrete patio paint does not hold up around a fire pit. The heat cycling causes it to peel in dramatic, ugly sheets. I’ve watched people spend weekends painting stamped concrete only to have it look worse than bare concrete by the following spring. Just seal it or leave it natural.
“Fire glass” media in wood-burning pits — I’ve seen people try this. Glass media is for gas fire features only. In a wood-burning fire the glass melts, sticks together, and becomes a safety hazard.
Skipping drainage planning is the mistake that causes the most regret. A beautiful patio that pools water after every rain gets used zero times per season. Slope your patio surface, install French drains if your yard is flat, and address grading before you pour a single bag of concrete.
And finally: any tree canopy within 20 feet of an open fire pit is a problem waiting to happen. I’ve seen gorgeous fire pit patios installed directly under mature oak trees. Fine for aesthetics, a genuine hazard for operation. Either relocate the pit or resign yourself to a gas feature with a lower flame profile.
Parting Wisdom
After a dozen-plus years of doing this, my honest opinion is that the best fire pit landscaping isn’t about the most elaborate design. It’s about creating a space that’s comfortable enough to actually use regularly, safe enough that you’re not anxious while guests are around it, and designed intentionally enough that it looks like it belongs.
Start with the one idea on this list that fits your budget and your yard’s existing character. Do that one thing really well before adding the next element. A single beautifully built seating wall and a quality fire pit beats a complicated multi-feature setup that was rushed and under-budgeted every single time.
The fire pit is always going to be the star. Your job as the landscaper — even if you’re just the homeowner with a shovel and a vision — is to give it a stage worth playing on.
Now I want to hear from you: which of these ideas fits your yard situation, and what’s the obstacle that’s been keeping you from tackling it? Drop your questions or your own hard-won lessons in the comments below — I read every one of them and I’ll give you a straight answer.