
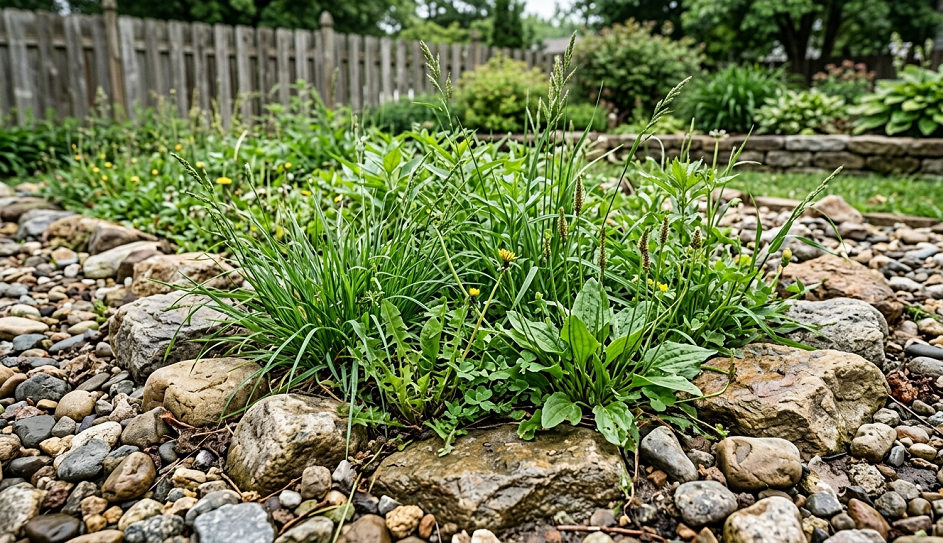
Nothing ruins the “sleek and modern” vibe of a rock garden faster than a bunch of stubborn dandelions and crabgrass poking through the stones. I’ve spent countless Saturdays on my hands and knees, pulling green shoots until my back screamed, only to see them return three days later like they had a personal vendetta against me.
If you’re tired of your rock bed looking like a neglected vacant lot, you’re in the right place. We aren’t just going to “manage” the weeds; we are going to stop them from coming back. I’ve tried the store-bought sprays that smell like a lab accident and the “all-natural” hacks that did nothing but season the weeds for a salad. Here is the actual, grit-and-grime strategy for keeping your rock landscaping clear for good.
Why Do Weeds Keep Growing Through Rocks and Landscape Fabric?
You probably thought that laying down that expensive black landscape fabric would be the end of your troubles. I thought the same thing back in 2012 when I did my first major renovation. I spent a fortune on “professional grade” weed barrier, pinned it down perfectly, and dumped three tons of river rock on top. By 2014, the weeds were growing on top of the fabric.
The hard truth is that dust, dirt, and organic debris blow into your rocks over time. This creates a thin layer of “new” soil right on top of your barrier. When a bird drops a seed or the wind blows in some thistle fluff, it lands in that dust, hits the moisture trapped by the rocks, and takes off. The roots then grow down through the fabric, making them nearly impossible to pull out without tearing the whole system apart.
I’ve found that relying on fabric alone is a total waste of money. It eventually clogs, prevents your soil from breathing, and becomes a tangled mess of plastic and roots. If you want a permanent solution, you have to change how you treat the ground underneath those rocks and how you maintain the surface.
Most people make the mistake of just spraying the green stuff they see. That’s like putting a Band-Aid on a leaky pipe. To kill weeds in rocks permanently, you have to address the seed bank in the soil and the environment between the stones. I’m going to show you how to starve those weeds of the light and nutrients they need to survive.

The Best Way to Kill Grass and Weeds in Rock Beds Naturally
I’m a big fan of not turning my backyard into a hazardous waste site, especially since my dogs like to roll around in the garden. For years, I tried to find a natural way to kill grass that actually worked. I tried the boiling water trick—which works for about five minutes—and I tried hand-pulling, which just resulted in a sore ego. Then I discovered the power of high-strength white vinegar.
Don’t bother with the 5% acidity vinegar you find in the grocery store salad aisle. It’s too weak. You need 20% or 30% industrial-strength horticultural vinegar. This stuff is the real deal. I once accidentally spilled a gallon of it on a patch of invasive ivy, and it looked like a blowtorch had passed over it by sunset. It desiccates the plant on contact by sucking the moisture out of the leaves.
To make this even more effective, I mix in a cup of salt and a tablespoon of liquid dish soap. The soap acts as a “surfactant,” which is just a fancy way of saying it helps the vinegar stick to the waxy leaves instead of rolling off. The salt is the “permanent” part of the equation. Salt makes the soil toxic to plants, which is exactly what you want in a rock bed where you never intend to grow anything ever again.
Be warned: do not use this mixture anywhere near your prized hydrangeas or the edge of your lawn. Salt doesn’t stay put; it leaches through the soil when it rains. I learned this the hard way when I “salted the earth” near my rock border and ended up with a six-inch dead zone in my beautiful fescue lawn. It took two seasons for the grass to creep back into that spot.
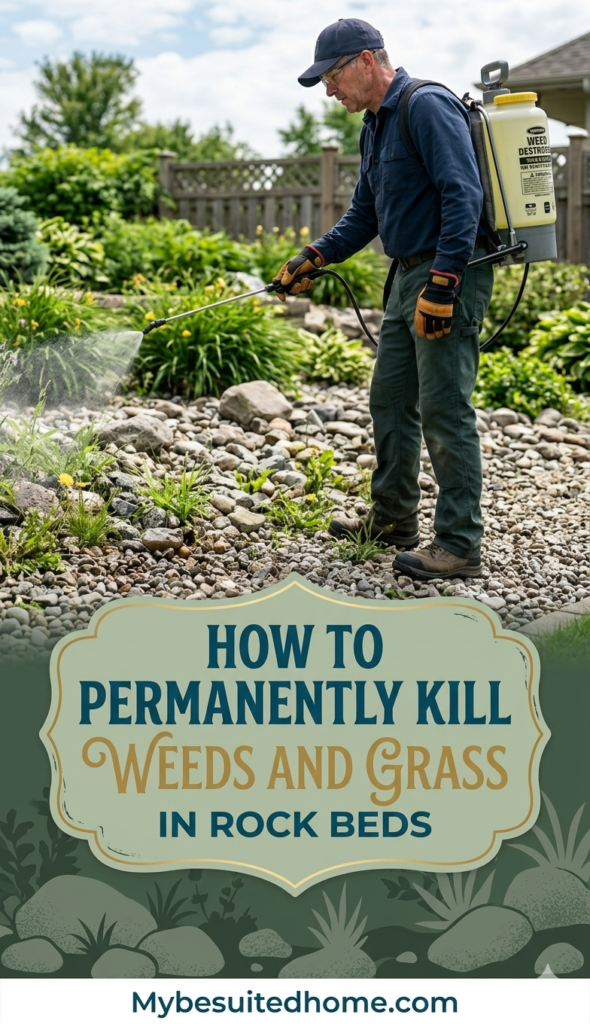
Using Heavy-Duty Weed Killer for Rocks and Gravel
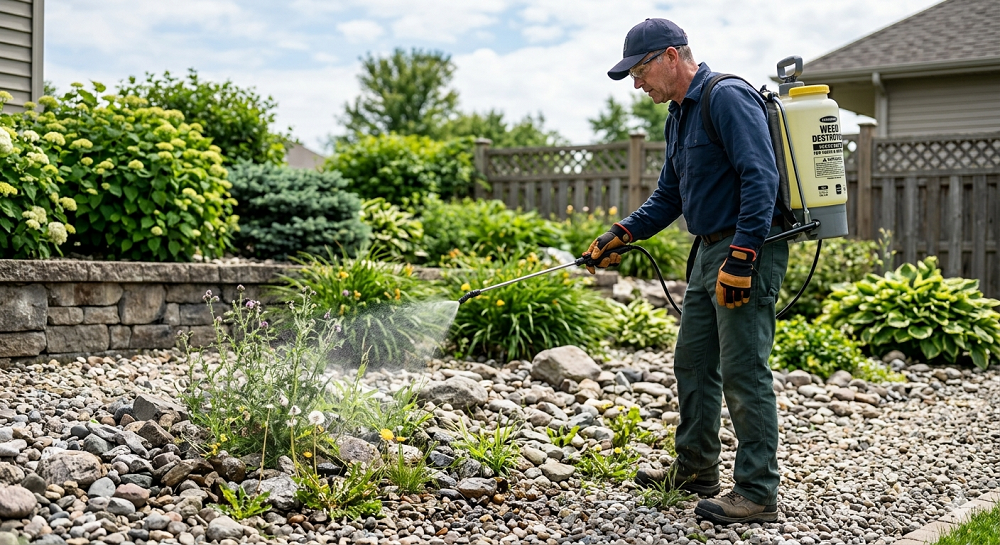
Sometimes, the “natural” route just isn’t enough for those deep-rooted perennial grasses that have underground runners. If you’ve got Bermuda grass or nutsedge growing through your gravel, you might need to bring out the big guns. I usually reach for a product containing Glyphosate or Imazapyr if I’m looking for a “one and done” application for the entire season.
The trick to using chemical weed killers in rock beds is timing. Most people spray when they see a weed, but that’s reactive. I like to spray a “pre-emergent” herbicide in early spring before the ground even warms up. These chemicals create a vapor barrier in the top layer of soil that stops seeds from ever germinating. It’s much easier to stop a seed from waking up than it is to kill a mature plant with a three-foot taproot.
When you are spraying among rocks, you have to be careful about “drift.” A light breeze can carry those chemicals onto your flowers or your neighbor’s prize-winning roses. I keep a dedicated sprayer just for my rock beds so I don’t accidentally cross-contaminate my vegetable garden equipment. I also use a “shield” (basically a piece of cardboard or a plastic bucket with the bottom cut out) to surround the weeds I’m spraying if they are close to plants I actually like.
One thing I’ve noticed is that people tend to over-apply chemicals, thinking “more is better.” It isn’t. You end up with toxic runoff that flows into your storm drains. Follow the mixing instructions on the label. I used to eyeball it until I killed a small ornamental maple tree that was twenty feet away from my rock path because the chemicals traveled through the groundwater. Follow the math, save your trees.
How to Install a Permanent Weed Barrier the Right Way
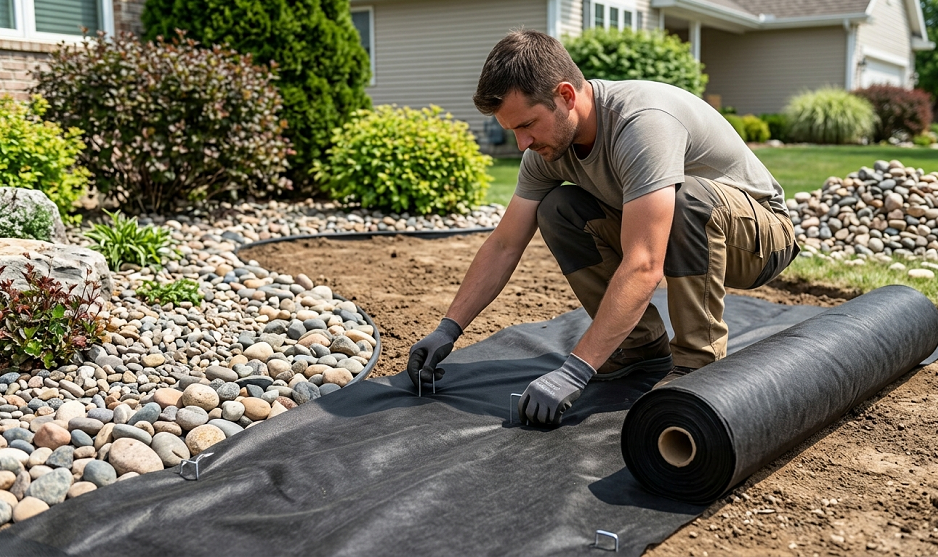
If you are starting from scratch or willing to move your rocks to do it right, the “sandwich method” is the only thing I’ve found that lasts more than a couple of seasons. First, you strip the area down to bare dirt. Then, you apply a heavy layer of salt or a soil sterilizer. After that, you don’t just lay down fabric; you lay down a layer of heavy-duty, 6-mil black plastic or a high-quality “non-woven” geotextile.
The cheap stuff at the big-box stores is basically cheesecloth. It’s useless. You want the thick, felt-like material that road crews use. This stuff allows water to drain so you don’t end up with a swamp, but it’s thick enough that even the angriest weed can’t punch through it. I overlap my seams by at least 12 inches and use “gorilla tape” or heavy-duty landscape staples every six inches to make sure there are no gaps.
Once the barrier is down, I add a two-inch layer of crushed stone (like 57 stone or screenings) before I put my “pretty” decorative rocks on top. This sub-layer acts as a filter. It catches the dust and organic bits before they reach the fabric, making it much harder for weeds to find a foothold. It’s a lot of extra work, and your back will hate you for moving that much extra stone, but you’ll thank me in five years when your neighbors are out weeding and you’re sitting on the porch with a cold drink.
I once skipped the sub-layer on a small side path because I was being lazy. Within two years, the decorative river rocks had sunk into the dirt, the fabric was shredded, and it looked like a muddy mess. Don’t be “Past Me.” Do the heavy lifting now so you don’t have to redo the whole project in twenty-four months.
Propane Torches: The Most Satisfying Way to Clear Weeds
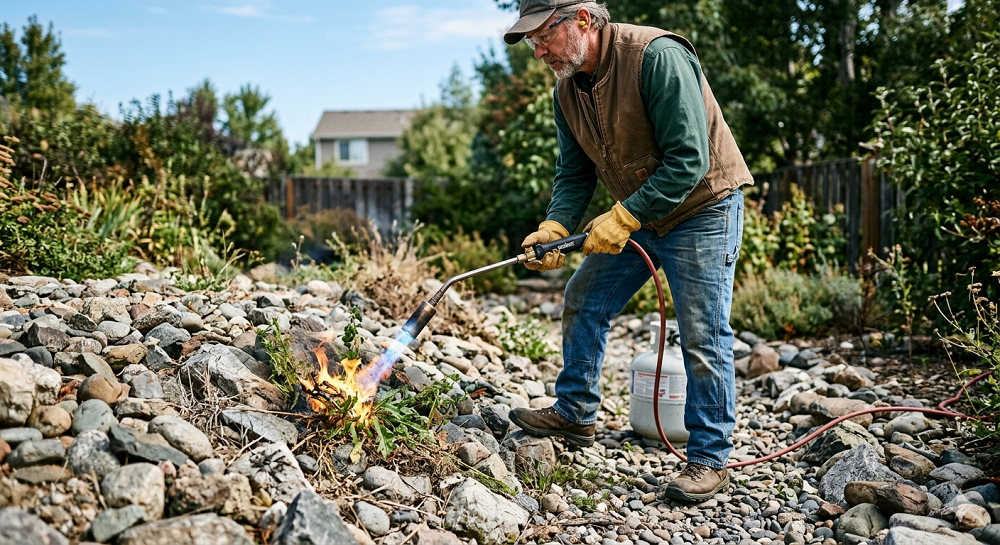
If you want to feel like a structural engineer with a grudge, get yourself a propane weed torch. This is, hands down, my favorite way to deal with weeds in rock beds. There is something deeply satisfying about incinerating a patch of crabgrass with a flame-thrower. It’s fast, it’s chemical-free, and it’s effective for killing the plant and any seeds sitting on the surface of the rocks.
You don’t actually need to turn the weed into a pile of ash. You just need to pass the flame over the leaves until they turn a dark, wilted green. This “blanching” boils the water inside the plant cells, causing them to burst. The plant will wither and die within hours. It’s perfect for those tiny little sprouts that are too small to pull but too ugly to leave.
A word of caution: don’t do this during a drought or near dry mulch. I nearly called the fire department one August when I got a little too enthusiastic with the torch near some dried pine needles. Also, be careful around certain types of rock like river stones or slate. If they get too hot too fast, they can actually crack or “pop” like popcorn.
I use the torch about once a month during the peak growing season. It takes me ten minutes to walk the perimeter of my house and zap anything green. It’s way more fun than pulling weeds, and it keeps the rocks looking pristine. Just make sure you have a garden hose nearby and you aren’t wearing flip-flops. (Ask me how I know about the flip-flops… actually, don’t).
Quick Side Note: The Cardboard Method
If you’re on a budget, you can use thick corrugated cardboard underneath your rocks instead of expensive fabric. It eventually rots away, which is usually a bad thing, but it does a fantastic job of smothering the existing grass and weeds during the first year. I’ve used this in areas where I know I might want to plant something in five years but want it clear for now. Just make sure you remove all the packing tape first, or you’ll be picking plastic strips out of your rocks for a decade.
Real Talk: What Isn’t Worth Your Time
Let’s be honest: some “hacks” are just Pinterest garbage. Using Epsom salt is one of them. People swear by it, but Epsom salt is actually magnesium sulfate—which is a fertilizer! You’re literally feeding the weeds you’re trying to kill. Unless you want your weeds to have lush, green foliage and strong root systems, keep the Epsom salt in the bathtub and out of the garden.
Another waste of time? Dish soap alone. Soap doesn’t kill weeds; it just makes them slippery. Without the vinegar or a high-heat source, you’re just giving the weeds a bath. And don’t bother with those “weed-pulling” tools that look like giant corkscrews for rock beds. They just hit the rocks, dull the blades, and leave the roots behind. In rocks, you either kill it chemically, fry it with fire, or smother it. There is no middle ground.
Lastly, stop thinking that “more rocks” is the solution. I’ve seen people pile six inches of gravel on top of weeds, thinking they can just bury the problem. Plants are incredibly resilient. They will find the light. All you’re doing is making it harder to spray them later. A two-to-three-inch layer of rock is the sweet spot. Anything more is just an expensive way to hide a problem that’s going to come back twice as strong.
Parting Wisdom
The secret to a weed-free rock bed isn’t a one-time miracle product; it’s a “scorched earth” policy. Use a heavy-duty barrier, treat the soil with salt if you never want anything to grow there again, and stay on top of the small sprouts with a torch or vinegar spray. If you let it go for a whole season, you’ve already lost the war.
I’ve spent way too many years fighting the same patches of grass to tell you anything else. Do the hard work of prepping the site correctly, and you’ll actually get to enjoy your yard instead of being its slave.
What’s the most stubborn weed you’ve ever had to fight in your landscaping? Drop a comment below and let’s brainstorm a way to take it down!