
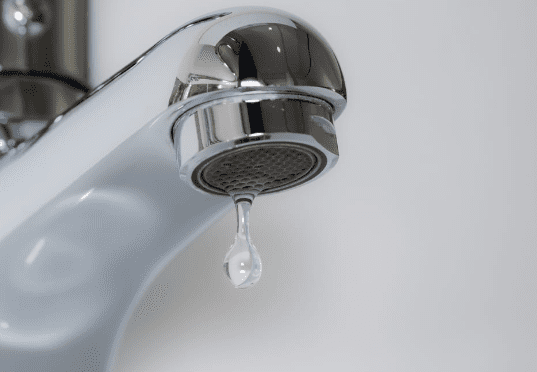
Have you ever experienced that infuriating drip-drip-drip from your faucet after you’ve turned it off? Oh, I know that feeling all too well. There I was, with a leaky faucet that had transformed my once serene kitchen into a water symphony. Fortunately for you, I’m here to share my adventure in tackling this dripping disaster head-on.
Causes of a Dripping Faucet: Plumbing Deconstructed
Let’s set the stage, shall we? You’ve just turned off your faucet, thinking you’ve successfully halted the water’s flow. But then, out of nowhere, that stubborn drip emerges, echoing through your thoughts and reminding you that water is indeed the universe’s ultimate prankster. Now, not only is this annoyance a constant reminder that your plumbing’s not up to par, but it’s also a bit like your tap’s sending Morse code – “Save me, save me!” It’s a call to action, a challenge that you – yes, you – are fully capable of conquering.
Let’s get acquainted with how these clever contraptions actually work. Picture this: a world of washers, seals, valves, and gaskets, all coming together to bring you the gift of running water. It’s a magical blend of mechanics and hydraulic wonders, a symphony of parts working harmoniously.
But as with any ensemble cast, there’s always room for drama – in this case, a post-shutoff drip. You see, when you turn off your faucet, it’s not a simple off-switch scenario. There’s a delicate ballet taking place within those pipes and valves. Sometimes, due to various factors, this ballet doesn’t quite conclude gracefully, leaving behind that irksome drip.
The main culprits behind this watery spectacle include:
Worn-out Washers and Seals:
These tiny components are unsung heroes, enduring the pressure of water day in and day out. Over time, they can become worn or brittle, leading to drips when the faucet is turned off. Think of them as the MVPs that need a halftime replacement to keep giving their best performance.
Corroded Valve Seat:
The valve seat, tucked away inside the faucet, is like the unsung hero’s sidekick. It provides a tight seal when the faucet is off, preventing any sneaky drips. But corrosion, that arch-nemesis of all things metal, can compromise its integrity, causing leaks. Imagine it as a knight with a rusty armor – not the most effective protector.
High Water Pressure:
Sometimes, too much of a good thing can be problematic. High water pressure can push water through even when the faucet is closed, resulting in drips. It’s like a never-ending encore performance that you didn’t sign up for.
Loose or Damaged Parts:
Just like a puzzle missing a few pieces, loose or damaged parts within the faucet assembly can lead to leaks. Imagine a theater production where the props keep falling over – chaos ensues, and your faucet becomes the stage.

Now that you’re armed with knowledge about the possible culprits behind that drip, it’s time to put on your plumbing detective hat and get to work!
- Preliminary Checks: Before you plunge into faucet surgery, ensure that you’ve fully turned off the faucet and that it’s indeed the source of the drip. No need to go on a wild goose chase!
- Gather Necessary Tools: Channel your inner handyman and grab your tools: a wrench, screwdriver, pliers, and perhaps a towel (because even leaks deserve a cozy cleanup). This is your arsenal, your toolbelt of power, ready to tackle anything that comes your way.
- Turn Off Water Supply: Imagine the chaos if you didn’t turn off the water before taking apart your faucet. Trust me, water fountains in the kitchen aren’t the latest trend. Find the shut-off valves – they’re usually under the sink – and turn them clockwise until you hear a satisfying “click.” This is your faucet’s intermission, time to catch your breath before the grand act.
- Disassemble the Faucet: Carefully remove the faucet handle, revealing the intricate components beneath. This is where the magic (and the drips) happen. But be gentle, like opening a treasure chest in a pirate’s lair – you don’t want to awaken any plumbing curses.
- Inspect and Replace Components: Take a good look at the washers, O-rings, and seals. If they resemble something your dog might chew on, it’s time for replacements. You’re the surgeon here, and these are your patients! Unscrew, replace, and tighten with the finesse of a seasoned craftsman.
- Examine the Valve Seat: Ah, the valve seat – the backstage VIP that nobody notices until it starts causing trouble. Check for corrosion or damage. If it’s seen better days, polish it up or replace it like a true faucet hero. Imagine you’re restoring a piece of vintage furniture, giving it a second chance to shine.
- Address High Water Pressure: Taming the wild beast that is high water pressure involves installing a pressure reducing valve. Think of it as a faucet whisperer – it ensures your faucet only flows when you say so. Adjust the valve until you find the perfect balance – not too much, not too little, just the Goldilocks pressure for your plumbing kingdom.
- Reassemble the Faucet: With your repairs complete, it’s time to put everything back together. Think of it as reuniting a dysfunctional family – each part has its place, and everyone must play nice. Screw in the components, slide on the handle, and give it a confident twist. Voilà! Your faucet is reborn, ready to shine without any backstage leaks stealing the spotlight.
- Test the Faucet: This is the moment of truth. Slowly turn the water supply back on and watch with bated breath. If all goes well, your faucet should be leak-free and ready to conquer hydration duties without the drama. But be prepared – if there’s a stubborn drip still lurking, it might take a few adjustments. Patience is key, and a successful fix is oh-so-sweet.
Additional Tips and Preventive Measures: Plumbing Maintenance 101
A true DIY hero doesn’t just fix what’s broken – they prevent it from breaking again! Regular maintenance is your secret weapon against future drips. Remember:
- Timely Repairs: Address drips promptly to prevent them from escalating into larger plumbing nightmares. Trust me, a dripping faucet today could become a waterfall tomorrow.
- Water-Saving Aerators: Installing these nifty gadgets can drastically reduce water wastage without sacrificing water pressure. It’s like giving your faucet a heart makeover.
When to Seek Professional Help: Admitting Defeat (Sometimes)
Now, before you start picturing yourself as the next great plumber, it’s crucial to recognize when to call in the professionals. If you’ve tried your best and the drips persist or multiply, it’s time to wave the white flag and summon a seasoned plumber. There’s no shame in acknowledging when a situation requires expertise beyond your DIY powers.
Conclusion
And there you have it, my fellow faucet fixers and drip detectives! Armed with this comprehensive guide, you’re equipped to tackle that incessant drip with a newfound sense of confidence. Remember, saving water is not just a responsibility – it’s a thrilling journey into the world of DIY plumbing, a chance to conquer those dripping demons and emerge victorious.
So, the next time your faucet decides to play waterworks even when you’ve turned it off, channel your inner plumber and give those drips a run for their money. With a bit of determination, some tools, and a dash of newfound knowledge, you can transform from a drip victim to a water-saving superhero. Happy fixing, fellow plumbing adventurers!