

Imagine the gentle sound of trickling water adding a touch of serenity to your garden or patio. Now imagine achieving that with a beautiful, eco-friendly solar fountain – and all in about an hour!
This DIY solar fountain project is perfect for anyone who wants to add a charming focal point to their outdoor space without breaking the bank or spending a whole day on construction. It’s surprisingly easy to create, even for beginners, and the best part? It harnesses the power of the sun, so you can enjoy the calming sound of water without adding to your electricity bill.
What You’ll Need:
- A large pot or container (ceramic, plastic, etc.) – Choose a size that complements your desired fountain size and your outdoor space.
- A smaller pot or bucket – This should fit snugly inside the larger pot upside down to create a raised platform.
- A solar fountain pump with a long cord – Make sure the pump has enough power to create the water flow you desire for your fountain. Consider the size of your fountain and the height you want the water to reach.
- Potting soil – Opt for a good quality potting mix suitable for outdoor container plants.
- Aquatic plants (optional) – Choose plants suited for your climate and that thrive in waterlogged conditions. Some popular options include water lilies, lotus flowers, or water hyacinths.
- Decorative elements (optional) – Rocks, pebbles, driftwood, or any other decorative items you’d like to add to create a natural or whimsical aesthetic for your fountain.
Step-by-Step Guide:
1. Prepping the Base (10 minutes)
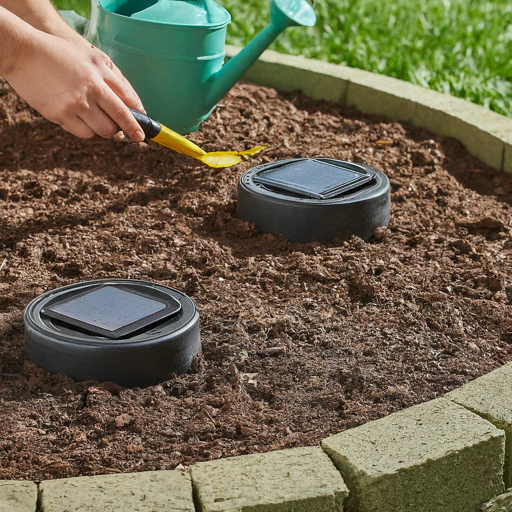
The first step is to find the perfect spot for your solar fountain. Remember, this little oasis needs sunshine! Choose a location in your garden or patio that receives several hours of direct sunlight throughout the day. This ensures optimal performance for your solar pump.
Once you’ve chosen your sunny spot, make sure the ground is level. A wobbly fountain is not ideal, so use a shovel to even out any uneven patches of soil if necessary. Now, go ahead and place your larger pot in its designated location.
2. Creating a Raised Platform (15 minutes)
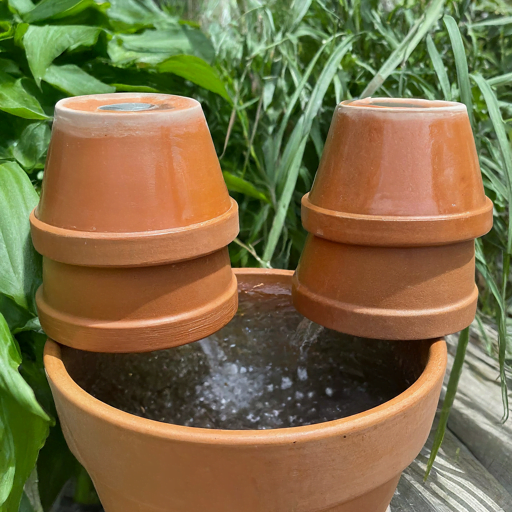
Here’s the clever part that creates the perfect platform for your pump! Take your smaller pot and, like a magician about to reveal a surprise, flip it upside down! Place it gently in the center of your larger pot. This inverted pot will create a raised platform in the center of your fountain.
Now, to ensure proper drainage and prevent water from pooling around the base of your raised platform, we need to fill the gap between the two pots. Grab your packing peanuts, gravel, or broken pieces of pottery (recycled!) and carefully fill the space between the inner and outer pots all the way up to the rim of the smaller, inverted pot. This creates a drainage layer that allows excess water to escape and prevents the soil from becoming waterlogged.
3. Planting and Decoration (20 minutes)

Time to get creative and personalize your fountain! Fill your larger pot with potting soil, leaving a few inches of space at the top. This allows room for the water and prevents overflowing.
Now, if you opted to include aquatic plants in your design, here’s your chance to add them! Choose plants that thrive in wet environments and are suitable for your climate. Gently dig holes in the potting soil and plant your chosen aquatic beauties. Water them lightly to help them settle in.
Feeling particularly artistic? This is where you can unleash your inner designer! Use decorative elements like rocks, pebbles, or driftwood to create a natural and visually appealing landscape around the base of your plants. You can even get creative and add colorful glass stones or other decorative accents to personalize your fountain’s look.
4. Setting Up the Solar Pump (25 minutes)

Before moving to this step, it’s always a good idea to consult the instructions that come with your specific solar fountain pump model. However, most pumps follow a similar setup process.
The solar pump will typically have a nozzle or sprayer attachment that determines the water flow pattern of your fountain. Take a look at the different nozzle options and choose the one that creates the water effect you desire. Sparkling jets, gentle streams, or a cascading waterfall – the choice is yours! Once you’ve selected your nozzle, go ahead and attach it securely to the pump.
Now, carefully place the pump in the center of the smaller pot, ensuring the water outlet faces upwards. Remember, the pump needs to be completely submerged in the water for it to function properly.
5. Positioning the Solar Panel (10 minutes)
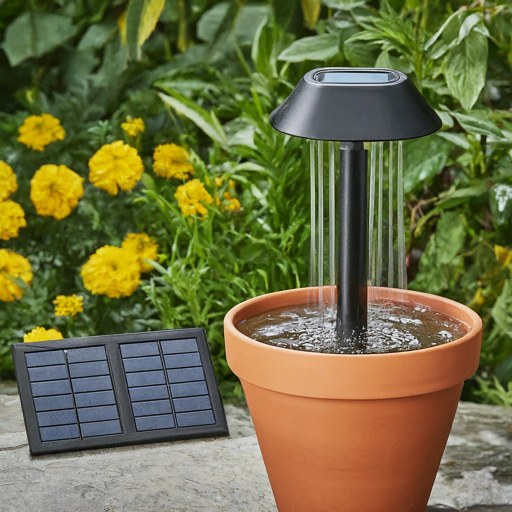
The solar panel is the heart of your eco-friendly fountain. It converts sunlight into energy, powering your pump and creating that mesmerizing flow of water. Locate the cord connecting the pump to the solar panel and ensure it has enough slack to reach its designated spot.
Here comes sunshine hunting again! Find a location for the solar panel where it will receive direct sunlight for most of the day. Ideally, this should be close enough to the fountain for the cord to reach comfortably, but not positioned directly in the fountain’s spray zone to avoid potential damage.
You might need to get a little creative depending on your chosen location. Consider placing the solar panel on a stake specifically designed for this purpose (often sold separately), mounting it on a nearby wall using appropriate brackets, or even resting it on a flat surface like a patio table (as long as it receives enough sunlight).
6. Let There Be Flow! (5 minutes)

Now for the moment of truth! Fill the larger pot with water until it reaches the desired level. The water level should be high enough to completely submerge the pump but low enough to leave some space at the top to prevent overflowing.
On a sunny day, with everything properly connected and positioned, your DIY solar fountain should spring to life automatically! The solar panel will convert sunlight into energy, powering the pump to draw water and create a beautiful water flow.
Congratulations! In just about an hour, you’ve transformed a simple pot into a charming and eco-friendly focal point for your outdoor space.
Adding Pond Water Plants to Your Solar Fountain
While not essential for the functionality of your solar fountain, incorporating pond water plants can elevate its aesthetic and create a more natural ecosystem. Here’s what to consider if you choose to add some aquatic flora to your DIY creation:
Choosing the Right Plants:
- Suitable Species: Select plants specifically designed for pond environments. These plants thrive in waterlogged conditions and can tolerate fluctuating water levels that might occur in a small fountain.
- Climate Considerations: Opt for plants that flourish in your specific climate zone. Research their sunlight requirements to ensure they will receive adequate sun exposure in your chosen location.
- Size Matters: Consider the mature size of the plants you choose. You don’t want them to overcrowd your fountain or block the pump or solar panel.
Planting Options:
- Direct Planting: If your fountain is large enough, you can plant directly in the potting soil surrounding the raised platform. Create planting pockets in the soil and carefully place your chosen plants, ensuring their roots are covered.
- Container Planting: For smaller fountains or if you prefer more flexibility, plant your aquatic beauties in individual containers. Use pots specifically designed for pond plants, which typically have a mesh bottom to allow for water exchange. Place the potted plants directly in the water, positioning them strategically around the base of the raised platform.
Plant Care:
- Regular Monitoring: Keep an eye on the health of your pond water plants. Remove any dead leaves or debris to maintain a clean and healthy environment.
- Fertilization: Aquatic plants typically require minimal fertilization. However, if you notice any signs of nutrient deficiency, consult a garden center for advice on appropriate fertilizers specifically formulated for pond plants.
Additional Tips:
- Balance is Key: While plants add beauty, avoid overcrowding your fountain. Aim for a balanced look that allows for proper water flow and easy access to the pump for maintenance.
- Beneficial Ecosystem: Certain pond water plants, like water hyacinths, can help keep your fountain water clean by absorbing excess nutrients.
- Mosquito Control: If you’re concerned about mosquitos, consider adding mosquito fish to your fountain. These tiny fish feed on mosquito larvae, helping to control their population naturally.
Bonus Tips and Tricks:
- Choosing the Right Pump: When selecting your solar fountain pump, consider the size of your fountain and the desired water flow. A more powerful pump will create a stronger water flow but might require more sunlight to operate effectively.
- Pump Maintenance: For optimal performance, it’s important to clean your pump regularly. Most pumps have a removable filter that can be easily cleaned with water. Consult your pump’s manual for specific cleaning instructions.
- Water Level Management: Keep an eye on the water level in your fountain, especially during hot weather or windy days. As water evaporates, you’ll need to top it up to ensure the pump stays submerged and continues to function properly.
- Combating Hard Water: If you live in an area with hard water, consider using distilled water for your fountain. This can help minimize mineral buildup that might clog the pump over time.
- Winterizing your Fountain: In colder climates, where freezing temperatures are expected, it’s best to bring your solar fountain indoors to protect the pump from damage. Simply disconnect the pump, drain the water, and store it in a cool, dry place until warmer weather returns.
Conclusion
With this easy DIY project, you’ve created a beautiful and sustainable addition to your outdoor space. Enjoy the calming sound of trickling water, the visual interest of a water feature, and the satisfaction of knowing you’ve harnessed the power of the sun!
Feel free to share pictures of your DIY solar fountain creations and inspire others. You can also experiment with different plant and decorative combinations to personalize your design.
Happy splashing, and happy gardening!