
Sunshine, fresh air, and a touch of creativity – isn’t that the perfect recipe for a rejuvenating escape in your own backyard? But sometimes, a plain patio or a bare patch of green can feel a little uninspired.
That’s where DIY comes in! With a few simple projects and readily available materials, you can transform your outdoor space into a personalized oasis. Not only is DIY cost-effective, but it allows you to inject your unique style and create something truly special. So, grab your tools, unleash your inner artist, and get ready to bring the outdoors to life with these 17 creative DIY ideas:
1. Upcycled Tire Poufs: Comfy Seating with Eco-Conscious Flair
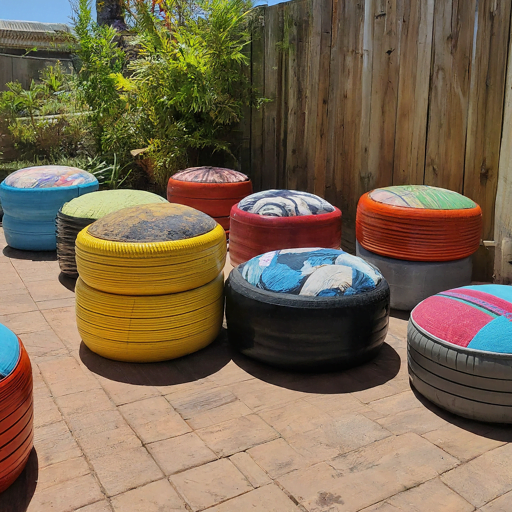
Let’s be honest, old tires rarely find a glamorous second life. But with a little TLC, they can become the coziest addition to your patio or deck. Here’s what you need:
- Discarded tires with rims (cleaned thoroughly!)
- Thick fabric (canvas or outdoor material) – consider using colorful scraps for a patchwork look!
- Sewing supplies (optional, but recommended for a polished finish)
- Stuffing (pillows, shredded foam)
Instructions:
- Clean the tires – Give them a good scrub with soapy water to remove any dirt or grime. Let them dry completely before proceeding.
- Cut the fabric – Measure the diameter of the tire and rim to determine the size of fabric needed. Cut a large enough piece to cover the sides and bottom of the tire, allowing extra fabric for overlap and seams.
- Stuff the tire – If you’re not sewing the fabric shut, stuff the tire generously with pillows or shredded foam to create a firm and comfortable seat.
- Secure the fabric – Here you have options: For a clean finish, sew the fabric pieces together with a strong stitch, tucking the edges securely under the rim. Alternatively, for a simpler solution, fold the fabric under the rim and secure it in place with heavy-duty staples or zip ties.
- Get creative! – Add a personal touch with buttons, stencils, or outdoor paint for a pop of color.
Tips & Variations:
- Stack two or three tires for a taller pouf with a backrest.
- Add caster wheels to the bottom for easy mobility.
2. Mason Jar Fairy Lights: Enchanting Illumination for Your Evenings
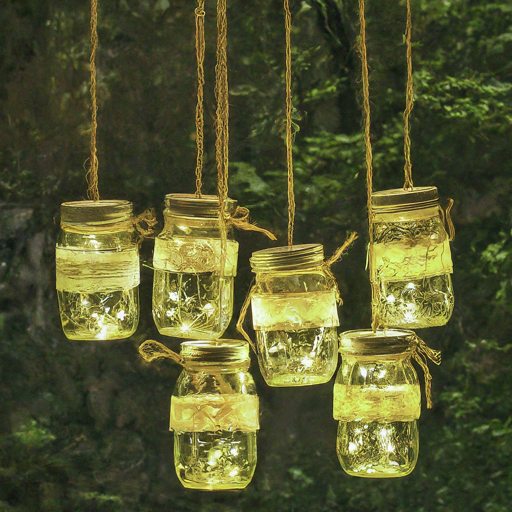
String lights are lovely, but mason jars add a touch of whimsical charm to your outdoor ambiance. Gather these materials:
- Mason jars in different sizes (the more, the merrier!)
- Battery-powered fairy lights (string lights work too)
- Decorative elements (twigs, moss, glitter, small figurines) to create a miniature scene inside the jar
- Glue (optional, for heavier decorative items)
Instructions:
- Design your scene – Unleash your creativity! Line the bottom of the jar with moss, pebbles, or glitter. Add twigs for a miniature forest look or tiny figurines for a fairy garden theme. Secure heavier items with a dab of glue.
- Light it up! Carefully push the string lights inside the jar, ensuring the battery pack remains accessible on the outside for easy on/off control.
- Seal the deal – Screw the lid on tightly or add a touch of rustic charm by decorating the rim with twine. Hang your creation from branches, shepherd’s hooks, or pergolas for a magical, twinkling effect.
Tips & Variations:
- Use colored fairy lights to create a specific mood – warm white for a cozy atmosphere, cool blue for a serene ambiance.
- Paint the mason jars for a more opaque look or frosted effect.
- Group jars of different sizes together for a visually appealing cascade of light.
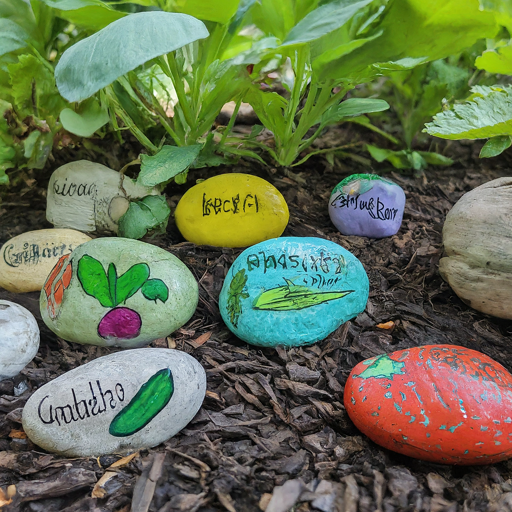
3. Painted Rock Garden Markers: Functional and Fun Plant Identification
Let your artistic side shine with these adorable plant markers! Here’s what you’ll need:
- Smooth, flat rocks in various sizes
- Acrylic paint pens or outdoor paint (choose vibrant colors!)
- Clear sealant (optional, for extra weather protection)
- Paint brushes (if using regular paint)
Instructions:
- Paint your masterpiece – Get creative! Write plant names in fun fonts, create colorful patterns, or paint little pictures that represent the plant itself (a tomato for your tomato plant, a sunflower for your sunflowers!).
- Let it dry – Allow the paint to dry completely before proceeding.
- Seal the deal (optional) – For added weather protection, apply a thin coat of clear sealant following the manufacturer’s instructions.
Tips & Variations:
- Use stencils for neat and consistent lettering, especially for longer plant names.
- Get inspired by nature! Paint ladybugs, butterflies, suns, or other garden critters on your rocks.
- Channel your inner comedian and write funny plant puns or inspirational messages.
4. Solar-Powered Wind Chimes: A Sustainable Symphony for Your Ears
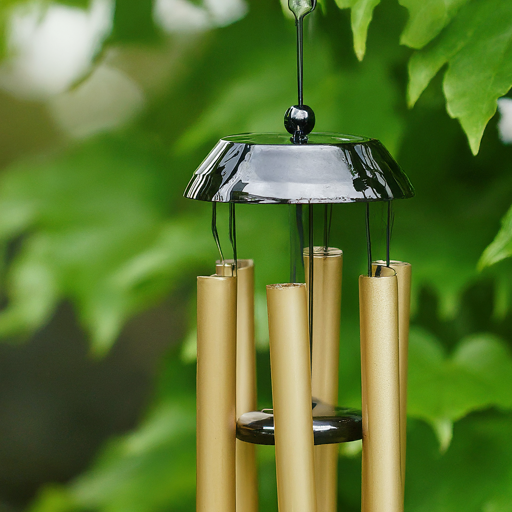
Wind chimes add a touch of melody to any outdoor space. Take it a step further with this eco-friendly version:
- Tin cans in various sizes (washed and dried)
- Wind chime frame (available at craft stores or online)
- Solar lights (with small hooks for hanging)
- Strings or fishing line
- Beads, bells, or other decorative wind chime elements
Instructions:
- Create the chimes – Using a hammer and nail (with adult supervision if needed) poke small holes in the top of the tin cans and a few around the sides.
- Deck out your cans – Personalize your chimes with paint, markers, or colorful washi tape. Let your artistic spirit flow!
- Assemble the chimes – Cut strings or fishing line to varying lengths and attach them securely to the holes in the cans and the wind chime frame.
- Light it up! Hang solar lights on separate strings within the chime for a dual effect of light and sound.
- Add the finishing touches – Decorate the strings with beads, bells, or other wind chime elements to create a visually and aurally pleasing masterpiece.
Tips & Variations:
- Experiment with different can sizes for a wider range of sounds.
- Paint nature scenes or geometric patterns on the cans for a unique look.
- Play around with the placement of lights and chimes to find a visually harmonious arrangement.
5. Herb Spiral Garden: A Space-Saving and Sustainable Herb Haven

Fresh herbs add a delightful touch to any meal. Grow your own with this beautiful and functional herb spiral:
- Bricks, stones, or cinder blocks
- Potting soil
- A variety of herbs (choose a mix based on sun and water needs)
- Optional: Landscaping fabric or weed barrier
Instructions:
- Build your spiral – Get creative! Use the bricks, stones, or cinder blocks to create a spiral shape. You can make it raised or flat depending on your preference and available space.
- Weed control (optional) – Line the inside of the spiral with landscaping fabric to suppress weeds and make maintenance easier.
- Fill ‘er up! – Fill the spiral with high-quality potting soil, ensuring proper drainage.
- Planting party! – Now for the fun part! Plant your herbs at different heights within the spiral, taking into account their individual sun and water needs. For example, herbs that love sunshine can be planted near the top, while those that prefer shade can thrive at the base.
Tips & Variations:
- Choose a sunny location for your herb spiral, with at least 6-8 hours of direct sunlight per day.
- Select a variety of culinary herbs like basil, oregano, and thyme, along with fragrant herbs like lavender or mint.
- Label your herbs with small markers or signs for easy identification, especially if planting a diverse selection.
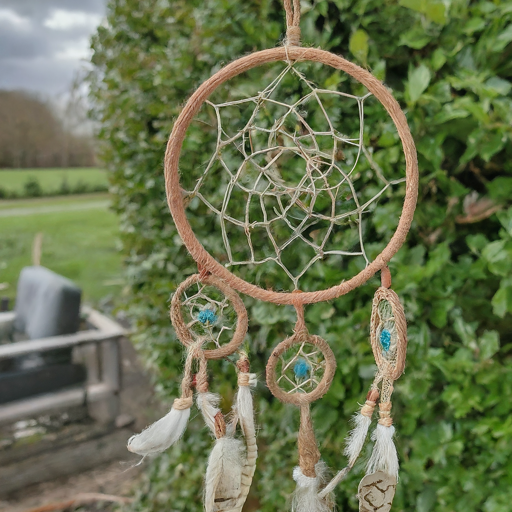
6. Bohemian Dream Catchers: Filter Your Dreams and Enhance Your Patio
Materials:
- Embroidery hoops (various sizes)
- Yarn or string in different colors and textures
- Feathers, beads, lace, or other decorative elements
- Scissors
Instructions:
- Wrap yarn or string around the embroidery hoop, creating a dense web. Experiment with different colors and textures for a bohemian vibe.
- Secure the yarn by tying the end to the hoop. You can also add a decorative button or bead to the knot for a finishing touch.
- Weave in feathers, beads, lace, or other trinkets that inspire you. Let your creativity flow!
- Hang your dream catchers on your patio, porch, or near a window to filter out bad dreams and capture good ones (or simply add a touch of whimsical beauty).
Tips & Variations:
- Use a loom for a more intricate web design.
- Attach multiple dream catchers to a driftwood branch for a cascading effect.
- Personalize them with meaningful trinkets or photos.
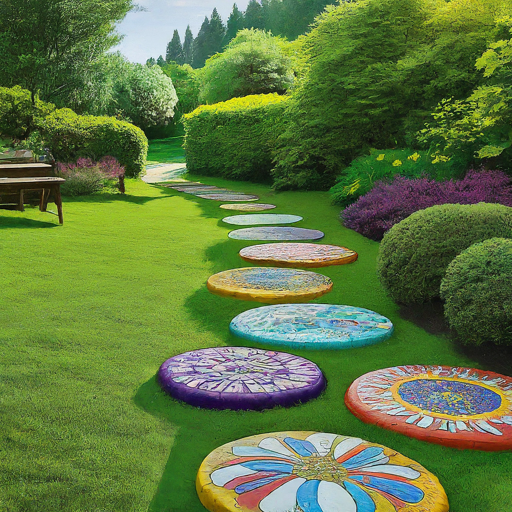
7. Painted Stepping Stones: A Colorful Path Through Your Garden
Materials:
- Flat stones or pavers (washed and dried)
- Acrylic paint in various colors
- Paint brushes
- Clear sealant (optional)
Instructions:
- Paint the stones with your favorite colors and designs. Get creative! You can paint geometric patterns, flowers, inspirational messages, or even create a hopscotch game for the kids.
- Let the paint dry completely.
- Apply a clear sealant (optional) for added weather protection.
- Arrange your painted stones to create a vibrant pathway through your garden or patio.
Tips & Variations:
- Use stencils for crisp and clean lettering or designs.
- Involve the whole family in the painting process for a fun bonding activity.
- Glow-in-the-dark paint can add a magical touch for nighttime walks.
8. DIY Fire Pit: Gather Around a Cozy Gathering Spot

Materials:
- Fire-resistant bricks or stones
- Sand (for base leveling)
- Shovel
- Metal fire ring (optional)
Instructions:
- Choose a flat, open area away from trees, buildings, or flammable materials.
- Dig a shallow pit for the fire pit base, ensuring proper drainage. Fill the base with sand and level it for stability.
- Create a circular or square fire pit using fire-resistant bricks or stones. You can build a single layer for a rustic look or stack multiple layers for a more substantial structure.
- If desired, place a metal fire ring within the brick structure for added containment and safety.
Tips & Variations:
- Check local fire regulations before building a fire pit.
- Consider incorporating a built-in log holder or seating area around the fire pit for added functionality.
- Decorate the surrounding area with gravel, stones, or fire-resistant landscaping for a finished look.
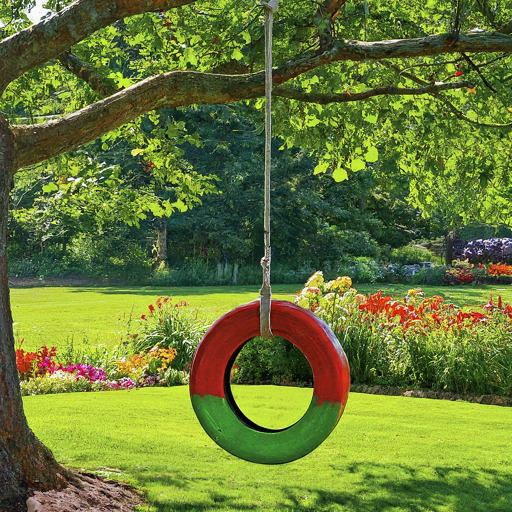
9. Recycled Tire Swing: A Nostalgic Addition for the Young (and Young at Heart!)

Materials:
- Sturdy tire with rim
- Thick rope (strong enough to support weight)
- Heavy-duty carabiner clips
- Drill (with adult supervision)
- Tree branch (strong enough to support the swing)
Instructions:
- Drill two holes on opposite sides of the tire rim, ensuring they are strong enough to hold the weight of the rope. (Adult supervision required for drilling)
- Cut the rope to a desired length, taking into account the height of the swing and the tree branch.
- Thread the rope through the holes in the tire rim and secure it with strong knots or carabiner clips.
- Tie the other end of the rope securely to a sturdy tree branch, ensuring at least 18 inches of clearance between the bottom of the swing and the ground.
Tips & Variations:
- Use a cushioned seat pad inside the tire for added comfort.
- Paint the tire for a pop of color.
- Hang multiple tire swings at different heights for a play area for children of all ages.
10. DIY Outdoor Movie Screen: Transform Your Backyard into a Cinema Under the Stars

Materials:
- White bedsheet or projector screen fabric
- Rope or string
- PVC pipes or sturdy branches (for frame construction)
- Duct tape or zip ties (for securing fabric to frame)
- Projector (not included in DIY project)
Instructions (using PVC pipes):
- Cut PVC pipes to desired lengths for the frame, ensuring a rectangular shape that fits your projector screen material.
- Assemble the frame using corner connectors or by drilling holes in the pipes and connecting them with zip ties.
- Create pockets along the top and bottom edges of the screen fabric using duct tape or by sewing a sleeve.
- Slide the fabric pockets over the top and bottom PVC pipes of the frame to secure the screen.
- Hang the screen from a sturdy structure like a clothesline, fence, or pergola using rope or string tied to the top corners of the frame.
Instructions (using branches):
- Select sturdy branches of similar length to create a rectangular frame. You can use twine or rope to lash the branches together at the corners for a more rustic look.
- Follow steps 3-5 from the PVC pipe instructions to secure the screen fabric to the branch frame.
Tips & Variations:
- Choose a flat, open area with minimal obstructions for optimal movie viewing.
- String fairy lights around the perimeter for a magical ambiance.
- Set up comfy seating like blankets, pillows, or outdoor chairs for a relaxing movie night experience.
11. Upcycled Tin Can Planters: Give New Life to Cans and Add Color to Your Patio

Materials:
- Clean tin cans (various sizes)
- Hammer and nail (with adult supervision)
- Sandpaper
- Paint (acrylic or spray paint)
- Potting soil
- Plants (flowers, herbs, succulents)
Instructions:
- Prep the cans: Wash and dry the tin cans thoroughly. Using a hammer and nail (with adult supervision!), carefully poke a few drainage holes in the bottom of each can. Sand down any sharp edges for safety.
- Paint it pretty! Prime the cans if desired, then unleash your creativity with paint. Opt for solid colors, geometric patterns, or whimsical designs. Let your personality shine through!
- Planting time! Fill the cans with well-draining potting soil. Choose plants suited to the can size and sunlight exposure. Smaller cans work well for succulents or herbs, while larger ones can accommodate flowering plants.
Tips & Variations:
- Use stencils for crisp lettering or designs.
- Group cans of different sizes together for a visually appealing display.
- Hang the cans with twine or wire for a vertical garden effect.
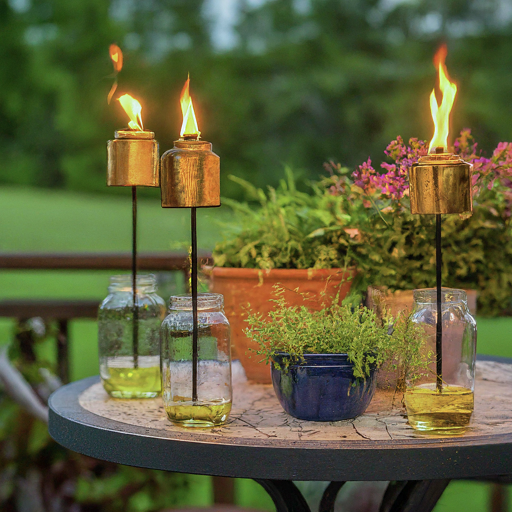
12. DIY Citronella Torches: Keep Mosquitoes at Bay with a Natural Glow
Materials:
- Glass jars (mason jars or similar)
- Citronella candles
- Citronella oil
- Lamp oil (optional, for extending burn time)
- Sand
- Decorative stones (optional)
- Tiki torches or metal poles (optional)
Instructions:
- Fill it up: Pour a layer of sand into the bottom of the jar for stability.
- Citronella power: Add citronella oil or a citronella candle to the jar. You can also mix citronella oil with lamp oil (following safety instructions) to extend the burn time.
- Light it up! Light the citronella candle or create a wick using a piece of natural fiber dipped in the oil mixture.
- Get creative: For a decorative touch, add a layer of colorful stones on top of the sand. If using tiki torches or metal poles, secure the jars using wire or metal brackets.
Tips & Variations:
- Plant citronella grass around your patio for an extra layer of mosquito defense.
- Use different sized jars for a layered effect.
- Citronella torches can also be used as outdoor lighting for evening gatherings.
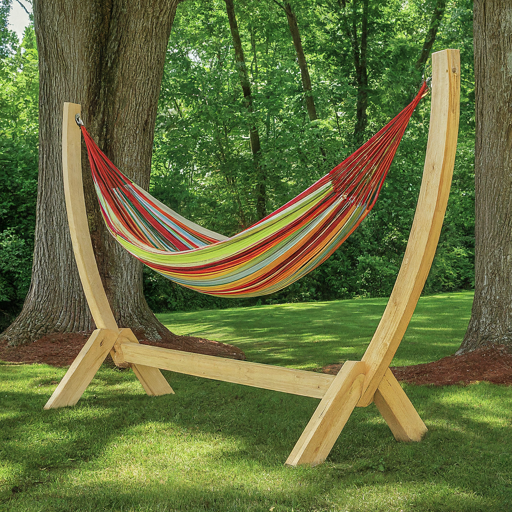
13. DIY Hammock Stand: Relaxation Awaits Between Two Trees
Materials:
- Sturdy wooden beams (treated for outdoor use)
- Saw
- Drill
- Lag screws or eye bolts
- Rope or thick chains
- Hammock (not included in DIY project)
Instructions:
- Measure and cut: Cut the wooden beams to the desired length for the hammock stand legs and top bar, ensuring they are long enough to accommodate your hammock and provide proper clearance.
- Assemble the stand: Drill holes in the ends of the legs and the top bar to connect them using lag screws or eye bolts. You can create an A-frame design or a simpler two-post structure depending on your preference.
- Hang the hammock: Secure the rope or chains to the eye bolts or drilled holes on the top bar. Tie the other ends of the rope or chains to sturdy branches on opposing trees, ensuring even weight distribution and proper height for comfortable use.
Tips & Variations:
- Stain or paint the wooden beams for a finished look.
- Add angled braces for additional stability, especially if using a heavy hammock.
- Consider incorporating a removable top bar for easy storage of the hammock stand during the winter months.
14. DIY Solar String Lights: Light Up Your Evenings with Eco-Friendly Charm

Materials:
- Solar string lights (choose your desired length and color)
- Shepherd’s hooks
- Mason jars (optional)
- Wire (optional, for hanging lights on structures)
Instructions:
- Plan your lighting: Decide on the placement of the solar lights. Shepherd’s hooks are perfect for creating a border along a walkway or path. You can also hang the lights from trees, pergolas, or fences using wire.
- Mason jar magic (optional): For a whimsical touch, thread the solar string lights through mason jars. Secure the lids on the jars tightly or decorate the rims with twine for a rustic look. Hang the jars from branches, shepherd’s hooks, or pergolas, allowing the solar panel on the string lights to receive direct sunlight for optimal charging.
Tips & Variations:
- Choose warm white or colored string lights to create a specific mood.
- Combine different lengths and styles of solar string lights for a layered effect.
- Wrap the solar string lights around tree trunks or branches for a magical, fairy-tale vibe.
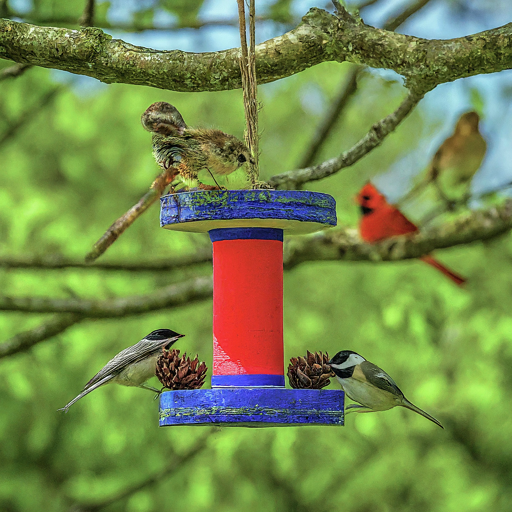
15. DIY Bird Feeder: Attract Feathery Friends and Enjoy a Little Nature Show
Materials:
- Recycled plastic bottle (2 liters or similar)
- Utility knife (with adult supervision)
- Wooden spoon or dowel rod
- Birdseed
- Twine or string
- Scissors
- Optional decorations (paint, markers, washi tape)
Instructions:
- Cut the bottle: Carefully cut the bottle in half (adult supervision required when using a utility knife). You can create a simple feeding trough by cutting a feeding hole near the bottom of the top half of the bottle, or create a perch-and-feeder combo by cutting a larger opening on the side and a smaller hole near the bottom.
- Create a perch: Poke a hole through the bottle cap and the center of the wooden spoon or dowel rod. Secure the rod in place by tying it with twine or string.
- Hang it up: Thread another piece of twine or string through the cap on the opposite side of the perch and use it to hang the feeder from a sturdy branch.
- Fill ‘er up! Fill the bottom half of the bottle with birdseed.
- Get creative (optional): Decorate the feeder with paint, markers, or washi tape to add a personal touch and attract even more feathered visitors.
Tips & Variations:
- Use multiple recycled bottles to create a multi-feeder station.
- Place the feeder in a location with some protection from the elements, but with clear sightlines for birds to easily spot it.
- Research the types of birds in your area and choose birdseed that they prefer.
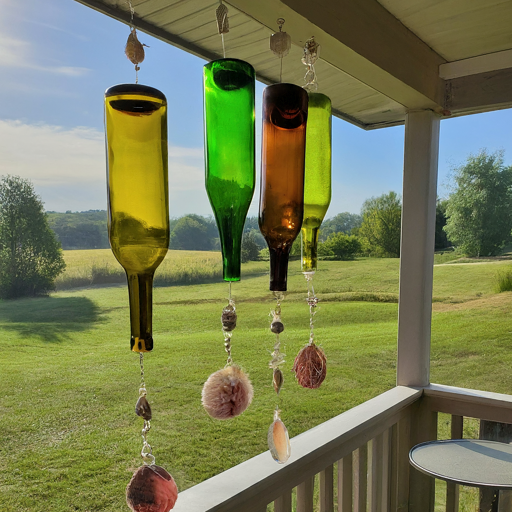
16. Recycled Wine Bottle Wind Chimes: A Sustainable Symphony for Your Ears
Materials:
- Empty wine bottles (washed and dried)
- Twine or string
- Beads, bells, or other decorative wind chime elements
- A metal ring or sturdy branch for hanging
Instructions:
- Safety first: Carefully remove any remaining labels from the wine bottles. You can soak the bottles in warm water to loosen stubborn labels.
- Get creative! Use a hammer and nail (with adult supervision) to carefully poke a small hole near the top rim of each wine bottle (adult supervision required).
- String it up: Cut pieces of twine or string to varying lengths. Thread the string through the holes in the wine bottles and secure them with knots.
- Add some sparkle: Decorate the strings with beads, bells, or other wind chime elements that inspire you. Experiment with different colors, textures, and sounds to create a unique symphony for your ears.
- Hang it high: Tie the strings together at the top and secure them to a metal ring or sturdy branch for hanging. Choose a location where the wind can gently chime your creation.
Tips & Variations:
- Use different colored wine bottles for a visually appealing effect.
- Paint the wine bottles with acrylic paint for a pop of color (ensure the paint is dry before hanging).
- Experiment with the length and weight of the hanging objects to create a range of sounds.
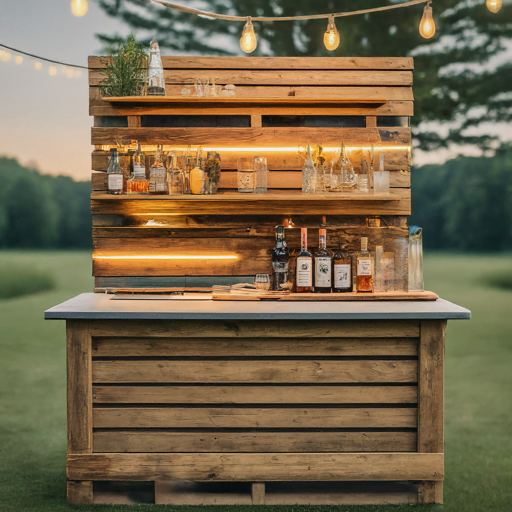
17. DIY Pallet Bar: Upcycled Chic for Entertaining Outdoors
Materials:
- Wooden pallets (disassembled or deconstructed with care)
- Sandpaper
- Wood stain or paint (optional)
- Screws and drill (with adult supervision)
- Hammer and nails (with adult supervision)
- L-brackets (optional, for added stability)
- Bar stools (optional)
Instructions:
- Pallet prep: Disassemble the pallets carefully, removing any loose nails or staples. Sand down the wood to remove splinters and create a smooth finish.
- Design your bar: Decide on the size and style of your bar. You can create a simple standing structure or a more elaborate one with shelves and storage.
- Assemble the bar: Secure the pallet pieces together using screws and nails (adult supervision required). L-brackets can be used for added stability at the corners.
- Finishing touches: Stain or paint the bar for a polished look (optional). Let the paint or stain dry completely before using the bar.
- Bar time! Add a bar top (such as a reclaimed piece of wood or countertop material) if desired. Place the bar in a convenient location on your patio or deck and add bar stools for a complete entertaining space.
Tips & Variations:
- Consider adding hooks or shelves to the bar for hanging glasses or storing bar accessories.
- Incorporate a small cooler underneath the bar for keeping drinks chilled.
- Decorate your pallet bar with fairy lights, lanterns, or potted plants for a festive touch.
Conclusion
These are just a few ideas to get your DIY juices flowing! The beauty of these projects lies in their customizability. Let your imagination run wild, experiment with colors, textures, and embellishments to create a truly unique outdoor space that reflects your personality. There’s immense satisfaction in creating something beautiful and functional for your backyard. So, grab your tools, channel your inner artist, and get ready to breathe new life into your outdoor haven!
Don’t forget to share your creations! We’d love to see your DIY masterpieces. Snap a photo and share them in the comments section below. Let’s inspire each other and create a community of outdoor oasis architects!