

The feeling of strolling through your garden and navigating a charming pathway that seamlessly blends with the surrounding beauty is unmatched. A well-designed walkway not only adds functionality to your outdoor space, guiding guests and highlighting key features, but it also injects a touch of personality and elegance. However, creating a stunning walkway doesn’t have to break the bank. With a little creativity and some readily available materials, you can transform your backyard into a haven of style and functionality with a budget-friendly DIY walkway.
This guide explores 17 inspiring walkway ideas that are easy on the wallet and big on charm. From classic stepping stones to whimsical recycled materials, we’ll unveil the materials needed, step-by-step instructions for building each walkway, and tips for adding a personalized touch.
Unleashing the Power of DIY Walkways
Walkways serve a dual purpose in our gardens and backyards. First and foremost, they provide a designated path for navigating the space, ensuring safe and comfortable passage, especially during wet weather. But beyond practicality, walkways also enhance the aesthetics of your outdoor haven. A well-placed walkway can visually connect different areas of your garden, draw attention to focal points, and create a sense of flow and invitation.
The beauty of DIY walkways lies in their affordability and freedom for personalization. You can tailor the materials and design to perfectly complement your garden’s style, whether it’s rustic, modern, whimsical, or anything in between. With a little planning and effort, you can create a walkway that reflects your unique taste and adds significant value to your outdoor space.
Budget-Friendly Materials and Techniques
The key to creating a budget-friendly walkway lies in utilizing readily available materials and employing simple construction techniques. Here are some general tips to keep in mind:
- Repurpose and recycle: Look around your property or neighborhood for materials that could be given a new life as a walkway. Bricks, pavers, and even large stones can be salvaged from old patios or construction sites.
- Embrace natural elements: Gravel, pebbles, and wood chips are cost-effective options that add a natural touch to your garden.
- Think beyond traditional materials: Get creative with unconventional materials like slabs, stepping stones made from recycled concrete, or even wine corks.
- Keep it simple: Opt for straightforward layouts and designs. Intricate patterns or curves might require more expensive materials and meticulous work.
- Prioritize preparation: Proper groundwork is essential for ensuring the longevity of your walkway. Invest some time in leveling the ground, laying weed barrier, and creating a solid base (where needed).
Now, let’s go into the specifics of creating 17 unique and budget-friendly walkways:
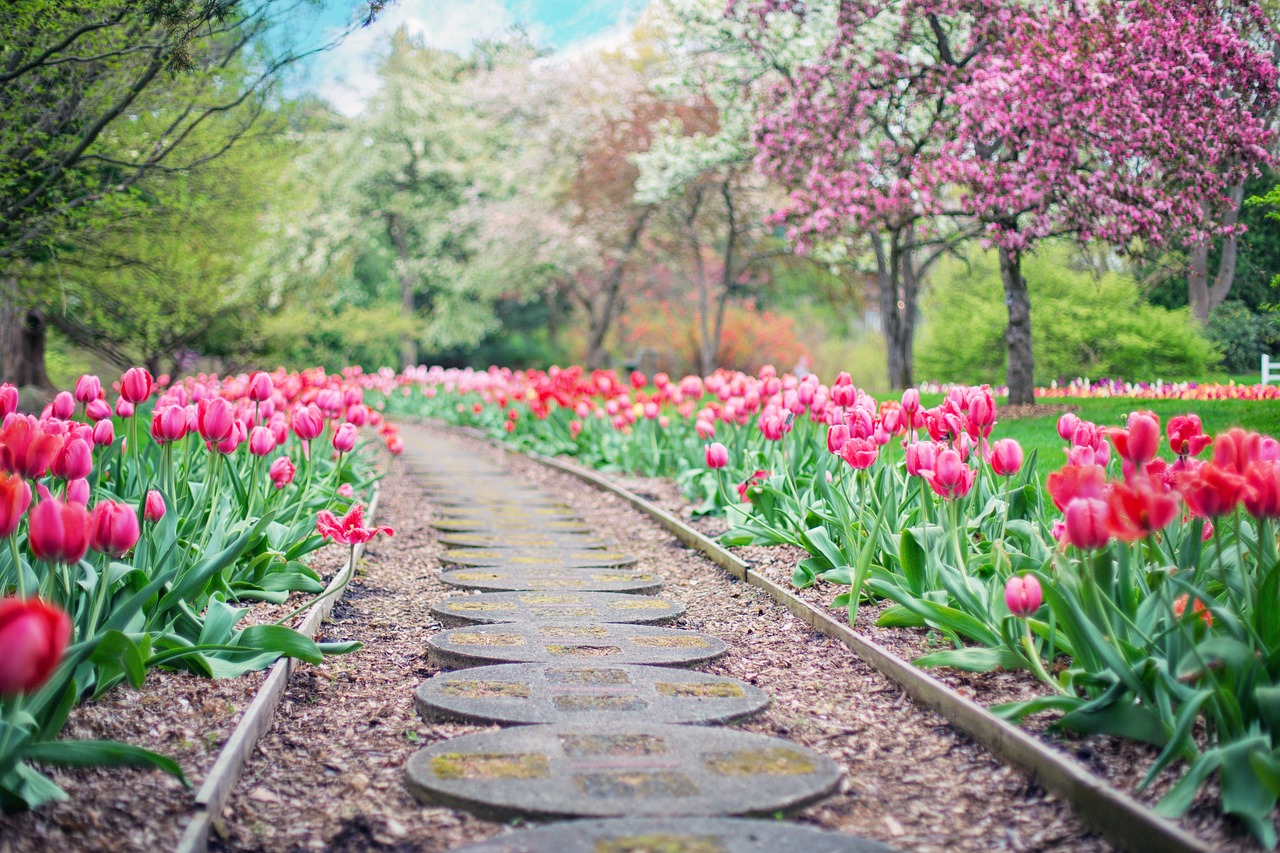
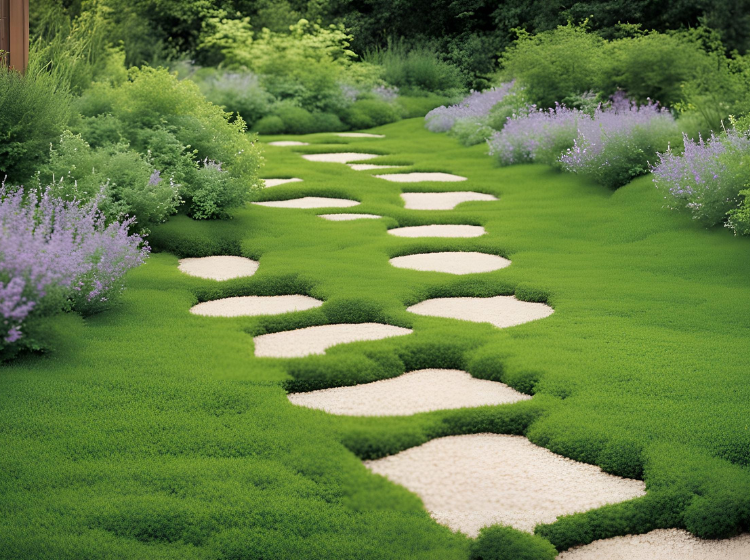
1. The Classic Stepping Stone Path: A Timeless Choice

Stepping stone paths are a timeless addition to any garden, offering a charming and functional way to navigate the space. This pathway is perfect for winding its way through flower beds or connecting different areas of your garden.
Materials:
- Pre-made stepping stones (concrete, pavers, or natural stone)
- Shovel
- Edging material (optional)
- Landscape fabric (optional)
- Sand or gravel (optional, for base layer)
- Tamper
Instructions:
- Plan Your Path: Sketch out the desired path on paper, considering its width, curves, and placement within your garden.
- Prepare the Ground: Mark the path on the ground using spray paint or sand. Dig out a shallow trench (approximately 2-3 inches deep) along the path, ensuring a level base. Lay down landscape fabric (optional) to suppress weeds.
- Create the Base (optional): If using heavier stepping stones or your soil is loose, consider adding a 1-inch layer of sand or gravel for a more stable base. Compact the base material firmly with a tamper.
- Lay the Stepping Stones: Arrange the stepping stones according to your design, ensuring proper spacing (typically 12-18 inches apart) for comfortable stepping. Adjust the level of each stone using sand or gravel beneath as needed.
- Finishing Touches: Add edging material (bricks, stones, or plastic edging) along the sides of the path for a clean and finished look. You can also add a decorative touch by planting low-growing flowers or herbs around the stepping stones.
2. The Rustic Charm of a Gravel Walkway
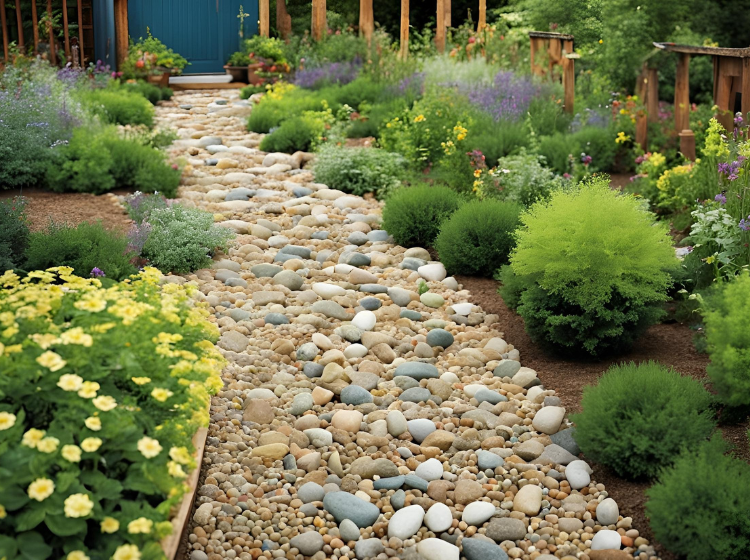
Gravel walkways offer a natural and low-maintenance solution for navigating your garden. This easy-to-build path is perfect for creating a relaxed and rustic ambiance.
Materials:
- Gravel (various sizes and colors available)
- Landscape fabric
- Edging material (optional)
- Shovel
- Tamper
Instructions:
- Design Your Path: Mark the desired path on the ground with spray paint or sand. Consider the width of the walkway to comfortably accommodate foot traffic. A good rule of thumb is 3-4 feet for single-file walking and 5-6 feet for side-by-side walking.
- Prepare the Ground: Dig a shallow trench (2-3 inches deep) along the path, ensuring a level base. Lay down landscape fabric to suppress weed growth. Extend the fabric a few inches beyond the edges of the trench for complete coverage.
- Lay the Edging (optional): If using edging material for a finished look, install it now. Plastic edging can be pushed into the ground along the sides of the trench. For sturdier edging options like bricks or stones, create a small trench for them to sit in and secure them firmly.
- Add the Gravel Base: Pour a 1-2 inch layer of coarse gravel ( ¾ inch or larger) over the landscape fabric. This layer provides drainage and stability for the finer gravel on top. Use a rake to spread the gravel evenly and compact it firmly with a tamper.
- Creating the Walking Surface: Add a 2-3 inch layer of your chosen decorative gravel on top of the base layer. Opt for smaller sized gravel (pea gravel or ½ inch) for a comfortable walking surface. Choose a color and texture that complements your garden’s style. Spread the gravel evenly and rake it smooth.
- Finishing Touches: Top off the edges of the gravel with additional gravel or decorative stones to create a clean border. You can also add accents like large rocks or strategically placed plants to enhance the natural aesthetic.
3. A Touch of History with a Brick Path
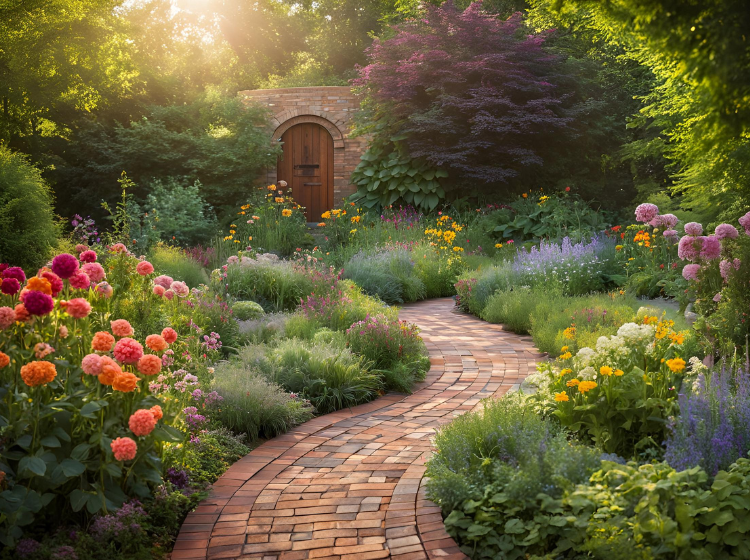
Brick walkways exude a timeless elegance and can add a touch of history to your garden. Recycled bricks are a budget-friendly option for creating this classic pathway.
Materials:
- Recycled bricks (cleaned and sorted)
- Paver sand
- Shovel
- Tamper
- Edging material (optional)
- Brick hammer and chisel (optional)
Instructions:
- Plan Your Path: Sketch out your desired path layout, considering curves, width, and brick pattern.
- Prepare the Ground: Mark the path on the ground and excavate a shallow trench (4-6 inches deep) ensuring a level base. Compact the soil firmly with a tamper.
- Laying the Sand Base: Spread a 2-inch layer of paver sand evenly over the compacted soil base. Use a level to ensure the sand base is consistent throughout the path.
- Bricklaying (Simple Straight Pattern): Begin laying the bricks in a straight pattern, working from a corner outwards. Gently tap each brick with a rubber mallet to set it in place and ensure a level surface. Use paver sand to fill any gaps between the bricks.
Tip: If using unevenly sized recycled bricks, you might need to cut or chip some bricks to achieve a tighter fit (use a brick hammer and chisel with caution and proper safety gear).
- Creating Curves (optional): For curved walkways, you might need to cut some bricks to fit the curve. Alternatively, consider using a soldier course (bricks placed vertically) along the outer edge of the curve for a more natural look.
- Edging and Finishing Touches: After laying all the bricks, add edging material (optional) along the sides of the path for a finished look. Sweep sand over the entire walkway to fill any remaining gaps and remove excess sand from the brick surface. Lightly dampen the sand to help it settle and compact.
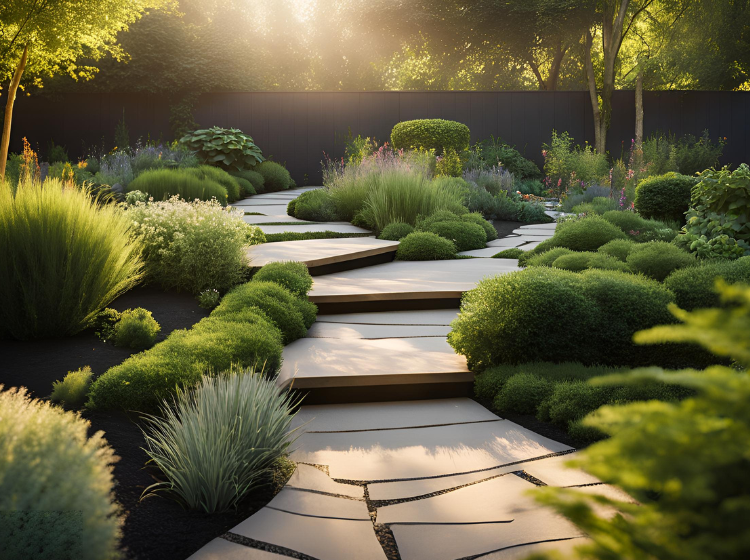
4. Natural Beauty with a Flagstone Path
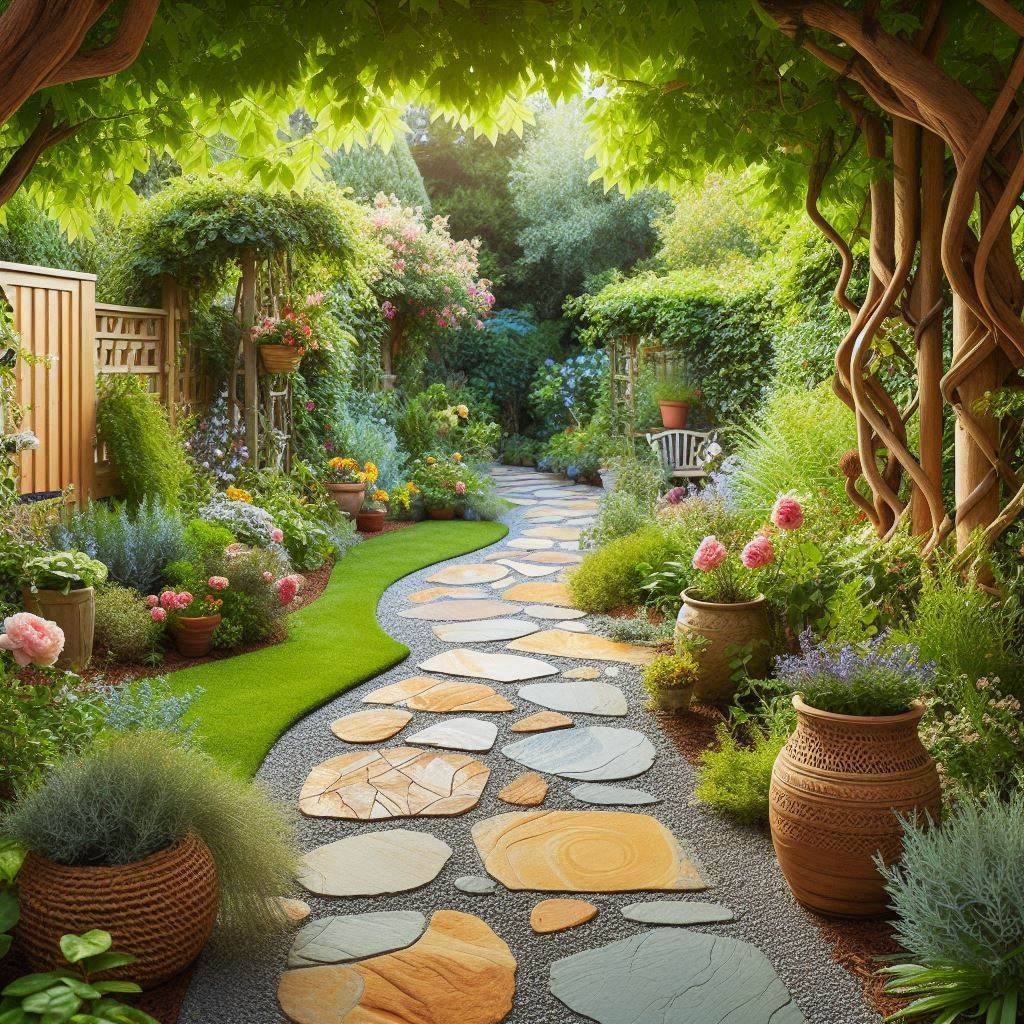
Flagstone walkways offer a unique and organic aesthetic, blending seamlessly with natural surroundings. Uneven flagstones with their natural textures and colors create a visually captivating path.
Materials:
- Irregular flagstones (various sizes and thicknesses)
- Crushed stone ( ¾ inch or smaller)
- Bedding sand
- Shovel
- Tamper
- Rubber mallet
Instructions:
- Plan Your Path: Sketch out the desired path layout, considering the irregular shapes of the flagstones and the need for some creative maneuvering during installation.
- Prepare the Ground: Mark the path on the ground and excavate a shallow trench (4-6 inches deep) ensuring a level base. Compact the soil firmly with a tamper.
- Laying the Crushed Stone Base: Spread a 3-inch layer of crushed stone evenly over the compacted soil. Use a level to ensure the base is consistent throughout the path. Compact the crushed stone base firmly with a tamper.
- Creating a Bedding Sand Layer: Spread a 1-inch layer of bedding sand over the compacted crushed stone base. Smooth the sand layer with a rake to create a level surface. This layer will provide a fine-tuned base for the flagstones.
- Placing the Flagstones: Start by laying the larger flagstones first, working from a corner outwards. Carefully fit the stones together, considering their natural shapes and creating a visually pleasing pattern. Use a rubber mallet to gently tap the flagstones into place, ensuring they sit level with minimal gaps.
Tip: Leave some space between the flagstones for a more natural look. You can adjust the spacing based on the size and shape of your flagstones. Aim for gaps of 1-2 inches.
- Filling the Gaps: Once all the flagstones are laid, fill the gaps between them with bedding sand. Sift the sand over the entire walkway surface, allowing it to settle into the gaps. Sweep away any excess sand from the flagstone surface.
- Compacting the Sand: Lightly dampen the sand with a gentle spray of water. Use a compactor or a piece of scrap wood to compact the sand further, ensuring the flagstones remain stable and level. Repeat the process of adding sand, dampening, and compacting until the gaps are filled and the flagstones are firmly secured.
- Finishing Touches: Once the sand is fully compacted, sweep away any remaining sand from the flagstone surface. You can also add a light coat of stone sealant (optional) to protect the flagstones from weather and stains.
5. The Easy-Care Option: A Mulch Path

Mulch walkways offer a low-maintenance solution for creating a soft and natural path in your garden. This option is perfect for areas with light foot traffic.
Materials:
- Shredded wood mulch (choose a long-lasting variety)
- Landscape fabric
- Edging material (optional)
- Shovel
Instructions:
- Plan Your Path: Mark the desired path layout on the ground. Consider the width to accommodate comfortable walking.
- Prepare the Ground: Dig a shallow trench (1-2 inches deep) along the path to define its borders. Lay down landscape fabric to suppress weed growth. Extend the fabric a few inches beyond the edges of the trench for complete coverage.
- Adding the Edging (optional): If using edging material for a clean look, install it now. Plastic edging can be pushed into the ground along the sides of the trench. For sturdier edging options like bricks or stones, create a small trench for them to sit in and secure them firmly.
- Applying the Mulch: Spread a 2-3 inch layer of shredded wood mulch evenly over the landscape fabric within the defined path. Choose a high-quality, long-lasting mulch variety to minimize frequent top-ups.
- Finishing Touches: Use a rake to smooth out the mulch surface and create a defined edge. You can also add decorative accents like edging stones or colorful plants along the sides of the path.
Important Note: Mulch paths require regular maintenance (topping up the mulch) as the mulch decomposes over time.
6. Unleash Your Creativity: A Recycled Material Path
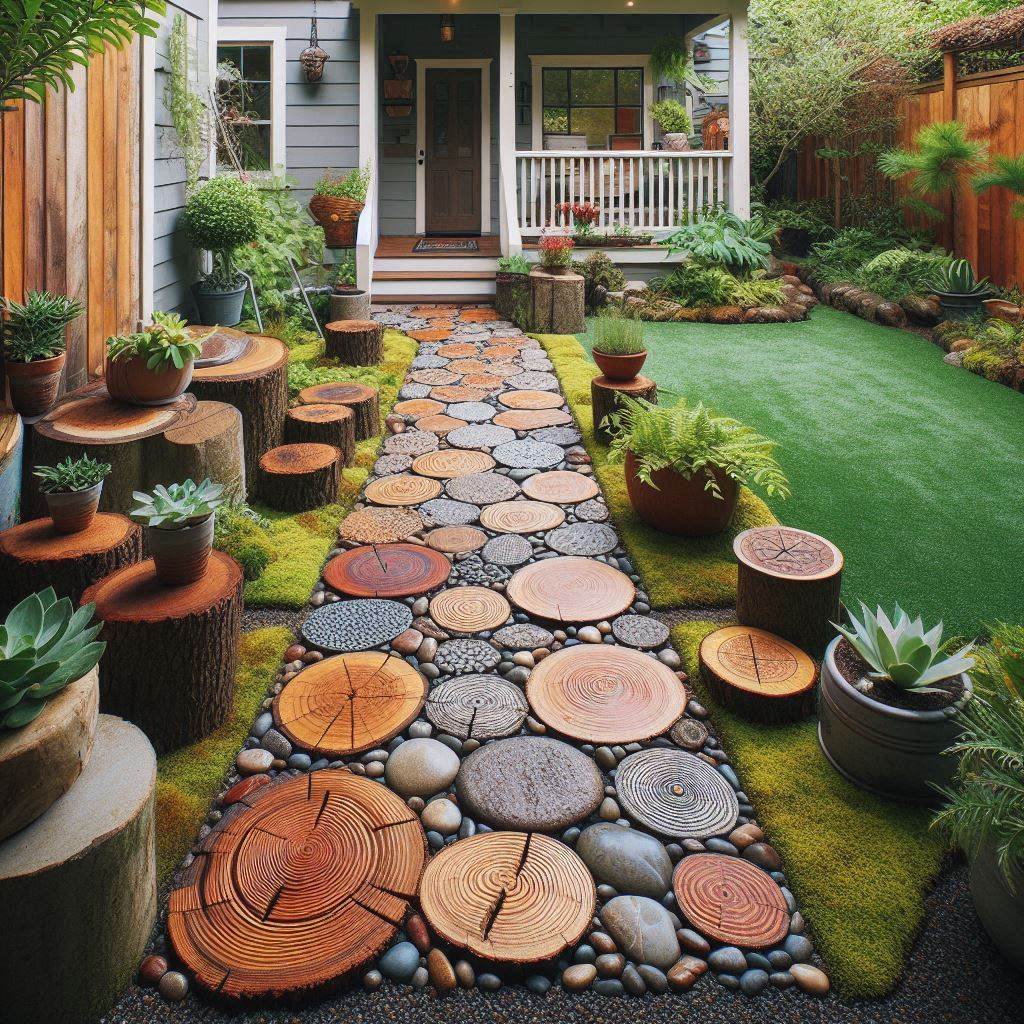
Embrace sustainability and unleash your creativity with a recycled material path! This option allows you to upcycle various materials into a unique and personalized walkway.
Materials:
- Recycled materials (slabs, pavers, large stepping stones made from recycled concrete, wine corks, etc.)
- Landscape fabric (optional)
- Edging material (optional)
- Sand or gravel (optional, for base layer)
- Shovel
- Tamper
Instructions:
- Plan Your Path and Gather Materials: Sketch out your desired path layout, considering the size and shape of your recycled materials. Gather a variety of recycled materials that can be used to create a stable and aesthetically pleasing walkway.
- Prepare the Ground (similar to other walkway options): Mark the path on the ground and excavate a shallow trench (depth will depend on your chosen materials and desired base layer). Lay down landscape fabric (optional) to suppress weed growth. Consider adding a base layer of sand or gravel (optional) for improved drainage and stability, especially if your recycled materials are not very heavy-duty.
- Get Creative with the Layout: Here’s where your creativity comes into play! Arrange your recycled materials in a way that creates a stable and visually appealing path. You can use a combination of different materials for added texture and interest.
Tip: For materials like wine corks, ensure they are secured in a way that prevents them from becoming loose or displaced underfoot. You can embed them in a concrete base or use a sealant to hold them together in a grid pattern.
- Ensuring Stability: Once you’ve laid out your recycled materials, ensure each piece sits level and feels secure underfoot. Fill any gaps between materials with sand, gravel, or mortar (depending on the material used) to create a stable walking surface.
- Finishing Touches: Add edging material (optional) along the sides of the path for a clean look. You can also incorporate additional decorative elements like pebbles, broken pottery pieces, or small plants to enhance the visual appeal of your unique walkway.
7. A Touch of Warmth: A Wooden Path
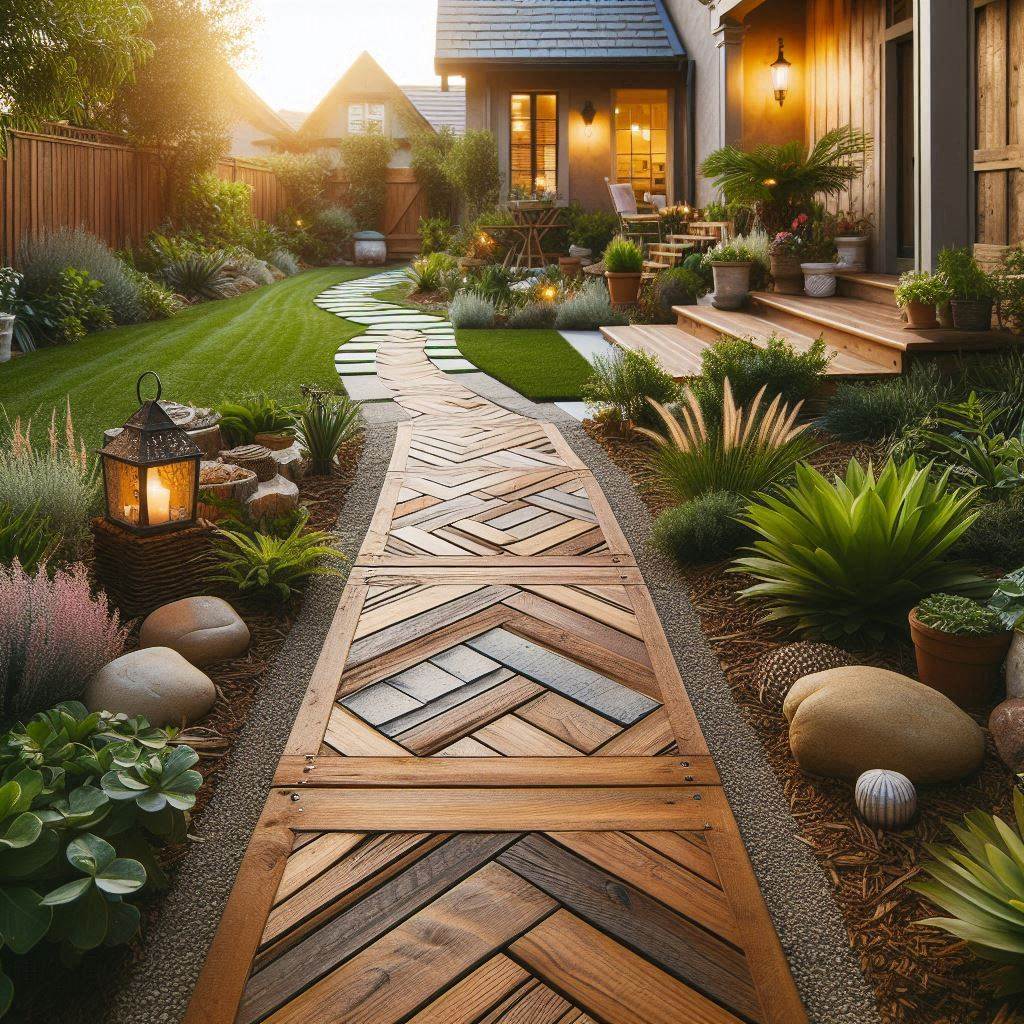
Wooden walkways offer a charming and inviting addition to your garden, creating a warm and natural feel.
Materials:
- Pressure-treated lumber (appropriate for outdoor use)
- Screws for outdoor use
- Landscape fabric (optional)
- Saw
- Drill
- Post hole digger (optional)
- Gravel (optional)
Instructions:
- Plan Your Path and Choose Lumber: Sketch out your desired path layout, considering the width and the length of lumber you will be using. Choose pressure-treated lumber that is specifically designed for outdoor use to ensure its longevity.
- Prepare the Ground: Mark the path on the ground. Decide if you want a simple pathway with wooden planks laid directly on the ground or a more elevated walkway with support posts.
Option 1: Ground-Level Wooden Path:
- Dig a shallow trench (1-2 inches deep) along the path to define its borders. Lay down landscape fabric (optional) to suppress weed growth.
Option 2: Elevated Wooden Walkway:
- Dig post holes at regular intervals along the path (depth will depend on the desired height of the walkway and soil conditions). Ensure the posts are level and secure them with gravel or concrete mix.
- Cutting the Lumber: Cut the lumber planks to the desired length according to your path layout.
- Creating the Walkway:
Option 1:
- Lay the wooden planks directly on the prepared ground (with or without landscape fabric). Secure the planks together with screws for outdoor use.
Option 2:
- Attach the wooden planks to the support posts using screws for outdoor use. Ensure the planks are evenly spaced and create a stable walking surface.
- Finishing Touches: Sand down any rough edges on the wooden planks. You can also stain or paint the wood (ensure you use products suitable for outdoor use) to match your garden’s aesthetic.
Remember: Regular maintenance is crucial for wooden walkways. Inspect the wood for signs of rot or damage and apply a fresh coat of sealant periodically to ensure its longevity.
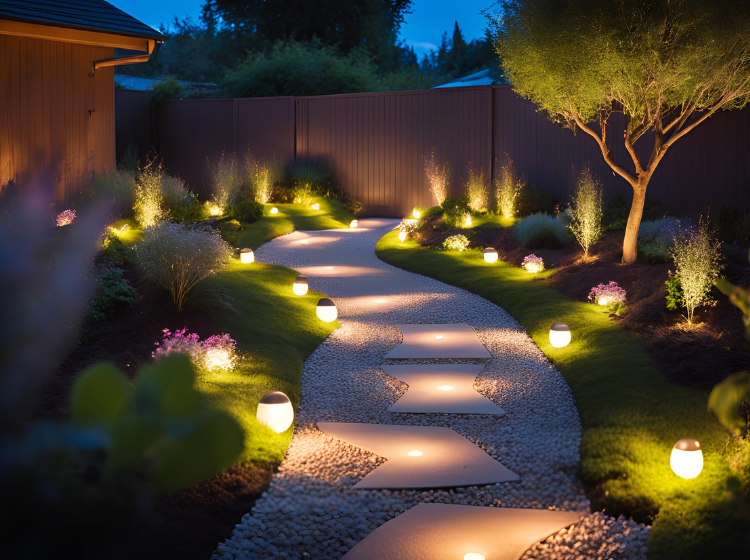
8. The Enchanting Glow: A Luminous Walkway
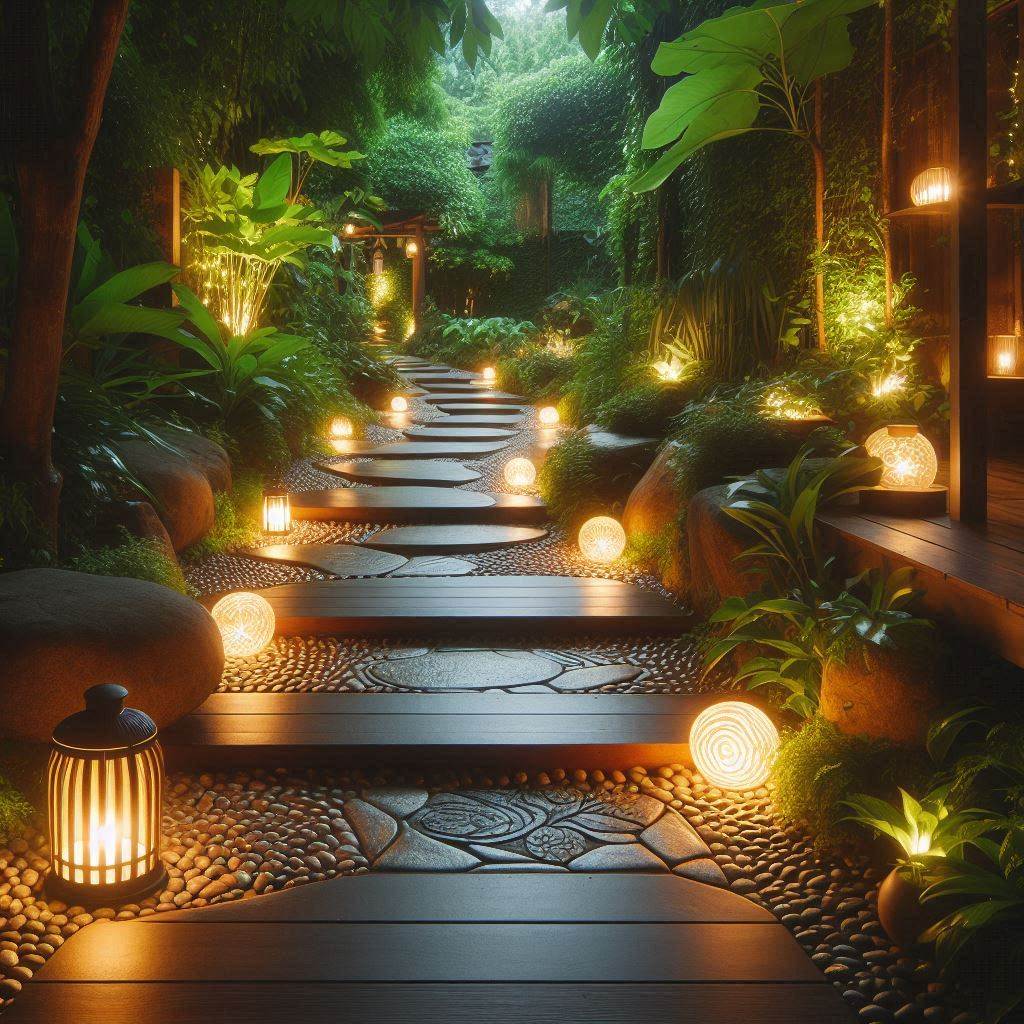
Transform your garden into a magical wonderland with a walkway that incorporates subtle lighting. This option adds a touch of whimsy and enhances safety during evening strolls.
Materials:
- Pavers or stepping stones (choose light-colored materials for better light reflection)
- Solar walkway lights
- Sand (optional)
- Edging material (optional)
Instructions:
- Plan Your Path: Sketch out your desired path layout, considering the placement of lights for optimal illumination. Opt for a simple, straight path or a gently curving design for easier installation of lights.
- Prepare the Ground: Mark the path on the ground and excavate a shallow trench (depth will depend on the thickness of your chosen pavers or stepping stones). Lay down a layer of sand (optional) for a more stable base, especially if your soil is loose. Compact the base material firmly with a tamper.
- Creating the Path: Arrange your pavers or stepping stones according to your design. Ensure proper spacing and a level surface. Fill any gaps with sand (optional). Secure the edges with edging material (optional) for a finished look.
- Installing the Solar Walkway Lights: Most solar walkway lights come with stakes for easy installation. Position the lights along the sides of the path, ensuring they receive adequate sunlight during the day for nighttime illumination. Some lights can be embedded directly between pavers or stepping stones for a more integrated look.
- Finishing Touches: Test the lights after sunset to ensure they function properly. You can add decorative elements like plants or small stones around the lights to enhance the visual appeal.
9. A Touch of the Mediterranean: A Pebble Mosaic Path
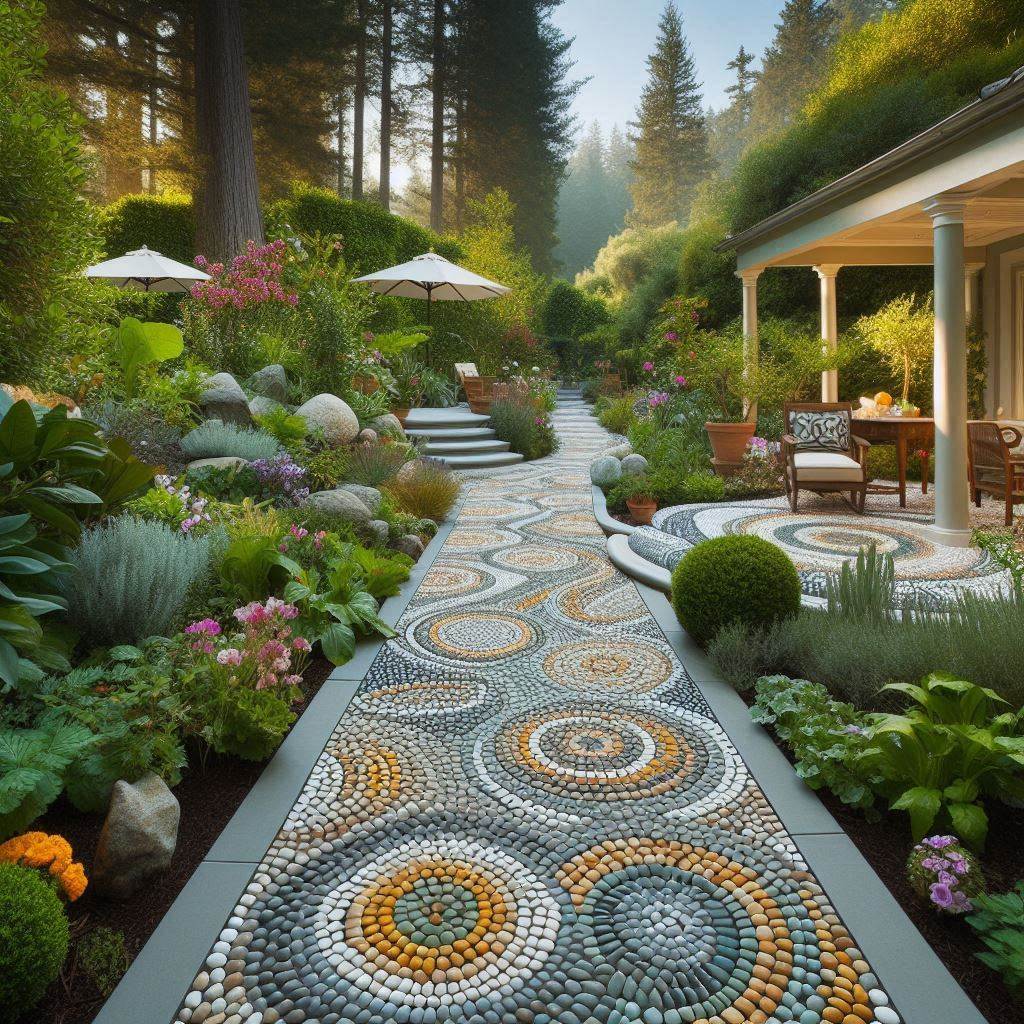
Create a unique and artistic walkway with a pebble mosaic design. This option allows you to personalize the path with colors and patterns that complement your garden’s theme.
Materials:
- Landscape fabric
- Sand
- Bagged pebbles in various colors
- Edging material (optional)
- Shovel
- Tamper
- Rake
Instructions:
- Plan Your Path and Design: Sketch out your desired path layout and create a design for the pebble mosaic. Consider using online resources or mosaic design software for inspiration. Choose colors that blend well with your garden’s aesthetics.
- Prepare the Ground: Mark the path on the ground and excavate a shallow trench (2-3 inches deep). Lay down landscape fabric to suppress weed growth. Spread a layer of sand over the fabric and compact it firmly with a tamper.
- Creating the Base: Wet the sand to create a workable surface. Use a rake to create a smooth and level base for the pebble mosaic.
- Laying the Pebbles: Following your chosen design, begin placing the pebbles carefully onto the wet sand base. Press each pebble firmly to ensure it adheres to the sand. Work in sections to maintain the design as you progress.
- Finishing Touches: Once the entire walkway is covered in pebbles, use a stiff brush to remove any loose sand from the surface. Add edging material (optional) along the sides of the path for a clean look. You can also incorporate plants or small decorative stones to enhance the visual appeal.
10. Rustic Elegance: A Cinder Path
Cinder, a byproduct of burning coal, offers a surprisingly elegant and budget-friendly option for walkways. Its dark color creates a striking contrast with surrounding greenery, adding a touch of rustic charm.
Materials:
- Crushed cinder (available at some landscaping supply stores)
- Landscape fabric (optional)
- Edging material (optional)
- Shovel
- Tamper
Instructions:
- Plan Your Path: Sketch out your desired path layout, considering the width and overall design.
- Prepare the Ground: Mark the path on the ground and excavate a shallow trench (2-3 inches deep). Lay down landscape fabric (optional) to suppress weed growth.
- Creating the Base (optional): If your soil is loose or you desire a more stable path, consider adding a 1-inch layer of crushed gravel or sand as a base layer. Compact the base material firmly with a tamper.
- Laying the Cinder: Spread a 2-3 inch layer of crushed cinder evenly over the prepared ground (or base layer, if used). Use a rake to create a smooth and level surface.
- Finishing Touches:
- Compact the cinder surface firmly with a tamper. You can repeat this process a few times over a few days as the cinder settles.
- Add edging material (optional) along the sides of the path for a clean look. Opt for natural materials like brick or stone to complement the rustic aesthetic of the cinder.
- Cinder can be slightly dusty, especially when dry. Consider applying a light mist of water to the surface periodically to minimize dust and maintain a more settled appearance.
11. A Walk Through Time: A Recycled Brick Path
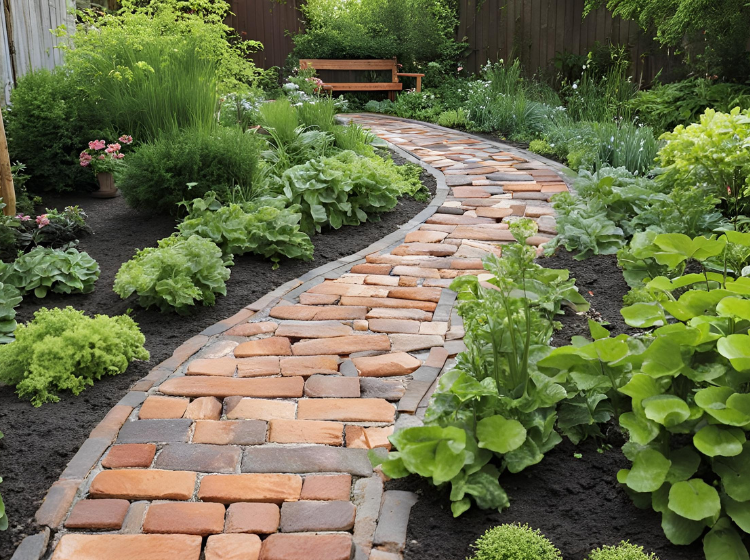
Give new life to salvaged bricks and create a charming walkway steeped in history. This option is perfect for adding a touch of vintage character to your garden.
Materials:
- Salvaged bricks (cleaned and sorted by size, if possible)
- Sand
- Crushed stone (optional)
- Edging material (optional)
- Shovel
- Tamper
- Brick hammer and chisel (optional)
Instructions:
- Plan Your Path: Sketch out your desired path layout, considering the size and shape of your salvaged bricks. You might need to adjust your design to accommodate variations in brick size.
- Prepare the Ground: Mark the path on the ground and excavate a shallow trench (4-6 inches deep) ensuring a level base. Compact the soil firmly with a tamper.
- Creating the Base (optional): If your soil is loose or the bricks are uneven in size, consider adding a 1-inch layer of crushed stone for a more stable base. Compact the crushed stone base firmly with a tamper.
- Laying the Sand Base: Spread a 2-inch layer of sand evenly over the compacted soil base (or crushed stone base, if used). Use a level to ensure the sand base is consistent throughout the path.
- Laying the Bricks: Begin laying the bricks in a pattern that works with their varying sizes. You can opt for a simple running bond pattern or a more intricate herringbone design. Use a rubber mallet to gently tap the bricks into place and ensure a level surface. Fill any gaps between the bricks with sand.
Tip: If using significantly uneven bricks, you might need to cut or chip some bricks to achieve a tighter fit (use a brick hammer and chisel with caution and proper safety gear).
- Finishing Touches: After laying all the bricks, add edging material (optional) along the sides of the path for a finished look. Sweep sand over the entire walkway to fill any remaining gaps and remove excess sand from the brick surface. Lightly dampen the sand with a gentle spray of water to help it settle and compact.
12. A Coastal Breeze: A Seashell Path
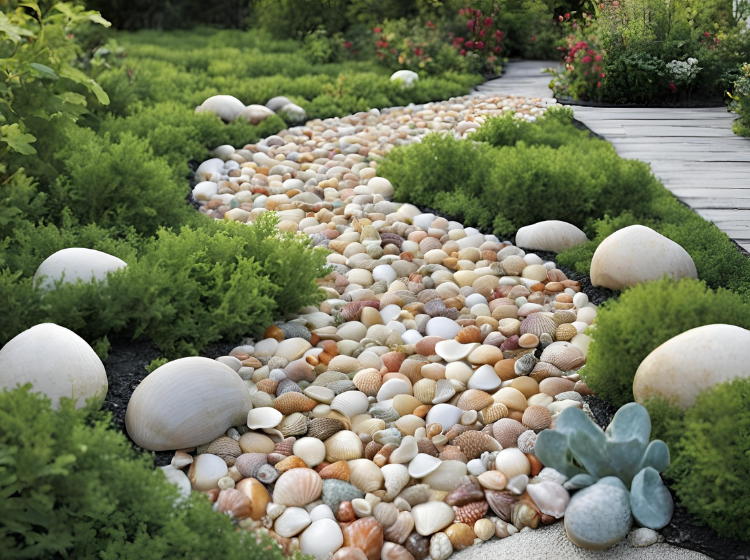
Embrace the coastal vibe with a walkway adorned with seashells. This option adds a touch of whimsy and evokes a sense of relaxation in your garden.
Materials:
- Seashells (various sizes and colors)
- Sand
- Landscape fabric
- Edging material (optional)
- Shovel
- Tamper
Instructions:
- Plan Your Path: Sketch out your desired path layout, considering the width and overall design. Seashell paths are typically narrow due to the size and shape of the shells.
- Prepare the Ground: Mark the path on the ground and excavate a shallow trench (2-3 inches deep). Lay down landscape fabric to suppress weed growth.
- Creating the Base: Spread a 2-inch layer of sand evenly over the landscape fabric within the defined path. Use a level to ensure the base is consistent throughout the path. Compact the sand base firmly with a tamper.
- Laying the Seashells: Begin by placing the larger seashells first, working from a corner outwards. Arrange the shells in a way that creates a stable and visually appealing surface. Fill any gaps between the larger shells with smaller shells and sand.
Tip: For a more secure walkway, you can partially embed the larger seashells into the sand base.
- Finishing Touches: Once the entire walkway is covered in seashells, use a stiff brush to remove any loose sand from the surface. Add edging material (optional) along the sides of the path for a clean look. You can also incorporate beach glass or small pebbles to enhance the coastal theme.
13. A Path of Fire: A Glowing Gravel Walkway
Create a mesmerizing walkway that illuminates your garden at night with glow-in-the-dark gravel. This option offers a unique and eye-catching addition to your outdoor space.
Materials:
- Glow-in-the-dark gravel (available at some landscaping supply stores)
- Landscape fabric
- Edging material (optional)
- Shovel
- Tamper
Instructions:
- Plan Your Path: Sketch out your desired path layout, considering the width and overall design.
- Prepare the Ground: Mark the path on the ground and excavate a shallow trench (2-3 inches deep). Lay down landscape fabric to suppress weed growth.
- Creating the Base (optional): If your soil is loose or you desire a more stable path, consider adding a 1-inch layer of crushed stone or sand as a base layer. Compact the base material firmly with a tamper.
- Laying the Glow Gravel: Spread a 2-3 inch layer of glow-in-the-dark gravel evenly over the prepared ground (or base layer, if used). Use a rake to create a smooth and level surface.
- Charging the Glow Gravel: Most glow-in-the-dark gravel requires exposure to sunlight for optimal luminescence at night. Ensure the gravel receives adequate sunlight during the day for it to emit a strong glow after sunset.
- Finishing Touches: Add edging material (optional) along the sides of the path for a clean look. Opt for darker materials like black stone or edging to create a better contrast with the glowing gravel at night.
14. A Living Pathway: A Creeping Thyme Walkway
Embrace the beauty and fragrance of nature with a walkway adorned with creeping thyme. This option offers a soft and aromatic alternative to traditional walkways.
Materials:
- Creeping thyme plants (choose a variety suitable for your climate)
- Landscape fabric
- Sand (optional)
- Edging material (optional)
- Shovel
- Garden hose
Instructions:
- Plan Your Path: Sketch out your desired path layout, considering the mature size and spread of the creeping thyme plants. Ensure the path width allows for comfortable stepping without overcrowding the plants.
- Prepare the Ground: Mark the path on the ground and excavate a shallow trench (2-3 inches deep). Lay down landscape fabric to suppress weed growth and create a barrier between the soil and the creeping thyme.
- Adding Sand (optional): In areas with heavy clay soil, adding a 1-inch layer of sand over the landscape fabric can improve drainage for the creeping thyme plants.
- Planting the Creeping Thyme: Purchase small creeping thyme plants or use sprigs from existing plants. Space the plants according to their mature size, typically 6-8 inches apart. Dig small holes in the landscape fabric and plant the creeping thyme, ensuring the roots are well-covered with soil. Water the plants thoroughly.
- Finishing Touches: Add edging material (optional) along the sides of the path for a clean look. Regularly water the creeping thyme plants until they are established. Once established, creeping thyme is a low-maintenance ground cover that requires minimal watering and weeding.
15. A Walk on the Wild Side: A Decomposed Granite Path
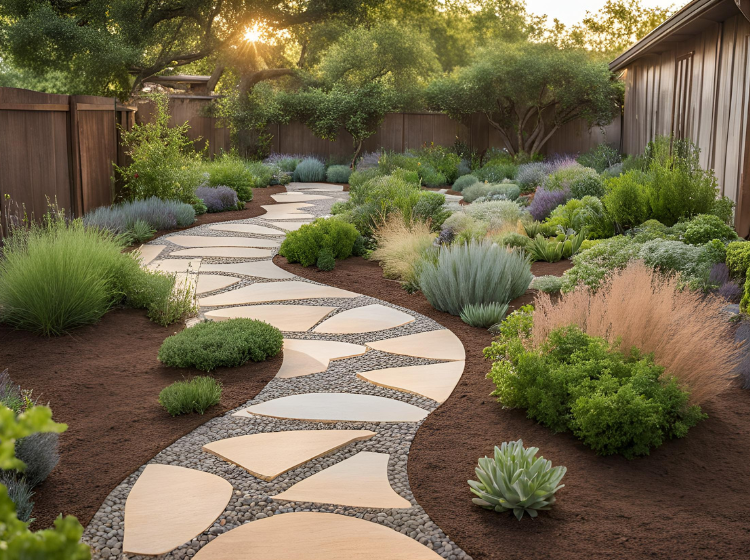
Decomposed granite, also known as DG, offers a natural-looking and low-maintenance option for walkways. This finely crushed granite creates a stable and comfortable walking surface.
Materials:
- Decomposed granite (DG)
- Landscape fabric
- Edging material (optional)
- Shovel
- Tamper
Instructions:
- Plan Your Path: Sketch out your desired path layout, considering the width and overall design.
- Prepare the Ground: Mark the path on the ground and excavate a shallow trench (2-3 inches deep). Lay down landscape fabric to suppress weed growth.
- Creating the Base: Spread a 2-inch layer of DG evenly over the landscape fabric within the defined path. Use a level to ensure the base is consistent throughout the path. Compact the DG base firmly with a tamper.
- Finishing Touches: Add edging material (optional) along the sides of the path for a clean look. You can also lightly dampen the surface of the DG to help it settle. Over time, the DG will naturally compact further under foot traffic.
16. A Touch of Zen: A Stepping Stone and Gravel Path
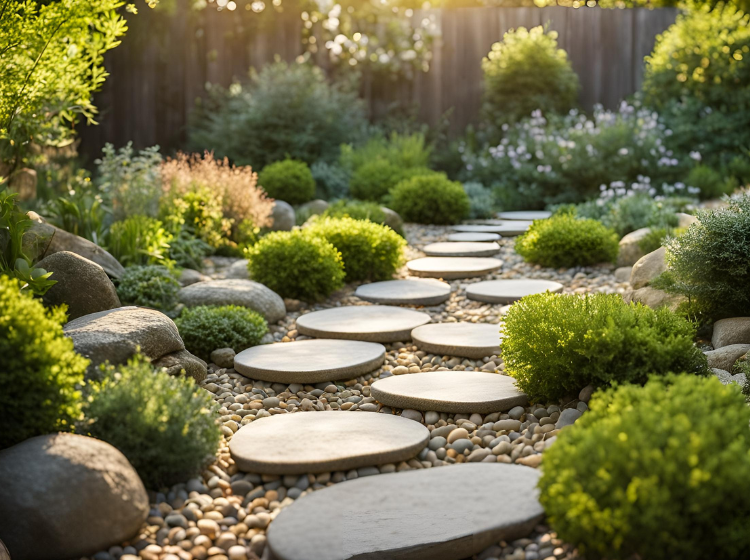
Combine the visual appeal of stepping stones with the practicality of gravel for a unique and functional walkway. This option offers a balanced blend of texture and design.
Materials:
- Pre-made stepping stones (various sizes and shapes)
- Gravel (various sizes and colors available)
- Landscape fabric
- Edging material (optional)
- Shovel
- Sand (optional)
- Tamper
Instructions:
- Plan Your Path: Sketch out your desired path layout, considering the placement of stepping stones and the overall design. Opt for a random or patterned arrangement of the stepping stones, ensuring they create a comfortable walking path with adequate spacing between them.
- Prepare the Ground: Mark the path on the ground and excavate shallow holes (depth will depend on the thickness of your chosen stepping stones) for each stepping stone location. Lay down landscape fabric throughout the entire path to suppress weed growth.
- Creating the Base for Stepping Stones (optional): If your soil is loose or uneven, consider adding a 1-inch layer of sand in each hole where the stepping stones will be placed. Compact the sand with a tamper to create a stable base for each stone.
- Laying the Stepping Stones: Place the stepping stones in their designated locations, ensuring they sit level and feel secure underfoot. Adjust the position of any stones as needed for a comfortable walking surface.
- Creating the Gravel Base: Spread a 2-3 inch layer of gravel evenly over the landscape fabric throughout the entire path, filling in the spaces between the stepping stones. Choose a gravel size and color that complements the stepping stones and your garden’s overall aesthetic.
- Finishing Touches: Use a rake to smooth out the gravel surface and ensure it sits slightly below the level of the stepping stones. Add edging material (optional) along the sides of the path for a clean look. You can also incorporate decorative elements like small plants or accent stones around the stepping stones to enhance the visual appeal.
17. A Walk Through History: A Reclaimed Cobblestone Path
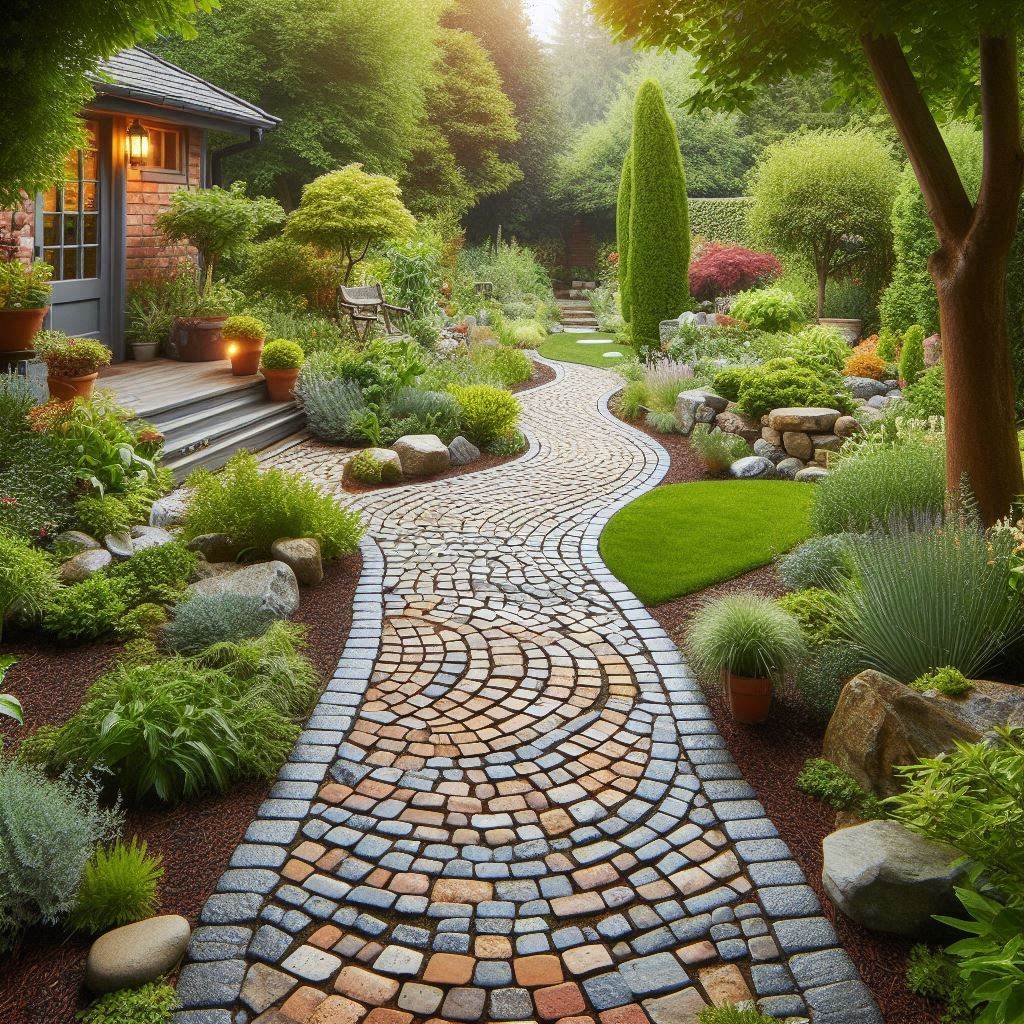
For a truly unique and historical feel, consider using reclaimed cobblestones to create your walkway. This option offers a conversation starter and adds a touch of timeless charm to your garden.
Materials:
- Reclaimed cobblestones (cleaned and sorted by size, if possible)
- Sand
- Crushed stone (optional)
- Edging material (optional)
- Shovel
- Tamper
- Rubber mallet (optional)
Instructions:
- Plan Your Path: Sketch out your desired path layout, considering the size and shape of your reclaimed cobblestones. You might need to adjust your design to accommodate variations in stone size.
- Prepare the Ground: Mark the path on the ground and excavate a shallow trench (6-8 inches deep) ensuring a level base. Compact the soil firmly with a tamper.
- Creating the Base (optional): If your soil is loose or the cobblestones are uneven in size, consider adding a 2-inch layer of crushed stone for a more stable base. Compact the crushed stone base firmly with a tamper.
- Laying the Sand Base: Spread a 2-inch layer of sand evenly over the compacted soil base (or crushed stone base, if used). Use a level to ensure the sand base is consistent throughout the path.
- Laying the Cobblestones: Begin by placing the larger cobblestones first, working from a corner outwards. Arrange the stones in a way that creates a stable and visually appealing surface. Fill any gaps between the stones with smaller cobblestones and sand.
Tip: Use a rubber mallet (gently) to tap the cobblestones into place and ensure a level surface.
- Finishing Touches: After laying all the cobblestones, add edging material (optional) along the sides of the path for a finished look. Sweep sand over the entire walkway to fill any remaining gaps and remove excess sand from the cobblestone surface. Lightly dampen the sand with a gentle spray of water to help it settle and compact.
Remember: Reclaimed cobblestones can be heavy and uneven. Ensure you have proper lifting techniques to avoid injury and consider seeking help for moving larger stones.
Bonus Tips: Choosing the Right Walkway Material
Selecting the right material for your walkway depends on several factors:
- Budget: Recycled materials, gravel, and mulch offer the most budget-friendly options. Brick, flagstone, and treated lumber come at a medium cost, while pre-made stepping stones and elaborate paver designs tend to be pricier.
- Garden Style: For a rustic or natural look, consider gravel, mulch, flagstone, or recycled materials. Brick and classic stepping stones create a timeless and elegant feel. Wooden walkways add warmth and complement gardens with a cottage or traditional style.
- Desired Level of Maintenance: Mulch and gravel require regular top-ups. Wooden walkways need periodic staining or sealing. Brick, flagstone, and pavers generally require minimal maintenance.
- Local Availability: Consider the materials readily available in your area to keep costs down and reduce environmental impact.
Embrace the Journey and Let Your Creativity Flow!
Building a DIY walkway is a rewarding journey. It allows you to personalize your outdoor space, express your creativity, and enjoy the satisfaction of creating something beautiful and functional. So, don’t be afraid to experiment, embrace resourcefulness, and let your imagination guide you as you craft the perfect walkway for your garden oasis.