
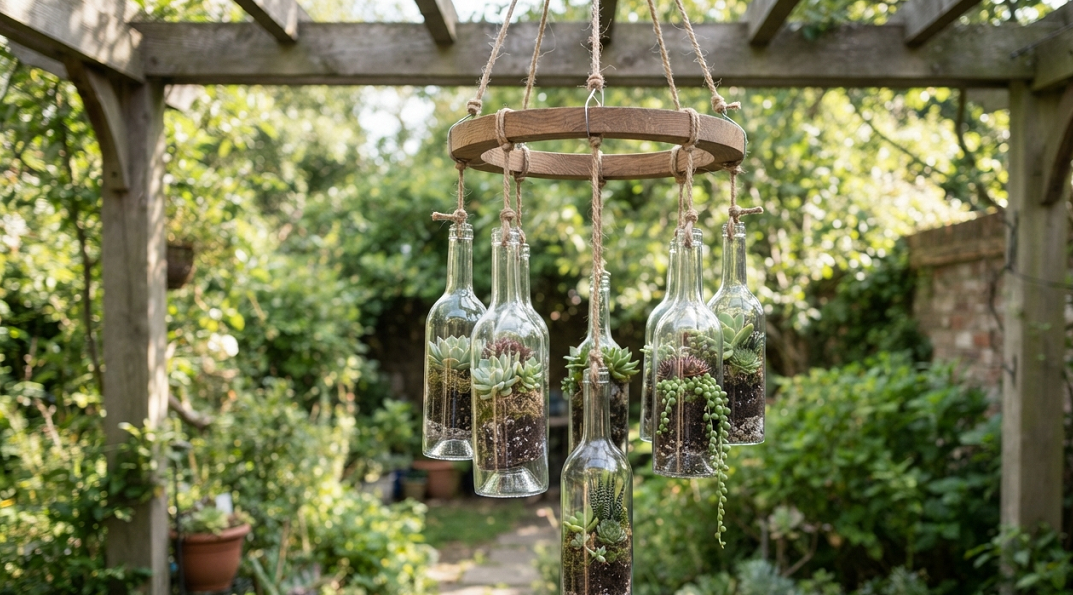
Your patio looks fine. Fine isn’t the word you want, though. You want people to walk out onto that patio and stop mid-sentence.
I’ve been growing succulents for over a decade, and the single biggest upgrade I ever made to my own backyard wasn’t a new fence or a fire pit. It was hanging a living succulent chandelier over my dining table. My neighbor thought I’d hired a florist. I hadn’t. I’d spent about $40 and one Saturday afternoon.
If you’re tired of the same three hanging baskets everyone on your street already has, a succulent chandelier solves that problem fast. These things are drought-tolerant, low-maintenance, and they turn heads in a way that petunias just can’t. Below are ten designs I’ve either built myself or watched close friends build, plus the honest truth about what’s worth your time and what isn’t.
What Is a Succulent Chandelier, Exactly?
Before we get into the ideas, let’s clear something up. A succulent chandelier is exactly what it sounds like: a hanging structure, usually metal or wood, planted with rosette-forming succulents like echeveria, sempervivum, or sedum. Instead of glass crystals, you get fleshy leaves catching the afternoon light.
They hang from pergolas, porch beams, or freestanding shepherd’s hooks. Some people use an actual repurposed light fixture as the frame. Others build a hoop out of wire and moss. Either way, the effect is the same: texture and color floating at eye level instead of sitting flat in a bed.
1. The Repurposed Wagon Wheel Chandelier
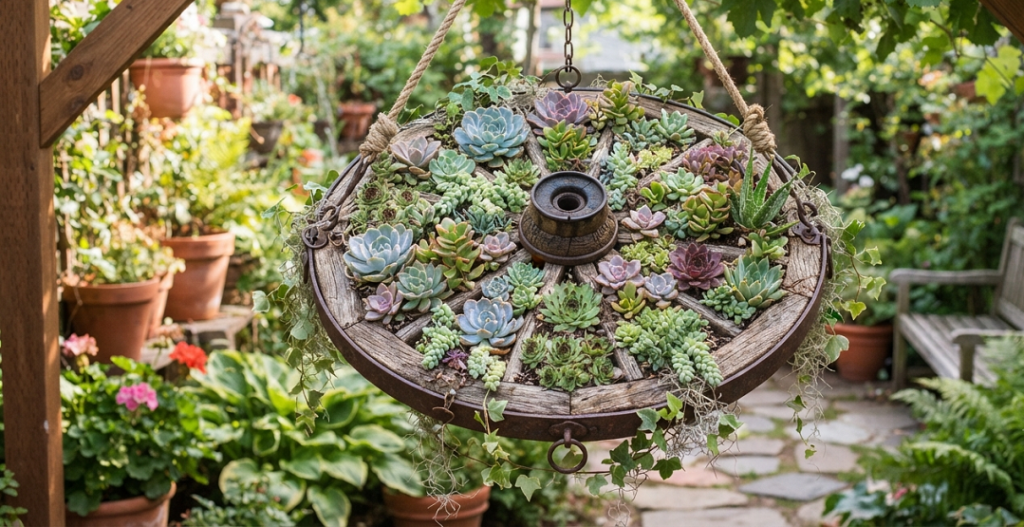
This was my very first attempt, and it’s still my favorite for beginners. You take an old wooden or metal wagon wheel, line the rim with sphagnum moss, and tuck small echeveria and hens-and-chicks into the gaps between the spokes.
I found my wheel at a farm sale for $12. The moss cost more than the wheel did, which tells you something about where your budget should actually go.
Hang it horizontally from three or four chains so it stays level, like an actual chandelier. As the succulents root into the moss over six to eight weeks, they’ll fill in the gaps and the whole thing starts to look like a green halo.
One thing I’ll say plainly: don’t use a wheel with rotting wood. I tried to save a few bucks on my second attempt and the whole structure snapped under the weight of wet moss about four months in. Cheap wood plus water equals a mess on your patio floor.
2. Vintage Birdcage Succulent Chandelier
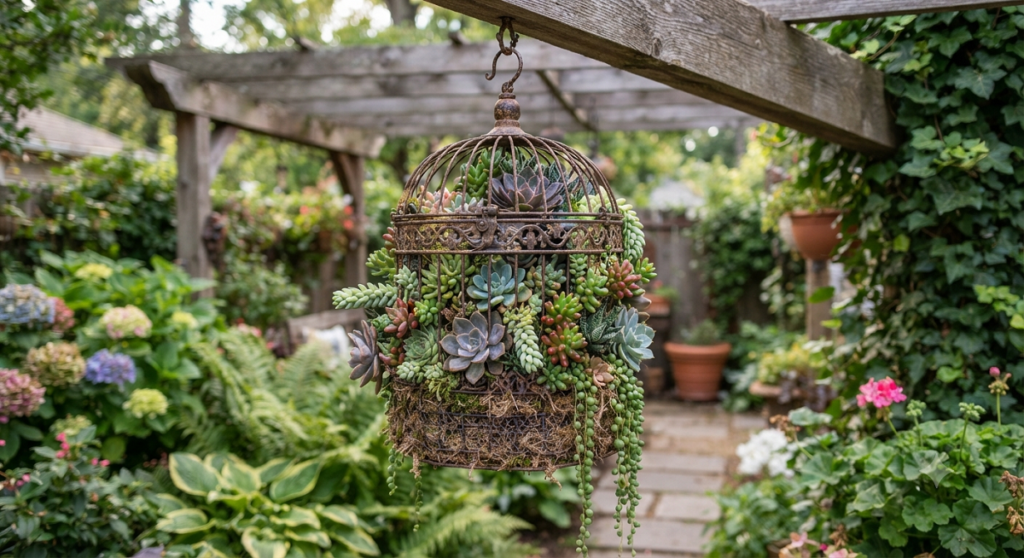
Thrift stores are full of old birdcages nobody wants, and that’s great news for you. Strip out the perches, line the bottom third with a shallow tray of cactus soil, and plant low-growing succulents like sedum morganianum, also known as burro’s tail, so it can trail out through the bars.
The wire cage does double duty as both structure and protection from birds that might otherwise peck at your plants. I’ve found that ornate, curved cages photograph better than the plain rectangular ones, so keep an eye out for anything with a little flair to the ironwork.
Hang it at a height where the trailing tails can move in the breeze without dragging on the ground. Anything under six feet tends to look cramped once the burro’s tail grows past two feet long, which it will.
Give this one partial sun. Full afternoon sun through metal bars can actually scorch leaves faster than you’d expect, since the cage traps heat.
3. Macrame Hanger Succulent Ring
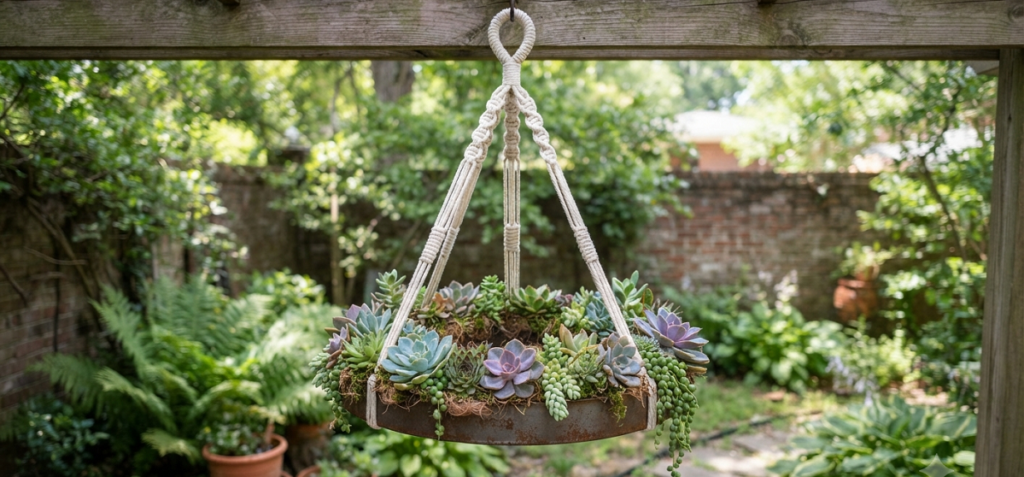
If you already own a macrame plant hanger, you’re one small hardware modification away from a chandelier. Instead of hanging a single pot, attach a circular wire wreath frame to the bottom of the macrame netting and fill the frame with a mix of soil, moss, and rooted succulent cuttings.
This is the design I recommend most to renters. It doesn’t require drilling into anything permanent, since most macrame hangers use an S-hook that clips onto an existing hook or bracket.
Mix your textures here. Combine spiky haworthia with soft, fuzzy panda plant and a few trailing string-of-pearls for contrast. A ring that’s all one texture ends up looking like a green blob instead of a chandelier.
Water this one carefully. Macrame cord, especially the cheaper cotton kind, will rot if it stays constantly damp. I water mine by taking the whole ring down and soaking it in a bucket for ten minutes, then letting it drip dry before rehanging.
4. Industrial Pipe and Fitting Chandelier
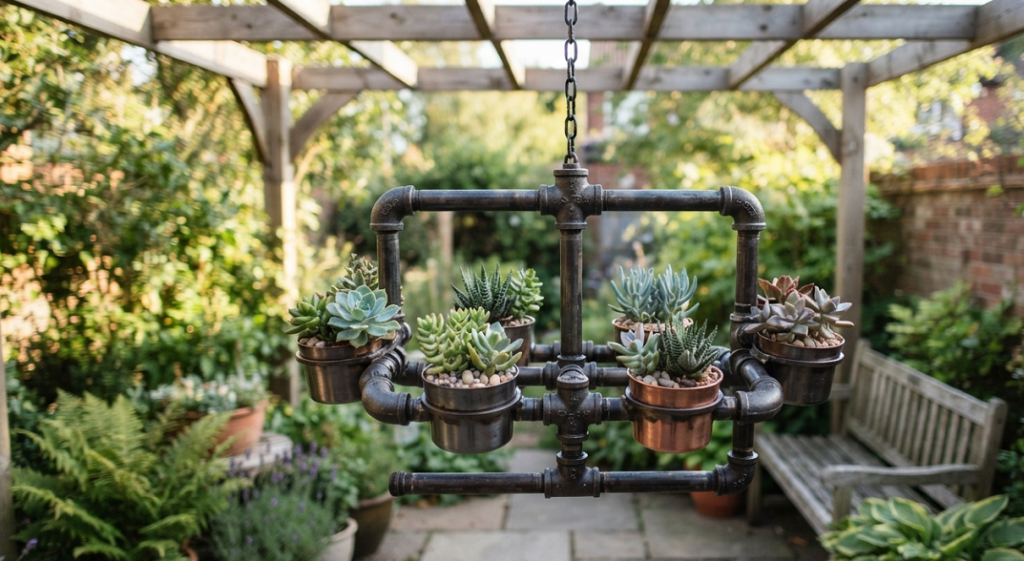
For a modern courtyard or a concrete patio, skip the rustic look entirely and build with black iron pipe fittings from the hardware store. You’re essentially constructing a geometric frame with small planting cups welded or clamped at intervals.
This one takes more upfront work than the others on this list. You’ll need basic pipe-fitting skills or a helpful friend at the hardware store counter who can cut and thread pipe to your measurements.
The payoff is worth it, though. Industrial pipe chandeliers hold their shape for years, unlike wood or wire frames that eventually sag or rust through. I built one for a client’s rooftop garden five years ago and it still looks sharp, no repairs needed.
Fill the small cups with drought-hardy varieties like echeveria ‘Perle von Nürnberg’ or graptopetalum for a soft purple-blue color that plays nicely against the black metal.
5. Hanging Terracotta Saucer Chandelier
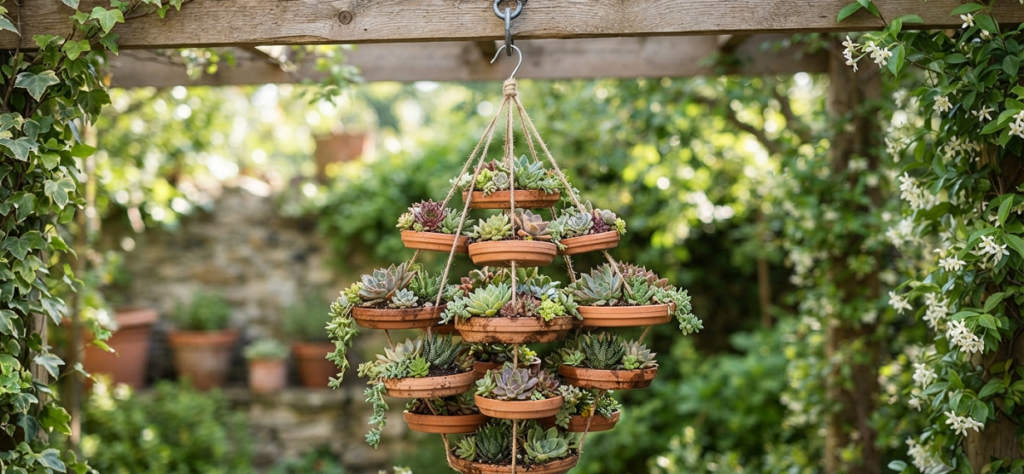
Stack three or four terracotta saucers of decreasing size, drill holes through the centers, and thread them onto a length of chain so they hang like tiers on a wedding cake, spaced about eight inches apart.
Fill each saucer with a shallow layer of gritty succulent mix and plant low, spreading varieties around the rim of each tier. Sempervivum, also called hens-and-chicks, works especially well here because it naturally spreads outward and will eventually drape over the saucer’s edge.
This design gives you serious visual height without needing a huge frame, which makes it a great option for smaller patios or apartment balconies where floor space is tight but vertical space is open.
Quick side note: seal your terracotta saucers with a food-safe outdoor sealant before planting. Unsealed terracotta wicks moisture out fast, and you’ll be watering constantly if you skip this step.
6. Copper Wire Geometric Chandelier
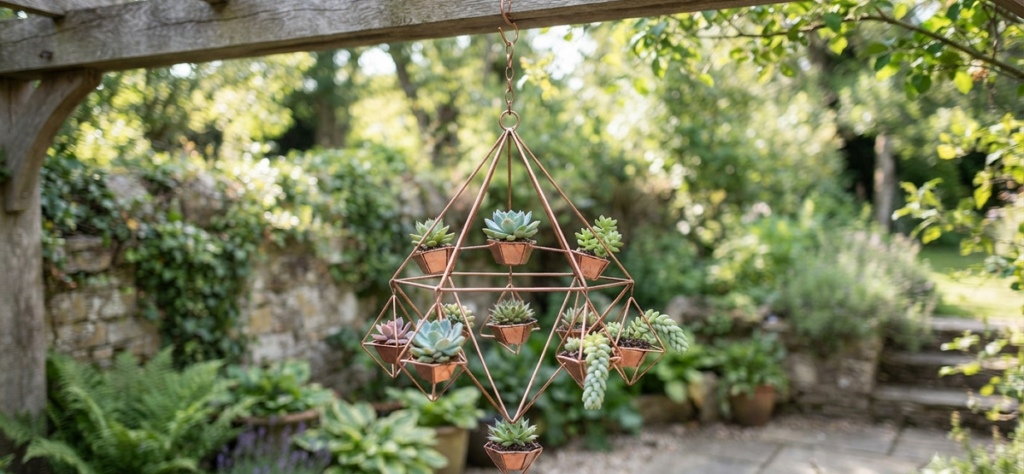
Bend 12-gauge copper wire into a geodesic or hexagonal frame, and weave sheet moss across the openings to create small planting pockets. This is the most sculptural option on this list, and it ages beautifully as the copper develops a green-blue patina over time.
Copper wire chandeliers work best with smaller succulent varieties since the moss pockets aren’t very deep. Think string-of-buttons, small echeveria offsets, and crassula.
I’ll be honest: this design takes patience. Bending clean geometric shapes by hand is harder than it looks in tutorial videos, and my first attempt looked more like a crumpled bird’s nest than a chandelier.
Once it’s built, though, it’s genuinely striking, especially with a light behind it in the evening so the patina and the plant shadows show up on a nearby wall.
7. Recycled Wine Bottle Chandelier
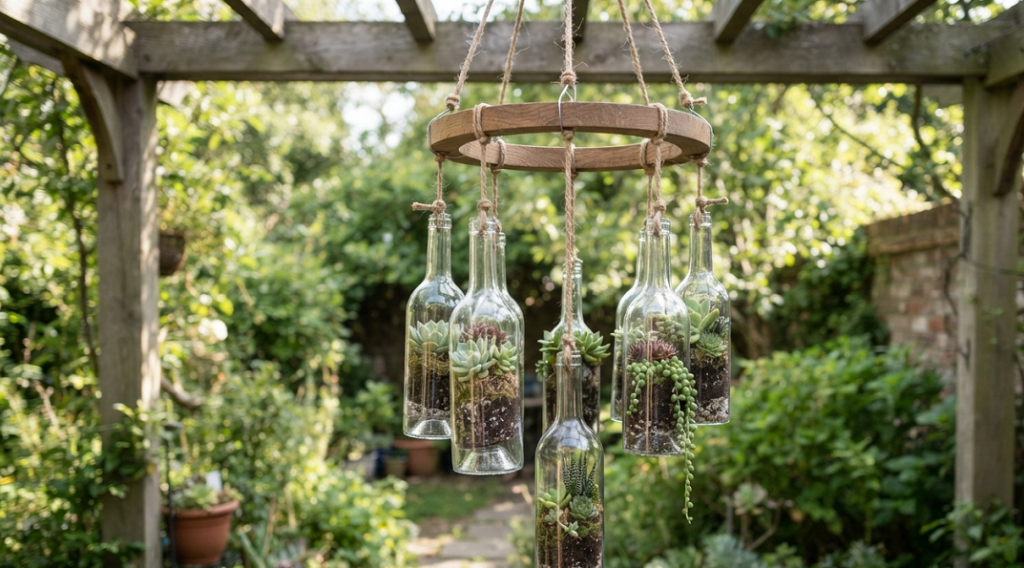
Cut the bottoms off wine bottles, invert them, and hang them in a cluster from a wooden frame or a simple metal ring. Each bottle becomes a narrow planting vessel for a single small succulent, usually something with a shallow root system like a sedum cutting or a small haworthia.
This idea started as a way for me to use up bottles from a backyard party, and it turned into one of the most-asked-about features in my garden. Green glass catches light in a way that plastic or ceramic just can’t match.
You will need a bottle cutter or a glass-cutting kit, and you should wear gloves and eye protection when scoring and snapping the glass. This isn’t a project to rush.
Space the bottles unevenly rather than in a perfect grid. A cluster of seven or nine bottles at varying heights reads as intentional and artistic. A perfect 3×3 grid reads as a science fair project.
8. Antique Chandelier Frame Conversion
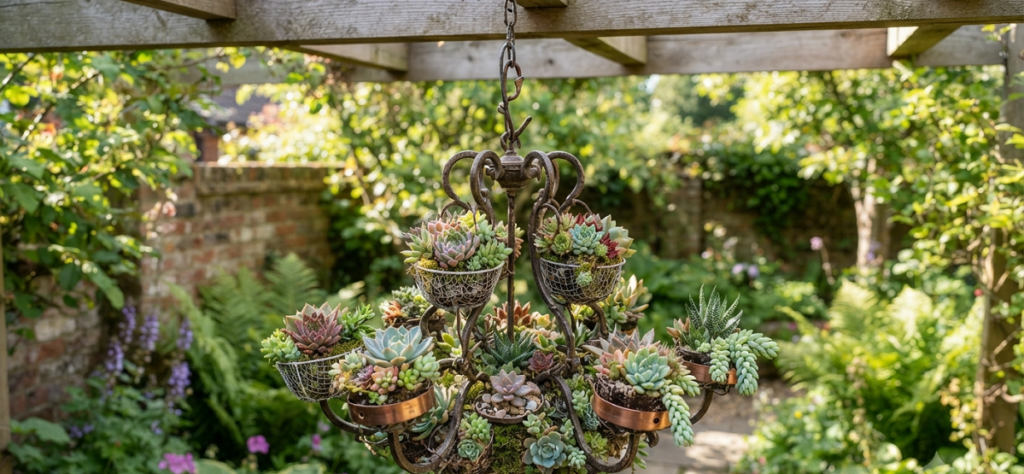
If you can find a genuine old chandelier frame at an estate sale or salvage yard, strip out the wiring and candle cups, and replace each socket with a small planting cup lined with sphagnum moss.
This is the showstopper option. Nothing else on this list gets as many “wait, is that real?” comments from guests. The ornate curves of a real chandelier frame do half the design work for you before you’ve even planted a single leaf.
Budget more for this one. A decent salvage-yard chandelier frame runs anywhere from $60 to $200 depending on condition and how ornate it is. I’ve found that the ones with a little rust and chipped paint actually look better once planted, so don’t hold out for pristine.
Weight matters here more than with any other design. A metal chandelier frame plus wet moss plus a dozen succulents gets heavy fast, so make sure whatever beam or hook you’re hanging it from is rated for real weight, not just a lightweight planter.
9. PVC Pipe Ring Chandelier (Budget Option)
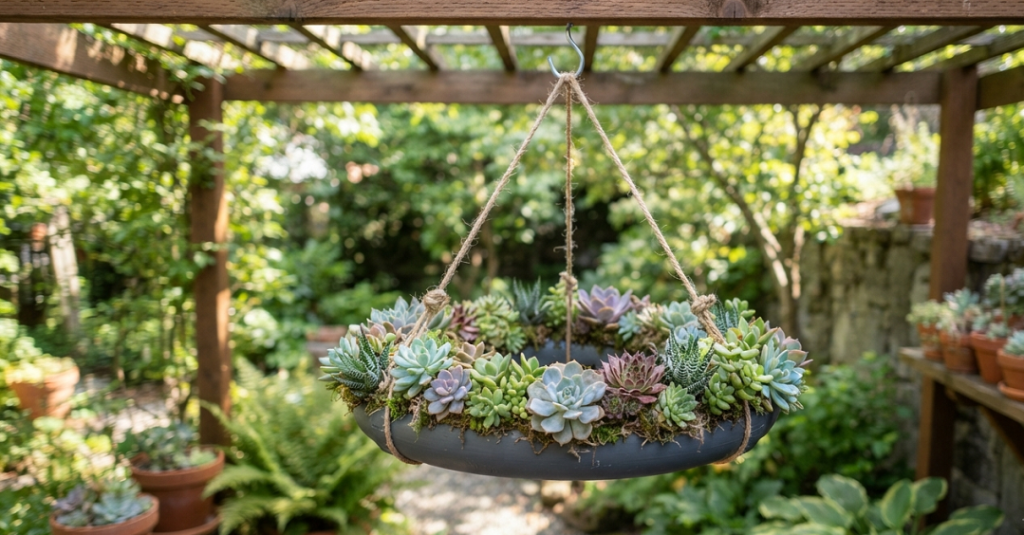
If you want the chandelier look on a tight budget, drill planting holes into a length of PVC pipe, bend it into a ring using a heat gun, and fill the holes with soil pockets and small succulent cuttings.
This is not the prettiest option on the list, and I won’t pretend otherwise. But it’s the cheapest, and PVC won’t rot, rust, or need sealant the way wood, metal, and terracotta do.
Paint the PVC a matte black or bronze before planting to hide the plastic look. Spray paint made for plastic works fine and holds up outdoors for at least a couple of seasons before it needs a touch-up.
This design works best tucked partially behind foliage, where the plant texture is the focus and the frame just fades into the background rather than trying to be the star of the show.
10. Living Wreath Chandelier with String Lights
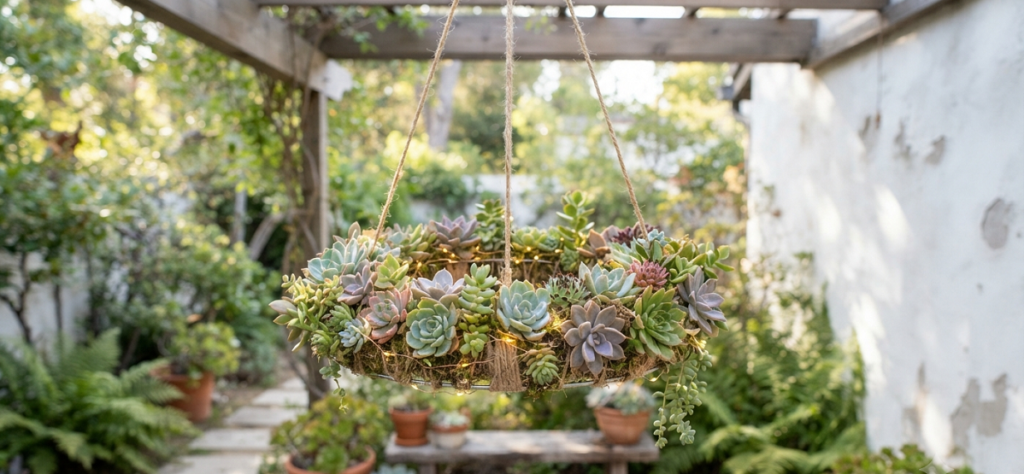
Take a wire wreath frame, fill it with moss and rooted succulents the way you would for a wall-mounted living wreath, but hang it horizontally instead and weave a strand of warm white LED string lights through the greenery before rehanging.
This one’s less about daytime drama and more about evening ambiance. During the day it looks like a straightforward succulent wreath. Once the sun goes down, it becomes the centerpiece of your whole backyard.
Use battery-powered or solar LED strings rather than anything plugged into an outlet, both for safety around wet moss and for flexibility in where you can hang it. I’ve rigged mine on a simple timer so the lights come on automatically at dusk.
Bonus tip: pick warm white lights, not cool white or color-changing ones. Warm white plays nicely with the green, purple, and blue tones in most succulents. Cool white washes them out and makes the whole thing look clinical instead of cozy.
How to Choose the Right Succulents for a Hanging Chandelier
Not every succulent belongs up in the air. Before you commit to a design, it helps to know which varieties actually thrive in a hanging, horizontal setup versus which ones sulk and rot within a month.
Rosette-forming types like echeveria and sempervivum are my go-to for the main body of almost any chandelier. They stay compact, they root shallowly into moss without much fuss, and they hold their shape even when the whole piece is hanging sideways or upside down for part of the day.
Trailing varieties earn their keep on the edges. Burro’s tail, string-of-pearls, and string-of-bananas all cascade beautifully once they’ve had a season to establish, and they’re what give a chandelier that “grown-in” look instead of the sparse, just-planted look you get in month one.
Skip anything that wants deep, consistently moist soil. Bigger jade plants, most cacti with long taproots, and anything advertised as needing “regular watering” will struggle in the shallow pockets most of these frames offer. Stick with plants that are genuinely happy in an inch or two of gritty, fast-draining soil.
Cost Breakdown: What You’ll Actually Spend
People always ask me for real numbers instead of vague price ranges, so here’s what I’ve spent building versions of each design over the years.
The budget builds, like the PVC ring or the wine bottle cluster, typically run $20 to $50 total once you count soil, cuttings, and hardware. Most of that goes toward the succulents themselves if you’re not propagating your own from cuttings.
Mid-range builds, including the wagon wheel, birdcage, and macrame ring, land somewhere between $50 and $120. The frame or vessel is usually the bigger expense here, especially if you’re buying a birdcage or wagon wheel new instead of thrifting one.
The premium builds, meaning the industrial pipe fixture and the antique chandelier conversion, can run anywhere from $150 to $300 once you factor in salvage costs, hardware, and a larger number of mature plants to fill out a bigger frame. I’d rather see a beginner start cheap and work their way up than sink $300 into a first attempt and get discouraged if it doesn’t root well.
Real Talk: What Can Go Wrong With Succulent Chandeliers
I want to be straight with you about the parts nobody puts in the pretty Pinterest photos.
- Weight is the number one failure point. Wet moss, wet soil, and mature succulents are heavier than people expect. I’ve seen more than one chandelier come crashing down because it was hung from a hook rated for a lightweight planter instead of real structural weight. Always over-build your hanging hardware.
- Watering is trickier than a normal pot. Because these designs are shallow and spread out horizontally, water doesn’t pool the way it does in a deep container. You’ll likely need to water more often in peak summer, even though succulents have a reputation for needing almost no water at all. A regular hanging basket forgives neglect. A chandelier, less so.
- Sun exposure isn’t uniform across the whole piece. One side of your chandelier may get hours more direct sun than the other, especially if it hangs near a wall or under a partial roofline. Rotate it every couple of weeks so growth stays even instead of lopsided.
- Some materials just aren’t worth it. I’ll say it plainly: rope and jute hangers rot fast in humid climates and I wouldn’t bother with them if you live anywhere with real summer humidity. Stick to chain, wire, or treated wood if longevity matters to you.
- Pests find these fast. Mealybugs especially seem to love the tight, shaded pockets where moss meets stem. Check your chandelier every couple of weeks, and catch an infestation early with a cotton swab dipped in rubbing alcohol before it spreads to the whole piece.
Final Thoughts
A succulent chandelier isn’t a weekend fad. Build one with the right materials and reasonable expectations, and it’ll outlast most of the furniture on your patio. Start small if you’re nervous. The wagon wheel or macrame ring designs forgive mistakes far better than an antique frame conversion does, so save the ambitious builds for once you’ve got one season of experience behind you.
I still walk past my own dining table chandelier every morning with coffee in hand, and it still catches me off guard sometimes, in the good way.
Which of these ten would actually work in your space? Drop a comment below and tell me what you’re working with, whether that’s a shady balcony, a sun-blasted concrete patio, or a pergola that’s been begging for something to hang from it. I read every comment, and I’m always happy to help you figure out which design fits your setup.

About Syprose Kiche
Syprose Kiche is the creator and writer behind My Besuited Home, a practical home and garden website covering DIY projects, gardening, lawn care, landscaping, home improvement, and outdoor living. She focuses on turning everyday homeowner questions into clear, practical guides backed by careful research and useful real-world considerations.