
Your patio furniture is embarrassing you. You know the type — mismatched plastic chairs, a wobbly table that came in a flat box, and a bench from a big-box store that everyone politely ignores. I’ve been there. For the first three years after I moved into my place, my backyard looked like a garage sale that forgot to end. Then one summer, after losing my third folding chair to a windstorm and a mild tantrum, I decided to actually build the seating in. Permanently. On purpose.
That decision changed everything about how I use my outdoor space. Built-in backyard seating isn’t just a design upgrade — it’s a lifestyle upgrade. It removes the hassle of dragging furniture around, it survives weather that would destroy anything on wheels, and it makes even a plain concrete slab look like it was designed by someone who knew what they were doing.
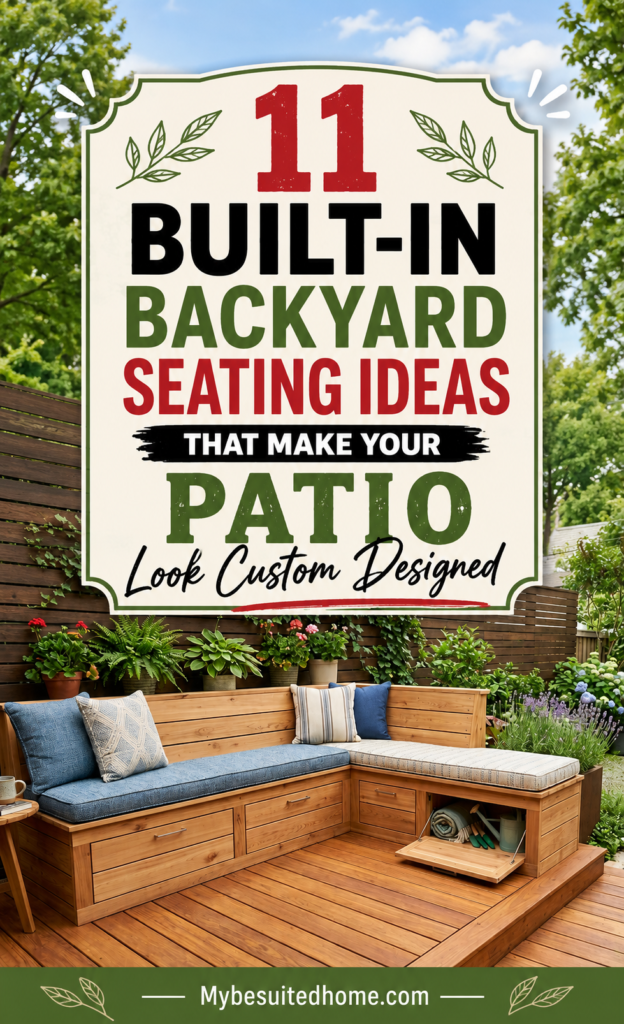
Here are 11 built-in seating ideas I’ve either built myself, helped a neighbor tackle, or seriously regretted not doing sooner.
1. Built-In Bench Along a Fence Line — The Best Use of “Dead Space”

If you have a fence running along the perimeter of your yard, you are sitting on (well, near) one of the easiest built-in seating wins available to you. A continuous bench built against the fence uses space that otherwise collects weeds, rogue garden hoses, and things you forgot you owned.
I built one of these along my back fence about four years ago, and I can honestly say it’s the single most-used piece of outdoor furniture I’ve ever had. Guests always migrate to it. It has a back (the fence itself), it’s stable as a rock, and it cost me less than one of those overpriced teak benches at the garden center.
For construction, I use pressure-treated 4×4 posts anchored into the ground (or bolted to a concrete footer if your frost line requires it), with 2×6 or 2×8 framing for the seat box. A simple cedar or redwood top makes it look finished and holds up beautifully to rain. Leave a small gap between the boards so water drains freely — I learned that lesson the hard way after a summer of mysterious rot.
The key measurement most people get wrong: seat height. You want 17 to 19 inches from the ground to the top of the seat. Any lower and adults feel like they’re sitting on a curb. Any higher and shorter guests look like they’re waiting in a doctor’s office.
2. Poured Concrete Bench — Built for Life (and Teenagers)
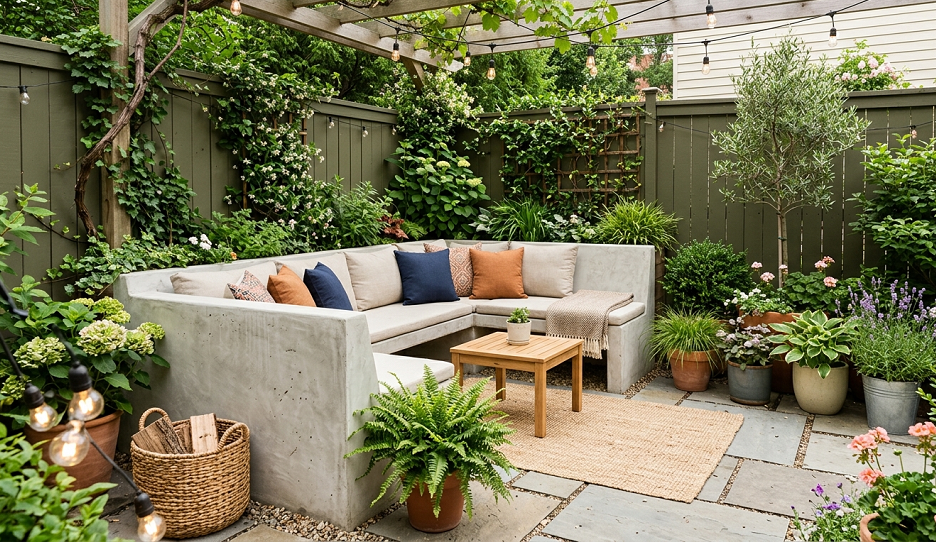
If you want seating that will outlast your mortgage, pour it in concrete. Concrete built-in benches are brutally durable, completely weather-proof, and — if you finish them right — genuinely beautiful.
The basic approach is a simple formed concrete bench: build a wooden form, pour concrete, let it cure, and strip the form. For a backyard patio, I recommend a seat depth of 15 to 18 inches and a thickness of 4 to 5 inches minimum. Anything thinner and you risk cracking under a heavy load. Trust me, I’ve watched a poorly poured garden bench crack under the combined weight of three adults and a cooler full of drinks. It was not a graceful moment.
You can keep the look raw and industrial (which is very on-trend right now, for what it’s worth), or you can add a wood or tile topper to soften the aesthetic. I’ve seen people glue cedar slats right onto cured concrete with construction adhesive and it looks stunning — like you hired someone who charges by the zero.
One thing I wish someone had told me earlier: seal your concrete. Use a penetrating concrete sealer every two years or so. Unsealed concrete absorbs water, expands when it freezes, and eventually cracks. A five-dollar can of sealer saves you from a hundred-dollar repair.
3. Raised Garden Bed with Built-In Seating Edge — Two Birds, One Stone
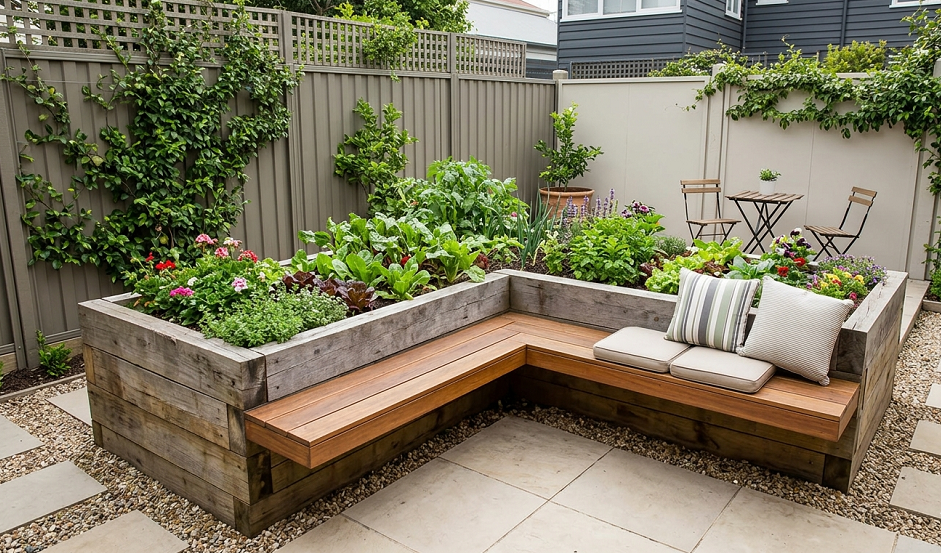
This is the move for gardeners who also want an outdoor living space but don’t have the square footage to separate the two. A raised bed with a wide, flat coping edge gives you both a planting area and a seating area in the same footprint.
My raised beds are built from stacked concrete block with a 6-inch wide solid capstone on top. That capstone is the seat. Guests sit around the edge of the bed while I’m grilling. It’s one of those things that sounds weird on paper and looks completely natural in person.
For this to work as real seating, the cap needs to be at least 5 to 6 inches wide — wider is better. I’ve seen raised beds with a 2-inch cap that someone called a “seating ledge.” It isn’t. It’s a ledge. Nobody sits on a 2-inch cap without sliding off and ruining the evening.
The material of the cap matters a lot. Natural stone (bluestone, flagstone, travertine) looks incredible and stays cool in the shade. Poured concrete caps are cheap and clean-looking. Thick cedar or ipe wood caps are warm and beautiful but require more maintenance. My personal preference is bluestone — it has a natural, finished look that makes the whole raised bed look like it was designed by a landscape architect.
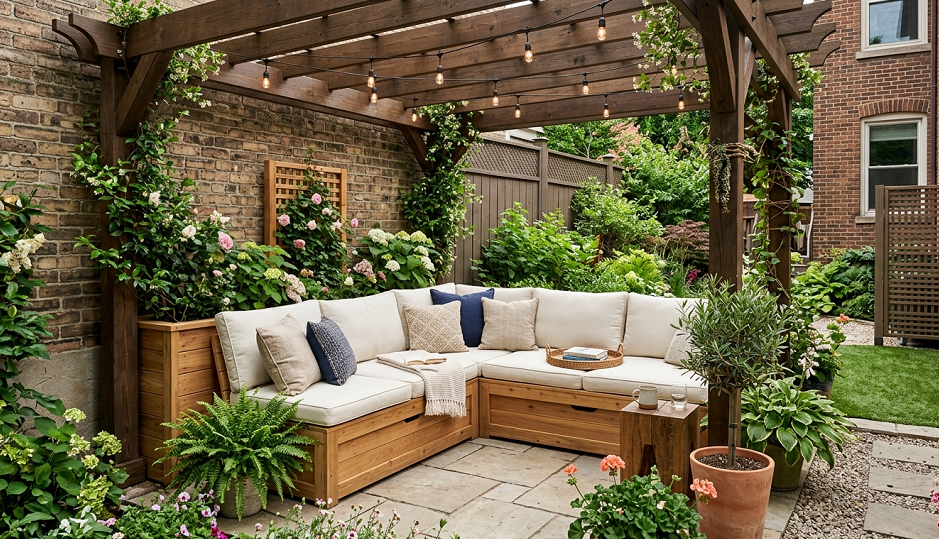
4. L-Shaped Corner Bench for Patio Corners — Stop Wasting That Angle
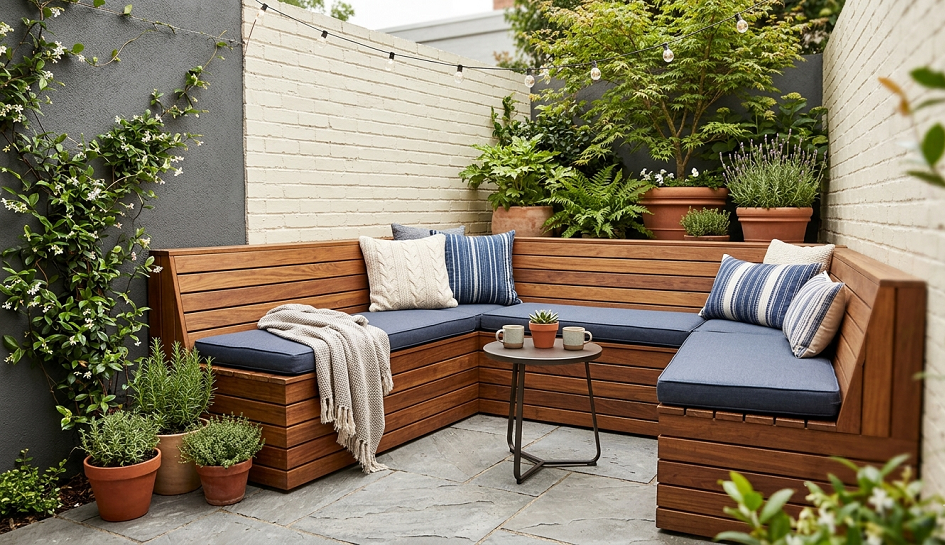
Every patio has at least one corner that does absolutely nothing. An L-shaped built-in bench claims that corner and turns it into the best seat in the house — literally. People love a corner seat. It feels anchored, it gives you a wide view of the yard, and it creates a natural gathering spot.
Building an L-shaped bench is the same principle as a fence-line bench, just with two connected runs meeting at 90 degrees. The trickiest part is that inside corner — you need to make sure your framing ties together solidly and the top boards meet cleanly. I miter-cut my seat boards at 45 degrees for the corner joint, and it makes the finished product look surprisingly professional.
I added a storage box underneath my L-bench by framing the seat with a hinged lid section. Now I store cushions, outdoor games, and two bags of potting mix in the same space as my seating. It’s the kind of thing that makes me feel like I actually have my life together when guests come over.
Don’t skimp on the cushion depth here. For a corner seating arrangement, you want cushions that are at least 3 to 4 inches thick. Thin cushions on a wood bench feel like patio penance after about 20 minutes.
5. Fire Pit Bench Surround — Seating That Earns Its Keep
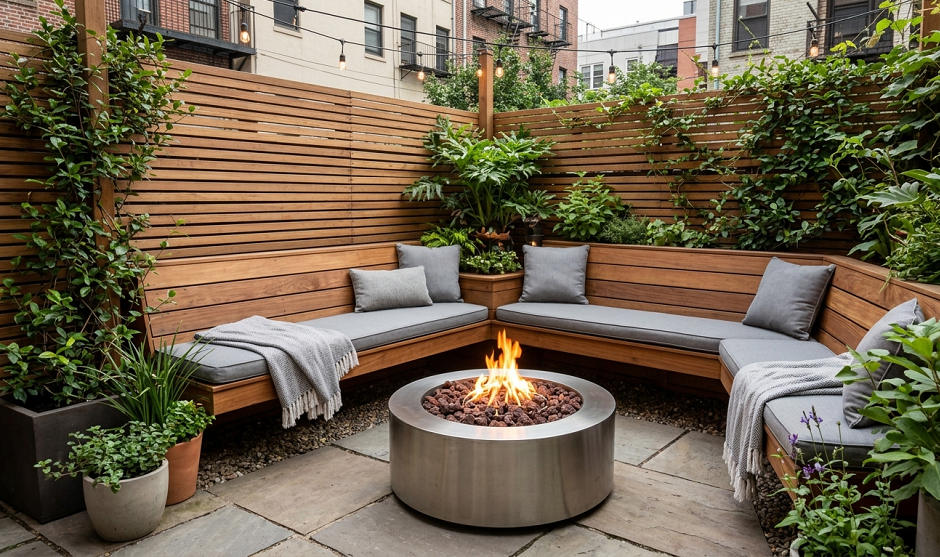
A built-in circular or curved bench around a fire pit is the outdoor seating idea that has launched a thousand Pinterest boards, and for once, Pinterest is right. There is something deeply satisfying about sitting in a permanent, purpose-built seat around a fire. It’s like the whole space was designed just for that one activity.
The circular or curved framing is what intimidates most people, but it’s simpler than it looks. You can build an octagonal bench (eight straight sections meeting at angles) and it reads as “curved” from any distance. For a true curve, you can use flexible composite decking boards as the seat surface — they bend without breaking. Or you can run straight boards tangentially and accept the slight geometric look, which works great with modern fire pit designs.
For the frame, I use pressure-treated lumber and make sure the legs are well-anchored. The heat from the fire pit can dry out wood over time, so I keep my bench at least 5 feet from the edge of the pit and I apply a UV/heat-resistant sealant annually.
The height of fire pit seating matters more than people realize. You want to be close enough to the fire to feel the warmth without having to lean forward. I built mine at 17 inches and positioned the pit so the rim is at about 24 inches. That ratio means I’m looking slightly down at the fire — relaxed, comfortable, not craning my neck.
6. Built-In Deck Bench with Under-Seat Storage — Work Smarter, Not Harder
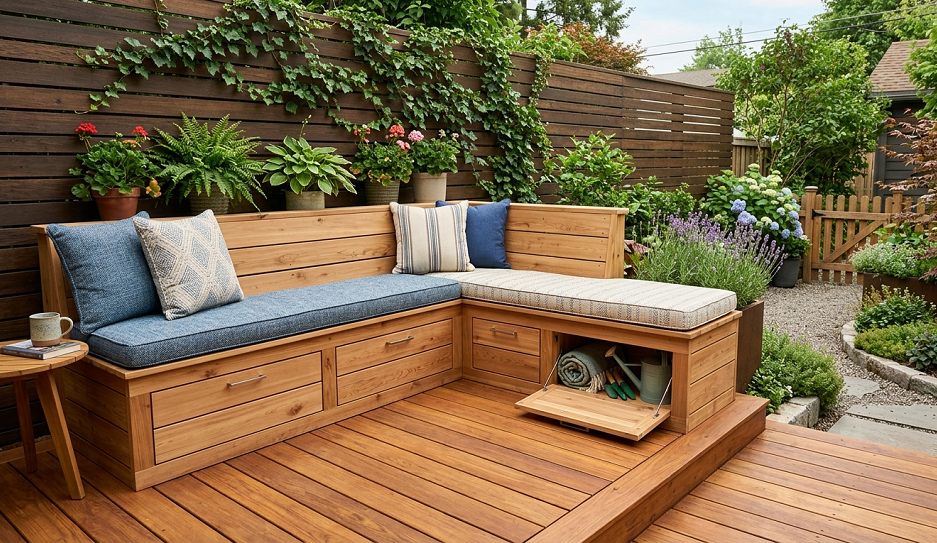
If you have a wood or composite deck, a built-in bench integrated into the railing structure is one of the slickest upgrades you can make. Done right, it looks like it was always part of the original deck design, even if the deck was built in 1987 and the bench went in last spring.
The structural key is connecting the bench posts to the deck’s rim joist or framing, not just surface-screwing them to the decking boards. Surface-mounted benches wobble. Benches bolted through the rim joist don’t. I’ve seen the wobbly kind at enough neighborhood cookouts to have strong feelings about it.
For a finished look, I run the seat boards in the same direction as the decking and use the same material. This makes the bench feel like an extension of the deck rather than an add-on. If your deck is composite, use the same brand and color for the bench top — most composite manufacturers sell matching boards specifically for built-ins.
The storage option here is pure practical magic. Frame the bench with a 2×4 box, hinge the lid in sections (not one giant lid — it’ll be too heavy), and you’ve created waterproof outdoor storage that looks deliberate and clean.
7. Stacked Stone Bench — The “I Hired a Landscaper” Look, DIY Price
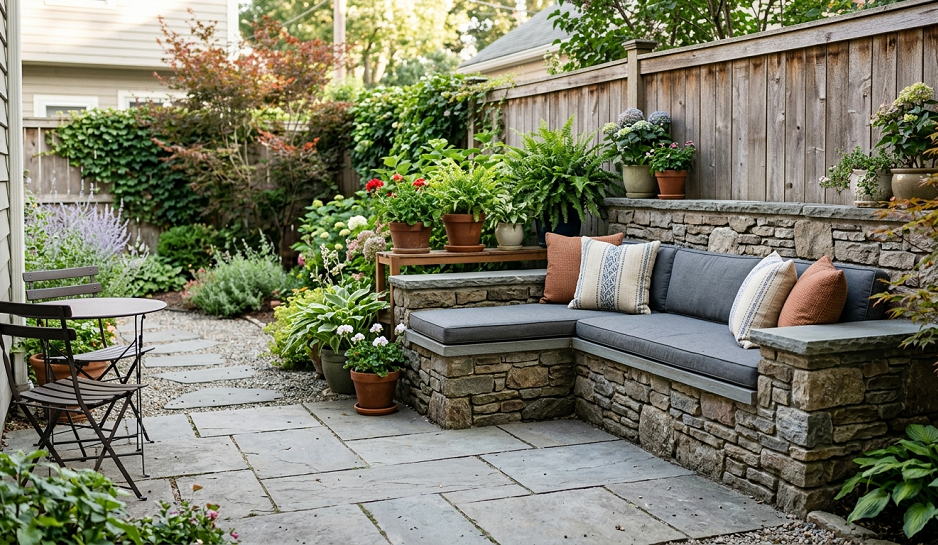
Dry-stacked stone benches look expensive. They look like they were there when the house was built. They look, frankly, better than most things that actually did cost a lot of money. And you can build one in a weekend with landscape stone from any home improvement center.
The process is simpler than it looks: stack your stone to height (16 to 18 inches), keep the base wider than the top for stability, and cap it with a smooth, level stone slab. I use a dry-stack method with landscape adhesive on the cap stone only. No mortar necessary for a basic bench, though if you want something more permanent (and you’re in a freeze-thaw climate), a thin mortar bed between layers helps with stability.
Natural fieldstone looks incredible but is wildly uneven and harder to work with. For beginners, I recommend manufactured stacked stone — the kind sold in flat panels or regular blocks. It stacks consistently, looks natural from three feet away, and won’t have you cursing at lopsided rocks for an entire afternoon. Not that I know what that’s like.
The cap is everything. A rough-textured top is uncomfortable to sit on for more than ten minutes. Spend the extra money on a smooth, flat capstone. Honed bluestone, sandblasted concrete, even a thick piece of ipe decking glued on top — all work great.
8. Porch Swing Mounted to Built-In Structure (Not Your Ceiling Joists, Please)
A porch swing feels built-in, but most people hang them from ceiling joists that were never engineered for swinging human weight. Then they wonder why there’s a creak. Or, in one memorable situation at my neighbor’s housewarming, why there’s a sudden, catastrophic ceiling repair project.
The right move is a purpose-built swing frame — freestanding timber A-frame or a pergola-integrated beam designed for the load. A single swing with two adults on it can hit 500+ lbs of dynamic load when swinging. Your pergola needs to be designed for that, not just hoped into existence.
For a truly built-in look, I love a swing mounted to a paired 6×6 timber frame built right at the edge of the patio, with the posts anchored in concrete footings. The frame becomes a permanent architectural feature even when the swing isn’t in use. You can add cross-beams, string lights, hang plants from it — it earns its footprint.
Use 5/16-inch eye bolts with a rating well above your expected load, and hang the swing with heavy-duty chains or manila rope (which looks beautiful but requires annual inspection). Galvanized hardware is the minimum. Stainless steel is better if you’re near the coast.
9. Sunken Conversation Pit with Built-In Bench Walls — Yes, It’s as Cool as It Sounds
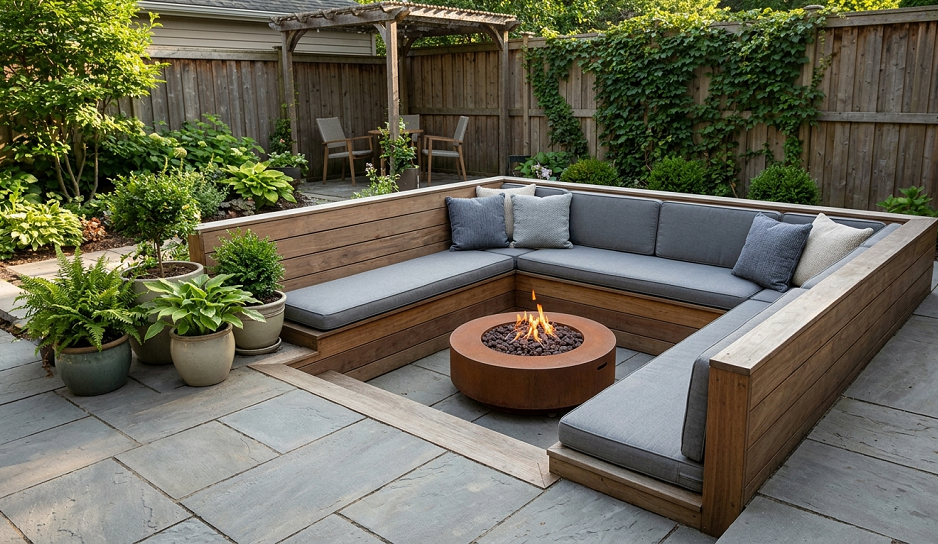
A sunken seating area — sometimes called a conversation pit — is a recessed patio area with built-in bench walls all around the perimeter. You step down into it, and suddenly you’re in a cozy, defined social space that feels like it belongs in an architectural digest, not in a typical backyard.
I’ll be honest: this one is a project. It requires excavation, a concrete footer or retaining structure, drainage, and careful waterproofing. I built a small version (roughly 10×10 feet, dropped 18 inches) and it took me two weekends plus two days of the slowest concrete work of my life. But every single person who sees it immediately says “wait, how did you do that?”
For the bench walls, I used concrete block as the structural core, faced with brick veneer and topped with a sandstone cap. The result looks like the seating was always there. The drainage is the most important part — slope the floor toward a central drain or perimeter drain tile. A sunken area that pools water is a mosquito breeding ground and a liability.
If full excavation is too much, a “semi-sunken” version works great: build up the surrounding patio surface by 10 to 12 inches with a raised platform, creating the feeling of a conversation pit without the digging. Different effect, same visual impact.
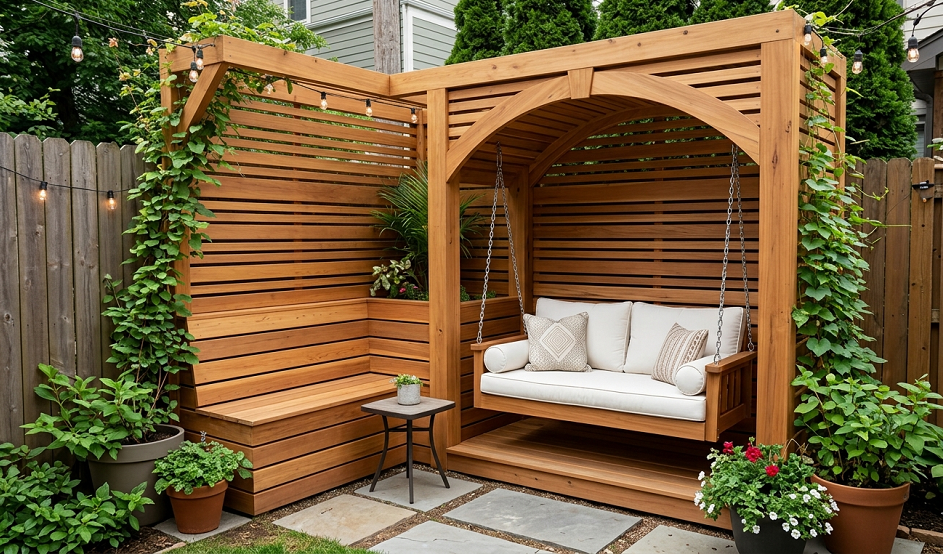
10. Pergola-Integrated Daybed or Lounge Bench — Actually Worth Building

A built-in lounge bench or daybed integrated into a pergola structure is the ultimate in backyard luxury, and it’s more achievable than it looks. The idea is simple: design the pergola with one side that includes a wide, deep built-in bench — deep enough to lie down on (at least 30 inches) — covered by the pergola overhead.
This is the piece of backyard furniture I wish I’d built five years earlier than I did. Once I added the pergola lounge bench, I stopped wanting to go anywhere on weekends. Which my family has mixed feelings about, but I maintain it was worth it.
The structure is a standard pergola build with 6×6 posts, 2×8 or 2×10 beams, and 2×6 rafters. The bench is built off one of the post bays, framed with 2×6 lumber and clad in whatever finish matches your pergola — cedar, ipe, composite, or even painted pine. The bench top should sit at 18 inches, but make it at least 30 to 36 inches deep so it functions as a real lounge.
Add a thick outdoor cushion (4 to 6 inches minimum), and this becomes the spot where people end up spending an entire afternoon without meaning to. Build it under shade and face it toward something worth looking at — your garden, your fire pit, your neighbor’s terrible landscaping choices. Whatever works.
11. Tiered Retaining Wall Seating — When Your Slope Becomes a Feature
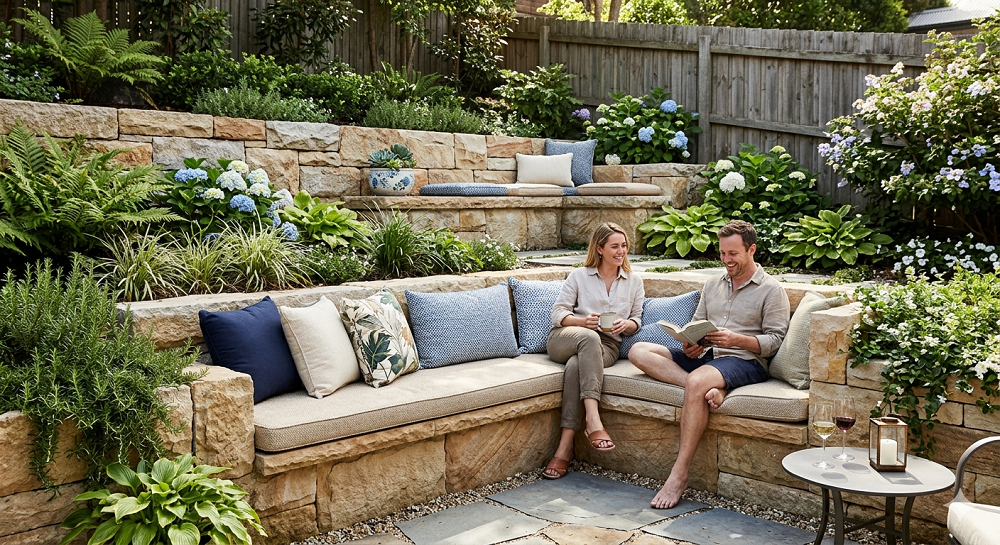
If your yard slopes, you have been fighting it with landscaping instead of using it. Tiered retaining walls that double as seating steps are one of the most functional outdoor design moves I know. Instead of trying to flatten a slope or hide it with mulch, you turn it into a series of deliberate terraces with wide, flat tops that function as benches, ledges, and steps all at once.
The tiered retaining wall approach works especially well for viewing areas — aim the seating tiers toward your fire pit, outdoor kitchen, or wherever the action happens. It creates a natural amphitheater effect, and your backyard suddenly looks like it was designed by a landscape architect who charged accordingly.
For materials, I’ve used concrete block (cheap, durable, clean lines), natural boulder (beautiful, labor-intensive), and timber landscape ties (fast and affordable but requires replacement every 10 to 15 years). My current preference is Allan Block or a similar interlocking concrete block system — it stacks without mortar, drains well, and the finished product looks intentionally designed.
Each tier should be at least 16 inches tall if you want it to function as real seating, and the cap should be a minimum of 14 inches deep. A 16-inch riser and an 18-inch cap is roughly the geometry of a comfortable outdoor bleacher seat. Build it right and you’ll end up hosting events around your own yard like it’s a small amphitheater. I may or may not have watched a neighbor’s kid’s soccer game from my tiered seating. Absolutely no regrets.
Bonus Tip: Outdoor Lighting Under or Behind Built-In Seating
Every single one of these seating ideas is improved by integrated lighting. I’m not talking about string lights draped over everything like the pergola version of a Christmas tree. I’m talking about purposeful, built-in light fixtures. LED strip lighting under the seat face, recessed step lights in tiered walls, or small path lights mounted in the base of a bench all make the seating usable after dark and make the whole patio look dramatically more finished.
I’ve found that solar-powered step lights are a total waste of money, even if they look pretty on Pinterest. They’re dim, they fail within two seasons, and they flicker. Run a low-voltage wire and use actual wired fixtures. The upfront work takes an afternoon. The result lasts a decade.
Real Talk: What Can Go Wrong with Built-In Outdoor Seating
Let me save you some pain here, because I’ve made most of these mistakes in some form.
Skipping the drainage conversation. Built-in seating collects water. Wood rots. Concrete cracks from freeze-thaw. Stone caps get slippery. Concrete surfaces pool. Before you build anything, think about where the water goes. Slope your surfaces away from the house (at least 1/8 inch per foot), leave drainage gaps in wood bench tops, and don’t enclose the underside of a wood bench without ventilation.
Going too short on seat depth. A 12-inch-deep bench is a punishment. A 16-inch deep bench is a bench. A 20-inch deep bench is comfortable. Spend the extra lumber and get the depth right, because you cannot fix this without tearing out the whole thing.
Using the wrong lumber. I once built a bench from standard construction-grade pine because I ran out of pressure-treated and was too impatient to go back to the store. By the following spring, it looked like it had aged 15 years in a swamp. Use exterior-rated wood — pressure-treated for the structure, cedar or redwood or composite for the top surface. Full stop.
Building without cushion dimensions in mind. Built-in benches look great. Built-in benches with cushions look incredible. But outdoor cushions come in standard sizes, and if your bench dimensions don’t match standard cushion sizes, you’ll spend 45 minutes on Wayfair ordering something custom and pay twice as much. Build to fit standard cushion widths (usually 18 or 20 inches for back cushions, 18-inch seats) or measure your cushions before you cut a single board.
Ignoring the sun. I built a beautiful south-facing concrete bench that gets full afternoon sun from May through September. In July it hits surface temperatures that qualify as assault. Either orient your seating toward shade, build a shade structure over it, or use a material that stays cool — wood, for instance, stays dramatically cooler than concrete or stone in direct sun.
Parting Wisdom
Built-in backyard seating is one of those projects where the difference between “I’m glad I did this” and “I wish I’d done this differently” almost always comes down to one thing: taking the time to plan before you buy materials. Walk your yard. Sit in different spots. Notice where the shade falls, where guests tend to cluster, where your eyes naturally go. Build your seating where life already wants to happen, not just where the internet says it should go.
The goal isn’t a yard that looks like a magazine. The goal is a yard you actually want to spend time in. In my experience, those two things overlap more often than people expect — you just have to build it around how you actually live, not how you imagine you might live.
Now I’m curious: which of these built-in seating ideas fits your yard best, and what’s the one thing stopping you from tackling it this season? Drop your questions or ideas in the comments below — I read every single one, and if you’re stuck, there’s a decent chance I’ve already made that exact mistake and can save you the trouble.