
Most fall crafts that look simple online go wrong for dull reasons. Raw wood soaks up thin paint and needs three coats. A glue stick can’t hold a twig. Leaves that were flexible on Saturday crumble by Tuesday. Kids lose interest long before the paint dries, and the project ends up in a drawer.
The thirteen crafts below were chosen to avoid those problems. Each one uses cheap materials, most of which you can find at Dollar Tree or in the yard. Each one also takes into account how long a child will actually stay interested. Some are done in twenty minutes. A few need a day to dry, so you can plan around that.
What to Buy at Dollar Tree, and What to Bring From Home
Dollar Tree’s craft aisle is built around low-cost basics, which suits kid projects. Stock changes by store and by season, so treat this as a shopping pattern, not a guarantee.
Items worth looking for:
- Unfinished wooden shapes, including pumpkins, leaves, and other cutouts, which tend to appear in the fall season
- Wooden craft (popsicle) sticks and clothespins
- Acrylic craft paint in small bottles
- Foam brushes and basic paintbrushes
- Pom-poms, googly eyes, and pipe cleaners
- Felt sheets, foam sheets, and construction paper
- Twine, yarn, and ribbon
- Mini canvases or canvas boards
- Glue sticks and school glue
Items to check on, because stock is inconsistent:
- Wood slices or rounds. Many craft stores carry them, and Dollar Tree’s selection varies.
- Clear self-adhesive contact paper or laminating pouches, which you need for suncatchers
- Embroidery hoops
- Low-temperature glue guns
Pricing at Dollar Tree has changed over the years, and not every item sits at a single price point, so check the current price before you plan a budget around a specific number. If a particular wood shape isn’t on the shelf, a craft store or a bag of precut wood slices will work for nearly every project here.
What to bring from home: scissors, a paper plate or old tray for paint, newspaper or a plastic tablecloth, paper towels, a cup of water, and a pencil. For the nature-based crafts, you’ll also need leaves, twigs, pinecones, and acorns, covered in the next section.
Setting Up So the Craft Actually Gets Finished
A little preparation separates a craft that works from a craft that stalls.
Match the project to the child
Under age three, anything small enough to fit through a toilet paper tube is a choking hazard. That includes googly eyes, pom-poms, acorn caps, and small wood pieces. Stick with large-format projects like the handprint tree or the leaf rubbing, and keep small parts away entirely. Ages four to six can paint, glue with school glue, and tear or stick paper. Ages seven and up can usually handle scissors without much help, and some can use a low-temperature glue gun with close adult supervision.
Choose the right paint
Look for acrylic craft paint with an “AP” (Approved Product) or “non-toxic” label. Even non-toxic paint isn’t meant to be eaten, and it stains clothing. Put a smock or old T-shirt on the child and cover the table.
Raw, unfinished wood absorbs paint unevenly. Expect two coats, and sometimes three for light colors over visible grain. A quick sanding of rough edges and splinters before painting, done by an adult with fine sandpaper, makes the wood nicer to handle and the paint go on more smoothly. Wipe off the dust with a damp paper towel and let it dry first.
Handle hot glue with realistic rules
Low-temperature glue guns reduce burn risk but don’t eliminate it. Melted glue can still cause a minor burn on skin. For children, a good rule is that an adult applies the glue and the child presses and holds the piece. For children who are old enough to use the gun themselves, stay within arm’s reach, use a protective mat, and keep the cord out of the walking path. School glue or tacky craft glue is safer and fine for paper, felt, and lightweight items, though it’s slow on wood. Plan on clamping or propping pieces and letting them sit.
Plan for drying time
Acrylic paint feels dry in 15 to 30 minutes in thin coats but takes longer to fully cure. If a project includes painting and then assembling, break it into two sessions. This is the single biggest improvement you can make. Paint on day one, assemble on day two.
Gathering Natural Materials Without Problems
Four of the crafts below use leaves, twigs, acorns, or pinecones. A few practical notes make those crafts more reliable.
Leaves: Collect leaves that are dry and still pliable, not wet or already brittle. Wet leaves can mold in a stack. For pressing, place them flat between sheets of paper inside a heavy book, or between layers of newspaper under a stack of books. Pressing typically takes a week or two, depending on leaf thickness and humidity. For crafts needing flexible leaves, like rubbings, you can use them fresh from the yard the same day.
Twigs and branches: Pick up fallen wood rather than cutting living branches. Break off any sharp, splintery ends. Dry twigs hold glue better than green ones.
Acorns: Acorns often contain insect larvae, and a hidden grub can emerge indoors weeks later. A common approach is to freeze acorns for several days, or to bake them in a low oven briefly, before crafting. Exact times and temperatures vary by source, so check a university extension or craft source before choosing a method. Acorns can also upset the stomachs of dogs and other pets if eaten, so keep finished pieces away from animals.
Pinecones: Shake out loose debris, and if there’s sap, expect stickiness. Some people bake pinecones to remove sap and insects. Again, confirm the method before trying it, since oven safety matters.
Where to collect: Backyards and your own property are the easy choice. Many public parks and nature preserves discourage or prohibit removing plant material, so check local rules before picking things up. Also teach kids to avoid unfamiliar plants. Poison ivy, poison oak, and sumac can look different in fall, and contact can cause a skin rash in sensitive people. If you’re not sure what a plant is, don’t let the child handle it.
The 13 Crafts
1. Painted Wood Pumpkins
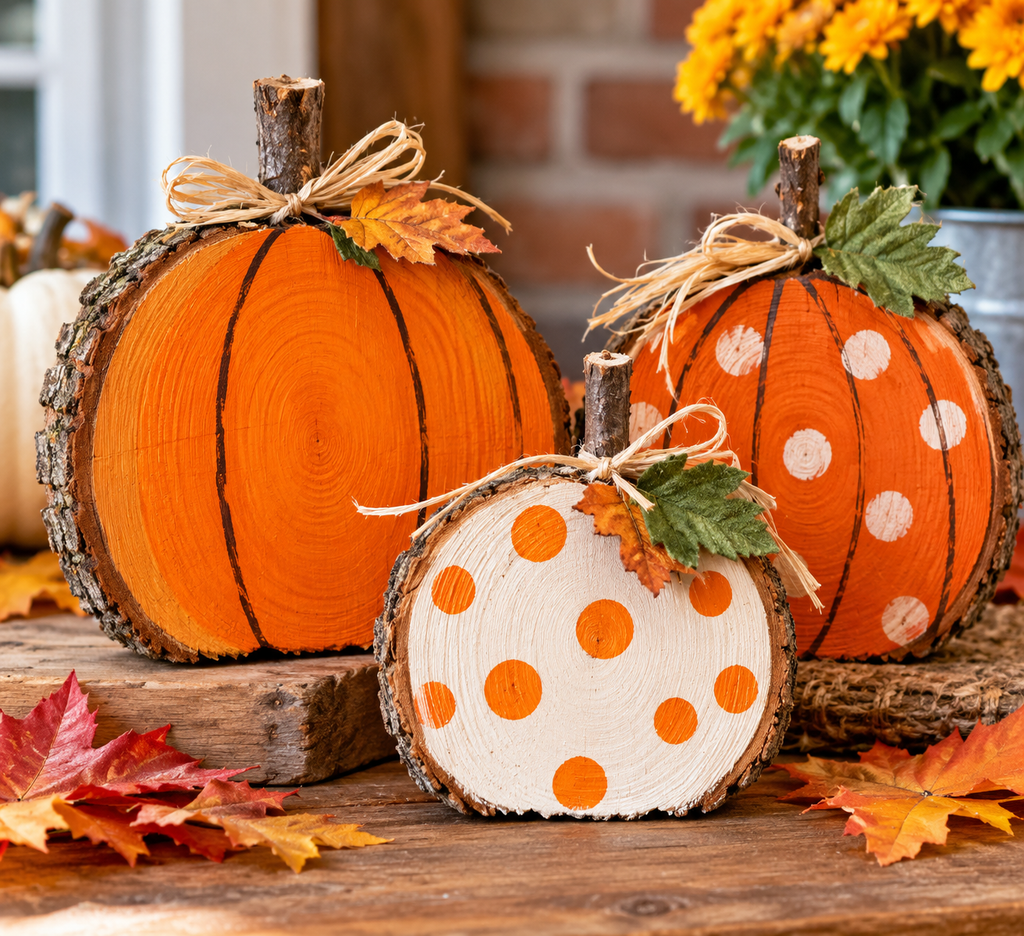
This is the classic Dollar Tree fall wood craft, and it works well because the pumpkin shape is forgiving. Unfinished wooden pumpkins come in different sizes, and a child can’t really paint one wrong.
You’ll need: unfinished wooden pumpkins (or pumpkin cutouts), acrylic paint in orange, white, yellow, and green or brown, foam brushes, a small paintbrush for details, and optional twine and a twig for a stem.
How to do it: Sand and wipe the wood. Let your child paint the whole pumpkin one color, orange being the obvious choice, though white, deep red, and even navy look striking. Add a second coat after the first dries. Once dry, they can paint vertical lines for ribbing, faces, or patterns with dots and stripes. A twig glued into a small drilled hole or onto the top makes a stem, but for kids, painting the stem green or brown is enough.
Worth knowing: If you plan to leave the pumpkins outside, unsealed acrylic paint on raw wood will fade and peel when it gets damp. A spray or brush-on sealer labeled for exterior use helps, but sealers are for adult use only, in a ventilated space, with the label followed. For indoor décor, a sealer is optional.
2. Wood Slice Fall Trees
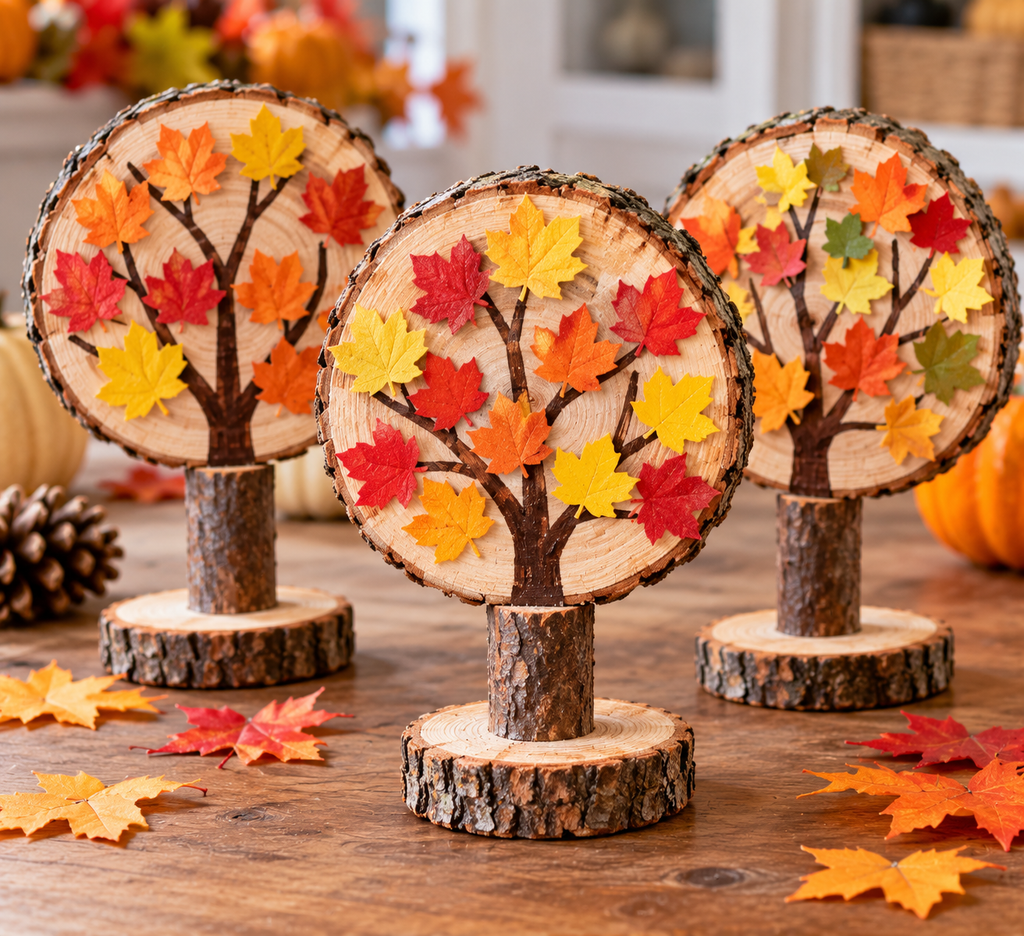
A round wood slice becomes the background, and the tree is built on top. This craft turns raw wood into a tiny framed scene.
You’ll need: wood slices or wooden rounds, brown paint or a brown marker, a small bottle of paint in red, orange, and yellow, cotton swabs, and optional twine for hanging.
How to do it: Paint or draw a simple trunk with a few branches. For the leaves, dip a cotton swab (or a fingertip) in paint and dot the branch tips. Layering reds, oranges, and yellows makes the canopy feel full. Younger children may prefer to press fingertips directly onto the wood.
Worth knowing: Wood rounds with a lot of bark or rough texture can make fine dots hard to place. Pick the smoothest slices for younger painters. If you want to hang it, an adult can add a loop of twine with hot glue on the back.
3. Handprint Tree on Canvas
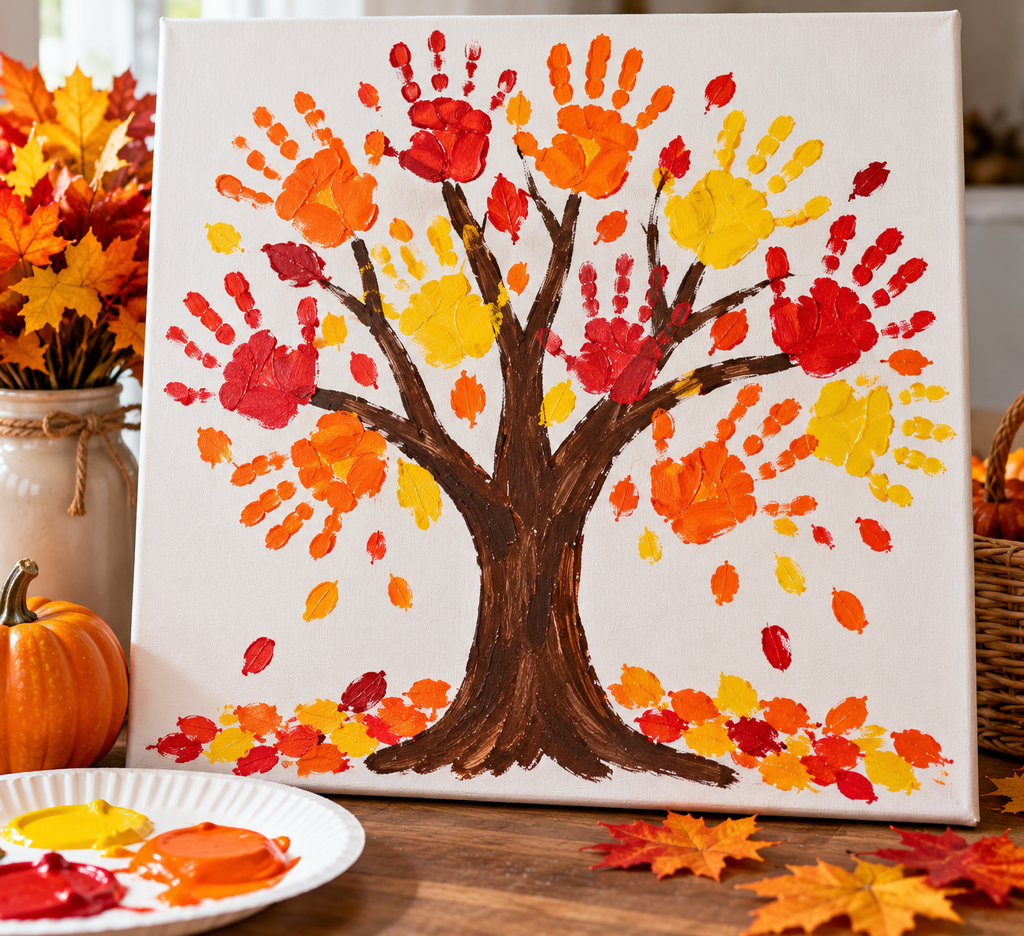
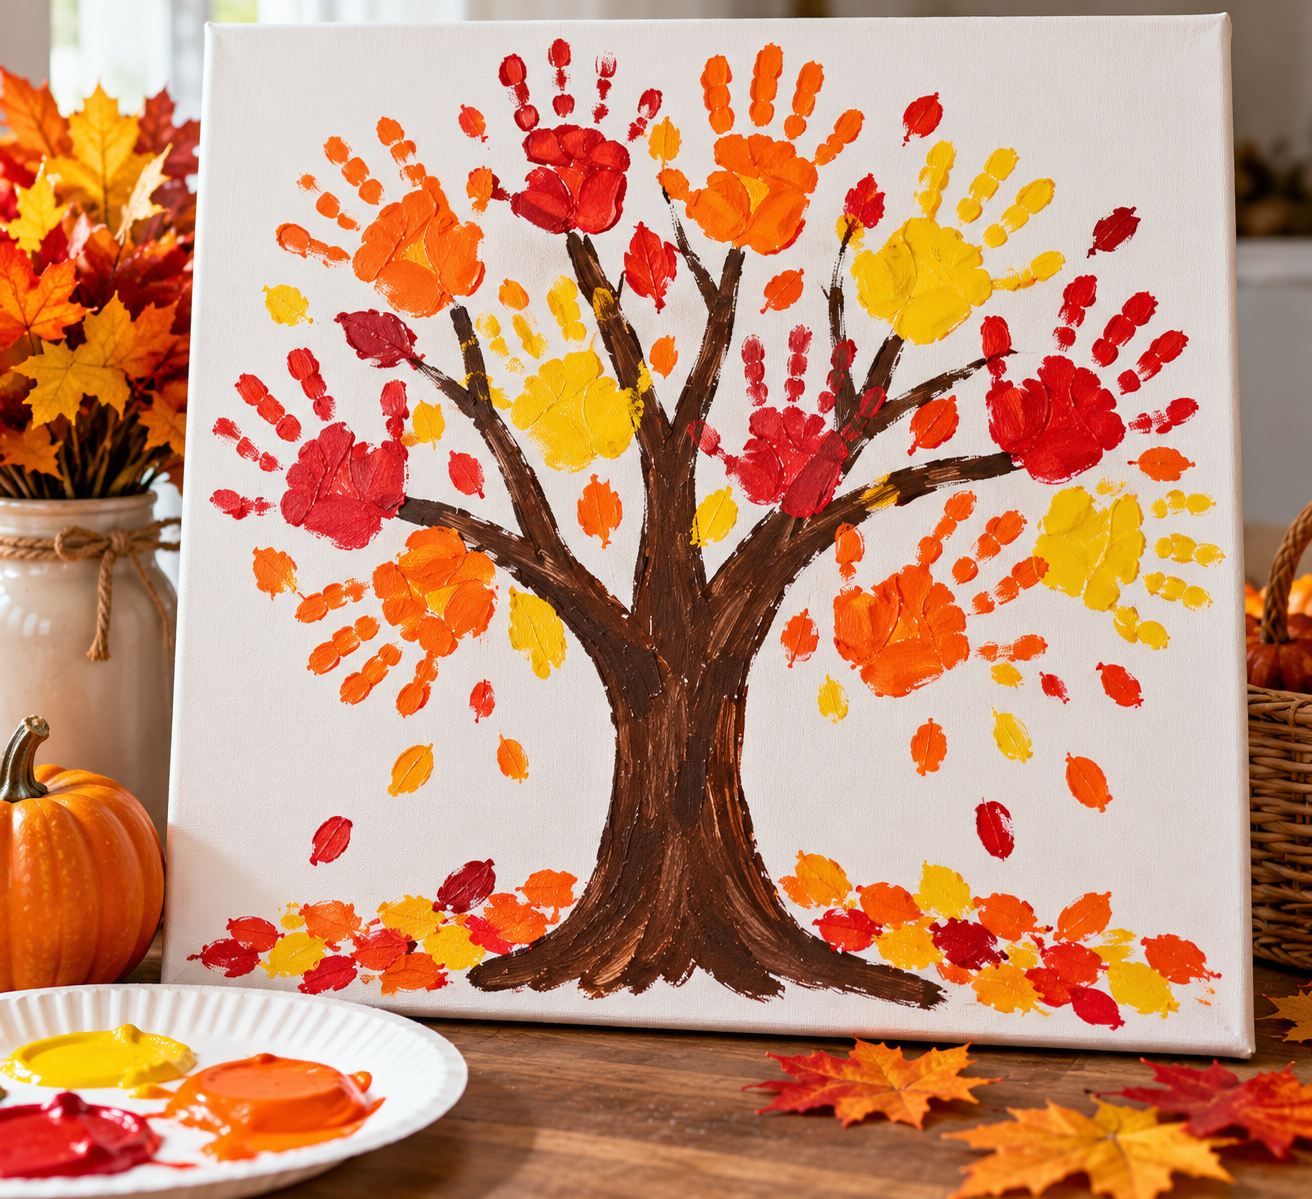
This one is more memory than craft, which is why it endures. A child’s forearm becomes the trunk, and their handprint becomes the leaf canopy.
You’ll need: a mini canvas or heavy paper, brown paint, red, orange, and yellow paint, a plate for each color, wipes, and a pen for the date.
How to do it: Paint the child’s forearm and palm brown (a foam brush gives even coverage), then press down with fingers spread, trunk pointing upward. Wash and dry. For the leaves, either stamp fingertips in the fall colors around the top of the trunk, or use the fingerprint approach with a different color per finger.
Worth knowing: Keep wipes and a warm, damp towel nearby. Paint on skin dries and gets uncomfortable quickly, and a toddler’s hand won’t stay still for long. If your child dislikes the feel of paint, use a paintbrush and let them paint the trunk on the paper directly.
4. Leaf Rubbing Tree
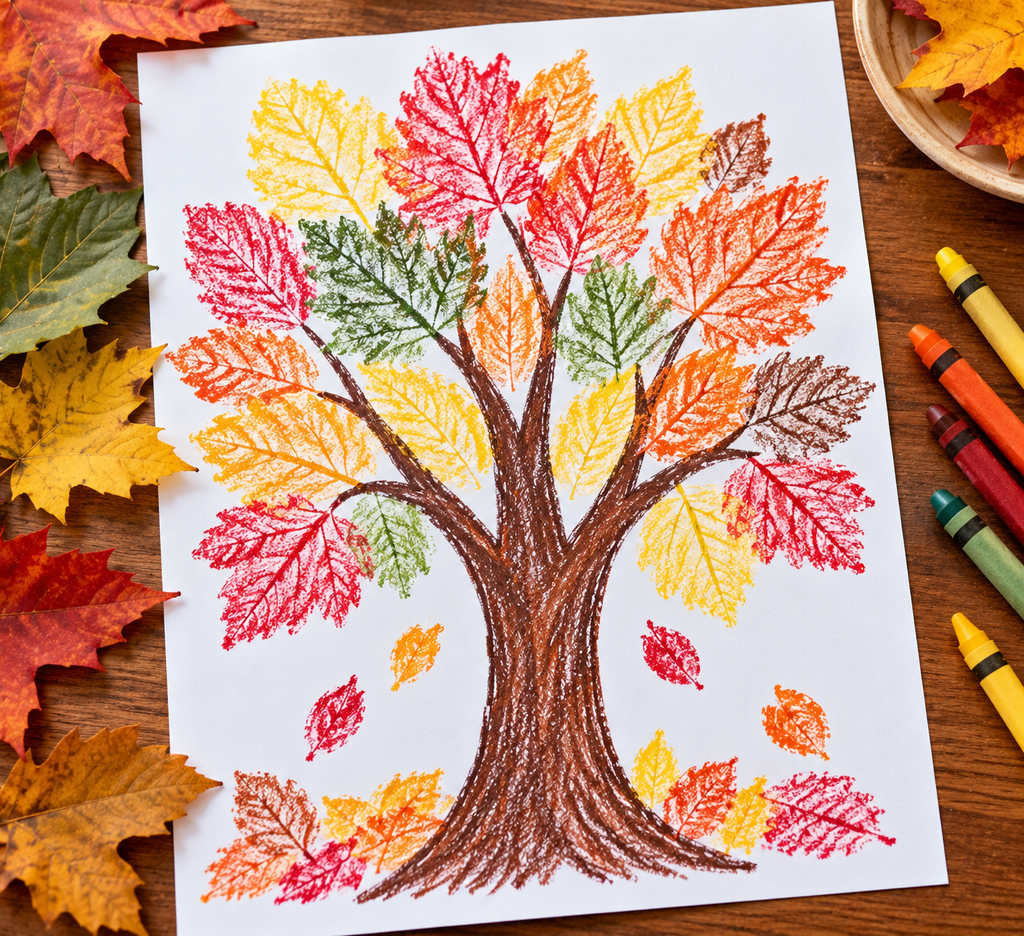
This is among the cheapest crafts here. The materials are leaves, paper, and crayons.
You’ll need: several fresh leaves with prominent veins, plain paper, peeled crayons in fall colors, and construction paper.
How to do it: Place a leaf vein-side up under a sheet of paper and rub the side of a peeled crayon across it until the shape appears. Do several in different colors. Cut out the leaf rubbings, then draw a trunk with branches on a sheet of construction paper. Glue the leaves onto the branches or let them fall at the base of the tree.
Worth knowing: Leaves with strong, raised veins (maple, oak, and sweetgum are common examples) tend to give the clearest rubbing. Waxy or smooth leaves produce faint results. Use a light touch for the first pass. Pressing too hard rips the paper.
5. Craft Stick Tree Frame
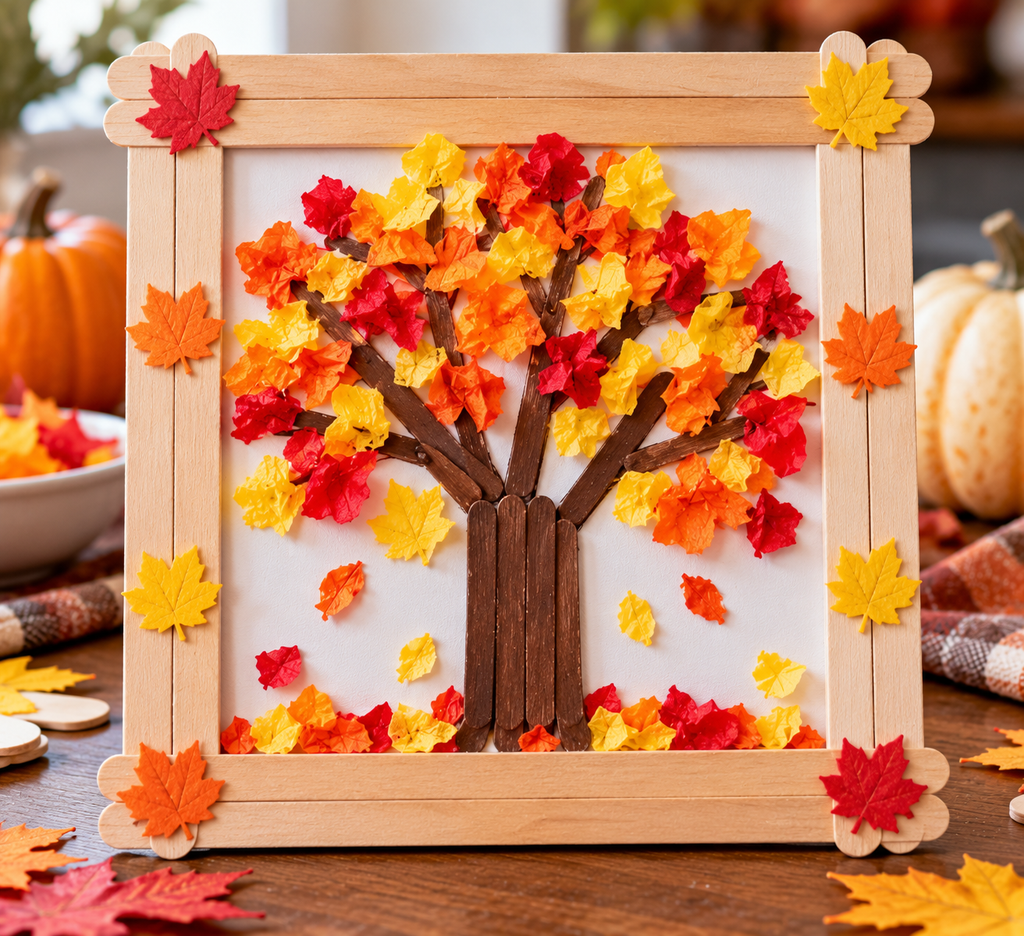
This turns a pile of popsicle sticks into a frame and a tree in one project.
You’ll need: craft sticks, school glue or tacky glue, paint, a sheet of cardstock, a photo (optional), and small foam or paper leaves.
How to do it: Glue four craft sticks into a square frame, overlapping the corners. Let it dry. Paint it brown or a fall color. Then glue a small photo behind it, or cut a trunk and branches from brown paper and glue them inside the frame, finishing with paper leaves. For a taller tree, glue sticks in a vertical row with a few shorter sticks as branches.
Worth knowing: Glue is the weak point. Craft sticks slide while the glue sets, so let a younger child build the frame on a flat surface and leave it untouched for an hour or two. A few clothespins make useful clamps on the corners.
6. Yarn-Wrapped Branch Tree
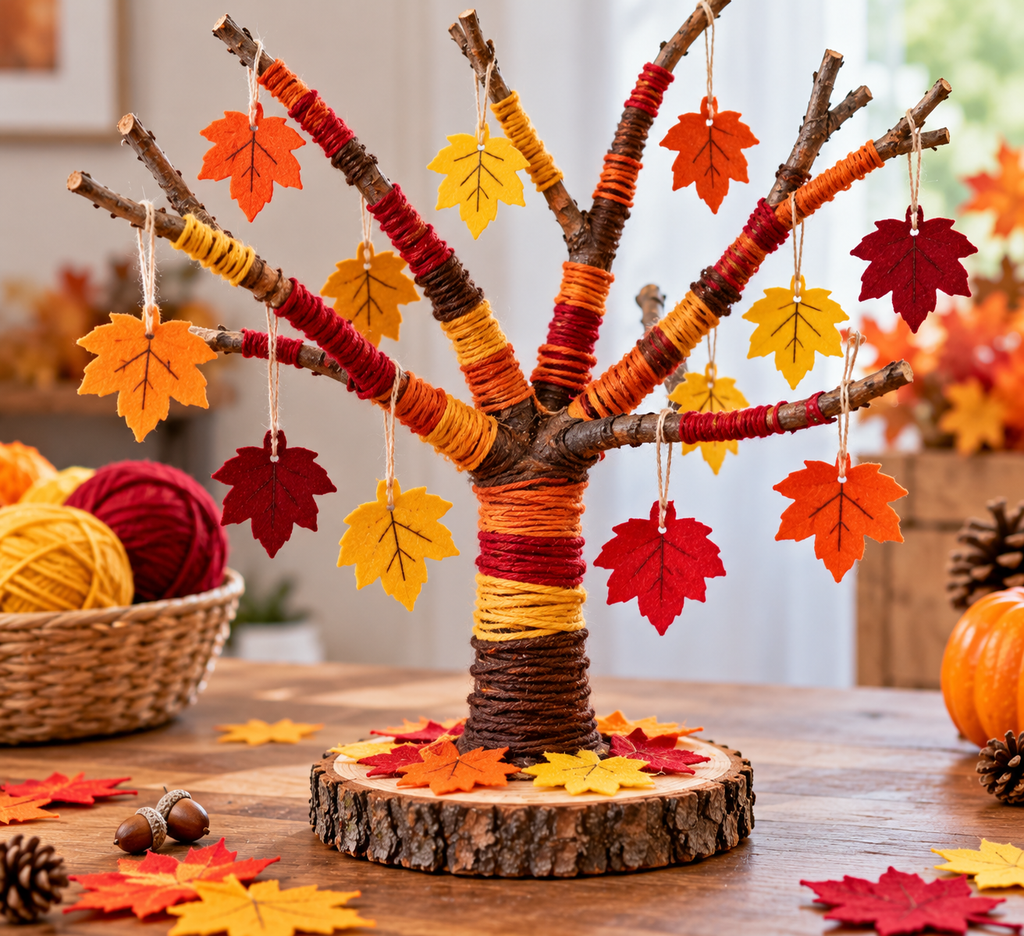
A forked twig is a natural tree shape. Wrapping it in yarn makes an easy, colorful piece for a child’s room or a shelf.
You’ll need: a sturdy forked twig, yarn in multiple fall colors, scissors, and glue.
How to do it: Start at the base with a dab of glue and wrap the yarn tightly around the trunk, then up each branch. Change colors for stripes. When the yarn reaches a branch tip, tie it off and tuck the end under. For extra detail, glue small paper leaves or pom-poms to the tips.
Worth knowing: This one takes a longer attention span, so it’s better for children about six and up. It also works well as a group craft, with each child wrapping one branch. Make sure the twig is dry and free of loose bark that could splinter.
7. Tissue Paper Window Tree
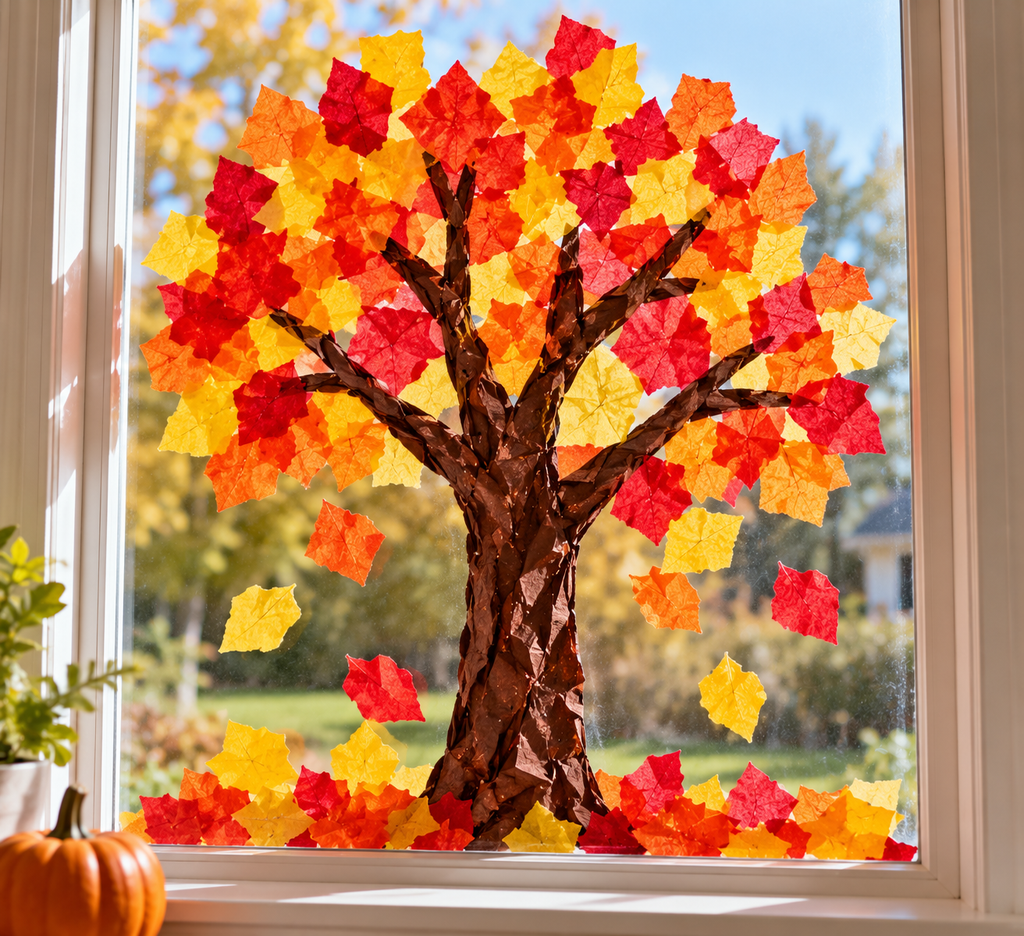
The tree glows when sunlight passes through it, which makes it a fun one to display.
You’ll need: clear self-adhesive contact paper, tissue paper in fall colors, scissors, and a black marker or brown construction paper.
How to do it: Cut a sheet of contact paper and peel the backing, with the sticky side up and taped to the table at the corners. Press a trunk cut from brown paper onto it. Tear tissue paper into small pieces and press them onto the sticky surface as leaves. Cover with a second sheet of contact paper, smooth out air bubbles, trim the edges, and tape it to a window.
Worth knowing: Tearing the tissue paper is easier and more forgiving than cutting. Younger children enjoy it. If contact paper is hard to find, you can use clear packing tape or laminating pouches as an alternative.
8. Pressed Leaf Suncatchers
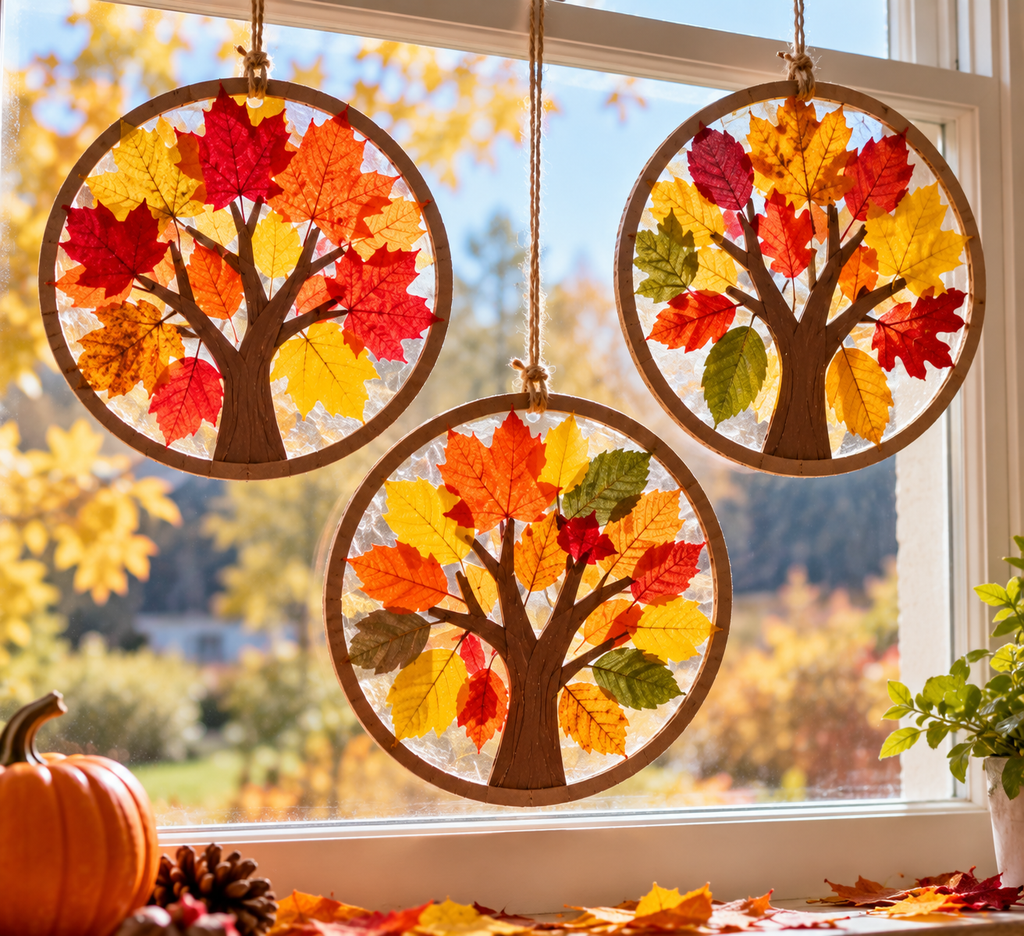
This craft uses real leaves in a see-through frame. It’s the more patient version of the tissue paper tree.
You’ll need: pressed leaves, clear contact paper or laminating pouches, scissors, hole punch, and string or ribbon.
How to do it: Arrange the dried leaves on a sheet of sticky contact paper, cover with a second sheet, smooth out the air, and trim around the shapes, leaving a border. Punch a hole, thread the ribbon, and hang in a window.
Worth knowing: Dry leaves are essential. A leaf still holding moisture can discolor or mold inside the plastic. This is why the pressing step in the earlier section matters. Expect the colors to fade over time, since sunlight will gradually dull them.
9. Acorn Cap Craft Creatures
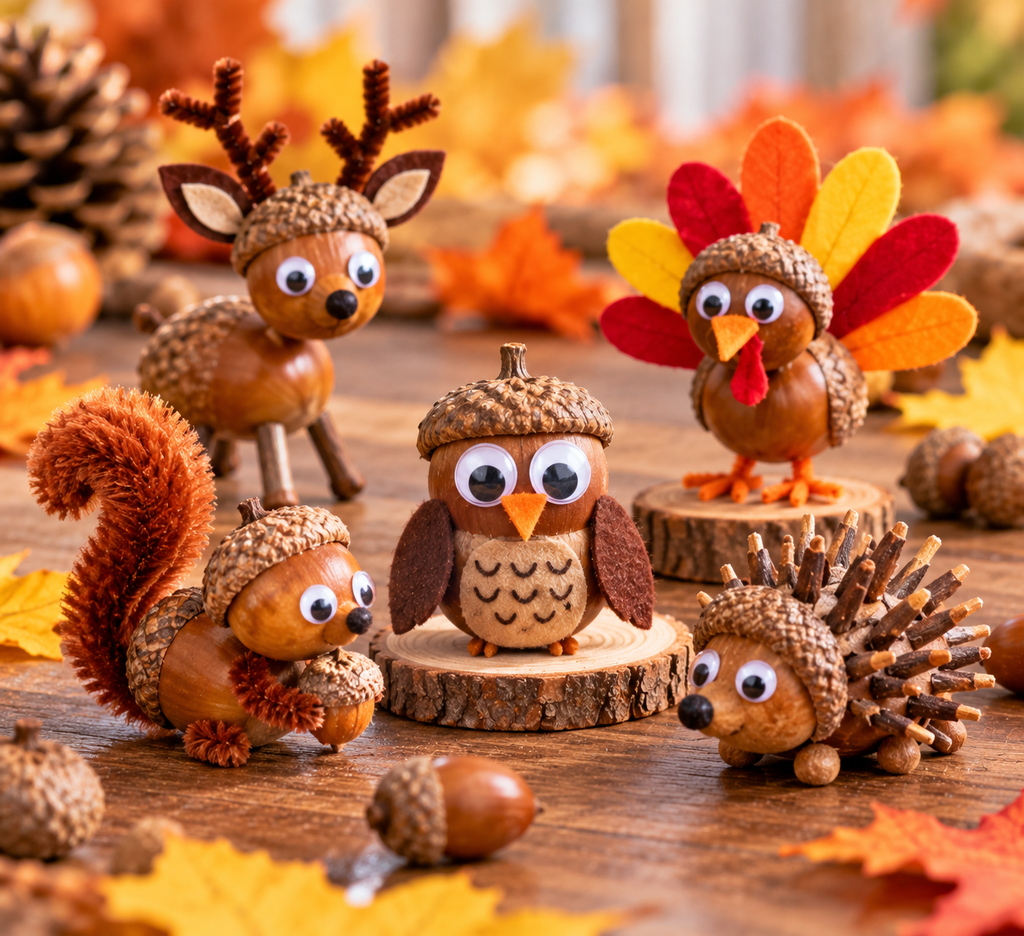
Acorns show up everywhere in fall, and the caps make good hats, wigs, and noses.
You’ll need: acorns and caps, treated as described earlier, acrylic paint, small wiggle eyes (for children old enough to handle small parts), felt, and tacky glue or hot glue applied by an adult.
How to do it: Paint the acorn body, or leave it natural. Glue the cap on as a hat. Add eyes and a tiny felt scarf. A triangle of felt makes a gnome-style hat if you prefer. A fine-tip marker works for faces.
Worth knowing: These are small items, so they aren’t for toddlers. Check the treated acorns again before crafting and discard any with tiny exit holes, which suggest a larva has already left. Keep finished pieces away from pets.
10. Pinecone Fall Trees
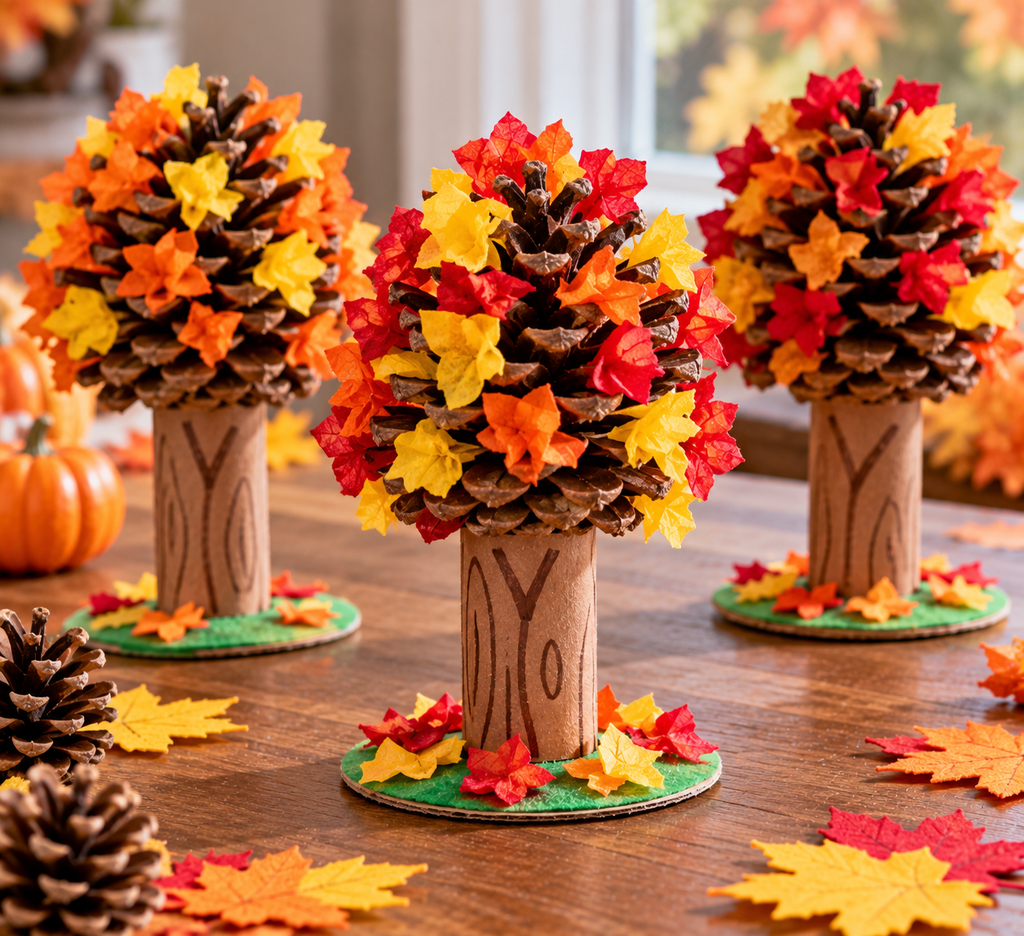
Pinecones look like miniature evergreens, and a dab of paint turns them into a fall scene.
You’ll need: small pinecones, cleaned and dried, acrylic paint, a paper plate for a palette, a hot glue gun (adult use), small wood slices or cardboard rounds for bases, and optional pom-poms.
How to do it: Glue the pinecone upright on a base. Dab the tips of the scales with orange, red, and yellow paint, using a sponge brush or a cotton swab. A light touch leaves the brown showing through and gives a realistic, frosted look. Add a small glued pom-pom at the top as decoration if wanted.
Worth knowing: Pinecones that are closed up and tight can be hard to paint. Choose open, dry cones. If a cone has sticky sap, skip it or have an adult handle it, since sap is tough to wash off hands and clothing.
11. Wood Pumpkin Garland
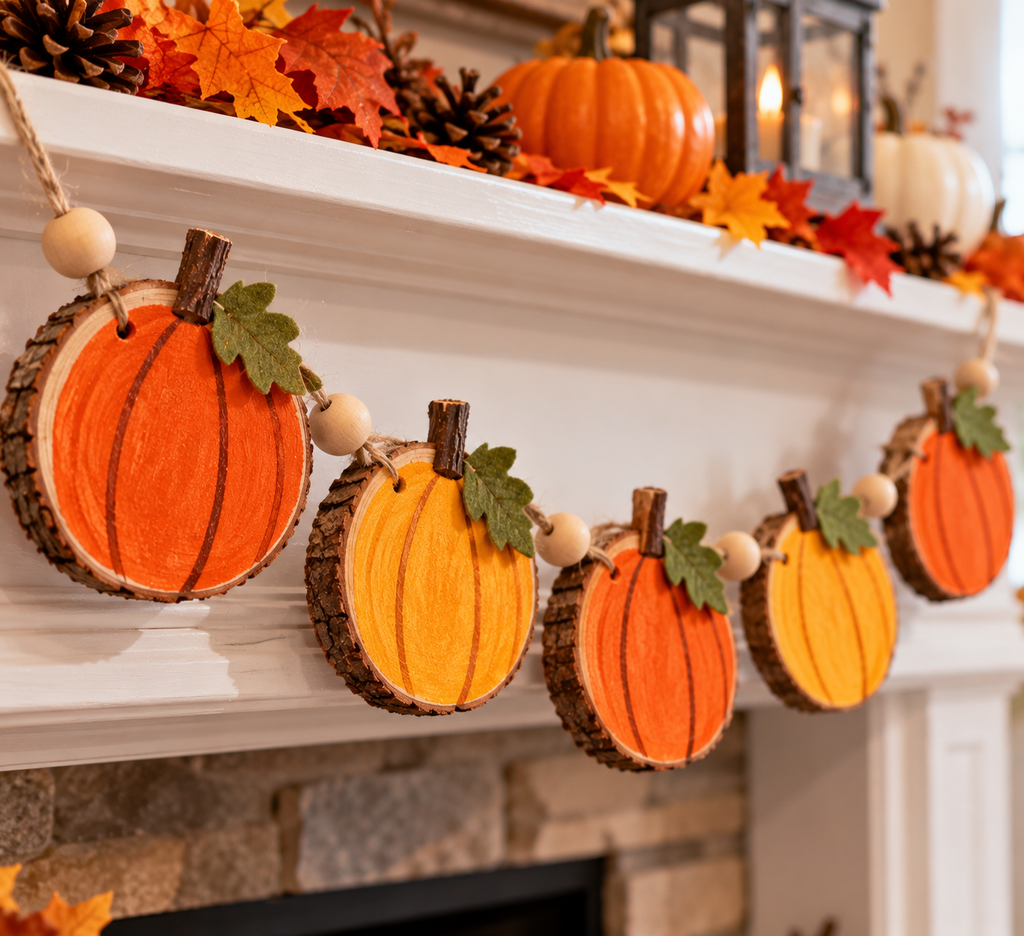
This is a good Dollar Tree wood craft because the cutouts do most of the work, and the result is a decoration that looks finished.
You’ll need: unfinished wooden pumpkin or leaf cutouts with holes (or an adult to drill small holes), acrylic paint, twine, and optional small wooden beads.
How to do it: Paint each cutout a different fall color, using more than one coat. When fully dry, thread the twine through the holes, spacing the pieces evenly along the length. Tie loops at each end for hanging.
Worth knowing: If the cutouts have no holes, an adult can drill a small hole with a hand drill, though only a careful adult should do this. Alternatively, glue the pieces onto the twine with hot glue, which is simpler. Hang the garland on a mantel, a window, or a bookshelf.
12. Embroidery Hoop Leaf Wreath
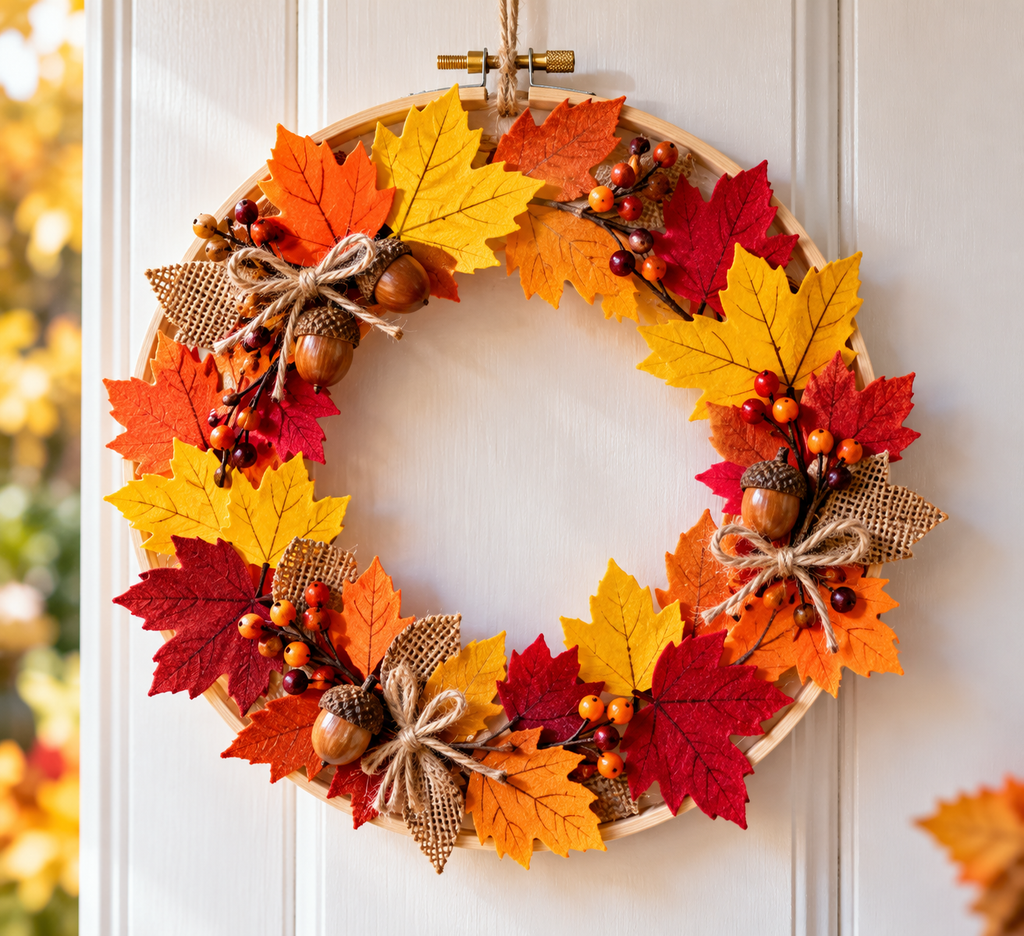
An embroidery hoop gives a clean frame, and the leaves fill it in. It’s one of the more polished-looking projects.
You’ll need: a wooden embroidery hoop (check availability), felt or foam leaves in fall colors, glue, and ribbon or twine for hanging.
How to do it: Separate the hoop and use the inner ring. Lay it flat and glue leaves around the circle, overlapping slightly, until the hoop is mostly covered. Add a bow. For an alternative, stretch fabric across the hoop and glue a tree made of felt in the center.
Worth knowing: Cutting dozens of felt leaves is tedious for small hands. Pre-cut some or use foam leaf shapes from the craft aisle. This one suits older kids who can arrange and layer.
13. 3D Paper Bag Tree
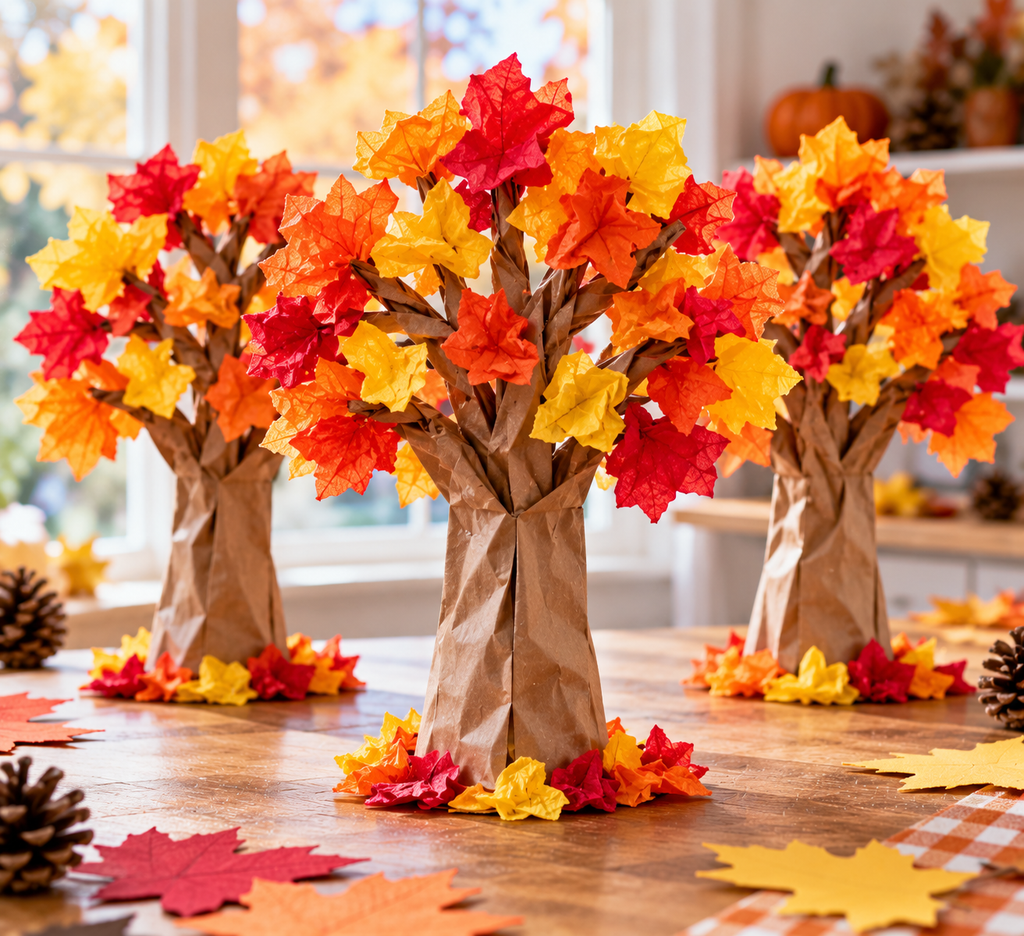
This old classroom favorite is still one of the best kid crafts, because it stands on its own and takes almost no money.
You’ll need: a brown paper lunch bag, scissors (adult help for younger kids), tape or glue, paper or tissue in fall colors, and a pencil.
How to do it: Cut the bag from the open end down about two-thirds of the way, in several strips. Twist the uncut bottom section into a trunk. Pull each of the cut strips outward and twist them into branches. Glue paper or tissue leaves on the branches, or stuff crumpled tissue paper into the trunk first so it stands up.
Worth knowing: The trunk needs stuffing to stay upright. Crumpled newspaper works well. Avoid overloading the branches with heavy glue, which makes them droop.
Keeping and Displaying What They Make
Most of these crafts don’t hold up in damp conditions. Paper, tissue, and felt will warp, and unsealed painted wood will peel. Display them indoors, away from direct moisture and heat sources, and avoid placing them close to candles or heaters because paper and dried leaves burn easily. Natural-material crafts such as pressed leaves and acorns are best kept for one season. Photograph the keepers, especially handprint pieces, since those are the ones people want to look back on.
FAQ
What kind of paint works best on Dollar Tree wood crafts?
Acrylic craft paint works well on raw wood. Plan on two coats, and sand any rough spots before you begin. For pieces displayed outdoors, an exterior-grade sealer applied by an adult helps protect against moisture.
Can kids use real leaves, or will they crumble?
Fresh leaves are fine for rubbings, but for anything that sits for a while, press and dry them first. Fully dried leaves handle gluing and laminating better and are less likely to mold.
How do I stop the glue from failing on wood?
Use tacky craft glue or hot glue rather than a glue stick, and hold or prop the pieces until they set. For heavier items, plan to let the piece rest overnight.
Key Takeaways
Start with the project that matches your child’s age and patience, and split anything that needs paint and assembly into two sessions. Keep small parts away from toddlers, handle hot glue and sealers yourself, and dry or treat natural materials before bringing them inside. The wood pumpkins, wood slice trees, and garland are the most reliable choices if you’re shopping the Dollar Tree wood aisle, while the leaf rubbing and paper bag tree need little more than supplies you already have.

About Syprose Kiche
Syprose Kiche is the creator and writer behind My Besuited Home, a practical home and garden website covering DIY projects, gardening, lawn care, landscaping, home improvement, and outdoor living. She focuses on turning everyday homeowner questions into clear, practical guides backed by careful research and useful real-world considerations.