
Dusk settles, painting the sky with vibrant hues of orange and purple. As the day fades, the magic of outdoor living takes a different turn. Strategic lighting can transform your patio, walkways, or garden into an enchanting evening escape. But who says you need to break the bank or harm the environment to achieve this?
Solar lights have become a game-changer in outdoor illumination. Not only are they cost-effective, but they also harness the power of the sun, making them an eco-friendly choice. If you’re looking for creative ways to illuminate your outdoor space with a touch of DIY magic, then this blog is for you! We’ve compiled 11 fantastic solar light ideas that are easy to assemble, budget-friendly, and perfect for unleashing your inner designer.
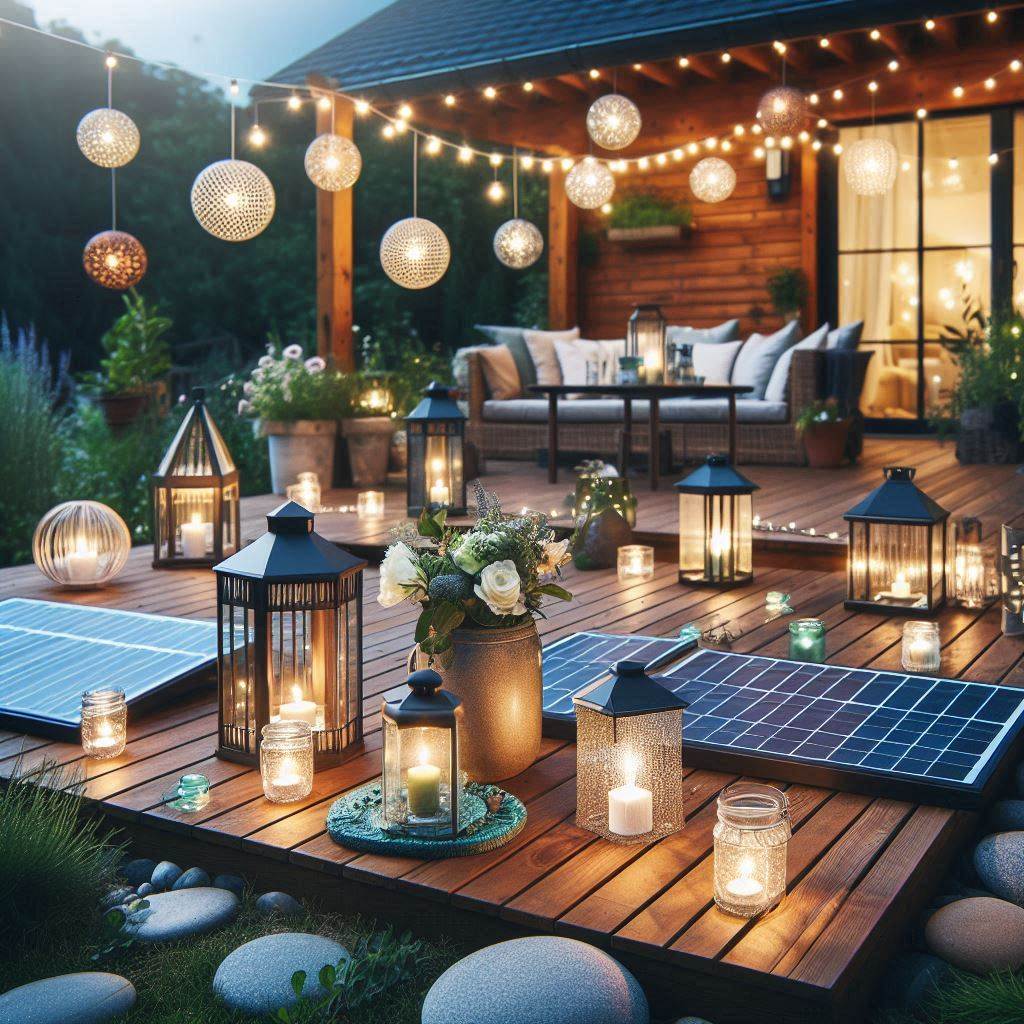
1. Mason Jar Solar Lights: Rustic Charm Meets Twinkling Light
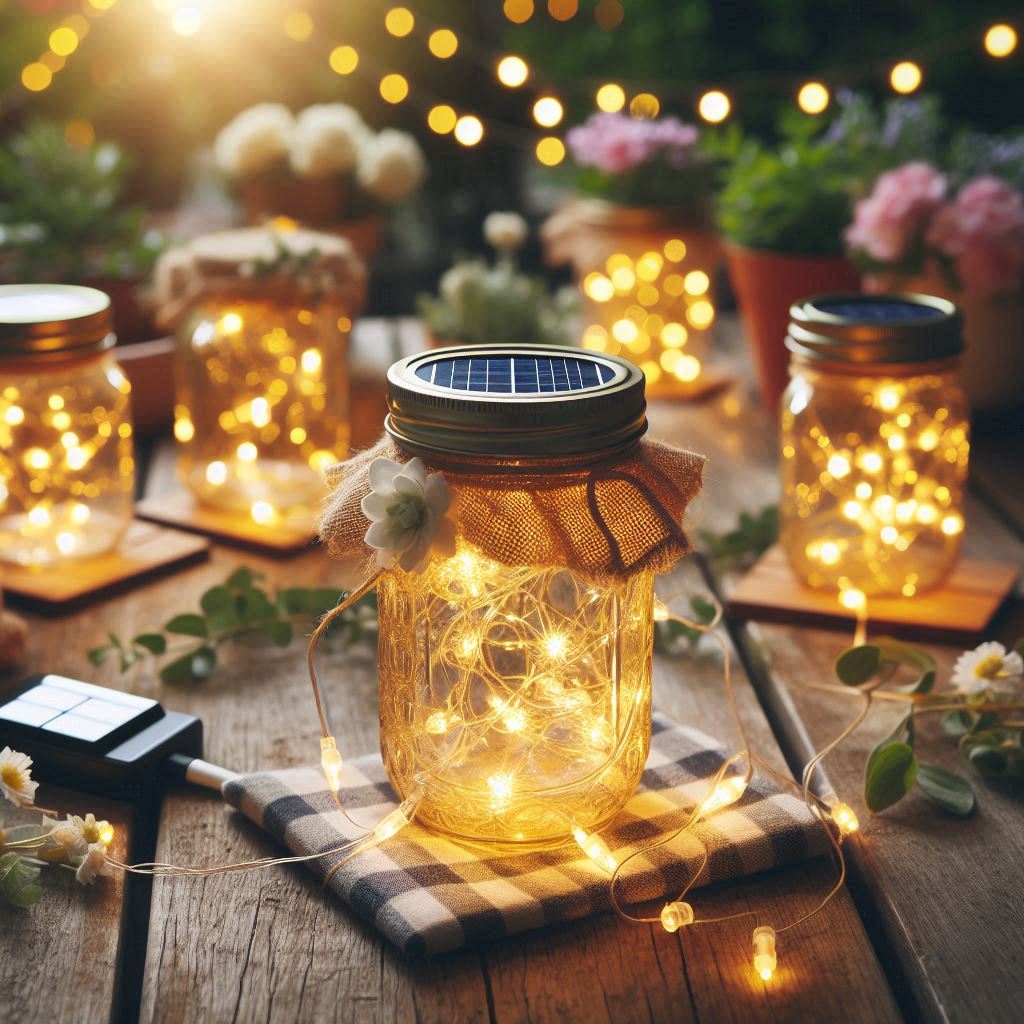
These beauties are a classic for a reason. Mason jars offer endless possibilities for customization, making them a versatile choice for any outdoor space.
What You’ll Need:
- Mason jars (various sizes can add visual interest)
- Solar fairy lights (choose warm white or colored lights for a specific ambiance)
- Shepherd’s hooks (optional, for hanging the jars)
- Spray paint (optional, to personalize the jars)
Bringing Your Vision to Life:
- Clean and prep your mason jars. Remove any labels or stickers and wash the jars thoroughly. Let them dry completely before proceeding.
- Light up your creativity (optional). This is where you can personalize your project! If you want a classic look, leave the jars as is. For a pop of color, consider spray painting them in hues that complement your outdoor decor. Metallic paints can add a touch of glamor, while matte finishes create a more rustic feel. Let the paint dry completely before moving on.
- String your lights! Carefully push the solar panel of the fairy lights through the opening of the mason jar. Once inside, gently unfurl the string lights, making sure they cascade down the inside of the jar. You can adjust the arrangement for a fuller or more sparse look.
- Seal the deal. Screw the lid back onto the jar tightly, ensuring the solar panel remains outside the jar for optimal sun exposure.
Adding a Touch of Whimsy:
- For a hanging display, attach shepherd’s hooks to the ground around your patio or walkway and hang the mason jars using sturdy twine or wire.
- Group jars of different sizes for a layered effect.
- Feeling artistic? Use stencils or paint pens to create designs on the outside of the jars.
Benefits:
Mason jar solar lights are incredibly easy to make and add a touch of rustic charm to your outdoor space. They’re perfect for walkways, patios, or even hanging from tree branches. The warm glow of the fairy lights creates a magical ambiance, perfect for relaxing evenings under the stars.
2. Solar String Lights: A Twinkling Tapestry for Your Outdoor Haven
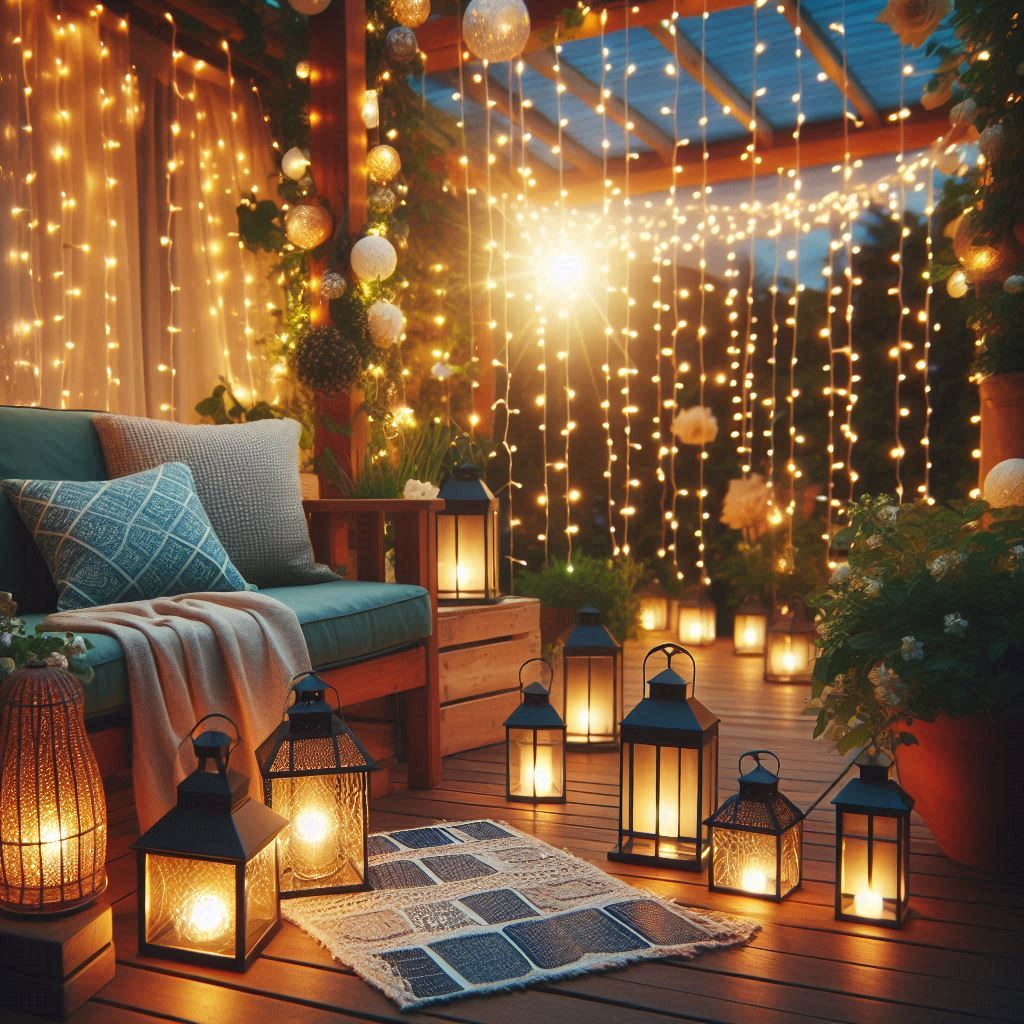
String lights are a timeless way to add a touch of magic to any space. Take it a step further with solar-powered string lights, and enjoy the ambiance without worrying about electrical cords or high energy bills.
What You’ll Need:
- Solar string lights (choose the desired length and light color)
- Hooks or nails (depending on your hanging surface)
Unleashing Your Inner Lighting Designer:
- Choose your canvas. Decide where you want to hang your solar string lights. Popular options include fences, pergolas, trees, or even the eaves of your house.
- Strategize your placement. Unfurl the string lights and plan the hanging points. Ensure the solar panel of the lights is positioned in a place that receives ample sunlight throughout the day.
- Light up the night! Using hooks or nails, carefully secure the string lights to your chosen surface.
Sparking Creativity:
- Curtain effect: Hang the string lights vertically along a fence or wall, creating a cascading curtain of light.
- Draped magic: Drape the lights loosely over branches of trees or shrubs for a whimsical, fairy-tale vibe.
- Geometric play: String the lights in a geometric pattern across a patio or pergola for a modern touch.
- Intertwined beauty: Weave the string lights through existing outdoor furniture or plants for a more integrated look.
Benefits:
Solar string lights are incredibly versatile and can be used to create a wide variety of lighting effects. They’re perfect for adding a touch of ambiance to any outdoor space, from intimate patios to sprawling backyards. Plus, the ease of installation makes them a great choice for DIY enthusiasts of all skill levels.
3. Solar Path Lights: Illuminating the Way for Safety and Beauty
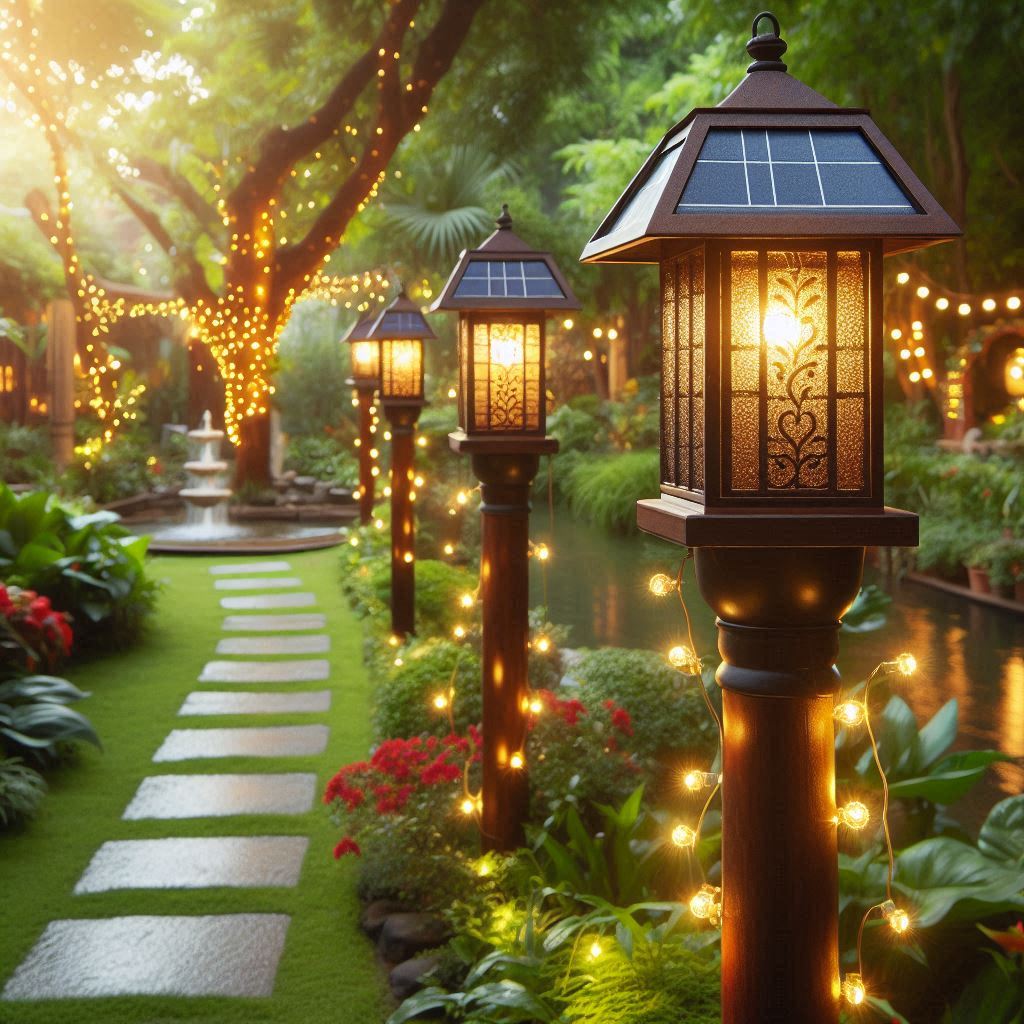
Solar path lights are a practical and stylish solution for illuminating walkways, driveways, and flower beds. They provide essential nighttime visibility while adding a touch of elegance to your outdoor space.
What You’ll Need:
- Solar path lights (choose the style and height that best suits your needs)
- Stakes (usually included with the lights)
Guiding Your Steps:
- Plan your path. Decide where you want to place your solar path lights. Ideally, space them evenly along your walkway, driveway, or flower bed edges. Consider the distance between lights and ensure they provide adequate coverage without creating too much glare.
- Stake it out! Using the provided stakes, carefully push them into the ground at the designated locations for each solar path light. Ensure the solar panels are facing upwards for optimal sun exposure.
Enhancing Your Outdoor Oasis:
- Mix and match styles. Don’t be afraid to combine different styles of solar path lights for a more dynamic look.
- Solar bollards for driveways. For driveways, consider using taller solar bollards instead of path lights. They provide better visibility for vehicles and pedestrians.
- Create borders. Line flower beds with solar path lights to create a beautiful and defined border.
Benefits:
Solar path lights offer a two-fold benefit: safety and aesthetics. They illuminate pathways, preventing nighttime stumbles, and add a touch of elegance to your outdoor space. Plus, the ease of installation makes them a perfect DIY project for anyone.
4. Solar Deck Lights: Extending the Functionality of Your Outdoor Living Space
Decks are a popular spot for relaxing and entertaining during the warmer months. However, as daylight fades, the enjoyment factor can diminish. Solar deck lights are a fantastic way to extend the functionality of your deck and create a safe and inviting atmosphere for evening gatherings.
What You’ll Need:
- Solar deck lights (choose the style that complements your deck design)
- Screws (size may vary depending on your deck material)
Lighting Up Your Deck Life:
- Choose your mounting location. Decide where you want to place your solar deck lights. Popular options include deck railings, stairs, or along the edges of the deck floor.
- Prepping for installation. If your deck is made of wood, pre-drill holes for the screws at the chosen locations. This will prevent the wood from splitting.
- Secure the lights. Using the appropriate screws, securely fasten the solar deck lights to the chosen location. Ensure the solar panels are facing upwards for optimal sun exposure.
Adding a Personal Touch:
- Up-lighting for drama. For a dramatic effect, consider mounting solar deck lights on the underside of deck railings, casting light upwards.
- Solar step lights for safety. Install solar step lights along the edges of your deck stairs for enhanced visibility and safety during nighttime use.
- Color options. Opt for solar deck lights with color-changing options to create a fun and festive ambiance.
Benefits:
Solar deck lights provide essential nighttime illumination for your deck, promoting safety and extending its usability. They also add a decorative touch, creating a warm and inviting atmosphere for outdoor gatherings.
5. Solar-Powered Tiki Torches: A Tropical Escape in Your Own Backyard

Tiki torches instantly add a touch of tropical flair to any outdoor space. But traditional torches require fuel and can be a fire hazard. Solar-powered tiki torches offer a safe and eco-friendly alternative, allowing you to create a tropical getaway in your own backyard.
What You’ll Need:
- Solar tiki torches
- Sand or gravel (for weighting the base)
Setting the Tropical Mood:
- Filling the base. Open the base of the solar tiki torch and fill it with sand or gravel. This will add weight and stability to the torch, especially on windy days.
- Choosing your location. Place your solar tiki torches strategically around your patio, fire pit area, or pool deck. Consider spacing them evenly for a cohesive look.
Taking it Up a Notch:
- Grouping for impact. Group several solar tiki torches together to create a more dramatic effect.
- Citronella fuel for added benefit. Some solar tiki torches have the option to add citronella fuel to the base. This can help deter mosquitos while creating a pleasant scent.
- DIY Tiki torch covers. Feeling crafty? Create your own decorative covers for the solar tiki torches using fabric or paint.
Benefits:
Solar-powered tiki torches add a touch of the tropics to your outdoor space, creating a relaxing and inviting atmosphere. They’re safe, eco-friendly, and require minimal maintenance.
6. Solar Mailbox Light: Enhancing Visibility and Adding a Touch of Security
Your mailbox is often the first point of contact for visitors to your home. A solar mailbox light not only improves nighttime visibility but can also add a touch of security by deterring potential nighttime package thieves.
What You’ll Need:
- Solar mailbox light (choose a style that complements your mailbox)
- Mounting hardware (usually included with the light)
Shining a Light on Your Mailbox
- Read the instructions. Every solar mailbox light might have slightly different installation requirements. Carefully read the manufacturer’s instructions before proceeding.
- Prepare the mounting surface. Clean the area on your mailbox where the light will be attached. This ensures a secure bond between the light and the mailbox surface.
- Mounting the light. Using the provided hardware, follow the instructions to securely attach the solar mailbox light to your mailbox. Ensure the solar panel faces upwards for optimal sun exposure.
Enhancing Curb Appeal:
- Matching mailbox style. Choose a solar mailbox light that complements the style and color of your mailbox for a cohesive look.
- Motion sensor lights for added security. Opt for a solar mailbox light with a motion sensor for an additional layer of security. The light will only activate when it detects movement, deterring potential nighttime intruders.
- Double-sided tape for non-permanent solutions. If you’re hesitant to drill holes in your mailbox, consider using strong double-sided tape to attach the solar light. However, remember this might not be as secure in harsh weather conditions.
Benefits:
Solar mailbox lights provide much-needed nighttime visibility for your mailbox, ensuring you can easily retrieve your mail even after dark. They also add a touch of security by deterring potential package theft and illuminating the area around your mailbox.
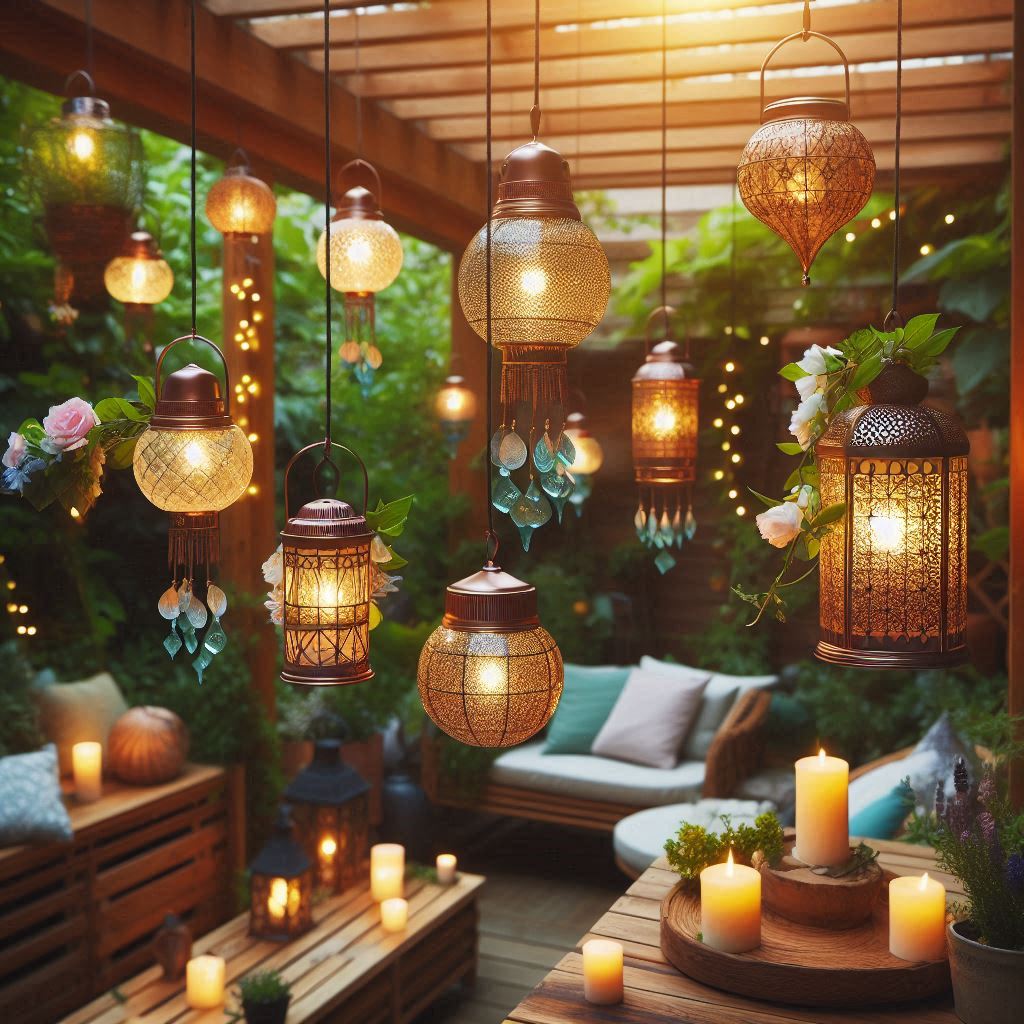
7. Solar Hanging Lanterns: A Touch of Whimsy for Your Outdoor Oasis
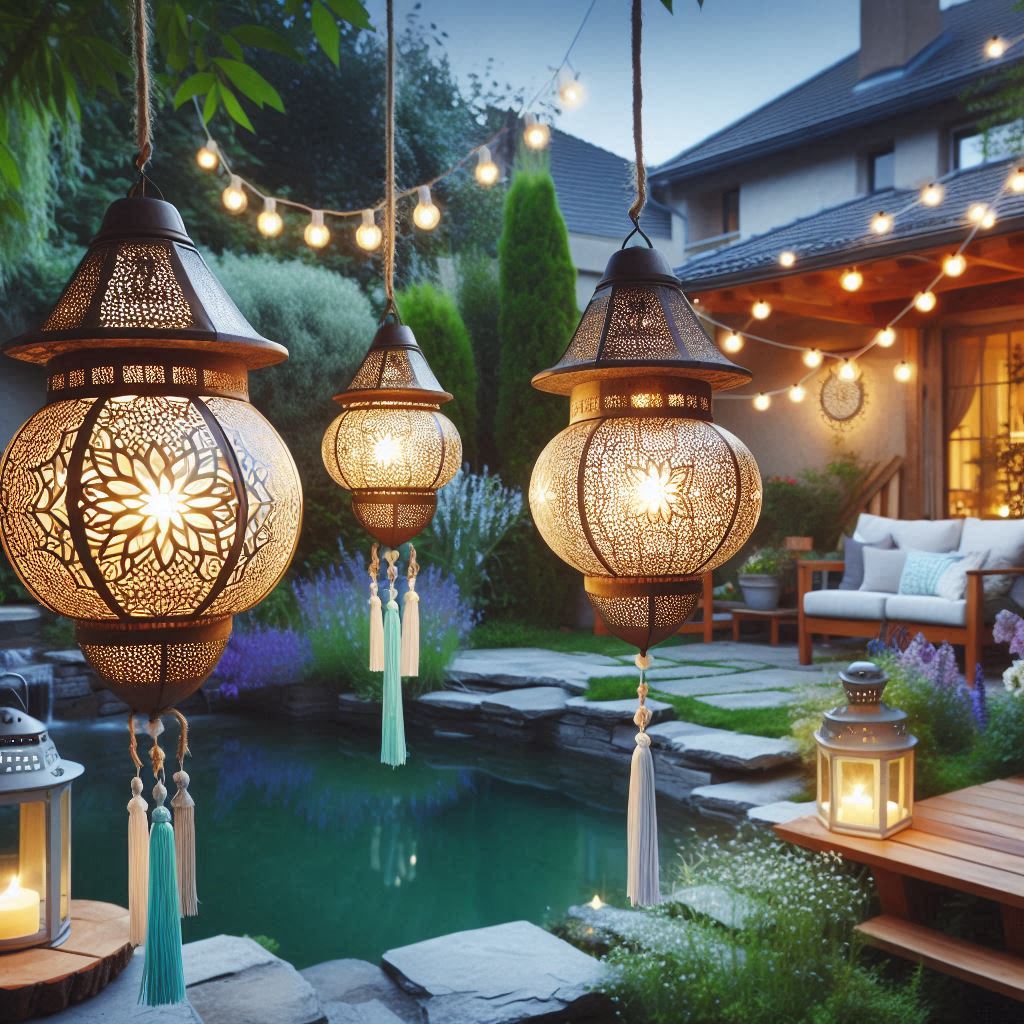
Solar hanging lanterns add a touch of charm and elegance to any outdoor space. They come in various styles and sizes, allowing you to personalize your space and create a magical ambiance.
What You’ll Need:
- Solar hanging lanterns (choose the style and size that suits your preference)
- Shepherd’s hooks (or hanging hooks)
Adding a Touch of Fairytale Magic
- Choosing your location. Decide where you want to hang your solar lanterns. Popular options include trees, porches, pergolas, or even shepherd’s hooks placed around your patio. Ensure the solar panels have access to ample sunlight for charging.
- Hanging with ease. If using shepherd’s hooks, simply push them into the ground at your chosen locations. For other hanging options, use sturdy hooks or nails to secure the lanterns.
Taking it a Step Further:
- Grouping for impact. Hang several solar lanterns together at varying heights to create a more dramatic effect.
- Mixing and matching styles. Don’t be afraid to combine different styles and sizes of solar lanterns for a more eclectic look.
- Adding a touch of color. Opt for solar lanterns with colored glass panels to add a pop of color to your outdoor space.
Benefits:
Solar hanging lanterns add a touch of whimsy and elegance to your outdoor space. They create a warm and inviting ambiance, perfect for relaxing evenings under the stars. Additionally, the variety of styles allows you to personalize your space and reflect your unique taste.
8. Solar Fairy Light Curtain: A Cascading Waterfall of Light
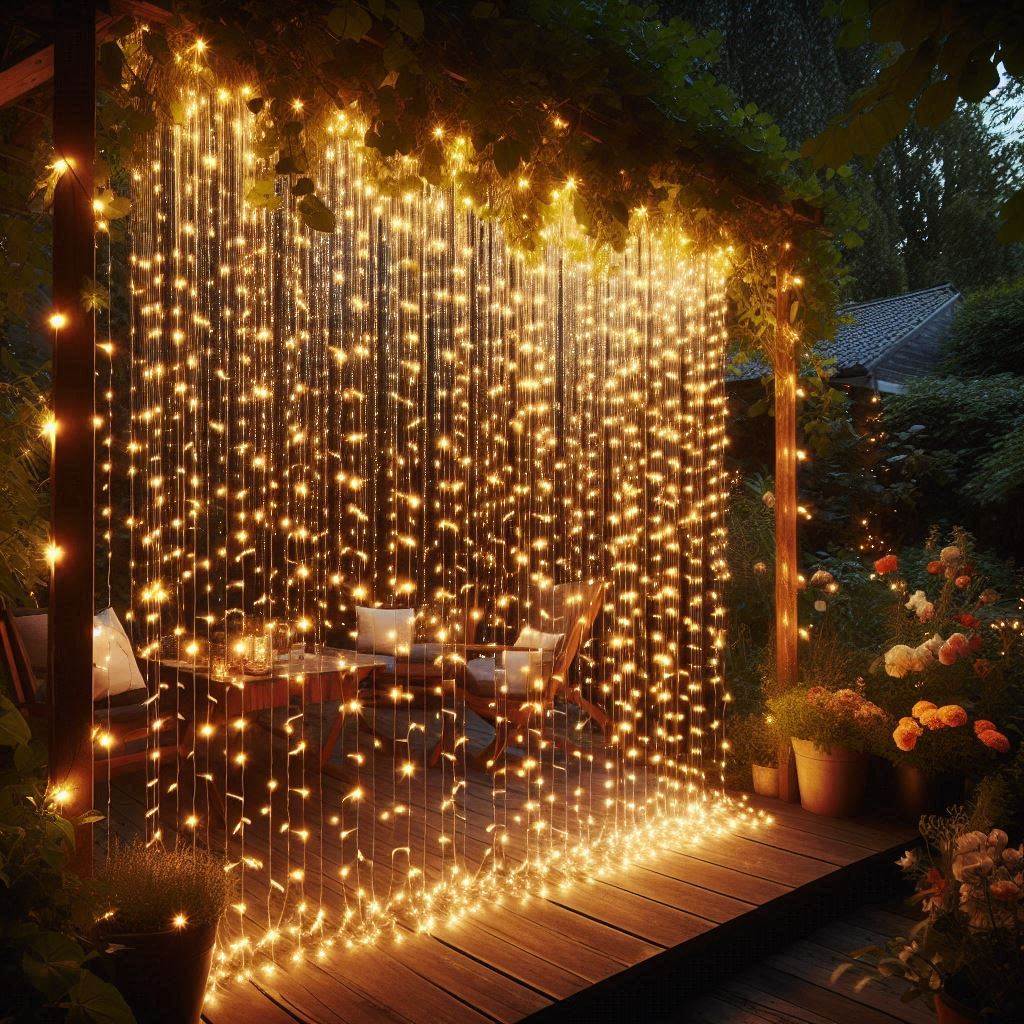
Imagine a waterfall of twinkling lights cascading down your fence or wall. Solar fairy light curtains make this dream a reality, adding a touch of whimsical magic to your outdoor space.
What You’ll Need:
- Solar fairy light curtain (choose the desired size and light color)
- Zip ties or hooks (depending on your hanging method)
Creating a Luminous Backdrop:
- Choose your canvas. Decide where you want to hang your solar fairy light curtain. Popular options include fences, walls, pergolas, or even the eaves of your house. Ensure the solar panel has access to ample sunlight for charging.
- Secure the curtain. Using zip ties or sturdy hooks, carefully attach the top of the fairy light curtain to your chosen surface. Ensure the lights hang freely and the solar panel is positioned upwards.
Adding a Touch of Drama:
- Double the magic. Hang two solar fairy light curtains side-by-side for a more dramatic and voluminous effect.
- Layer it up! Combine a solar fairy light curtain with other string lights or hanging lanterns for a layered and textured look.
- Light up a special occasion. Solar fairy light curtains are perfect for creating a magical ambiance for outdoor parties or weddings.
Benefits:
Solar fairy light curtains add a touch of whimsy and romance to your outdoor space. They create a cascading waterfall of light, perfect for setting a dreamy and inviting atmosphere. Plus, the ease of installation makes them a great choice for DIY enthusiasts.
9. Solar-Powered Wind Chimes: A Symphony of Light and Sound
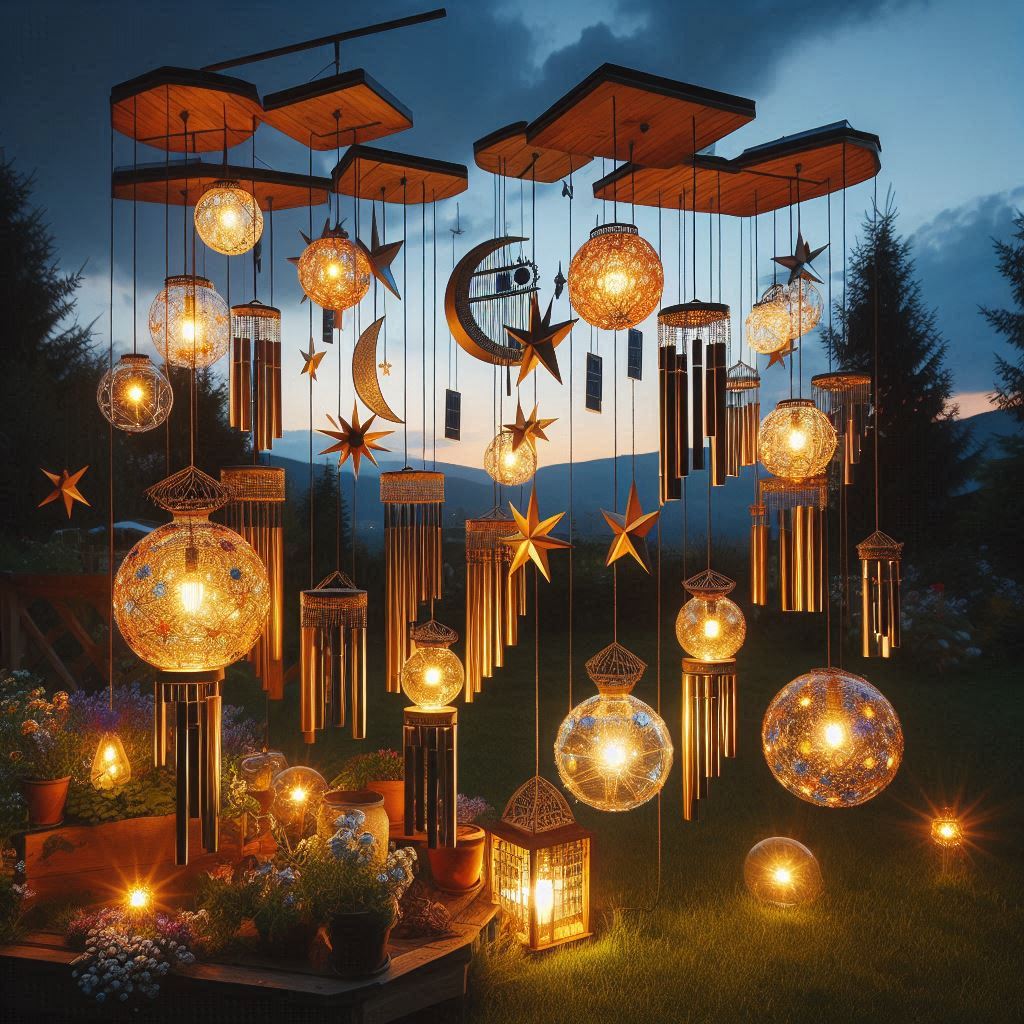
Solar-powered wind chimes add a delightful touch to your patio or garden. They combine the beauty of traditional wind chimes with the soft glow of solar lights, creating a mesmerizing spectacle for your senses.
What You’ll Need:
- Solar-powered wind chimes
- Shepherd’s hook (optional)
Bringing Harmony to Your Outdoor Oasis:
- Choosing the perfect spot. Find a location in your outdoor space that receives good wind flow. This ensures the wind chimes will move and generate electricity for the solar lights.
- Hanging with ease. If using a shepherd’s hook, simply push it into the ground at your chosen location. The wind chime will usually have a built-in hook for hanging.
Taking it a Step Further:
- Group chimes for a melody. Hang several solar-powered wind chimes together at varying heights to create a symphony of sound and light.
- DIY chimes for a personal touch. Feeling crafty? Consider creating your own wind chimes using recycled materials and incorporating solar lights for a unique touch.
Benefits:
Solar-powered wind chimes add a delightful touch of sound and light to your outdoor space. They create a calming and mesmerizing ambiance, perfect for relaxing evenings on your patio. Plus, they’re a great conversation starter for guests.
10. Solar Pond Lights: Illuminating Your Water Feature
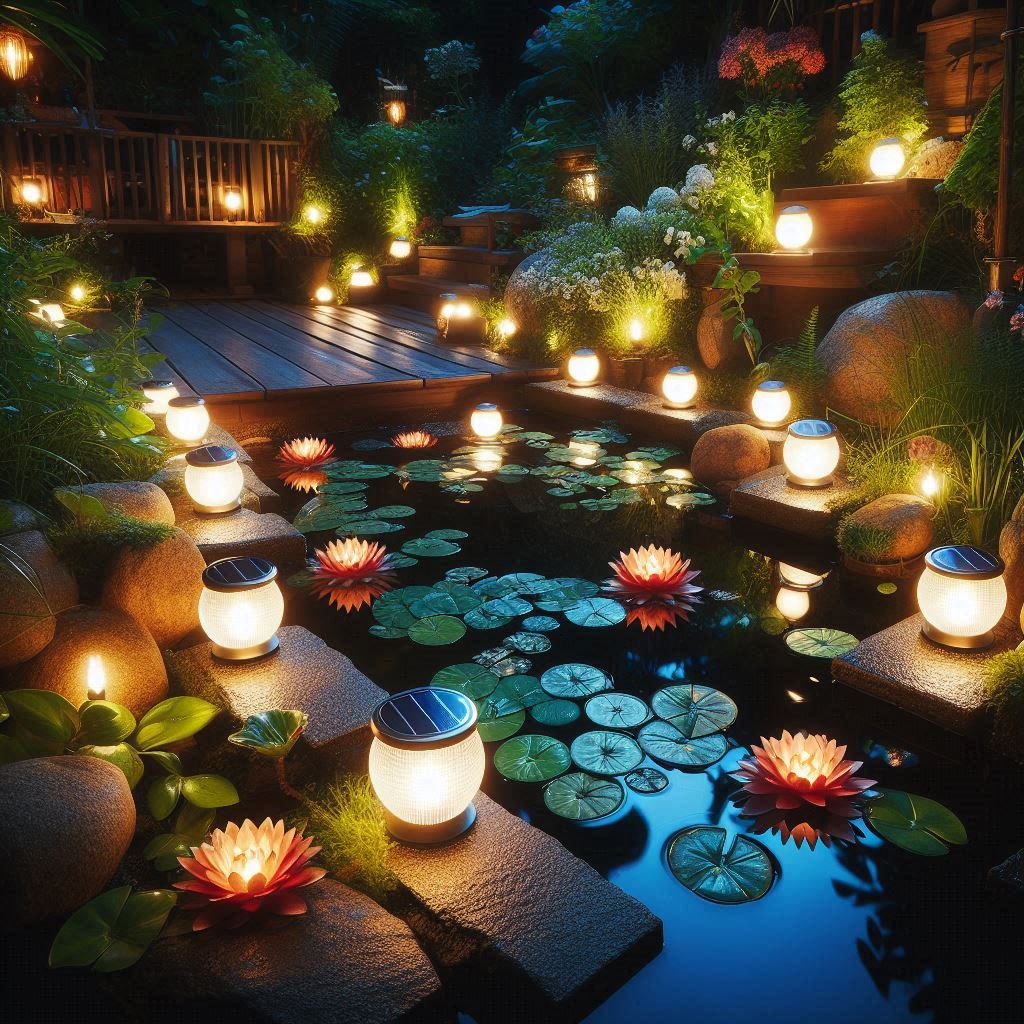
Solar pond lights add a touch of magic to your pond or water feature. They come in various styles and colors, allowing you to create a captivating underwater display.
What You’ll Need:
- Solar pond lights (choose the style and color that best suits your pond)
Bringing Your Pond to Life After Dark:
- Read the instructions. Every solar pond light might have slightly different placement recommendations. Carefully read the manufacturer’s instructions before proceeding.
- Light up your water feature. Following the instructions, place the solar pond lights strategically around your pond. Ensure the solar panels are positioned upwards for optimal sun exposure during the day.
Enhancing the Aquatic Ambiance:
- Submerged or floating. Some solar pond lights can be submerged underwater, while others are designed to float on the surface. Choose the option that best suits your preference and the type of pond you have.
- Color play. Opt for solar pond lights with color-changing options to create a dynamic and captivating underwater display.
- Grouped beauty. For larger ponds, consider using multiple solar pond lights for a more even distribution of light.
Benefits:
Solar pond lights add a touch of magic to your pond or water feature at night. They create a shimmering and captivating underwater display, enhancing the beauty of your outdoor space. Plus, they’re completely safe for fish and other aquatic life.
11. Solar Up-Lights: Highlighting the Beauty of Your Landscape

Solar up-lights are fantastic for adding depth and dimension to your outdoor space. By strategically placing them, you can highlight the beauty of trees, shrubs, or architectural features, creating a dramatic effect at night.
What You’ll Need:
- Solar up-lights (choose the brightness and beam angle based on your needs)
- Stakes (usually included with the lights)
Casting Light on Your Landscape:
- Choose your subjects. Decide what elements in your landscape you want to highlight with the solar up-lights. Popular options include trees, statues, fountains, or architectural features of your house.
- Strategically placed. Position the solar up-lights at the base of the chosen elements, directing the beam upwards to illuminate them effectively. Ensure the solar panels have access to ample sunlight during the day.
Taking it a Step Further:
- Adjustable spotlights. Opt for solar up-lights with adjustable heads to precisely direct the light beam onto your chosen subject.
- Color play. Consider using solar up-lights with color options to add a dramatic touch and highlight different elements with contrasting colors.
- Grouped for impact. For larger trees or architectural features, use multiple solar up-lights strategically placed around the base for a more even and dramatic illumination.
Benefits:
Solar up-lights add a touch of drama and sophistication to your outdoor space. They allow you to highlight the beauty of trees, shrubs, or architectural features, creating a visually stunning display at night. Plus, the variety of beam angles and brightness options allows for flexibility and customization.
Conclusion
With these 11 DIY solar light ideas, you can transform your outdoor space into a magical haven, perfect for entertaining friends and family or simply enjoying a quiet evening under the stars. The beauty of these projects lies in their ease of use and affordability. Plus, you get the satisfaction of creating something beautiful and functional with your own hands. Remember, solar lights are not only eco-friendly, but they also save you money on your electricity bill in the long run. So, unleash your inner designer, grab some solar lights, and get ready to illuminate your nights!