
Spring has sprung! With the days growing longer, the sun shining brighter, and flowers bursting into bloom, it’s the perfect time to bring the vibrant energy of the season indoors and outdoors. DIY projects are a fantastic way to personalize your space and celebrate the fresh start that spring embodies. So, grab your crafting supplies and get ready to unleash your creativity with these 15 super cute Spring DIY projects!
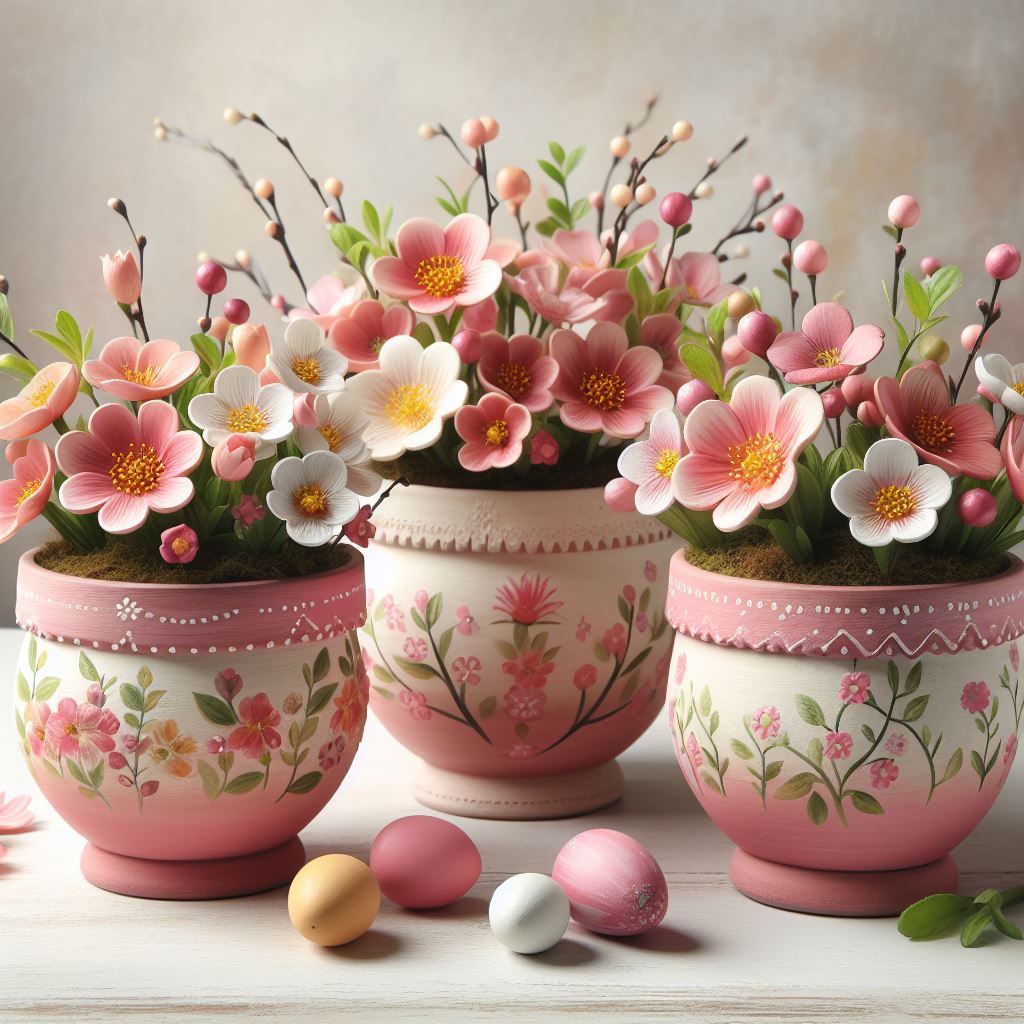
Project 1: Blooming Beauties: Painted Clay Pot Spring Planters
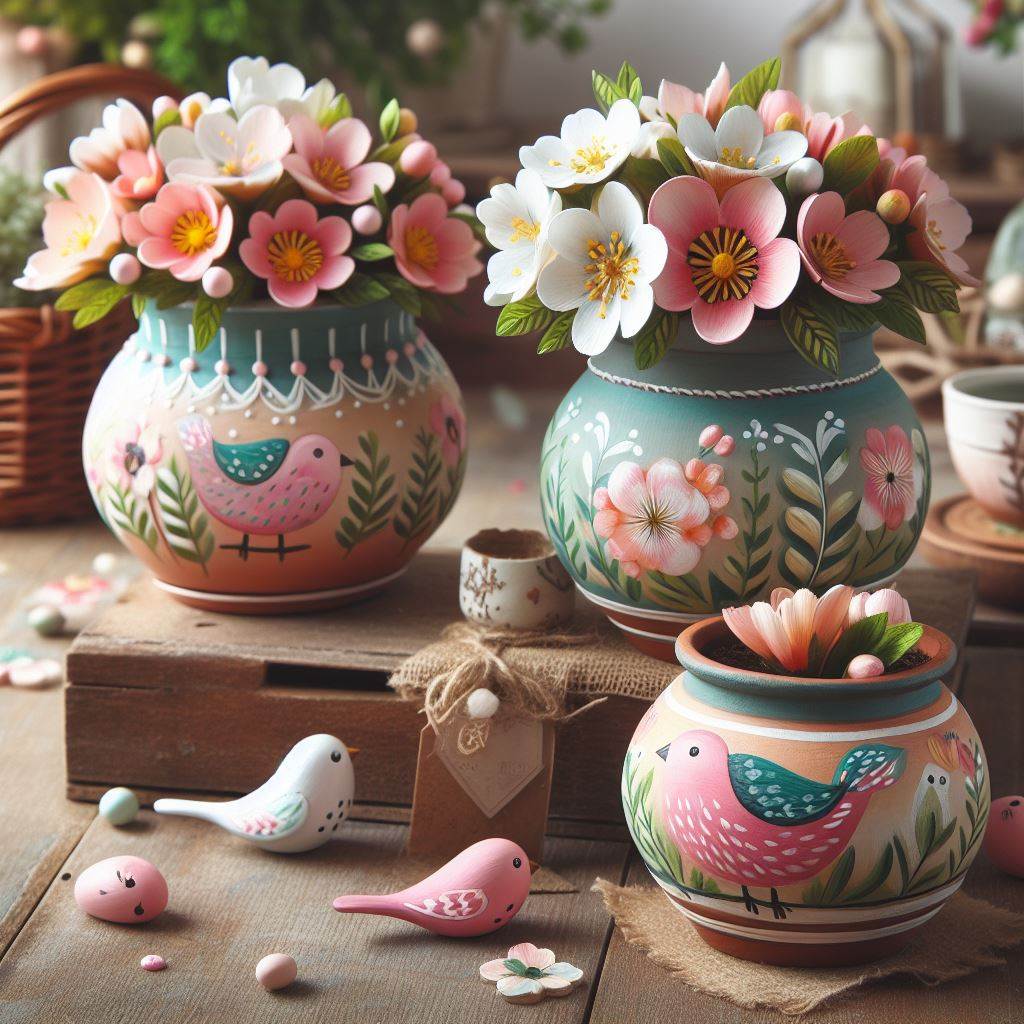
There’s nothing quite like the sight of colorful blooms adorning your windowsill or patio. Elevate your plant game this spring with hand-painted clay pot planters!
What you’ll need:
- Clay pots (various sizes)
- Acrylic paint in various colors
- Paint brushes
- Stencils (optional)
- Potting mix
- Small spring plants (violets, pansies, etc.)
Let’s get started!
- Prep your canvas: Begin by giving your clay pots a good cleaning. Wipe away any dust or dirt with a damp cloth. Let them dry completely before painting.
- Paint your masterpiece: Unleash your inner artist! Choose a base color for each pot – classic white, sunny yellow, or a cheerful pastel shade. Apply two or three thin coats of paint, allowing each coat to dry completely before adding the next.
- Get creative with designs: Once your base coat is dry, it’s time to personalize your planters! You can add stripes, polka dots, or geometric patterns using a different paint color. Stencils can also be a great way to create intricate designs if you’re feeling fancy. Remember, there are no mistakes here – embrace the imperfections and let your personality shine through!
- Planting time! Once the paint is completely dry, it’s time to fill your planters with fresh potting mix. Choose vibrant spring flowers like pansies, violas, or dwarf snapdragons to complement your colorful pots. Gently place your chosen plants into the pots, ensuring they’re positioned at the right depth according to the plant’s needs. Water thoroughly and watch your blooming beauties come to life!
Top tip: Don’t be afraid to experiment with different color combinations and patterns. You can even paint a message or quote on your pots for a personalized touch. Feeling less adventurous? Pre-painted pots or plastic pots (lighter option) can be a great starting point.
Project 2: Fluttery Friends: Button Butterfly Wall Art
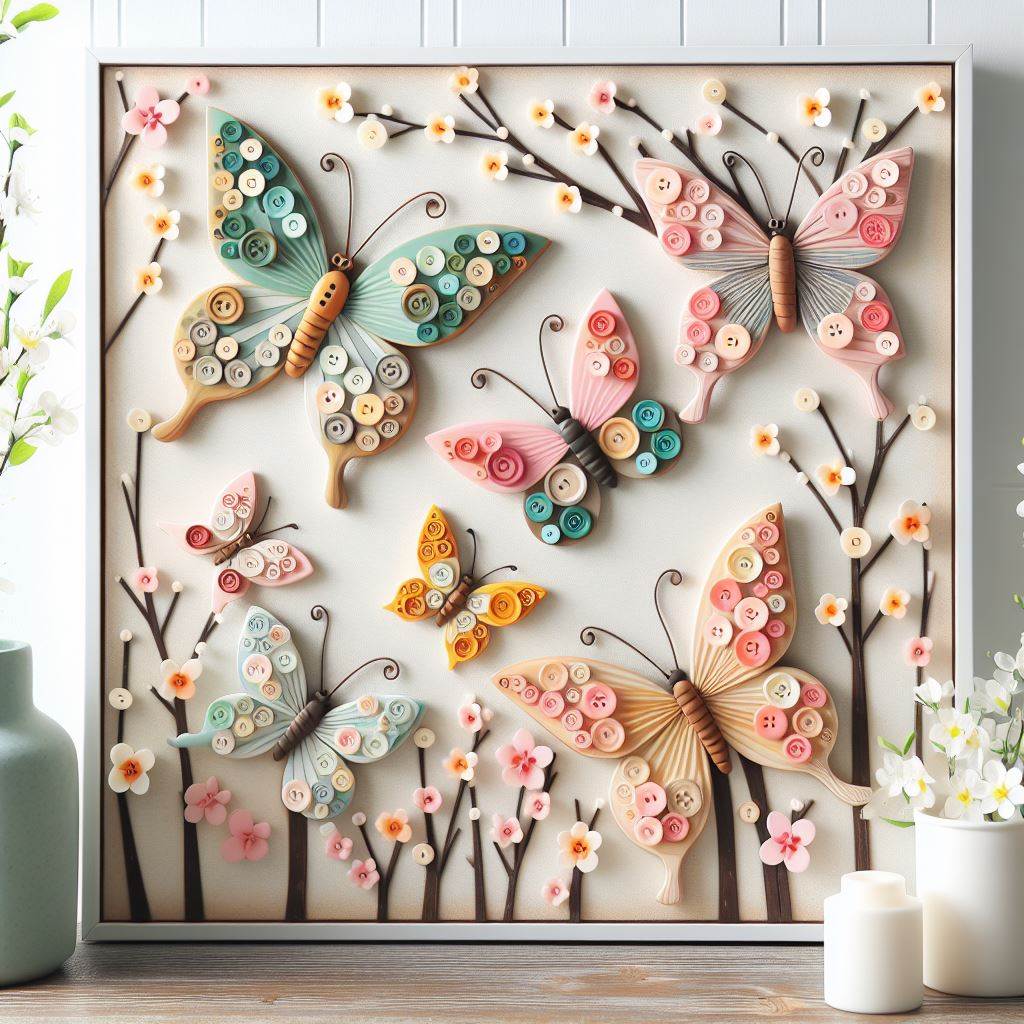
Bring a touch of whimsy to your walls with this adorable button butterfly wall art project! It’s a perfect DIY for a kid’s room, a spring-themed kitchen, or anywhere you want to add a burst of color and cheer.
Gather your materials:
- Canvas (any size)
- Various colorful buttons (different sizes)
- Glue gun with glue sticks
- Scissors (optional)
- Pipe cleaners (optional)
- Permanent marker (optional)
Let’s create!
- Plan your butterfly: Decide on the size and layout of your butterfly on the canvas. You can use a pre-drawn template or freehand your design. Consider the size of your canvas and the number of buttons you have available when planning your butterfly’s wingspan.
- Button magic: Now comes the fun part! Begin by gluing the buttons onto the canvas to create the butterfly’s wings. Use a mix of sizes and colors to create a vibrant and whimsical effect. Start with larger buttons for the center of the wings and gradually work your way outwards with smaller buttons.
- Adding details: Once the wings are complete, you can add details like antennae and eyes to make your butterfly come alive. Pipe cleaners are perfect for creating whimsical antennae, while a permanent marker can be used to draw small dots for eyes.
Top tip: Using a butterfly image as a reference can be helpful when placing your buttons, especially if you’re aiming for a realistic look. Feeling adventurous? Explore beyond buttons! Felt scraps, fabric pieces, or even bottle caps can be used to create unique and colorful butterfly wings.
Project 3: Blooming Banner: No-Sew Fabric Flower Bunting
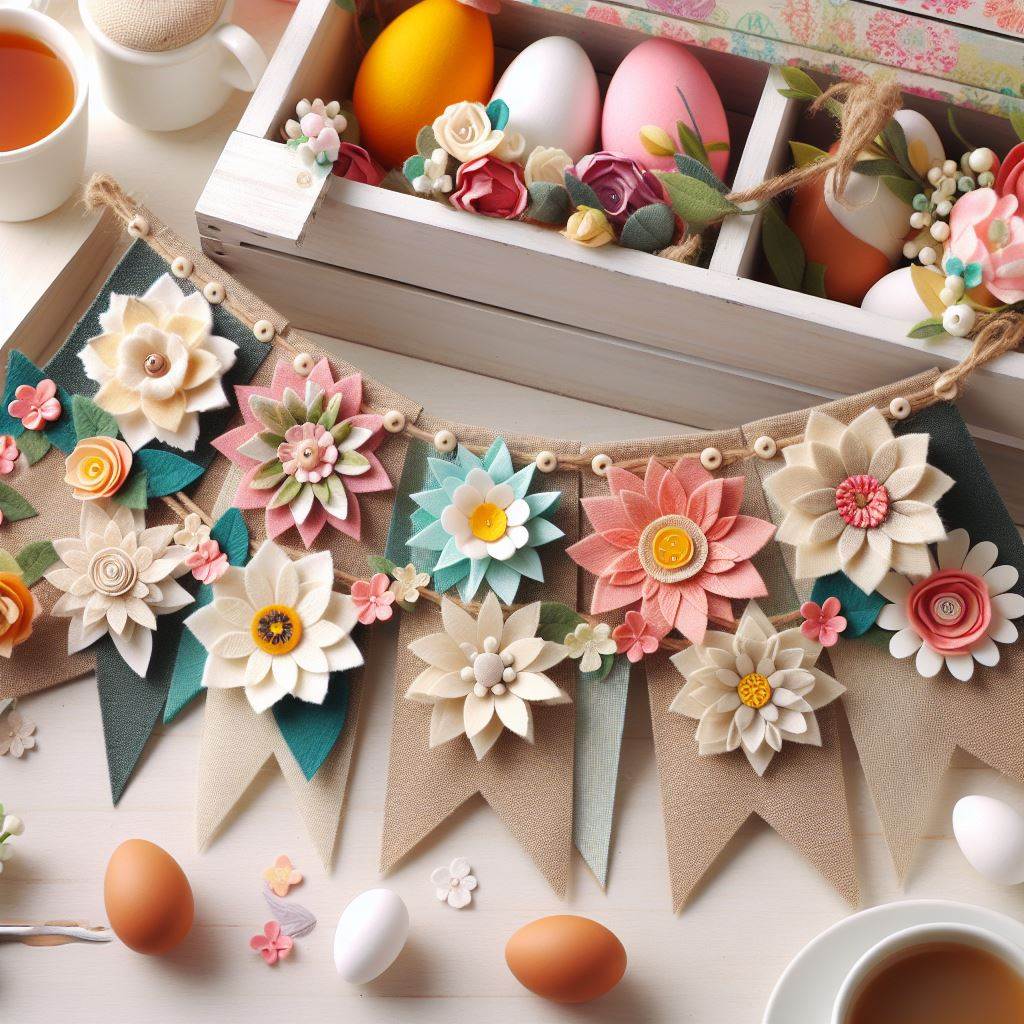
Add a touch of springtime cheer to your porch, mantelpiece, or anywhere you want a festive touch with this easy no-sew fabric flower bunting!
Here’s what you’ll need:
- Fabric scraps (various spring colors and patterns)
- Scissors
- Ribbon
- Pinking shears (optional)
- Sewing machine (optional)
Let’s get crafting!
- Flower power: Choose your fabric scraps! Opt for a mix of cheerful spring colors and patterns like florals, polka dots, or stripes. Cut out squares or circles of various sizes from your chosen fabrics (depending on the desired flower size). The more variety you have, the more vibrant your bunting will be.
- Create the blooms: Here comes the fun part of transforming fabric into beautiful flowers! Take a fabric square or circle and layer it on top of another one, slightly offsetting the edges to create a layered effect. Repeat this step with a few more fabric pieces, creating a stack of fabric circles.
- Securing the bloom: Now, to hold your flower layers together, tie a piece of twine or thread tightly around the center of the fabric stack. You can simply knot the thread or, for a more secure hold, use a needle and thread to make a quick stitch through the center of the fabric layers.
- Blooming bunting: Now that you have your beautiful fabric flowers, it’s time to assemble your bunting! Cut a length of ribbon to your desired bunting length. Here, you can decide on the spacing between the flowers – closer together for a denser look or spaced out for a more airy feel.
- Attaching the flowers: Simply tie the thread or twine securing the center of each flower onto the ribbon at your desired intervals. You can secure the knot with a dab of hot glue for extra security.
Top tip: Using pinking shears to cut your fabric squares will add a decorative scalloped edge to your flowers and eliminate the need to fray the edges. Don’t have a sewing machine? No worries! This project is entirely achievable without one. However, if you’re comfortable with sewing, you can stitch the center of your fabric layers instead of tying them for a more polished look.
Project 4: Melodies of Spring: Upcycled Tin Can Wind Chimes
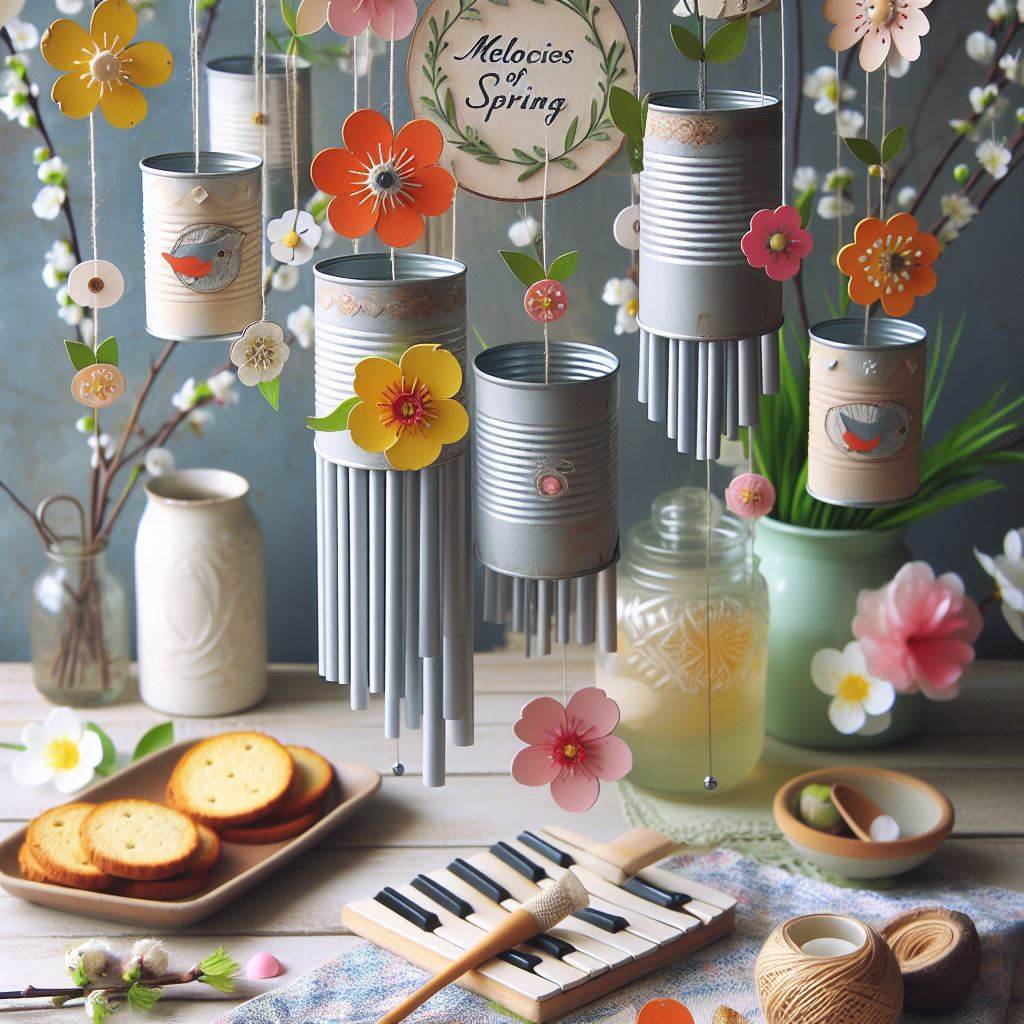
Embrace the sounds of spring with these charming upcycled tin can wind chimes! This project is a fantastic way to give new life to used tin cans and add a touch of musical magic to your patio or balcony.
Gather your supplies:
- Clean tin cans (various sizes)
- String or yarn
- Drill
- Hammer and nail
- Wind chime chimes (purchased or other decorative objects)
- Paint and paint brushes (optional)
Let’s upcycle and create!
- Prep your cans: First things first, clean those tin cans! Wash them thoroughly with soap and water, removing any labels or residue. Let them dry completely before moving on.
- Colorful chimes (optional): If you want to add a pop of color to your wind chimes, this is the time to do it! Use acrylic paint to paint your tin cans in different colors. Opt for a cohesive color scheme or get creative with a rainbow effect. Let the paint dry completely before proceeding.
- Drilling time: Carefully drill holes near the top rim of each tin can. It’s important to drill several holes spaced evenly around the rim for a balanced sound. Make sure the holes are large enough to accommodate your chosen string or yarn.
- Creating the chimes: Cut your string or yarn into different lengths. The longer the string, the lower the pitch of the sound it will produce. Here’s where you can experiment to create a melody you enjoy. Tie one end of each string or yarn to your chosen wind chime chimes or decorative objects (bells, beads, etc.). You can use various chime objects for a unique sound experience.
- Assembling the wind chimes: Now, tie the other end of each string (with the attached chime) to the holes you drilled in the tin cans. Make sure the strings are knotted securely to prevent them from coming loose.
- Hanging your masterpiece: Find a breezy spot outdoors, like a porch or a tree branch, and hang your upcycled tin can wind chimes. Let the spring breeze carry the delightful melodies throughout your space!
Project 5: Lucky Ladybug Charm: Easy Painted Rock Ladybugs
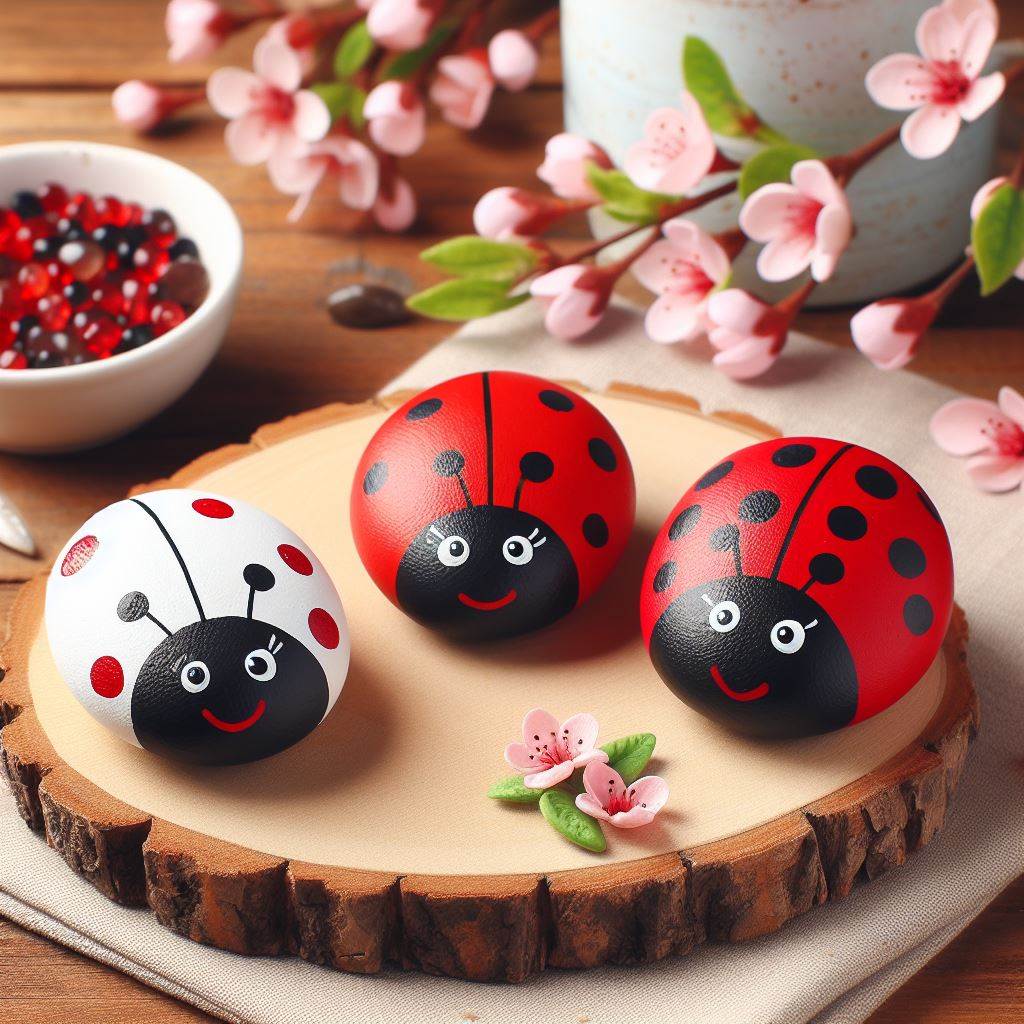
Welcome a touch of luck and whimsy to your garden or windowsill with these adorable painted rock ladybugs! This is a quick and easy project perfect for kids and adults alike.
What you’ll need:
- Smooth, flat rocks
- Acrylic paint (red, black, white)
- Paint brushes
- Clear gloss spray (optional)
Let’s paint some lucky bugs!
- Rock stars: The first step is finding the perfect canvas for your ladybugs. Look for smooth, flat rocks in various sizes. Wash them thoroughly with soap and water to remove any dirt or debris. Let the rocks dry completely before painting.
- Ladybug red: Start by painting the base coat of your rocks red. This will be the body of your ladybug. Use two to three thin coats of paint, allowing each coat to dry completely before adding the next.
- Spotty friends: Once the red paint is dry, it’s time to add the signature ladybug spots! Use a black paintbrush to create small circles on the red base coat. You can experiment with the number and placement of the spots – there’s no right or wrong way!
- Head and eyes: Now, let’s give our ladybugs a face. Paint a small black circle on one end of the rock for the ladybug’s head. Once the black paint dries, use a white paintbrush to add two tiny dots for the eyes within the black circle. You can even add a small black dot in the center of each white dot for pupils (optional).
- Shiny charm (optional): If you want to give your ladybugs an extra touch of shine, you can spray them with a clear gloss coat once the paint is completely dry. This will also help protect the paint from the elements if you plan to display your ladybugs outdoors.
Top tip: For a more polished look, you can lightly sketch the ladybug design on the rock with a pencil before painting. Feeling creative? Use buttons or wooden beads instead of rocks for a unique twist on this classic craft.
Project 6: Springtime Wreath Magic: Fabric Scrap Wreath
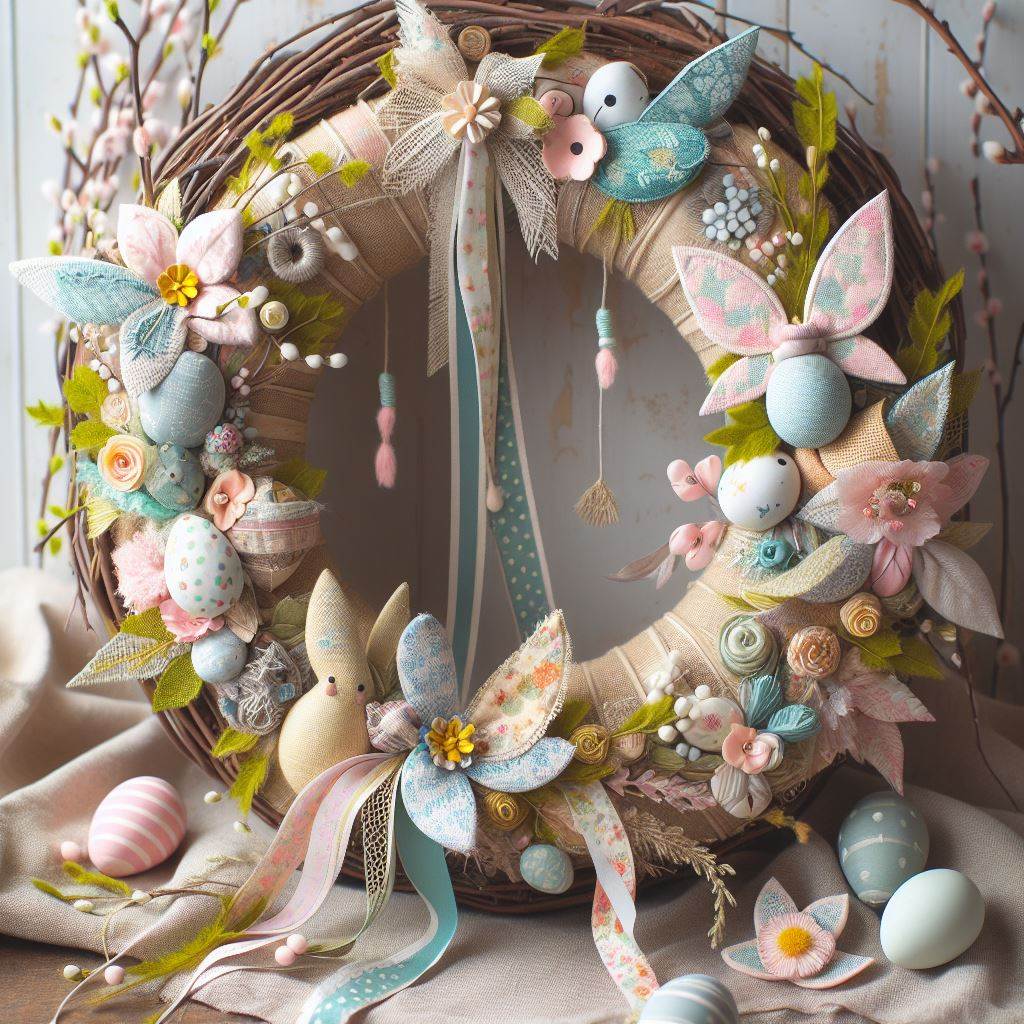
Welcome spring with a vibrant and colorful fabric scrap wreath! This project is a fantastic way to use up leftover fabric pieces and create a unique statement piece for your door or wall.
What you’ll need:
- Fabric scraps in various spring colors and patterns
- Wire wreath frame (any size)
- Scissors
- Hot glue gun with glue sticks
- Ribbon or twine (optional)
Let’s get crafting!
- Fabric frenzy: Gather your fabric scraps! Opt for a mix of cheerful spring colors and playful patterns like florals, polka dots, or stripes. Cut your fabric scraps into strips of varying lengths and widths. The more variety you have, the more interesting your wreath will look.
- Transforming scraps: Now comes the fun part of transforming fabric into wreath magic! Begin by hot gluing the fabric strips onto the wire wreath frame. You can start by covering the entire frame with a base layer of fabric strips in a neutral color. Then, layer on your colorful patterned strips, overlapping them slightly for a full and textured look.
- Creating dimension (optional): For added texture and visual interest, consider curling some of your fabric strips before gluing them onto the frame. Use a pencil or a craft stick to gently curl the edges of the fabric strips inwards.
- Finishing touches: Once you’ve covered the wire frame completely and are happy with the overall look, it’s time to add a finishing touch. You can tie a ribbon or twine around the top of the wreath for hanging purposes. Alternatively, you can hot glue a small bunch of artificial flowers or other embellishments onto the wreath for a more decorative touch.
Top tip: Don’t have a wire wreath frame? No worries! You can use a cardboard cut-out as a base for your fabric wreath. Simply cut a donut shape out of sturdy cardboard and use it as the foundation for gluing your fabric strips.
Project 7: Hoppy Decorations: DIY Sock Bunnies

Celebrate the season with these adorable and easy-to-make sock bunnies! This project is perfect for using up old socks and creating charming Easter decorations or springtime home accents.
Gather your supplies:
- Old socks (white or light-colored)
- Rice or stuffing
- Rubber bands
- Scissors
- Buttons or felt (optional)
- Sewing needle and thread (optional)
Let’s get hopping!
- Sock selection: Choose a pair of clean, white or light-colored socks. Avoid socks with large holes or tears.
- Stuffing time: Turn the sock inside out. Fill the toe section of the sock with rice or stuffing, creating a round shape for the bunny’s head. Use a rubber band to secure the filled section tightly at the ankle of the sock.
- Shaping the bunny: Now, gently push some of the stuffing down from the head section towards the heel of the sock. This will create the bunny’s body. Use another rubber band to secure the stuffing at the base of the body, separating it from the head section.
- Bunny ears: Take the remaining sock cuff (the top part) and fold it down over the head section of the bunny. You can pinch and fold the top of the cuff to create floppy ears, or use scissors to cut the cuff into two separate triangles for pointed ears. Secure the ears in place with a dab of hot glue, sewing them down with needle and thread, or simply tucking them under the rubber band at the head section.
- Adding details (optional): This is where you can personalize your sock bunnies! Use buttons for eyes and a nose, or cut small circles from felt and glue them on. You can also embroider a small smile or other details onto the bunny’s face.
Top tip: Feeling adventurous? Use different colored socks or add other embellishments like ribbons or yarn for a unique look!
Project 8: A Touch of Whimsy: Springtime Fairy House
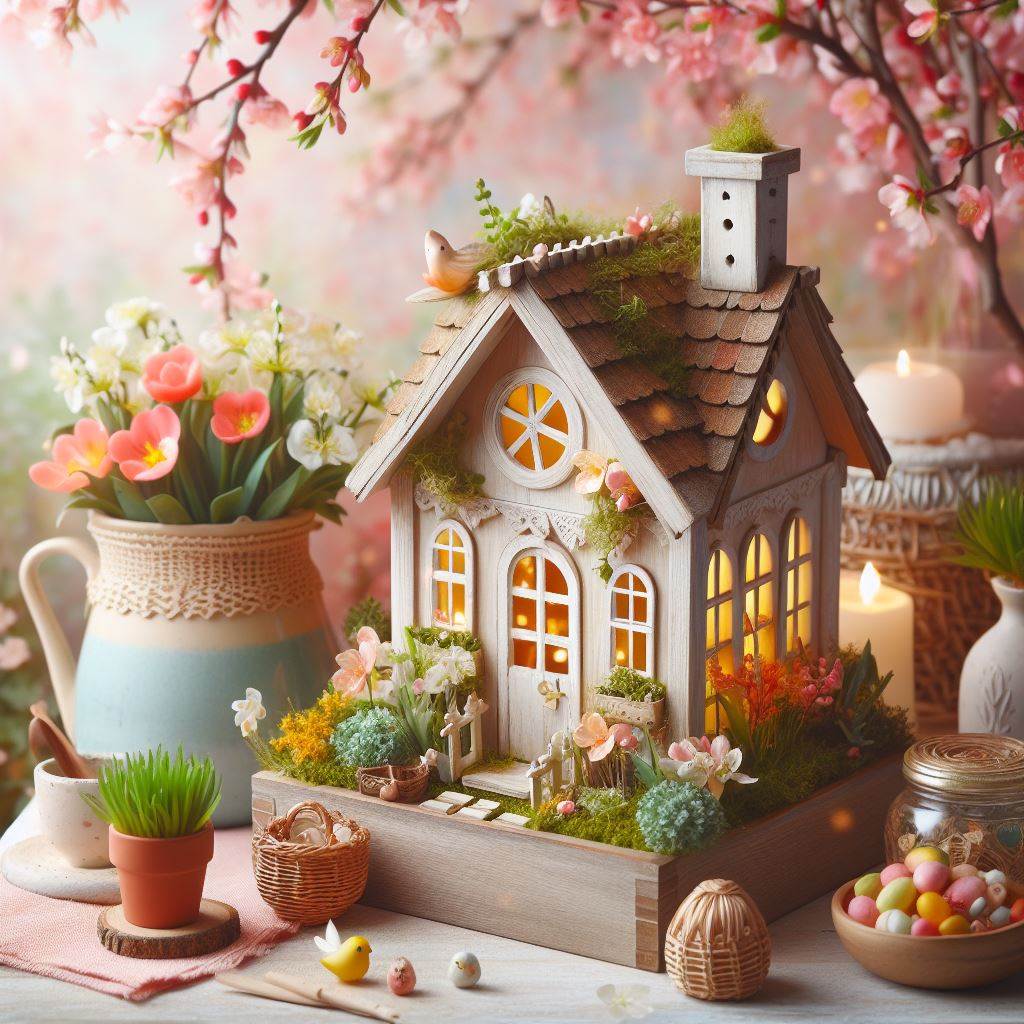
Create a magical haven for fairies in your garden with this enchanting springtime fairy house project! This activity is perfect for kids and adults alike, encouraging creativity and imagination.
What you’ll need:
- Natural materials like bark, twigs, leaves, and pebbles
- Cardboard (optional)
- Hot glue gun with glue sticks
- Dried flowers, moss, and other decorative elements (optional)
Let’s build a fairy haven!
- Finding the perfect spot: Choose a location in your garden that offers some shade and protection from the elements. Look for a spot near flowering plants or a small tree for an extra touch of magic.
- Building the base (optional): For a more structured fairy house, you can use a cardboard box cut in half as the base. This will provide a sturdy foundation for attaching your natural materials.
- Natural wonders: Here comes the fun part of letting your imagination run wild! Use twigs and bark to create the walls and roof of your fairy house. Smaller twigs can be used for windows and doorways. Leaves can be layered to create a thatched roof or used as decorative accents on the walls. Pebbles can be used to create a pathway leading up to the fairy house.
- Securing your creation: Use hot glue to securely attach the natural materials to your cardboard base (if using) or directly to each other. Be mindful of using minimal glue to maintain the natural look.
- Fairy-tale finishing touches: Once the basic structure is complete, it’s time to add the finishing touches! Decorate your fairy house with dried flowers, moss, colorful pebbles, or any other natural elements that spark your creativity. You can even create tiny furniture pieces out of twigs and leaves to furnish the fairy house interior.
Top tip: Encourage your local fairies to move in by leaving out a small bowl of water or a sprinkle of sugar near the fairy house.
Project 9: A Symphony of Spring: DIY Windsock
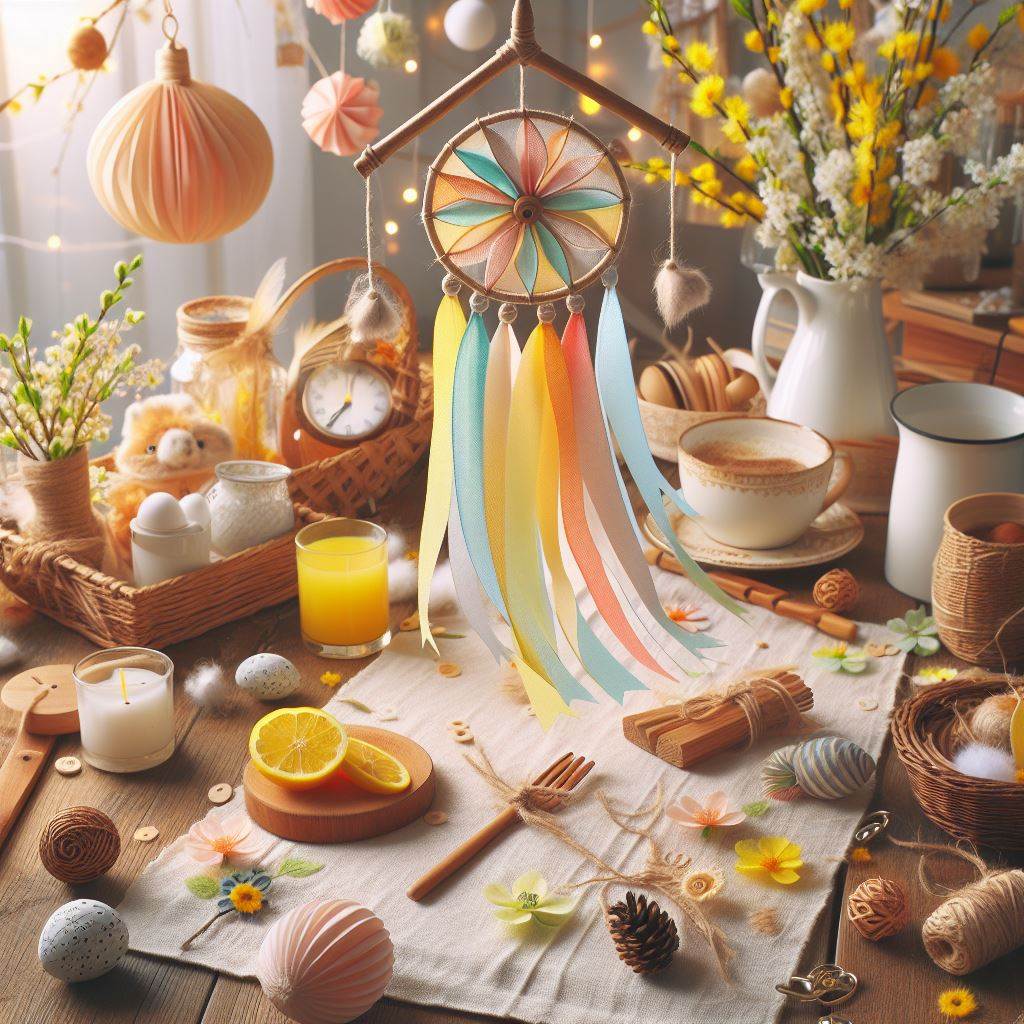
Embrace the spring breezes with a vibrant and musical DIY windsock! This project is a fun activity for kids and a delightful addition to your porch or balcony.
What you’ll need:
- Fabric scraps in various spring colors and patterns
- Cardboard (optional)
- Scissors
- String or yarn
- Craft sticks (optional)
- Ribbon or bias tape
- Hole punch (optional)
Let’s create a springtime symphony!
- Fabric symphony: Choose a selection of fabric scraps in bright and playful spring colors and patterns. You can use a single large piece of fabric or create a patchwork design by sewing or gluing different fabric scraps together.
- Shaping the windsock: Cut the fabric into a triangular or rectangular shape. If using a rectangular piece, you can sew the two shorter ends together to create a cone shape for the windsock.
- Reinforcement (optional): For added structure and to prevent the windsock from tearing, you can cut a triangular or rectangular shape out of cardboard slightly smaller than your fabric piece. Slide the cardboard shape into the pocket created by sewing the shorter ends of the fabric together (if using a rectangular fabric). This will provide a sturdy base for the windsock.
- Attaching the string: Use a hole punch (or carefully make a small hole) near the top corner of the windsock. Thread a long piece of string or yarn through the hole and tie a secure knot.
- Finishing touches: Cut a strip of ribbon or bias tape and wrap it around the top edge of the windsock, creating a clean finish and hiding the raw fabric edge. Secure the ribbon with hot glue or by sewing it in place.
- Flying high: Attach the other end of the string to a sturdy pole or hang it from a tree branch. Let the spring breeze carry the vibrant colors and gentle sounds of your DIY windsock!
Top tip: For a more decorative touch, you can add streamers or ribbons of different lengths to the bottom of the windsock. These will flutter in the wind and add to the visual appeal.
Project 10: A Splash of Color: Painted Flower Pots with Fingerprint Art
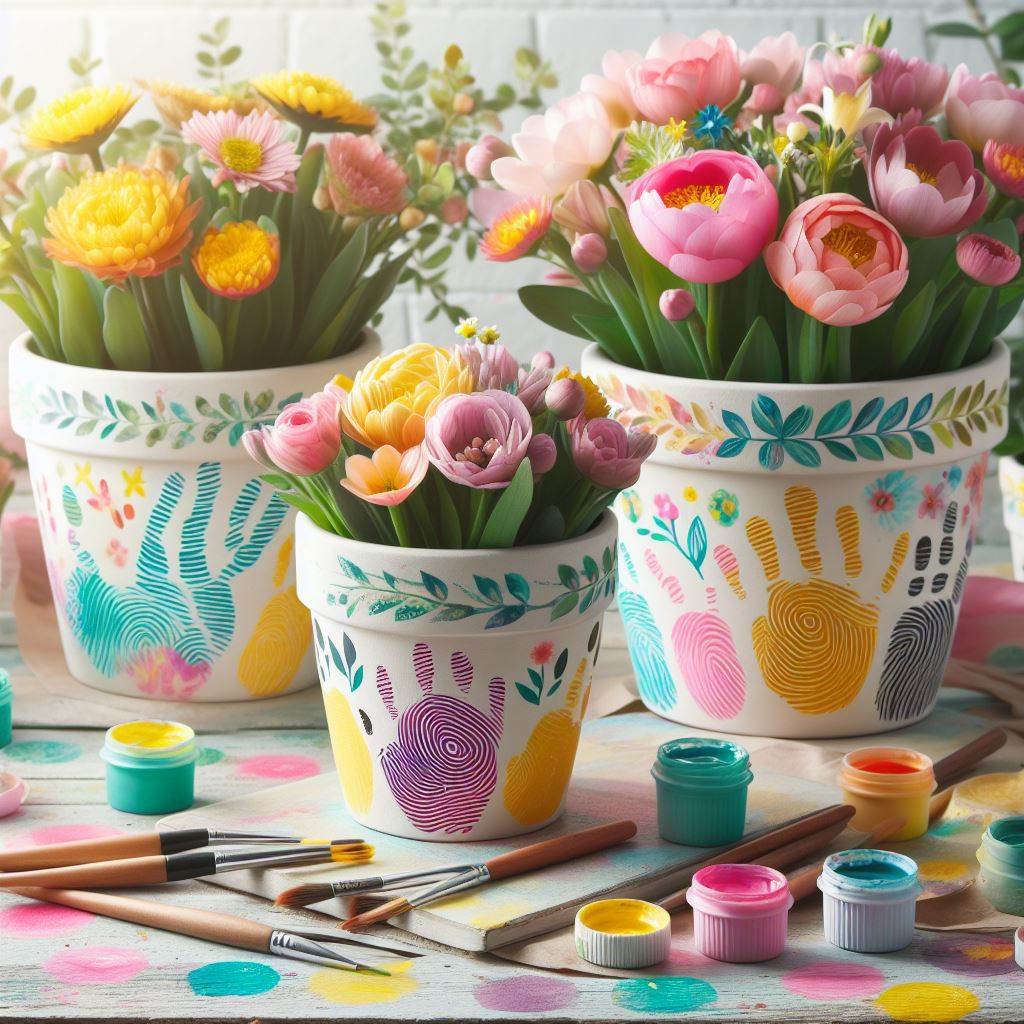
Transform plain clay pots into blooming works of art with this fun and easy fingerprint art project! This activity is perfect for creating unique and personalized planters for your spring flowers.
What you’ll need:
- Clay pots (various sizes)
- Acrylic paint in various colors
- Paint brushes
- Baby wipes or damp cloth
Let’s get creative with fingerprints!
- Prep your canvas: Begin by cleaning the clay pots with a damp cloth to remove any dust or dirt. Let them dry completely before painting.
- Colorful base: Choose a base color for each pot. Apply two or three thin coats of paint, allowing each coat to dry completely before adding the next.
- Fingerprint flowers: This is where the fun begins! Dip your child’s (or your own) finger into a different paint color than the base coat. Gently press the painted finger onto the pot to create a flower shape. You can experiment with different colors and arrangements to create a blooming bouquet on your pot.
- Adding details (optional): Use a paintbrush to add details to your fingerprint flowers like stems and leaves. You can also add dots or small lines in the center of the fingerprints to create flower pistils.
- Cleaning up: Once the paint is completely dry, use baby wipes or a damp cloth to gently remove any excess paint from your child’s fingers.
Top tip: For a more coordinated look, use a limited color palette for the fingerprint flowers. You can also create a border around the rim of the pot using a paintbrush and a contrasting color.
Project 11: A Feathery Welcome: Springtime Wreath with Bird’s Nest
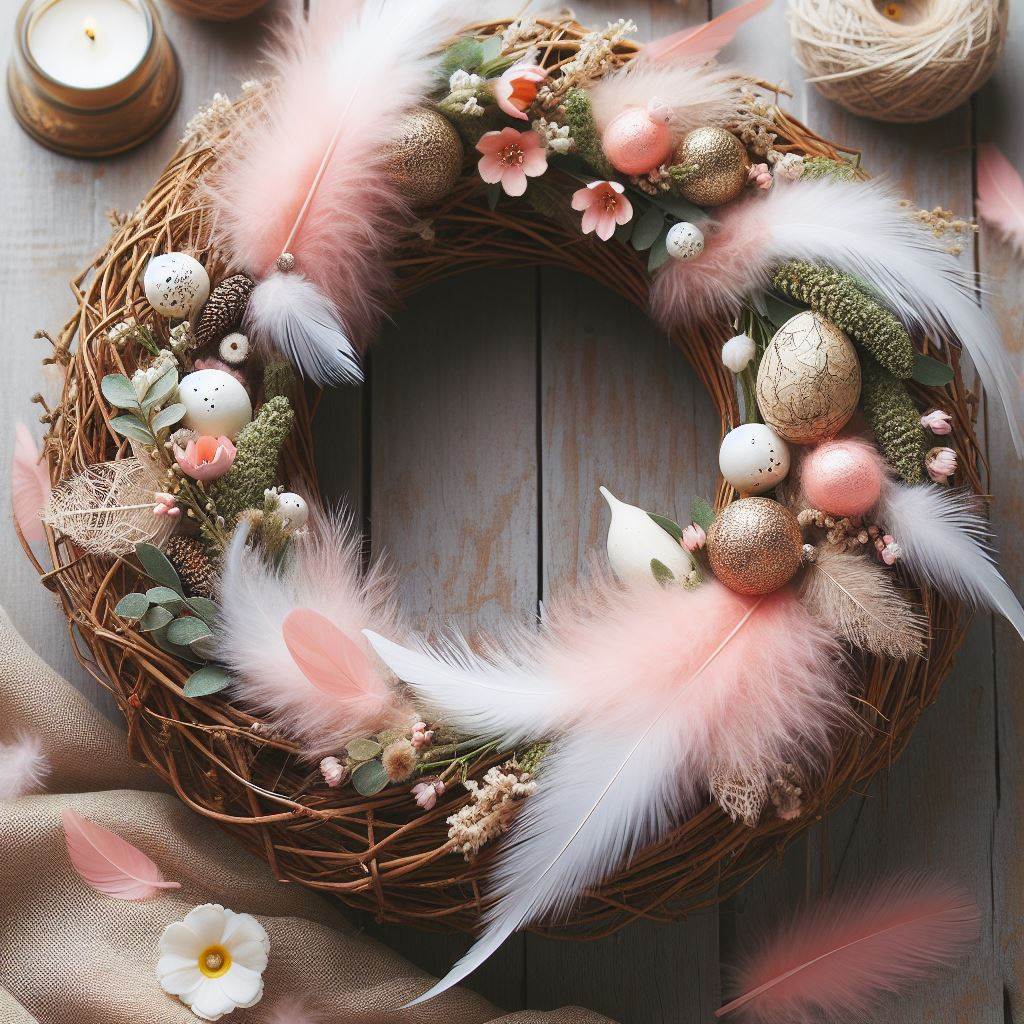
Welcome spring and feathered friends with this charming wreath adorned with a bird’s nest! This project is perfect for your front door or a cozy corner inside your home.
Gather your supplies:
- Grapevine wreath (any size)
- Floral wire (optional)
- Twigs and dried vines
- Artificial moss
- Hot glue gun with glue sticks
- Artificial bird’s nest
- Feathers in various colors (optional)
- Small silk flowers (optional)
Let’s create a welcoming haven!
- Building the base: The grapevine wreath will serve as the base for your creation. If the wreath feels loose, use floral wire to secure any gaps or broken pieces.
- Natural touches: Here comes the fun part of adding natural elements! Use twigs and dried vines of various sizes to create a textured and organic look on the wreath. You can weave them around the grapevine base or secure them with hot glue for a sturdier hold.
- Mossy magic: Fill in any gaps between the twigs and vines with artificial moss. This will add a touch of green and create a more natural and inviting look for your wreath.
- Creating a home: Now, use hot glue to secure the artificial bird’s nest onto the wreath. Position it strategically for a balanced look.
- A touch of color (optional): Add a pop of color and visual interest by hot gluing feathers of different colors around the bird’s nest or onto the wreath itself. You can also add small silk flowers in spring colors to further enhance the design.
Top tip: Consider adding a small decorative sign or a handmade “Welcome Spring” banner to the wreath for a more personalized touch.
Project 12: A Glimmering Display: Upcycled Glass Jar Terrarium

Transform old glass jars into captivating miniature gardens with this upcycled glass jar terrarium project! This is a great way to bring a touch of nature indoors and enjoy a low-maintenance display of greenery.
What you’ll need:
- Clean glass jars (various sizes)
- Pebbles or gravel
- Activated charcoal (optional)
- Potting soil suitable for terrarium plants
- Small terrarium plants (baby ferns, mosses, succulents)
- Decorative elements (small figurines, shells, moss)
- Spray bottle filled with water
Let’s create a mini world!
- Clean canvas: Begin by thoroughly washing the glass jars with soap and water. Remove any labels or residue and let the jars dry completely.
- Drainage layer: Create a drainage layer at the bottom of the jar. Add a layer of pebbles or gravel that is about 1-2 inches deep. This will help prevent waterlogging, which can damage your terrarium plants.
- Optional filtration: For added filtration and odor control, you can sprinkle a thin layer of activated charcoal on top of the gravel layer. However, this step is not essential.
- Soil foundation: Add a layer of potting soil suitable for terrarium plants on top of the drainage layer. Aim for a layer that’s about 2-3 inches deep.
- Planting time! Now comes the fun part: choosing and planting your terrarium plants! Opt for small, slow-growing plants that thrive in a humid environment. Popular choices include baby ferns, mosses, and succulents. Arrange your plants carefully within the jar, creating a miniature landscape.
- Decorative touches (optional): Once your plants are in place, you can add decorative elements to personalize your terrarium. Small figurines, colorful shells, or additional moss can enhance the visual appeal of your miniature world.
- Maintaining your masterpiece: Mist the inside of the jar with water from a spray bottle to create a humid environment. Avoid overwatering, as terrariums require minimal moisture. Keep your terrarium in a location with bright, indirect sunlight for optimal plant growth.
Top tip: Research the specific needs of your chosen terrarium plants to ensure they have the right balance of light, moisture, and humidity to thrive.
Project 13: A Buzzing Welcome: DIY Bee Skep House (Bird feeder alternative)
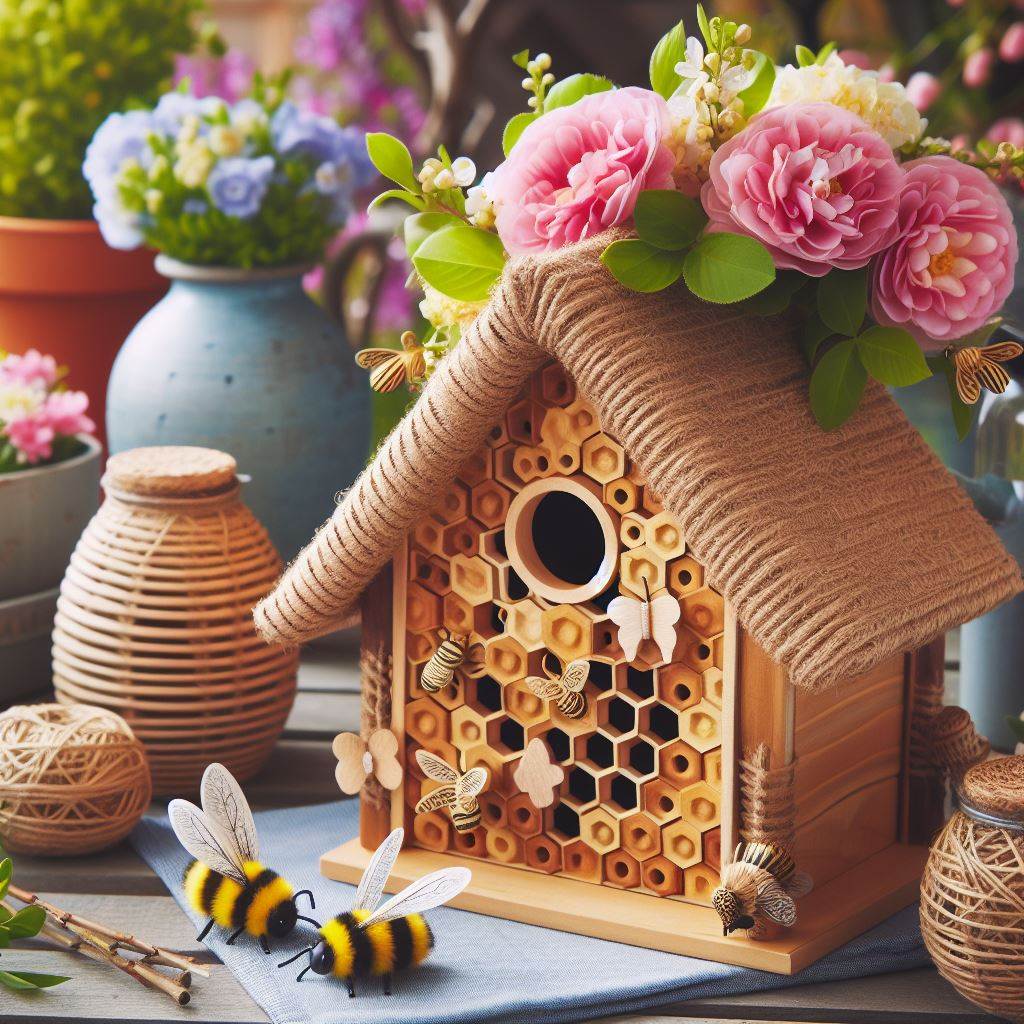
Celebrate spring’s pollinators with this adorable DIY bee skep house! While not a functional beehive, this project serves as a charming garden decoration and a potential nesting site for solitary bees.
What you’ll need:
- Round wicker basket (small to medium size)
- Twigs (various sizes and thicknesses)
- Hot glue gun with glue sticks
- Scissors (optional)
- Dried leaves and moss (optional)
- Paint (optional)
Let’s build a bee haven!
- Choosing the perfect basket: Find a round wicker basket that’s the right size for your project. It should be small to medium in size, with a narrow opening at the top. Avoid baskets with synthetic materials, as natural wicker is preferable for bees.
- Twig transformation: Here comes the creative part! Use twigs of various sizes and thicknesses to create a “thatch” effect on the outside of the basket. You can secure the twigs by carefully weaving them through the existing wicker weave of the basket or by hot gluing them in place. Start from the bottom and work your way up, ensuring the twigs are layered in a way that creates small gaps and crevices for potential bee nesting.
- Securing the structure: Once you’ve covered most of the basket with twigs, use hot glue to secure any loose ends or gaps. You can also trim any twigs that protrude significantly beyond the overall shape of the bee skep with scissors for a more finished look.
- Nature’s touch (optional): For a more natural and inviting look, you can add dried leaves and moss around the base of the bee skep. Secure them with hot glue for a permanent hold.
- A splash of color (optional): If you want to add a pop of color to your bee skep, you can paint the twigs with a light coat of acrylic paint in a color that complements your garden décor. Opt for natural tones like brown, yellow, or green for a cohesive look.
Top tip: While this project is not a functional beehive, it can provide potential nesting sites for solitary bees who prefer small cavities to lay their eggs. Placing the bee skep house in a sunny location with access to flowering plants can further attract these beneficial pollinators.
Project 14: A Hoppy Display: DIY Spring Sign with Fabric Bunny
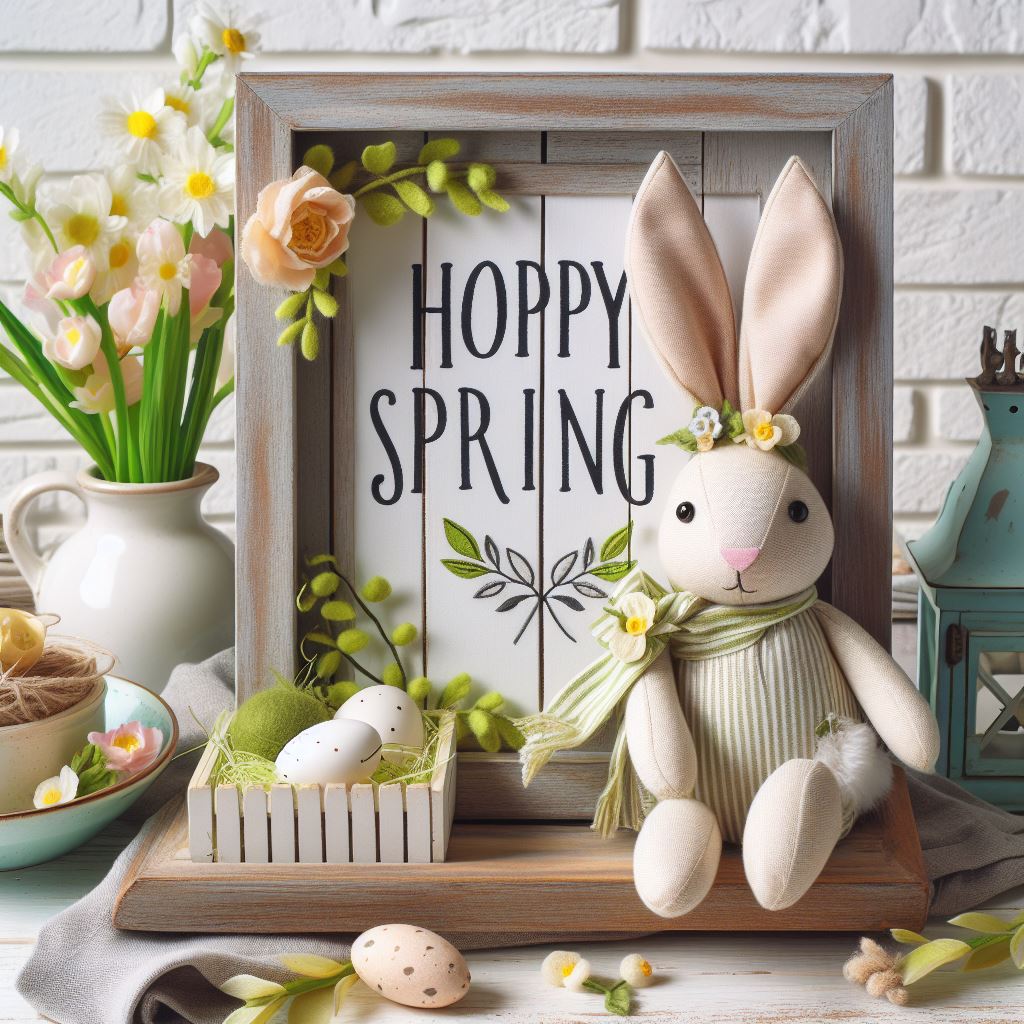
Welcome spring with a cheerful and personalized DIY spring sign featuring a fabric bunny! This project is perfect for adding a touch of whimsy to your door or mantelpiece.
What you’ll need:
- Wooden board (desired size and thickness)
- Acrylic paint in various colors
- Paint brushes
- Fabric scraps in white and other spring colors
- Scissors
- Craft glue or hot glue gun with glue sticks
- Buttons or felt (optional)
- Twine or ribbon for hanging
Let’s create a springtime welcome!
- Painting the base: Begin by painting your wooden board with a base coat of acrylic paint in a color that complements your chosen spring theme. Opt for a bright and cheerful color like yellow, light blue, or green. Apply two or three thin coats of paint, allowing each coat to dry completely before adding the next.
- Fabric bunny time! Cut out two identical bunny shapes from your white fabric scrap. You can use a freehand drawing or find a bunny template online. Layer the two fabric pieces together and secure them with craft glue or hot glue along the edges, leaving a small opening at the bottom for stuffing.
- Stuffing the bunny: Fill the bunny with a small amount of stuffing through the opening you left at the bottom. Once stuffed, carefully glue the opening shut.
- Adding details (optional): Cut out small circles from another colored fabric scrap and glue them onto the bunny face for eyes. You can also use buttons or felt to create eyes, a nose, and a mouth.
- Attaching the bunny: Once your fabric bunny is complete, use hot glue to securely attach it to your painted wooden board. Position it strategically for a balanced look.
- A personalized touch: You can personalize your spring sign further by using stencils or freehand painting to add spring-themed words or phrases like “Welcome Spring,” “Happy Spring,” or “Hoppy Spring.”
- Hanging your masterpiece: Tie a piece of twine or ribbon to the back of the wooden board to create a hanger. Now, your adorable spring sign with a fabric bunny is ready to be displayed!
Top tip: Get creative with the fabric choices and embellishments for your bunny! You can use patterned fabrics for the body or add a tiny fabric bowtie for a touch of charm.
Project 15: A Symphony of Light: Upcycled Jar Lanterns
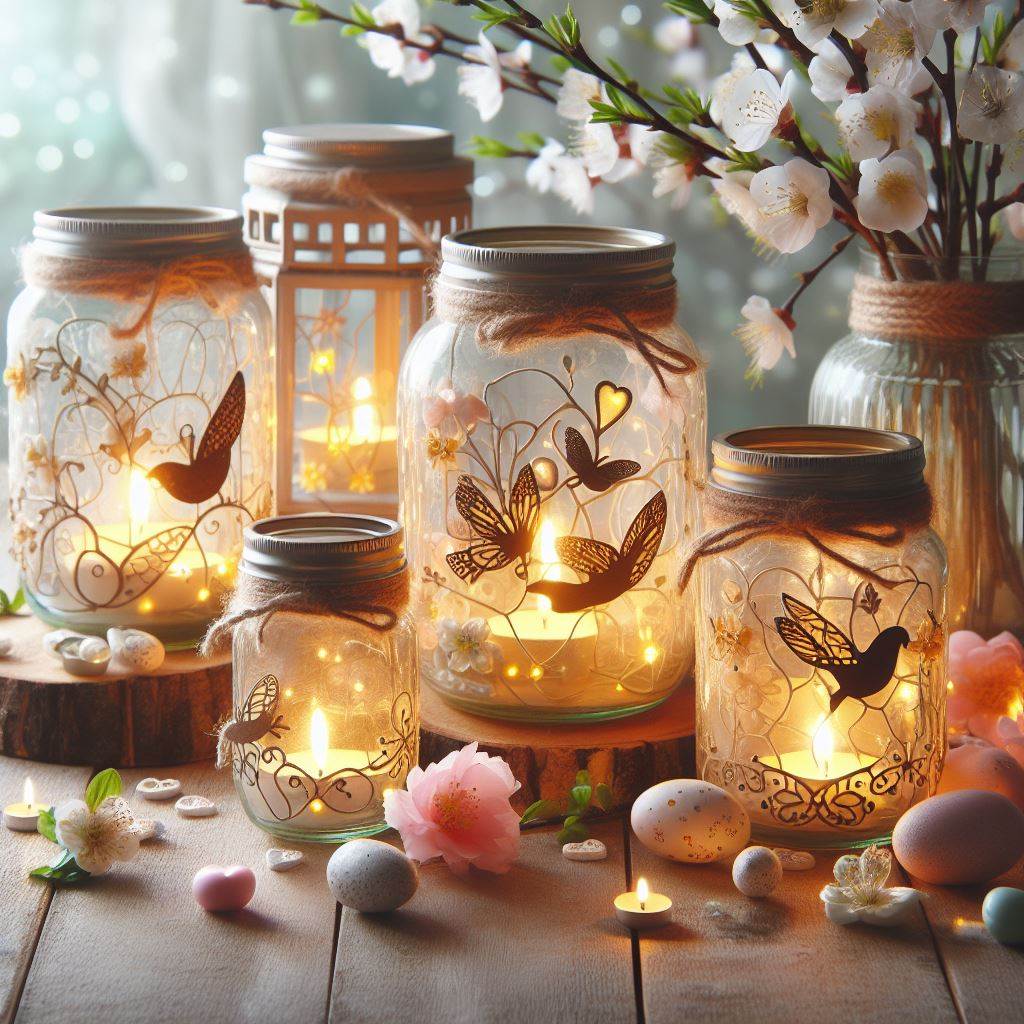
Transform old glass jars into whimsical lanterns with this upcycled jar lantern project! This is a fantastic way to create a magical ambiance for your patio or garden during spring evenings.
What you’ll need:
- Clean glass jars (various sizes)
- Acrylic paint (optional)
- Paint brushes (optional)
- Decorative wire mesh or metal fencing (cut into small squares)
- Hammer and nail (or drill)
- Battery-operated tea lights
- Decorative items (twigs, dried flowers, colorful pebbles)
Let’s create a springtime glow!
- Painting for personalization (optional): If you want to add a pop of color to your lanterns, you can paint your glass jars with acrylic paint in a solid color or create decorative patterns. Allow the paint to dry completely before moving on.
- Transforming the jars: Here comes the key step! You’ll need to create a way for the light from the tea lights to shine through the jars while keeping them enclosed. Use the wire mesh or metal fencing pieces. Cut them into squares slightly larger than the opening of the jar. Using the hammer and nail (or drill), carefully create small holes or a pattern around the edges of the mesh squares.
- Securing the light: Place the mesh square over the opening of the jar. You can bend the edges slightly to secure it in place.
- Adding a decorative touch (optional): Fill the bottom of the jar with decorative items like twigs, dried flowers, or colorful pebbles. These will add visual interest and cast beautiful shadows when the tea light is lit.
- Lighting up the night: Pop a battery-operated tea light inside the jar through the mesh opening. Now, your upcycled jar lantern is ready to add a touch of magic to your spring evenings!
Top tip: Group several jar lanterns of different sizes together to create a stunning centerpiece for your outdoor table or hang them from tree branches for a fairy-tale ambiance.
Let your creativity bloom!
These are just a few ideas to inspire your spring crafting adventures. Don’t be afraid to experiment with different colors, patterns, and materials to create DIY projects that reflect your unique personality and style. Embrace the joy of creating and add a touch of spring magic to your home and garden!