
Let’s be real: grass is a high-maintenance roommate. It wants a drink every five minutes, demands a haircut every Saturday, and still looks like a patchy mess if the sun hits it the wrong way. A few years ago, I got tired of fighting my sandy soil and decided to lean into the “desert look.” I thought I could just toss a few pebbles down and call it a day. Spoiler alert: I ended up with a pile of rocks that looked like a construction site runoff.
That “Pinterest-perfect” look doesn’t happen by accident, but it also shouldn’t cost you your entire retirement fund or your sanity. I’ve spent more time than I’d like to admit hauling limestone and cursing at invasive weeds to figure out what actually works. If you want a yard that looks intentional rather than neglected, you need a plan that balances heavy lifting with smart plant choices.
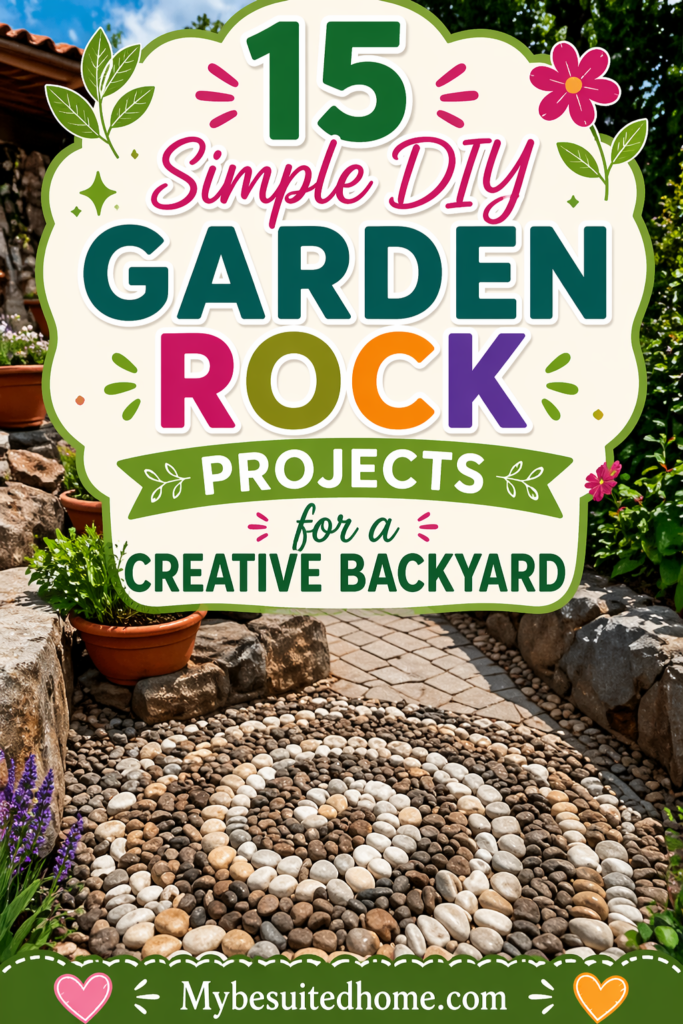
These 15 DIY rock garden projects are designed to save you the Advil and the buyer’s remorse. We’re talking about real-world solutions for slope drainage, curb appeal, and those awkward corners where nothing seems to grow. Grab a pair of heavy-duty gloves, because we’re about to turn that dead patch of dirt into something neighbors will actually stop to admire.
1. The Low-Maintenance Front Yard Rockery
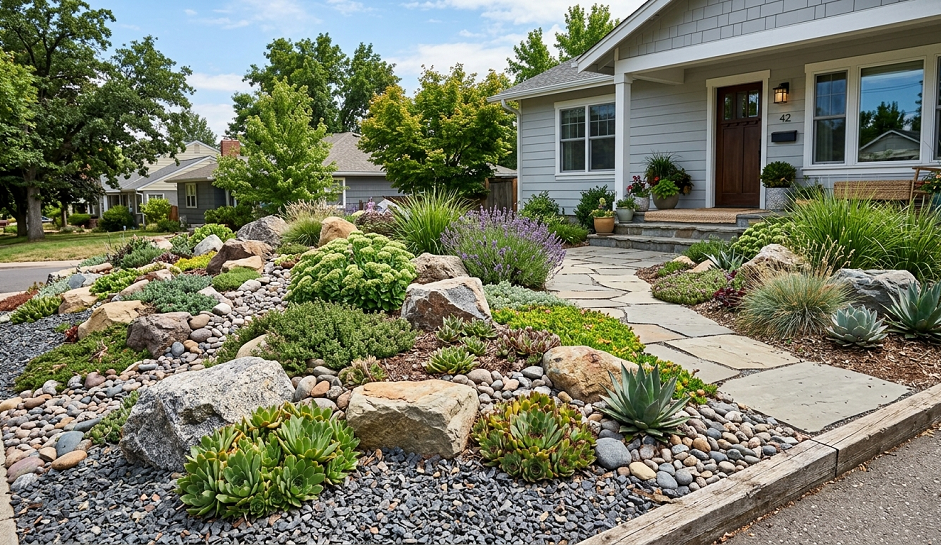
When I first tried to “rock out” my front yard, I made the classic rookie mistake of using stones that were all the same size. It looked like a bag of marbles had spilled on my lawn. For a front yard rockery that actually boosts your home value, you need variety. I’m talking about “anchor” boulders that look like they’ve been there since the Ice Age, surrounded by smaller river rocks and pea gravel to fill the gaps.
To get this right, you have to dig. I know, it’s a pain, but if you just plop a boulder on top of the grass, it’ll sink and look like a dropped potato. I always excavate about 2-3 inches of soil first, lay down a heavy-duty landscape fabric (don’t buy the cheap stuff, or you’ll be weeding until 2030), and then place my biggest stones. Think of it like a puzzle where the pieces weigh 50 pounds.
Planting in these gaps is where the magic happens. I swear by Creeping Thyme. It smells amazing when you accidentally step on it, and it fills in those rocky crevices faster than a rumor spreads in a small town. You want plants that can handle the heat reflecting off the stones. Stonecrop and Hens-and-Chicks are your best friends here because they basically thrive on neglect and direct sunlight.
The goal here is “structured chaos.” You want the rocks to look like a natural outcrop, not a museum display. I like to group stones in odd numbers—threes and fives always look better to the human eye. If you have a flat yard, create a small mound of dirt (a “berm”) before you start. It adds height and keeps the garden from looking like a flat, grey pancake in front of your house.
2. Sloped Backyard Rock Drainage Solution
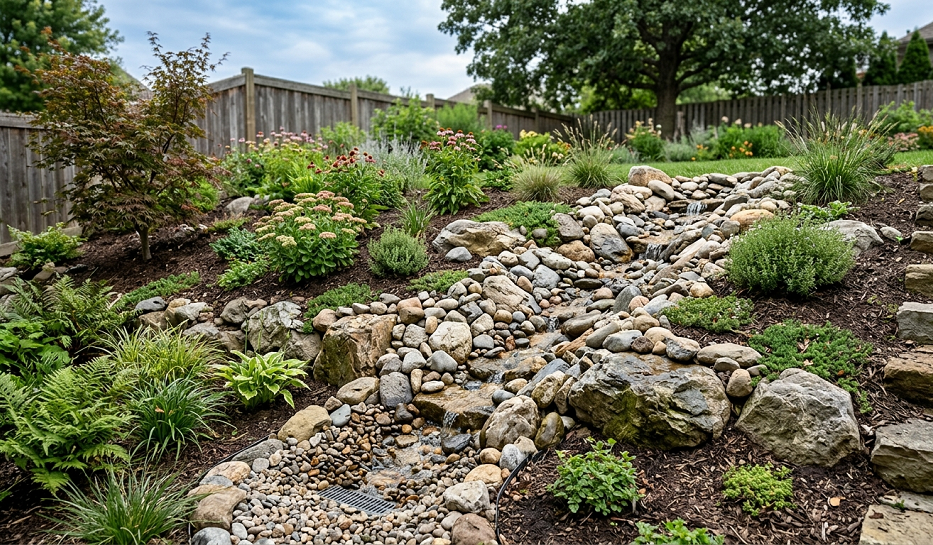
If you have a hill in your backyard, you probably also have a mud problem every time it rains. I once watched my expensive mulch wash straight into the neighbor’s pool after a summer thunderstorm. That was the day I became a believer in the dry creek bed. A rock garden on a slope isn’t just about aesthetics; it’s about managing the “river” that forms when the clouds open up.
Start by mapping out the natural path the water takes. You’ll want to dig a shallow trench—maybe 6 inches deep—along that path. Line it with heavy-duty plastic or rubber if you want to divert water away from the foundation, or use permeable fabric if you just want to slow it down. I prefer using large, jagged rocks at the “head” of the slope to break the water’s momentum.
River rocks are the standard choice here because their rounded edges look natural in a water-themed feature. However, I’ve found that mixing in some larger “rip-rap” or limestone chunks helps keep the smaller pebbles from migrating downstream during a heavy downpour. It’s like building a dam that actually looks like a landscaping choice.
For the edges, stay away from thirsty plants. I love blue fescue grass for slopes because its roots are like iron claws that hold the soil in place. Plus, the blue-grey color looks incredible against tan or brown river rocks. Just make sure you aren’t planting anything that needs constant pruning, because trying to balance a hedge trimmer on a 45-degree angle is a one-way ticket to the urgent care clinic.
3. The Zen Corner with Pea Gravel and Basalt
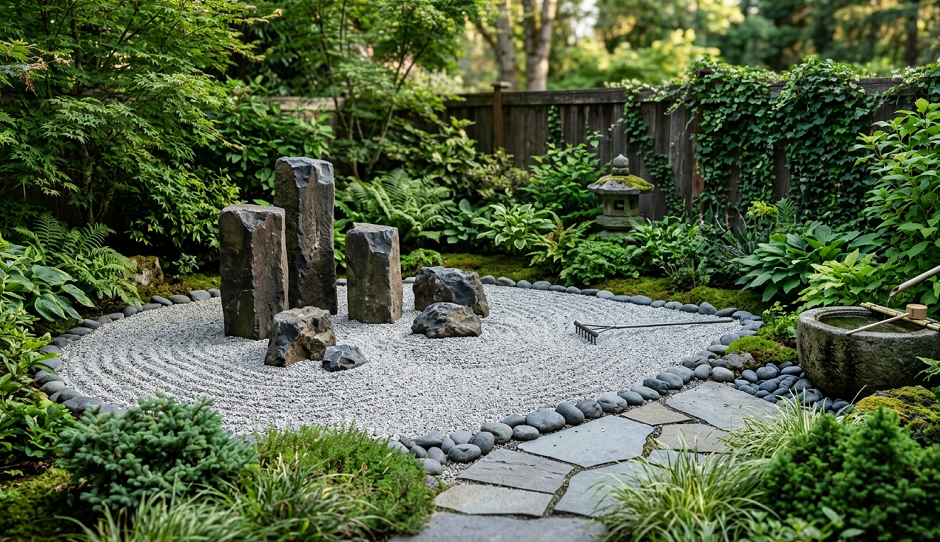
Sometimes you don’t need a whole yard makeover; you just need a place to sit and wonder where your life went wrong while sipping a cold drink. I built a small Zen-inspired rock corner under my old oak tree, and it’s become my favorite spot. The key here is “negative space.” In a Zen garden, the rocks you don’t see are just as important as the ones you do.
Pea gravel is the MVP of this project. It’s cheap, easy to spread, and feels surprisingly good underfoot if you’re a barefoot kind of person. I suggest using a dark basalt or a grey granite for the focal stones. Set one large vertical stone upright and surround it with two smaller, flatter stones. It creates a sense of balance that even a cluttered garage can’t ruin.
Don’t go overboard with plants in a Zen space. A single Japanese Maple or a well-placed clump of Hakonechloa (Japanese Forest Grass) is plenty. I once tried to put a whole flower bed in my Zen corner, and it felt like a crowded elevator. Keep it simple. The texture of the gravel should be the main event.
A quick pro-tip: buy a heavy-duty rake. Part of the “Zen” experience is raking patterns into the gravel. It’s weirdly therapeutic, like those little desktop sandboxes but on a scale that actually burns calories. Just be prepared for neighborhood kids to walk through your perfect concentric circles within five minutes of you finishing.
4. Modern Geometric Rock Border for Walkways
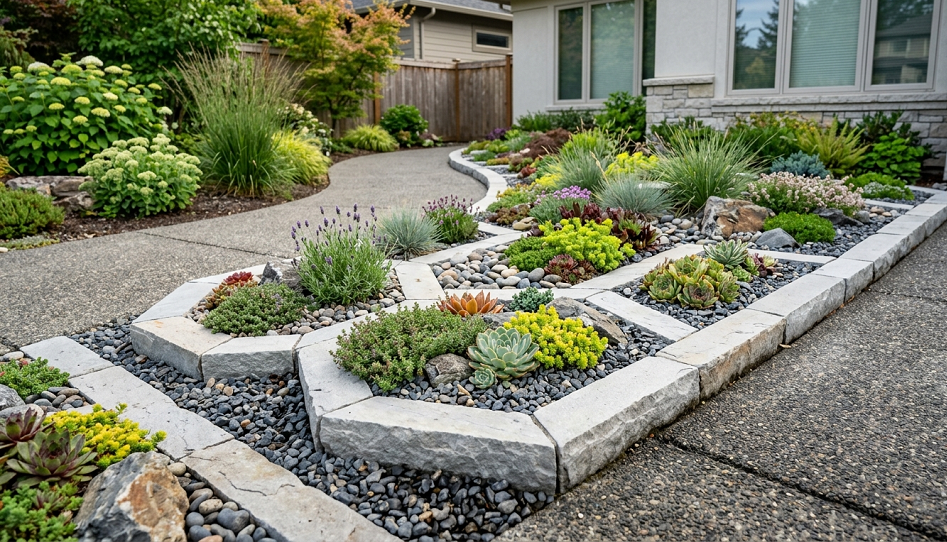
If your style is more “clean lines” and less “forest floor,” a geometric rock border is the way to go. I used this technique along my driveway to stop people from cutting the corner and killing my grass. Instead of a messy mix of stones, you’re using steel or plastic edging to create crisp, straight lines filled with a single type of rock—usually white marble chips or black lava rock.
The “wow” factor comes from the contrast. If you have a dark-colored house, use bright white rocks. If your siding is light, go with charcoal-colored slate. I’ve found that using 1-inch to 2-inch stones works best for borders. Anything smaller gets kicked into the grass and becomes a lethal projectile when you run the lawnmower. Trust me, your windows will thank you.
For the plants, think “architectural.” Succulents like Agave or upright ornamental grasses like “Karl Foerster” look fantastic in a linear rock border. They don’t flop over, and they maintain their shape all year. I’m a big fan of using “Black Mondo Grass” in white rock borders; it looks like something out of a high-end design magazine but costs about ten bucks at the local nursery.
The biggest headache with this design is keeping the rocks clean. Leaves and “helicopter” seeds love to get trapped in those bright white stones. Every fall, I find myself out there with a leaf blower trying to keep my “modern” look from becoming a “compost” look. If you aren’t prepared to do a little vacuuming (yes, outdoor vacuuming is a thing), stick to darker stones that hide the dirt better.
5. The Vertical Rock Wall Herb Garden
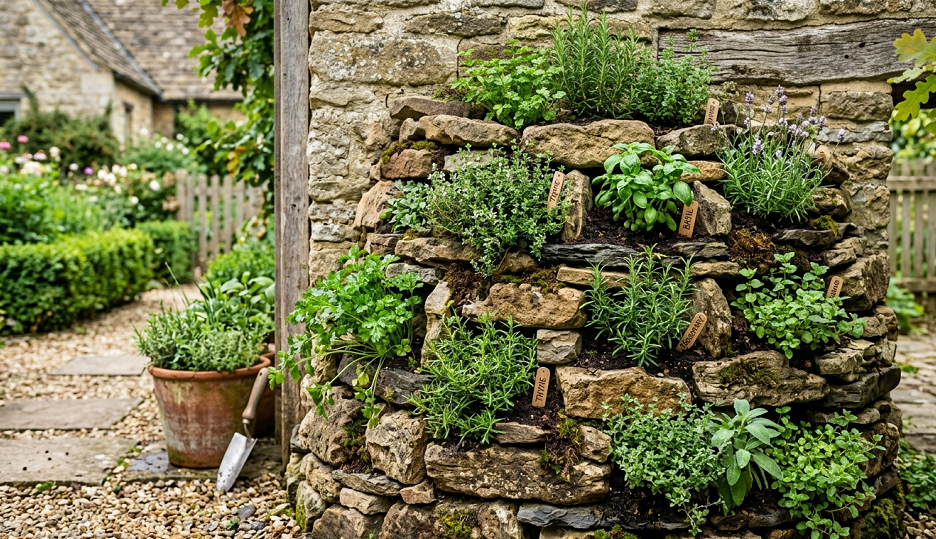
My first attempt at a vertical rock wall was a disaster. I essentially built a pile of loose stones and shoved some mint in the cracks. The first time I watered it, the whole thing collapsed and nearly broke my toe. If you want a vertical rock garden that actually stays vertical, you have to use “dry-stack” techniques or, better yet, a bit of hidden mortar.
This is perfect for a small patio where you don’t have ground space. You can build a small “retaining wall” style structure out of flat flagstones. The trick is to leave “pockets” of soil between the stones. I like to fill these pockets with a mix of potting soil and grit to ensure the herbs don’t get “wet feet.” Lavender and Rosemary love these well-draining, rocky environments because it mimics their Mediterranean home.
Using rocks as a backdrop for herbs actually helps them grow. The stones soak up the sun’s heat during the day and release it at night, which keeps your plants cozy when the temperature drops. I’ve had Rosemary survive surprisingly late into the winter just because it was tucked into a south-facing rock wall. It’s like a natural heating pad for your garden.
A quick side note on mint: do NOT put it in a rock wall unless you want your entire yard to be mint. I made that mistake once, and three years later, I was still pulling sprigs out from under my deck. Stick to clumping herbs like Chives or Thyme. They stay where you put them and don’t try to take over the ZIP code.
6. Desert-Style Xeriscaping with Red Cinder
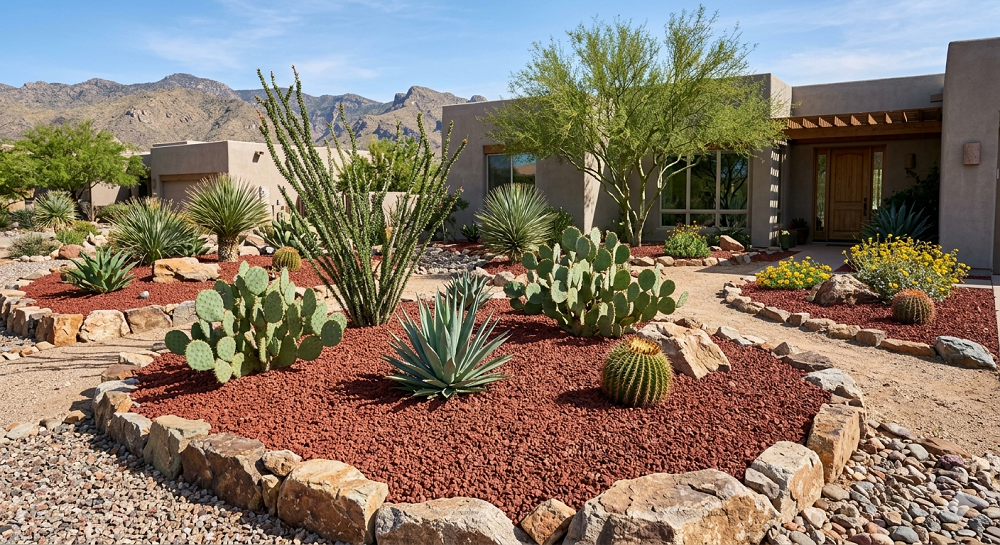
I live in an area that gets “surface of the sun” hot in July, and trying to keep a traditional garden green was costing me a fortune in water bills. Switching to a desert-style rock garden was the best move I ever made. Red cinder rock or decomposed granite are excellent choices for this because they provide a warm, natural look that doesn’t scream “I gave up on my yard.”
The key to a good desert garden is the “top-dressing.” You aren’t just throwing rocks around; you’re creating a mulch that doesn’t decompose. I like to use a mix of different sizes of red volcanic rock. It’s porous, so it helps keep the soil underneath cool, and the color stays vibrant even after years of UV exposure.
You can’t have a desert garden without cacti and succulents. I’m partial to Prickly Pear because they are tough as nails, but be careful where you plant them. I once planted one too close to the path, and my poor dog learned a very sharp lesson about spatial awareness. Stick to “soft” succulents like Echeveria or Yucca if you have pets or kids running around.
One thing people get wrong about xeriscaping is thinking it’s “no-maintenance.” It’s “low-maintenance.” You’ll still get weeds that find a way to sprout in a single grain of dust. I’ve found that a quick spray of vinegar and dish soap on a sunny day kills those rock-dwelling weeds without poisoning the groundwater. It’s much easier than pulling them by hand out of jagged lava rock.
7. The Naturalistic “Alpine” Rock Mound
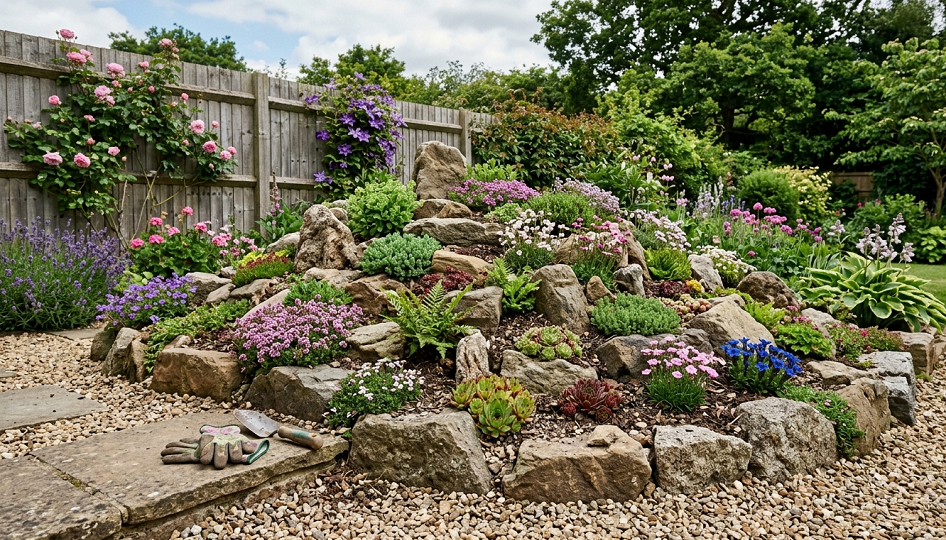
Alpine gardens are for the people who love those tiny, intricate flowers that grow on the tops of mountains. I built an alpine mound in a corner of my yard that was basically a pile of construction debris, and now it’s the most colorful part of my garden. The idea is to mimic a mountain scree slope—lots of grit, lots of drainage, and very little “rich” soil.
I start by building a base of broken bricks or large gravel for drainage. Then, I pile on a “gritty” soil mix—half potting soil, half coarse sand or fine gravel. Then comes the fun part: burying your rocks. You want about two-thirds of the rock to be underground. It makes the garden look like a natural geological formation rather than a pile of stones you just dumped out of a truck.
Plants like Saxifrage, Gentians, and Alpine Pinks are the stars here. They stay low to the ground to avoid “wind” (or in my case, the neighbor’s leaf blower) and produce a carpet of color in the spring. These plants hate sitting in water, so that rocky mound is exactly what they need to keep their roots happy.
Warning: Alpine gardens can be addictive. You start with one little mound, and suddenly you’re researching the mineral content of dolomite and trying to source rare seeds from Switzerland. It’s a bit of a “nerdy” gardening niche, but if you like detail-oriented work, you’ll love it. Just don’t blame me when you start looking at every rock on the side of the road as a potential “focal point.”
8. Flagstone Pathway with Creeping Groundcover
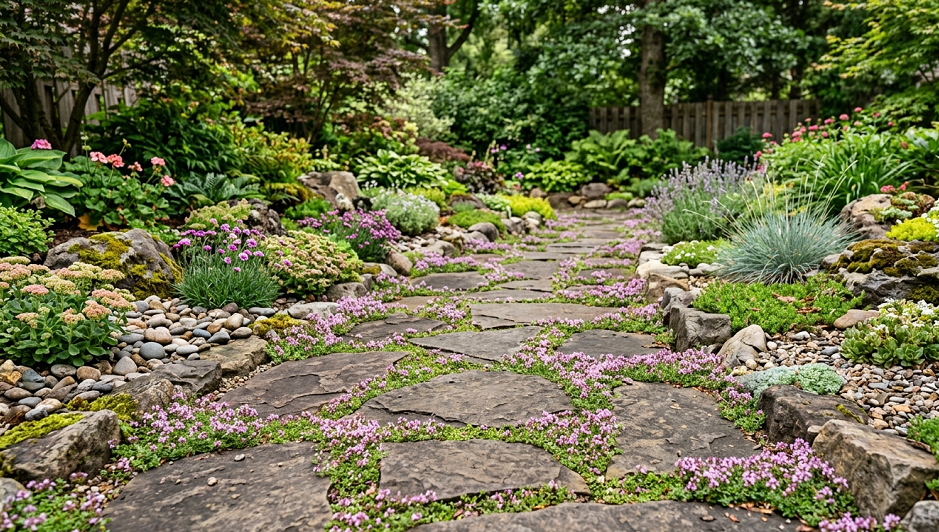
If you have a path that’s just a muddy track through the grass, flagstones are your solution. I tried using those pre-cast concrete stepping stones from the big-box store once, and they looked like giant grey cookies. Real flagstone has character, varying thickness, and colors that range from rusty orange to deep blue.
The trick to a path that doesn’t wobble is “leveling sand.” Don’t just throw the stones on the dirt. Dig out a path, lay down some crushed stone (base rock), then a layer of sand. Wiggle the flagstones into the sand until they don’t budge when you jump on them. I spent an entire Saturday “testing” my stones by doing a little dance on each one—my neighbors definitely think I’ve lost it.
Once the stones are set, don’t fill the gaps with mortar. Fill them with life. “Elfin” Thyme or “Irish Moss” are perfect for this. They grow in the narrow spaces between the rocks and soften the whole look. It makes the path feel like it’s been there for a century. Plus, the plants help lock the stones in place as their roots grow.
Be careful with the spacing. I once set my stones too far apart, and I felt like I was playing a game of “the floor is lava” every time I went to the mailbox. Measure your natural stride and place the center of the stones about 20-24 inches apart. Your hamstrings will thank you.
9. The “Boulder-In-A-Box” Raised Bed
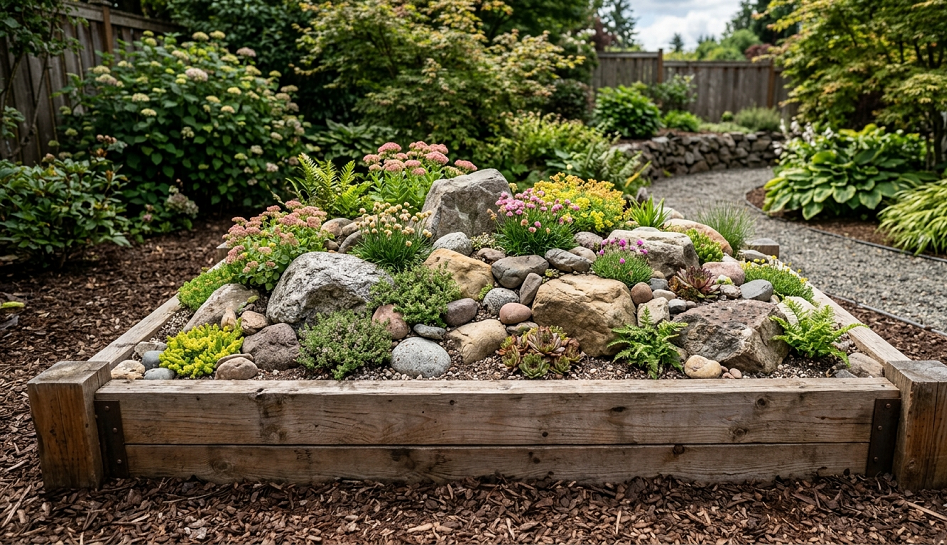
If you have terrible soil—I’m talking heavy clay that you could use to make pottery—raised beds are a lifesaver. But why use boring pressure-treated wood that rots after five years? I built a “rock-walled” raised bed using large limestone blocks, and it’s basically a permanent piece of the landscape. It looks like an old ruins-style garden and holds heat beautifully.
You don’t need to be a mason to do this. You can use “wall stones” which are flat on the top and bottom. Stack them up, staggering the joints like bricks. For a raised bed that’s only 12-18 inches high, you don’t even need mortar. The weight of the stones and the dirt inside will hold everything together. I like to tip the stones slightly inward toward the center of the bed for extra stability.
Inside the bed, you can grow whatever your heart desires. Since the rocks provide such a neutral, rustic backdrop, I love planting “wild” looking flowers like Black-Eyed Susans or Coneflowers. The contrast between the solid, heavy stone and the airy, swaying flowers is gorgeous. It gives the garden a “stately manor” vibe on a “backyard DIY” budget.
One downside: these beds are heavy. Once you build it, it’s not moving. I spent three days building one, realized it was blocking the gate to the backyard, and had to tear the whole thing down. Measure twice, lift once. Or better yet, have a friend help you lift while you “supervise” with a cold lemonade.
10. River Rock and Ornamental Grass Privacy Screen
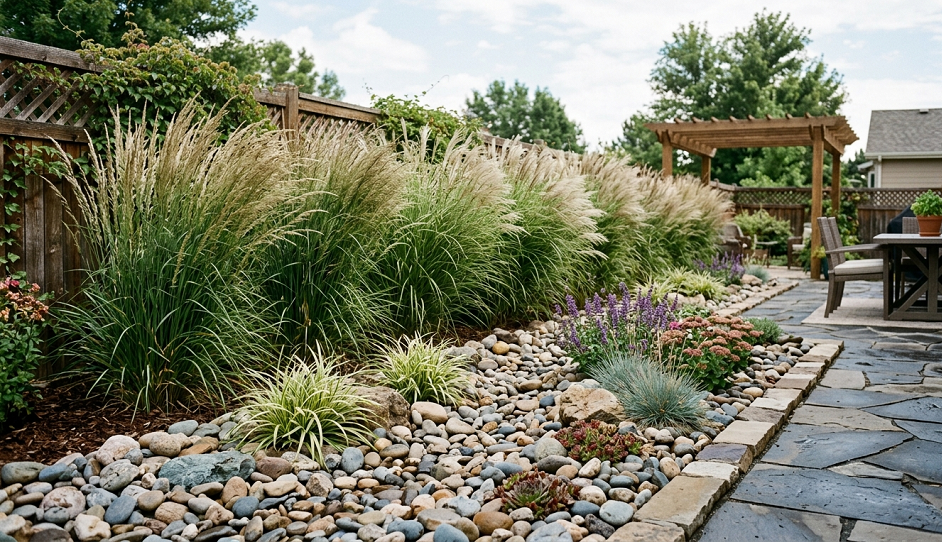
We all have that one neighbor who is a little too interested in what we’re grilling. I didn’t want a giant wooden fence that felt like a prison wall, so I went with a rock-and-grass privacy screen. I dug a long, narrow trench, filled it with large river stones, and planted tall, clumping grasses right in the middle of the rocks.
“Maiden Grass” (Miscanthus) or “Pampas Grass” are perfect for this. They grow 5-7 feet tall and create a shimmering, rustling wall that provides privacy without blocking the light. Placing them in a bed of river rocks keeps the base of the plants tidy and prevents them from spreading where you don’t want them. It looks like a high-end spa feature.
The rocks also serve a practical purpose here. Tall grasses can get heavy and “flop” after a big storm. A thick layer of large stones at the base acts like a weight, keeping the root ball secure. I’ve found that using 3-5 inch river boulders works best. Anything smaller just disappears under the grass clippings.
In the winter, don’t cut the grass down. The dried, golden stalks against the grey river rocks look stunning in the snow. I wait until early March to hack them back. It’s the one time of year I actually enjoy yard work because you can see the progress immediately. Just wear long sleeves—some of those grasses have edges like serrated knives.
11. The “Spilled Pot” Rock Feature
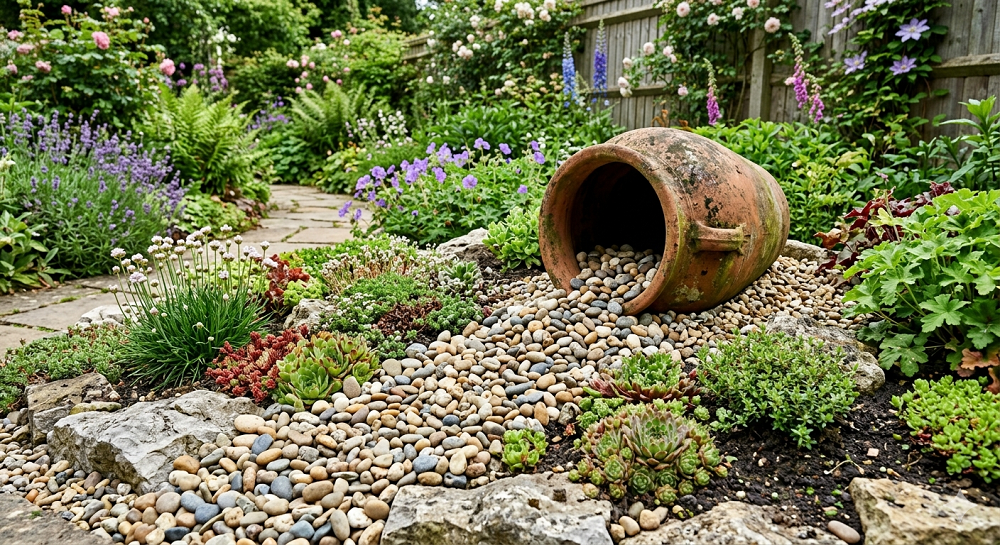
This is a classic for a reason: it’s easy and it looks cool. You take an old terracotta pot (the more cracked and “weathered” the better), half-bury it on its side, and make it look like a stream of “liquid” rocks is pouring out of it. I used small, blue-tinted slate chips for mine to mimic water, and it’s a total conversation starter.
To make it look “real,” the “stream” of rocks should widen as it gets further from the pot. I like to tuck a few low-growing succulents around the edges of the “spill” to make it look like it’s been there for years. It’s a great way to use up those random bags of leftover gravel you have sitting in the back of the shed.
I’ve seen people do this with flowers, but rocks are better because they don’t die. If you use white pebbles, it looks like spilled milk. If you use colorful glass gems (the kind they sell for vases), it looks like a treasure chest exploded. It’s a low-risk project that you can finish in about twenty minutes.
Don’t use a brand-new, shiny pot. It looks fake. I found an old, mossy pot at a garage sale for two dollars that worked perfectly. If your pot is too clean, rub some plain yogurt on the outside and leave it in the shade. It’ll grow moss and “patina” in a few weeks. It’s a weird gardening hack, but it works every time.
12. Backyard Fire Pit Rock Surround
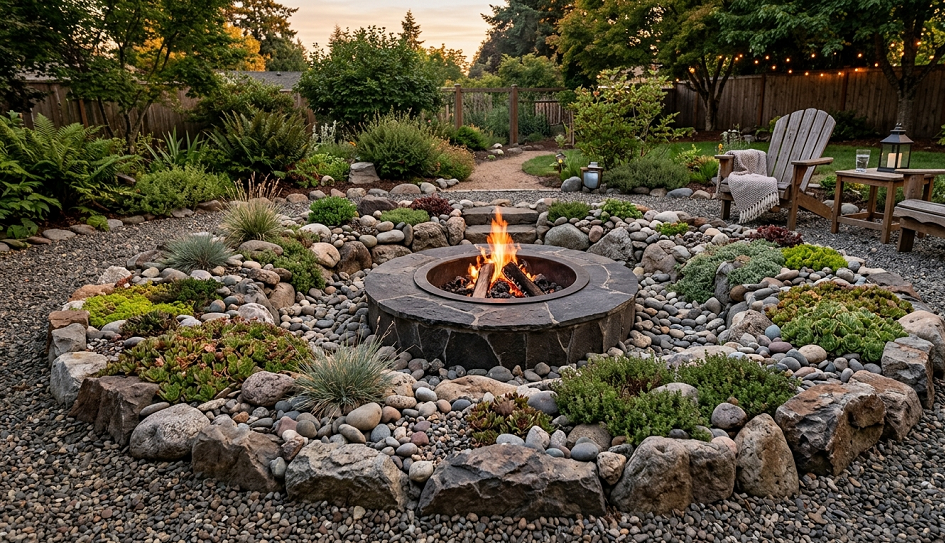
If you have a fire pit, you know the struggle of the “burnt grass ring” around it. I got tired of the scorched earth look and replaced the grass with a wide radius of crushed granite. It’s fire-proof, it drains well, and it provides a stable surface for Adirondack chairs. No more wobbling around while you’re trying to roast a marshmallow.
I recommend a “compactable” gravel for this, like 3/4-inch minus limestone. It has a mix of small stones and “fines” (dust) that packs down into a hard surface. It feels almost like concrete but looks a lot more natural. I topped mine with a thin layer of decorative “pea gravel” just for the color.
Safety first: make sure your rocks aren’t the kind that explode when they get hot. Avoid river rocks or anything “wet” from a creek bed for the actual fire ring. Stick to dry-quarried limestone, lava rock, or fire-rated bricks. I once saw a river rock “pop” like a firecracker because of trapped moisture—not the kind of excitement you want at a family BBQ.
For the edges of the fire pit area, I like to use larger “sitting stones.” Big, flat boulders can double as extra seating or a place to set your drink. It gives the whole area a “mountain campsite” feel right in the suburbs. Just be prepared for the fact that every cat in the neighborhood will think you’ve built them a giant, luxury litter box.
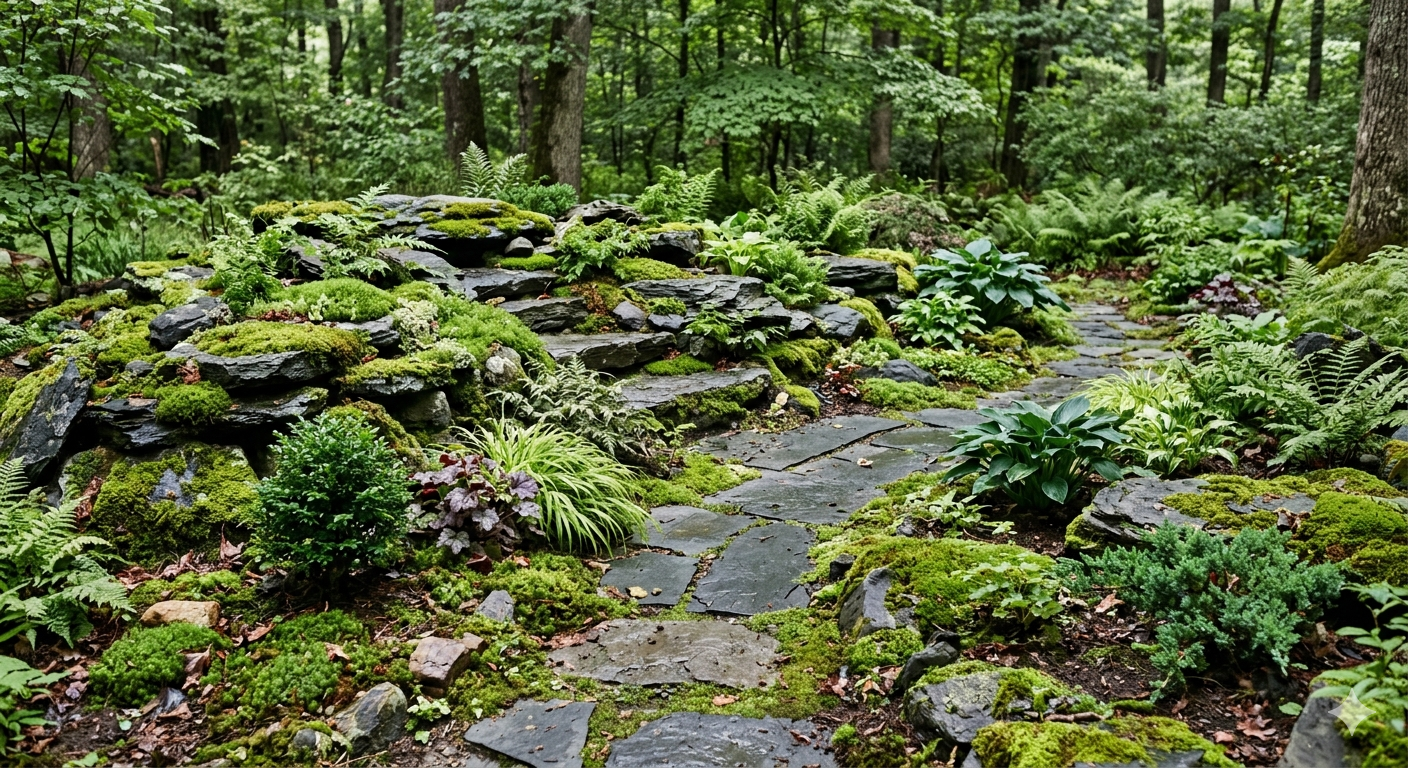
13. The Shade-Loving Moss and Slate Garden
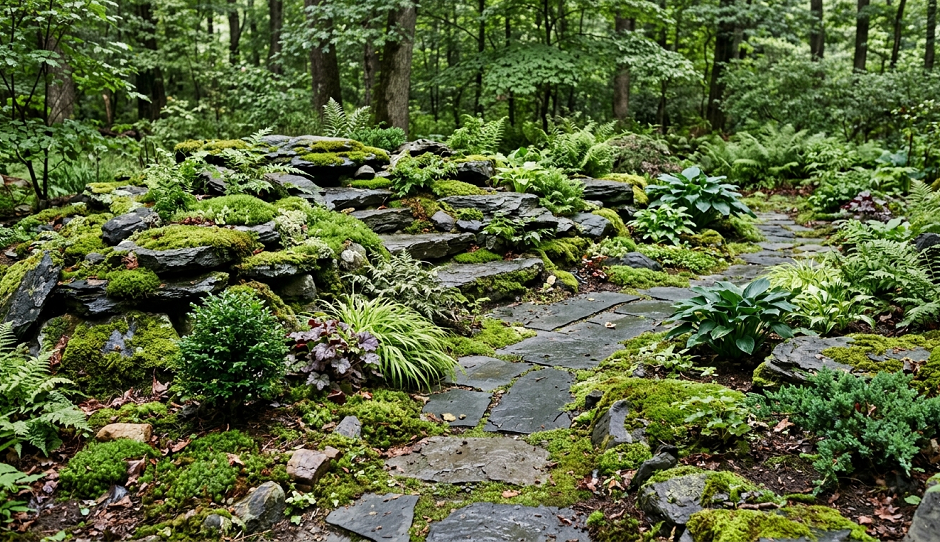
I have a spot under my North-facing porch where grass goes to die. It’s dark, it’s damp, and it’s ugly. Instead of fighting nature, I leaned into the “grotto” vibe. I used flat pieces of slate and encouraged moss to grow between them. It’s cool, quiet, and honestly looks like something out of a fairy tale.
Slate is great for shade because it doesn’t get “bleached” out by the sun. I lay the pieces out like a loose puzzle and fill the gaps with a mixture of soil and shredded moss. If you don’t want to wait for moss to grow naturally, you can literally put moss and buttermilk in a blender and “paint” it onto the rocks. It’s gross, it smells like a farm for a few days, but it works like a charm.
Pair the slate with shade-tolerant plants like Hostas or Ferns. The broad, green leaves of a Hosta look incredible against the sharp, dark edges of the slate. I especially love “Autumn Ferns” because they have a copper color that makes the grey stone pop.
The “Real Talk” here is that slate can be slippery when wet. If this is a high-traffic area, you might want to look for “textured” slate or mix in some coarser gravel for traction. I’ve taken a spectacular tumble on wet slate before, and I can tell you from experience that stone is much harder than your ego.
14. Rock Garden “Island” in a Sea of Mulch

If you have a huge yard and don’t know what to do with the middle of it, build an island. I created a large, kidney-shaped rock garden right in the center of my back lawn. It broke up the “sea of green” and gave me a place to plant all the things that my lawnmower usually tries to eat.
I started by outlining the shape with a garden hose to get the curves right. Then, I killed the grass (sorry, grass) and piled up about a foot of topsoil in the center. I used large “fieldstones” to border the island, which keeps the mulch and rocks inside the bed. It looks like a natural “lump” in the landscape that evolved there over time.
Mix your media. I used large boulders for height, river rocks for texture, and dark wood mulch for the planting areas. The combination of different materials makes the garden look professionally designed. I planted a “Weeping Cherry” tree in the center of mine, and when it blooms, it’s the star of the whole property.
Side note: make sure you have a “mower edge.” I didn’t leave a flat border at first, and trying to trim the grass right up against jagged rocks was a nightmare for my weed-whacker. I ended up putting a row of flat bricks at ground level around the whole island. Now I can just run the mower wheel right over the bricks and I’m done.
15. The “Bonus” Miniature Fairy Rock Garden
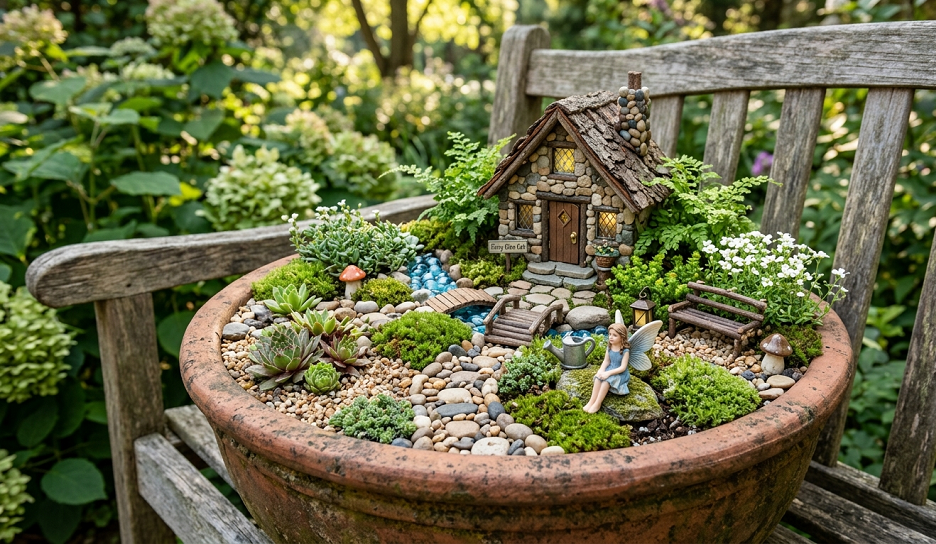
Okay, this one is a bit “cute,” but hear me out. If you have kids or grandkids—or if you’re just a kid at heart—a miniature rock garden is a blast to build. I used a large, shallow stone trough and filled it with tiny “bonsai” rocks and miniature succulents. It’s like a regular rock garden, but everything is at a 1:12 scale.
You can get really creative with the “rocks” here. I used pieces of sea glass, polished pebbles from the craft store, and even some cool-looking gravel I found in the driveway. The plants should be “micro” versions of the big stuff—miniature Stonecrop or “Baby Tears” work perfectly.
It’s the ultimate low-stakes gardening. If a plant dies, it costs two dollars to replace. If you don’t like the layout, you can move the entire garden in about thirty seconds. I keep mine on the patio table, and it’s a great way to introduce kids to gardening without them having to dig up the whole yard.
Plus, it’s a great excuse to buy those tiny little fairy houses. My granddaughter thinks a “rock troll” lives in ours, and honestly, after a long day of hauling actual boulders, I’m starting to believe her.
Real Talk: What They Don’t Tell You on Pinterest
Before you go out and buy three tons of river rock, let’s have a heart-to-heart. Rock gardens are “permanent” in a way that flower beds aren’t. If you decide you hate that limestone boulder in two years, you can’t just dig it up with a trowel. You’re going to need a crowbar, a couple of strong friends, and probably a new chiropractor. Do not rush the planning phase.
Another thing: Rocks don’t kill weeds. I see people all the time who think a layer of gravel is a “magic shield” against crabgrass. It isn’t. Weeds will grow in the dust that settles between the rocks, or they’ll punch right through cheap landscape fabric like it’s wet tissue paper. If you don’t use high-quality, professional-grade fabric and a thick layer (at least 3 inches) of rock, you’ll be spending your weekends with a bottle of herbicide.
Lastly, choose your colors wisely. Those bright, snowy white marble chips look amazing for the first six months. Then they start to turn green from algae, or brown from the dirt blowing off the neighbor’s yard. If you aren’t prepared to power-wash your rocks (yes, people do that), stick to “earth tones”—tans, greys, and browns. They age much more gracefully and hide a multitude of gardening sins.
The Wrap-Up
Building a rock garden is one of the most rewarding DIY projects you can tackle because the results are instant. You aren’t waiting three years for a hedge to grow; once that stone is in the ground, it looks great immediately. It’s about working with the land instead of against it. Whether you’re fixing a muddy slope or just tired of mowing, rocks are the answer.
My final piece of “dirt-under-the-fingernails” wisdom? Let the rocks do the heavy lifting. Don’t over-plant. A rock garden should be a balance of “hard” and “soft.” Let the beauty of the stones show through, and use plants to accent them, not hide them. Now, I want to hear from you. What’s the biggest “rock mistake” you’ve ever made in your yard? Are you team “River Rock” or team “Lava Rock”?
Drop your questions or your own DIY rock success stories in the comment box below!