
Your lawn looks tired. Not dead, just… flat. Water pools in weird spots after it rains, the grass feels spongy in some places and hard as concrete in others, and no matter how much fertilizer you dump on it, nothing seems to soak in. That’s compacted soil talking, and the fix everyone recommends is aeration.
Then you check the rental price for a core aerator. Fifty, sometimes ninety bucks for a few hours, plus you need a truck or trailer to haul the thing home, plus it weighs about as much as a baby hippo. For a quarter-acre yard, that math doesn’t work.
Here’s the good news: my neighbor Dale and I have spent years testing every cheap alternative to a rental machine, mostly because neither of us wanted to admit defeat to a gas-powered lawn tool. Some of these methods are genuinely effective. A couple are borderline gimmicks. I’ll tell you which is which.
Why Your Lawn Needs Aeration In The First Place
Before we get into the how, let’s talk about the why, because it changes how aggressive you need to be.
Soil compaction happens when the tiny air pockets between soil particles get squeezed out. Foot traffic does it. Kids playing football in the backyard does it. Dogs running the same path along the fence line does it. Clay-heavy soil compacts faster than sandy soil, and if you’ve got clay, you already know the drill: water sits on top instead of soaking in.
Compacted soil chokes your grass roots. They can’t push down for water and nutrients, so they stay shallow, and shallow roots mean a lawn that browns out the second summer gets hot. Aeration punches holes (or pulls plugs) so air, water, and fertilizer can actually reach the root zone instead of running off into the storm drain.
Quick test: grab a screwdriver and try to push it into your lawn. If it slides in easy, you’re fine. If you’re leaning on it with your body weight and it barely goes two inches, your yard needs help.
There’s also a simple visual clue most people miss: puddling. If rainwater or sprinkler runoff sits on the surface for more than thirty minutes instead of soaking in, that’s compacted soil refusing to let water through. Same goes for thatch buildup. If you dig up a small square of lawn and the thatch layer, that spongy brown mat between the grass blades and the soil, is thicker than half an inch, compaction and thatch are probably working together to smother your roots.
One more thing worth mentioning: clay soil and sandy soil behave completely differently here. Clay particles are flat and tiny, so they pack together like stacked plates with almost no room for air. Sandy soil has bigger, rounder particles, so it drains fast and rarely gets as concrete-hard, though it can still compact under heavy, repeated traffic. Knowing which one you’re dealing with tells you how aggressive to get and how often you’ll need to repeat the process.
Method 1: Core Aeration Sandals (The Gimmick That Sort Of Works)
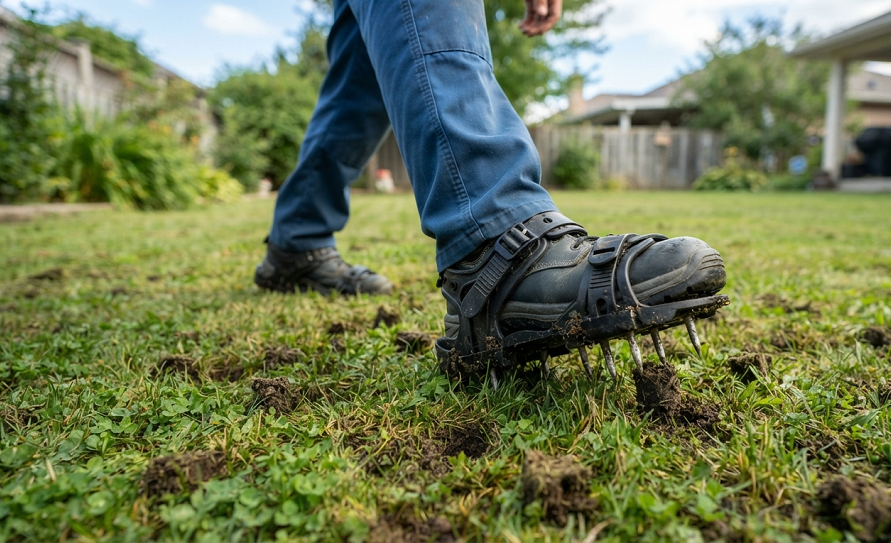
You’ve seen these on Amazon. Sandals with metal spikes strapped to the bottom, so you basically wear golf cleats and walk around your yard like you’re doing some kind of grass-based cardio workout.
I’ll be honest, I bought a pair mostly out of curiosity, and I’ve found that aeration sandals are a total waste of money if you expect professional results, even though the reviews make them sound like a miracle. The spikes are solid, not hollow, which means they’re compressing soil to the sides instead of removing a plug. That’s the opposite of what you want in heavily compacted dirt.
That said, they’re not completely useless. For a small lawn with mild compaction, mostly sandy soil, and patience, strapping these on while you do yard work anyway can help loosen the top inch or two. Just don’t expect it to fix a yard that feels like a parking lot.
If you do try them, wear them consistently over a few weeks rather than one marathon session. Your ankles will thank you, and the gradual repeated puncturing does more good than one aggressive pass. Water the lawn the day before so the spikes actually penetrate instead of just scuffing the surface.
A few practical notes if you go this route anyway. Buy a pair with adjustable straps, because the cheap ones tend to slip sideways on grass and twist your ankle when you’re not paying attention. Wear them while doing something else, mowing, watering, checking the mail, so the extra steps don’t feel like wasted time. And don’t bother on a slope. I tried mine on a gentle hill along our side yard and nearly ate dirt twice before giving up and switching to the fork instead.
Method 2: A Garden Fork (My Actual Go-To)
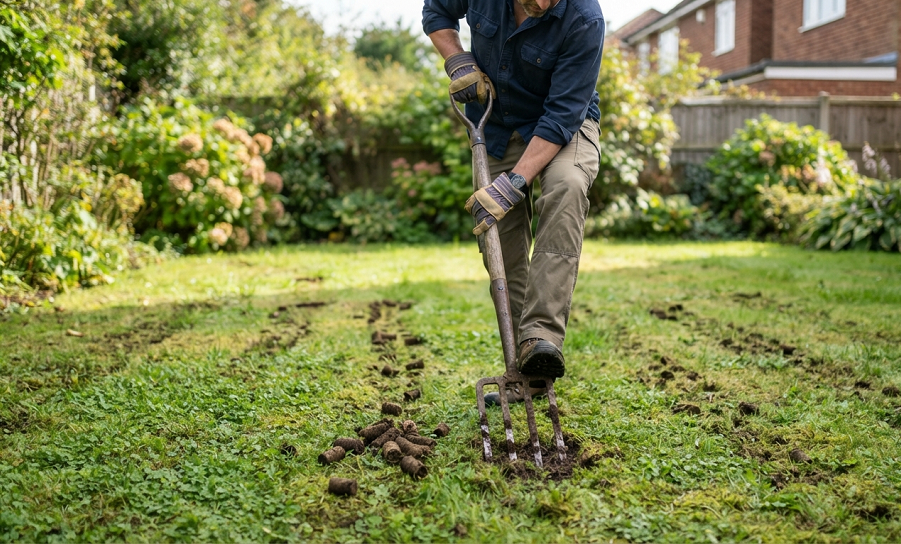
This is the method I use every fall, and it’s the one I recommend to anyone with a yard under 3,000 square feet. A basic garden fork, the kind with four sturdy tines, works better than most people expect.
Here’s the process. Water your lawn a day or two ahead so the soil isn’t bone dry, since dry compacted soil fights back hard. Push the fork straight down as far as it’ll go, ideally 4 to 6 inches. Rock it back and forth a few times to widen the hole and break up the soil around the tines, then pull it out and move over about 4 inches.
Repeat that across the whole yard in a grid pattern. Yes, it’s tedious. Yes, your lower back will file a formal complaint by hour two. I usually break it into two sessions on back-to-back weekends instead of doing the entire yard in one go.
The rocking motion matters more than people realize. Just stabbing the fork in and pulling it straight out barely disturbs the soil. Rocking it side to side actually fractures the compacted layer, which is the whole point. Focus extra effort on high-traffic zones: the path to the mailbox, the spot under the swing set, anywhere the dog runs laps.
I’d also recommend doing this in cooler weather, early morning or late afternoon in fall, rather than fighting the fork under a blazing July sun. The soil handles it better and so does your body. Wear real boots too, not sneakers. I ruined a decent pair of running shoes the first year I tried this, standing on the fork’s shoulder rest with my full weight and wondering why my arches hurt for a week straight.
For anyone with a bigger yard who still wants to skip the rental, consider splitting the work with a neighbor. Dale and I trade off every fall, one of us forks the front while the other tackles the back, then we swap yards. It cuts the time roughly in half and turns a miserable solo chore into something closer to a reason to hang out and complain about our knees together.
Method 3: The Screwdriver Or Soil Knife Method For Small Problem Areas
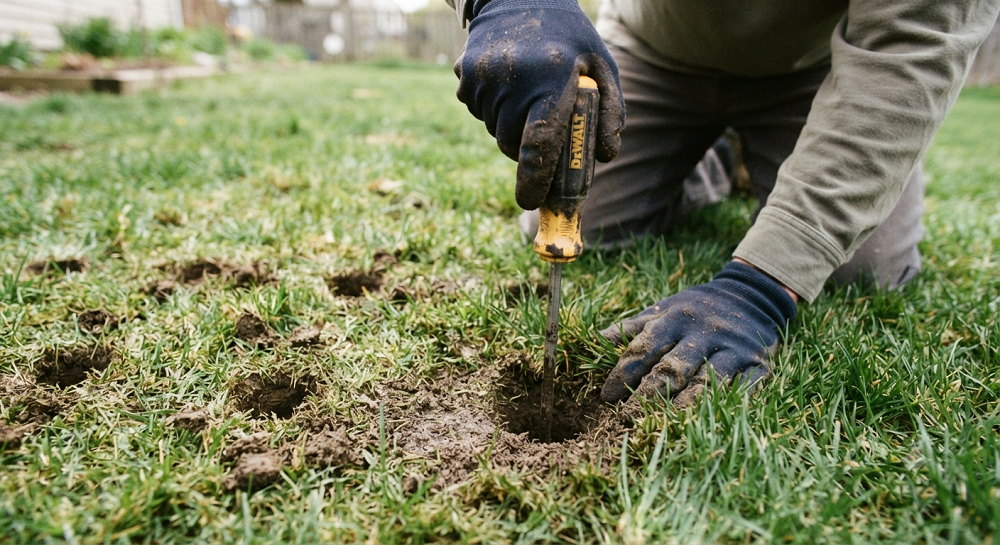
You don’t always need to aerate the whole yard. Sometimes it’s one bad patch, maybe where the kiddie pool sat all summer or where the delivery truck parks every week.
For spots under a few hundred square feet, a long flathead screwdriver or a hori-hori soil knife does the job. Push it in every 3 to 4 inches across the trouble zone, going as deep as you can manage, then wiggle it around before pulling it out.
This is slow, borderline meditative work. I do it while listening to a podcast because otherwise the repetition gets old fast. It’s not a whole-yard solution, but for targeted compaction, it’s genuinely effective and costs nothing if you already own a screwdriver.
One thing I’d add: mark the spots you’ve done with a stick of chalk spray or a stray twig, because it’s shockingly easy to lose track of which square foot you already hit. I’ve redone the same three-foot patch four times while missing an entire section six feet over.
A hori-hori knife has a slight edge over a plain screwdriver because the serrated edge lets you carve small plugs out rather than just punching holes, which more closely mimics what a real core aerator does. It’s a bit pricier, usually fifteen to twenty-five dollars, but if you garden regularly anyway, it’s a tool you’ll use for a dozen other jobs too, from dividing perennials to cutting sod edges. I keep mine in a bucket by the back door and reach for it more than half my actual garden tools combined.
Method 4: Renting Isn’t The Only Machine Option, Try A Broadfork
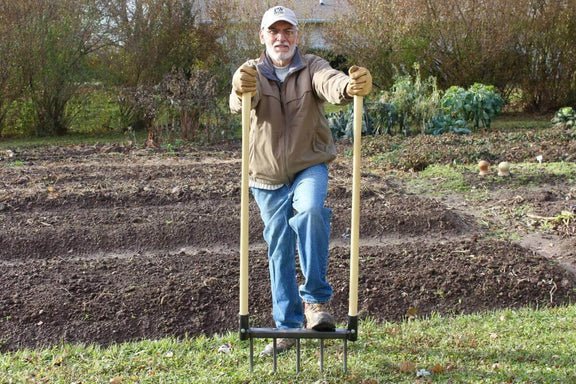
A broadfork is basically a garden fork’s bigger, more serious cousin. It’s got a wide bar with multiple long tines and two handles sticking straight up, so you stand on the crossbar to drive the tines deep, then pull back on the handles to lever the soil apart.
Broadforks cost somewhere between sixty and a hundred and fifty dollars depending on quality, which sounds like a lot until you compare it to a single aerator rental. And unlike a rental, you own it forever, so it pays for itself the second season if you aerate every fall like you should.
The technique is different from a regular fork. Step onto the bar with your full body weight, driving the tines a solid 8 to 10 inches down, deeper than almost any other manual method on this list. Then pull the handles toward you to lever and crack the soil, step back, and move forward about 6 inches before repeating.
This is genuinely the closest manual equivalent to a rental core aerator in terms of depth and soil disruption. It’s a serious upper-body and core workout, so pace yourself, and it’s overkill for a tiny postage-stamp lawn. But for a half-acre yard with real compaction issues, I’d pick a broadfork over a rental machine any day, mostly because I’m not fighting with a trailer hitch at 7am on a Saturday.
When you’re shopping for one, pay attention to tine spacing and length. Wider spacing, around six to eight inches between tines, covers ground faster but disturbs less soil per pass. Narrower spacing does the opposite. For compacted lawns specifically, I’d lean toward a model with tines closer to ten inches long, since anything shorter won’t get you meaningfully deeper than a regular garden fork, and at that point you’ve overpaid for the extra handles.
Storage is worth thinking about too, since a broadfork is roughly the size of a snow shovel and about as awkward to lean against a garage wall without it toppling over. A hook on a stud works fine. It’s not glamorous, but it beats tripping over it every time you go looking for the hose.
Method 5: Liquid Aeration (No Tools, No Sweat)
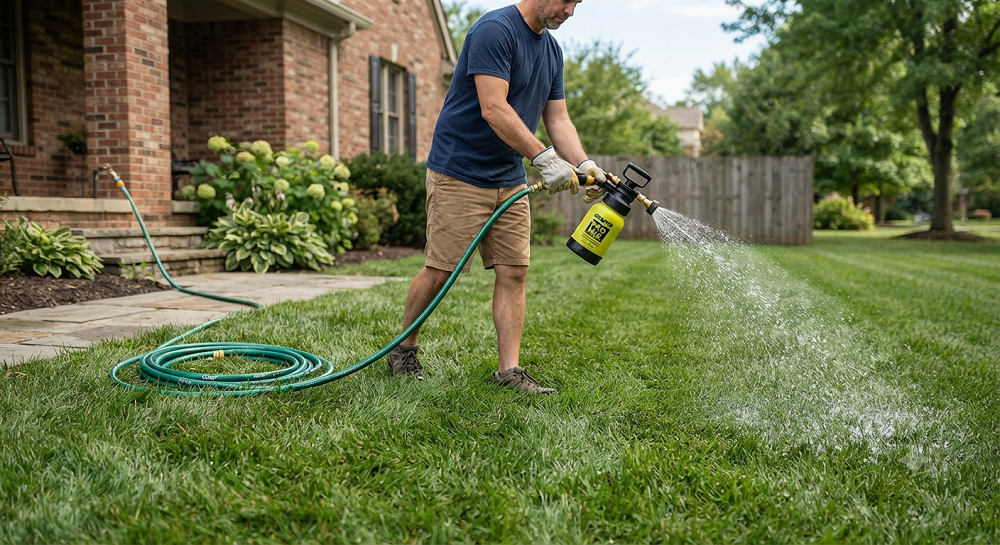
This one surprises people. Liquid soil conditioners, sold under names like humic acid or liquid aerator products, work chemically instead of mechanically. You mix them with water and spray them across the lawn, and they help break down compacted clay particles over several weeks.
I was skeptical the first time Dale talked me into trying it, mostly because it felt like a lawn-care infomercial. But I’ve found liquid aeration genuinely helps as a supplement, especially between physical aeration sessions or on lawns too large to fork by hand.
The catch is patience. This isn’t instant. You’re looking at 4 to 6 weeks of consistent application to see real improvement in water absorption. It also won’t fix severe compaction on its own. Think of it as a maintenance tool, not a rescue mission for a yard that’s basically a driveway with grass painted on top.
Apply it in early spring or fall when the grass is actively growing, water it in well, and reapply according to the product label, usually every few weeks through the season. Pairing this with a manual fork session in the worst spots gives you the best of both approaches without breaking your back on the whole yard.
I’ll add one honest caveat here: results vary a lot depending on your soil type and how bad the compaction actually is. Sandy soil responds faster and more noticeably. Heavy clay takes longer and sometimes needs a full season of consistent applications before you notice a real difference in drainage. Don’t expect miracles from a bottle, and definitely don’t skip watering afterward, since the product needs moisture to actually work its way down into the soil profile rather than just sitting on the surface evaporating in the sun.
Method 6: Bonus Tip, Time It With Overseeding
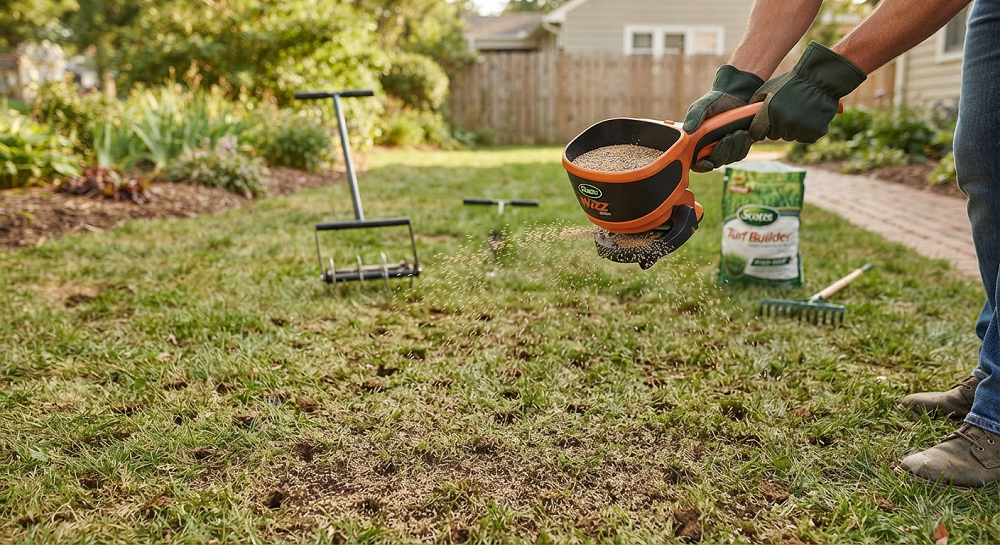
Quick side note here because this isn’t really a standalone method, more of a strategy tweak. Whatever manual aeration approach you pick, do it right before overseeding, not months apart.
The holes you create, whether from a fork, broadfork, or screwdriver, are prime real estate for grass seed to settle into direct contact with soil instead of sitting on top getting eaten by birds. Aerate, then immediately spread seed, then top it with a thin layer of compost. The timing multiplies the benefit of both jobs for basically zero extra effort.
Fall is the sweet spot for cool-season grasses, and late spring works for warm-season varieties. Don’t aerate and seed in the peak heat of summer unless you enjoy watching your work fry.
While you’re at it, don’t skip a light topdressing of compost after seeding. A quarter-inch layer raked evenly across the aerated, seeded area helps hold moisture around the seed and gives new roots something soft to push into right away instead of hitting compacted soil again two inches down. It’s an extra ten minutes of work that noticeably speeds up germination, especially if your existing soil is more clay than loam.
Real Talk: What’s Not Worth The Effort
Let’s talk about what actually goes wrong, because plenty does.
Manual aeration on a large lawn, anything over half an acre, is genuinely brutal. I’m not going to pretend a garden fork is a reasonable substitute for a machine on a yard that size. Your back, shoulders, and patience will all run out before you finish. At some point, renting a machine or hiring it out is the smarter call, and there’s no shame in that math.
Aerating soil that’s bone dry is a waste of time. The tines barely penetrate, you’ll wear yourself out, and you’ll get maybe an inch of depth instead of the four to six you need. Always water first, ideally the day before, not right before you start.
Spike-based tools, including the sandals from Method 1, can make compaction worse in heavy clay soil over time because they compress soil sideways instead of removing it. If your soil test or screwdriver test shows serious compaction, skip the spikes entirely and go straight to a fork or broadfork.
Doing this once and expecting a permanent fix isn’t realistic either. Aeration is a maintenance task, not a one-time cure. High-traffic lawns benefit from aeration once or even twice a year. Skip it for three years and you’re basically starting from zero again.
And honestly, don’t aerate a lawn that isn’t actually compacted. If your screwdriver test slides in easy, you don’t need this. Aerating healthy soil doesn’t help anything and just stresses the grass for no reason.
I’ll also mention timing mistakes, since I’ve made this one myself. Aerating right before a heat wave or during a drought stresses grass that’s already struggling, and you’ll end up with brown, patchy stress marks exactly where you were trying to help. Same goes for aerating a brand-new lawn less than a year old. The root system isn’t established enough to bounce back quickly, and you can do more harm than good. Give a new lawn at least one full growing season before you start poking holes in it.
Last one: skipping the follow-up watering. Aeration opens up channels in the soil, but if you don’t water within a day or two afterward, especially with the fork or broadfork methods, those channels can start closing back up before they’ve done any good. Treat the days right after aerating like you would after overseeding. Consistent moisture matters more than usual.
Final Thoughts
You don’t need a rental truck or a gas-powered machine to fix compacted soil. A garden fork, a little patience, and a Saturday afternoon (or two) will get most average-sized yards where they need to be. Save the rental money for something else, maybe a broadfork you’ll actually own, or just a well-earned six-pack for after you’re done digging.
Have you tried any of these methods, or found one I didn’t mention? Drop your experience in the comments below, I read every one and I’m always curious what’s working in other people’s yards.

About Syprose Kiche
Syprose Kiche is the creator and writer behind My Besuited Home, a practical home and garden website covering DIY projects, gardening, lawn care, landscaping, home improvement, and outdoor living. She focuses on turning everyday homeowner questions into clear, practical guides backed by careful research and useful real-world considerations.