
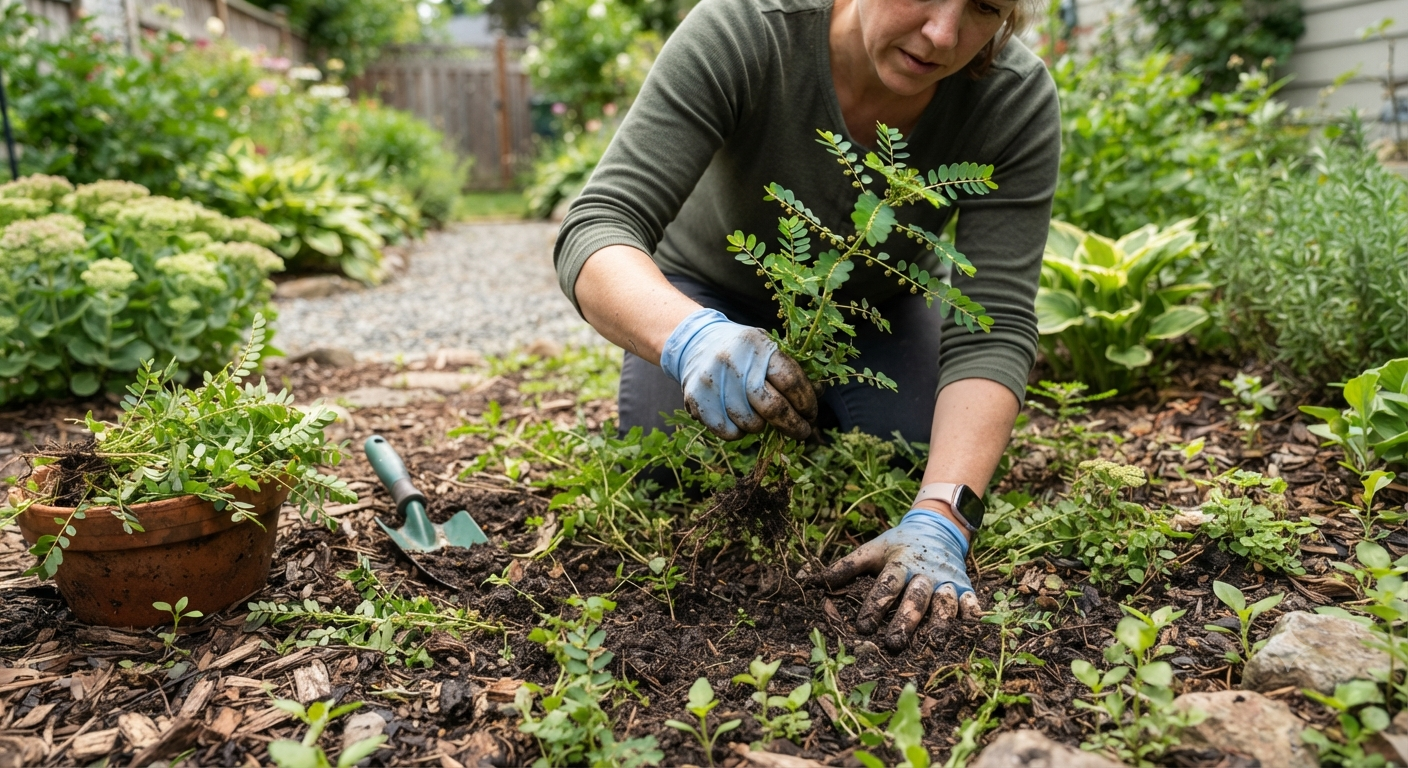
If you’ve spotted a low, ferny little weed creeping through your grass that seems to multiply overnight, I’ve got bad news: that’s probably chamberbitter, and it did not show up to be polite. This stuff is sneaky. It hides under its own leaves, drops thousands of seeds before you even notice it’s flowering, and by the time most homeowners realize what they’re dealing with, it’s already claimed half the yard.
I’ve been pulling, spraying, and cussing at chamberbitter for over a decade now, and I can tell you exactly why it’s such a nightmare. Each plant produces tiny seed capsules tucked underneath its leaflets, almost like it’s hiding contraband. Brush against a mature plant and you’ll literally hear the seeds ping off in every direction. One plant can drop over 1,000 seeds in a single season. Ignore it for even a few weeks in July, and you’ll be fighting this weed for the next three summers.
The good news? You don’t need to reach for a jug of harsh chemical herbicide to get chamberbitter under control. I’ve tested pretty much every natural method out there on my own lawn and on a handful of neighbors’ yards too (they stopped asking me for advice after the third summer, which tells you how often I was over there). Below are the seven methods that actually work, plus the ones that are a waste of your Saturday.
What Is Chamberbitter and Why Is It So Hard to Kill?
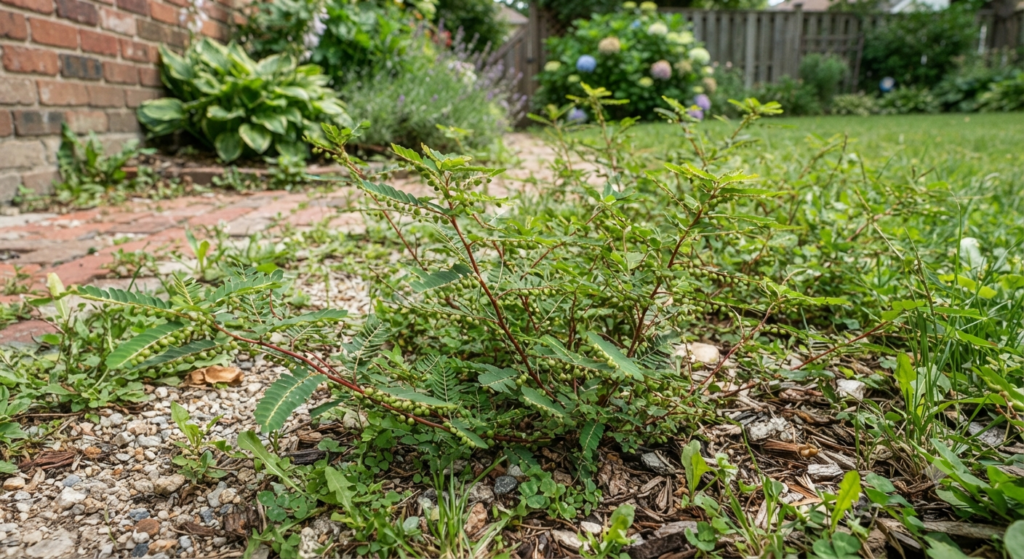
Before we get into the fixes, it helps to know your enemy. Chamberbitter (Phyllanthus urinaria) goes by a bunch of nicknames depending on where you live — gripeweed, leafflower, little mimosa weed. That last one trips people up because the leaves genuinely do look like a shrunk-down mimosa tree, with small oval leaflets running along a central stem.
Here’s what makes this weed such a pain to manage:
- It’s a summer annual with a short, aggressive life cycle. Chamberbitter germinates when soil temps hit around 65 degrees, usually late spring into early summer. From there it grows fast, flowers, and sets seed all within a matter of weeks. By late summer, a single uncontrolled patch can seed the surrounding fifty feet of lawn.
- The seeds are practically waterproof and drought-proof. They can sit dormant in your soil for years, patiently waiting for the right combination of warmth and moisture. This is why chamberbitter has a habit of “coming back” in a yard that supposedly got treated the year before. It’s not coming back — it never left. It was just waiting.
- It thrives in exactly the conditions most lawns struggle with. Thin, compacted, or bare patches. Areas with inconsistent watering. Mulch beds that get disturbed. If your lawn has any weak spots, chamberbitter will find them before you do.
I want to be upfront about something: natural control of chamberbitter is a process, not a single afternoon fix. If you’re looking for a one-and-done spray that wipes it out permanently, that’s not how this weed works, natural or synthetic. What you’re building here is a system — several small habits that stack together to choke this thing out for good.
1. Hand-Pull Chamberbitter Early, Before It Sets Seed
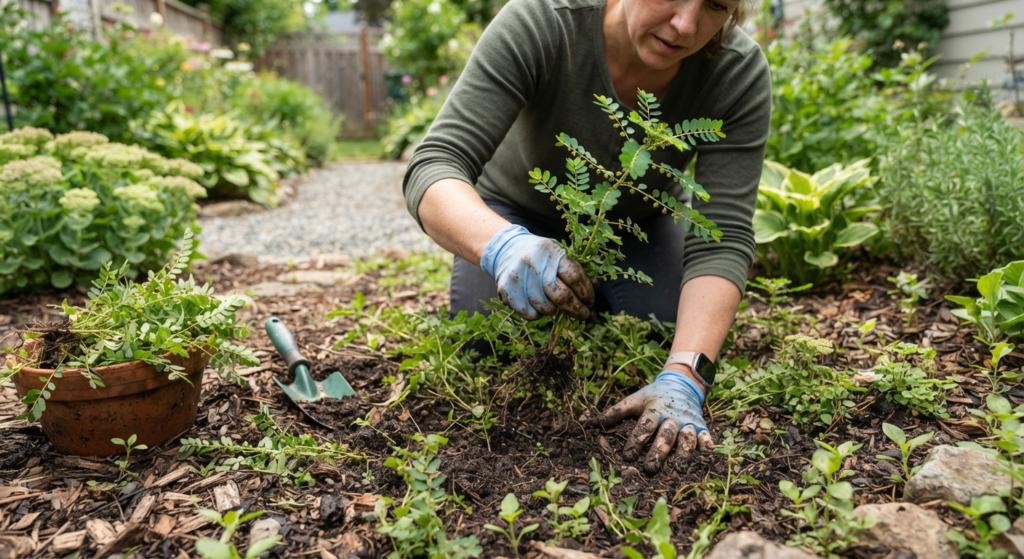
This is unglamorous, it’s a little tedious, and it’s still the single most effective thing you can do. I pull chamberbitter by hand every single week during peak season, usually with a cup of coffee in the other hand and a grudge in my heart.
The trick is timing. You want to pull these plants while they’re small, ideally under 3 inches tall, and definitely before you see those tiny seed capsules forming under the leaves. Once seeds have formed, pulling the plant can actually scatter them across your lawn, which is the exact opposite of what you’re trying to do.
How to hand-pull it correctly:
- Water the area lightly first if the soil is dry. Chamberbitter has a shallow taproot, and damp soil lets you pull the whole plant, root included, instead of snapping the top off.
- Grip the plant low, right at the soil line, and pull straight up in one smooth motion.
- Check that you got the root. If the stem snaps and leaves the root behind, that plant will just regrow.
- Bag the pulled weeds instead of tossing them in your compost. Even a stressed, half-dead chamberbitter plant can sometimes finish setting seed after the fact.
The summer my front bed got completely overrun with chamberbitter, I made the mistake of composting the pulled plants because I figured they were basically dead already. Big mistake. I ended up spreading viable seed straight into the compost I later used on my vegetable beds. That’s a mistake I only made once.
Bonus tip: Set a phone reminder to walk your lawn every Saturday morning during chamberbitter season (roughly June through September, depending on your climate). Ten minutes of pulling once a week is genuinely less work than one big two-hour battle in August.
2. Smother It with Mulch to Block Germination
Chamberbitter seeds need light and warmth to germinate, which means a thick layer of mulch is basically kryptonite for this weed. This is my go-to move for garden beds, borders, and any area around trees or shrubs where I’m not trying to grow turfgrass.
Best mulching practices for chamberbitter control:
- Apply a layer at least 3 inches deep. Anything thinner and enough light sneaks through for seeds to sprout anyway.
- Organic mulches like shredded hardwood, pine straw, or wood chips work well and improve your soil as they break down.
- Refresh thin spots throughout the season, especially after heavy rain washes mulch away or packs it down.
- Pull any existing weeds before mulching. Mulch prevents new germination, but it won’t smother an established plant that’s already growing through it.
I’ll be honest, mulch alone won’t solve a chamberbitter problem in your actual lawn since you obviously can’t mulch over grass. But for flower beds, vegetable gardens, and the mulched ring around your trees, this is one of the lowest-effort, highest-payoff methods on this list. Set it and mostly forget it.
3. Solarize Small, Isolated Patches with Clear Plastic
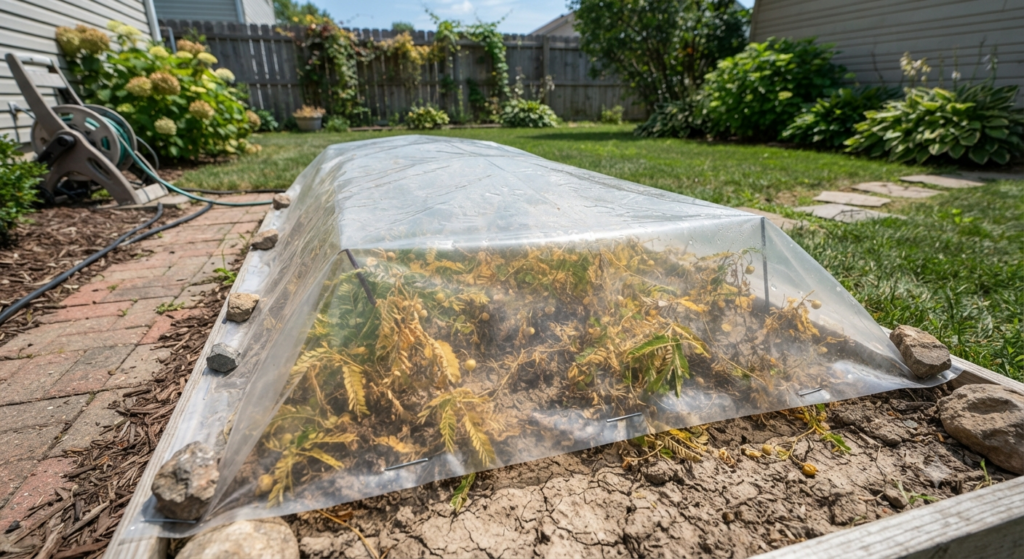
If you’ve got a small, badly infested patch that’s not worth reseeding yet, solarization is a brutally effective, completely chemical-free option. Basically, you’re using the sun to cook the weed seeds right out of the soil.
How to solarize a chamberbitter-infested patch:
- Mow or cut the area down as short as possible.
- Water the soil thoroughly. Moist soil conducts heat better than dry soil, which speeds up the process.
- Lay a sheet of clear plastic over the area and bury the edges with soil or bricks to seal in the heat.
- Leave it in place for 4 to 6 weeks during the hottest part of summer.
- Remove the plastic and rake the area before reseeding or replanting.
This method essentially bakes the top few inches of soil, killing existing weeds, weed seeds, and even some soil-borne pathogens. The catch is that it’ll kill any grass in that spot too, so this is really a “reset button” strategy for badly infested areas, not something you do across your whole yard. I’ve used it on a stubborn patch near my driveway that chamberbitter had claimed for two years running, and it hasn’t come back since.
4. Boost Grass Density So Chamberbitter Has Nowhere to Land
Here’s a truth that took me way too long to accept: the healthiest defense against chamberbitter isn’t a spray or a tool, it’s a thick lawn. Chamberbitter is what’s called an opportunistic weed. It needs bare soil and sunlight to germinate. A dense, healthy stand of turfgrass simply doesn’t give it the opening it needs.
Ways to thicken your lawn naturally:
- Overseed thin or bare patches every fall (or spring, depending on your grass type) with a seed blend suited to your region.
- Mow at the taller end of your grass type’s recommended height. Taller grass shades the soil surface, which suppresses weed seed germination across the board, not just chamberbitter.
- Aerate compacted soil once a year. Compaction creates the exact bare, stressed conditions chamberbitter loves.
- Feed your lawn with a slow-release, natural fertilizer appropriate for your grass type and season.
I used to mow my lawn shorter because I thought it looked “cleaner.” That was a mistake. The summer my front yard turned into a chamberbitter jungle was the same summer I’d been scalping the grass down low every week. Once I raised my mower deck and let the grass grow a little taller, the weed pressure dropped noticeably the following season. Thick grass is doing more weed control work than most people give it credit for.
5. Apply Corn Gluten Meal as a Natural Pre-Emergent
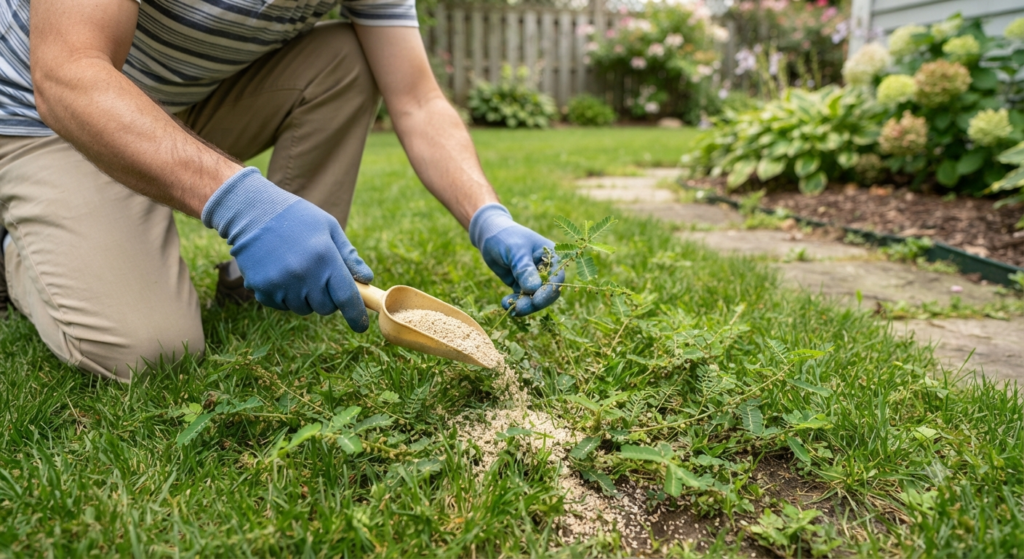
Corn gluten meal is one of those old-school organic gardening tricks that actually holds up under scrutiny. It’s a byproduct of corn processing, and it works as a natural pre-emergent herbicide, meaning it targets weed seeds before they sprout rather than killing existing plants.
How to use corn gluten meal against chamberbitter:
- Apply it in early spring, before soil temperatures hit that 65-degree germination trigger for chamberbitter.
- Use a broadcast spreader for even coverage across your lawn, following the bag’s rate recommendations (usually around 20 pounds per 1,000 square feet).
- Water it in lightly after application.
- Reapply again about 6 weeks later for season-long suppression, since one application tends to lose effectiveness over time.
One important caveat: corn gluten meal works by inhibiting root formation in newly sprouted seeds. That means it doesn’t care whether the seed is chamberbitter or the grass seed you just put down last month. If you’re planning to overseed your lawn, do not use corn gluten meal within about 8 weeks of seeding, or you’ll be sabotaging your own grass.
As a side note, corn gluten meal also has a small amount of nitrogen in it (about 10%), so you’re getting a mild fertilizing effect as a bonus. It’s not a replacement for a real fertilizing program, but it’s a nice little extra.
6. Use a Natural Vinegar-Based Spray on Young Plants
For chamberbitter that’s already popped up in spots where you can’t easily hand-pull, a horticultural vinegar spray can knock it back fast. I want to set expectations here: this is not a permanent fix, and it works best on very young plants.
Mixing and applying a vinegar-based weed spray:
- Use horticultural vinegar (20% acetic acid), not the stuff in your kitchen cabinet, which is only around 5% and honestly won’t do much.
- Add a small amount of natural dish soap as a surfactant, which helps the vinegar stick to the waxy leaves instead of beading off.
- Spray directly on chamberbitter leaves on a sunny, dry day with no rain in the forecast for at least 24 hours.
- Reapply to any regrowth after 5 to 7 days.
This method is contact-only, meaning it burns whatever it touches and does nothing to the root system of established plants. On seedlings under an inch or two tall, it’s genuinely effective and can kill the whole plant. On bigger, already-flowering chamberbitter, expect the top growth to die back while the root sends up new shoots a week or two later.
Also, and I cannot stress this enough: horticultural vinegar is not selective. It will absolutely kill your grass, your flowers, and anything else green that it touches. Spot-treat carefully, or you’ll trade a weed problem for a bald patch problem.
7. Apply a Thick Layer of Newspaper or Cardboard Before Mulching
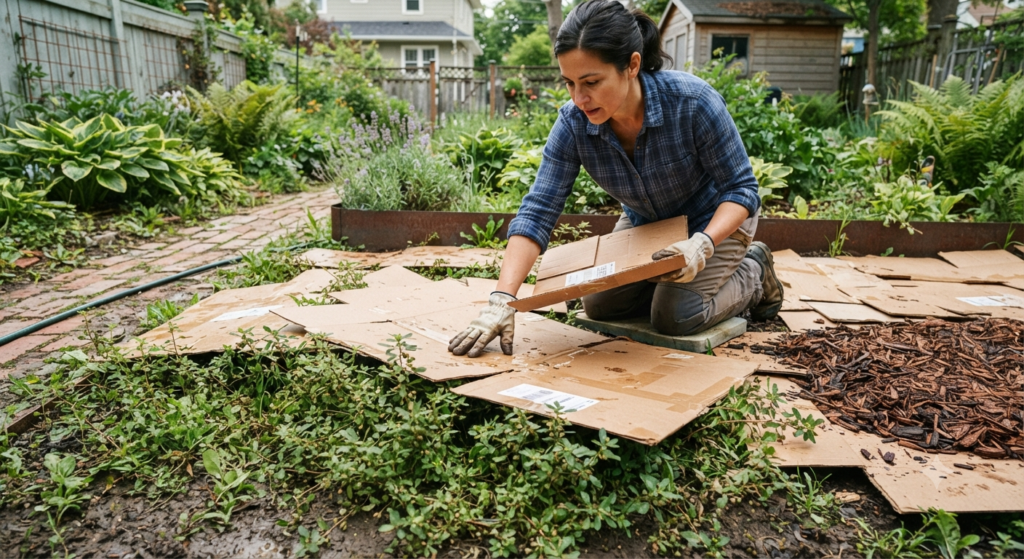
This one’s a favorite of mine for garden beds and borders because it’s basically free and it uses stuff you’re probably already throwing away. Layering cardboard or newspaper underneath mulch creates a physical barrier that chamberbitter seedlings simply cannot push through, even if a few seeds do manage to germinate underneath.
Steps for the cardboard-and-mulch method:
- Clear the bed of any existing weeds and debris.
- Lay flattened cardboard boxes or several layers of newspaper directly over the soil, overlapping the edges by several inches so there are no gaps.
- Wet the cardboard or newspaper down so it stays in place and starts breaking down faster.
- Cover with 2 to 3 inches of mulch on top.
Over a few months, the cardboard breaks down and actually improves your soil structure while it’s at it, adding organic matter as it decomposes. Meanwhile, it’s been quietly starving out any chamberbitter seeds trying to sprout underneath. I’ve used this method on a border bed that used to be a chamberbitter hot spot every single July, and it’s been clean for two seasons running now.
Quick side note: avoid glossy or heavily printed cardboard and newspaper, since some inks and coatings aren’t great for soil health long term. Plain brown cardboard and standard black-and-white newsprint are your safest bets.
Real Talk: What’s Not Worth the Effort
I promised I’d be straight with you, so here’s where I tell you what doesn’t work, or what works but isn’t worth your time.
- Boiling water spot treatment. I’ve seen this recommended constantly online, and yes, it technically kills the plant it touches. But hauling a kettle of boiling water around your yard is impractical, it’s genuinely dangerous if you’ve got kids or pets running around, and it kills whatever grass is nearby too. Skip it.
- Salt as a weed killer. This is a hard no from me. Salt doesn’t break down, it sterilizes your soil for a long time afterward, and it can leach into surrounding areas and kill plants you actually wanted to keep. I know it looks like an easy DIY hack, and I’ve found that it’s a total waste of a good garden bed, even if it’s cheap and satisfying in the moment.
- Expecting one treatment to fix everything. Chamberbitter seeds can survive in soil for years. Even if you nuke every visible plant this season, you’re going to see germination again next year from the seed bank already sitting in your dirt. Natural control is a multi-season commitment, not a one-time event.
- Pulling mature, seeding plants without bagging them. If you pull a chamberbitter plant that’s already got seed capsules on it and just toss it aside on the lawn, you’ve probably already lost that battle. Those seed pods can finish maturing and drop seed even after the plant is dead. Always bag it.
- Tilling infested soil. It seems logical, right, till it up and bury the problem? Wrong move. Tilling actually brings buried, dormant chamberbitter seeds up to the surface where they finally get the light they need to germinate. I made this mistake in a vegetable bed once and turned a minor chamberbitter problem into a full-blown infestation practically overnight.
Parting Wisdom
Chamberbitter isn’t a weed you beat in one weekend. It’s a weed you outlast, one pulled plant, one thick layer of mulch, one healthier patch of grass at a time. The lawns and beds I’ve had the least trouble with over the years aren’t the ones I hit with the strongest treatment. They’re the ones where I stayed consistent with small habits all season long.
Start with whichever method fits your situation best, whether that’s a weekly hand-pulling routine or a fresh layer of mulch this weekend, and build from there. Give it a full season before you judge whether it’s working, since a lot of the payoff here is cumulative.
Have you dealt with chamberbitter in your own yard? I’d love to hear what’s worked for you (or spectacularly hasn’t). Drop your experience in the comments below, I read every one of them.

About Syprose Kiche
Syprose Kiche is the creator and writer behind My Besuited Home, a practical home and garden website covering DIY projects, gardening, lawn care, landscaping, home improvement, and outdoor living. She focuses on turning everyday homeowner questions into clear, practical guides backed by careful research and useful real-world considerations.