
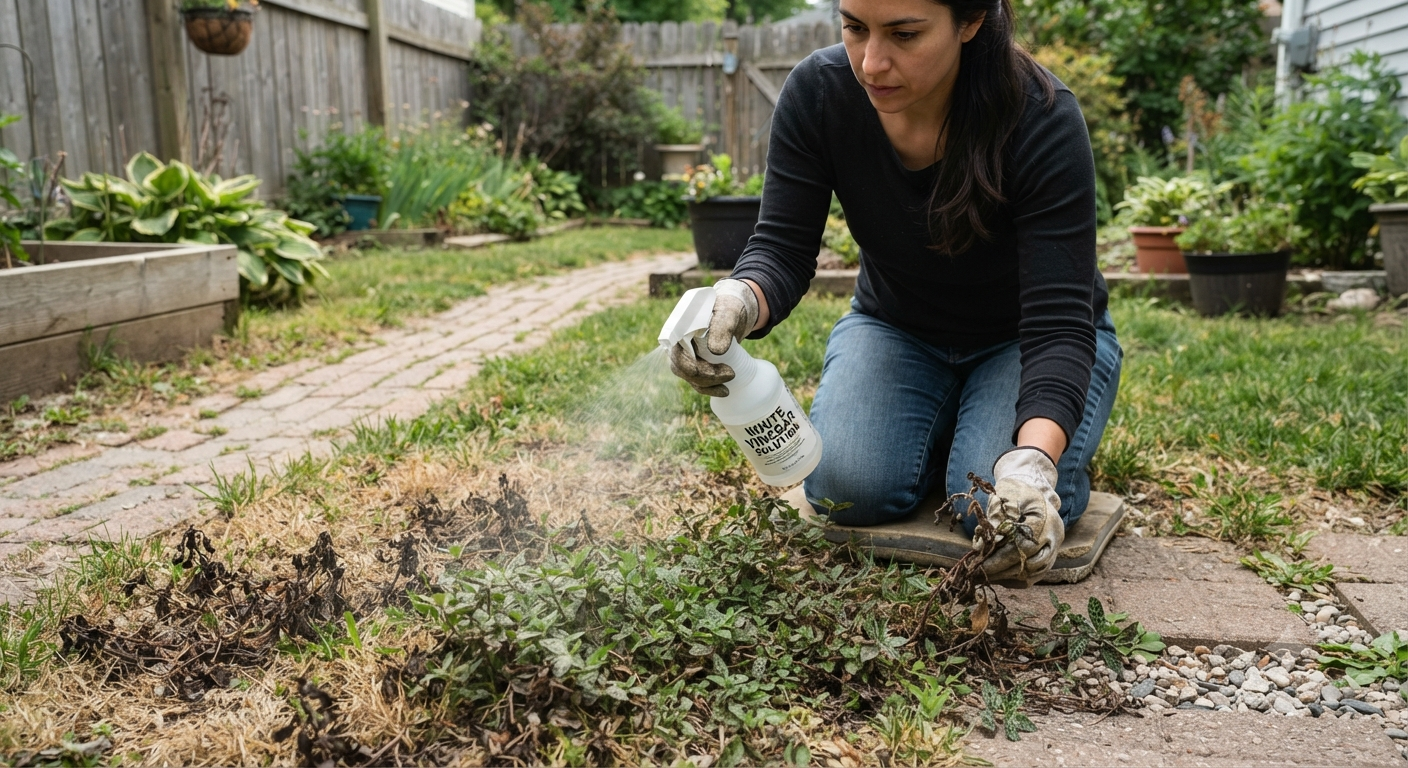
You’re on your knees in the July heat, and there it is again. That low, ground-hugging mat of tiny leaves spreading across your driveway crack and creeping straight into your lawn like it owns the place. You pull it, and within a week it’s back, bigger than before.
That’s spurge for you. It’s one of the sneakiest lawn weeds out there because it doesn’t look threatening at first. It stays low, it’s easy to ignore, and by the time you notice it, it’s already dropped thousands of seeds into your soil.
I’ve been fighting spurge in my own yard and in client gardens for over a decade now, and I can tell you this: most people make the problem worse before they make it better. They grab whatever weed killer is under the kitchen sink, spray it straight onto their lawn, and end up with dead grass patches right next to the spurge that somehow survived anyway.
My neighbor did exactly that two summers ago. She sprayed a broad-leaf herbicide on a 90-degree afternoon, right on schedule with the spurge, and torched a section of her fescue the size of a kiddie pool. The spurge came back within three weeks. The grass took all season to recover.
So let’s skip that path. Here’s how I get rid of spurge weed naturally, without turning my lawn into a patchwork quilt of dead spots.
What Is Spurge Weed and Why Is It Taking Over Your Lawn?
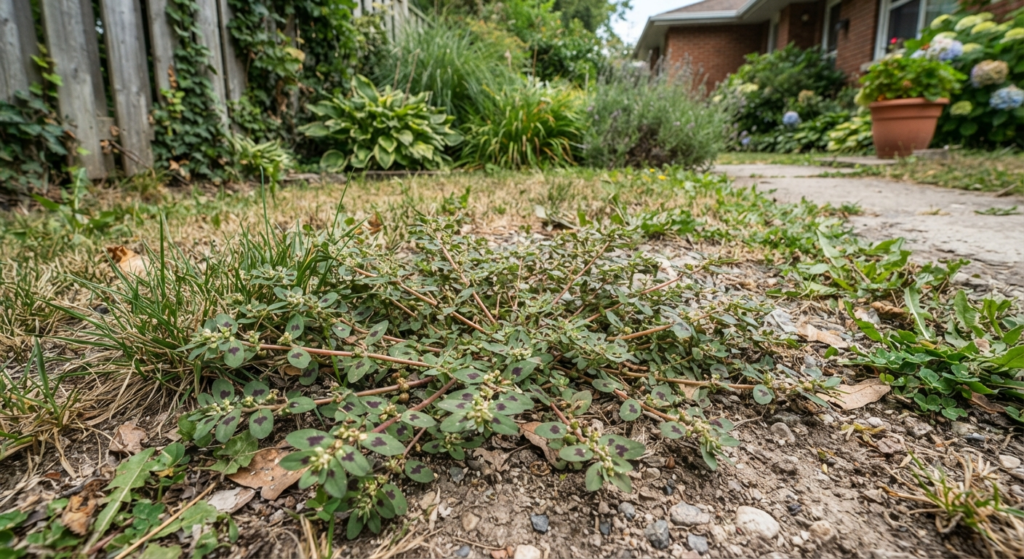
Before you can beat spurge, you need to know what you’re dealing with. Spotted spurge (sometimes called prostrate spurge) is a low-growing, mat-forming weed with small oval leaves, often with a reddish or purple blotch in the center. Snap a stem and you’ll see a milky white sap ooze out. That sap is your fastest identification trick, and it’s mildly irritating to skin, so wear gloves when you’re pulling it.
Spurge loves three things: heat, bare soil, and thin grass. It’s a summer annual, which means it germinates when soil temperatures climb into the 60s and 70s, usually late spring through midsummer depending on your zone. One plant can produce thousands of seeds in a single season, and those seeds can sit in your soil for years waiting for the right conditions.
Here’s the part most homeowners miss. Spurge isn’t really the problem. It’s a symptom. It shows up in compacted soil, thin turf, and bare patches where grass isn’t dense enough to compete for sunlight and space. If your lawn had thick, healthy grass covering every inch of soil, spurge wouldn’t have anywhere to germinate in the first place.
I learned this by watching where spurge actually showed up in my own yard. It wasn’t randomly scattered. It was concentrated along the edge of my driveway where the soil gets compacted from foot traffic, and in a bare patch under my kids’ old swing set where grass never fully filled in. Once I understood spurge as a “thin lawn” problem rather than a “weed” problem, my whole approach changed.
How to Identify Spurge Before You Treat the Wrong Weed
A lot of people confuse spurge with other low-growing weeds like purslane, clover, or knotweed, and treating the wrong plant wastes time and money. Purslane has thicker, fleshier, paddle-shaped leaves and no milky sap. Prostrate knotweed has a woodier stem and small papery sheaths at each leaf node. Clover has that classic three-leaf shape and no sap at all.
Spurge is the one with the milky sap, hands down. Snap a stem near the base. If white, latex-like sap appears within a couple seconds, you’ve got spurge. This single test will save you from misidentifying the weed and reaching for the wrong removal method.
Timing matters too. Spurge seedlings are easiest to catch in late spring, right when soil temperatures start warming up. By midsummer, established plants have already spread into dense mats and started dropping seed, which makes manual removal messier and less effective. If you’re scouting your lawn in April or May and you spot small, reddish-tinged seedlings hugging the ground near bare patches, that’s your window to act before the problem multiplies.
Check your problem spots first. Scan sidewalk edges, driveway cracks, mailbox beds, and anywhere your sprinkler system doesn’t quite reach. Spurge thrives in stressed, dry, compacted soil, so these marginal areas are usually ground zero for an infestation before it spreads into the main lawn.
Pull It Before It Seeds: The Manual Removal Method That Actually Works
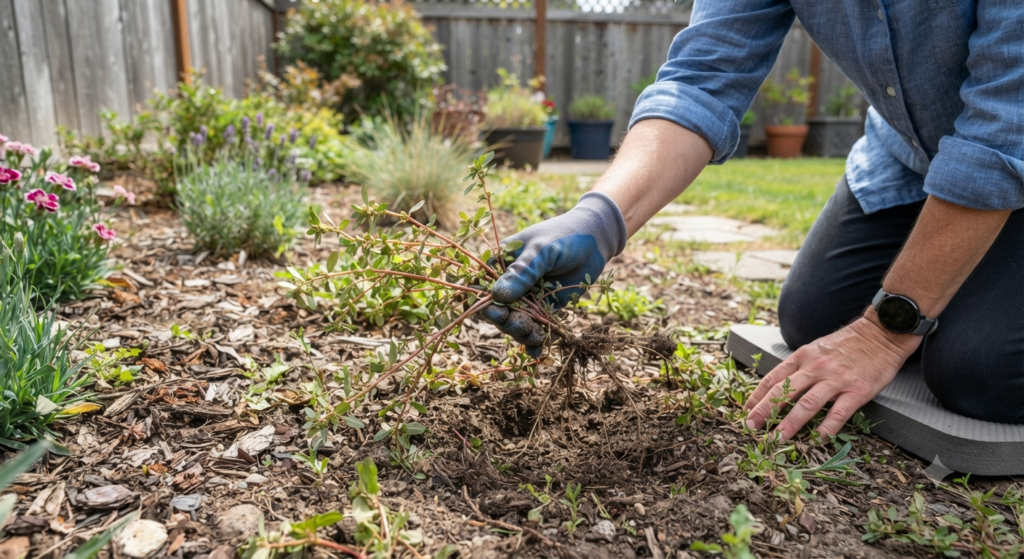
I know hand-pulling sounds tedious, and it is, but it’s genuinely the most effective natural method if you catch spurge early. Here’s my process.
- Step 1: Water the area first. Spurge has a shallow taproot, but pulling it from dry, compacted soil almost always leaves the root behind, and any leftover root regrows fast. Water the section the night before or a few hours ahead of time so the soil loosens up.
- Step 2: Grab the base, not the leaves. Pull from as close to the soil line as you can. Yanking from the leafy top just breaks the plant off and leaves the root system intact, which means round two is coming in a week.
- Step 3: Use a soil knife or dandelion weeder for stubborn patches. For thicker mats, a hand tool gets underneath the whole root system in one motion instead of you tugging piece by piece.
- Step 4: Bag it, don’t compost it. This is the step people skip, and it’s the reason spurge keeps coming back. If the plant has already flowered or gone to seed, tossing it in your compost pile just spreads thousands of seeds right back into your yard once you use that compost. Bag mature plants and toss them in the trash.
- Step 5: Fill the gap immediately. Every spot you pull spurge from is now bare soil, which is basically an open invitation for the next spurge seed to germinate. Overseed that patch the same day or within 48 hours.
Bonus tip: do a five-minute sweep of your problem areas once a week during peak spurge season (roughly June through August depending on your region). Five minutes weekly beats three hours of frustrated pulling in September.
Boiling Water and Vinegar: Do These Home Remedies Actually Work on Spurge?
I get asked about boiling water and vinegar sprays constantly, so let’s talk honestly about both.
Boiling water works, but only on spurge growing in cracks, gravel, or driveway edges where you’re not worried about killing anything around it. Pour it directly on the plant’s crown and it’ll cook the tissue on contact. The problem is boiling water doesn’t know the difference between spurge and your Kentucky bluegrass, so using it anywhere near your actual lawn will kill grass just as fast as it kills weeds. I only use this method on hardscape edges, never in the turf itself.
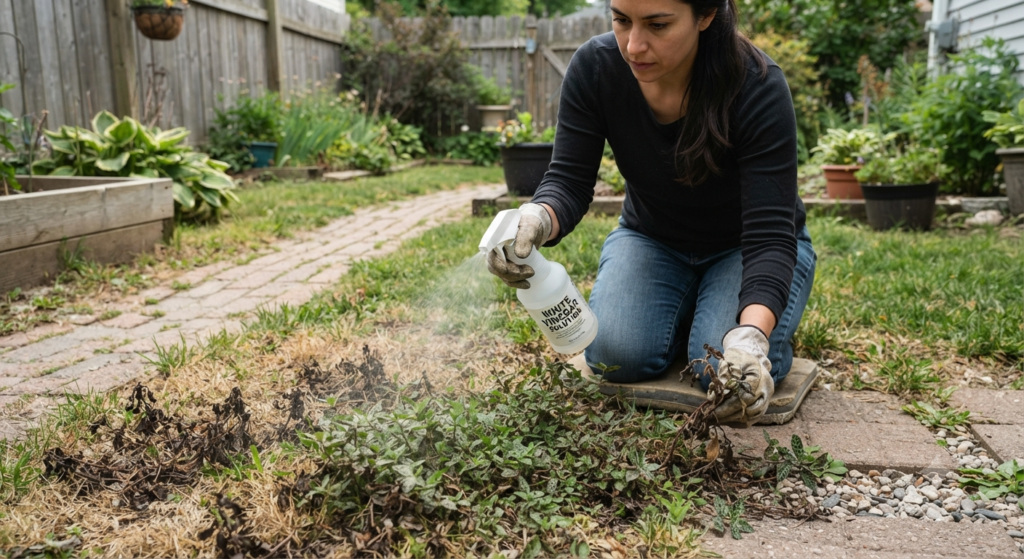
Household vinegar (the 5% stuff from your pantry) is mostly a myth when it comes to real spurge control. It’ll burn the leaves and make the plant look dead within a day, which feels satisfying, but the root system usually survives and the plant regrows within two weeks. Horticultural vinegar, which runs 20% acetic acid, is more effective, but it’s still non-selective and will scorch grass blades it touches. Same rule applies: driveway cracks and gravel paths only.
I tried the vinegar route on a client’s front walkway a few summers back, spraying every visible spurge plant on a Saturday morning feeling very proud of myself. By the following weekend, half of it had bounced right back, sprouting new growth from the root crown like nothing happened. That’s when I switched to pulling first and using vinegar only as a touch-up on cracks and gravel, not as a primary strategy.
Neither of these methods addresses the real issue, which is thin turf and bare soil giving spurge room to grow. Treat them as supporting players, not your main strategy.
Corn Gluten Meal: The Natural Pre-Emergent Most People Skip
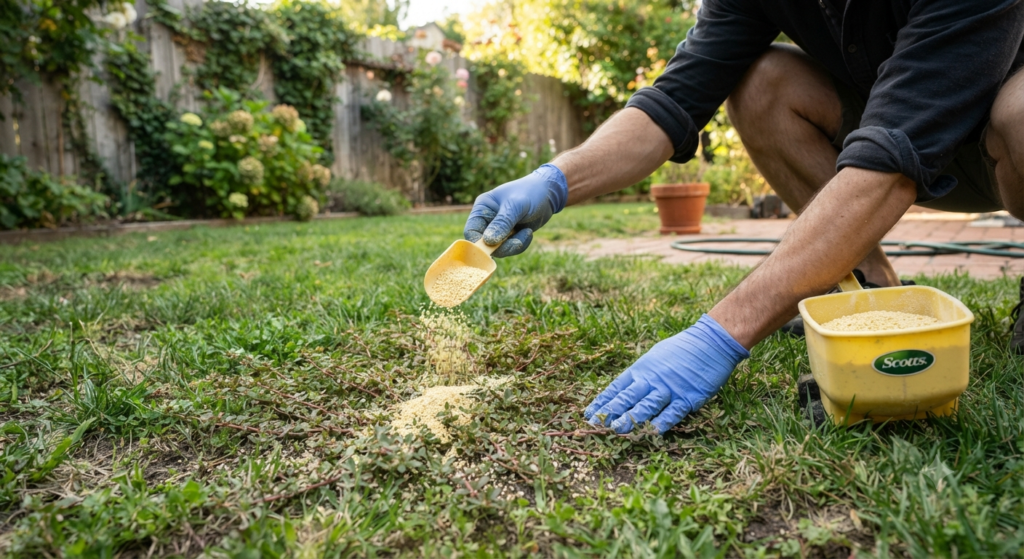
If you want to actually get ahead of spurge instead of chasing it all summer, corn gluten meal is the natural pre-emergent I recommend most. It works by suppressing root development in newly germinating seeds, so spurge seedlings that try to sprout basically starve before they get established.
Timing is everything here. Apply corn gluten meal in early spring, before soil temperatures hit the 55-60 degree range where spurge seeds start germinating. Apply it too late and you’ve missed the window; the spurge is already up and corn gluten meal won’t touch established plants.
Use about 20 pounds per 1,000 square feet, water it in lightly, and then hold off on any additional seeding for about six to eight weeks. Here’s the catch that trips people up: corn gluten meal doesn’t discriminate between weed seeds and grass seed. If you’re planning to overseed your lawn this spring, you can’t do both corn gluten meal and grass seed at the same time. Pick one or the other for that window.
I apply corn gluten meal on my own lawn every March now, right around when the forsythia in my neighbor’s yard starts blooming (that’s my low-tech soil temperature indicator, and it works better than you’d expect). It’s not a magic bullet on its own, but paired with a thick, well-fed lawn, it’s cut my spurge problem down significantly compared to five years ago.
Thicken Your Lawn: The Long-Term Fix Nobody Wants to Hear
Here’s my most opinionated take in this whole article: spraying, pulling, and boiling spurge without fixing your lawn’s density is a total waste of time. You’ll be back out here fighting the same battle every single summer.
Spurge needs bare soil and sunlight hitting the ground to germinate. Thick grass blocks both. A dense, healthy lawn is genuinely the best natural spurge control you can invest in, and it’s not close.
Start with your mowing height. Cutting grass too short is one of the biggest reasons lawns thin out and let weeds like spurge move in. Most cool-season grasses (fescue, bluegrass, rye) do best at 3 to 3.5 inches. Warm-season grasses like Bermuda and zoysia can go a bit shorter, but still don’t scalp them. Taller grass shades the soil surface and physically blocks light that spurge seeds need to germinate.
Overseed thin or bare patches every fall, and again in early spring if needed. I overseed my problem areas twice a year now, once in September and once in April, and the difference in weed pressure between those spots and the parts of my lawn I neglected is night and day.
Address soil compaction. If your lawn gets heavy foot traffic (kids, dogs, that one spot everyone cuts across to get to the driveway), core aerate once a year. Compacted soil is basically a welcome mat for spurge because grass roots struggle to establish there, but spurge’s shallow root system doesn’t care.
Feed your lawn properly. A lawn that’s underfed grows thin and weak, opening up gaps for weeds. I feed mine with a slow-release nitrogen fertilizer in early spring and again in fall, following soil test recommendations rather than guessing.
Quick side note: don’t overwater. Frequent, shallow watering actually encourages shallow-rooted weeds like spurge while doing nothing for your grass’s deep root development. Water less often but more deeply, about an inch per week including rainfall, and you’ll build stronger turf that outcompetes weeds on its own.
Natural Spurge Killer Recipes People Ask Me About
I get a lot of messages asking about homemade spurge killer recipes, usually some combination of vinegar, dish soap, and salt. Here’s my honest take on the popular ones.
The classic mix is one gallon of white vinegar, one cup of table salt, and a tablespoon of dish soap. The soap helps the solution stick to the leaves instead of beading up and rolling off, and the salt adds a drying effect on top of the vinegar’s acid burn. This combo will brown spurge leaves within a day or two, and it genuinely works better than vinegar alone for surface knockdown.
Here’s the trade-off nobody mentions upfront: salt doesn’t break down in soil the way vinegar does. It builds up and can make that patch of ground inhospitable to grass and plants for months, sometimes longer depending on your soil type and rainfall. I only use a salt-based spray on driveway cracks, gravel paths, or between patio pavers, areas where I have zero interest in anything ever growing again. I’d never use it anywhere near my lawn or garden beds.
A gentler option is straight dish soap diluted in water, about two tablespoons per quart, sprayed directly on the leaves during the hottest part of the day. It breaks down the waxy leaf coating and dehydrates smaller seedlings. It’s not strong enough for mature spurge with an established root system, but for catching seedlings early, it’s a reasonably safe option that won’t linger in your soil the way salt does.
When to Call In Reinforcements (Without Reaching for Harsh Chemicals)
If you’ve got a serious infestation covering large sections of lawn, sometimes the natural, gradual approach needs a boost. This doesn’t mean grabbing the strongest synthetic herbicide on the shelf.
Seek out products labeled as organic or OMRI-listed broadleaf herbicides, which typically use ingredients like iron-based compounds or plant oils rather than synthetic chemicals. These still require some caution and spot application, but they break down faster in soil and carry less risk to groundwater and pets than traditional broad-spectrum herbicides.
Timing your application matters just as much as which product you choose. Spraying anything, natural or not, during peak afternoon heat stresses your grass and increases the odds of collateral damage. I always treat spurge in the early morning or early evening when temperatures are cooler and the plant isn’t already heat-stressed.
If your infestation is genuinely overwhelming, a licensed lawn care professional who offers organic programs can assess soil compaction, drainage, and turf density issues that might be driving the problem, things that are hard to diagnose on your own from a single walk around the yard.
Real Talk: What’s Not Worth the Effort (and What Will Go Wrong)
Let’s be honest about the parts of this process that trip people up, because I’ve made most of these mistakes myself.
Don’t expect a one-and-done fix. Spurge seeds can survive in soil for years. Even a perfect season of pulling and overseeding won’t eliminate every seed already banked in your soil. You’re managing this, not winning it in a single summer. Anyone who tells you otherwise is selling something.
Skip the flame weeders unless you really know what you’re doing. I see this recommended online constantly, and while a propane weed torch will absolutely kill spurge on contact, it’s also a genuine fire hazard near dry grass, mulch beds, or wood fencing. I don’t use these anymore after nearly setting a mulch bed smoldering trying to torch a patch near my garage. Not worth the risk for most homeowners.
Don’t wait until August to start caring. By midsummer, mature spurge plants have already dropped seed for next year, so anything you do at that point is just cosmetic cleanup, not real prevention. The real work happens in early spring with pre-emergent timing and again in early summer catching seedlings before they mature.
Mulch depth matters more than people think in garden beds. If spurge is invading your flower beds rather than your lawn, a 2 to 3 inch layer of mulch blocks light and smothers germinating seeds far better than pulling ever will. Thin mulch, under an inch, does almost nothing.
And don’t dump undiluted horticultural vinegar near anything you care about. I mentioned this above, but it bears repeating: this stuff will kill grass, flowers, and shrub roots just as efficiently as it kills spurge. Spot-treat only, and only on hardscape.
Final Thoughts on Beating Spurge Without Wrecking Your Lawn
Spurge isn’t actually the enemy here. Bare soil and thin grass are the real problem, and spurge is just the opportunist that shows up to take advantage of it. Pull what you can catch early, use corn gluten meal as your spring pre-emergent, and spend your real energy thickening up your turf so there’s no room left for spurge to germinate in the first place.
It took me a few frustrating summers to stop chasing individual weeds and start fixing the lawn underneath them. Once I made that shift, my spurge problem shrank to almost nothing within two seasons, no harsh chemicals required.
What’s your spurge situation looking like this summer? Drop a comment below and let me know where it’s showing up in your yard, I’ll do my best to help you figure out what’s going on underneath it.

About Syprose Kiche
Syprose Kiche is the creator and writer behind My Besuited Home, a practical home and garden website covering DIY projects, gardening, lawn care, landscaping, home improvement, and outdoor living. She focuses on turning everyday homeowner questions into clear, practical guides backed by careful research and useful real-world considerations.