

Staring at a brown, shriveled rosemary plant that was supposed to be the star of your kitchen is a rite of passage. Most people think they lack a “green thumb” when, in reality, they probably just put a sun-loving Mediterranean herb in a soggy plastic pot in a dark corner. I’ve killed more mint than I’d like to admit—which is impressive considering mint is basically a leafy weed that tries to colonize the Earth—and those failures taught me exactly how to build herb setups that actually survive.
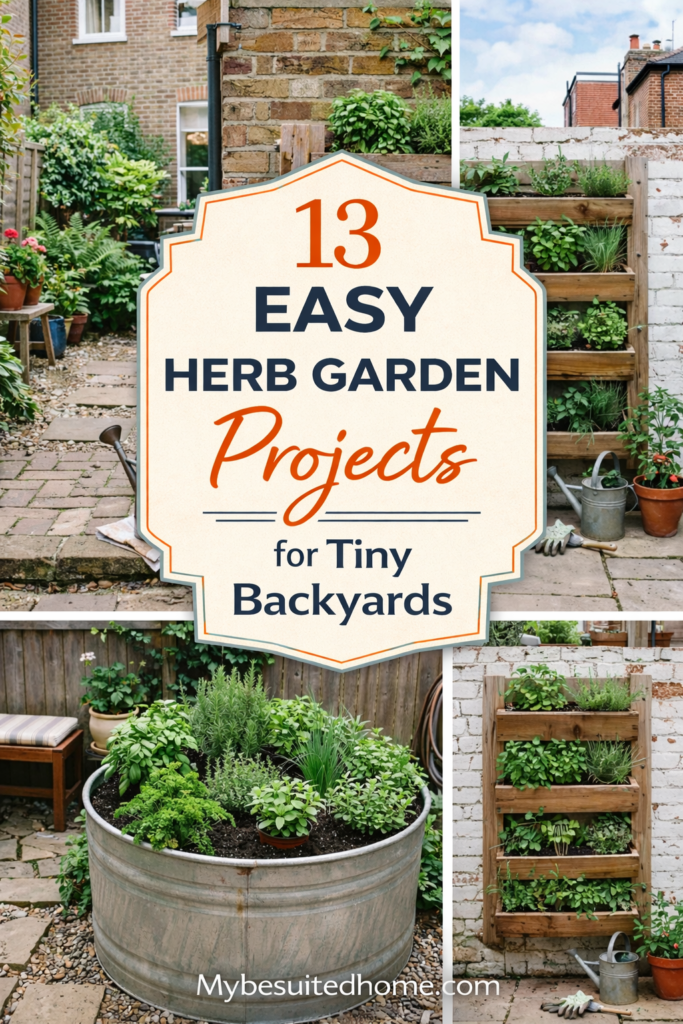
You don’t need a massive acreage or a degree in botany to have fresh basil for your pizza. You just need a project that matches your actual lifestyle and your specific patch of dirt (or concrete). These 13 projects are designed to get you harvesting within weeks, not months, and they range from “I have zero floor space” to “I want a backyard centerpiece.”
1. The Vertical Cedar Herb Wall for Tight Spaces
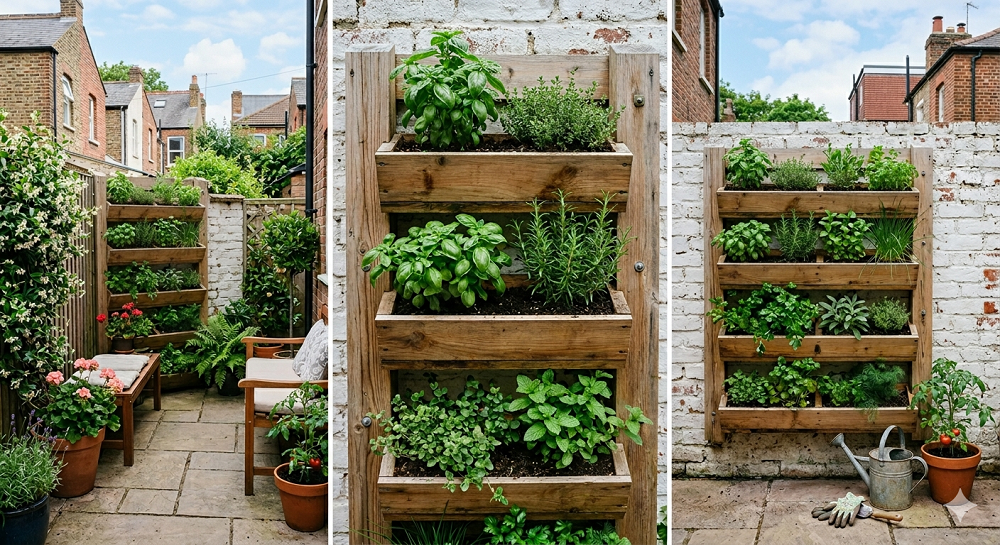
If you’re working with a small balcony, stop looking at floor pots. Every time I tried to line up round pots on my deck, I ended up tripping over them while carrying my morning coffee. A vertical cedar wall is the gold standard for small-space herb gardening because it uses your “air real estate.” It’s basically a ladder of planter boxes that leans against or mounts to your wall.
I built my first one out of scrap cedar, and let me tell you, don’t use treated pine. The chemicals in pressure-treated wood are great for fences, but I don’t want them anywhere near the cilantro I’m putting in my tacos. Cedar is naturally rot-resistant and smells like a mountain cabin, which is a nice bonus. You want to space the boxes at least 10 inches apart so the tall herbs on the bottom don’t get shaded out by the ones on top.
When you’re planting this, put your moisture-loving herbs like parsley and chives at the bottom. Gravity is a thing, and water naturally trickles down. The top box is the hottest and driest spot, so that’s where the Mediterranean heavy hitters go—rosemary and oregano love that drainage. I once put my mint at the top of a vertical wall, and within two months, it had sent “runners” down into every single box below it. It was a hostile takeover. Keep your mint in its own separate, isolated pot unless you want a vertical wall of nothing but mint.
For the best SEO results and growth, ensure your wall gets at least six hours of sun. If your balcony is shady, swap the rosemary for lemon balm and mint. This project is the ultimate “upgrade” because it turns a boring siding wall into a living, breathing pantry.
2. Galvanized Stock Tank Herb Garden
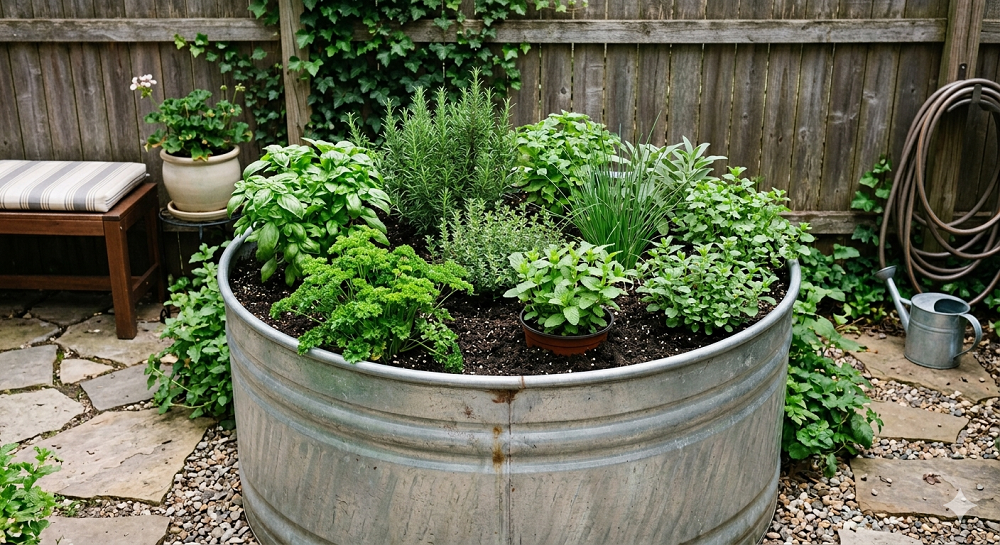
If you have the floor space in your backyard, stop messing around with small terra cotta pots that dry out in twenty minutes. I transitioned most of my “workhorse” herbs into a galvanized stock tank three years ago, and I’ll never go back. These are the giant metal tubs farmers use to water cattle. They are indestructible, they look fantastic in a “modern farmhouse” kind of way, and they hold enough soil volume to keep roots cool during a heatwave.
The biggest mistake people make here is forgetting the drainage. You cannot just dump soil into a metal tub and expect magic. I spent an entire afternoon with a power drill and a half-inch bit putting about 20 holes in the bottom of mine. If you don’t do this, you’re just making a very expensive, very swampy soup. I also like to put a layer of crushed soda cans or plastic milk jugs at the bottom before adding soil to save money on potting mix. You don’t need three feet of dirt for herbs; most only need about 12 inches of root space.
In a stock tank, you can create a “micro-climate.” I plant a large rosemary bush right in the center to act as a focal point, then surround it with sage, thyme, and oregano. Because the metal heats up in the spring, it actually gives you a bit of a head start on the growing season. Just be careful in July—if you live somewhere like Arizona or Texas, that metal gets hot enough to fry an egg. I usually drape some burlap over the sides during the peak of summer to keep the roots from cooking.
I’ve found that high-quality organic potting soil is non-negotiable here. Don’t use “garden soil” from a bag meant for the ground; it’s too heavy and will compact like concrete in a metal tank. You want something fluffy with lots of perlite. This setup is a total “set it and forget it” win for anyone who wants a massive harvest without the back-breaking weeding of a traditional garden bed.
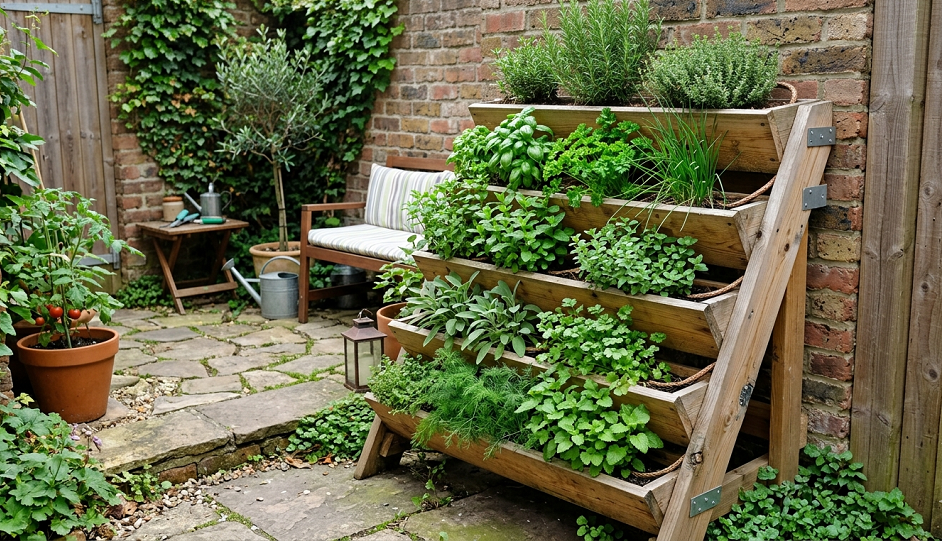
3. The Reclaimed Pallet Herb Planter
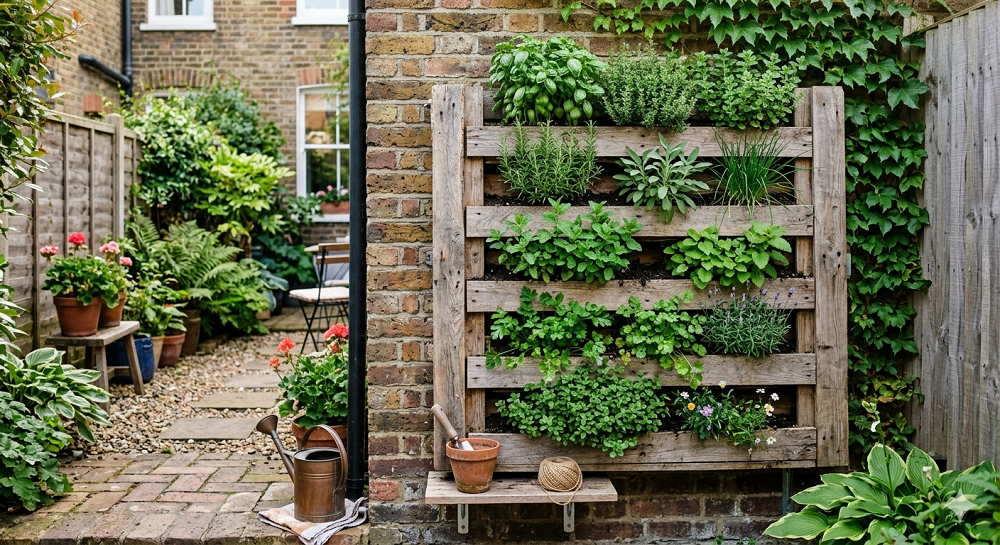
Pallets are the “free lunch” of the gardening world, but you have to be picky. I used to grab any pallet I saw behind a grocery store until I realized some are sprayed with some pretty nasty pesticides. Look for the “HT” stamp, which stands for Heat Treated. Avoid “MB” (Methyl Bromide) like the plague. Once you have a safe pallet, you can turn it into a rustic herb display that looks like it cost $200 at a boutique garden center.
The easiest way to do this is to staple landscape fabric into the “slats” to create pockets. It’s essentially a giant fabric-lined shelf. I tried using staples alone once, and the weight of the wet soil ripped the fabric right out, dumping my lavender all over the patio. Now, I use a staple gun and thin wooden strips to batten down the fabric. It’s a bit more work, but it saves you a literal mess down the road.
This is the perfect project for “soft” herbs. I’m talking about basil, cilantro, and dill. These guys don’t have massive root systems, so they thrive in the shallower pockets of a pallet. Plus, having your basil at waist height makes it way easier to pinch off the tops (which you must do if you want the plant to get bushy and not go to seed).
I’ve found that painting the pallet a dark charcoal or a deep forest green makes the bright green of the herbs pop. It takes a “trashy” piece of wood and makes it look intentional. Just make sure you lean it at a slight angle or secure it to a fence. A top-heavy pallet full of wet dirt is a tipping hazard that will definitely ruin your afternoon.
4. Hanging Mason Jar Window Gallery
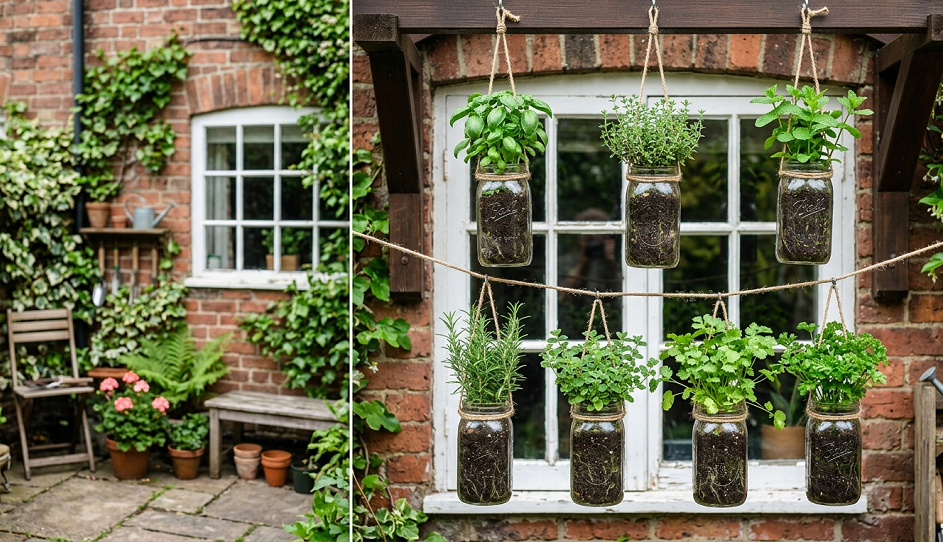
This is for the person who has zero outdoor space. If you have a sunny window, you can grow herbs. However, let’s get one thing straight: mason jars do not have drainage holes. I see these all over Pinterest, and they are usually a death sentence for plants unless you know the secret. I personally think the “layer of rocks at the bottom” trick is a total waste of time because the water just sits there and rots the roots anyway.
My workaround is to use the jars as “cachepots.” I grow the herbs in small, cheap plastic nursery liners that fit inside the mason jar. When it’s time to water, I take the plastic liner to the sink, water it, let it drain, and then pop it back into the jar. It looks beautiful, and your plants won’t die of “wet feet.” I hung mine using hose clamps and a piece of reclaimed barn wood, and it’s basically living art in my kitchen.
For a window garden, you have to be realistic about light. Most people think “bright light” means “the room is lit up.” In reality, herbs need direct hits of sun. If your window faces north, you’re going to struggle with anything other than mint or chives. If you have a south-facing window, go nuts with basil and oregano. I once tried to grow lavender in a jar on a dimly lit shelf because it looked “aesthetic,” and the poor thing became so leggy and weak it looked like a wet noodle within a week.
If you’re doing the jar method, stick to the “mini” versions of herbs. “Spicy Globe” basil or “English” thyme are much better suited for small containers than the giant Italian varieties that want to grow three feet tall. It’s a quick, cheap project that brings a lot of life to a kitchen, provided you don’t overwater them.
5. The Tiered Strawberry Planter (For Herbs)
Don’t let the name fool you. Those terracotta “strawberry jars” with the little pockets on the sides are actually terrible for strawberries but absolutely incredible for a diverse herb collection. I’ve found that strawberries in those jars usually get dried out or shaded, but herbs like thyme and oregano absolutely love hanging out of those side pockets.
The trick to making these work is a “watering pipe.” Because these jars are tall and narrow, the water usually only hits the top two inches of soil, while the bottom becomes a dry desert. I take a piece of PVC pipe, drill holes all along the length of it, and stick it right down the center of the jar before I add the dirt. When I water into the pipe, it distributes moisture evenly from the top to the bottom. It’s a game-changer.
In the top “main” opening, I usually plant something upright like rosemary or a big bunch of flat-leaf parsley. In the side pockets, I tuck in trailing herbs. “Creeping Thyme” or “Golden Oregano” looks stunning as it spills down the sides of the clay. It turns a functional herb garden into a piece of sculpture.
A quick side note: Terracotta is porous, meaning it breathes. This is great for the plants, but it means you’ll be watering this thing every single day in the summer. If you’re the type of person who forgets to water for a week, get a glazed ceramic version instead. It holds moisture much longer.
6. The “Herb Spiral” Permaculture Feature
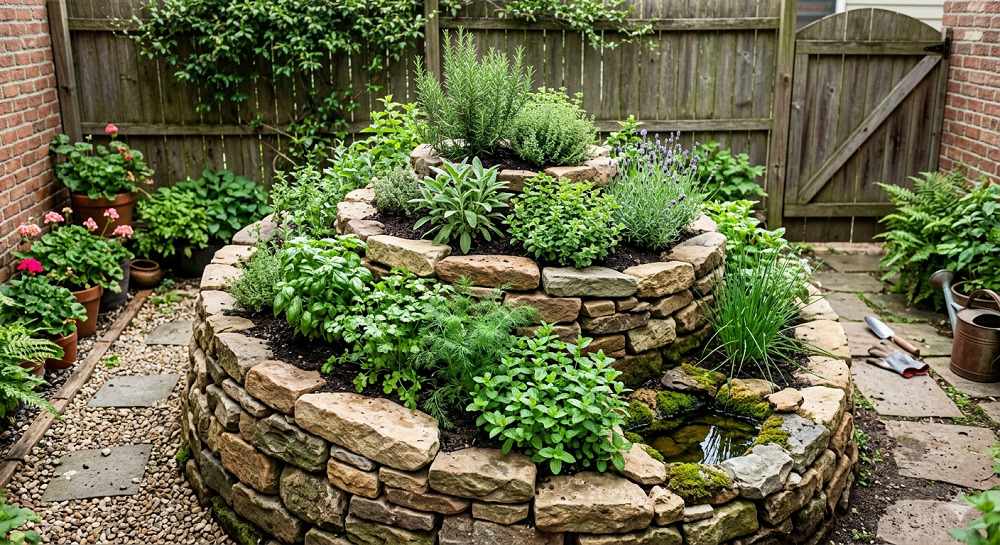
If you have a corner of the yard that looks a bit sad, an herb spiral is the ultimate “seasoned gardener” flex. It’s a mound of soil held in place by stones or bricks that spirals upward into a peak. This isn’t just for looks; it creates different “zones.” The top is dry and sunny, the bottom is moist and cool, and the sides offer varying levels of shade throughout the day.
I built mine using old fieldstones I dug up while trying to put in a fence. It’s about three feet high and five feet wide. At the very top, I have my rosemary and sage—herbs that love “hot feet” and sharp drainage. As the spiral winds down, I move into cilantro and parsley. At the very bottom, where the water collects, I have a little patch of mint and watercress. It’s a self-contained ecosystem.
Building this requires a bit of muscle. You aren’t just stacking rocks; you’re creating a structural slope. I didn’t use mortar because I like the “dry stack” look, but you have to make sure your base is wide and stable. I’ve found that filling the center with a mix of compost and native soil works best.
The beauty of the spiral is that you can grow about 10 different herbs in a very small footprint because you’re building up. Plus, it’s a great conversation starter. People will ask why you have a stone snail in your yard, and you can give them a 20-minute lecture on permaculture (or just tell them it’s where the good snacks grow).
7. The Rolling Kitchen Cart Garden
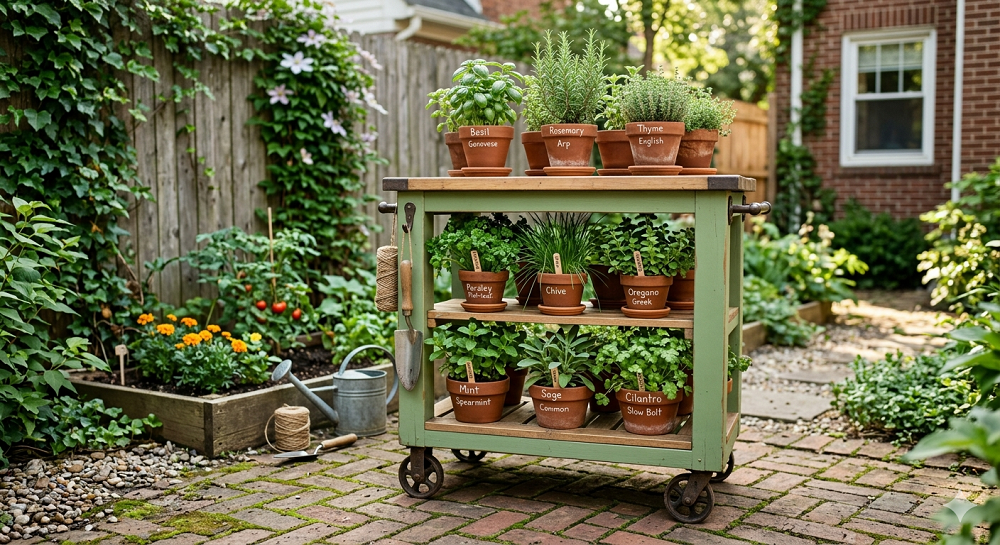
I am a huge fan of “movable feasts.” I took an old metal utility cart—the kind with three tiers and wheels—and turned it into a mobile herb station. This is a total life-saver if your backyard gets weird shadows throughout the day. I can literally wheel my herbs into the sun in the morning and back under the porch if a hailstorm is coming.
Each “shelf” of the cart gets a different theme. The top shelf is my “Pizza Garden” with basil and oregano. The middle shelf is my “Tea Garden” with Moroccan mint and lemon verbena. The bottom shelf is for my gardening tools and extra twine. I lined the mesh bottom of the shelves with coco liners (the fuzzy brown stuff used in hanging baskets) so the soil doesn’t just fall through the holes.
You have to be careful with weight here. Soil is heavy, and wet soil is even heavier. I bought a cart with “heavy-duty” casters because the cheap plastic wheels on my first attempt snapped off the moment I tried to move it across the grass. Look for something with rubber wheels if you plan on taking it off the patio.
I’ve found that this is the best way to keep the “fragile” herbs alive. Things like cilantro go to seed (bolt) the second they get too hot. With the rolling cart, I can wheel them into the shade during the heat of the afternoon to trick them into staying leafy and delicious for a few extra weeks. It’s a clever hack for extending your harvest.
8. Repurposed Wine Crate Planters
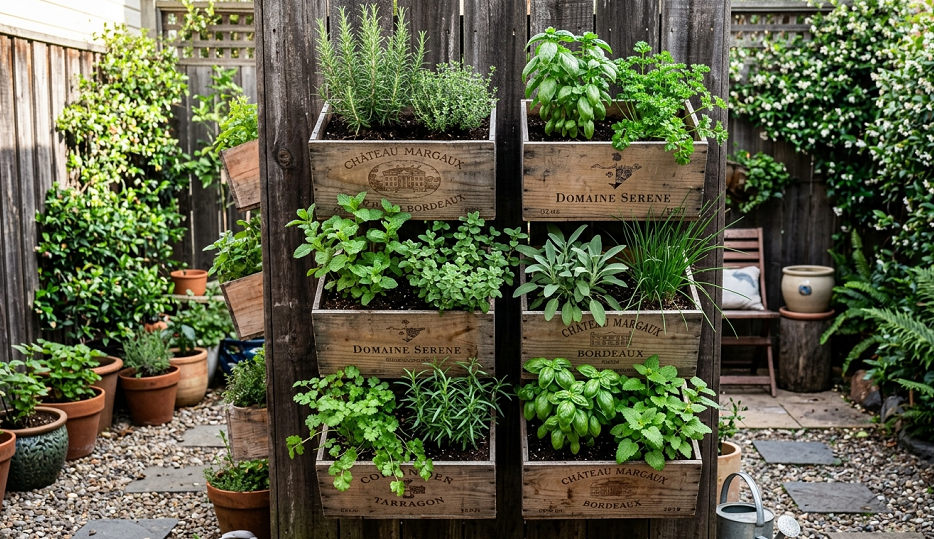
If you want an “expensive” look for almost no money, go to your local liquor store and ask for wooden wine crates. Most of the time, they just throw them out. These crates are usually made of sturdy pine or plywood and have beautiful branded logos on the side. They are the perfect depth for an herb garden.
I like to line mine with heavy-duty plastic (like a trash bag) and then poke drainage holes through the plastic and the wood. If you don’t line them, the wood will rot out in a single season. I’ve found that three wine crates lined up on a bench look like a high-end custom planter setup. I grow my “Gourmet” herbs here—things like French tarragon and chervil that feel a bit more sophisticated.
One thing to watch out for: these crates are shallow. You have to stay on top of the watering. Because there isn’t a lot of soil volume, they can dry out in a heartbeat. I usually mulch the top of the soil with some cedar chips to keep the moisture in.
I once tried to grow a “standard” rosemary bush in one of these, and it was a disaster. The roots were too cramped, and the plant looked miserable. Stick to herbs that stay relatively small or are “annuals” that you’ll replace next year anyway. It’s all about matching the plant to the container.
9. The Self-Watering Bucket System
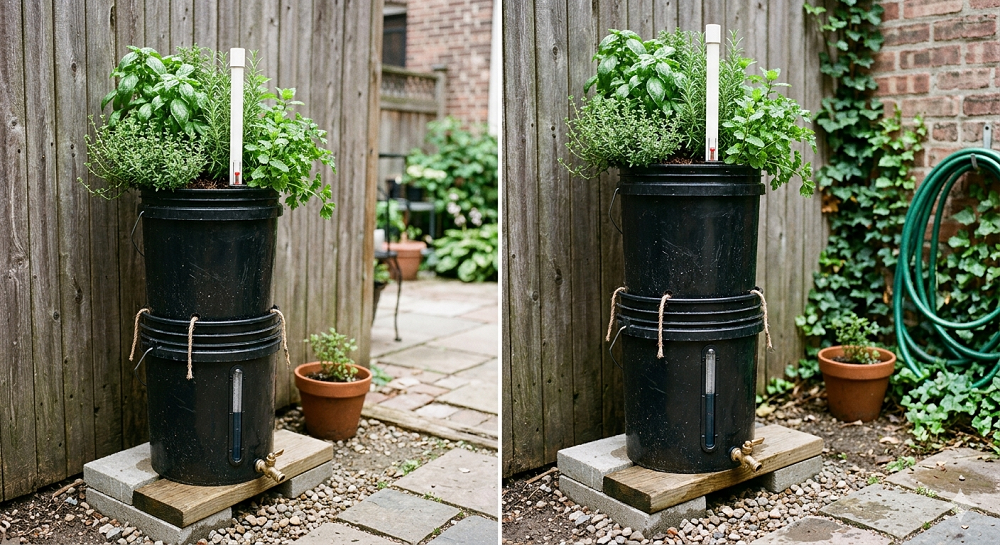
Let’s be real: sometimes we go on vacation, and we come back to a “herb graveyard.” The self-watering bucket system (often called a “Sippy Cup for plants”) is the solution for the forgetful gardener. It uses two 5-gallon buckets nested inside each other. The bottom bucket holds a reservoir of water, and a “wick” of soil pulls that water up into the top bucket where the plants live.
I’ve found that this is the only way to grow massive, monster-sized basil. Basil is a thirsty plant, and it loves having constant, consistent moisture. In a regular pot, the “wet-dry-wet-dry” cycle can make the leaves taste a bit bitter. In a self-watering bucket, the growth is explosive. I’ve had basil plants grow three feet tall in these things.
You can hide the ugly plastic buckets by slipping them into a decorative wooden half-barrel or wrapping them in reed fencing. It’s a “pro” setup hidden inside a “DIY” exterior. I use a simple piece of 1-inch PVC pipe tucked into the side so I can refill the reservoir without disturbing the plants.
The only downside? Mosquitoes. If you leave that water reservoir open, you’re basically building a Five-Star hotel for mosquito larvae. I always make sure the top bucket fits snugly, or I put a few drops of vegetable oil in the water to create a film that prevents the bugs from breeding. It’s a small price to pay for herbs that never wilt.
10. The Birdbath Herb Oasis
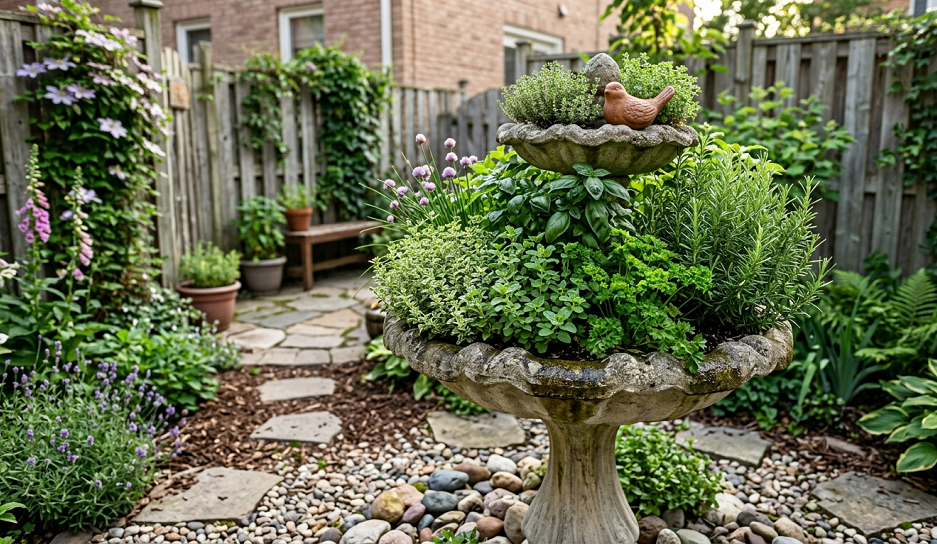
Got an old concrete birdbath that’s cracked or just sits there collecting stagnant water and bird poop? Turn it into an herb succulent-style display. Because birdbaths are shallow and wide, they are perfect for herbs that have “creeping” habits.
I filled mine with a mix of “Woolly Thyme,” “Lemon Thyme,” and “Variegated Sage.” The different colors and textures of the leaves look like a living tapestry. Since most birdbaths don’t have drainage, I actually had to use a masonry bit to drill a hole right through the center of the concrete. It was nerve-wracking, but it worked. If you don’t want to drill, you’ll have to be extremely careful with watering—only give it a “sip” at a time.
I’ve found that this works best as a centerpiece in a flower bed. It raises the herbs up so you don’t have to bend over to smell them. There is nothing better than brushing your hand against a birdbath full of lemon thyme as you walk past; the scent is incredible.
Just a heads-up: Concrete can leach lime into the soil, which makes it more “alkaline.” Most herbs actually like this, especially lavender and rosemary. If your plants start looking a bit yellow, though, you might need to add a little bit of acid-loving fertilizer to balance things out.
11. The “A-Frame” Hydroponic Pipe Garden
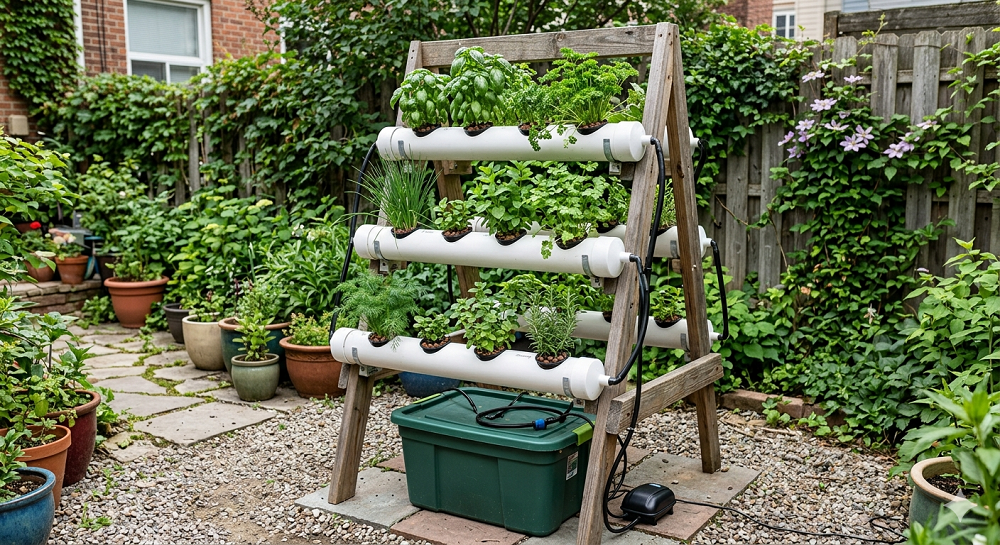
If you want to feel like a scientist and grow herbs at lightning speed, look into a simple NFT (Nutrient Film Technique) pipe system. It’s basically white PVC pipes with holes cut in them, tilted slightly so a thin film of water flows over the roots. I built an A-frame version that sits on my patio, and the growth rate is honestly a bit scary.
I grew enough cilantro in one of these to feed a small village. Because the plants aren’t fighting through soil, all their energy goes into making leaves. You do need a small pump (like a fountain pump) and a reservoir, but it’s a lot easier than it sounds.
The biggest “mistake” I made here was not checking the pH of the water. Hydroponics is less forgiving than soil. If your water is too “hard” or too “soft,” the plants just stop growing. I had to buy a cheap $10 pH pen to keep things in the “sweet spot.”
I wouldn’t recommend this for woody herbs like rosemary, but for “leafy” herbs like basil, mint, and parsley, it’s unbeatable. It’s clean, there’s no dirt involved, and it looks like something out of a sci-fi movie. If you want a conversation piece that also makes a mean pesto, this is it.
12. The Hanging Gutter Garden
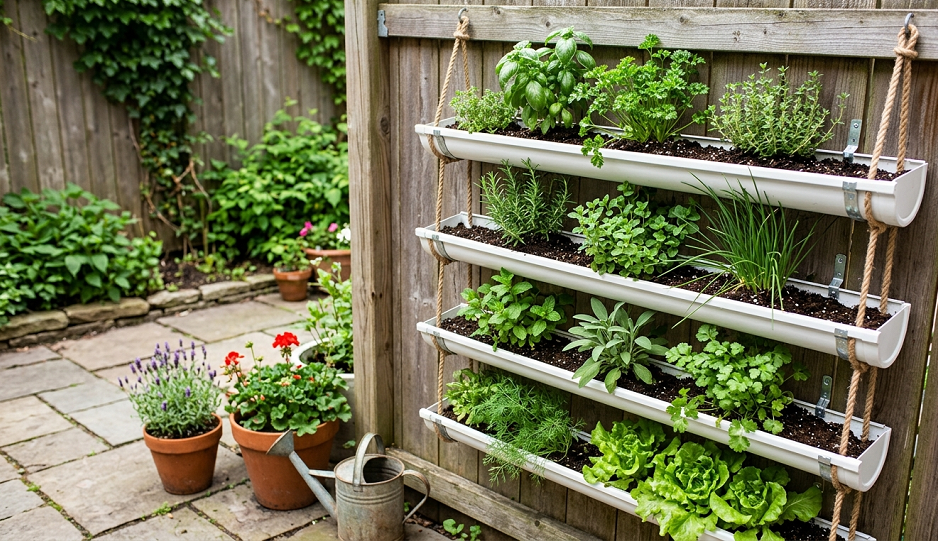
This is a classic “life hack” for a reason. You take standard aluminum rain gutters, cap the ends, and hang them from a fence or a wall. It’s dirt cheap and gives you a long, linear growing space. I’ve found that these are the absolute best for growing a “salad mix” of herbs—parsley, cilantro, and chives all lined up in a row.
Don’t buy the plastic gutters; they tend to sag under the weight of the soil over time. Go for the metal ones. I used heavy-duty chains to hang three tiers of gutters on my back fence. It turned a “dead” space into a productive wall of green.
The real talk here? Gutters are very shallow. This means they dry out fast. On a hot August day, I sometimes have to water them twice. I also learned the hard way to drill plenty of drainage holes. During a heavy rainstorm, my gutters turned into actual “gutters,” and the water pressure washed half my soil and all my young dill plants right over the edge.
If you use a high-quality potting mix with “moisture crystals” (those little beads that hold water), you can mitigate the drying out. It’s a fantastic project for anyone on a budget who wants to maximize every inch of their outdoor space.
13. The “Bonus” Countertop Aerogarden Hack
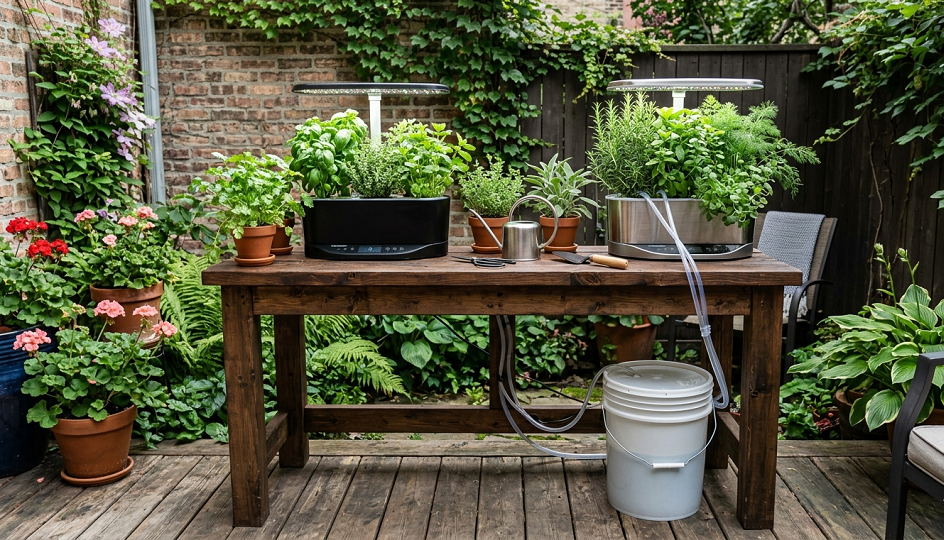
Okay, this isn’t exactly a “build” project, but it’s a “system” project. If you have an indoor smart-grower like an Aerogarden, don’t just use their expensive pre-seeded pods. I’ve found that you can buy “blank” sponges and use your own seeds for a fraction of the cost.
I use mine strictly for starting seeds in the late winter. I’ll grow my basil and Thai basil indoors under the powerful LED lights, and then “harden them off” and move them outside in May. It gives me a two-month head start on the season.
The trick to using these indoors is to keep the “light hood” as low as possible. If the light is too high, the herbs will reach for it and get “leggy.” You want short, stocky, powerful plants. I also recommend adding a tiny oscillating fan nearby; it strengthens the “stems” of the plants so they don’t flop over when you finally move them to the great outdoors.
It’s the perfect way to scratch the gardening itch when there’s still snow on the ground. By the time your neighbors are buying overpriced, half-dead herbs at the big-box store, you’ll already be harvesting your first batch of mojito mint.
The “Real Talk”: What Nobody Tells You
Before you go out and buy a truckload of soil, let’s have a heart-to-heart. Herb gardening is “easy,” but it’s not “magic.”
- The Mint Trap: I will say it again: NEVER plant mint in the ground. I don’t care how much you like tea. It will find a way to under-tunnel your driveway and pop up in your neighbor’s yard. Always, always use a container.
- Fertilizer Overload: Most people over-fertilize their herbs. If you give them too much “food,” they grow fast but lose their flavor. The essential oils (the stuff that makes them smell and taste good) are actually a defense mechanism. A “stressed” herb often tastes better than a pampered one.
- The “Bolting” Heartbreak: Cilantro is the heartbreaker of the herb world. It looks great for two weeks, and then suddenly it shoots up a tall stalk with white flowers and the leaves start tasting like soap. This is called “bolting.” You can’t stop it; you can only delay it by keeping it cool and picking the flowers off. Just accept that you’ll need to replant cilantro every few weeks.
- Cheap Soil is a Trap: If the bag of soil costs $2, leave it there. It’s usually just ground-up wood chips and sand. Your herbs will struggle to breathe. Spend the extra $5 on the “pro” stuff with peat moss or coco coir and perlite. It makes a 100% difference in your success rate.
Parting Wisdom
The secret to a great herb garden isn’t having the most expensive equipment; it’s just paying attention. Stick your finger in the dirt—if it feels dry up to the first knuckle, water it. If the plant looks yellow, it’s probably drowning. Start small with just two or three of these projects, and I promise you’ll never go back to those plastic-wrapped, wilted grocery store herbs again.
Which of these projects are you going to tackle first this weekend? Or do you have a “secret” herb-growing hack that I missed? Let me know in the comments below—I read every single one!