
If you’ve ever walked through a garden center and seen the price tag on a cedar planter, you’ve probably had the same heart attack I did. Paying $200 for a box that holds dirt is highway robbery. Most of us have a pile of leftover decking boards in the garage or can snag some pressure-treated planks for cheap, but the fear of the wood rotting out or the sides bowing like a cheap accordion keeps people from picking up the drill.
Building your own wooden planter box out of decking isn’t just about saving money; it’s about making something that actually survives more than one season. I once built a “designer” box out of thin scrap plywood that disintegrated the second I watered my petunias. Trust me, decking is the way to go because it’s literally built to handle the elements.
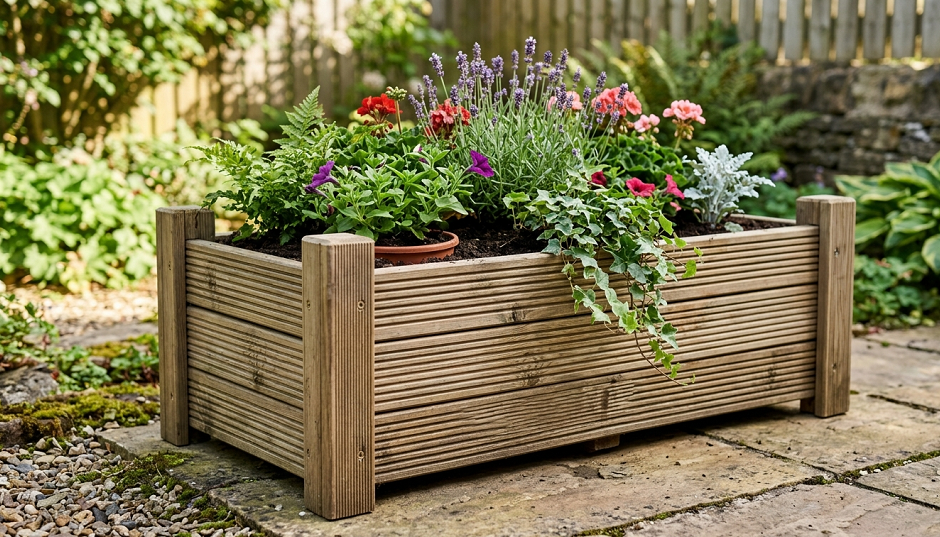
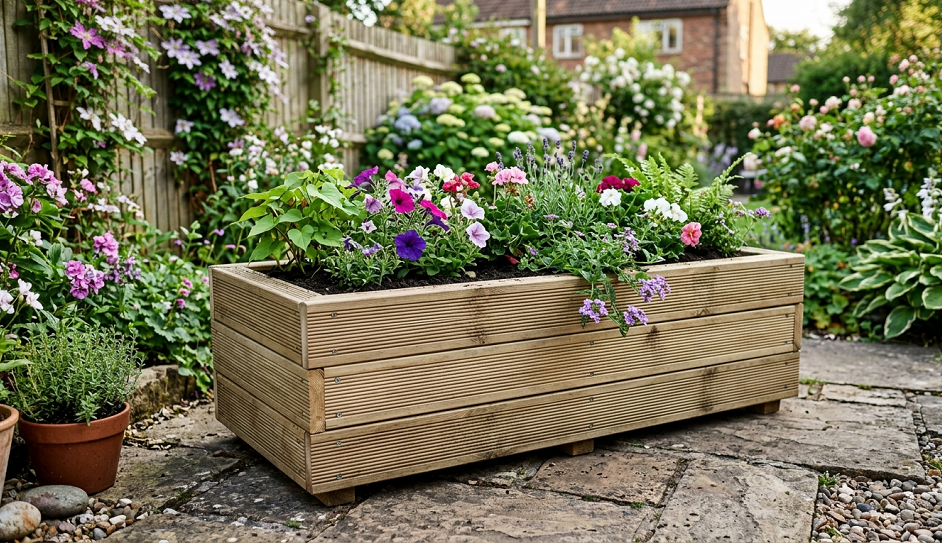
Choosing the Best Decking Wood for Planters
When you’re standing in the lumber aisle, the choices can be paralyzing. For a planter box, you want wood that can handle constant moisture. I swear by 5/4-inch pressure-treated decking or cedar if you’re feeling fancy. Cedar is naturally rot-resistant and smells like a spa, but it’ll cost you. Pressure-treated wood is the “workhorse” of the garden.
Modern pressure-treated lumber is safe for most plants, though I still line my boxes with heavy-duty plastic if I’m growing veggies. I’ve seen people try to use interior-grade pine because it’s cheap, but that’s a one-way ticket to Fungus Town. Pine will turn into mush faster than you can say “harvest time.” Spend the extra few dollars on real decking boards.
If you’re scavenging for materials, check the thickness. Standard decking is usually about an inch thick, which is perfect. Anything thinner will warp under the weight of wet soil. I once tried using fence pickets for a large planter, and within three months, the sides looked like they were trying to escape. Stick to heavy-duty decking planks to ensure your box stays square for years.
Easy Steps to Build a Sturdy DIY Garden Box
Start by cutting your decking boards into four side pieces and one bottom piece. If you want a classic rectangular look, go for two 3-foot lengths and two 18-inch lengths. Use a miter saw if you have one, but a basic hand saw works if you’re looking for a workout. I always cut a few extra “cleats”—small 2×2 wood blocks—to screw into the inside corners. This adds massive structural integrity.
Assembly is where most people mess up. Do not just screw the boards into each other’s grain. It’ll split faster than a pair of tight pants. Drill pilot holes first. I use 2.5-inch exterior-grade deck screws. These are coated so they won’t rust and leave ugly black streaks down the side of your beautiful wood.
For the base, don’t just slap a solid board on the bottom and call it a day. You need drainage, or your plants will literally drown. I space my bottom boards about a quarter-inch apart or drill half-inch holes every six inches. One summer, I forgot the drainage on a strawberry box, and by July, I was growing a very expensive swamp. It wasn’t pretty, and the smell was even worse.
Finally, give the whole thing a quick sand. You don’t need a mirror finish, but knocking off the splinters will save you a trip to the ER later. If you want to stain it, do it before you add the dirt. I prefer a clear sealer that lets the wood grain pop, but a dark walnut stain can make a $10 DIY project look like it came from a high-end boutique.
Real Talk: Why Your Planter Might Fail (And How to Fix It)
Here is the truth: wood and water are natural enemies. Even the best-built box will eventually rot if you don’t take precautions. The biggest mistake I see is people sitting their planters directly on the grass or soil. The bottom will suck up moisture like a straw. I always add “feet” to my boxes—either small wood blocks or actual furniture feet—to keep them an inch off the ground.
Another thing that’s a total waste of time is using “decorative” nails. They look cute for a week, but the weight of the soil will pop them right out. Use screws. Always. Also, don’t skip the liner. A simple heavy-duty trash bag or pond liner with holes poked in the bottom prevents the wet soil from being in constant contact with the wood, which can double the life of your planter.
I’ve also found that those “self-watering” inserts for DIY boxes are usually a gimmick that just creates a breeding ground for mosquitoes. If you want your plants to stay hydrated, just use good quality potting mix with some perlite. Don’t overcomplicate the engineering. A simple box, well-drained and slightly elevated, is all you really need.
Parting Wisdom for the Weekend Carpenter
Building these boxes is addictive. Once you finish one and see how much better your porch looks, you’ll want to build ten more. My best advice is to measure twice and cut once—and maybe buy a box of Band-Aids just in case.
What are you planning to grow in your new planter box this season? If you run into a snag with your measurements or need a tool recommendation, drop a comment below and let’s talk shop!