

Spring has sprung! The days are longer, the air is warmer, and everything outside feels fresh and alive. As the world outside bursts with color and the scent of blooming flowers, it’s natural to want to bring that vibrant energy indoors. Spring crafts are a delightful way to personalize your home decor and celebrate the season with handmade creations.
Not only is crafting a fun and rewarding activity, but it also allows you to create unique decorations that perfectly reflect your style and taste. So, grab your crafting supplies, unleash your creativity, and get ready to transform your home into a spring haven with these 17 gorgeous DIY projects:
1. Blooming Beauties: Paper Flower Wall Hanging
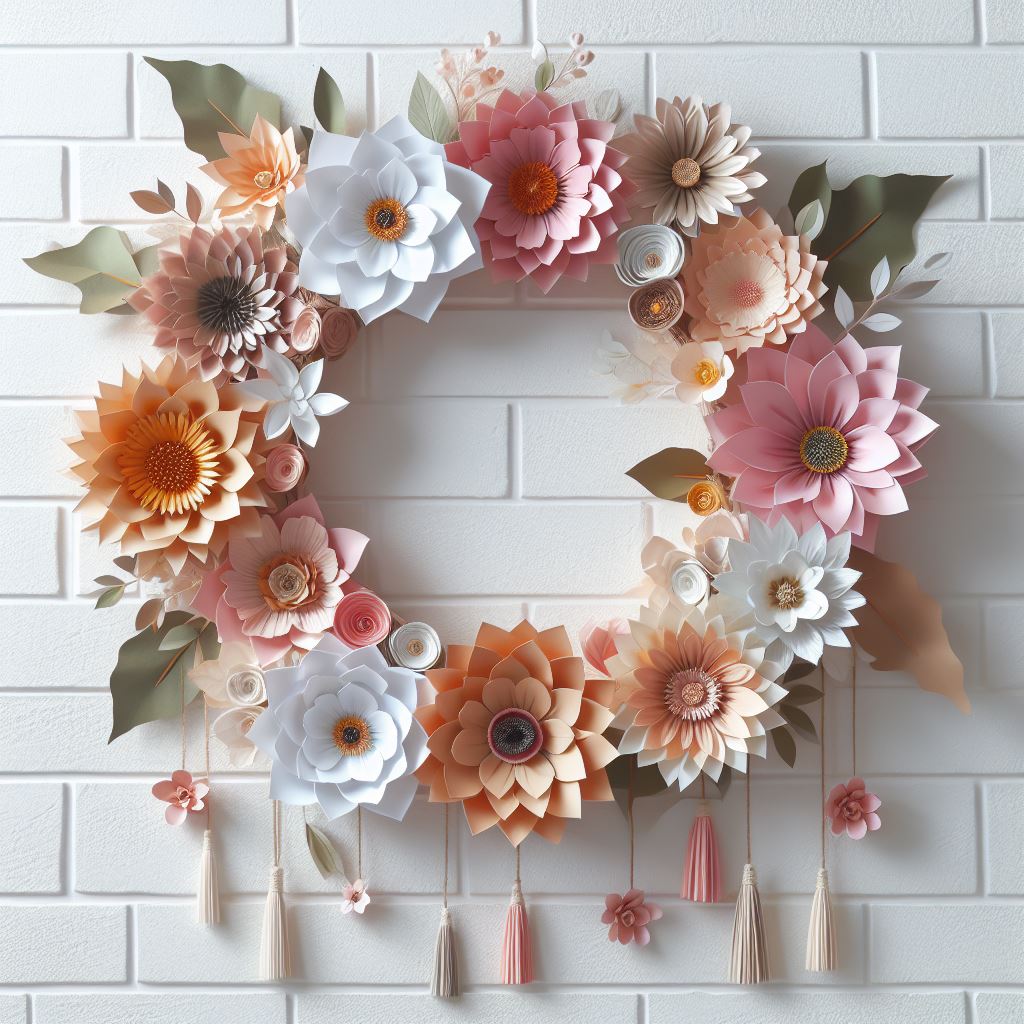
Who needs a real flower garden when you can create a stunning floral display with colorful paper? This paper flower wall hanging is a show-stopping piece that will add a touch of whimsical charm to any room.
Materials:
- Construction paper, crepe paper, or tissue paper in various spring colors (pinks, yellows, greens, blues)
- Scissors
- Ruler and pencil (optional, for stenciling)
- Floral stencils (optional)
- Craft glue or hot glue gun
- Canvas or cardboard as the base for the wall hanging
- Ribbon or twine for hanging (optional)
Instructions:
- Choose your flowers: Decide on the types of flowers you want to create. Popular choices for a spring wall hanging include roses, peonies, daisies, and hydrangeas. You can find stencils online or in craft stores, or you can freehand cut your own flower shapes.
- Create your flowers: Using your chosen paper and stencils or freehand cutting techniques, create several flower shapes in different sizes. Aim for a variety of colors and bloom sizes for a more visually interesting display.
- Assemble the flowers: For roses, layer several flower circles cut in decreasing sizes, slightly offset from each other, and secure them in the center with a dab of glue. For peonies, crumple tissue paper squares and layer them in the center, then add larger petal shapes around the base. For daisies, cut out a yellow circle for the center and white petal shapes, then glue them together. Use your creativity to shape and assemble the flowers.
- Construct the wall hanging: Lay your canvas or cardboard flat. Arrange the paper flowers on the base to create your desired design. Once you’re happy with the layout, begin gluing the flowers down securely.
- Finishing touches: (Optional) Add leaves cut from green paper for a more natural look. You can also embellish your flowers with glitter, tiny pearls, or buttons for added sparkle.
- Hanging your masterpiece: Attach a ribbon or twine to the back of the canvas or cardboard for hanging. Display your beautiful paper flower wall hanging on a wall, door, or even above a mantelpiece for a burst of springtime cheer.
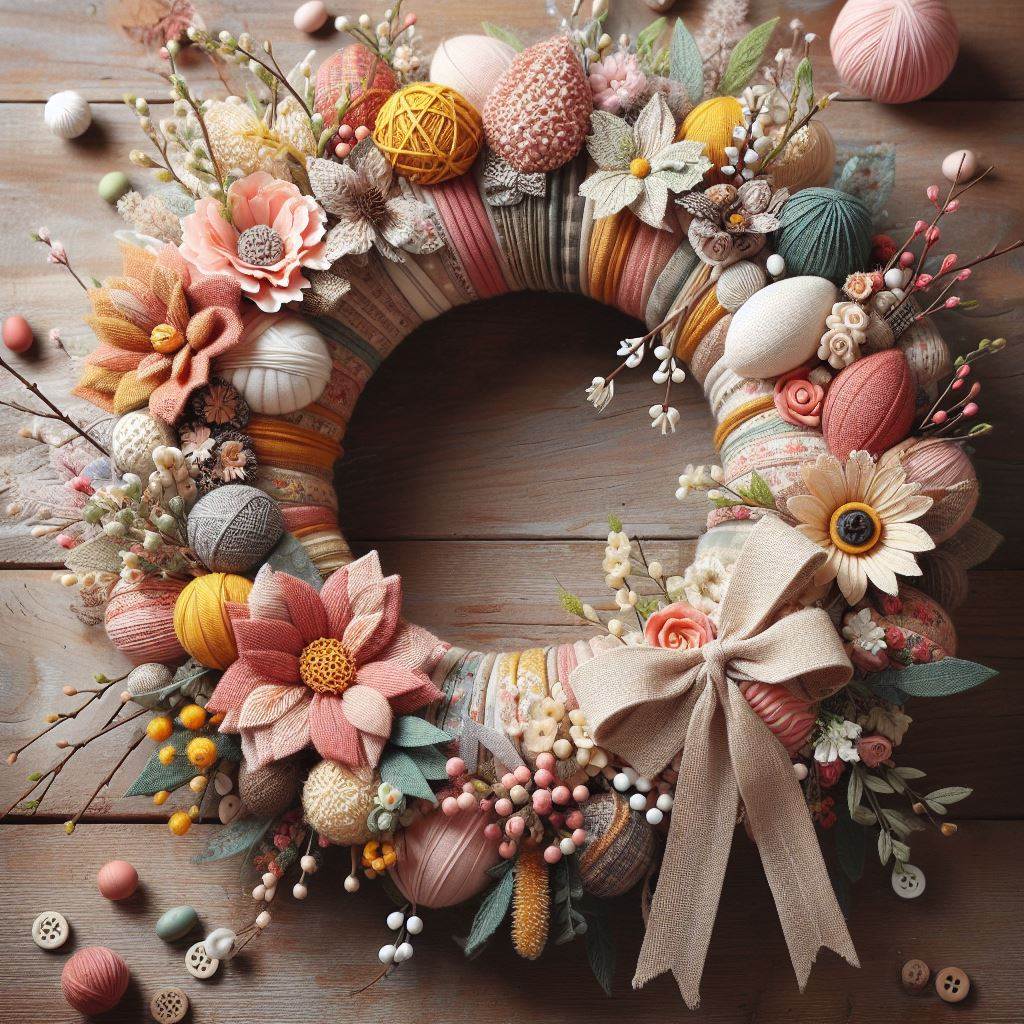
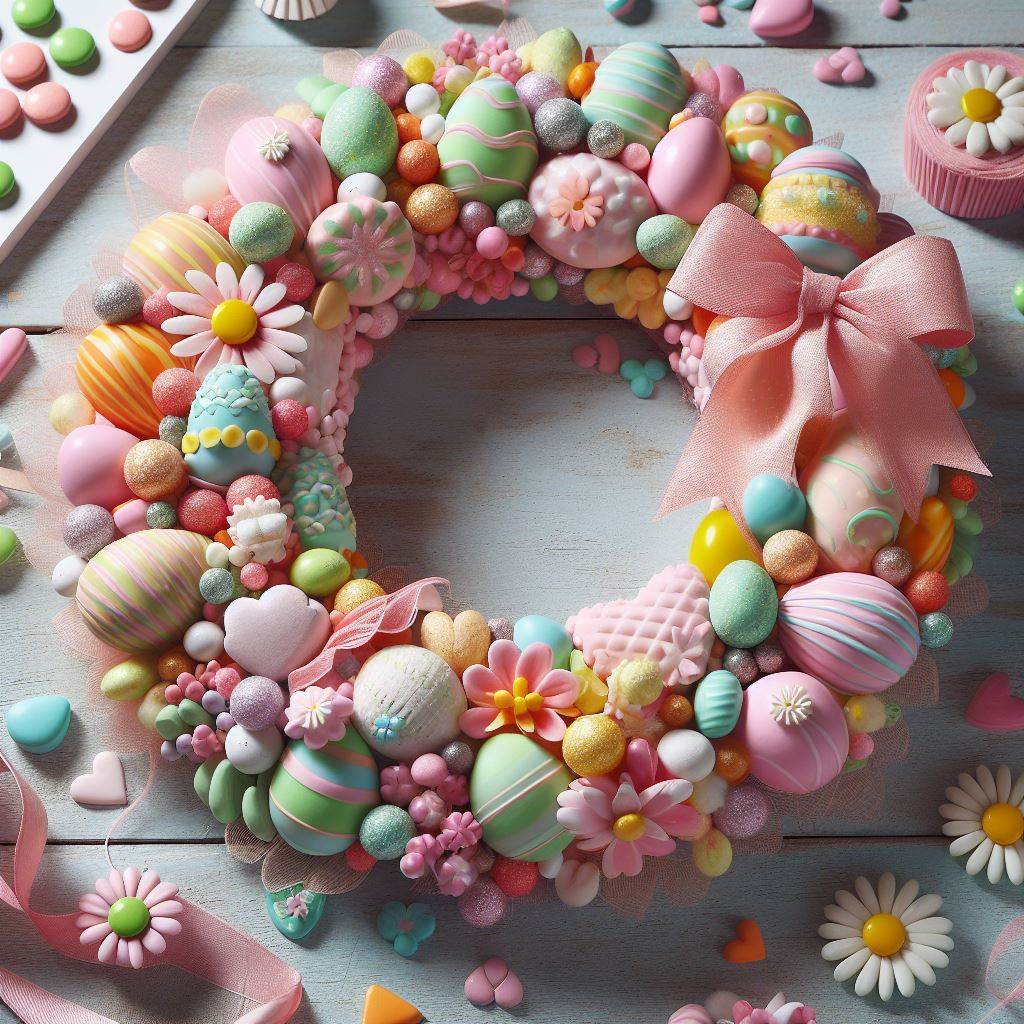
2. A Breath of Fresh Air: DIY Spring Wreath
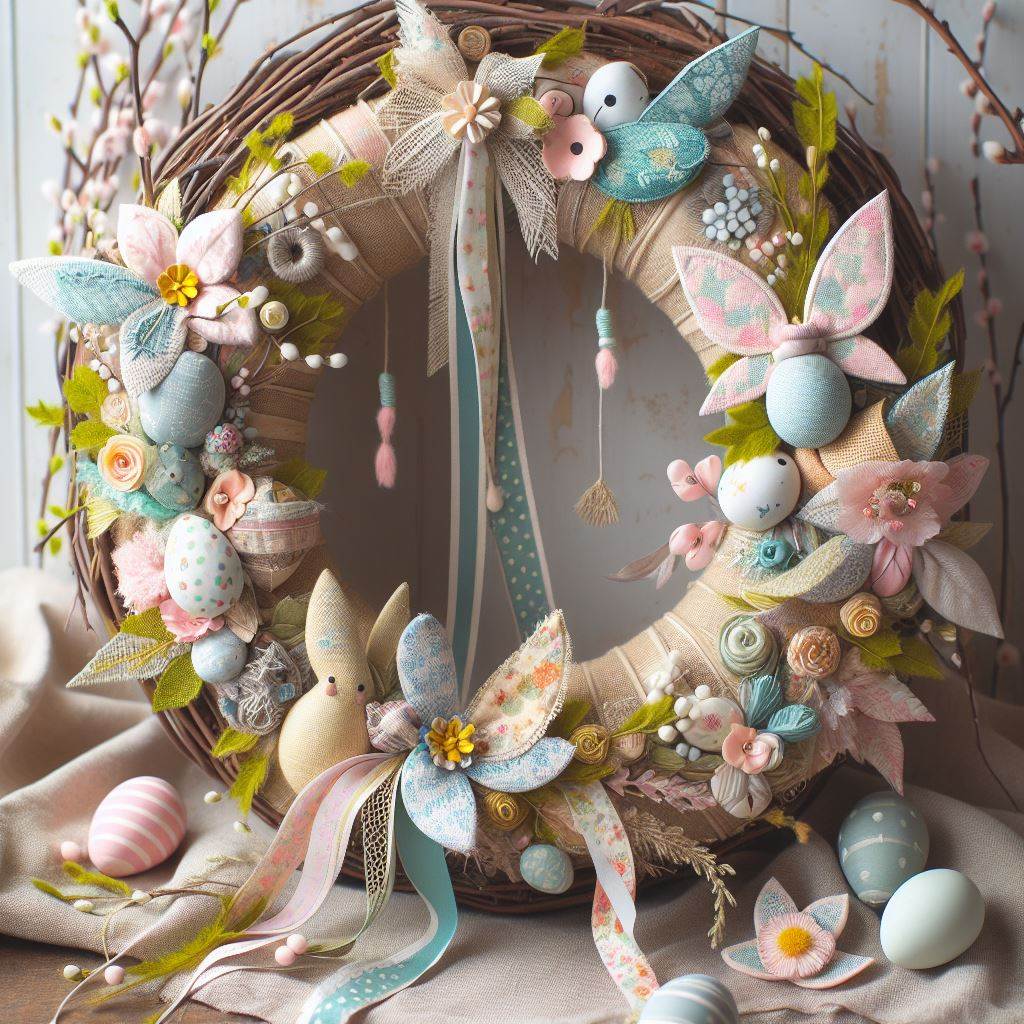
Greet spring at your door with a unique and welcoming wreath handcrafted by you. This DIY spring wreath is a fantastic way to add a touch of personality to your entryway and set the tone for your spring home decor.
Materials:
- Grapevine wreath base (or floral foam wreath base)
- Dried flowers in various colors and textures (lavender, baby’s breath, eucalyptus)
- Twigs and branches in different shapes and sizes
- Colorful feathers (optional)
- Artificial flowers in spring colors (optional)
- Yarn or ribbon in spring colors
- Floral wire
- Hot glue gun (optional)
- Scissors
Instructions:
- Prepare your base: Choose a grapevine wreath base for a rustic look, or a floral foam wreath base for a more lightweight option.
- Incorporate natural elements: Begin by attaching dried flowers, twigs, and branches to the wreath base using floral wire. Secure them firmly, tucking them into the grapevine or pushing them into the floral foam.
- Add pops of color: If you’d like to add a burst of vibrant color, incorporate artificial flowers in spring hues like pink, yellow, or lavender. You can also weave colorful yarn or ribbon throughout the wreath for a whimsical touch.
- Secure your elements: Use floral wire to securely fasten all the elements to the wreath base. Hot glue can be used for additional security, especially for heavier items like large twigs or artificial flowers.
- Finishing touches: For an extra touch of whimsy, add some colorful feathers to your wreath. Arrange them artistically and secure them with floral wire or hot glue.
- Hang your wreath: Attach a sturdy ribbon or twine to the back of the wreath for hanging.
3. A Pop of Color with Painted Flower Pots
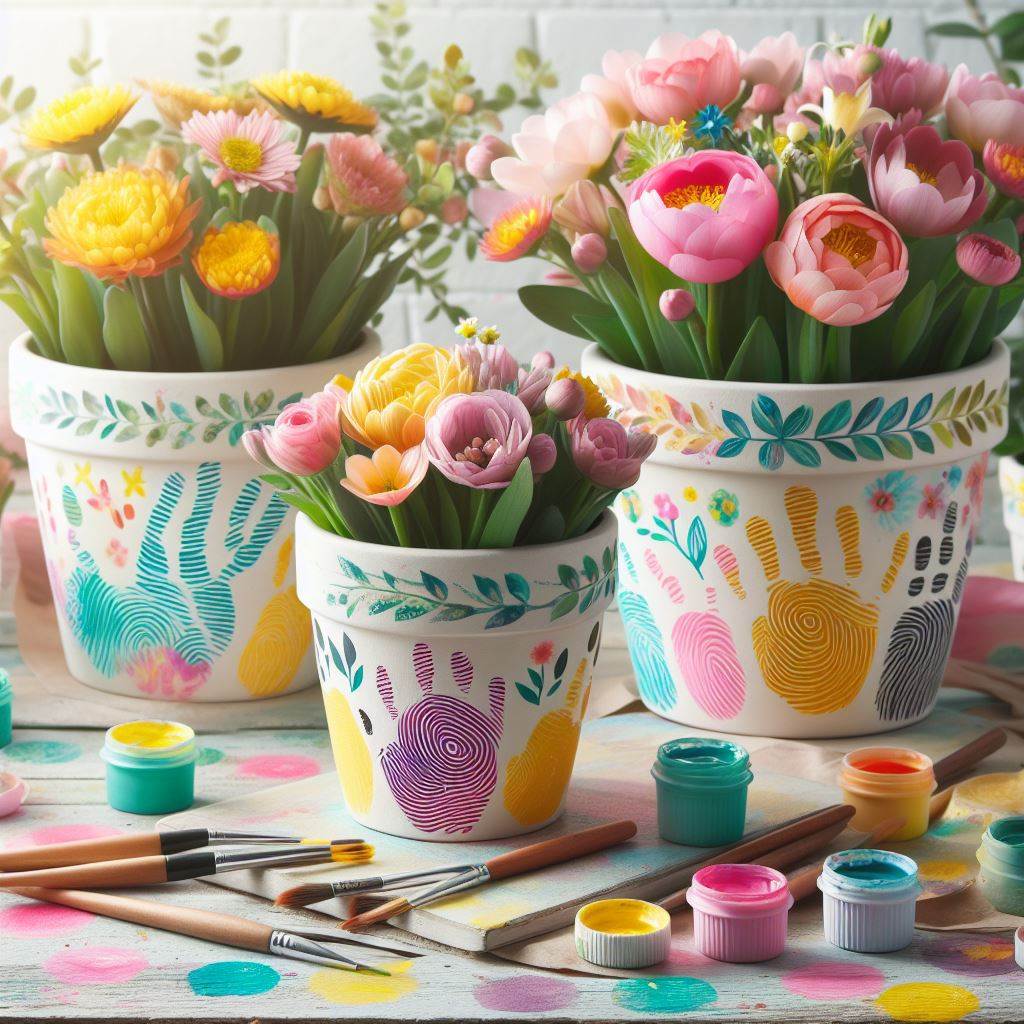
Tired of plain terracotta pots? Breathe new life into them with a splash of color and transform them into vibrant planters for your spring blooms. This project allows you to personalize your pots and create a cohesive look for your spring plants.
Materials:
- Plain terracotta pots or plastic planters in various sizes
- Acrylic paints in spring colors (pinks, yellows, greens, blues)
- Paint brushes in various sizes
- Painter’s tape (optional)
- Pencils (optional)
- Stencils (optional)
- Clear sealant (optional)
Instructions:
- Clean the pots: Wash your terracotta pots or plastic planters thoroughly with warm soapy water to remove any dirt or debris. Allow them to dry completely before painting.
- Choose your colors: Spring is all about cheerful hues, so select acrylic paints in vibrant colors or calming pastels. Consider using a color palette that complements your existing home decor or the flowers you plan to plant.
- Solid color or patterned? Decide whether you want to paint your pots a solid color or add some patterns. For a simple and classic look, choose a single spring color and paint the entire pot.
- Creating patterns: For a more personalized touch, consider adding patterns to your pots. You can achieve stripes, polka dots, or geometric designs by freehand painting or using painter’s tape to create clean lines. Stencils are also a great option for creating intricate floral or botanical patterns.
- Painting your masterpiece: Begin by applying a base coat of paint to your chosen color. Allow the first coat to dry completely before adding a second coat for better coverage.
- Adding details: Once the base coat is dry, you can add details like stripes or polka dots using a smaller paintbrush. If you’re using stencils, carefully apply paint over the stencil and remove it gently to reveal the design.
- Seal the deal (optional): For added protection against the elements, especially for outdoor planters, apply a coat of clear sealant once the paint is completely dry.
- Planting time: Fill your painted pots with fresh potting mix and plant your favorite spring blooms. You can create a delightful display on a windowsill, porch steps, or a patio table with your newly decorated planters.
4. A Touch of Whimsy with Butterfly Mobiles
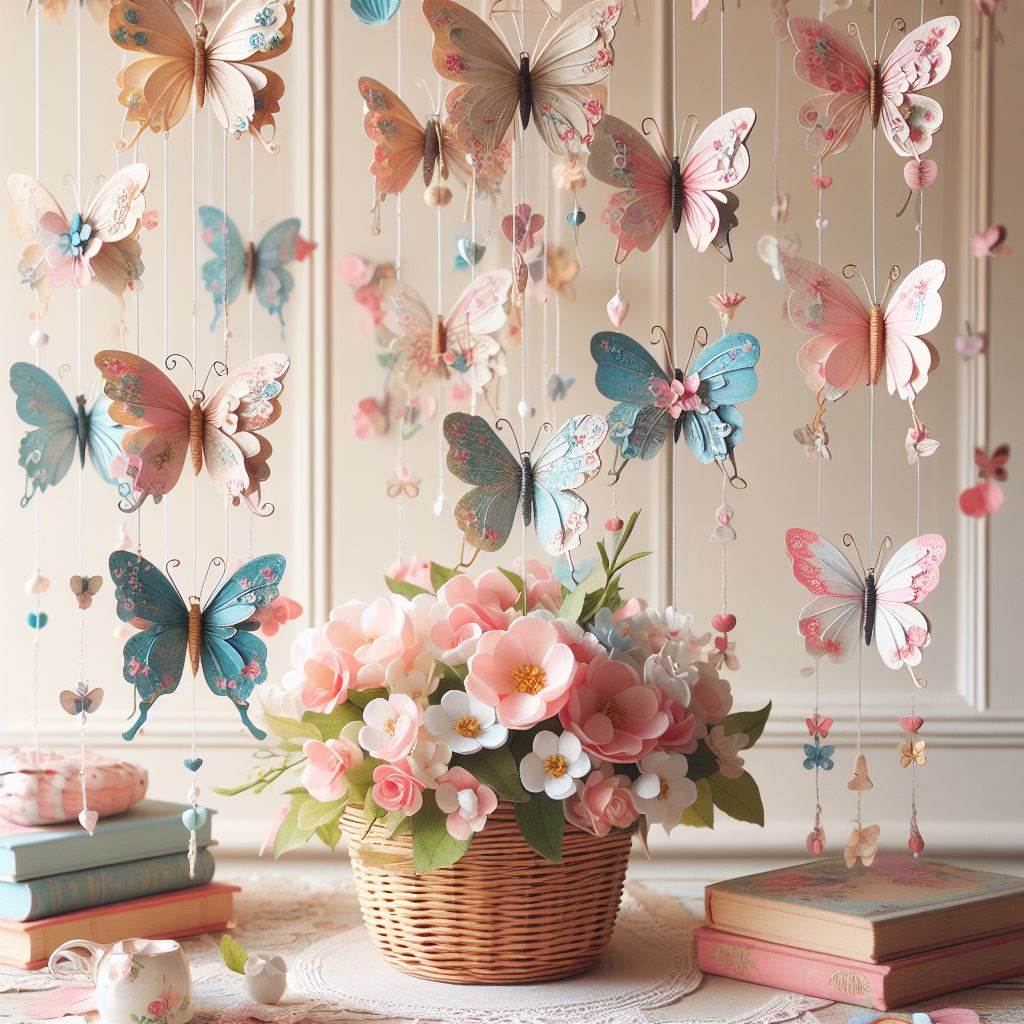
Bring the delicate beauty of butterflies indoors and add a touch of whimsy to your space with these charming DIY butterfly mobiles. They’re perfect for hanging in a child’s room, a nursery, or any space that needs a dose of spring cheer.
Materials:
- Construction paper, felt, or fabric in various spring colors and patterns
- Scissors
- Markers, pens, or fabric paint (optional)
- Sequins, glitter, or buttons (optional)
- Pipe cleaners or straws cut into different lengths
- Thread or fishing line
- Embroidery needle (optional)
- Mobile hanging ring
Instructions:
- Create your butterflies: Cut out butterfly shapes from your chosen material. Construction paper is a budget-friendly option, while felt offers a more textured look, and fabric allows for more intricate patterns. You can find butterfly templates online or create your own freehand designs.
- Decorate your butterflies: Personalize your butterflies by drawing on details like eyes, wings patterns, or even tiny antennae with markers or fabric paint. For extra sparkle, add sequins or glitter to the wings. You can also embellish them with buttons for a quirky touch.
- Assemble the butterflies: If using fabric, consider lightly fusing the edges with an iron to prevent fraying. Using an embroidery needle and thread (optional), sew two butterfly shapes together, leaving a small opening at the top. Stuff the butterfly with a small amount of cotton for a more 3D effect, then sew the opening closed.
- Creating the mobile: Cut pipe cleaners or straws into different lengths. Thread one end of a piece of thread or fishing line through the top of a butterfly and tie a knot to secure it. Repeat this process for additional butterflies, using varying thread lengths to create a cascading effect.
- Attaching the butterflies: Tie the threaded butterflies to the mobile hanging ring at different points. Ensure the butterflies hang at varying heights for a more dynamic display.
- Hang and admire: Hang your beautiful butterfly mobile from the ceiling, a light fixture, or even a window for a touch of whimsical springtime charm.
5. Springtime Scents with DIY Potpourri
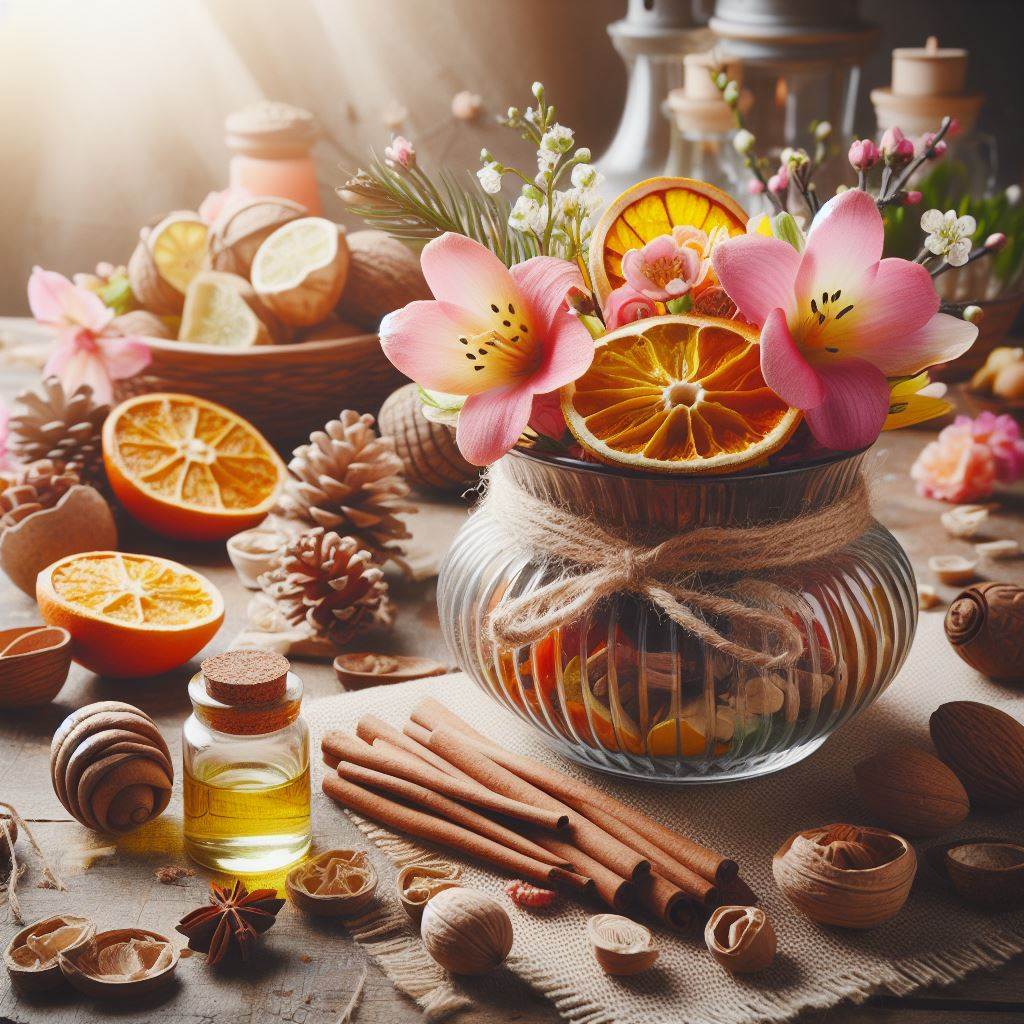
Fill your home with the delightful fragrances of spring by creating your own potpourri. This project allows you to personalize the scent to your liking and create a beautiful and decorative element for your home.
Materials:
- Dried flowers (lavender, rosebuds, chamomile)
- Dried herbs (lemon balm, mint, rosemary)
- Citrus peels (orange, lemon, grapefruit)
- Cinnamon sticks
- Star anise
- Essential oils (optional) (lavender, lemon, bergamot)
- Bowl or decorative jar with a lid
- Scissors
Instructions:
- Gather your ingredients: The beauty of DIY potpourri lies in its customization. Choose a variety of dried flowers, herbs, and spices that you find visually appealing and smell delightful. Popular choices include lavender, rosebuds, chamomile, lemon balm, mint, rosemary, orange peels, lemon peels, grapefruit peels, cinnamon sticks, and star anise.
- Prepare the ingredients: Ensure all your ingredients are completely dry to prevent mold growth. If using fresh citrus peels, dry them thoroughly by laying them on a paper towel in a well-ventilated area for several days. You can also speed up the process by placing them in a dehydrator on a low setting.
- Cut and arrange: Using scissors, cut the larger ingredients like citrus peels and cinnamon sticks into smaller pieces for a more visually appealing display and to allow the fragrance to disperse better. Arrange the dried flowers, herbs, spices, and citrus peels in a large bowl.
- Adding essential oils (optional): For a more intense fragrance, you can add a few drops of essential oils to your potpourri. Choose essential oils with spring scents like lavender, lemon, bergamot, or a combination of your favorites. Add the essential oils sparingly, a drop or two at a time, and mix the potpourri gently to distribute the fragrance evenly.
- Curing your potpourri: Allow your potpourri mixture to cure for several weeks in a cool, dark place. Stir the potpourri occasionally to ensure the essential oils are evenly distributed and to prevent mold growth.
- Presentation time: Once your potpourri is cured and the fragrance is to your liking, fill a decorative bowl or jar with a lid. Arrange the potpourri mixture attractively, adding whole cinnamon sticks or star anise for a touch of visual interest. Display your homemade potpourri on a coffee table, bookshelf, or anywhere you want to enjoy the delightful spring scents.
6. A Tabletop Welcome with a Spring Centerpiece
Create a charming centerpiece to add a touch of spring to your dining table or any other surface that needs a seasonal refresh. This project allows you to use your creativity and personalize it to match your existing decor.
Materials:
- Decorative tray or basket as the base
- Moss or decorative pebbles (optional)
- Potted succulents
- Small flowering plants (pansies, violets, hyacinths)
- Faux florals (optional)
- Bird figurines, colorful eggs, or candles (optional)
- Crafting supplies like glue or floral foam (optional)
Instructions:
- Choose your base: Select a decorative tray or basket as the foundation for your centerpiece. Consider the size and style of your table when choosing the base. A rustic wooden tray works well for a farmhouse aesthetic, while a sleek metal tray creates a more modern look.
- Add a natural touch (optional): If you want to create a more natural and organic look, line the bottom of your tray or basket with moss. Alternatively, you can use decorative pebbles in various colors and sizes for a visual pop.
- Star of the show: The centerpiece of your spring arrangement will be your plants. Choose a variety of potted succulents, small flowering plants like pansies or violets, or even hyacinths for a touch of springtime elegance.
- Faux florals for year-round beauty (optional): If you prefer a long-lasting display or want to add pops of color, incorporate faux florals in spring hues. Consider using realistic-looking artificial flowers or ones with a whimsical and playful aesthetic.
- Accessorize for personality: Personalize your centerpiece by adding decorative elements that reflect your style and the spirit of spring. Bird figurines, colorful Easter eggs, or scented candles can all add a touch of whimsy and charm.
- Secure the elements (optional): For a more permanent arrangement, especially if using loose flowers or greenery, you can secure them in place using floral foam or hot glue. This is particularly helpful if your centerpiece will be displayed in a high-traffic area.
- Enjoy your creation: Display your beautiful spring centerpiece on your dining table, coffee table, or any surface that needs a touch of seasonal cheer.
7. Spring Greetings with a Hand-Painted Doormat
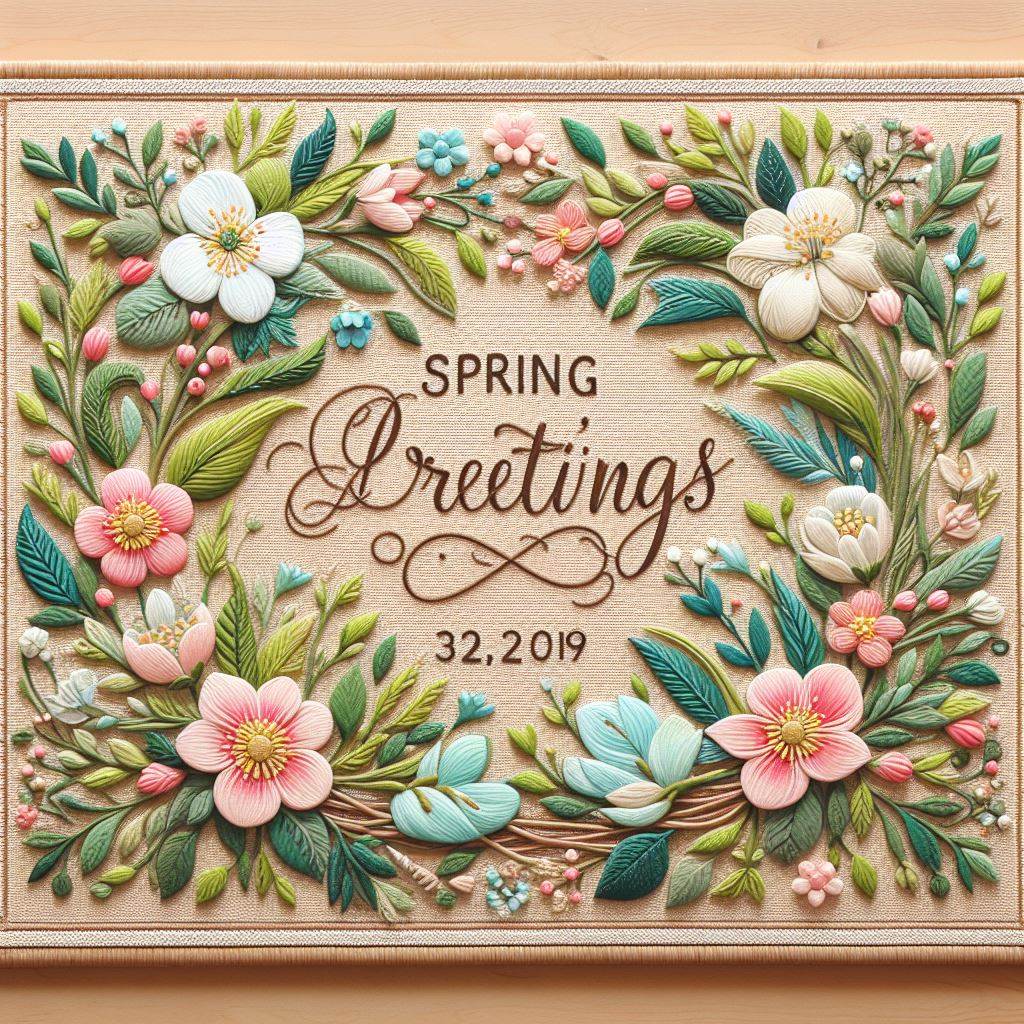
Welcome guests and celebrate the arrival of spring with a personalized and vibrant doormat. This project allows you to showcase your creativity and create a unique first impression for your home.
Materials:
- Plain coir doormat
- Outdoor acrylic paints in spring colors (pinks, yellows, greens, blues)
- Paint brushes in various sizes
- Painter’s tape (optional)
- Stencils (optional)
- Drop cloths or newspaper (optional)
- Clear sealant (optional)
Instructions:
- Prepare your workspace: Find a well-ventilated area outdoors to work on your doormat. Lay down drop cloths or newspaper to protect your work surface from paint splatters.
- Clean the doormat: Using a stiff brush or broom, remove any dirt, debris, or loose fibers from the coir doormat. Allow the doormat to dry completely before painting.
- Plan your design: Decide what message or design you want to create on your doormat. Popular spring-themed ideas include “Hello Spring,” “Welcome,” or a simple floral design. You can also use stencils with springtime motifs like butterflies, ladybugs, or blooming flowers.
- Protect surrounding areas (optional): If you’re painting a detailed design or using stencils, consider using painter’s tape to mask off areas you don’t want painted. This will help create clean lines and prevent paint from bleeding onto unwanted areas.
- Painting your masterpiece: Begin by applying a base coat of paint to your chosen color. Allow the first coat to dry completely before adding a second coat for better coverage.
- Adding details: Once the base coat is dry, you can use smaller paint brushes to add details like lettering, stripes, or polka dots. If using stencils, carefully apply paint over the stencil and remove it gently to reveal the design.
- Seal the deal (optional): For added protection against the elements and to prevent the paint from fading, apply a coat of clear sealant specifically designed for outdoor use. Ensure the paint is completely dry before applying the sealant.
- Let it cure: Allow the painted doormat to dry completely and cure according to the sealant instructions before placing it outside your door.
- Welcome spring in style: Display your personalized spring doormat with pride and greet your guests with a touch of handmade charm and seasonal cheer.
8. Wind Chimes with a Natural Touch
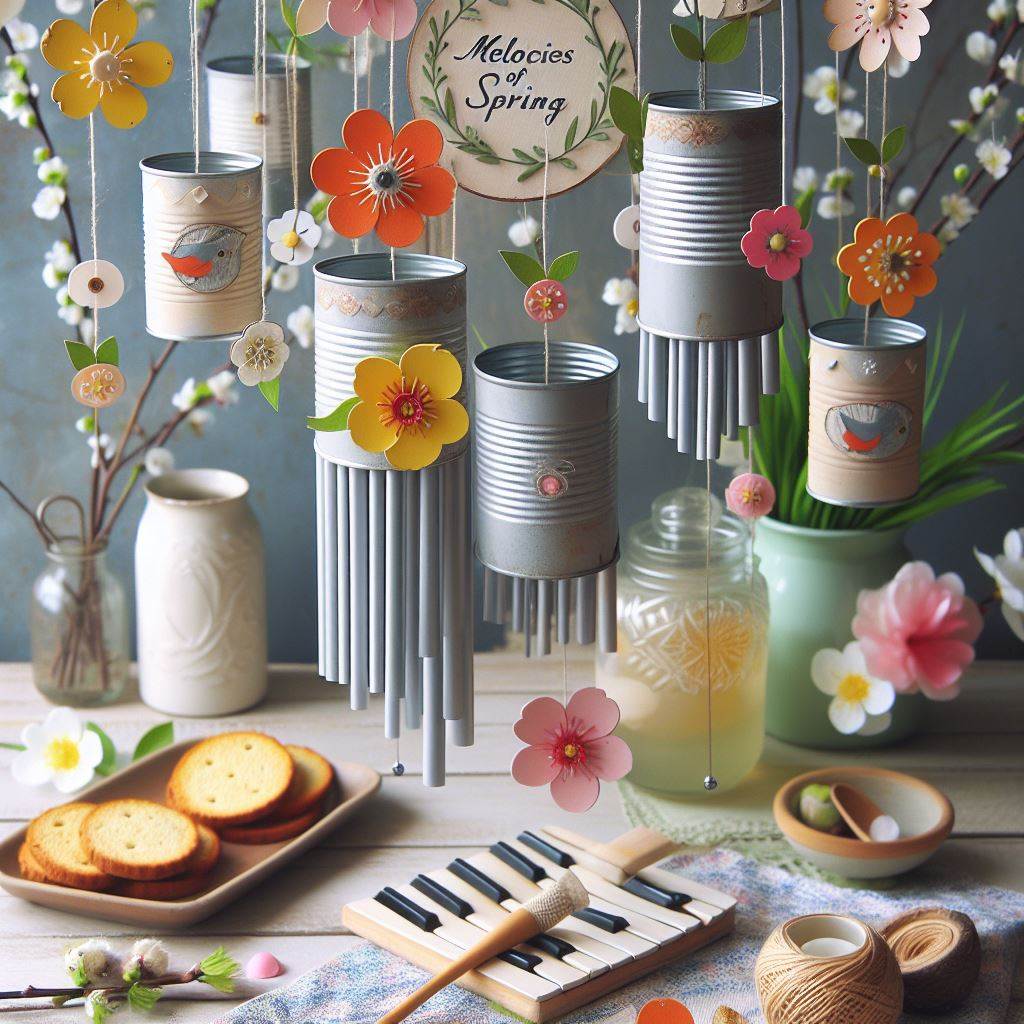
Bring the soothing sounds of spring breezes indoors with handcrafted wind chimes. This project allows you to personalize the sound and visual elements for a unique and delightful addition to your porch or patio.
Materials:
- Driftwood pieces in various sizes
- Shells collected from the beach (optional)
- Glass beads in spring colors
- Metal rings or large hooks
- Fishing line or nylon string
- Drill with a small bit (optional)
- Hammer and nails (optional)
- Wood glue (optional)
Instructions:
- Prepare the driftwood: Clean and dry the driftwood pieces thoroughly. You can leave them natural or stain them in light spring colors like pale yellow or light blue (optional).
- Create the chimes: Decide how many chimes you want on your wind chime. Using a drill (optional) or a hammer and nail (optional), create small holes near the top of each driftwood piece.
- Stringing the chimes: Cut various lengths of fishing line or nylon string. Thread a glass bead onto each string, then tie one end of the string securely to a driftwood piece through the pre-drilled hole. You can secure the knot with a dab of glue for added stability.
- Assembling the wind chime: Attach the strings with the driftwood chimes to a metal ring or large hook. Tie the strings at varying heights to create a cascading effect.
- Adding embellishments (optional): Incorporate additional elements like seashells strung onto the lines or small bells attached to the driftwood pieces for a touch of whimsy and a variety of sounds.
- Hang and enjoy: Hang your handcrafted wind chimes outdoors on a porch, patio, or from a tree branch. Listen to the soothing sounds of the chimes dancing in the spring breeze.
9. Textured Spring Wreath with Fabric Scraps
Move beyond the traditional floral wreath and create a textural masterpiece with fabric scraps. This project allows you to upcycle leftover materials and create a unique and stylish spring decoration.
Materials:
- Wire wreath frame
- Fabric scraps in various spring colors and textures (burlap, linen, cotton)
- Scissors
- Hot glue gun
- Ribbon or twine for hanging (optional)
- Decorative buttons, lace, or trims (optional)
Instructions:
- Cut your fabric: Cut your fabric scraps into strips of varying widths and lengths. Aim for a variety of textures and patterns to create visual interest.
- Attaching the fabric: Begin by securing the end of a fabric strip to the wire wreath frame using hot glue. Wrap the fabric strip around the frame, overlapping slightly and securing it with hot glue as you go.
- Building texture: Continue adding fabric strips in a random pattern, layering them and creating a sense of texture and dimension. Use a combination of wider and narrower strips for added visual interest.
- Filling the gaps: As you work your way around the wreath frame, ensure you cover the entire wire base and fill in any gaps with additional fabric scraps.
- Finishing touches: Once the wreath frame is completely covered, add a touch of personality. Hot glue decorative buttons, lace trimmings, or other embellishments to personalize your creation.
- Hang and admire: Attach a ribbon or twine to the back of the wreath for hanging. Display your unique textured fabric wreath on your door, wall, or above a mantelpiece for a touch of springtime charm.
10. A Springtime Tablescape with Hand-Dyed Napkins
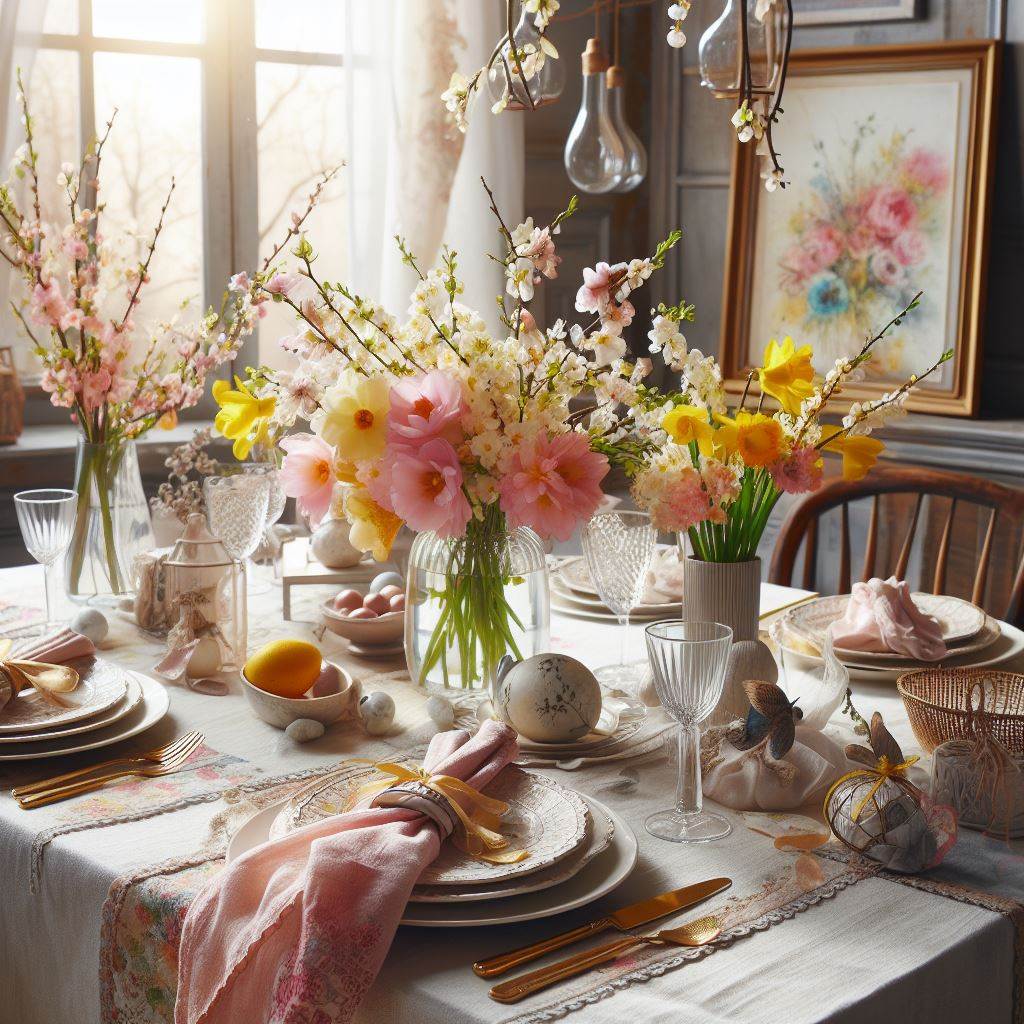
Elevate your spring dinner parties with a touch of handmade elegance. These hand-dyed napkins add a personal touch to your table setting and create a delightful spring tablescape.
Materials:
- Plain white cotton napkins
- Fabric dye in spring colors (pink, yellow, blue)
- Rubber bands
- Large container or sink
- Tongs (optional)
- Salt (optional)
- Vinegar (optional)
Instructions:
Prepare the napkins: Wash and iron the plain white cotton napkins to remove any wrinkles or residue that might prevent the dye from adhering evenly.
- Prepping for dye (optional): For some dye techniques, you may need to pre-treat the napkins with a salt-water solution or a vinegar-water solution according to the specific dye instructions.
- Rubber Band Magic: Creating Patterns: Here’s where the fun and creativity come in! Instead of simply wrapping the fabric strips randomly, you can use rubber bands to create unique patterns on your wreath.
- Spiral Design: Wrap several fabric strips around your fingers to create a loose coil. Secure the coil with a rubber band. Attach the coiled end to the wreath frame with hot glue and begin unwrapping the fabric strip while simultaneously wrapping it around the frame. This will create a beautiful spiral pattern.
- Striped Design: Use fabric strips in contrasting colors. Bunch several strips of the same color together and secure them tightly with a rubber band at regular intervals. Wrap this bundled strip around the wreath frame, adhering it with hot glue as you go. Repeat with strips of another color to create a striped pattern.
- Sunburst Design: Cut your fabric strips into squares. Fold each square diagonally in half to create triangles. Bunch several triangles together at the base and secure them tightly with a rubber band. Hot glue this bundled cluster to the center of the wreath frame. Repeat with additional fabric squares, radiating outwards to create a sunburst design.
- Let’s get dyeing: Follow the instructions provided with your chosen fabric dye for mixing the dye solution and preparing the water bath. Put on gloves (optional) to protect your hands from dye stains.
- Dipping or dunking: Depending on the desired effect, you can either dip the entire napkin into the dye bath or dunk specific sections based on your rubber band placement. Hold the napkin for a few minutes, then remove it and allow excess dye to drip back into the container.
- Rinsing and drying: Rinse the dyed napkins thoroughly in cool water until the water runs clear. Gently squeeze out excess water and hang the napkins to dry completely.
- Ironing (optional): Once dry, iron the napkins flat for a crisp and polished look.
- Tablescape magic: Fold your beautifully hand-dyed napkins and arrange them on your spring tablescape alongside colorful plates, fresh flowers, and your favorite tableware.
11. A Whimsical Spring Garland with Paper Flowers and Pinwheels
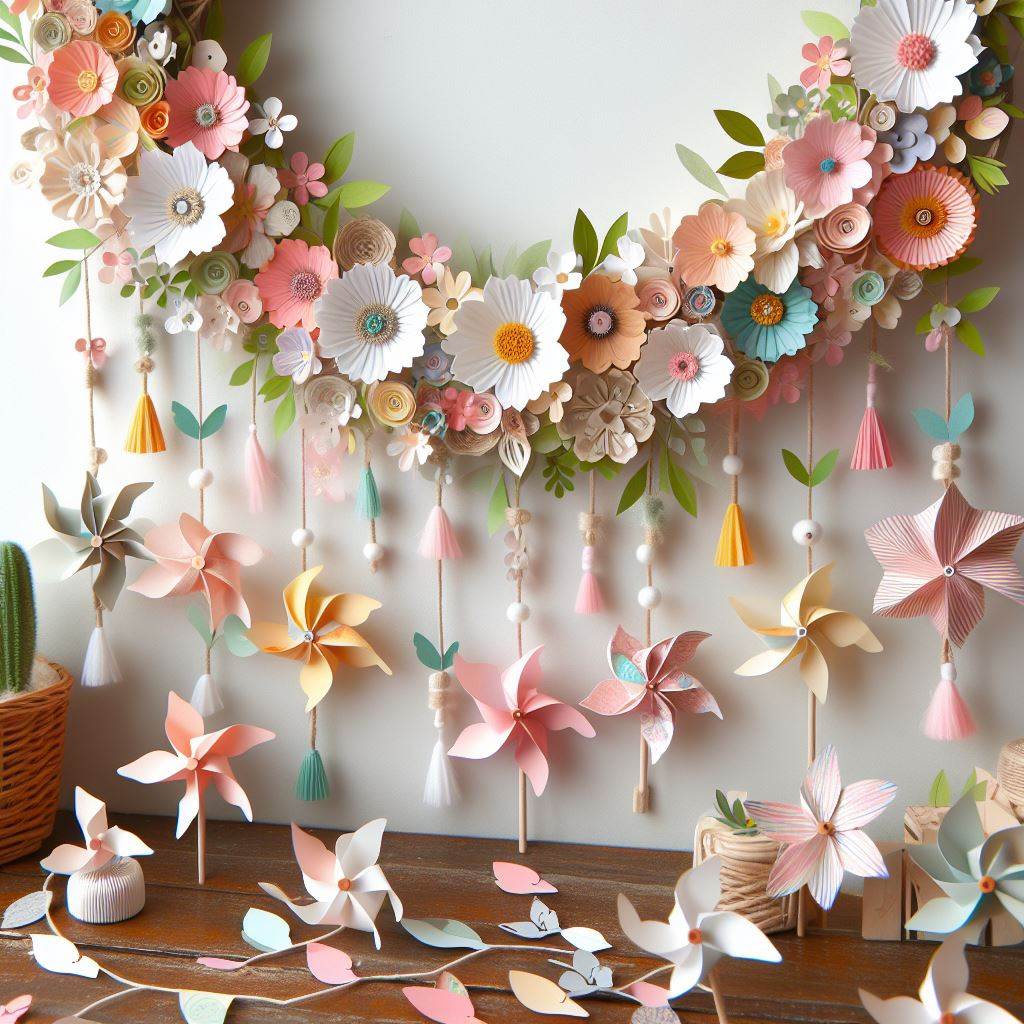
Add a touch of playful charm to your mantelpiece or windowsill with a whimsical spring garland featuring paper flowers and pinwheels. This project is perfect for a craft night with friends or family and allows for endless creativity.
Materials:
- Construction paper in various spring colors
- Scissors
- Ruler and pencil (optional)
- Glue stick or hot glue gun
- Straws or skewers
- Tape
- Decorative twine or ribbon
Instructions:
- Paper flower power: Choose your favorite paper flower designs and create them from construction paper using stencils or freehand cutting techniques. Popular options include roses, daisies, and lilies.
- Pinwheel fun: Cut squares from construction paper in contrasting colors. Fold the squares diagonally in half to create triangles. Overlap the center of the triangle and secure it with a piece of tape to create the pinwheel base. Decorate the pinwheel with additional paper cutouts or glitter.
- Assembling the garland: Cut straws or skewers to your desired garland length. Attach paper flowers and pinwheels to the straws or skewers using glue.
- Adding a string: Thread a decorative twine or ribbon through the straws or skewers, spacing the elements out evenly to create your garland.
- Hang and admire: Display your whimsical spring garland on your mantelpiece, windowsill, or across a doorway for a touch of playful springtime cheer.
12. A Springtime Sensory Basket for Little Ones
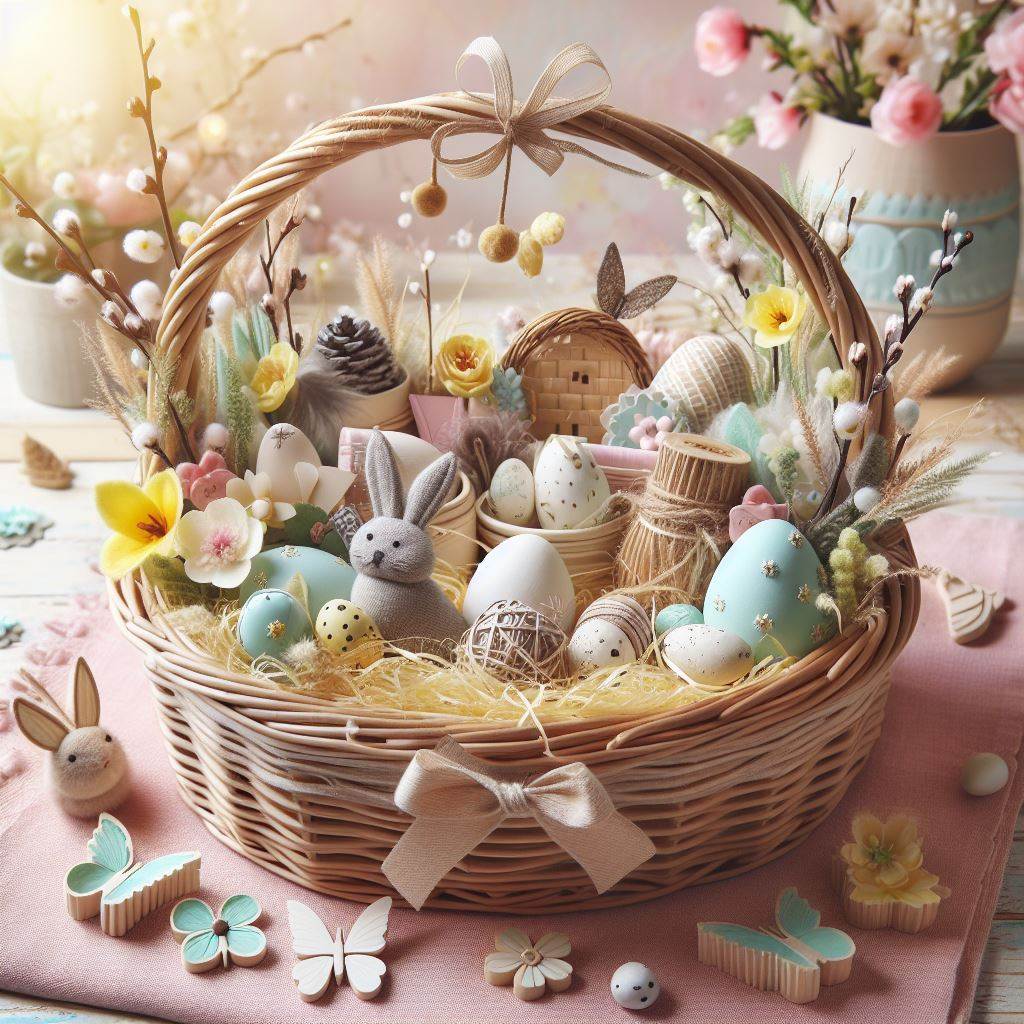
Engage the senses of your little ones with a delightful springtime sensory basket. This project is perfect for toddlers and preschoolers, offering them a fun and stimulating way to explore the season.
Materials:
- Basket or bin
- Fabric scraps in various textures (soft fleece, crinkly taffeta, rough burlap)
- Colorful plastic eggs filled with dried beans or rice (optional)
- Small scented objects like potpourri sachets or dried flowers
- Plastic or wooden spoons
- Colorful feathers
- Small toy animals
Instructions:
- Lining the basket: Line the basket or bin with a variety of fabric scraps in different textures. This provides a soft and stimulating base for little hands to explore.
- Sensory exploration: Fill the basket with a variety of objects that engage the senses of touch, sight, sound, and smell. Here are some ideas:
- Touch: Include fabric scraps in various textures like soft fleece, crinkly taffeta, and rough burlap. Add colorful plastic eggs filled with dried beans or rice to create a rattle effect.
- Sight: Fill the basket with brightly colored objects like plastic spoons, wooden blocks painted in spring colors, or colorful feathers.
- Sound: Add small bells or shakers to some of the fabric scraps or plastic eggs for a delightful auditory experience.
- Smell: Include small scented objects like potpourri sachets or dried flowers (ensure they are safe for children and not easily ingested).
- Playtime companions: Add a few small toy animals with a spring theme like ladybugs, butterflies, or bunnies for imaginative play.
- Exploration time: Supervise young children as they explore the sensory basket. Encourage them to touch, feel, smell, and listen to the various objects. This basket provides a fun and engaging way for little ones to learn about the world around them and connect with the sights, sounds, and textures of spring.
13. A Springtime Herb Garden in Upcycled Containers

Embrace the fresh flavors of spring by creating your own herb garden using upcycled containers. This project is a sustainable and practical way to add a touch of green to your kitchen windowsill or patio.
Materials:
- Upcycled containers (coffee cans, tea tins, old mugs)
- Drainage pebbles
- Potting mix
- Herb seeds or seedlings (basil, mint, parsley, chives)
- Permanent markers (optional)
- Paint and paint brushes (optional)
Instructions:
- Prepare your containers: Choose a variety of upcycled containers like coffee cans, tea tins, or even old mugs. Ensure they have drainage holes in the bottom. If not, you can carefully create a few small holes using a hammer and nail.
- Get creative (optional): You can personalize your upcycled containers by painting them with spring colors or adding decorative designs using permanent markers.
- Drainage layer: Add a layer of drainage pebbles to the bottom of each container to prevent waterlogging.
- Filling with soil: Fill the containers with a good quality potting mix, leaving about an inch of space at the top.
- Planting your herbs: Follow the planting instructions for your chosen herb seeds or seedlings. Most herbs prefer well-drained soil and plenty of sunlight.
- Labeling your herbs: Using permanent markers or small plant labels, identify each herb variety to avoid confusion when harvesting.
- Watering and care: Water your herb garden regularly, allowing the soil to dry slightly between waterings. Place your herb garden in a sunny location for optimal growth.
- Fresh herbs at your fingertips: Enjoy the fresh flavors of homegrown herbs by snipping them for use in your culinary creations. Upcycled containers and a thriving herb garden add a touch of sustainability and springtime beauty to your kitchen.
14. A Delectable Springtime Wreath Made with Candy
Who says wreaths are just for decoration? Create a delightful and whimsical spring wreath made with colorful candy that will be a sweet treat for the whole family.
Materials:
- Wire wreath frame
- Floral wire
- Colorful candy in various shapes and sizes (jelly beans, candy corn, marshmallows)
- Artificial flowers or leaves (optional)
- Ribbon or twine for hanging (optional)
Instructions:
- Securing the candy: Using floral wire, begin attaching your chosen candy to the wire wreath frame. Twist the floral wire around the base of the candy and secure it firmly to the frame.
- Color and variety: Choose a variety of colorful candies in different shapes and sizes to create a visually appealing display. Jelly beans, candy corn, and marshmallows are all great options.
- Filling the gaps: Continue adding candy to the wreath frame, ensuring you fill in any gaps and cover the entire wire base.
- A touch of green (optional): For a more balanced look, you can incorporate some artificial flowers or leaves in between the candy pieces.
- Finishing touches: Once the wreath is completely covered, attach a ribbon or twine to the back of the wire frame for hanging. Display your delectable spring wreath on a door, wall, or above a mantelpiece, but remember to keep it out of reach of little hands (and tempting for grown-up ones too!)
15. A Springtime Chandelier Made with Recycled Plastic Bottles
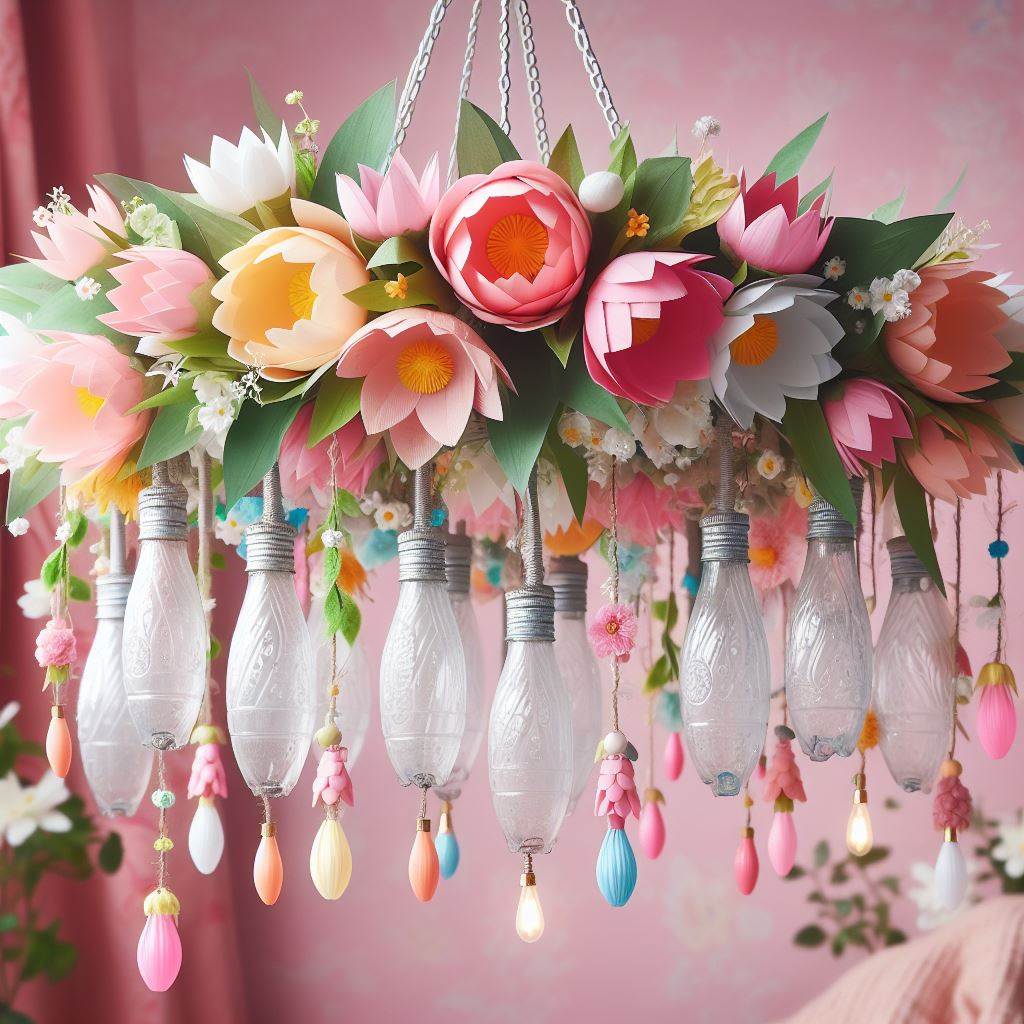
Transform everyday recyclables into a dazzling spring chandelier. This project is a creative and eco-friendly way to add a touch of whimsy and sparkle to your home.
Materials:
- Clean plastic bottles in various sizes and shapes (clear or colored)
- Scissors or craft knife
- Hole punch
- String or fishing line
- Spray paint in spring colors (optional)
- Fairy lights (optional)
Instructions:
- Prepare the bottles: Wash and dry the plastic bottles thoroughly. Remove any labels or residue.
- Cutting and shaping: Using scissors or a craft knife, carefully cut the plastic bottles into desired shapes. You can create flowers, leaves, butterflies, or any other spring-themed motifs.
- Creating holes: Use a hole punch to create small holes at the top of each plastic bottle cutout.
- Painting for a pop of color (optional): If using clear plastic bottles, you can spray paint them in various spring colors for added vibrancy.
- Stringing it all together: Cut long pieces of string or fishing line. Thread the string through the holes in the plastic bottle cutouts, creating a cascading chandelier effect.
- Light it up (optional): Weave strands of fairy lights throughout the string structure of your chandelier for a magical touch, especially when used in the evening.
- Hanging your masterpiece: Find a sturdy hook in your ceiling and securely hang your upcycled plastic bottle chandelier.
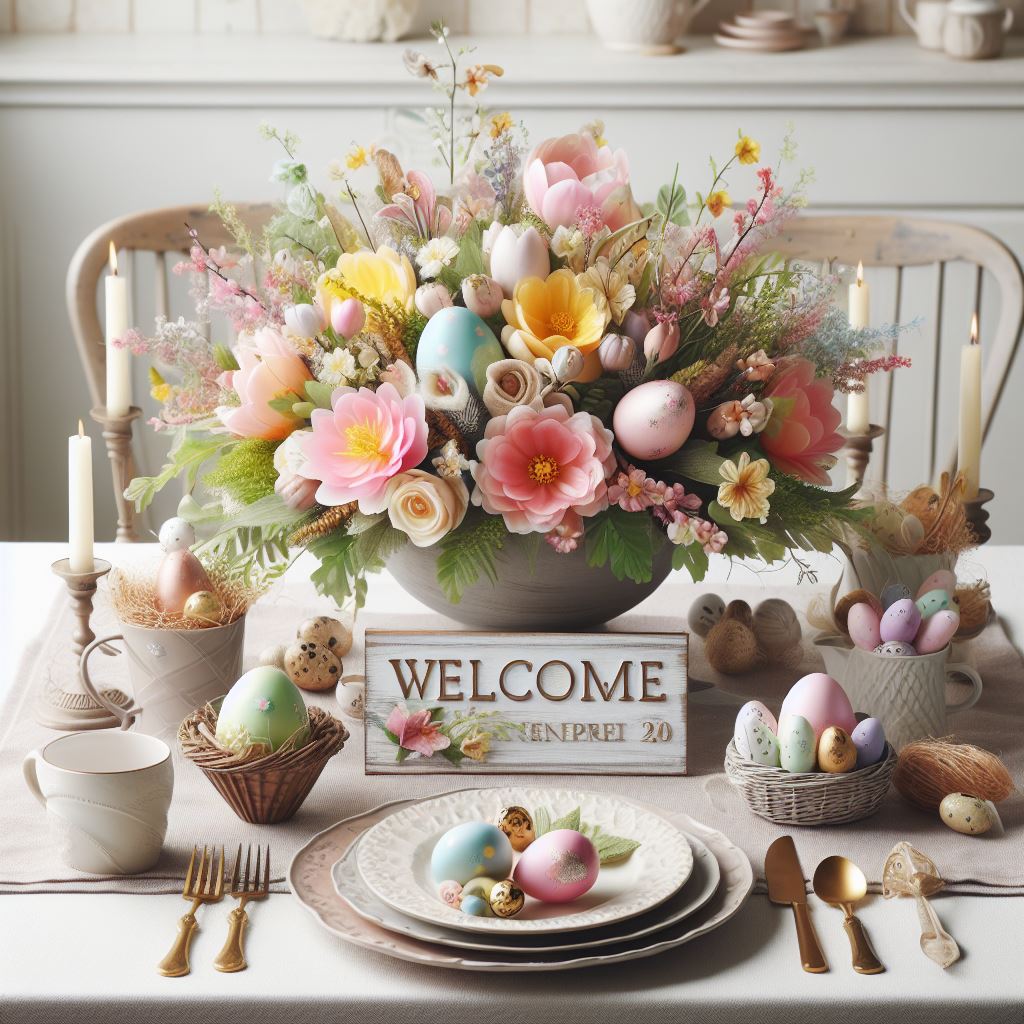
16. A Springtime Centerpiece with a Nest and Colorful Eggs

Create a charming and natural centerpiece for your spring table with a nest filled with colorful eggs. This project allows for customization and can be a collaborative effort with young children for a fun and creative activity.
Materials:
- Bird’s nest (real or artificial)
- Colorful Easter eggs (dyed or decorated)
- Moss or decorative Easter grass
- Twigs or branches
- Small faux flowers or feathers (optional)
- Decorative plate or tray
Instructions:
- Prepare the base: Place a decorative plate or tray on your table as the base for your centerpiece.
- Nesting time: Arrange the bird’s nest, real or artificial, in the center of the plate or tray.
- A splash of color: Fill the nest with colorful Easter eggs. You can use pre-dyed eggs or create your own using natural dyes and fun decorating techniques.
- Natural elements: Add a touch of springtime nature by surrounding the nest with moss or decorative Easter grass.
- Bringing it to life (optional): For added visual interest, incorporate twigs or branches around the nest and Easter eggs. You can also add small faux flowers or feathers for a touch of whimsy.
- Springtime charm: Your beautiful and natural spring centerpiece is complete! Enjoy its charming presence on your table throughout the season.
17. A Fragrant Springtime Sachet with Dried Flowers and Herbs
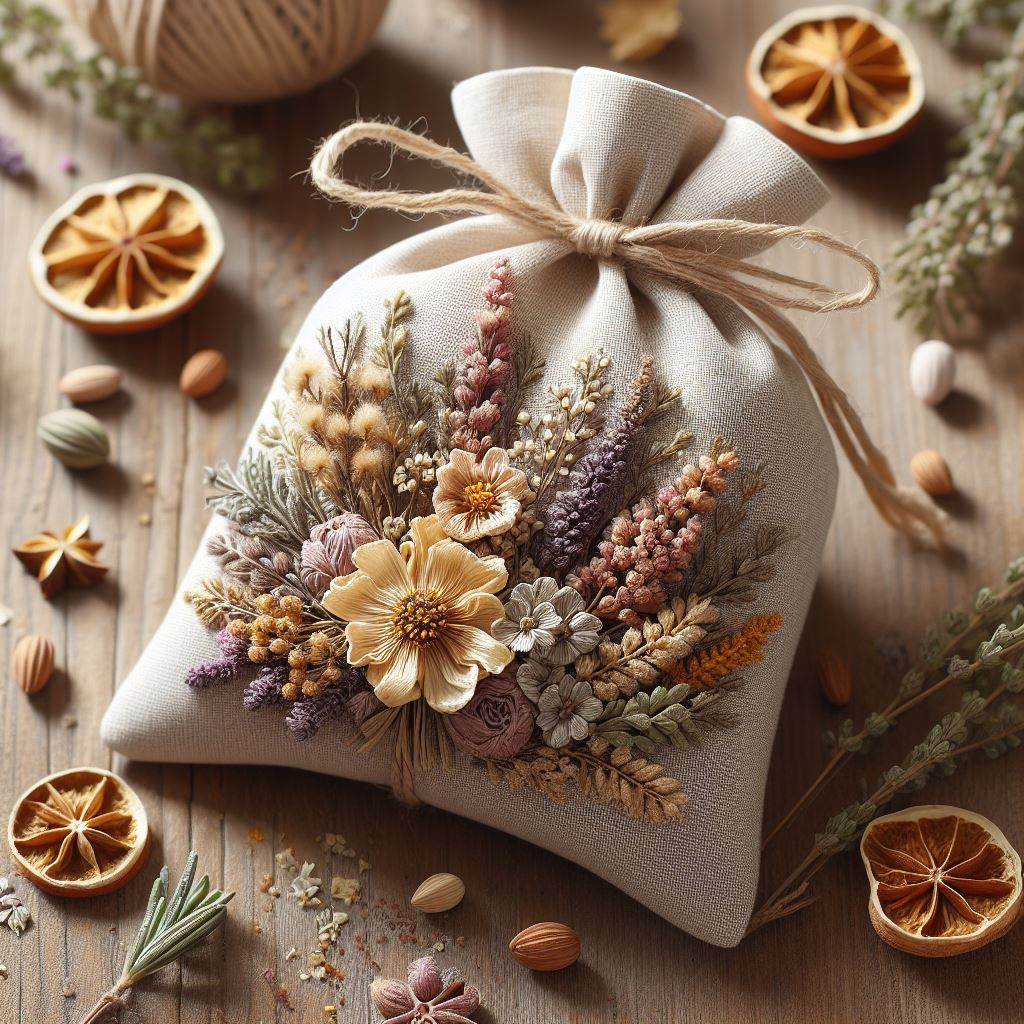
Fill your home with the delightful scents of spring by creating your own fragrant sachets. These little bundles of potpourri are perfect for placing in drawers, closets, or anywhere you want a touch of springtime fragrance.
Materials:
- Fabric scraps in breathable materials like muslin or cotton
- Dried flowers (lavender, rosebuds, chamomile)
- Dried herbs (lemon balm, mint, rosemary)
- Essential oils (optional) (lavender, lemon, bergamot)
- Sewing needle and thread
- Scissors
- Ribbon or twine for tying (optional)
Instructions:
- Choose your fabric: Select breathable fabric scraps like muslin or cotton for your sachets. Cut squares or small rectangles from the fabric.
- Gathering the fragrance: Combine a variety of dried flowers and herbs that you find visually appealing and smell delightful. Popular choices include lavender, rosebuds, chamomile, lemon balm, mint, and rosemary.
- Essential oil boost (optional): For a more intense fragrance, add a few drops of essential oils like lavender, lemon, or bergamot to your dried flower and herb mixture.
- Filling the sachets: Place a spoonful of the dried flower and herb mixture in the center of your fabric square.
- Sewing it up: Using a needle and thread, sew the edges of the fabric square together, creating a small pouch with the fragrant mixture inside. You can use a simple running stitch or a decorative stitch for a more personalized touch.
- Finishing touches (optional): Leave the sachet open at the top and tie it closed with a ribbon or twine for a rustic look. Alternatively, sew the sachet completely closed and leave a small loop of ribbon attached for hanging.
- Spreading the fragrance: Place your fragrant springtime sachets in drawers, closets, linen cabinets, or anywhere you want a delightful touch of spring aroma.
Conclusion
Spring is a time for renewal and creativity. With these 17 gorgeous spring crafts for the home, you can transform your living space into a vibrant and welcoming haven that celebrates the beauty of the season. Embrace the opportunity to personalize these projects, experiment with different colors and techniques, and let your creativity bloom!
So, gather your supplies, unleash your inner artist, and get ready to enjoy the satisfaction of creating beautiful handmade decorations that bring the spirit of spring into your home. Happy crafting!