

Spring has sprung! The days are getting longer, the birds are singing, and there’s a vibrant energy in the air. It’s time to trash out the heavy winter decor and embrace the season’s beauty by transforming your entryway. After all, your front door is the first impression your home makes, and a beautiful spring wreath or door hanger sets the tone for a warm and welcoming atmosphere.
This blog post is your guide to creating stunning spring wreaths and door hangers that will add a touch of seasonal cheer to your home. We’ll explore 11 unique and easy-to-make ideas suitable for every style and budget, from classic floral arrangements to whimsical DIY projects. So, get ready to unleash your creativity and transform your entryway into a spring masterpiece!
11 Spring Wreath & Door Hanger Ideas to Celebrate the Season
Let’s go straight to the top spring wreath and door hanger ideas:
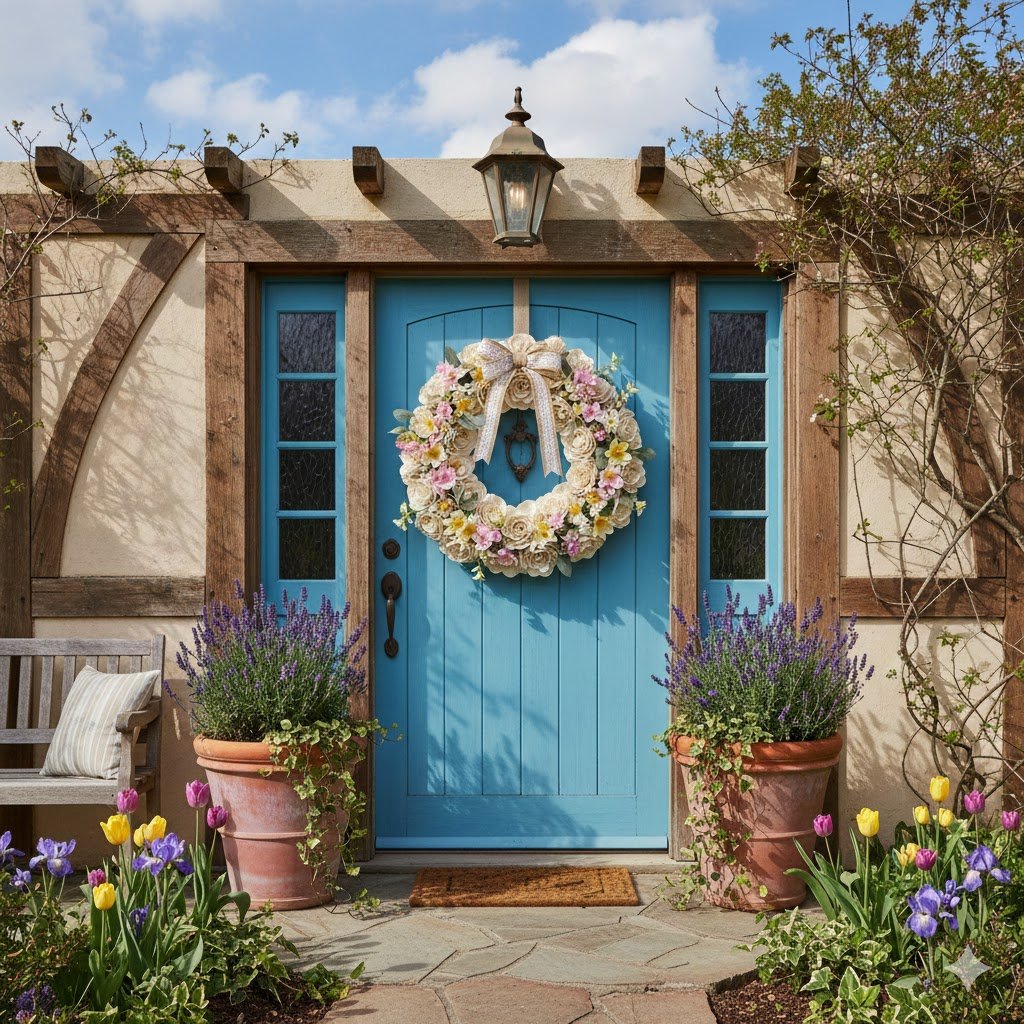
1. Blooming Beauty: A Classic Floral Wreath
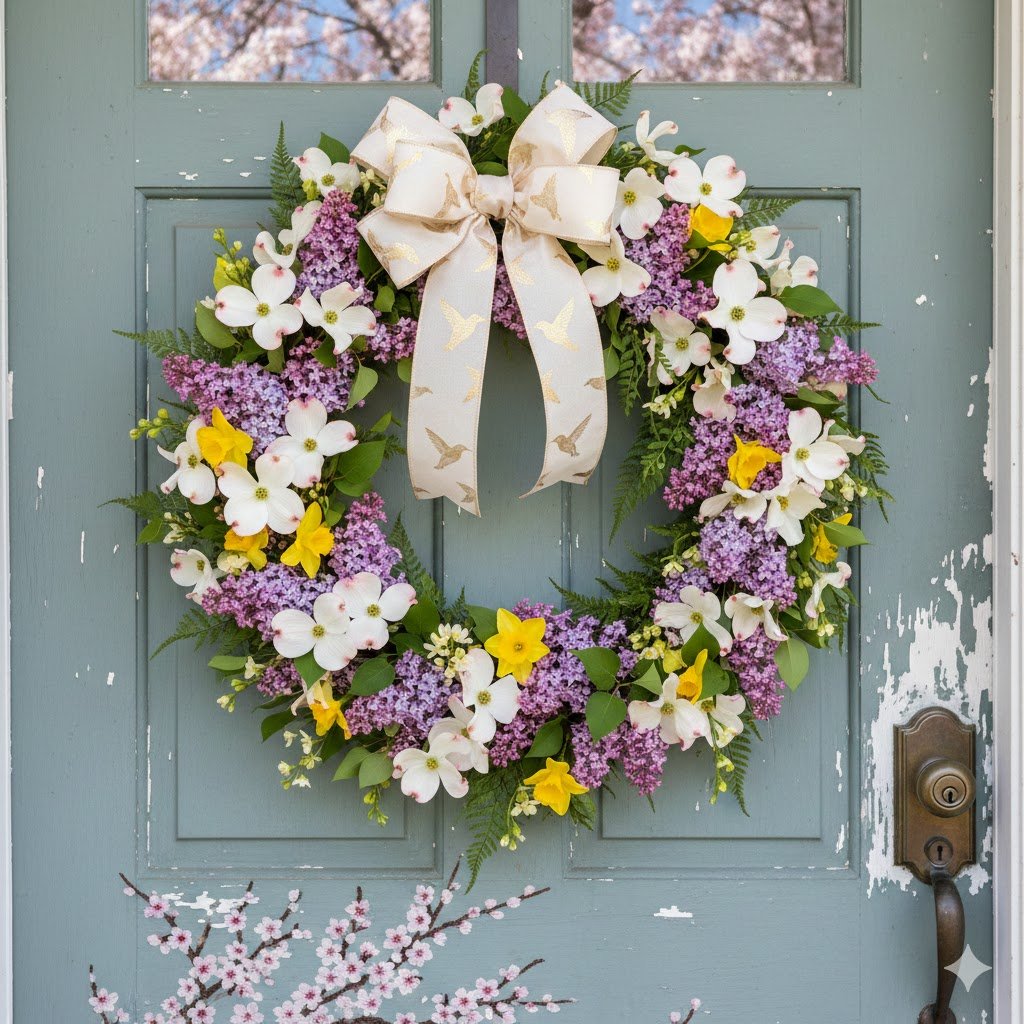
Nothing quite says spring like a vibrant floral wreath bursting with color. This timeless option is perfect for those who love a touch of elegance and the sweet fragrance of fresh flowers.
Here’s what you’ll need:
- Wreath base: Choose a sturdy base like a grapevine wreath, a straw wreath, or a wire wreath base, depending on the weight of your flowers.
- Fresh or artificial flowers: Select a variety of blooms that represent the season. Popular choices include tulips, daffodils, hyacinths, forsythia, ranunculus, and roses. Opt for a mix of colors or stick to a single, vibrant shade for a bolder look.
- Floral wire or twine: This will be used to secure the flowers to the wreath base.
- Greenery accents: Eucalyptus, ferns, lamb’s ear, or seeded eucalyptus add texture, depth, and a natural touch to your floral arrangement.
- Ribbon, twine, or decorative embellishments (optional): Add a finishing touch with a beautiful ribbon, rustic twine, or decorative elements like butterflies, ladybugs, or small bird figurines.
Let’s get crafting:
- Prepare your base: If using a grapevine or straw wreath, ensure it’s clean and free of debris. You can spray paint it a light spring color if desired.
- Start with the greenery: Attach small bunches of greenery to the wreath base using floral wire or twine. Distribute the greenery evenly throughout the wreath to create a base for the flowers.
- Blooming beauty: Now comes the fun part! Begin attaching your flowers to the wreath base. Start with larger blooms at the back and work your way forward with smaller flowers and filler elements. Secure each flower stem with floral wire, ensuring they are positioned at different angles for a natural look.
- Finishing touches: Once all the flowers are secured, tie a beautiful ribbon or twine around the base of the wreath to create a hanging loop. You can also add decorative embellishments for a personalized touch.
Pro Tip: If using fresh flowers, water your wreath regularly to keep them looking their best. Consider using a floral spray to extend their lifespan.
2. Rustic Charm: A Twig Wreath with Burlap Accents
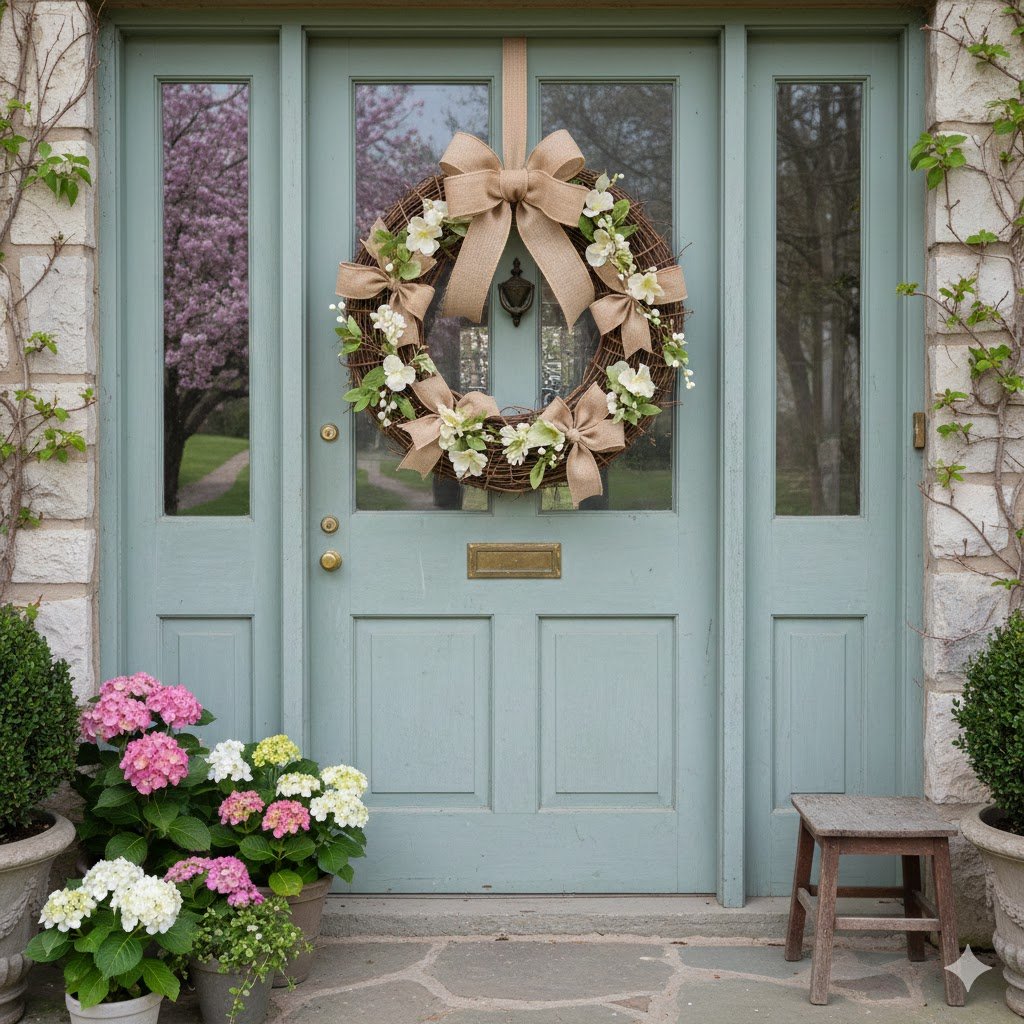
Embrace the natural beauty of spring with a rustic twig wreath adorned with burlap accents. This simple yet charming option is perfect for farmhouse-inspired homes or those who love a touch of natural texture.
Here’s what you’ll need:
- Twigs: Gather a collection of twigs in various sizes and thicknesses from your backyard or a local park. Ensure they are dry and clean.
- Wire wreath base: This will provide the structure for your twig wreath.
- Twine or floral wire: Used to secure the twigs to the base.
- Burlap ribbon: Choose a burlap ribbon in a natural color or a light spring shade to add a rustic touch.
- Spring embellishments (optional): Small nests, faux eggs, pinecones, or decorative butterflies can enhance the rustic charm.
Let’s get crafting:
- Prepare the twigs: Cut the twigs to various lengths, ensuring some are longer for the outer layer and some shorter for the inner layers.
- Build the base: Start by securing thicker twigs to the wire wreath base using twine or floral wire. Overlap the twigs slightly and continue adding layers until the base is completely covered.
- Burlap magic: Wrap the burlap ribbon around the wreath base, starting from the inner layer and working your way outwards. Secure the burlap with twine or hot glue at the end.
- Springtime touches: Now comes the fun part! Attach small nests, faux eggs, pinecones, or other spring-themed embellishments to the wreath using twine or glue.
Pro Tip: You can spray paint the twigs in a soft pastel color for a unique look. Additionally, consider adding a touch of fragrance by weaving in dried lavender sprigs or potpourri amongst the twigs.
3. A Touch of Whimsy: A DIY Fabric Bunny Wreath
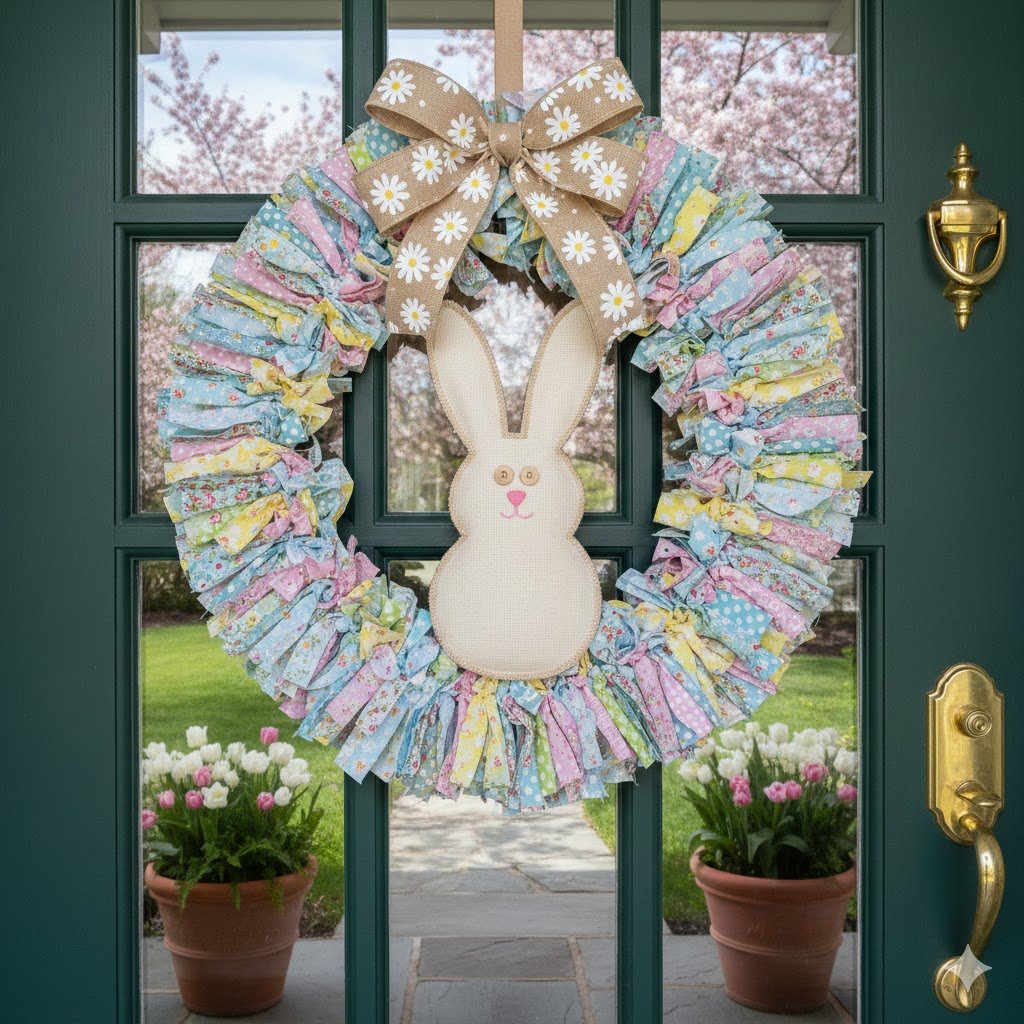
If you love playful and creative decor, a DIY fabric bunny wreath is sure to add a touch of whimsy to your door. This project is perfect for those who enjoy crafting and allows you to personalize it with your favorite colors and patterns.
Here’s what you’ll need:
- Fabric scraps: Choose a variety of bright spring colors and playful patterns like polka dots, florals, or stripes.
- Bunny template: Find a free bunny silhouette template online or create your own design.
- Wreath base: A foam wreath or a wire wreath base will work well for this project.
- Sewing skills (optional): You can hand-sew the fabric pieces together for a more polished look, or use a strong fabric glue for a simpler option.
- Craft supplies (optional): Buttons, felt, googly eyes, or pink fabric scraps for a charming bunny face.
- Ribbon or twine for hanging (optional)
Let’s get crafting:
- Bunny bonanza: Trace the bunny template onto your fabric scraps and cut out two bunny shapes (one for the front and one for the back). You can use different fabrics for each side for a more playful look.
- Sewing or gluing: If opting to sew, stitch the two bunny shapes together, leaving a small opening for stuffing. Stuff with cotton balls or polyfill before sewing the opening shut. Alternatively, use a strong fabric glue to adhere the two bunny shapes together.
- Embellish the bunny: This is where your creativity shines! Use buttons or felt circles for eyes, pink fabric scraps for a cute nose, and googly eyes for a whimsical touch. You can even embroider a smile or whiskers onto the bunny face.
- Attaching to the wreath: Secure the finished bunny to the front of the wreath base using twine or hot glue.
- Finishing touches: Add a ribbon or twine loop for hanging, or you can directly attach the bunny to a pre-made wreath with a decorative ribbon already attached.
Pro Tip: Get the whole family involved in this fun project! Let the kids choose the fabrics and help decorate the bunny face for a personalized touch.
4. Modern Elegance: A Wreath with Geometric Shapes
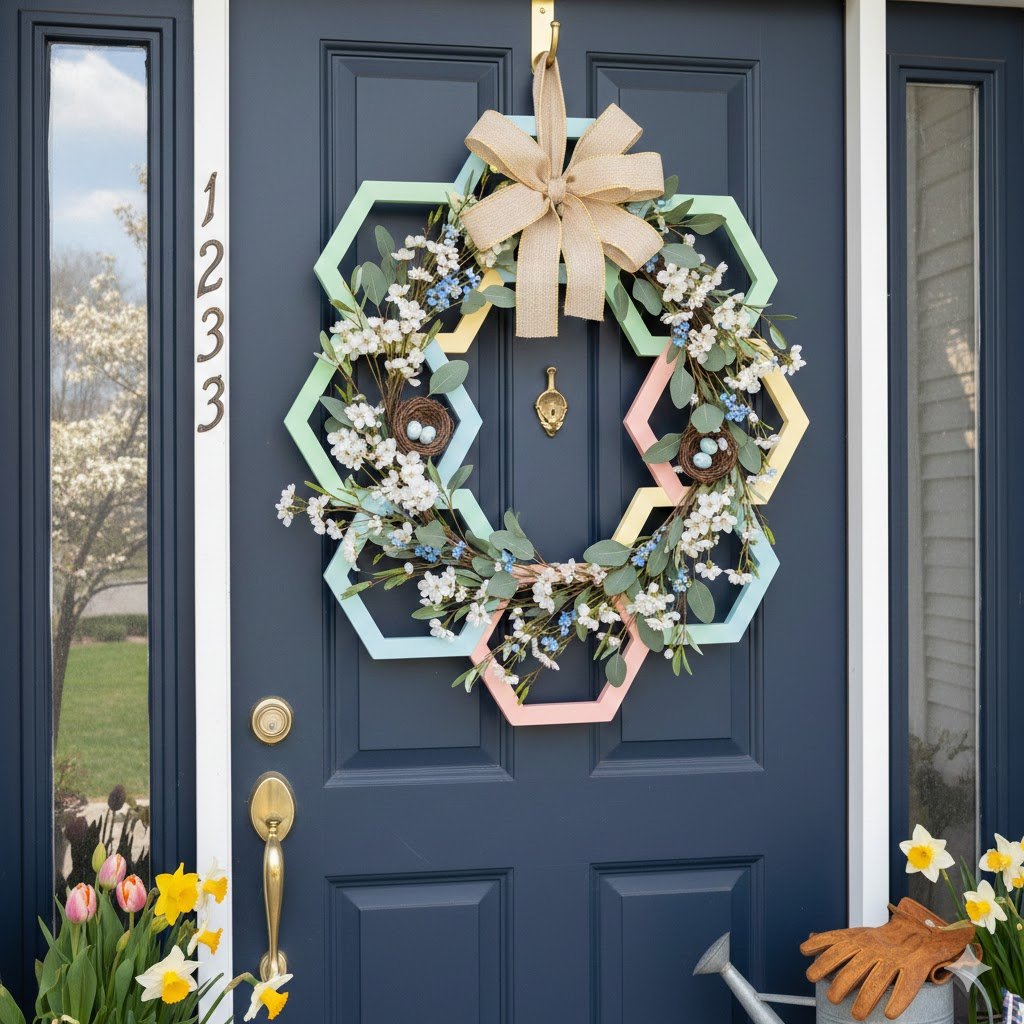
For those who love a sleek and modern aesthetic, a wreath adorned with geometric shapes is a perfect choice. This contemporary design adds a touch of sophistication to your entryway and complements minimalist decor beautifully.
Here’s what you’ll need:
- Geometric elements: This can include colorful paper cutouts, painted wooden shapes (triangles, squares, circles), or even wire mesh cut into geometric shapes.
- Wreath base: A wire wreath base is a versatile option for easily attaching various materials.
- Spray paint (optional): You can spray paint the geometric shapes in a cohesive color palette for a uniform look.
- Hot glue gun: This will be your best friend for securely attaching the elements to the wreath base.
- Minimalist accents (optional): Metallic ribbons, decorative beads, or feathers can add a touch of glam to your modern wreath.
Let’s get crafting:
- Prepare your shapes: If using paper, choose high-quality cardstock paper and cut out various geometric shapes using templates or a freehand design. You can paint wooden shapes in a cohesive color palette or leave them natural for a more rustic touch.
- Assembly time: Start by arranging the geometric shapes on the wire wreath base to visualize the overall design. You can create a symmetrical pattern or a more asymmetrical look depending on your preference.
- Hot glue magic: Once you’re happy with the arrangement, begin carefully attaching the geometric shapes to the wreath base using hot glue. Ensure a secure bond to prevent any elements from falling off.
- Finishing touches: Add a touch of glam with metallic ribbons woven through the geometric shapes. You can also incorporate decorative beads or feathers for a unique and modern touch.
Pro Tip: Play with the scale and dimension of the geometric shapes. Using a mix of larger and smaller shapes adds visual interest to your wreath.
5. Fresh & Fragrant: A Herb Wreath for Your Door
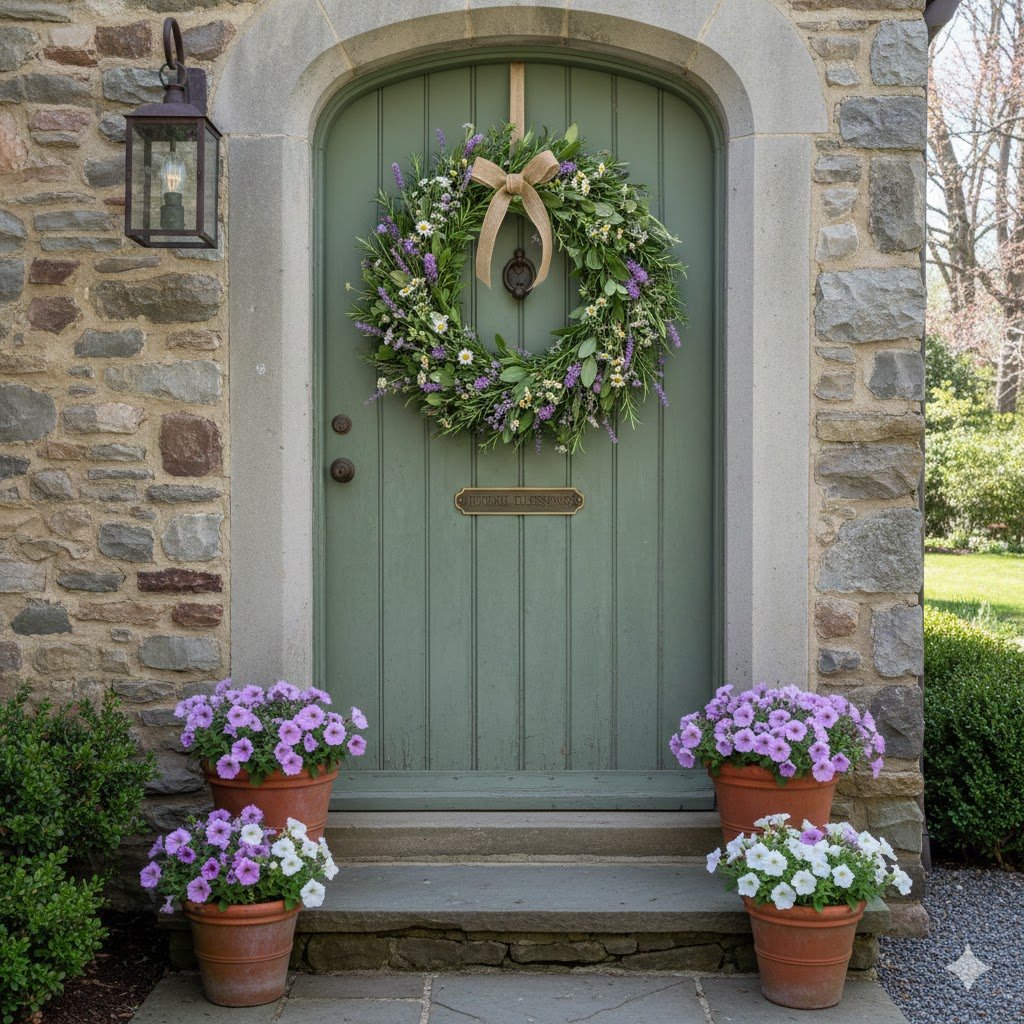
Looking for a unique and practical option? A fragrant herb wreath is a perfect choice! Not only does it add a touch of spring beauty to your entryway, but the fresh herbs also release a delightful aroma that welcomes guests.
Here’s what you’ll need:
- Fresh herbs: Choose a variety of fragrant herbs that thrive in your climate. Popular choices include rosemary, thyme, lavender, sage, mint, or oregano.
- Grapevine wreath base: A sturdy and natural base that allows for easy herb attachment.
- Twine or floral wire: This will be used to secure the herb bundles to the wreath base.
- Gardening shears: For trimming the herbs to the desired length.
- Ribbon or twine for hanging (optional)
Let’s get crafting:
- Herb selection: Select fresh herbs that are healthy and free of blemishes. Ideally, choose herbs that are at their peak and haven’t flowered yet, as flowering can affect their fragrance.
- Prepare the herbs: Gently rinse the herbs and pat them dry with a clean towel. Using gardening shears, trim the stems to a uniform length, leaving enough length for securing them to the wreath base.
- Building the herb haven: Start by creating small bundles of herbs. Combine 2-3 different types of herbs for a visually appealing and aromatic mix. Secure the bundles tightly with twine or floral wire at the base of the stems.
- Attaching to the wreath: Begin attaching the herb bundles to the grapevine wreath base. Overlap the bundles slightly and secure them with twine or floral wire. Work your way around the wreath base, ensuring the entire surface is covered with fragrant herbs.
- Finishing touches: Once all the herb bundles are secured, tie a beautiful ribbon or twine loop around the top of the wreath for hanging.
Pro Tip: To prolong the life of your herb wreath, mist it lightly with water every few days. You can also replace the herbs as needed to maintain their fragrance.
6. Welcome the Birds: A Wreath with a Birdhouse Centerpiece
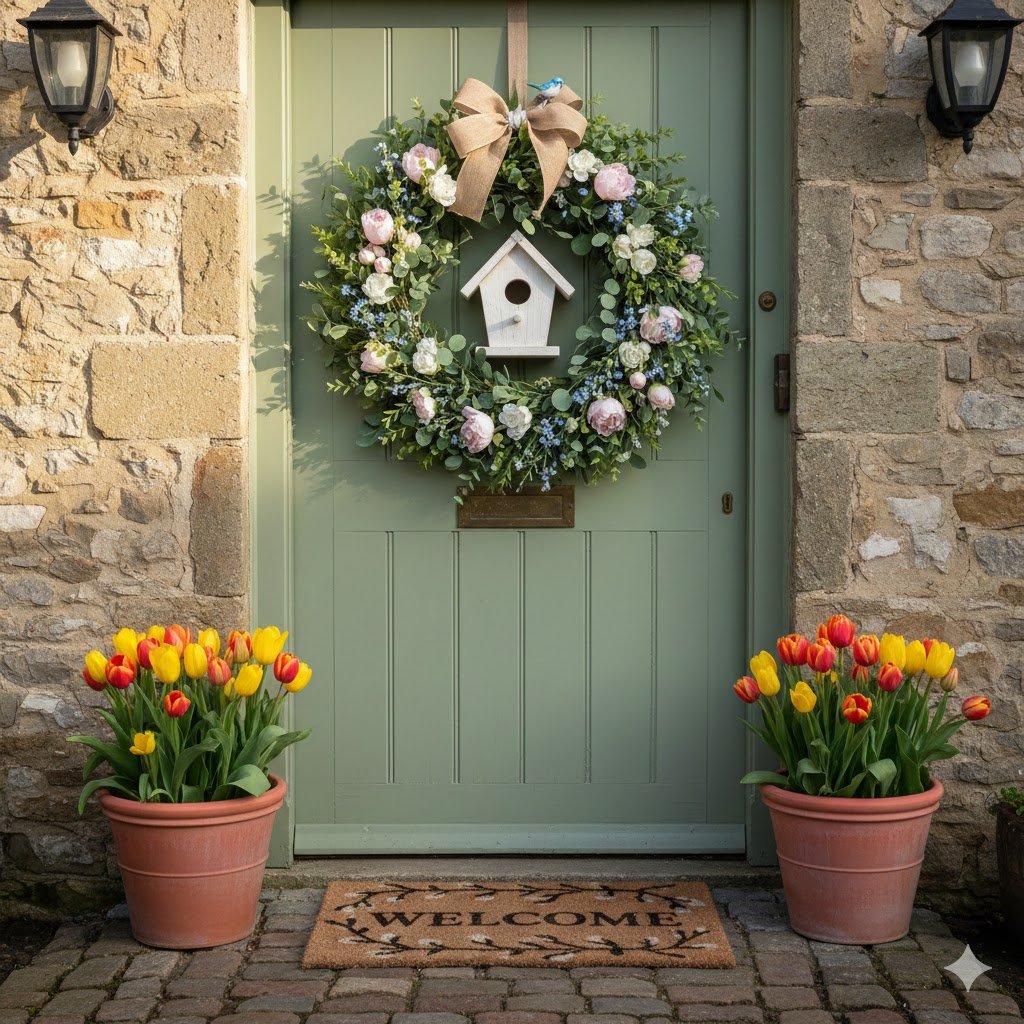
If you’re a bird lover, a charming wreath featuring a miniature birdhouse is a delightful way to welcome feathered friends to your doorstep.
Here’s what you’ll need:
- Miniature birdhouse: Find a small, decorative birdhouse with a spring-themed design. Consider options with a ventilation hole and a small opening for easy cleaning.
- Grapevine wreath base: A natural and sturdy base for the birdhouse.
- Floral foam (optional): This can be used to create a secure platform for the birdhouse on the wreath base.
- Natural nesting materials: Twigs, straw, or moss can be used to create a bird-friendly environment inside the birdhouse.
- Greenery & Florals: Enhance the display with faux spring flowers, greenery like ferns or eucalyptus, and decorative elements like small pinecones or berries.
- Hot glue gun or twine: Used to secure the birdhouse and decorative elements to the wreath base.
Let’s get crafting:
- Prepare the birdhouse: If using floral foam, cut a piece to fit snugly inside the base of the birdhouse. This will create a level platform for attaching it to the wreath.
- Natural touches: Fill the birdhouse with twigs, straw, or moss to create a welcoming nesting environment for birds.
- Assembling the wreath: Secure the birdhouse to the grapevine wreath base using hot glue or twine. Ensure it’s positioned securely and won’t fall off easily.
- Floral & Greenery Magic: Adorn the wreath with faux spring flowers and greenery. You can arrange them around the base of the birdhouse or create a cascade down the sides of the wreath.
- Finishing touches: Add a touch of whimsy with decorative elements like small pinecones or berries. You can also use twine or ribbon to create a hanging loop for the wreath.
Pro Tip: Consider placing a small bowl of birdseed near your entryway to attract feathered friends to your welcoming birdhouse wreath.
7. A Rainbow of Ribbon: A Cheerful Fabric Scrap Wreath
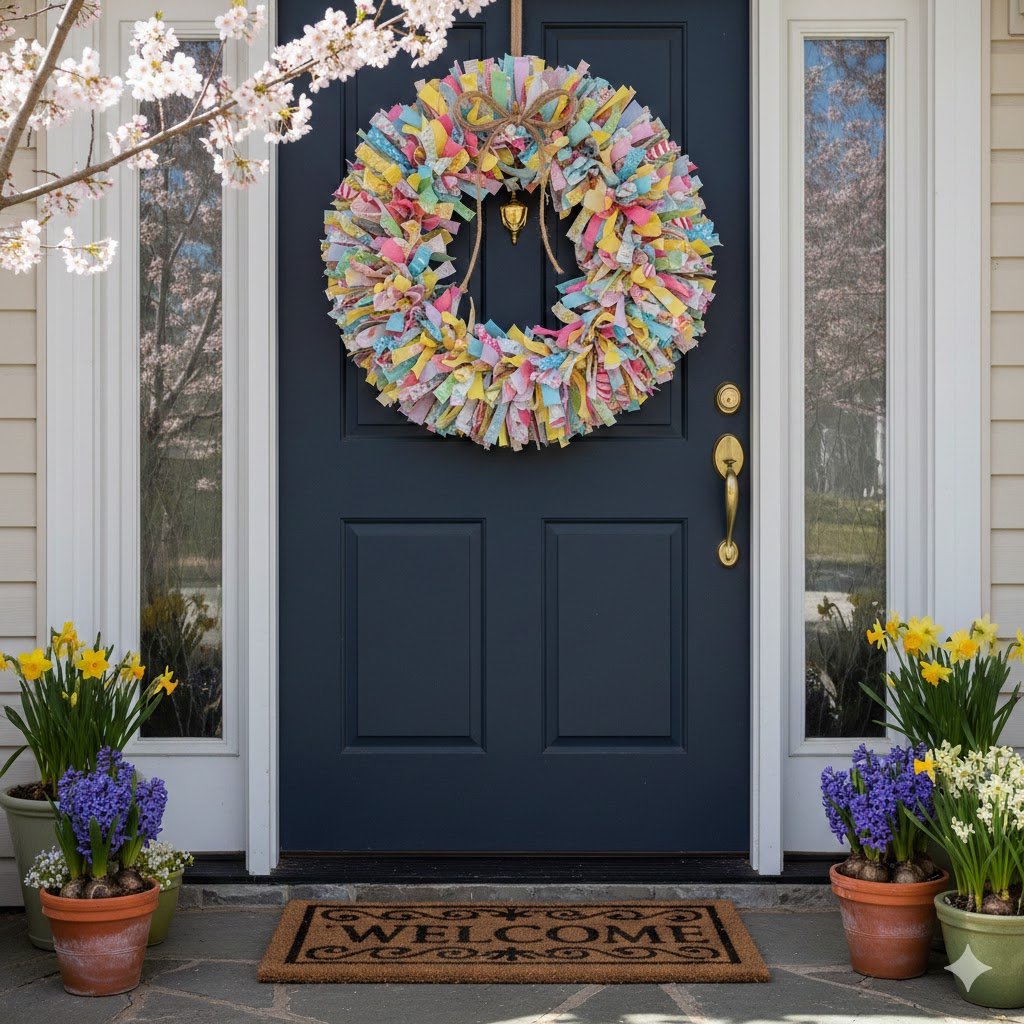
Embrace the spirit of spring with a burst of color using recycled fabric scraps!
Here’s what you’ll need:
- Fabric scraps: Gather a variety of colorful fabric scraps in various textures and patterns. Think floral prints, polka dots, stripes, or even lace for a whimsical touch.
- Wreath base: A foam wreath base or a wire wreath base works well for this project.
- Fabric strips: Cut the fabric scraps into long strips, approximately 1-2 inches wide. You can use pinking shears to create a decorative edge.
- Hot glue gun: This is your best friend for securely attaching the fabric strips to the wreath base.
- Scissors or rotary cutter: Used to cut the fabric scraps into strips.
Let’s get crafting:
- Fabric frenzy: Begin by cutting your fabric scraps into long strips. Aim for a variety of lengths and widths for added visual interest.
- Building the rainbow: Start attaching the fabric strips to the wreath base using hot glue. Begin at the inner layer and work your way outwards, completely covering the base. Alternate colors and patterns for a vibrant and playful look.
- Filling in the gaps: If there are any gaps between the fabric strips, use smaller scraps or leftover pieces to fill them in.
- Finishing touches: Once the entire wreath base is covered, you can add a decorative ribbon or twine loop for hanging.
Pro Tip: To add a touch of dimension, consider curling some of the fabric strips before attaching them to the wreath base. This creates a more textured and visually appealing look.
8. Under the Sea: A Seashell & Netting Door Hanger
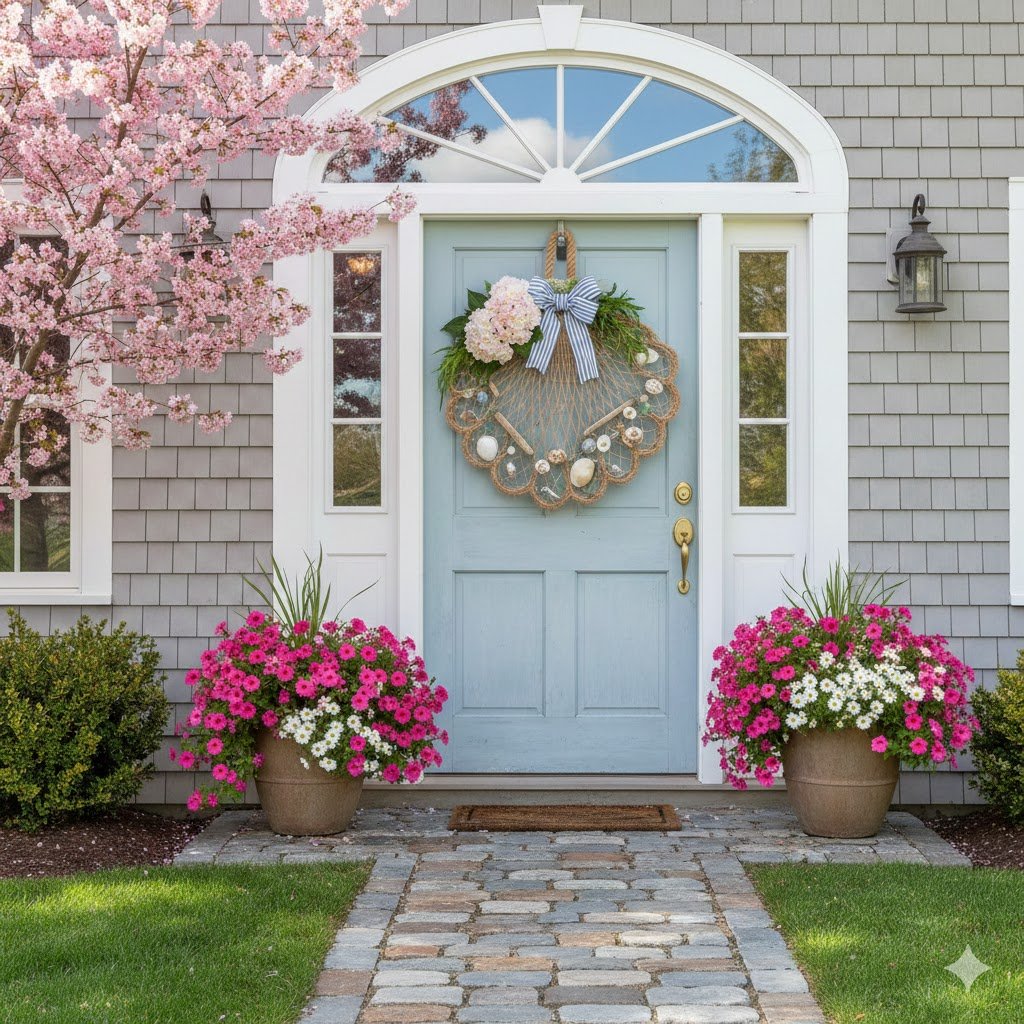
Bring a touch of coastal charm to your entryway with a nautical-inspired door hanger.
Here’s what you’ll need:
- Decorative fishing net: Find a small, decorative fishing net with a weathered or natural look.
- Seashells: Gather a collection of seashells in various sizes and shapes. You can use seashells you’ve collected from the beach or purchase them from a craft store.
- Hot glue gun: Securely attach the seashells and other embellishments to the fishing net.
- Twine or rope for hanging: Create a loop for hanging the door hanger.
- Nautical embellishments (optional): Driftwood pieces, starfish, or small decorative anchors can add to the coastal theme.
Let’s get crafting:
- Prepare the net: Lay the fishing net flat on a work surface. Decide on the placement of your seashells and other embellishments.
- Seashell symphony: Begin attaching the seashells to the fishing net using hot glue. Use a variety of sizes and shapes to create a visually interesting arrangement.
- Nautical touches: Incorporate other nautical elements like driftwood pieces, starfish, or small decorative anchors for a more coastal feel.
- Hanging mechanism: Attach a sturdy piece of twine or rope to the top of the fishing net to create a hanging loop.
Pro Tip: To add a touch of color, consider spray painting some of the seashells in soft pastel shades that complement the spring season.
9. A Literary Spring: A Book Page Wreath with Floral Accents
For bookworms and literature lovers, a book page wreath adorned with spring flowers is a unique and creative option.
Here’s what you’ll need:
- Old book pages: Use pages from old, unwanted books with interesting typography or illustrations. You can also print decorative book page designs online.
- Wire wreath base: This provides a sturdy structure for attaching the book pages.
- Hot glue gun: Securely attach the book pages and floral embellishments to the wreath base.
- Floral embellishments: Artificial spring flowers, dried flowers, or even paper flowers can add a touch of color and nature to your literary wreath.
- Ribbon or twine (optional): Create a hanging loop for the wreath.
Let’s get crafting:
- Book page bonanza: Cut or tear the book pages into various shapes and sizes. Aim for a mix of rectangles, squares, and even triangular shapes for added visual interest.
- Layering the story: Begin attaching the book pages to the wire wreath base using hot glue. Overlap the pages slightly to create a textured and layered effect.
- Blooming beauty: Once the book pages are secured, incorporate your chosen floral embellishments. Arrange them throughout the wreath to add pops of color and spring essence.
- Finishing touches: Tie a beautiful ribbon or twine loop around the top of the wreath for hanging. You can also embellish the loop with a small paper bookmark for a literary touch.
Pro Tip: Consider using vintage book pages with aged paper for a more rustic and charming look.
10. Butterfly Bliss: A Vibrant Butterfly Wreath
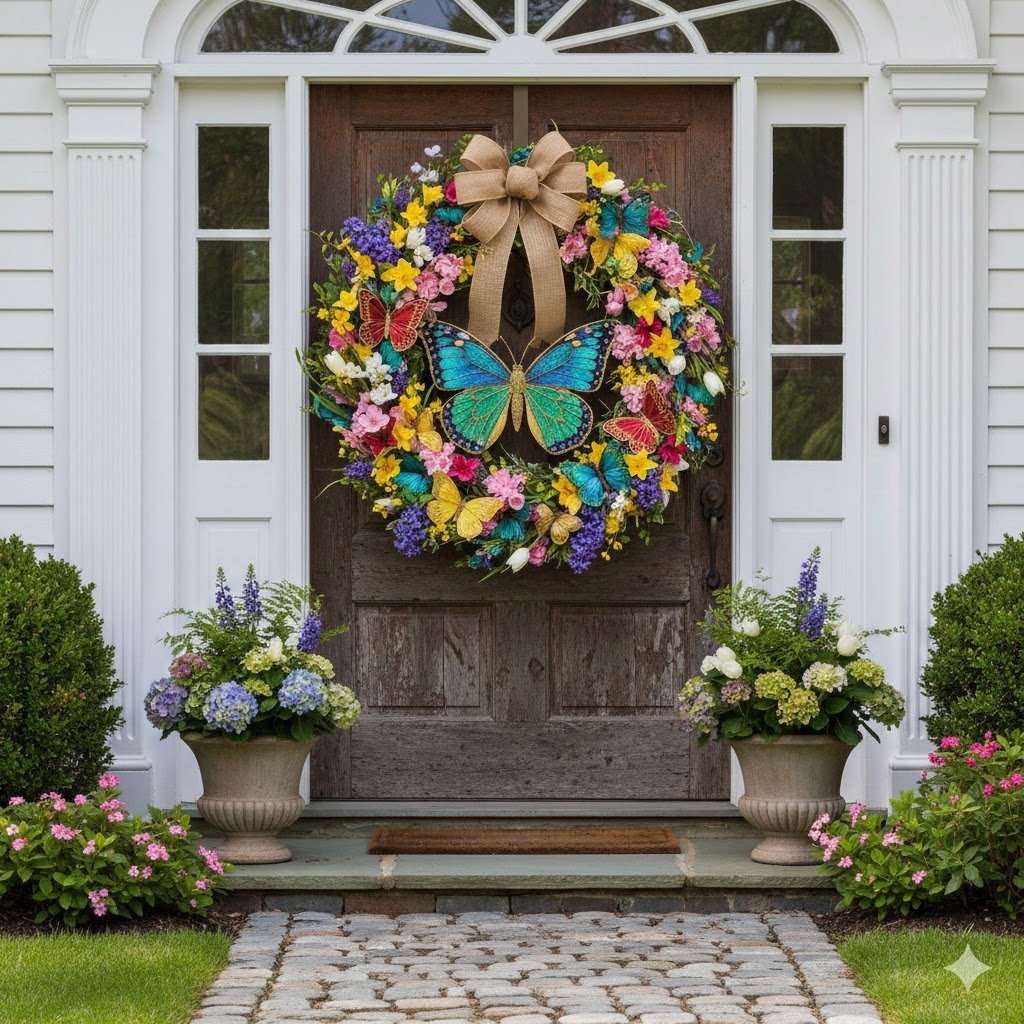
Welcome spring with a flutter of colorful butterflies!
Here’s what you’ll need:
- Artificial butterflies: Choose a variety of artificial butterflies in different sizes, colors, and wing patterns. Look for butterflies with realistic details for a more natural look.
- Grapevine wreath base: A natural and sturdy base for attaching the butterflies.
- Floral elements (optional): Artificial spring flowers, greenery, or vines can add a touch of nature to your butterfly display.
- Floral wire or twine: Securely attach the butterflies and other embellishments to the wreath base.
- Hot glue gun (optional): While floral wire works well for most butterflies, hot glue can be used for additional security.
Let’s get crafting:
- Butterfly ballet: Arrange the butterflies on the grapevine wreath base to create a visually pleasing composition. Consider using a mix of sizes and wing patterns for a dynamic look.
- Secure the flutter: Use floral wire or hot glue to securely attach the butterflies to the wreath base. Ensure the butterflies are positioned at different angles to create a sense of movement.
- Floral additions (optional): If desired, incorporate artificial spring flowers, greenery, or vines to add a natural touch to your butterfly display. Arrange them throughout the wreath to complement the butterflies.
- Finishing touches: Create a hanging loop for the wreath using twine or ribbon.
Pro Tip: To add a touch of whimsy, consider incorporating some butterflies with glitter accents or iridescent wings that shimmer in the sunlight.
11. Macrame Magic: A Spring Boho Wreath with Yarn Accents
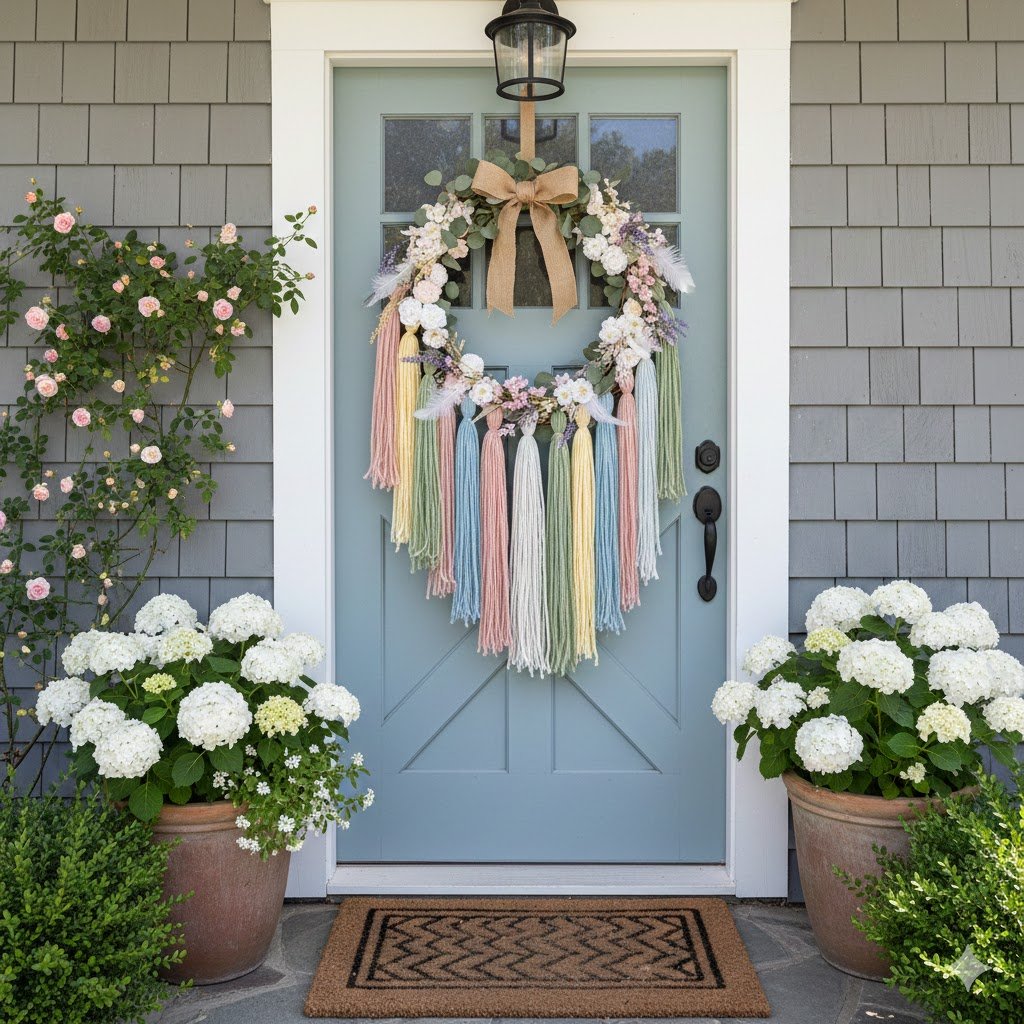
Embrace the bohemian trend with a macrame wreath adorned with colorful yarn and natural elements.
Here’s what you’ll need:
- Cotton macrame cord: Choose a thick macrame cord in a natural color like cream or white.
- Cardboard wreath form: This will serve as the base for creating the macrame pattern. You can also use a foam wreath base if macrame isn’t your forte.
- Yarn: Add pops of color with various colors of yarn. Choose a variety of textures like acrylic, wool, or even recycled yarn scraps.
- Scissors: Used to cut the macrame cord and yarn.
- Hot glue gun (optional): Securely attach the yarn embellishments to the macrame base (if not using a foam wreath).
- Natural elements (optional): Dried flowers, feathers, or wooden beads can add a touch of boho charm to your wreath.
Let’s get crafting (Macrame option):
- Macrame magic: Create a basic macrame square knot pattern using the cotton macrame cord and the cardboard wreath form as a guide. You can find numerous online tutorials for macrame square knot patterns.
- Shaping the wreath: Once you’ve completed the macrame square, carefully remove the cardboard form. The macrame square will naturally form a circular shape.
- Yarn embellishments (optional): If using a macrame base, cut yarn pieces in various lengths and tie them to the macrame knots, creating a fringe effect. Alternatively, for a foam wreath base, use hot glue to secure the yarn pieces to create a colorful and textured design.
- Natural touches (optional): Incorporate dried flowers, feathers, or wooden beads to add a touch of boho flair to your macrame wreath.
Let’s get crafting (Non-macrame option):
- Foam wreath base: Wrap the foam wreath base with yarn, completely covering the surface. You can use a single color or alternate colors for a striped effect. Secure the yarn with hot glue.
- Embellish and hang: Add pops of color and texture with yarn scraps, dried flowers, feathers, or wooden beads. Secure them to the foam base using hot glue. Create a hanging loop with twine or ribbon.
Pro Tip: If you’re new to macrame, there are many beginner-friendly patterns available online. Don’t be afraid to experiment with different knotting techniques to create a unique and personalized macrame wreath.
Bonus Tips for Wreath-Making Success
- Choose the right size wreath: Consider the size of your door to ensure the wreath is visually proportional. A small wreath on a large door can get lost, while a large wreath on a small door may overwhelm the entryway.
- Consider the weather conditions: If using fresh materials, opt for weather-resistant elements that can withstand rain or wind. For harsher climates, artificial flowers or other durable materials might be a better choice.
- Hang your wreath securely: Use a sturdy hook or nail to hang your wreath and ensure it’s level for a polished look.
- Embrace personalization
Final Thoughts
With these 11 inspiring spring wreath and door hanger ideas, you’re sure to find the perfect option to welcome the season and add a touch of personality to your entryway. Remember, there are no hard and fast rules! Embrace your creativity, experiment with different materials, and have fun crafting a spring masterpiece that reflects your unique style.