
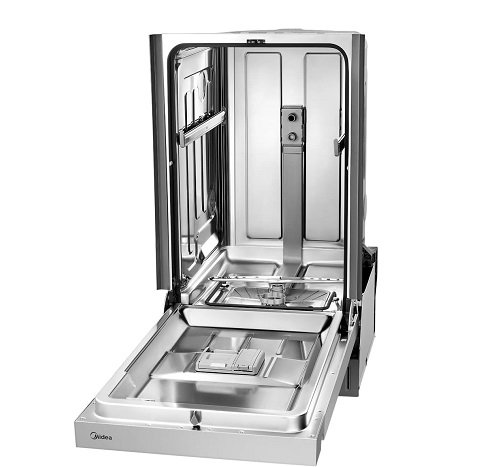
The rhythmic beeping of your KitchenAid dishwasher can be enough to send shivers down any homeowner’s spine. However, this seemingly ominous sound doesn’t necessarily mean disaster. KitchenAid dishwashers use beeps to communicate various issues, and with a little troubleshooting, you can decipher the message and get your dishes sparkling clean once again.
Understanding Kitchenaid Dishwasher Beeps
KitchenAid dishwashers use a variety of beep patterns to signal different problems. A continuous beep usually indicates an error, while short beeps might signify cycle completion. However, beep patterns can vary depending on the model. For the most accurate information, consult your KitchenAid user manual to find a specific beep code chart for your dishwasher model.
Common Reasons Your Kitchenaid Dishwasher Won’t Stop Beeping
Now, let’s discuss the thirteen most common reasons why your KitchenAid dishwasher might be beeping continually and how to silence the symphony of frustration:
#1: Door Not Latched Properly
A beeping KitchenAid dishwasher with a door that won’t latch can be frustrating. Here’s why it happens and how to fix it:
Why the Door Won’t Latch:
There are a few reasons why your KitchenAid dishwasher door might not be latching properly:
- Obstructions: Something could be preventing the door from closing completely. This could be leftover food particles or utensils caught in the door frame or seal.
- Misaligned Door: Over time, the door might become misaligned and not sit flush with the dishwasher frame, causing a latching issue.
- Faulty Latch Mechanism: In less common cases, the latch mechanism itself may be malfunctioning or damaged.
Fixing the Latching Issue:
- Clear Obstructions: First, visually inspect the door frame and gasket for any obstructions like food debris or utensils. Remove any items that might be preventing a secure closure.
- Check the Gasket: The door gasket creates a watertight seal when the dishwasher is closed. If the gasket is damaged or worn, it might not allow the door to close properly. Inspect the gasket for any tears or cracks. If the gasket is damaged, you will need to replace it with a new one.
- Reset the Dishwasher (Optional): Sometimes a simple reset can resolve minor electrical glitches that might be causing the latching issue. Turn off the dishwasher at the power switch, unplug it for 30 seconds, and then plug it back in and restart the dishwasher.
- Inspect the Door Alignment (For Advanced Users): If the above solutions don’t work, the door itself might be misaligned. Consult your KitchenAid user manual for specific instructions on adjusting the door alignment for your model. This process might involve adjusting screws or brackets and is recommended for those comfortable with basic appliance repair tasks.
If the Problem Persists:
If you’ve tried all the above solutions and the door still won’t latch, the latch mechanism itself might be faulty. In this case, it’s best to contact KitchenAid authorized service for repairs.
#2: Water Supply Issues (lack of water or low water pressure)
A KitchenAid dishwasher that beeps and refuses to fill with water can be a real headache. Most often, the culprit is a problem with the water supply itself. Let’s explore the reasons behind water supply issues and how to get your dishwasher gushing happily again.
Why Your Dishwasher Isn’t Getting Enough Water:
- Closed Water Supply Valve: This might seem obvious, but double-check that the shutoff valve under your sink where the dishwasher hose connects is fully open. A closed valve will prevent any water from reaching the dishwasher.
- Kinked or Clogged Hose: Over time, the water supply hose can become kinked or clogged with minerals or debris. This restricts water flow to the dishwasher.
- Low Water Pressure: If your home’s overall water pressure is low, it might not be enough to fill the dishwasher properly. This can be a city-wide issue or specific to your plumbing.
Fixing the Water Supply Problem:
- Check the Shut-off Valve: Locate the water supply valve under your sink, typically near where the dishwasher hose connects. Turn the valve handle counter-clockwise to ensure it’s fully open.
- Inspect the Water Supply Hose: Visually inspect the hose for any kinks or twists that might restrict water flow. Straighten any kinks and ensure the hose isn’t crushed behind the dishwasher. If the hose appears damaged or excessively clogged, you might need to replace it with a new one.
- Test Water Pressure: Run a faucet closest to the dishwasher to see if the water flow seems weak. If you suspect low water pressure throughout your house, contact your local water department or a plumber to investigate the issue.
Additional Tips:
- Turn Off the Water Supply Before Disconnecting the Hose: If you need to replace the hose or check for clogs, be sure to turn off the water supply valve first to avoid a surprise leak.
- Consider a Professional: If you’re uncomfortable replacing the hose or suspect more complex plumbing issues, contacting a qualified plumber is recommended.
With these steps, you should be able to identify and address the water supply issue hindering your KitchenAid dishwasher’s performance. Remember, a steady flow of water is essential for sparkling clean dishes!
#3: Drainage Problems (clogged drain hose or filter)
A beeping KitchenAid dishwasher refusing to drain can leave you with a sink full of sudsy frustration. Clogged drain issues are a common culprit, but with a little know-how, you can send those clogs packing and get your dishwasher draining smoothly once again.
The Drainage Culprits:
- Clogged Drain Filter: The drain filter is a common catch-all for food scraps and debris that can accumulate over time and impede proper drainage.
- Clogged Drain Hose: Similar to the filter, the drain hose itself can become clogged with food particles, grease, or even mineral buildup.
- Improper Garbage Disposal Use: If you have a garbage disposal, food scraps not properly ground can end up in the dishwasher drain hose and cause clogs.
Unclogging for Smooth Drainage:
- Clean the Drain Filter: Locate the drain filter, typically at the bottom of the dishwasher tub (consult your user manual for specific location). Most filters can be easily removed by hand. Rinse the filter thoroughly under running water to remove any trapped food scraps or debris. Once clean, replace the filter securely.
- Inspect the Drain Hose: Disconnect the drain hose from the dishwasher (consult your user manual for specific instructions). Look for any blockages or clogs within the hose. You can use a long, thin object or a plumber’s snake to dislodge any debris. Flush the hose with clean water to ensure proper flow. Reconnect the hose to the dishwasher securely.
- Mind the Garbage Disposal: Avoid putting large food scraps, grease, or coffee grounds down the garbage disposal, as these can contribute to clogs further down the line in the dishwasher drain hose.
Additional Tips:
- Regular Cleaning is Key: To prevent future clogs, make it a habit to regularly clean the drain filter, typically after every few cycles. Refer to your user manual for the recommended cleaning frequency for your specific model.
- Hot Water Helps: Pouring a cup of hot (not boiling) water down the drain after cleaning the filter can help loosen any lingering grease or debris.
- Consult a Professional: If you’re uncomfortable tackling the drain cleaning yourself or suspect a deeper clog beyond the hose or filter, contacting a qualified plumber is recommended.
By following these steps and maintaining a regular cleaning routine, you can keep your KitchenAid dishwasher draining efficiently and prevent those dreaded beeps and sudsy sink surprises.
#4: Incomplete Cycle (power outage or surge interrupting the cycle)
A mid-cycle beep from your KitchenAid dishwasher can be alarming. Often, the culprit is a power outage or surge that disrupts the wash cycle. Here’s how to get your dishwasher back on track with a simple reset.
The Power Problem:
- Power Outage: An unexpected power outage can abruptly halt your dishwasher’s cleaning cycle. When the power returns, the dishwasher might be confused and start beeping, unsure how to proceed.
- Power Surge: Similarly, a power surge can disrupt the dishwasher’s electrical signals, leading to a mid-cycle malfunction and beeping symphony.
The Reset Solution:
- Power Down and Unplug: First things first, turn off the dishwasher at the power switch or fuse box. Then, for good measure, unplug the dishwasher from the outlet.
- Wait it Out: Give the dishwasher some time to “reset” itself. Wait at least 30 seconds to a minute after unplugging it before proceeding.
- Power Up and Restart: Plug the dishwasher back in and turn it on at the power switch. Most KitchenAid dishwashers will automatically attempt to resume the cycle from where it left off.
- Manual Restart (Optional): If the dishwasher doesn’t automatically resume the cycle, you might need to restart it manually. Consult your user manual for specific instructions on restarting the cycle for your model.
Additional Tips:
- Surge Protection: Consider using a surge protector for your dishwasher to help prevent power surges from disrupting future cycles.
- Check the Display: Some KitchenAid models might display an error code on the control panel after a power interruption. Consult your user manual to decipher the error code and any specific troubleshooting steps.
With these simple steps, you should be able to reset your KitchenAid dishwasher after a power outage or surge and get it back to sparkling clean dish duty. A quick reset can often be the answer to a mid-cycle beeping dilemma.
#5: Dirty Drain Filter
A neglected drain filter is a common culprit behind a beeping KitchenAid dishwasher. This essential component traps food scraps and debris, preventing them from clogging the drain hose and causing bigger problems. However, a dirty filter itself can impede proper drainage and trigger those annoying beeps.
Why a Clean Filter Matters:
- Prevents Clogs: The drain filter acts as the first line of defense, catching food scraps, grease, and other debris that could clog the drain hose further down the line.
- Maintains Drainage Efficiency: A clean filter allows water to flow freely through the dishwasher, ensuring proper drainage and optimal cleaning performance.
- Reduces Odors: Food particles trapped in a dirty filter can decompose and create unpleasant odors in your dishwasher.
Cleaning the Drain Filter:
- Locate the Filter: The drain filter is typically located at the bottom of the dishwasher tub, near the spray arms. Consult your KitchenAid user manual for the exact location for your specific model. Most filters can be easily removed by hand.
- Remove and Rinse: Turn the filter counter-clockwise or lift it out, depending on the model. Rinse the filter thoroughly under running water to remove any trapped food scraps or debris.
- Inspect for Damage: While rinsing, take a moment to inspect the filter for any cracks or damage. A damaged filter might need to be replaced.
- Clean the Filter Area: While the filter is removed, take a damp cloth and wipe down the surrounding area in the dishwasher tub to remove any debris that might have accumulated.
- Replace the Filter: Once clean and dry, reinsert the filter and turn it clockwise until it clicks into place (or place it back down depending on the model).
Frequency of Cleaning:
For optimal performance, it’s recommended to clean the drain filter after every few dishwasher cycles. However, the frequency can vary depending on how often you use your dishwasher and the types of food you wash.
Your KitchenAid user manual might suggest a specific cleaning frequency for your model. You can also pour a cup of hot (not boiling) water down the drain after cleaning the filter to help loosen any lingering grease or debris.
#6: Clogged Drain Hose
A clogged drain hose can be a stealthy villain in the world of KitchenAid dishwashers. Unlike a dirty filter, a clogged hose might not cause immediate beeping, but it can lead to a gradual decline in drainage performance, leaving you with a sink full of sudsy dishwater – a truly disheartening sight. Here’s how to identify a clogged drain hose and unclog it for a smoothly flowing dishwasher.
Signs of a Clogged Drain Hose:
- Slow Drainage: The most common sign of a clogged drain hose is a dishwasher that takes significantly longer than usual to drain the wash water.
- Standing Water: If there’s water remaining at the bottom of the dishwasher tub after a cycle, it could indicate a drainage issue, potentially due to a clogged hose.
- Unpleasant Odors: Food debris trapped in a clogged hose can decompose and create unpleasant odors in your dishwasher.
How to Clear the Clog:
- Gather Your Supplies: You’ll need a bucket, a pan to catch any spills, a flashlight (optional), a long, thin object like a straightened wire hanger, or a plumber’s snake.
- Access the Drain Hose: The drain hose typically connects to the back of the dishwasher under the sink. Consult your KitchenAid user manual for specific instructions on accessing the hose for your model. You might need to move the dishwasher slightly to access the hose connection.
- Disconnect the Hose: Locate the hose clamp securing the hose to the dishwasher outlet. Using pliers, loosen the clamp and carefully disconnect the hose from the dishwasher. Place a pan under the connection point to catch any spills.
- Inspect the Hose: Visually inspect the hose for any kinks or damage. Hold the hose up to a light (if possible) to see if you can spot any blockages within the hose.
- Clear the Clog: If you suspect a clog, use your long, thin object or plumber’s snake to carefully push through the clog from both ends of the hose. Be gentle to avoid damaging the hose. 5. Flush the Hose: Once the clog is dislodged, run hot water through the hose to flush out any remaining debris.
- Reconnect the Hose: Reattach the drain hose to the dishwasher outlet and secure it with the clamp. Tighten the clamp securely with pliers.
- Run a Test Cycle: Once everything is reconnected, run a short rinse cycle on your dishwasher to test the drainage.
Additional Tips:
If you’re uncomfortable accessing or cleaning the drain hose yourself, or if the clog persists after your attempts, contact a qualified plumber for assistance. You can help prevent future clogs by avoiding putting excessive grease or food scraps down the drain. Also, consider cleaning the drain filter regularly to prevent debris from traveling further down into the hose.
#7: Faulty Drain Pump
While a clogged filter or drain hose are frequent culprits behind drainage woes, a malfunctioning drain pump can also be the silent villain causing your KitchenAid dishwasher to beep and refuse to drain. The drain pump is responsible for removing water from the dishwasher during the cycle. Let’s explore the signs of a faulty drain pump and when it might be time to call in the professionals.
Signs of a Faulty Drain Pump:
- Drainage Issues: The most obvious sign of a drain pump problem is a dishwasher that won’t drain properly. This can manifest as slow drainage, standing water in the tub after a cycle, or a complete inability to drain at all.
- Beeping Symphony: Often, a faulty drain pump will trigger a series of beeps from your KitchenAid dishwasher, alerting you to an issue. Consult your user manual to decipher the specific beep code associated with a drain pump error for your model.
- Burning Smell: In rare cases, a failing drain pump might emit a burning smell. This is a serious concern and indicates a potential electrical issue.
Troubleshooting a Faulty Drain Pump:
- Reset the Dishwasher: Sometimes a simple reset can resolve minor electrical glitches that might be affecting the drain pump. Turn off the dishwasher at the power switch, unplug it for 30 seconds, and then plug it back in and restart the dishwasher.
- Check for Clogs: Before suspecting the pump itself, ensure there are no clogs in the drain filter or hose that might be hindering drainage and causing the pump to work harder. Refer to the previous sections on cleaning the drain filter and unclogging the drain hose for troubleshooting steps.
- Consult Your User Manual: Your KitchenAid user manual might offer additional troubleshooting tips specific to your model and potential drain pump error codes.
When to Call a Professional:
If you’ve tried the above steps and your dishwasher still won’t drain, it’s best to contact a qualified appliance repair technician. If you detect a burning smell coming from your dishwasher, do not use it and immediately unplug it. Contact a professional appliance repair technician to address the issue as it could indicate a serious electrical problem.
#8: Faulty Water Inlet Valve
The rhythmic beeping of your KitchenAid dishwasher might not be a call to clean the dishes, but a cry for help from a failing water inlet valve. This hidden component controls the flow of water entering the dishwasher during the wash cycle. Let’s highlight some of the signs of a faulty water inlet valve and how to diagnose the issue.
Why Water Won’t Flow:
- Malfunctioning Valve: Over time, the water inlet valve can malfunction due to wear and tear, faulty internal components, or mineral buildup. This can prevent the valve from opening properly and allowing water into the dishwasher.
- Solenoid Failure: The water inlet valve utilizes solenoids, which are like electrical switches that control water flow. A faulty solenoid within the valve can disrupt the water flow signal.
- Clogged Valve Screen: Some water inlet valves have a small screen to filter debris from the incoming water supply. If this screen becomes clogged with mineral deposits or debris, it can restrict water flow.
Signs of a Faulty Water Inlet Valve:
- Lack of Water: The most obvious sign of a problem with the water inlet valve is a dishwasher that simply doesn’t fill with water during the cycle. This will likely be accompanied by beeping or error codes on your KitchenAid dishwasher.
- Slow Filling: Even if the dishwasher fills with water, a faulty valve might cause it to fill slowly, extending the cycle time.
- Leaking: In some cases, a malfunctioning water inlet valve can leak internally or externally, leading to water damage around the dishwasher.
Diagnosing the Culprit:
- Check the Water Supply: Before assuming a valve issue, ensure the water supply valve under your sink is fully open and there are no kinks in the water supply hose.
- Consult Your User Manual: Your KitchenAid user manual might have specific troubleshooting steps or error codes related to a faulty water inlet valve for your model.
- Listen for Clicking: During a normal cycle, you might hear a clicking sound as the water inlet valve opens and closes to regulate water flow. The absence of clicking could indicate a solenoid issue.

When to Call a Professional:
Replacing a water inlet valve can involve some disassembly of the dishwasher and plumbing connections. If you’re uncomfortable with this level of repair, it’s best to call a qualified appliance repair technician.
If you’ve checked the water supply and the dishwasher still isn’t filling with water, or if you suspect a solenoid failure or clogged valve screen, it’s best to contact a professional to diagnose and potentially replace the water inlet valve.
Additionally, any signs of leaking around the dishwasher should be addressed by a qualified plumber or appliance repair technician to prevent water damage. While some troubleshooting steps can be attempted, replacing the water inlet valve itself is often best left to a professional.
#9: Faulty Wash Sensor
If your KitchenAid dishwasher is beeping incessantly and seemingly not cleaning the dishes properly, the culprit might be the wash sensor. This component is responsible for monitoring the wash water’s clarity and signaling the dishwasher to move on to the rinse cycle. Let’s explore the signs of a faulty wash sensor and how to approach this issue.
The Wash Sensor’s Role:
- Monitoring Cleanliness: During the wash cycle, the wash sensor constantly assesses the water’s clarity. As food particles and debris are dislodged from the dishes, the wash water becomes progressively cleaner.
- Signaling the Rinse: Once the wash sensor detects a sufficiently clean wash water, it sends a signal to the dishwasher’s control board to initiate the rinse cycle.
When the Sensor Goes Rogue:
- Faulty Readings: A malfunctioning wash sensor might provide inaccurate readings about the water’s cleanliness. This could lead to the dishwasher:
- Running excessively long wash cycles, as it constantly waits for a clean water signal that never comes.
- Failing to switch to the rinse cycle altogether, leaving your dishes with a cloudy, filmy residue.
- Sensor Wear and Tear: Like any component, wash sensors can wear out over time due to mineral buildup or internal electrical issues.
Signs of a Faulty Wash Sensor:
- Extended Wash Cycles: If your dishwasher seems to be stuck in an endless wash cycle, unable to progress to rinsing, a faulty wash sensor could be to blame.
- Cloudy Dishes: Even after a complete cycle, your dishes might still have a filmy, unclear appearance if the dishwasher didn’t properly rinse due to a wash sensor malfunction.
- Error Codes: Some KitchenAid models might display specific error codes on the control panel that indicate a wash sensor issue. Consult your user manual for code interpretation.
Troubleshooting and Solutions:
Unfortunately, troubleshooting a faulty wash sensor often involves accessing and potentially replacing the sensor itself, which can be a complex task. Unless you’re comfortable with dishwasher disassembly and electrical components, it’s best to call a qualified appliance repair technician.
Your KitchenAid user manual might offer some basic troubleshooting tips or error code explanations related to the wash sensor for your specific model.
When to Call a Professional:
Appliance repairs can involve electrical components and potential water leaks. If you’re not comfortable with these aspects, leave it to the professionals to ensure a safe and proper repair.
A qualified technician can diagnose the issue definitively and determine if the wash sensor needs replacement or if there’s another underlying problem.
Hiring a professional often comes with a guarantee on the repairs, giving you peace of mind that your dishwasher is fixed correctly.
#10: Faulty Rinse Sensor
The symphony of beeps emanating from your KitchenAid dishwasher might not be an operatic masterpiece, but a plea for help from a malfunctioning rinse sensor. This component plays a vital role in ensuring your dishes emerge sparkling clean, not coated in a soapy residue.
The Rinse Sensor’s Role:
- Monitoring Rinse Efficiency: During the rinse cycle, the rinse sensor assesses the water’s cleanliness to ensure all soap residue and food particles have been removed from the dishes.
- Signaling Completion: Once the rinse sensor detects a sufficiently clean rinse water, it sends a signal to the dishwasher’s control board to indicate a successful rinse cycle and initiate drying or the final cycle.
When the Rinse Sensor Falters:
- Faulty Readings: A malfunctioning rinse sensor might provide inaccurate readings about the rinse water’s cleanliness. This could lead to your dishwasher:
- Running excessively long rinse cycles, as it constantly waits for a clean water signal that never comes.
- Failing to complete the rinse cycle altogether, leaving your dishes with a soapy film or residue.
- Sensor Wear and Tear: Like any component, rinse sensors can wear out over time due to mineral buildup or internal electrical issues.
Signs of a Faulty Rinse Sensor:
- Soapy Dishes: Even after a complete cycle, your dishes might still have a filmy, soapy residue if the dishwasher didn’t properly rinse due to a rinse sensor malfunction.
- Extended Rinse Cycles: If your dishwasher seems stuck in an endless rinse cycle, unable to progress to drying or the final cycle, a faulty rinse sensor could be to blame.
- Error Codes: Some KitchenAid models might display specific error codes on the control panel that indicate a rinse sensor issue. Consult your user manual for code interpretation.
Troubleshooting and Solutions:
Similar to the wash sensor, troubleshooting a faulty rinse sensor often involves accessing and potentially replacing the sensor itself, which can be a complex task. Unless you’re comfortable with dishwasher disassembly and electrical components, it’s best to call a qualified appliance repair technician.
Your KitchenAid user manual might offer some basic troubleshooting tips or error code explanations related to the rinse sensor for your specific model.

When to Call a Professional:
Appliance repairs can involve electrical components and potential water leaks. If you’re not comfortable with these aspects, leave it to the professionals to ensure a safe and proper repair.
A qualified technician can diagnose the issue definitively and determine if the rinse sensor needs replacement or if there’s another underlying problem.
#11: Overloaded Dishwasher
The urge to cram every dirty dish into your KitchenAid dishwasher in one go is understandable. But resist the urge since verloading your dishwasher is a recipe for disaster, leading to a symphony of beeps, frustration, and ultimately, unclean dishes. Let’s explore why overloading is a bad idea and how to find the happy medium for sparkling clean dishes and a happy dishwasher.
The Problems with Overloading:
- Water Woes: A crammed dishwasher hinders the proper flow of water throughout the machine. This can leave some dishes with stubborn food particles clinging on.
- Soap Sudsy Mess: With limited water movement, detergent might not disperse evenly, leading to excessive suds that can linger on your dishes.
- Washing in the Shadows: Overcrowding prevents the spray arms from rotating freely, leaving some dishes hidden from the cleaning action. Those hidden areas become prime real estate for leftover food particles.
- Strained Machine: An overloaded dishwasher forces the machine to work harder, putting extra stress on the motor and other components. This can lead to premature wear and tear in the long run.
Finding the Goldilocks Zone:
- Consult Your Manual: Your KitchenAid user manual will likely have a section on proper loading techniques and diagrams to help you maximize space efficiently.
- Leave Room to Breathe: Don’t pack dishes in like sardines! Leave some space between dishes to allow for proper water flow and spray arm rotation.
- Think Like a Puzzle Master: Load your dishwasher strategically, placing plates vertically, utensils in the designated basket, and pots and pans at an angle to maximize space.
- Focus on Function: Larger items should go along the sides and back, while smaller items like cups and bowls can fill in the gaps.
Bonus Tip: Run your dishwasher on a hot water cycle whenever possible for optimal cleaning performance.
#12: Incorrect Dishwasher Detergent
Reaching for that bargain basement detergent might seem like a good idea, but for your KitchenAid dishwasher, it can lead to a pile of problems. Let’s explore why using the wrong detergent can cause issues and how to choose the right kind for a clean and efficient wash.
The Wrong Detergent Recipe for Disaster:
- Sudsy Symphony: Regular dish soap is designed for handwashing and creates excessive suds in a dishwasher. These suds can overflow, clog components, and leave a filmy residue on your dishes.
- Not-So-Clean Dishes: Dishwashing detergents are formulated to break down grease and food particles during the wash cycle. Regular dish soap simply doesn’t have the cleaning power to tackle tough messes in your dishwasher.
- Machine Wear and Tear: The harsh chemicals in some detergents can erode the gaskets and seals in your dishwasher, leading to leaks and potential damage over time.
Choosing the Right Dishwasher Detergent:
- Go Automatic: Always use detergents specifically formulated for automatic dishwashers. These detergents are designed to create a controlled amount of suds, clean effectively, and be safe for your dishwasher components.
- Powder, Gel, or Pacs? All three types (powder, gel, and dishwasher detergent packs) can be effective. Choose the format that works best for your dispensing system and preferences.
- Consider Your Needs: If you have hard water, look for detergents with a water softener to prevent mineral buildup. For heavily soiled dishes, a concentrated formula might be a good choice.
Your KitchenAid dishwasher user manual might recommend specific detergent types or brands. Always opt for detergents that are free of phosphates and chlorine, which can be harmful to the environment and can potentially damage your dishwasher’s components.
Bonus Tip: Rinse off large food particles from your dishes before loading them into the dishwasher. This will help the detergent work more effectively and prevent clogs.
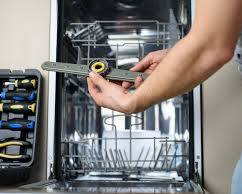
#13: Faulty Control Board (Less common)
You’ve checked the filter, the hoses, the sensors, and the detergent. Yet, your KitchenAid dishwasher remains stubbornly uncooperative, beeping with a symphony of frustration. The culprit might be the control board that acts as the dishwasher’s brain, coordinating all its functions. While less frequent than other issues, a faulty control board can cause a variety of problems.
The Control Board’s Role:
- The Maestro of Dishwashing: The control board receives signals from various components like sensors and timers, and uses these signals to control the dishwasher’s functions throughout the wash cycle.
- Power Distribution: The control board also regulates power distribution to different parts of the dishwasher, ensuring each component receives the necessary electricity to function.
When the Brain Goes Bad:
- Electrical Malfunctions: Power surges, faulty components on the board itself, or general wear and tear can lead to electrical malfunctions within the control board.
- Communication Breakdown: A malfunctioning control board might not properly interpret signals from sensors or timers, leading to erratic dishwasher behavior or a complete shutdown.
- Error Codes: Some KitchenAid models might display specific error codes on the control board that indicate a potential control board issue. Consult your user manual for code interpretation.
Signs of a Faulty Control Board:
- Random Beeping: The dishwasher might beep incessantly or at seemingly random times, even if there are no other apparent issues.
- Erratic Operation: The dishwasher might cycle through functions incorrectly, stop mid-cycle, or fail to respond to control panel selections altogether.
- Dead Dishwasher: In the worst-case scenario, the control board failure might leave your dishwasher completely dead, with no power or response.
Troubleshooting and Solutions:
The control board is the heart of your dishwasher’s electronics. Diagnosing and replacing a faulty control board is typically a job for a qualified appliance repair technician due to the complexity involved. Fortunately, your KitchenAid user manual might offer some basic troubleshooting tips or error code explanations related to the control board for your specific model.
Wrapping Up
With these troubleshooting steps, you should be able to identify and address the most common reasons behind your KitchenAid dishwasher’s beeping woes. Remember, for issues related to potentially faulty internal components like the drain pump, water inlet valve, or sensors, contacting KitchenAid authorized service is the best course of action.