
Most weekend garden projects go wrong in one of two places. Either the materials were never meant to sit outside in rain and sun, or the thing got built before anyone decided where it would live. A planter that dries out in a day, a trellis that leans after the first windy week, a compost bin placed so far from the kitchen that nobody uses it: none of these are failures of skill. They are failures of planning, and planning takes about ten minutes.
The fifteen projects below are chosen because each one can realistically be finished in a day or less with basic tools. Some take an hour. A few need a second pair of hands. Each includes the details that tend to get left out of quick tutorials: where to put it, what to avoid, and what will make it fall apart.
Ten Minutes of Planning That Saves a Weekend of Rework
Walk the space before buying anything. Notice where the sun actually falls between mid-morning and mid-afternoon, which corners stay wet after rain, and where you already walk every day. Anything you need to reach often (a compost bin, a seed-starting shelf, a tool rack) belongs close to a door or tap. Anything meant for wildlife (a birdbath, a feeder) does better a little further out, with some cover nearby.
Two rules apply to nearly every project here. First, anything that touches soil or stands in water will eventually rot unless the material suits it, so favor rot-resistant woods such as cedar, or metal, stone, brick and recycled plastic. Second, call your local utility locating service before digging deeper than a spade’s depth. In the United States that is 811; other countries have their own equivalents. It matters for edging trenches, rain barrel bases and anything involving a post.
If you want a sensible order of attack: the seed-starting station, compost bin and rainwater collection take the most lead time to pay off, so they are worth doing first. Wildlife projects give quick rewards, and the decorative ones can fill in around the edges.
1. A Bird Feeder That Is Easy to Clean
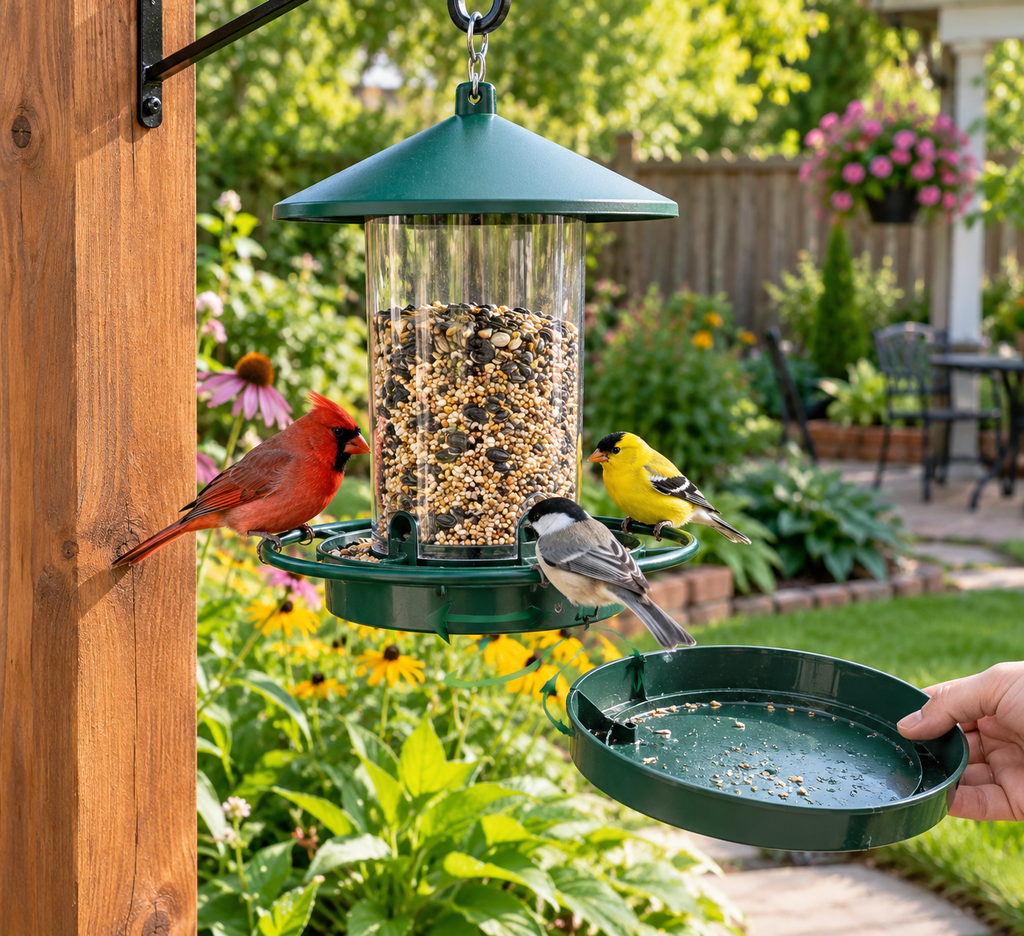
The design that matters most is not the prettiest one, it is the one you can take apart and scrub. Feeders that stay damp and dirty can spread disease among birds, and wildlife organizations commonly recommend cleaning them regularly, often every week or two in wet weather, using a dilute bleach solution (a commonly cited ratio is about one part bleach to nine parts water), then rinsing thoroughly and letting the feeder dry before refilling. Check the guidance from a bird conservation group in your region, since recommendations vary.
A simple version: a shallow tray feeder made from an untreated softwood or cedar board frame with a mesh or slatted bottom so rain drains through. Drill drainage holes if you use a solid base. Skip pressure-treated lumber and paint on any surface birds touch.
Placement is where most people slip. Feeders close to a window (within about a metre or three feet) or well away from it (beyond roughly nine metres or thirty feet) are generally recommended to reduce window strikes, because birds flushed from a mid-distance feeder can build up speed before hitting glass. Keep it a few metres from dense shrubs that cats could hide in, but close enough that birds can duck into cover if a hawk passes.
Seed choice shapes who visits. Black oil sunflower seed attracts the widest range of small birds. Cheap mixes with lots of filler such as milo often end up scattered on the ground and sprouting.
2. A Simple Trellis That Will Not Lean Over by July
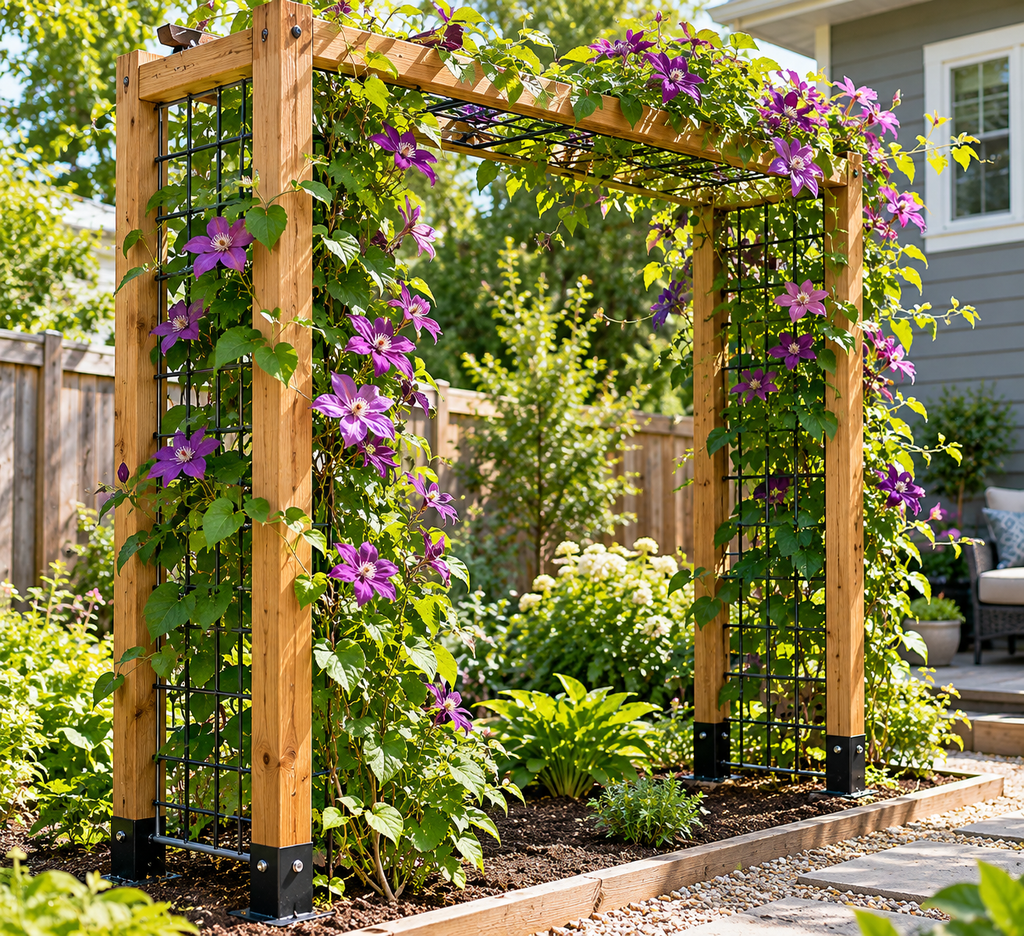
A trellis fails at the base. Wind pushes against a trellis loaded with foliage like a sail, so the anchoring matters more than the lattice. For a freestanding frame, sink the uprights at least 30 centimetres (about a foot) into the ground, or longer in loose soil.
A reliable weekend build uses two tall stakes and horizontal crosspieces every 20 to 30 centimetres, with jute or galvanized wire between them. Bamboo canes lashed into a lattice work for peas and light climbers, though bamboo thinner than thumb width bows under heavy crops. For climbing beans, squash or cucumbers, switch to sturdier wood or cattle panel.
Match the spacing to the plant. Peas grab thin supports with tendrils, so a mesh or string grid does the job. Pole beans twine, so they want vertical poles or strings. Clematis and many roses need something to be tied to, not something to wrap around.
A mistake worth avoiding: placing a solid-looking trellis against a wall with no gap. A few centimetres of space behind it improves airflow and reduces the dampness that encourages mildew on the plant and rot on the wall.
3. Garden Markers That Stay Readable
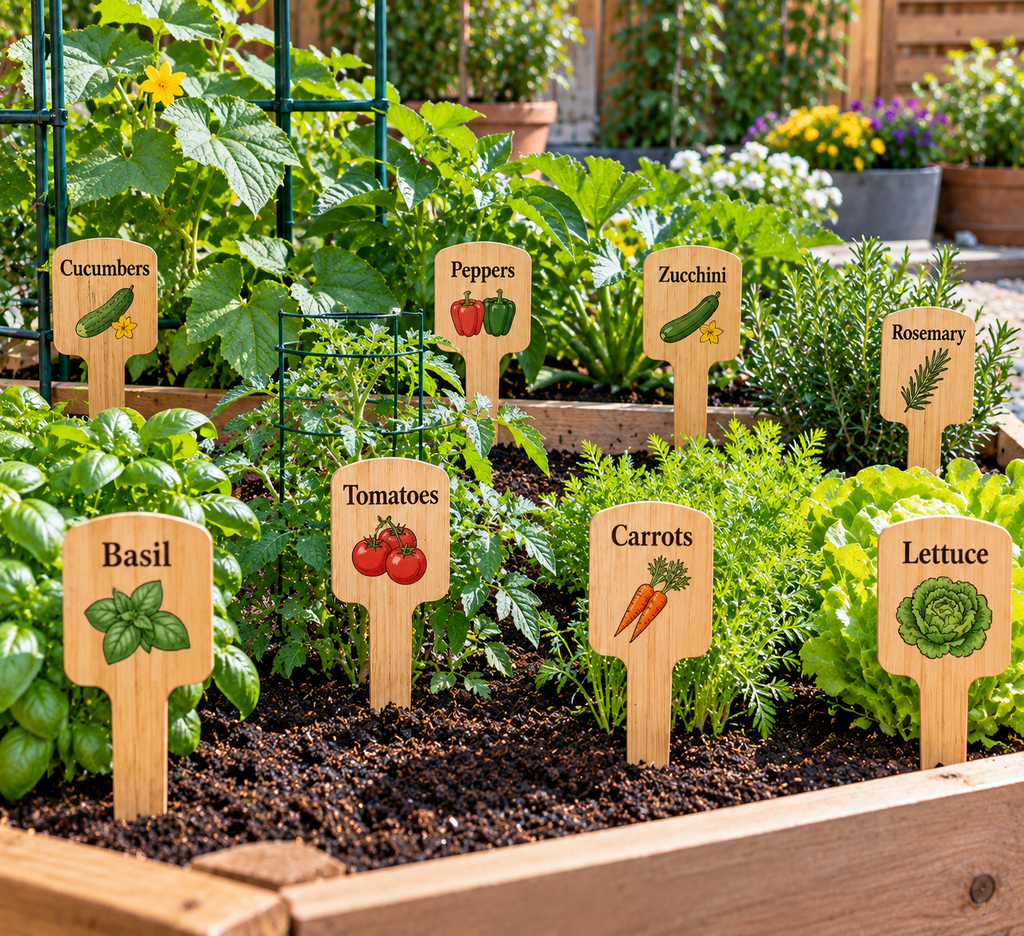
Outdoor labels fade for a boring reason: sunlight breaks down many inks. Permanent marker on plastic tags is a common culprit, so test any marker by leaving a sample outside for a few weeks before relying on it. Pencil on a roughened wooden or plastic surface tends to hold up well because graphite does not fade the way dye does. Engraving or stamping metal tags lasts longest.
Good materials for a weekend batch: wooden paint stirrers cut to length, flat river stones, offcuts of aluminium flashing, or the lids of plastic tubs cut into strips. For rocks, a paint pen followed by a clear outdoor sealer gives decent legibility.
Think about what the marker needs to say. The plant name alone is less useful than the name plus sowing date or variety, since you will forget which tomato was the early one. For a vegetable garden, put the label at the end of the row on the side you approach from, and stand it tall enough that mulch does not bury it.
4. A Container Planter With Real Drainage
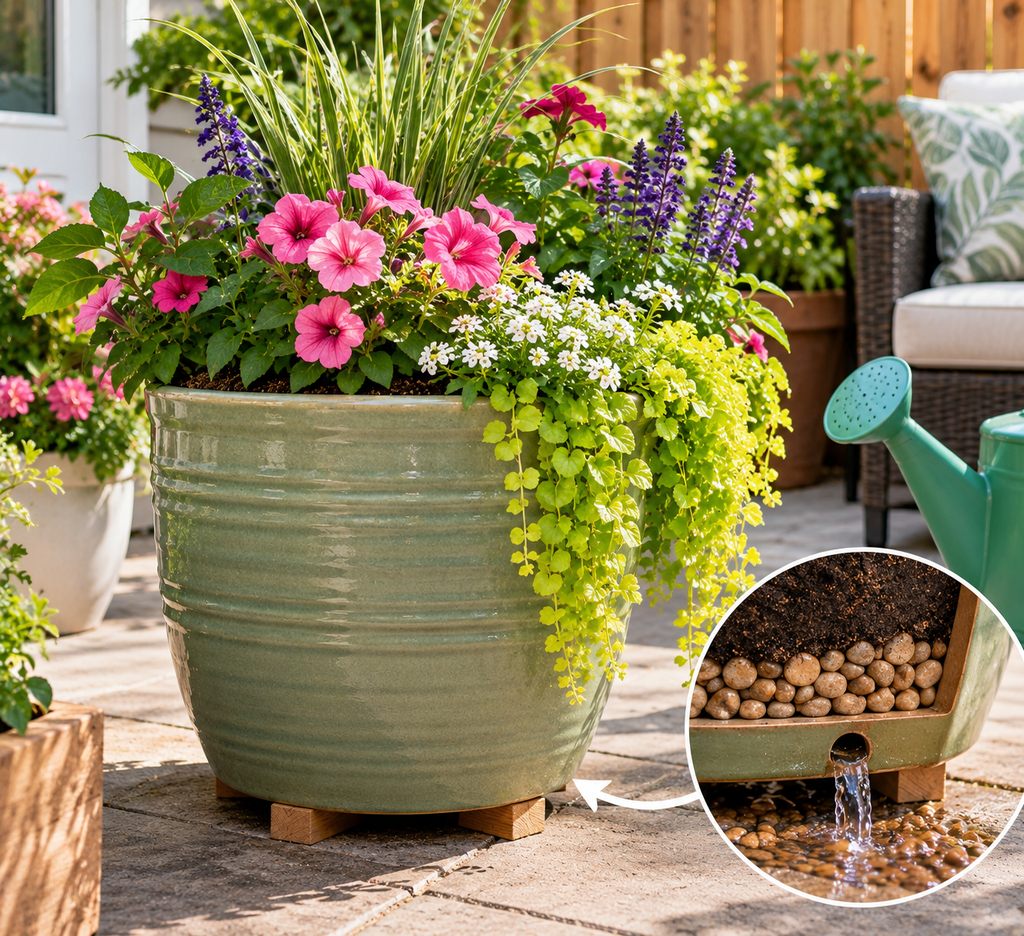
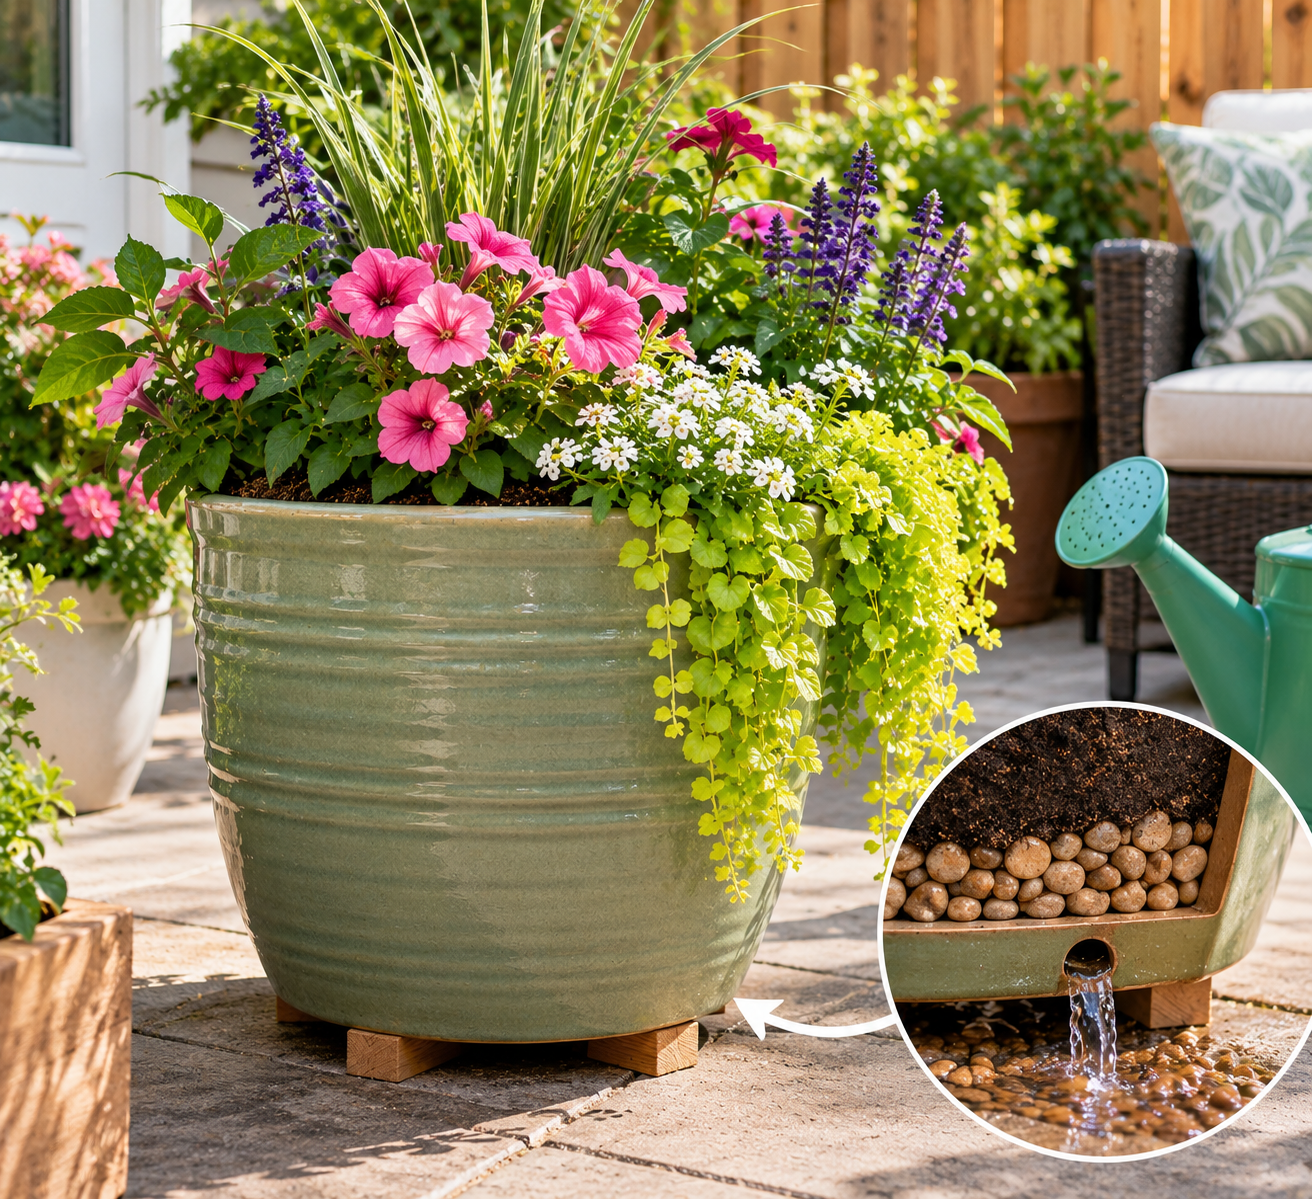
Almost anything watertight can become a planter: a wooden crate, a galvanized tub, a five-gallon bucket. What decides whether plants live is drainage. Drill several holes in the base, roughly 1 centimetre across for a bucket-sized container, and raise the container slightly on pot feet or bricks so the holes do not sit in a puddle.
A popular tip says to add gravel or broken pottery in the base to improve drainage. Horticultural research suggests this does the opposite: water tends to collect at the boundary between fine and coarse material, which raises the soggy zone closer to the roots. Fill the whole container with potting mix instead, and use a piece of mesh over the holes if you want to keep the mix from washing out.
Use potting mix, not garden soil. Garden soil compacts in containers and drains poorly. If the container will hold edibles, check that it was not used for chemicals, paint or fuel, and use food-grade buckets where possible.
Size decides how often you water. A small pot in summer sun can need water daily, while a large tub holds moisture for much longer. If watering is the thing you are most likely to forget, go bigger than you think you need.
5. A Hanging Planter Rated for the Weight
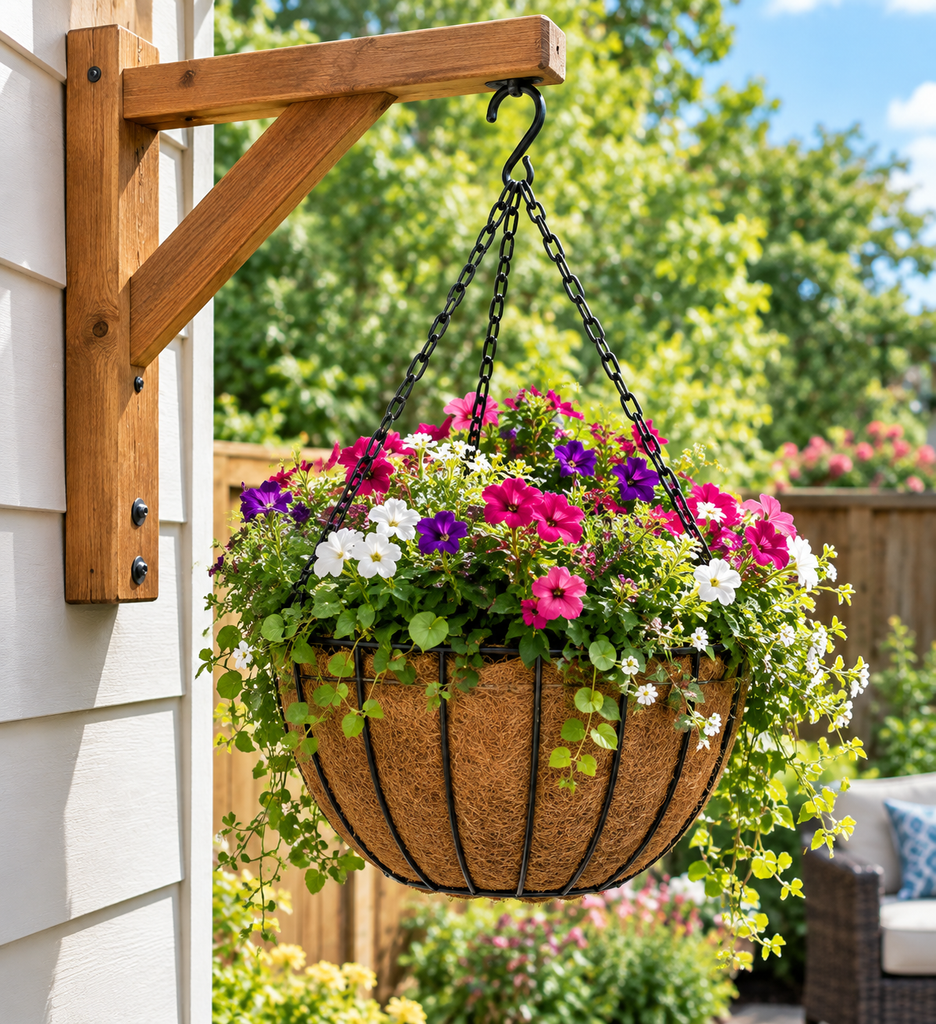
Wet soil is heavy. A medium hanging basket can weigh a few kilograms once watered, and a larger pot with mix and a growing plant can weigh considerably more. That changes the hardware decision completely. A decorative hook screwed into a thin fascia board will not hold.
For a rope-and-board version, cut a square of untreated wood, drill four corner holes and thread rope through with knots below each hole, then bring the four ropes together above. Add a drip tray or choose a plant that tolerates occasional dryness, since hanging containers drain onto whatever is below. For something lighter, repurpose a colander lined with coir, which drains well.
Plants matter as much as the build. Trailing petunias, lobelia, sweet potato vine, strawberries and creeping thyme suit hanging containers. Hanging baskets dry out faster than ground-level pots because air moves around all sides, so expect more frequent watering, especially on windy balconies.
Hang from a structural point: a roof beam, a pergola cross-member or a screw-in hook into a joist. If you rent or cannot drill, a freestanding shepherd’s hook set into the ground often suits lighter baskets.
6. A Vertical Herb Garden for a Small Wall or Fence
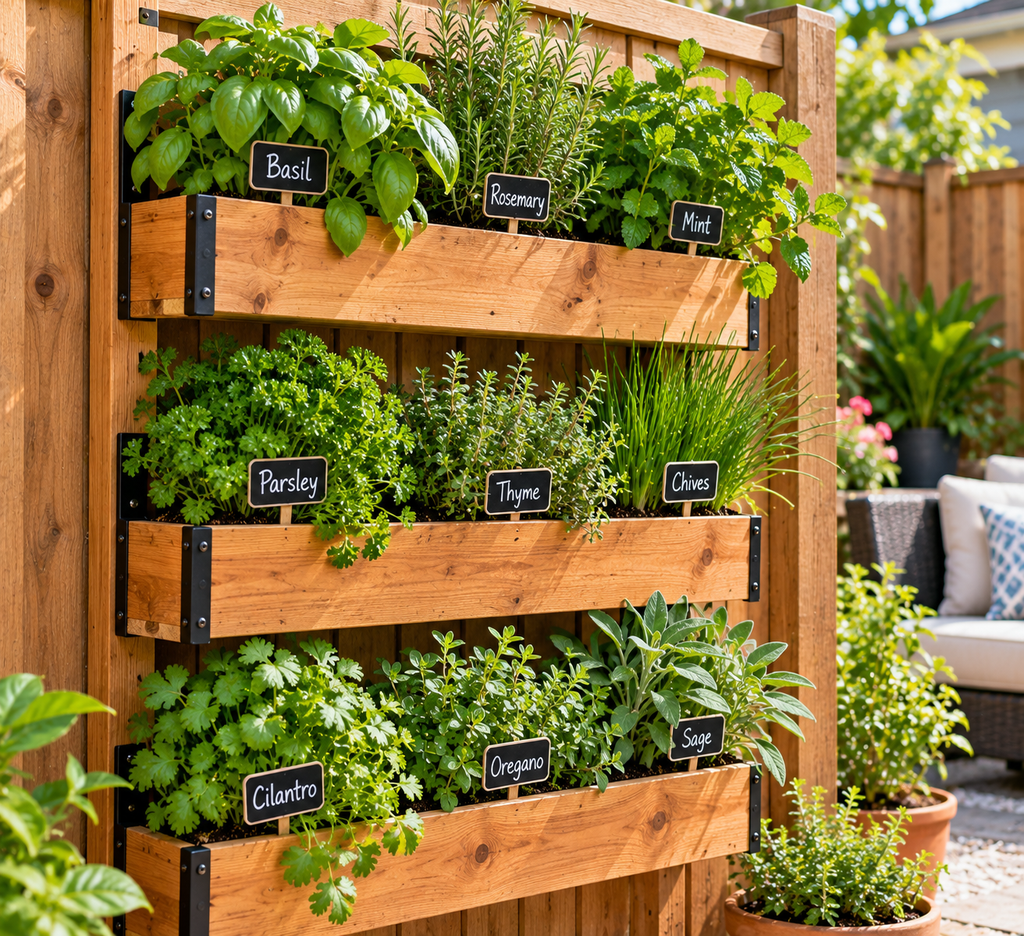
A vertical herb planter saves floor space, but gravity works against it: water drains from the top downward, so the top row dries first and the bottom row stays wet. Plan the plants accordingly. Put drought-tolerant herbs such as rosemary, thyme and oregano on the upper rows, and moisture-lovers such as parsley, chives and basil lower down.
Pallets are a popular base, but not every pallet is safe. International standards require pallets used in shipping to be stamped, and “HT” means heat-treated, while “MB” indicates methyl bromide fumigation, which you should avoid for anything growing food. A pallet with no stamp or one you cannot read is best left alone. If you use one, line the back with landscape fabric or weed-barrier cloth, staple it on, and fill the slots with potting mix from the top.
Alternatives: a series of gutters mounted horizontally on a fence, a shoe organiser with the pockets drilled for drainage, or tiered tin cans hung on a rail.
Keep mint in its own pot. It spreads aggressively through runners and will crowd out neighbours in a shared planter. Most culinary herbs need roughly six hours of sun, so mount the planter on a south-facing (or in the southern hemisphere, north-facing) wall if you can.
7. A Mini Greenhouse That Does Not Cook Your Seedlings
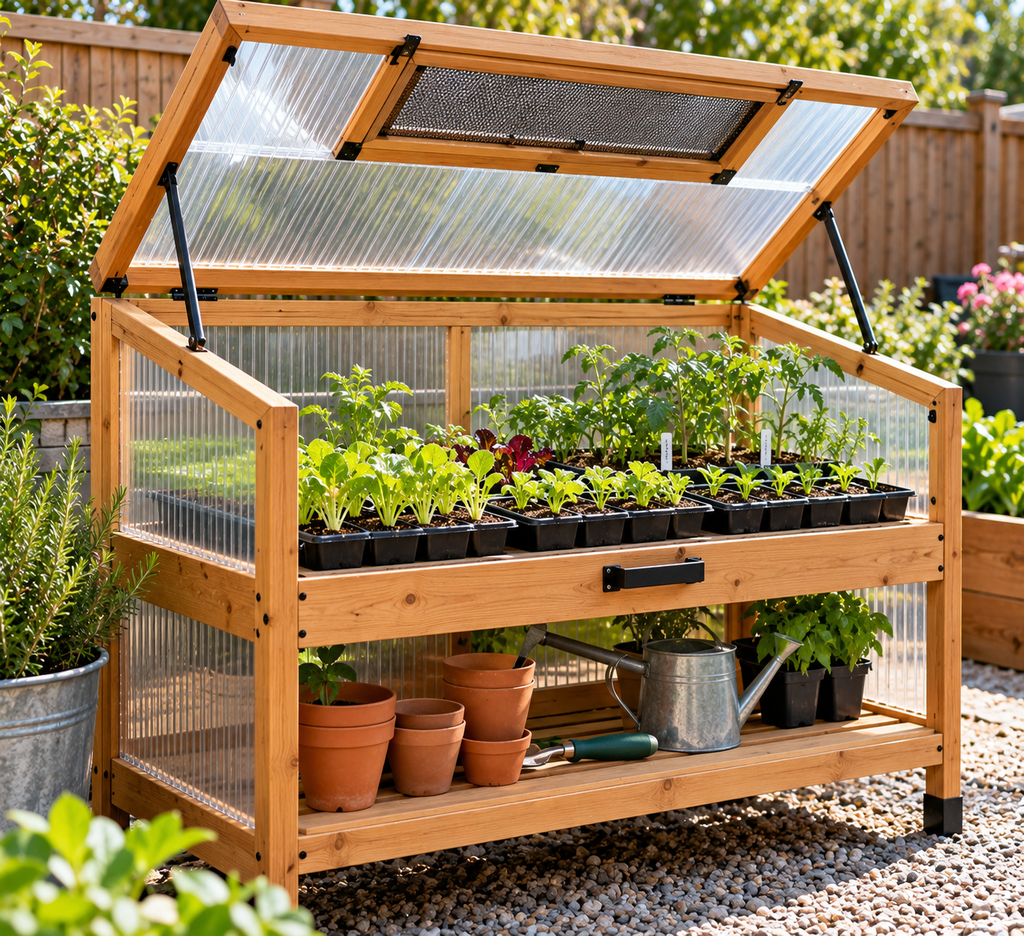
The common problem with small greenhouses is heat, not cold. On a sunny day, even in winter, the inside of a small enclosed structure can climb far above outdoor temperatures within an hour or two, and tender seedlings can be scorched. Any design needs a vent you can open easily.
The simplest weekend build is a cold frame: a box of untreated wood or reclaimed lumber with a hinged, clear lid sloping toward the sun. A prop stick lets you vent it. Use an old window if you have one, but check the age. Windows painted before the late 1970s may have lead-based paint, and scraping or sanding it creates hazardous dust. If you are unsure, either test the paint with a home kit or buy new glazing.
For something taller, a PVC hoop frame or a shelving unit wrapped in a clear greenhouse cover works for a single season. Twin-wall polycarbonate lasts longer than plastic film and holds heat better but costs more.
A cold frame extends the season at both ends. In spring it lets you harden off seedlings gradually, and in autumn it can protect hardy greens such as lettuce, spinach and kale. How much extra protection you actually get depends on your climate, so treat any claim about degrees gained with caution until you check it with a thermometer.
8. A Compost Bin Sized to Make Heat
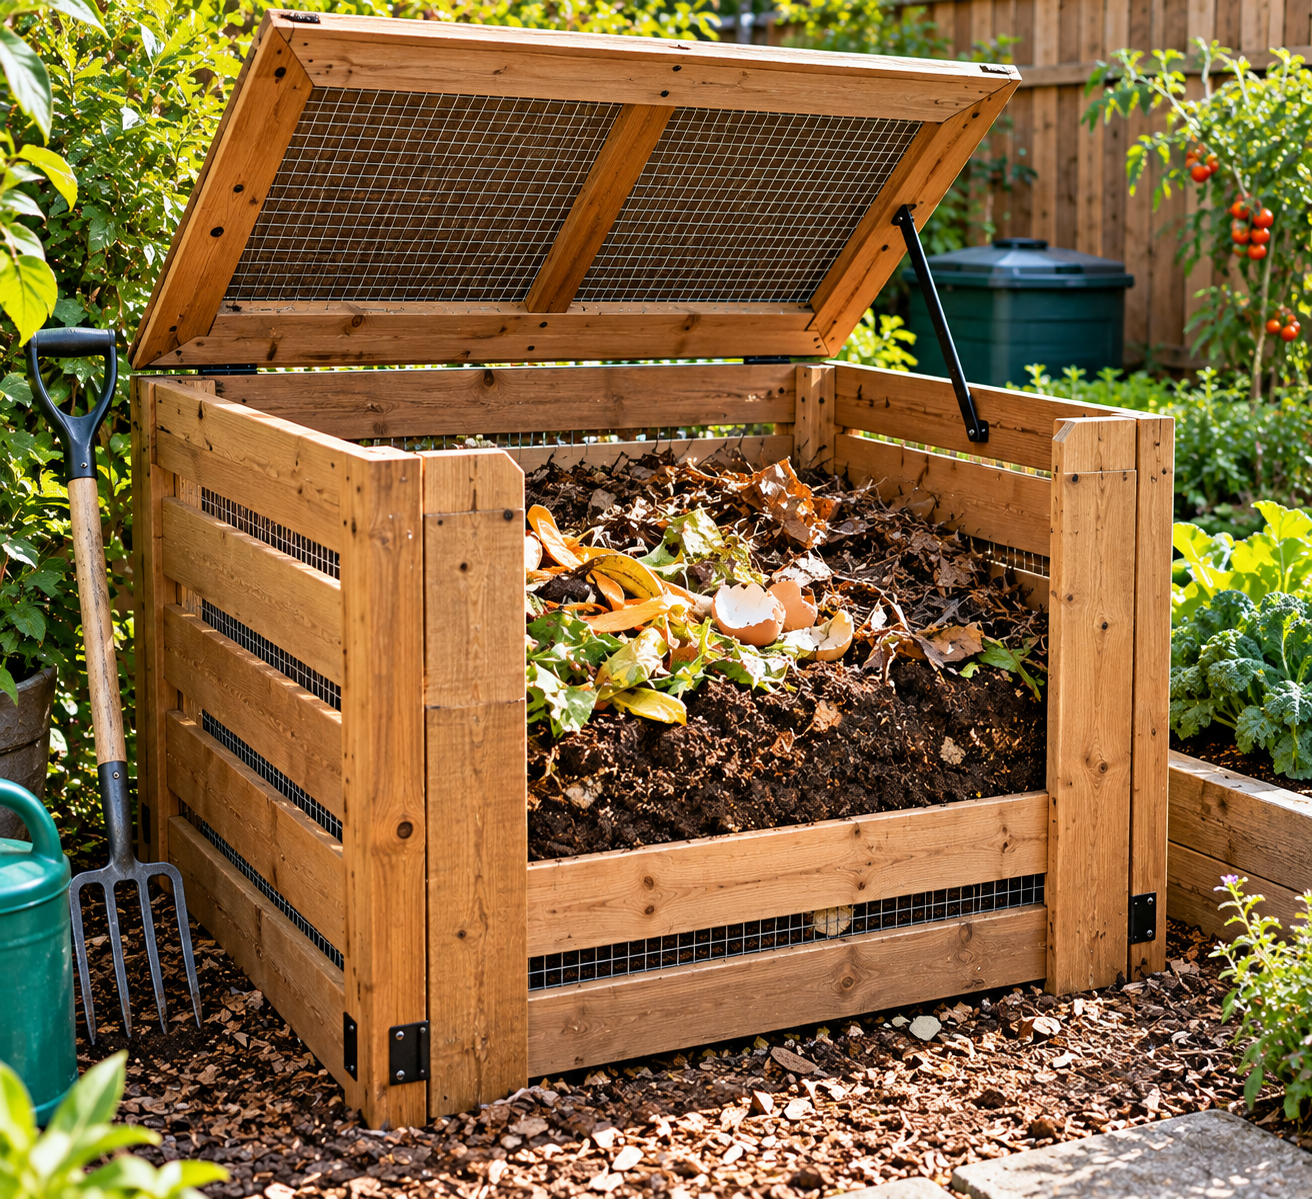
Size matters more than looks. A pile that is too small loses heat and breaks down slowly; commonly recommended guidance is a bin about one metre or three feet on each side, which holds enough material to warm up. Smaller bins still work, they just decompose more slowly.
A three-sided pallet bin is easy, but use heat-treated pallets (see the herb garden section). For a cleaner option, make a bin from four wooden frames wrapped with hardware cloth, or buy a plastic barrel and drill air holes around it. If rodents are an issue, line the bottom and sides with half-inch hardware cloth.
Set it on bare soil so worms and microbes can move in, close to the kitchen door so you will actually use it, in partial shade to avoid drying out.
The working rule is a mix of “browns” (dry leaves, shredded cardboard, straw) and “greens” (kitchen scraps, fresh grass clippings). Many guides suggest roughly two to three parts brown to one part green by volume as a starting point. If it smells like ammonia, add browns. If it is dry and nothing is happening, add greens and water.
Leave out meat, fish, dairy, oils and pet waste, which attract pests and carry pathogens. Expect finished compost in anywhere from a few months to a year, depending on how often you turn it and how finely the material is chopped.
9. Garden Edging That Keeps Grass Out of the Beds
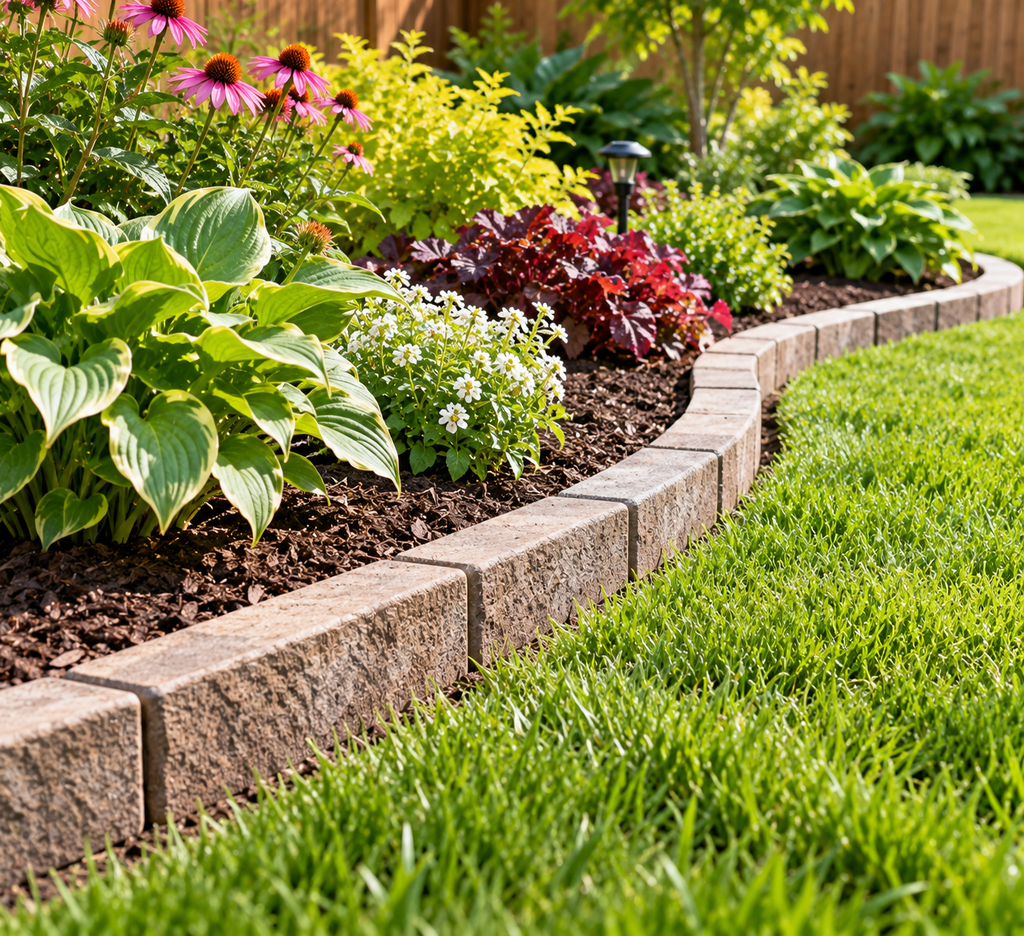
Edging has two jobs: keep mulch in and keep grass out. The right choice depends on the grass you have. Creeping grasses that spread underground, such as Bermuda grass, will go under a shallow border, so an edge needs to go deeper, often 10 centimetres or more, or you may be better with a metal edge or a maintained trench.
The cheapest option is a spade-cut edge: cut a vertical line along the bed and a sloped trench on the lawn side, about 5 to 8 centimetres deep. It looks sharp and costs nothing, but needs recutting once or twice a season.
Brick or stone edging is sturdier. Set the pieces in a shallow trench on a layer of compacted sand or gravel so they sit level and do not tilt after frost. If you plan to mow along it, set the top flush with or just below lawn level so a wheel can run over it.
Plastic edging is quick and flexible, but it tends to heave in freeze-thaw climates unless it is staked well. Metal edging is more durable and gives a thin, clean line, though its top edge can be sharp, so avoid it in paths where children or pets run.
Before digging, check for buried lines, and mark the curve with a garden hose or spray paint first. Curves are forgiving, straight lines show every wobble.
10. A Rock Garden That Starts With Drainage
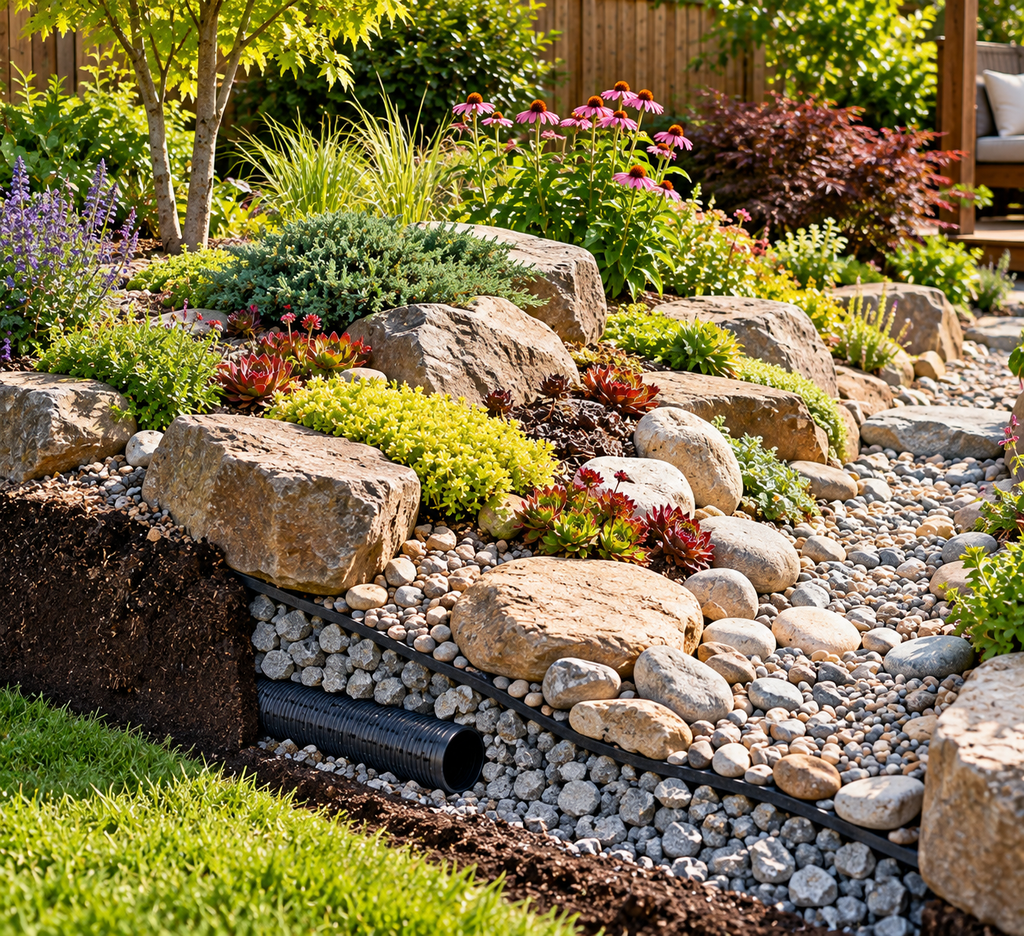
Rock gardens suit hot, dry or poor soil, or a slope where grass struggles. The main requirement is drainage, since most plants that belong in a rock garden die from wet roots, not drought.
If your soil is heavy clay, build up rather than dig down: a mound or raised bed of free-draining soil mixed with grit or coarse sand, then place the rocks. Bury the larger stones about a third of the way down so they look like natural outcrops, not decorations sitting on top.
Lift carefully. Rocks are heavy, so use your legs, a wheelbarrow and a plank ramp, and wear gloves and sturdy boots. For rocks too big to move, rolling them on pipes is easier than carrying.
Plants that tend to do well include sedum, sempervivum (houseleeks), creeping thyme, dianthus and ornamental oregano, though suitability varies by climate. Cover the soil between plants with a layer of gravel, which reduces weeds and keeps the crowns of alpine-type plants dry.
Weed before you plant. Perennial weeds such as bindweed and couch grass left in the soil come back through the stones and are painful to remove later.
11. Rainwater Collection That Does Not Breed Mosquitoes
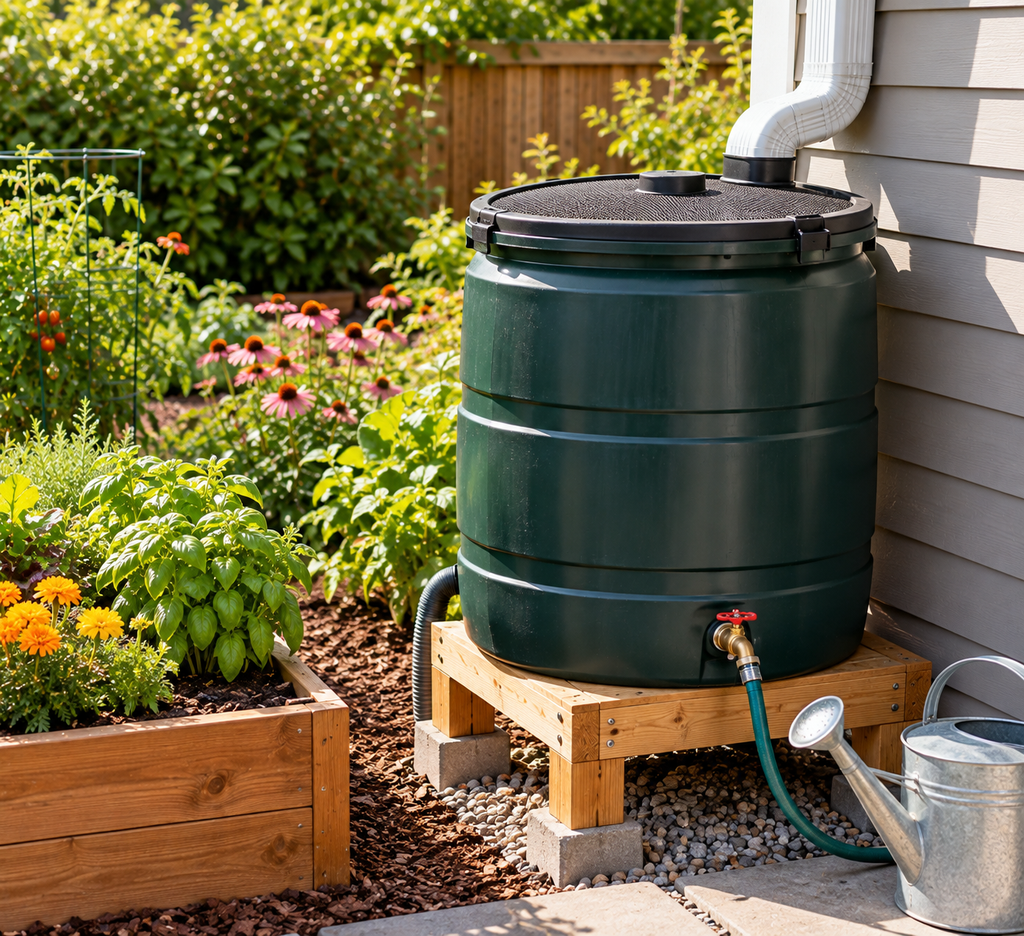
The simplest way to see why this is worth doing is to calculate it. One millimetre of rain falling on one square metre yields one litre of water. A 50-square-metre roof collects about 50 litres from a single millimetre of rain, so a 10-millimetre shower produces about 500 litres. In imperial terms, one inch of rain on 1,000 square feet yields roughly 600 gallons. A single barrel will fill very quickly, so an overflow route matters as much as the barrel itself.
A basic setup: a food-grade barrel (avoid containers that held chemicals), a downpipe diverter, a fine mesh screen over the inlet, a tap near the bottom for filling a watering can, and an overflow hose directed away from the foundation. Raise the barrel on a sturdy platform of concrete blocks, since water weighs 1 kilogram per litre and a full 200-litre barrel is heavy. Tap height matters: raising the barrel gives better flow and room to fit a can underneath.
Sealing the inlet is the most important detail. Mosquitoes can lay eggs in open water, so use a tight mesh and keep the lid closed.
Use caution with the water. Roof runoff can carry bird droppings, dust and residue from roofing materials, so most guidance treats it as suitable for ornamental plants and soil watering, not drinking. For vegetables, water the soil, not the leaves you will eat. Some regions regulate rainwater harvesting, including limits on volume or on how it can be used, so check local rules before installing.
12. A Butterfly Feeder That Actually Suits Butterflies
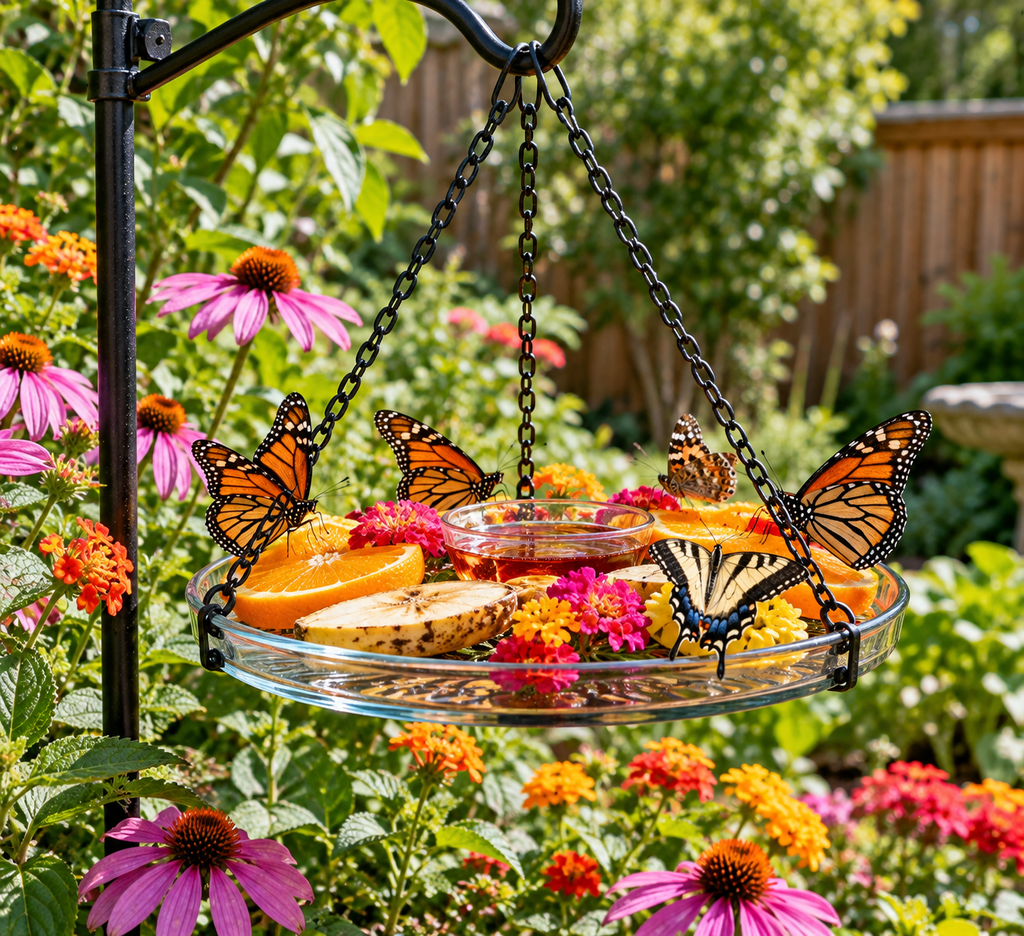
Copying a hummingbird feeder with sugar water rarely works well for butterflies. Many species prefer overripe fruit, tree sap and mineral-rich damp ground to thin nectar.
So the weekend build is a fruit feeder: a shallow plate or saucer hung from three strings or set on a stake, with slices of overripe banana, orange, watermelon or peach. A damp sponge also works. Set it in a sheltered, sunny spot out of strong wind, near plants butterflies already visit.
Change the fruit every day or two. It ferments, grows mould and draws flies, wasps and ants, so use an ant barrier on hanging strings if ants are an issue. Wasps and bees may visit, so keep the feeder away from seating areas.
Add a puddling station next to it: a shallow dish of damp sand or soil kept moist, sometimes with a tiny pinch of salt. Butterflies, mostly males, land on wet ground to take up minerals.
No feeder replaces plants. Butterflies need nectar flowers for adults and specific host plants for caterpillars. Which plants matter depends on what lives in your region, so look up local species before you plant. Avoid spraying insecticides nearby.
13. A Birdbath That Birds Will Actually Use
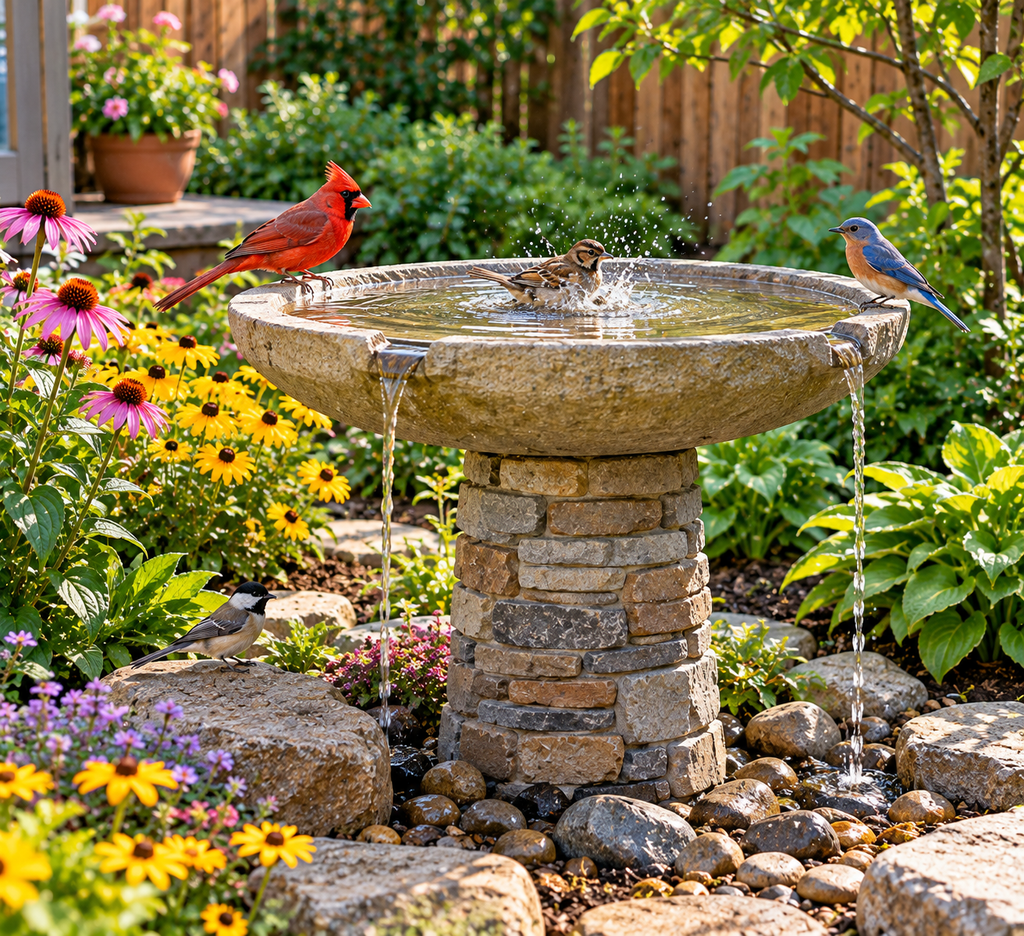
Birds prefer shallow water. A depth of about 2 to 5 centimetres (roughly an inch or two) at the edge, with a gentle slope toward the middle, suits most small songbirds. A deep, steep-sided basin is more likely to be ignored or even dangerous.
The easiest build is a large plant saucer set on an upturned flowerpot, or a shallow dish on a stack of bricks. Choose a rough surface, or add a few flat stones in the water so birds have grip. Unglazed terracotta is porous, so it loses water faster, and a glazed or plastic saucer holds it better.
Place it where birds can see approaching cats, ideally with a shrub or tree two or three metres away for quick escape. A site in dappled shade keeps the water cooler and slows algae.
Change the water every day or two in warm weather and scrub the basin every few days. Standing water becomes a mosquito nursery, and in a warm spell mosquito larvae can mature in about a week. Moving water, such as a small solar bubbler, discourages them.
In freezing weather, use a heated birdbath or break and refill ice. Never add antifreeze or any chemical to keep it from freezing: antifreeze is toxic to birds and other animals.
14. Garden Storage That Keeps Tools Dry and Findable
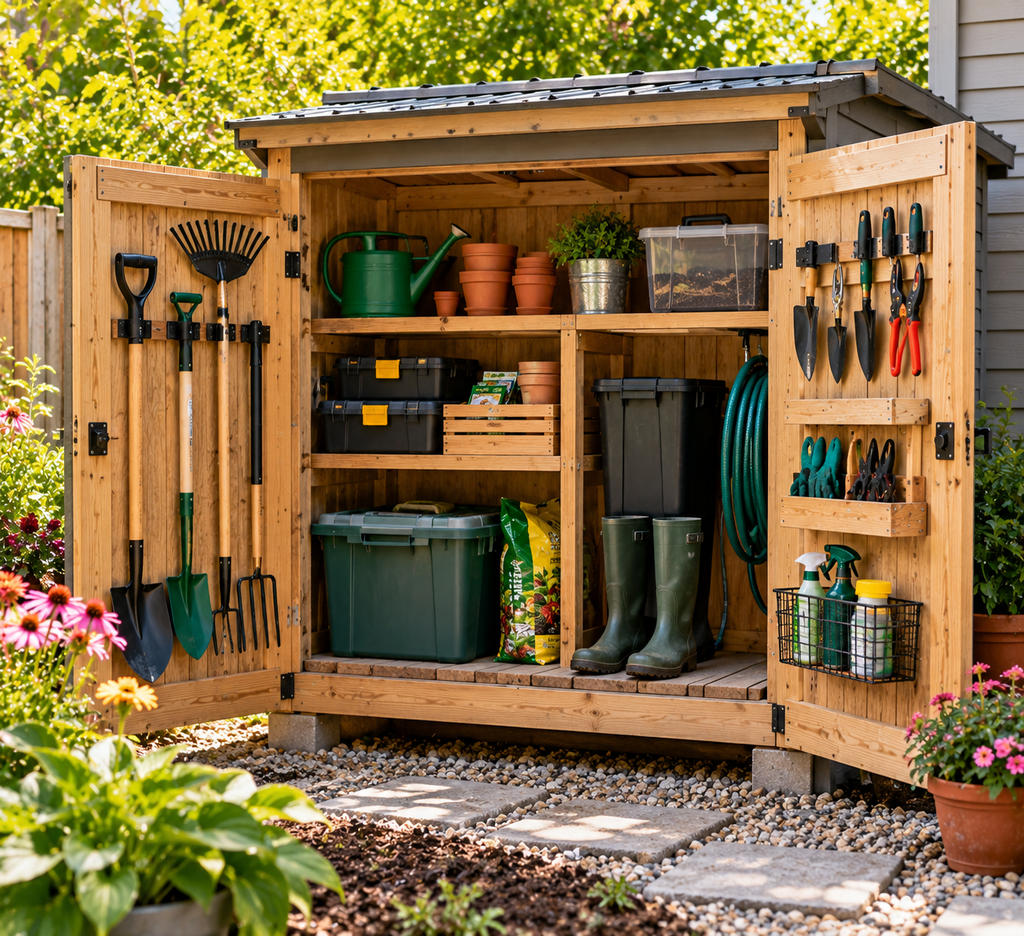
Tools wear out from damp more than from use. Rust on blades and rot on wooden handles come mostly from being left outside or stored in a damp shed. A weekend storage project aims to get tools off the floor, out of the rain, and visible.
The simplest version is a wall-mounted rack: a length of treated or sealed board fixed to studs or a fence post, with spring clips or long screws and hooks for long-handled tools. Allow a gap between tool heads, otherwise they tangle when you pull one out. Mount it high enough that the heads clear the ground and, if children are around, high enough that sharp edges are out of reach.
For small tools, fill a bucket with sand mixed with a little mineral oil and push trowels and shears into it after use. The sand scours and the oil lightly coats the metal. A word of caution: oily rags soaked with boiled linseed oil can self-heat and ignite, so avoid using it for this, and if you do use any oil-soaked rag, spread it flat to dry outdoors before disposing of it.
Keep fertilisers, pesticides and fuel in a locked, ventilated cabinet or a high shelf, away from children and pets and from tools that could rust from fumes. Check the product label for storage instructions, because some products must not freeze or must be kept away from heat.
A larger shed or deck box is a bigger job. In many areas, sheds above a certain size need a permit or must stay a set distance from boundaries, so check local rules before you build.
15. A Seed-Starting Station That Prevents Leggy Seedlings
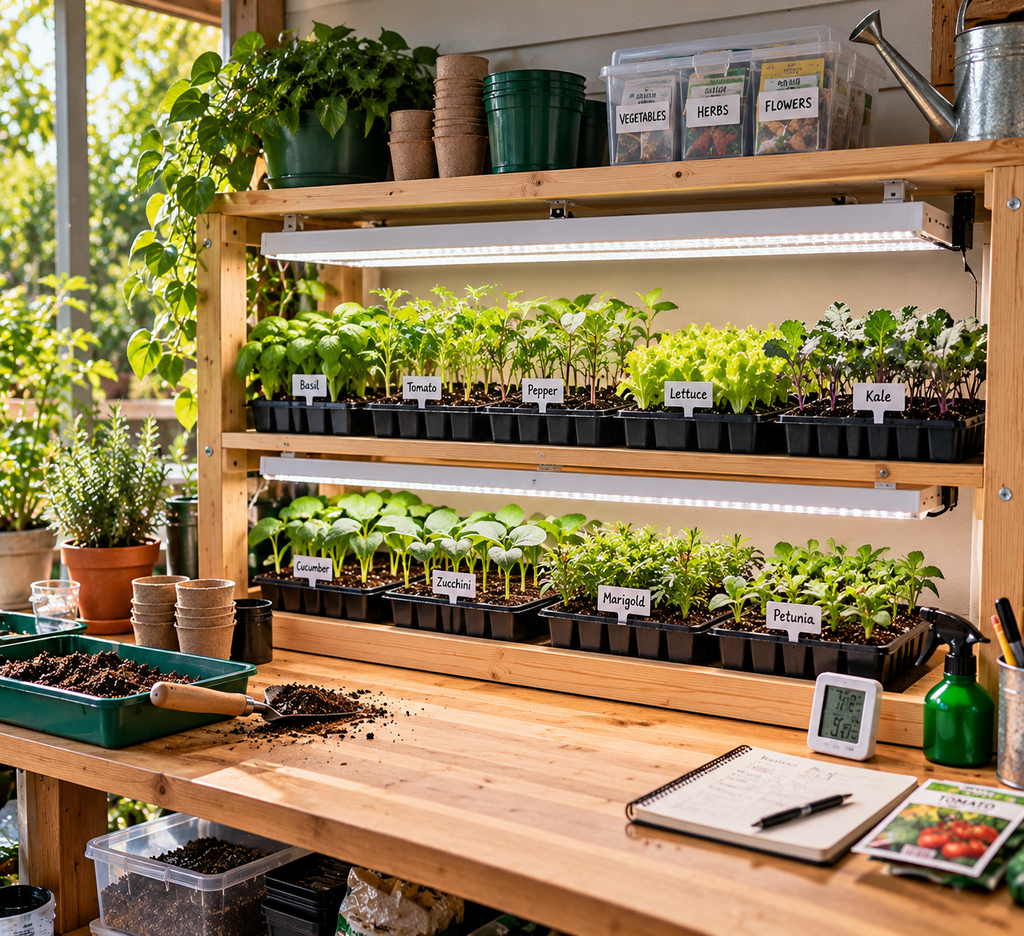
Seedlings on a windowsill often stretch toward the light and flop over. That leggy growth is a sign of insufficient light, not too much water or too little. A simple shelf with a light fixture can fix it.
Build or buy a sturdy shelving unit, then hang a full-spectrum LED or fluorescent shop light on chains so you can raise it as plants grow. Keep the light a few centimetres (about two to four inches) above the seedlings and run it for roughly 14 to 16 hours a day on a timer. Specific distances vary with the light’s strength, so follow the manufacturer’s guidance.
Use a sterile seed-starting mix instead of garden soil, which can carry fungi that cause damping-off, where seedlings collapse at the base. Bottom-water from a tray, and keep air moving with a small fan on low, which also strengthens stems. A heat mat helps warmth-loving crops such as peppers and tomatoes germinate; remove it once seeds sprout.
Timing is the part people miss. Work backwards from your last expected frost date. Tomatoes are often started six to eight weeks before, peppers eight to ten, and brassicas four to six, though seed packets give more accurate figures for each variety.
On the electrical side, plug everything into a GFCI-protected outlet, keep power strips off the floor and away from watering trays, and let cables loop down before they reach the socket so water cannot run along them.
Questions Readers Often Ask
Can I use treated lumber for planters or beds?
It depends on the treatment and what you plan to grow. Current residential treatments are generally considered acceptable for many uses, but guidance differs between agencies and gardeners. Many people avoid treated wood for edible beds and use cedar, untreated hardwood, or non-wood alternatives. If you are unsure, check the manufacturer’s information or your local extension service.
Which of these projects can wait until spring?
Projects that need soil to be workable, such as edging or a rock garden, are easiest when the ground is not frozen. Seed-starting stations, storage and hanging planters can happen at any point. A compost bin is worth building in autumn, since fallen leaves are free “browns.”
How do I stop pests from using my projects as a home?
Keep compost covered and free of meat or dairy. Seal rain barrels. Refresh feeders and fruit plates often. Gaps under a tool rack or storage box where rodents can nest are worth checking each season.
Key Takeaways
Pick the project whose payoff you will notice soonest, and decide its location before buying materials. Favor rot-resistant materials, plan for drainage in every container or bed, and treat anything involving water, electricity or stored chemicals with extra care. If a build involves a structure, buried utilities or rainwater rules, check local requirements first. Most of these can be done with one trip to the hardware store, and the ones that go wrong usually do so at the planning stage, not the building stage.

About Syprose Kiche
Syprose Kiche is the creator and writer behind My Besuited Home, a practical home and garden website covering DIY projects, gardening, lawn care, landscaping, home improvement, and outdoor living. She focuses on turning everyday homeowner questions into clear, practical guides backed by careful research and useful real-world considerations.