
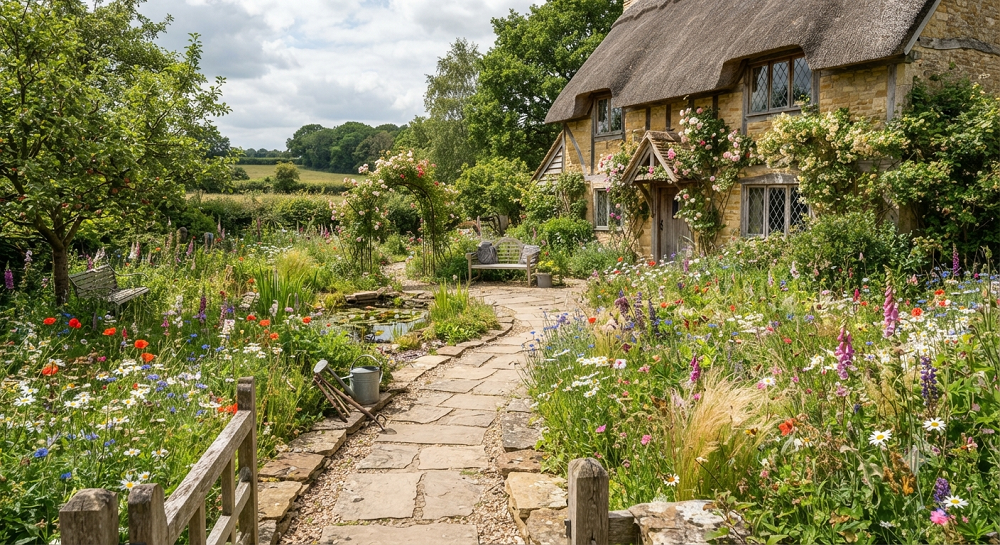
My neighbor asked me last July why her cottage garden looked like a crime scene while mine was still blooming through a stretch of 95-degree days with zero rain. The answer was simple: her garden was gorgeous on paper and completely wrong for the weather we actually get now.
Cottage gardens have a reputation problem. People picture cascading roses, thirsty delphiniums, and a hose running non-stop from May to September. That version of the cottage garden belongs in a cooler, wetter climate than most of us are dealing with these days. The good news is you can keep the messy, romantic, overflowing look without babysitting a sprinkler system all summer.
I’ve redesigned my own front and back beds three separate times chasing this balance, and I’ve helped friends rework theirs too. Below are seven layouts that deliver that classic cottage feel — layered heights, informal drifts, a little bit of chaos — while actually surviving drought. I’ll walk you through what to plant, how to arrange it, and where each layout tends to fall apart if you’re not careful.
What Makes a Cottage Garden Layout Drought-Tolerant Anyway
Before we get into specific layouts, it helps to understand what separates a water-guzzling cottage garden from one that shrugs off dry spells.
A drought-tolerant cottage garden relies on plants with deep taproots, silvery or fuzzy foliage, and a Mediterranean or prairie origin story instead of an English countryside one. Think lavender, yarrow, and Russian sage instead of hydrangeas, astilbe, and delphiniums. The layout still uses that classic cottage principle of dense, layered planting with no bare soil showing, but the plant palette does the heavy lifting.
Soil prep matters just as much as plant choice. I learned this the hard way after planting a gorgeous drought-tolerant bed straight into heavy clay and watching half of it rot at the roots during a wet spring. Most drought-tolerant plants hate soggy feet even more than they hate dry spells, so you need sharp drainage — amend with grit, coarse sand, or raise the bed a few inches.
Grouping plants by water need, sometimes called hydrozoning, is the other secret. If you tuck one thirsty plant into a bed full of drought lovers, you’ll end up watering the whole bed to keep that one plant alive, which defeats the purpose. Every layout below keeps water needs grouped together on purpose.
1. The Gravel Garden Cottage Border
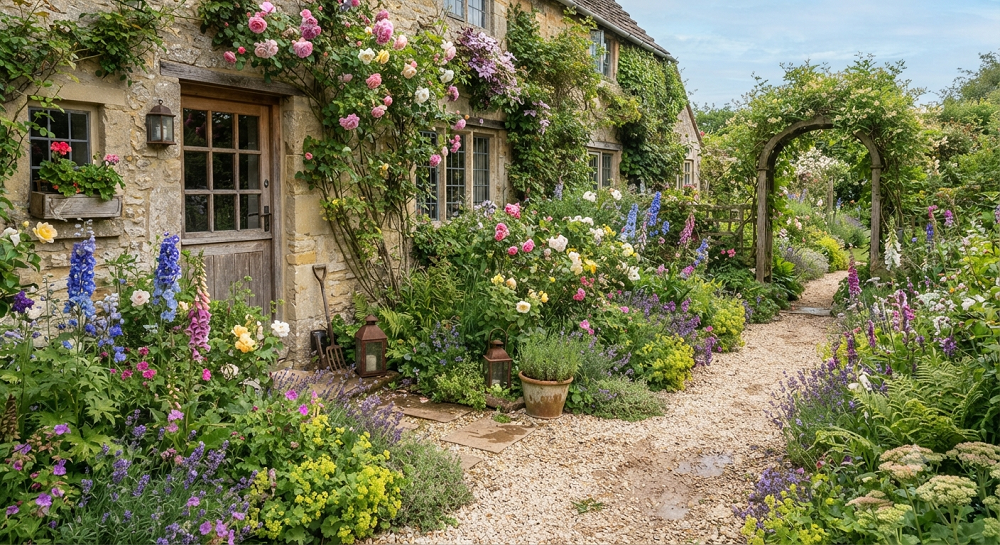
This is the layout I recommend most often to people who are drought-gardening for the first time, because gravel does about 70% of the work for you.
Instead of traditional mulch or bare soil, you spread a two-to-three-inch layer of pea gravel or crushed granite across the whole bed, then plant directly into it. The gravel reflects heat away from plant crowns, stops weeds cold, and lets water drain instantly instead of pooling around roots. It also gives that slightly wild, sun-baked cottage look that mulch just can’t replicate.
For plants, lean on lavender, catmint, sedum, and ornamental alliums planted in loose, informal drifts rather than straight rows. Let a few self-seeders like California poppies or verbena bonariensis wander through the gaps. That self-seeding habit is actually what gives gravel gardens their cottage charm over time — the layout gets looser and more natural every year instead of staying static.
Height variation is what sells the cottage look here. Put your tallest plants like verbena bonariensis or Russian sage toward the back or center, then step down to catmint and lavender, and finish with low sedum or thyme spilling over the gravel edge. I planted my first gravel border in a straight line by height and it looked like a corporate landscaping job. The second attempt, I scattered heights in loose clusters instead, and it finally read as “cottage” instead of “office park.”
One quick side note: gravel gardens look sparse for the first year while plants establish their root systems. Don’t panic and overplant to fill the gaps — that’s the mistake that leads to overcrowding and rot two years down the line.
2. The Mediterranean Herb Cottage Bed
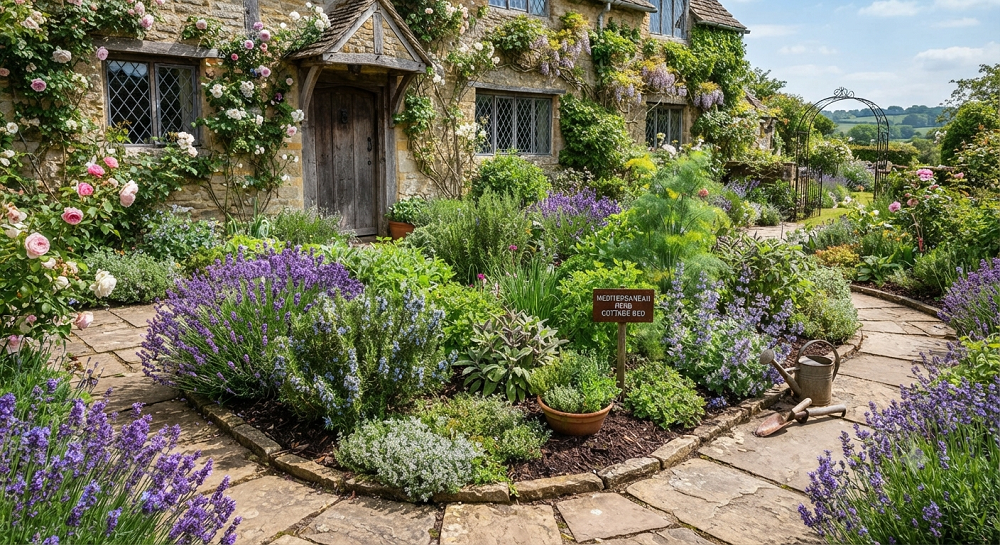
If you cook at all, this layout earns its keep twice — once as a beautiful border and once as your spice rack.
Rosemary, thyme, oregano, sage, and lavender form the backbone here, and every single one of them is bred by evolution to survive baking hillsides with almost no water. Arrange rosemary as your anchor shrub at the back or corner of the bed since it gets the biggest, then work forward with sage and lavender at mid-height, finishing with creeping thyme and oregano along the front edge where they can spill over a path or stone border.
The cottage feel comes from letting these herbs grow a little wild instead of clipping them into tidy meatballs. I let my rosemary get leggy and sprawling on purpose because a pruned, ball-shaped rosemary looks like it belongs outside a chain restaurant, not in a cottage bed. Sage flowers are a bonus you don’t want to miss — the purple spikes attract bees and pull double duty as a filler flower among your foliage.
Mix in a few classic cottage flowers that share the same dry, sunny preferences: yarrow, coneflower, and blanket flower all thrive in the same conditions as Mediterranean herbs and add color that pure herb beds sometimes lack. This keeps the layout from reading as “herb garden” and firmly in “cottage garden” territory.
The real advantage of this layout is that it gets better with neglect. Herbs like rosemary and thyme actually develop stronger flavor and denser growth habits when they’re a little stressed for water, so skipping a week of watering here isn’t a problem — it’s practically the goal.
3. The Prairie-Style Drift Cottage Garden
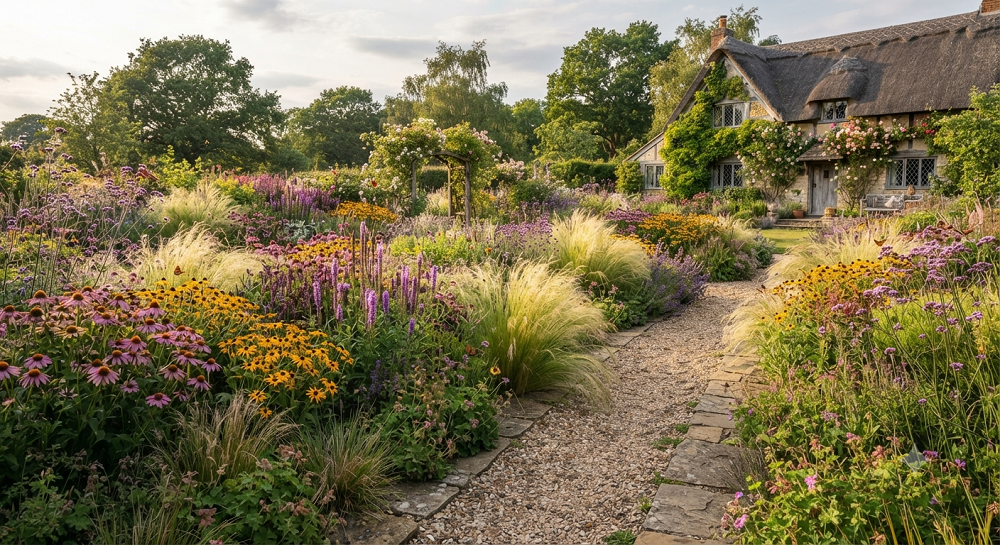
This layout borrows from prairie planting design, where big sweeping drifts of a single plant blend into the next drift instead of individual specimens dotted around like furniture.
Pick five or six drought-tolerant perennials — coneflower, black-eyed Susan, Russian sage, blazing star, and little bluestem grass work well together — and plant each in a loose, irregular drift of seven to fifteen plants rather than scattering single plants throughout the bed. The drifts should have soft, wavy edges that bleed into their neighbors instead of hard lines.
What makes this drought-friendly is that most prairie natives evolved with taproots that plunge several feet down, well below where surface watering ever reaches. Once established, usually after their first full growing season, these plants pull moisture from deep in the soil that shallow-rooted garden plants simply can’t access. That’s the whole trick.
Grasses are the unsung hero of this layout and I think people skip them way too often. Little bluestem and prairie dropseed add movement and a soft, hazy texture between the bold perennial drifts, and they turn gorgeous copper and gold colors in fall when everything else is fading. Without grass texture woven through, a prairie-style bed can look like a bunch of flowers standing at attention instead of a flowing cottage scene.
Give this layout room to breathe. Prairie drifts need more square footage than a typical cottage bed to really work — I’d say a minimum of 100 square feet before the drift effect reads properly. In a small yard, scale this down to three drifts instead of six and keep the plant list tighter.
4. The Vertical Layered Cottage Garden for Small Spaces
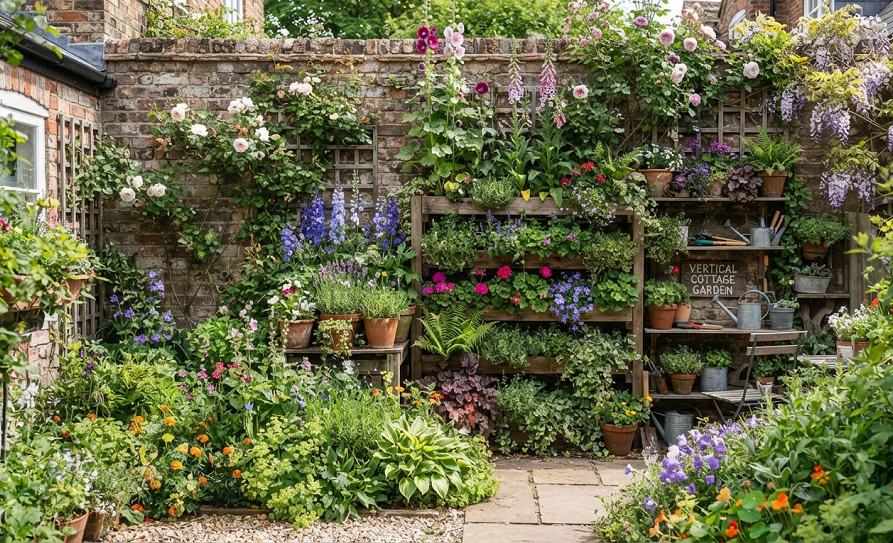
Not everyone has a sprawling yard, and this layout is my go-to recommendation for anyone working with a narrow side yard or a small front bed.
The idea is to stack height instead of spreading width, using a trellis, obelisk, or low fence as the backbone of the design. Train a drought-tolerant climber like a native clematis variety or climbing rose bred for dry climates up the vertical structure, then layer shorter drought lovers in front — salvia, catmint, and dwarf yarrow work great for the middle layer, with creeping thyme or sedum as a groundcover at the very front.
Containers do a lot of work in this layout too. I keep large terra cotta pots of agave and dwarf lavender staggered at different heights along a narrow side path, and it creates that layered cottage look in a space that’s barely three feet wide. Terra cotta itself matters here — it’s porous and breathes, so roots don’t sit in soggy soil the way they can in glazed or plastic pots after a rainstorm.
Vertical layering also solves a real drought problem: shading the soil. When you stack plants at multiple heights, the taller layers cast partial shade on the soil and shorter plants below, which cuts down on evaporation significantly compared to a flat, single-height bed baking in full sun all day.
I’ll be honest, this layout takes more maintenance in year one than the others on this list because you’re training climbers and managing containers, which need more frequent watering than in-ground plants regardless of drought tolerance. It pays off by year two once the climbing structure fills in, but don’t expect a “plant it and forget it” experience right out of the gate.
5. The Rock and Succulent Cottage Garden
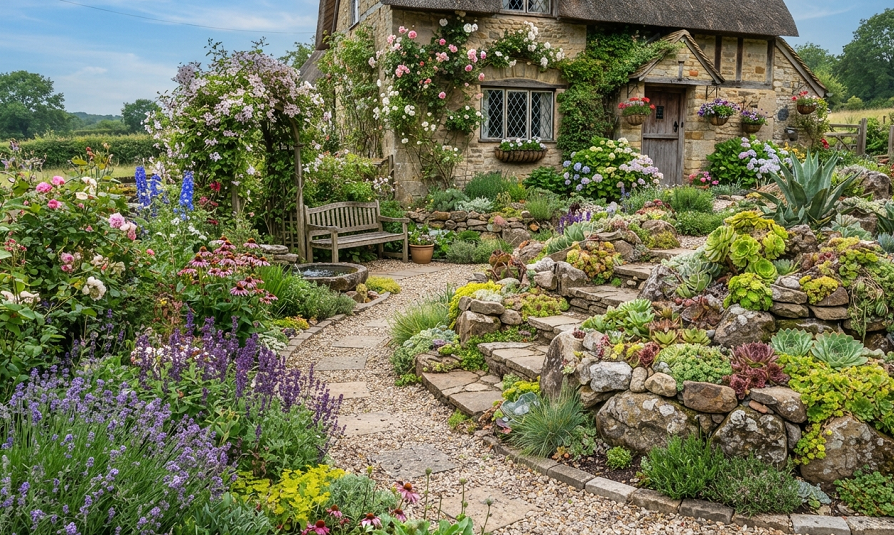
This one surprises people because succulents don’t usually get associated with cottage style, but hear me out.
Use large, irregular boulders or flat fieldstones as the structural backbone, tucked into the bed at slightly different heights like they’ve always been there. Plant hens and chicks, ice plant, and low sedum varieties directly in the pockets and crevices around the stones, then add taller drought-tolerant flowers like penstemon or gaura in the gaps between rock groupings for that classic cottage softness.
The rocks aren’t just decoration. They absorb heat during the day and release it slowly overnight, which keeps root zones warmer in spring and extends the growing season for tender succulents. They also create dozens of microclimates within a single small bed — the north side of a boulder stays cooler and slightly moister than the south side, and smart plant placement takes advantage of that.
What sells this as “cottage” rather than “desert landscaping” is the plant density and the informal arrangement. Skip the neat rows of matching succulents you see in modern xeriscaping. Instead, let hens and chicks colonize the gaps between stones unevenly, let some gaura self-seed into cracks, and resist the urge to space everything with a ruler. Cottage style has always been about abundance, and that rule doesn’t disappear just because you swapped roses for rocks.
This layout genuinely thrives on less water than almost anything else on this list once it’s established, which took me by surprise the first time I built one. My rock and succulent bed goes three to four weeks without supplemental water during a normal summer here and still looks better than beds I water twice a week.
6. The Wildflower Meadow Cottage Garden
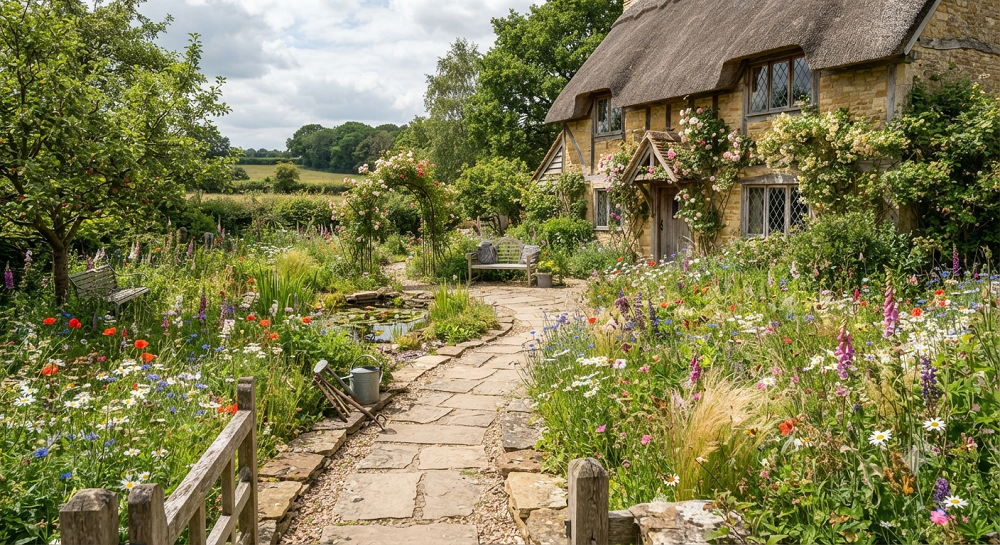
If you want maximum color with minimum structure, a wildflower meadow layout gives you that classic cottage “overflowing” feeling using almost entirely self-sufficient annuals and perennials.
Choose a regional wildflower seed mix suited to your climate zone rather than a generic national blend — this single decision makes or breaks the drought tolerance of the whole bed, since a mix designed for a wetter region will include species that just can’t handle a dry summer. California poppy, cosmos, coreopsis, and native asters show up in most dry-climate mixes and reliably deliver season-long color.
Broadcast the seed instead of planting in rows, and rake it lightly into loosened soil in fall or early spring depending on your zone. The randomness of broadcast seeding is exactly what gives a meadow its natural, unplanned cottage look — you genuinely cannot replicate this effect by placing individual plants by hand, I’ve tried.
Mowing timing matters more than people expect. Most meadow mixes need to stay unmowed until the annuals have fully set and dropped seed for next year, usually late fall, or you’ll lose the self-sustaining cycle that makes this layout low-maintenance in the first place. I mowed mine too early my first year out of habit and spent a fortune reseeding the following spring.
Meadows do need consistent moisture during their first six to eight weeks of germination even if the mature plants will be drought-tolerant later. Budget for that early watering commitment, then step back almost entirely for the rest of the season once seedlings are established.
7. The Xeric Cottage Garden with Native Perennials
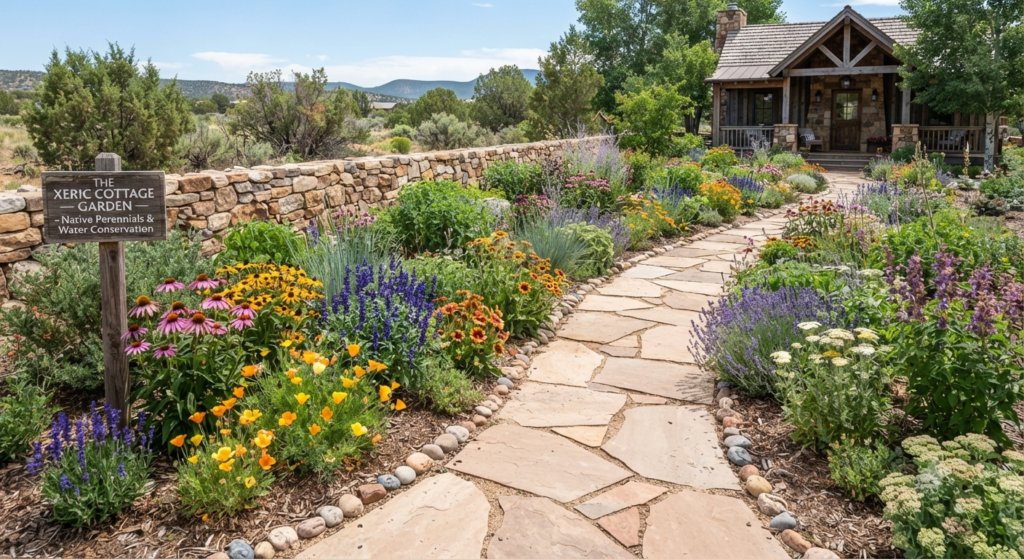
This is the layout I’d point to if someone told me they wanted the absolute lowest water bill possible while still keeping cottage garden charm.
Build the entire bed around plants native to your specific region rather than drought-tolerant plants imported from other dry climates. A native plant is adapted to your exact rainfall pattern, soil type, and local pollinators in a way that even a “drought-tolerant” nursery label can’t guarantee. A quick search for your state’s native plant society usually turns up a solid regional list to start from.
Layer your natives the same way you would any cottage bed: tall native grasses or asters at the back, mid-height flowering perennials like native milkweed or bee balm varieties bred for dry soil in the middle, and low native groundcovers like creeping phlox at the front edge.
Native plant beds attract a noticeably wider range of pollinators and beneficial insects than beds full of imported ornamentals, since local bees, butterflies, and birds evolved alongside these specific plants. I noticed a real jump in butterfly activity within one season of converting a corner of my yard to natives, which wasn’t something I expected to happen that fast.
The one trade-off worth knowing about upfront is that native plant beds often look scrappy and unimpressive for the first full year while root systems establish underground before top growth catches up. I’ve found that this is a total dealbreaker for people who want instant curb appeal, even though it looks fantastic on Pinterest by year two. If you need immediate visual payoff, mix in a few fast-growing drought-tolerant annuals during year one to fill the gaps while the natives get established.
Real Talk: What Actually Goes Wrong With Drought-Tolerant Cottage Gardens
Here’s where I tell you the stuff the pretty photos don’t show you.
Overwatering kills more drought-tolerant plants than drought does. This is the single biggest mistake I see, hands down. People plant lavender or sedum and then keep watering it on the same schedule as their old thirsty garden out of habit, and the plants rot from the roots up within a season. Once these plants are established, cut back watering dramatically — most only need supplemental water during extended heat waves, not on a weekly schedule.
Year one is rough, and that’s normal. Every single layout on this list needs consistent watering for the first several months while root systems establish, even the toughest natives and succulents. If you’re expecting a low-water garden to need zero water from day one, you’re setting yourself up for disappointment and probably some dead plants. Budget for regular watering the first summer, then taper off.
Gravel and rock mulches trap heat that can scorch tender new growth. I’ve cooked a few seedlings by planting too early in spring when gravel was still absorbing brutal midday sun. Wait until plants have a bit of size on them before tucking them into a gravel or rock bed, or provide temporary shade cloth for the first few weeks.
Self-seeding plants can turn from charming to invasive fast. California poppies, verbena bonariensis, and some yarrow varieties will happily take over an entire bed if you let every seedling grow. I edit my self-seeders aggressively every spring, pulling the majority of volunteers and keeping only the ones in good spots. Skip this step and your carefully designed layout turns into a monoculture within three years.
Not every “drought-tolerant” label means what you think it means. Plant tags can be generous with that phrase. Always cross-check with your specific climate zone and rainfall numbers before trusting a nursery tag blindly, because a plant labeled drought-tolerant for the Pacific Northwest might struggle badly in a hot, dry Southwest summer.
Clay soil ruins more drought gardens than actual drought does. If your soil holds water like a sponge, even the toughest drought-tolerant plants will sit in soggy conditions and rot. Test your drainage before you plant a single thing — dig a hole, fill it with water, and see how long it takes to drain. If it’s still full after a few hours, you need to amend before you plant, not after you’ve lost half your garden.
Final Thoughts
A drought-tolerant cottage garden isn’t about giving up the romantic, overflowing look you fell in love with in the first place. It’s about picking plants that were built for tough conditions and arranging them with the same generous, layered spirit that makes cottage gardens feel alive instead of stiff. Start with one bed, get comfortable with how these plants behave in your specific yard, and expand from there once you’ve got a feel for it.
Which of these seven layouts fits your space best, and what’s actually growing in your yard right now? Drop a comment below and let me know what you’re working with — I read every one and I’m always curious what’s thriving (or struggling) in gardens outside my own.

About Syprose Kiche
Syprose Kiche is the creator and writer behind My Besuited Home, a practical home and garden website covering DIY projects, gardening, lawn care, landscaping, home improvement, and outdoor living. She focuses on turning everyday homeowner questions into clear, practical guides backed by careful research and useful real-world considerations.