
Summer is a time for fun in the sun, carefree vibes, and basking in the warm glow of long days. It’s a season that evokes feelings of happiness, relaxation, and a yearning for the outdoors. And what better way to celebrate the arrival of summer than by adding a touch of its vibrancy to your home?
Decorating your front door or living space with a seasonal wreath is a simple yet impactful way to embrace the spirit of summer. But store-bought wreaths can be expensive, and sometimes you just want something unique that reflects your personal style. This is where the magic of DIY comes in!
This article presents 27 fun and easy DIY summer wreath ideas that are perfect for unleashing your creativity and adding a touch of summertime cheer to your home. So, gather your crafting supplies, put on some upbeat music, and get ready to transform your doorstep or living space with a homemade summer wreath!
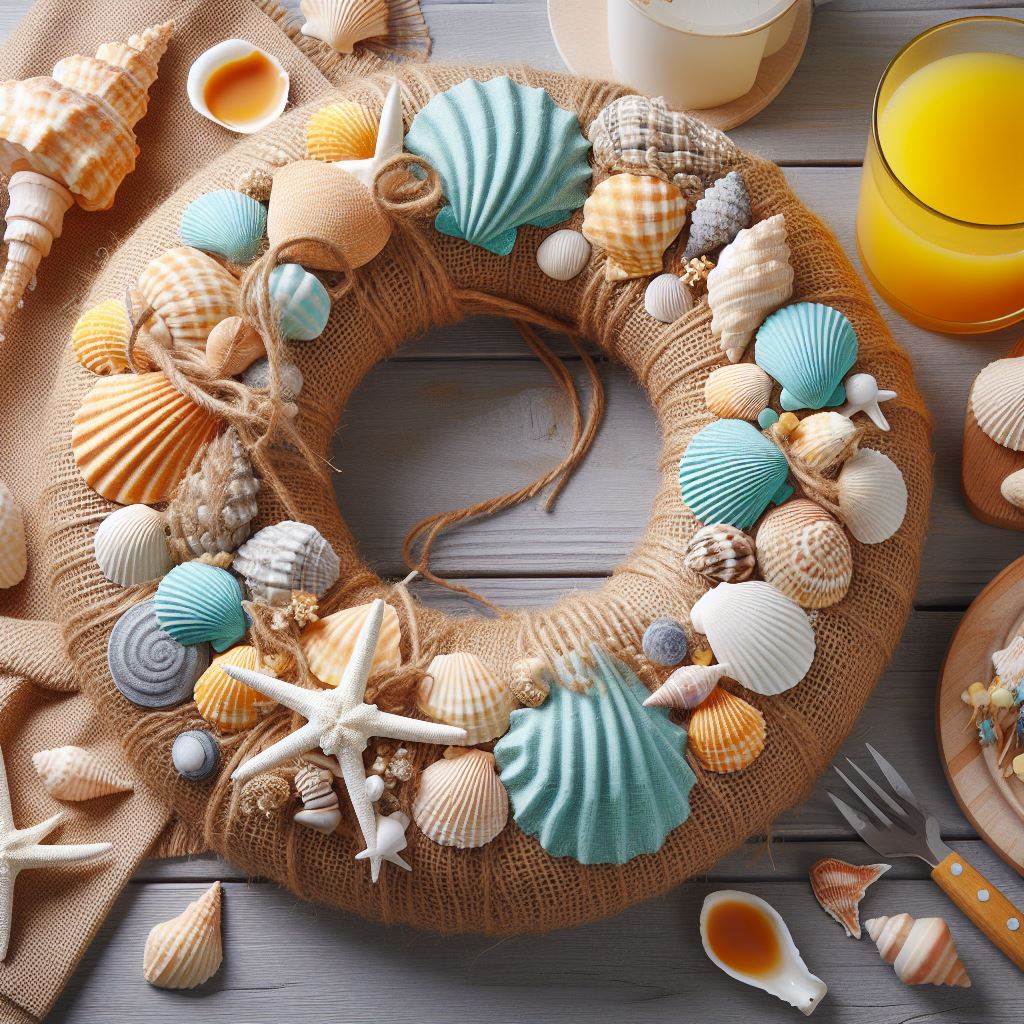
1. The Classic Burlap and Seashell Wreath
There’s something undeniably charming about a seashell wreath. It evokes memories of beach vacations, the sound of crashing waves, and the feel of warm sand between your toes. This classic summer wreath is perfect for bringing a touch of the seashore to your doorstep.
Materials:
- Burlap ribbon (at least 3-4 inches wide and several yards long)
- Seashells (collected from a beach trip or purchased at a craft store)
- Hot glue gun and glue sticks
- Wire wreath frame (size of your choosing)
Instructions:
- Begin by wrapping the burlap ribbon around the wire wreath frame. Start at the inner ring of the frame and secure the end of the ribbon with hot glue. Continue wrapping the ribbon tightly around the frame, overlapping slightly with each turn. Use hot glue periodically to secure the ribbon in place.
- Once you’ve completely covered the wire frame with burlap, it’s time to add the seashells! Arrange the seashells on the burlap base in a way that pleases you. You can create a cluster in the center, scatter them evenly around the wreath, or follow a specific pattern.
- Once you’re happy with the arrangement, use your hot glue gun to securely attach each seashell to the burlap base.
- (Optional) Feeling creative? Add other summery elements to personalize your wreath! Small starfish, colorful twine tied in bows, or miniature painted wooden boats can all add a unique touch.
2. The Vibrant Tissue Paper Flower Wreath
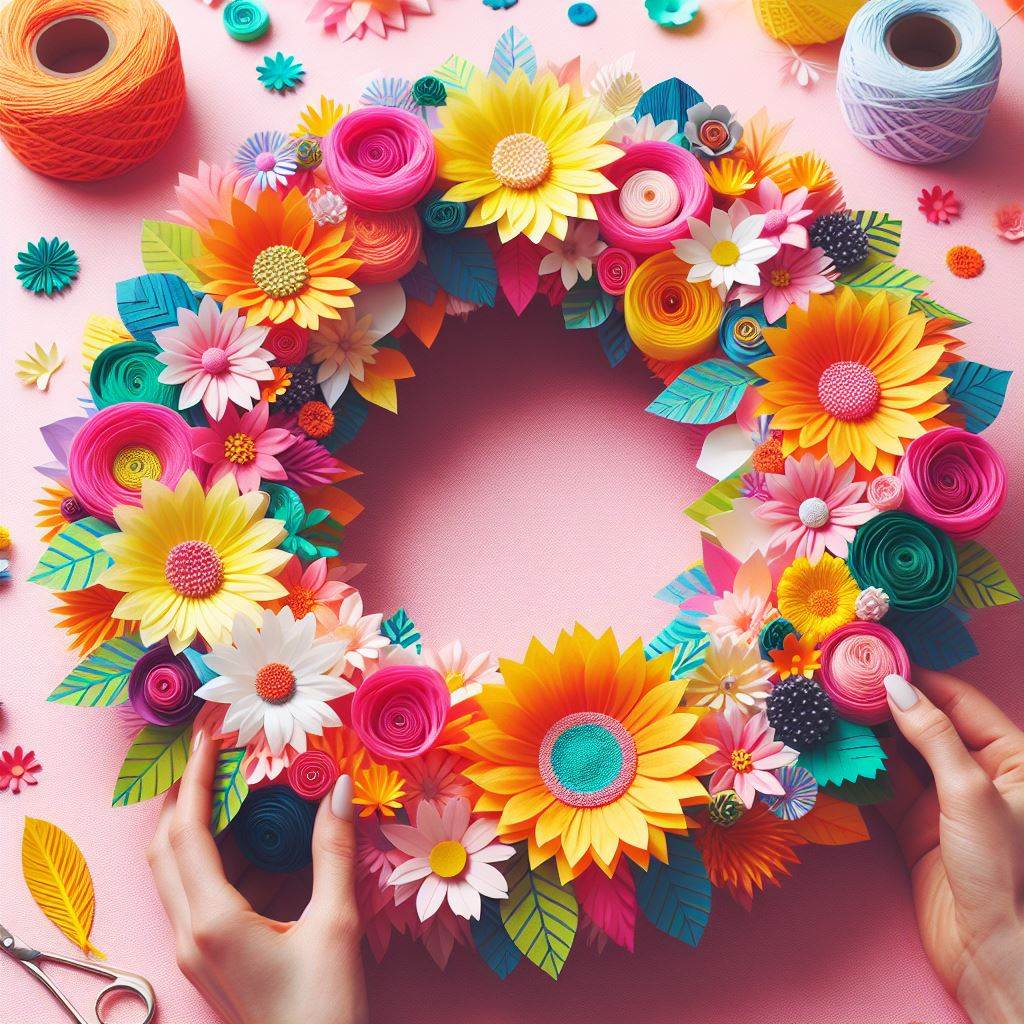
Looking for a burst of color and a touch of whimsy? This vibrant tissue paper flower wreath is a fun and cheerful option for your summer decor.
Materials:
- Colorful tissue paper (various summery colors)
- Scissors
- Pipe cleaners (green or brown for stems)
- Floral wire
- Wire wreath frame (size of your choosing)
Instructions:
- Cut out circles or squares of various sizes from your colorful tissue paper. The size of the circles or squares will determine the size of your finished flowers.
- Transform the tissue paper circles or squares into simple flowers! Place a single layer of tissue paper in the palm of your hand. Gently gather the center of the tissue paper with your fingers, creating a small puff in the middle. Pinch the base of the puff to secure it and twist the base tightly with a pipe cleaner.
- Repeat step 2 to create several tissue paper flowers in different colors and sizes.
- Now it’s time to assemble your wreath! Cut floral wire into pieces about 6 inches long. Attach each tissue paper flower to a piece of floral wire by wrapping the wire around the base of the flower stem (pipe cleaner) and twisting it securely.
- Secure the floral wire with the attached tissue paper flower onto the wire wreath frame. You can space the flowers evenly around the frame or create a cluster in the center. Repeat this step until the entire wreath frame is covered in colorful tissue paper flowers.
3. The Mason Jar Lid and Fairy Light Wreath
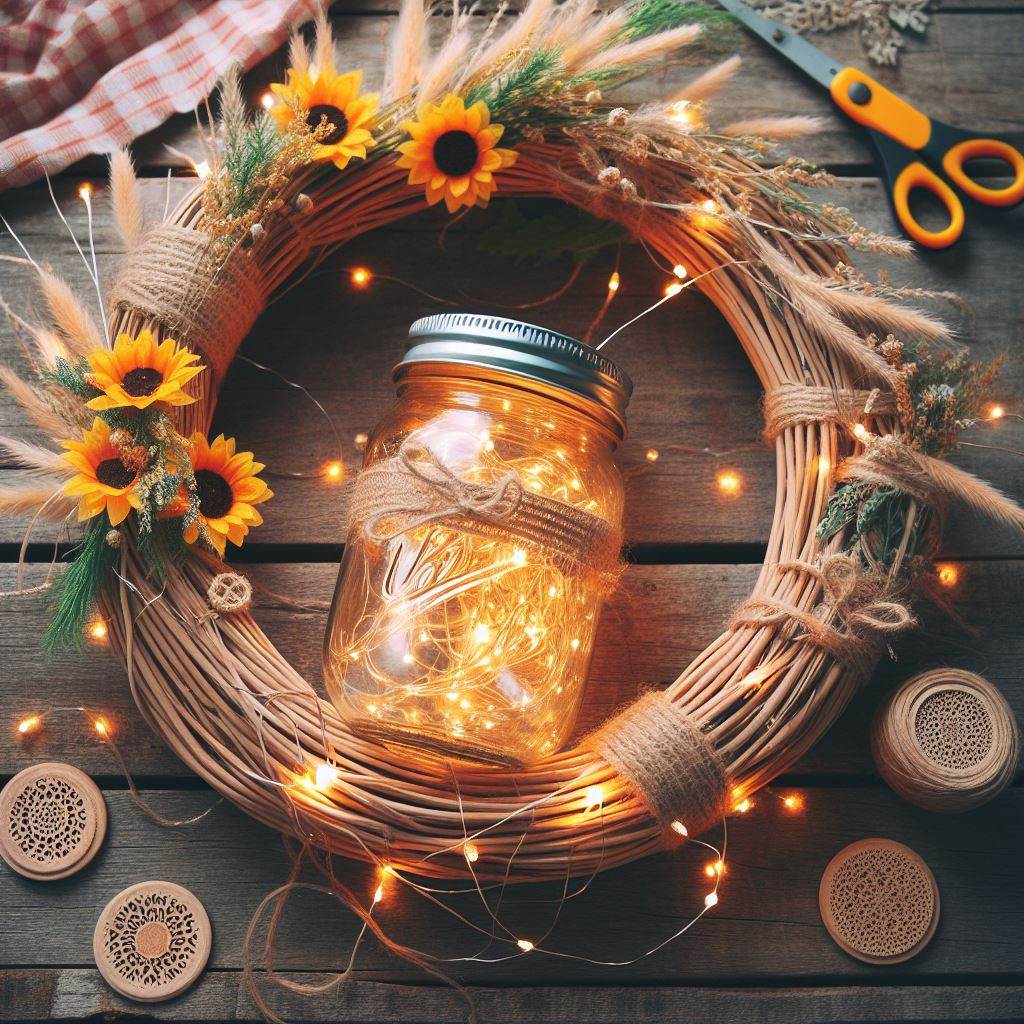
Looking for a unique and upcycled way to celebrate summer? This mason jar lid and fairy light wreath is a creative twist on traditional summer decor.
Materials:
- Mason jar lids (various colors, painted if desired) – You can upcycle lids from old jars or purchase them pre-painted at craft stores.
- Hot glue gun and glue sticks
- Fairy lights (battery-operated or plug-in, depending on your preference)
- Wire wreath frame (size of your choosing)
Instructions:
- If you’re upcycling old mason jar lids, paint them in various summery colors like yellow, blue, green, or pink. Let the paint dry completely. If you’re using pre-painted lids, great!
- Now it’s time to assemble your wreath.
- Begin by arranging the mason jar lids on a flat surface to visualize the overall design. You can create a random pattern, cluster them in the center, or arrange them in a specific color sequence.
- Once you’re happy with the layout, use your hot glue gun to secure the mason jar lids onto the wire wreath frame. Leave a small gap between each lid to allow the fairy lights to shine through later.
- Now comes the magical part – the fairy lights! Carefully wrap the fairy lights around the wire wreath frame, weaving them in between the mason jar lids. The lights should be positioned behind the lids so they illuminate them from within when turned on.
- Secure the end of the fairy light strand with hot glue or by tucking it under one of the mason jar lids.
- (Optional) If using battery-operated fairy lights, hide the battery pack behind the wreath or secure it with a ribbon or twine bow for easy access.
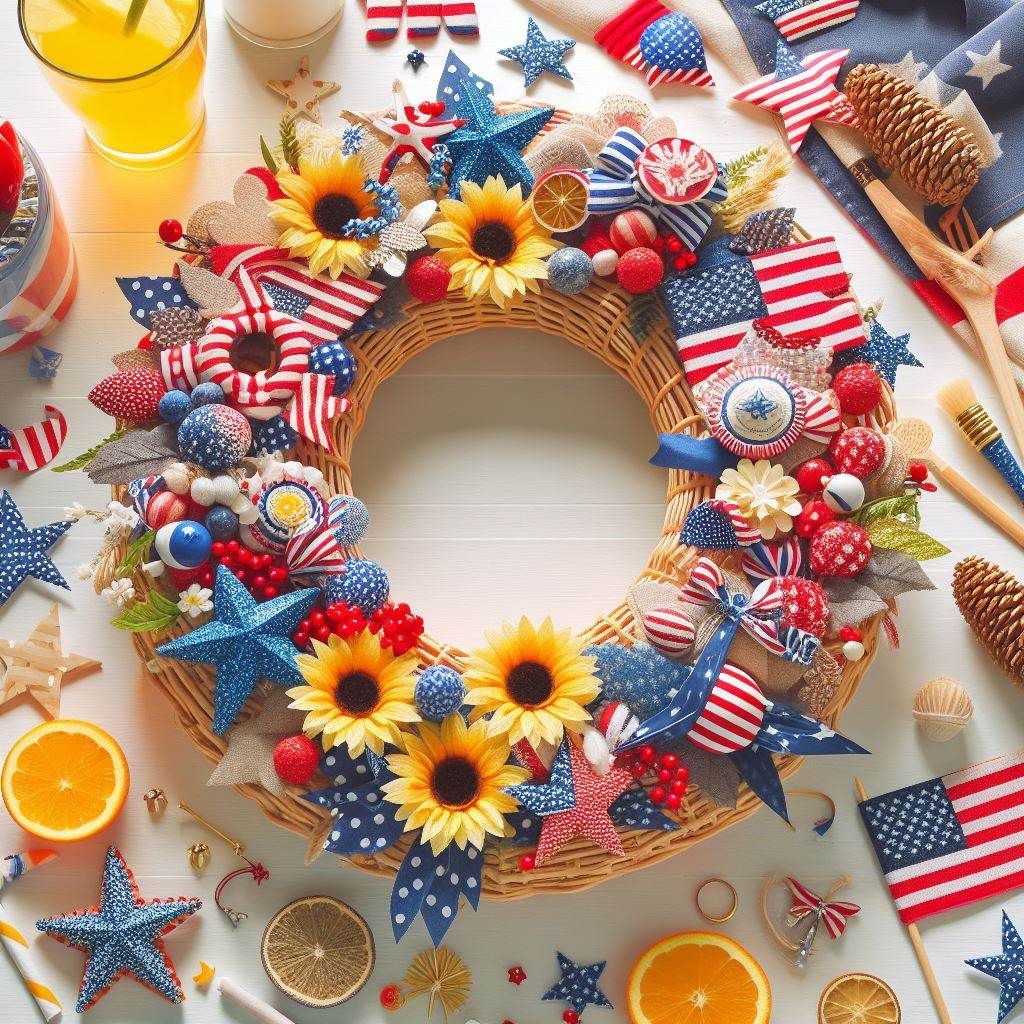
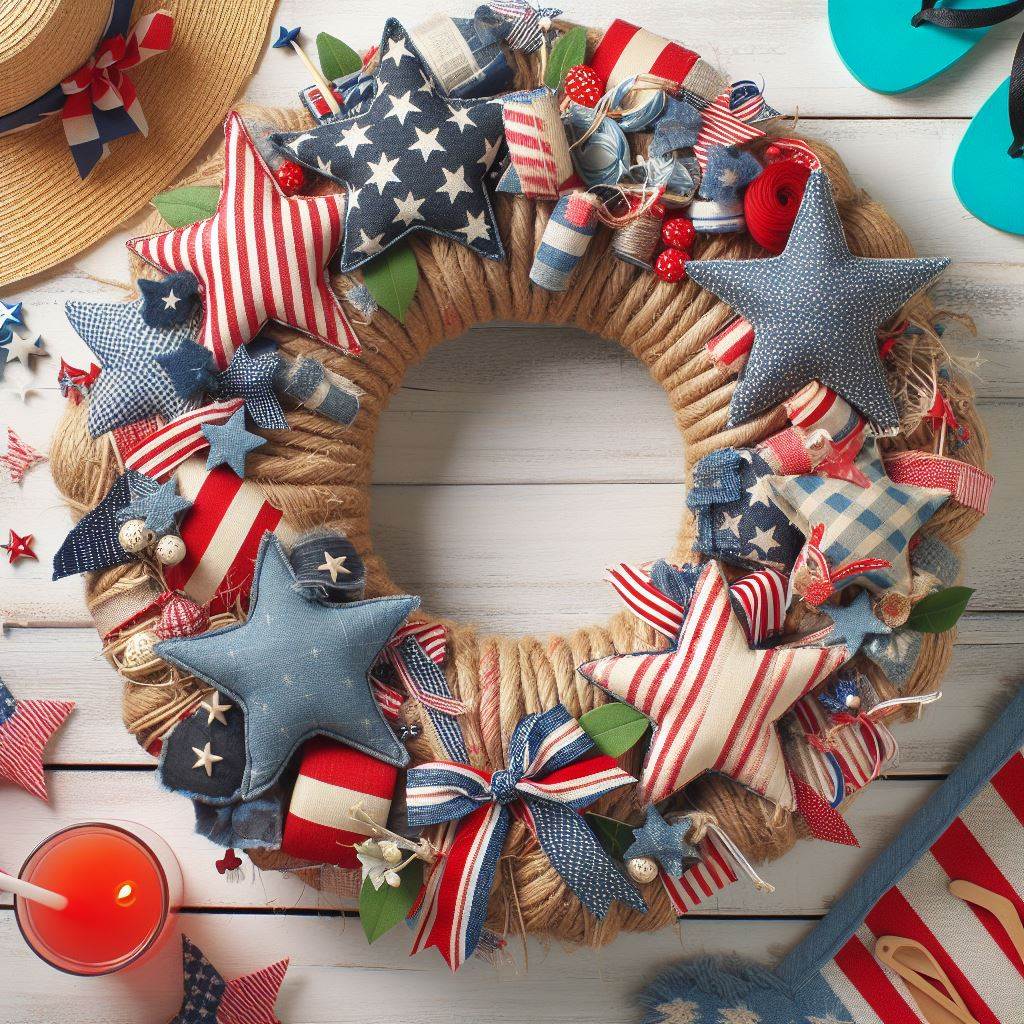
4. The Patriotic Summer Wreath
Materials:
- Red, white, and blue burlap ribbon (at least 3-4 inches wide and several yards long)
- Red and/or blue felt (for cutting stars)
- Star-shaped cookie cutters (optional)
- Hot glue gun and glue sticks
- Wire wreath frame (size of your choosing)
Instructions:
- This wreath is a fun way to celebrate summer holidays like Memorial Day or the Fourth of July. Begin by cutting star shapes out of red and/or blue felt. You can use star-shaped cookie cutters for perfect shapes, or freehand cut your own stars.
- Wrap the burlap ribbon around the wire wreath frame, alternating red, white, and blue colors for a festive look. Secure the end of the ribbon with hot glue and continue wrapping tightly, overlapping slightly with each turn. Use hot glue periodically to secure the ribbon in place.
- Once the wire frame is completely covered in burlap, it’s time to add the stars! Arrange the felt stars on the burlap base in a pleasing way. You can scatter them evenly, create a cluster in the center, or form a specific pattern.
- Use your hot glue gun to securely attach each felt star to the burlap base.
5. The Fun and Fruity Watermelon Wreath
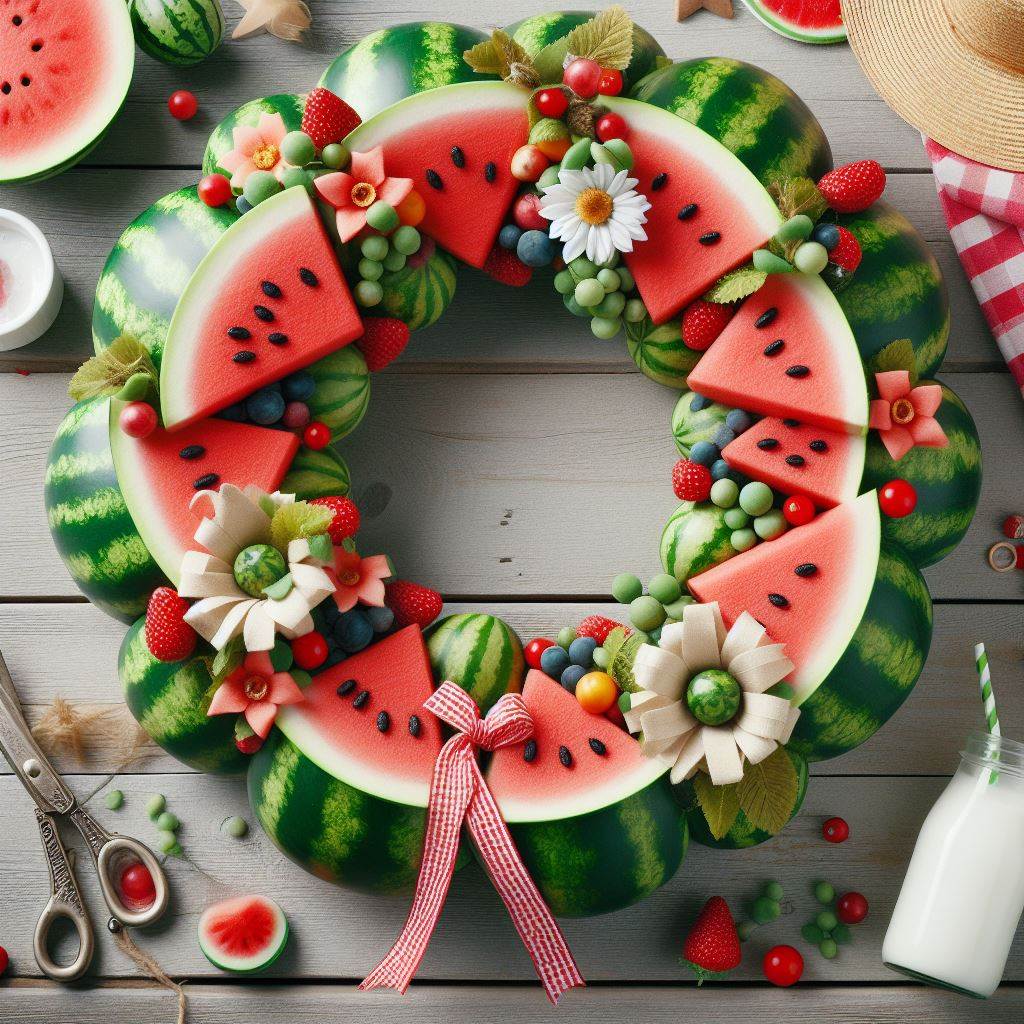
This playful wreath is a delightful way to celebrate the quintessential summer fruit – the watermelon!
Materials:
- Red felt
- Green felt
- Pink felt or fabric scraps (for the watermelon rind)
- Black sharpie marker
- Hot glue gun and glue sticks
- Wire wreath frame (size of your choosing)
Instructions:
- Cut out large watermelon slices from your red felt. You can use a freehand approach or create a template for perfect uniformity.
- Cut out large watermelon slices from your green felt. These slices will be the watermelon rind. Make sure they are slightly larger than the red felt watermelon slices.
- Cut out small black circles from your felt or fabric scraps. These will represent the watermelon seeds.
- Using the black sharpie marker, add small details to the red felt watermelon slices. Draw curved lines to depict the texture of the watermelon flesh.
- Use hot glue to attach the black felt circles (watermelon seeds) onto the red felt watermelon slices.
- Cut out small pink triangles from your felt or fabric scraps. These will represent the edge of the watermelon rind.
- Use hot glue to attach the pink triangles (watermelon rind) onto the green felt watermelon slices.
- Now it’s time to assemble your wreath! Arrange the red felt watermelon slices (with seeds) and the green felt watermelon slices (with rind) on the wire frame. Alternate the slices for a realistic look.
- Securely hot glue each watermelon slice onto the wire frame.
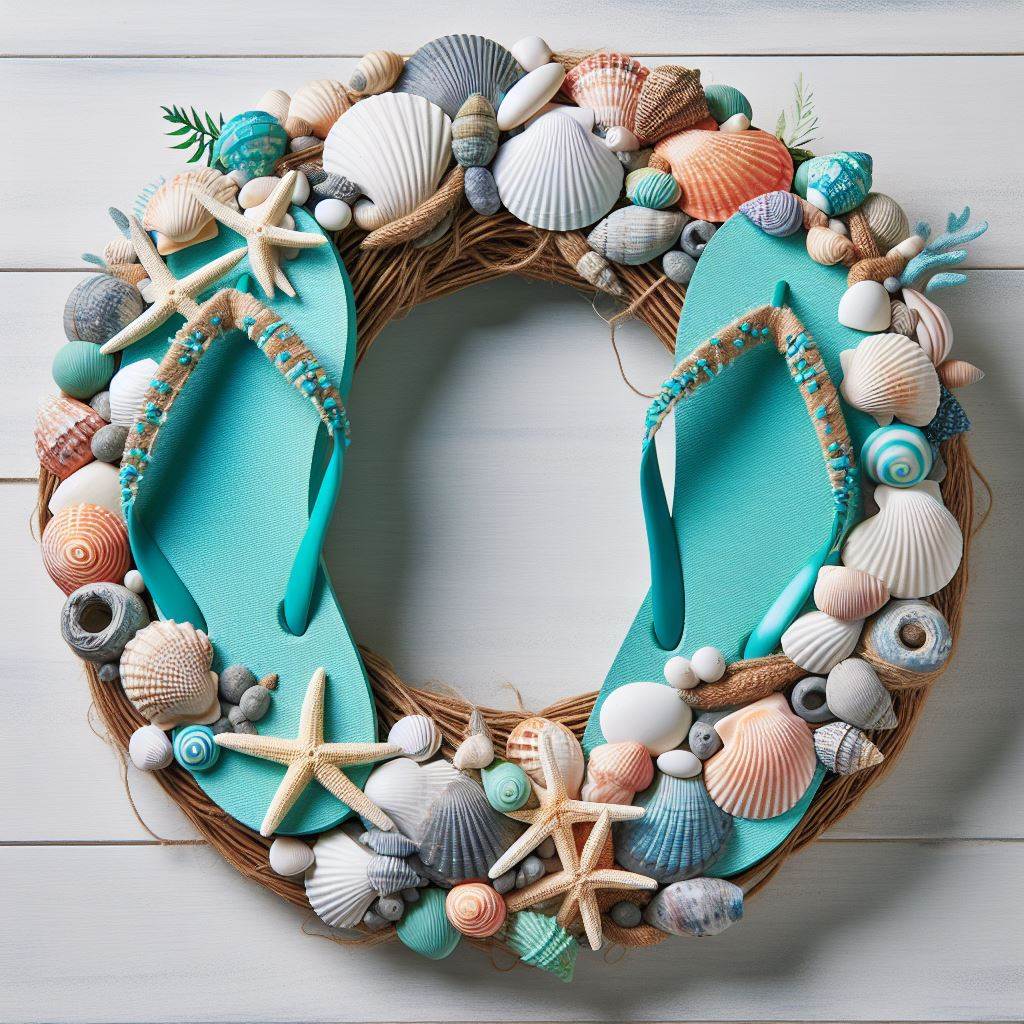
6. The Recycled Flip Flop Wreath
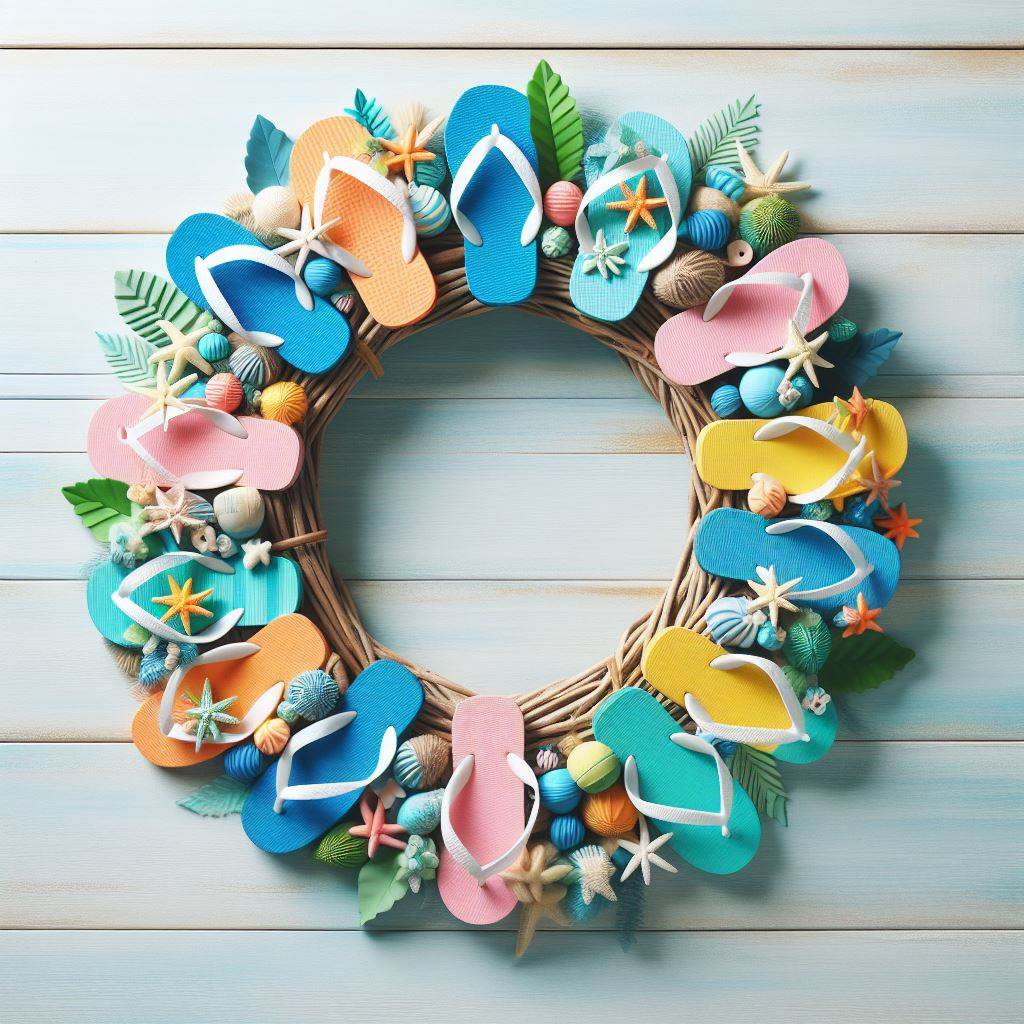
Calling all beach lovers! This recycled flip flop wreath is a creative way to give old flip flops a new life and add a touch of summer fun to your decor.
Materials:
- Old flip flops in various colors (mismatched is perfectly fine!)
- Scissors
- Hot glue gun and glue sticks
- Wire wreath frame (size of your choosing)
Instructions:
- Gather your old flip flops and unleash your creativity! You can cut the flip flops into strips of varying widths, or create fun shapes like flowers or butterflies.
- Use your hot glue gun to secure the cut flip flop pieces onto the wire wreath frame. Start by attaching the larger pieces first, building a base for the wreath. Then, fill in the gaps with smaller flip flop pieces or shapes.
- Overlap the flip flop pieces slightly for a more cohesive look.
- (Optional) Feeling extra playful? Add other summery elements to your wreath! Small beach balls cut from colorful felt, miniature seashells, or even tiny toy sunglasses can add a touch of whimsy.
7. The No-Sew Fabric Scrap Wreath
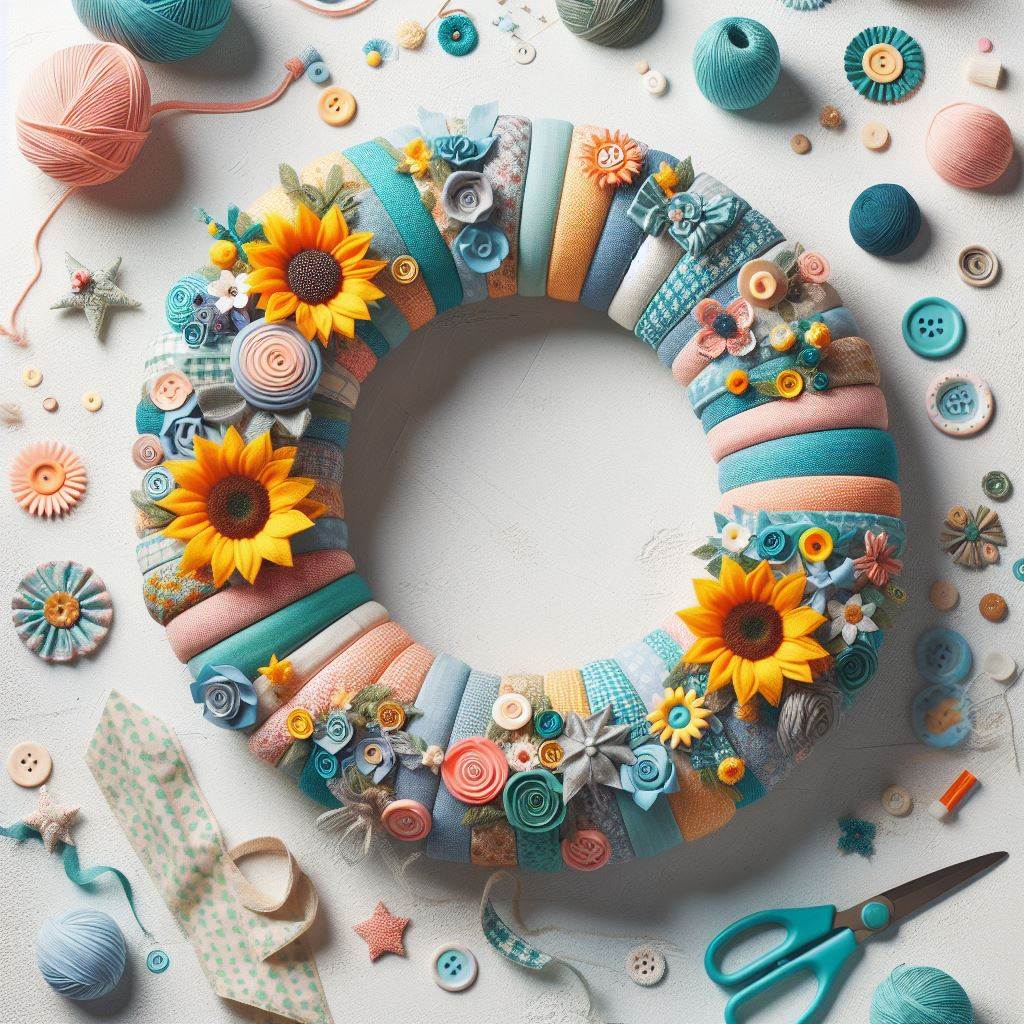
This summery wreath is a great way to use up leftover fabric scraps and add a burst of color to your decor. The best part? No sewing required!
Materials:
- Colorful fabric scraps in various summery patterns (think floral prints, stripes, polka dots)
- Scissors
- Pinking shears (optional) for a frayed edge
- Hot glue gun and glue sticks
- Wire wreath frame (size of your choosing)
Instructions:
- Gather your fabric scraps and unleash your creativity! Cut the fabric scraps into squares or triangles of various sizes. Pinking shears can be used to create a frayed edge for a more rustic look, but regular scissors work just fine too.
- Now comes the fun part – assembling the wreath! Begin by hot gluing the fabric pieces overlapping each other onto the wire frame. Start at the inner ring of the frame and work your way outwards, covering the entire frame with fabric scraps.
- Layer the fabric pieces for a full and colorful effect. Vary the sizes and patterns of the fabric scraps to create visual interest.
- Once the entire wire frame is covered, use a final piece of fabric or a ribbon to create a bow and hot glue it to the top of the wreath for a finishing touch.
8. The Sunshiny Sunflower Wreath
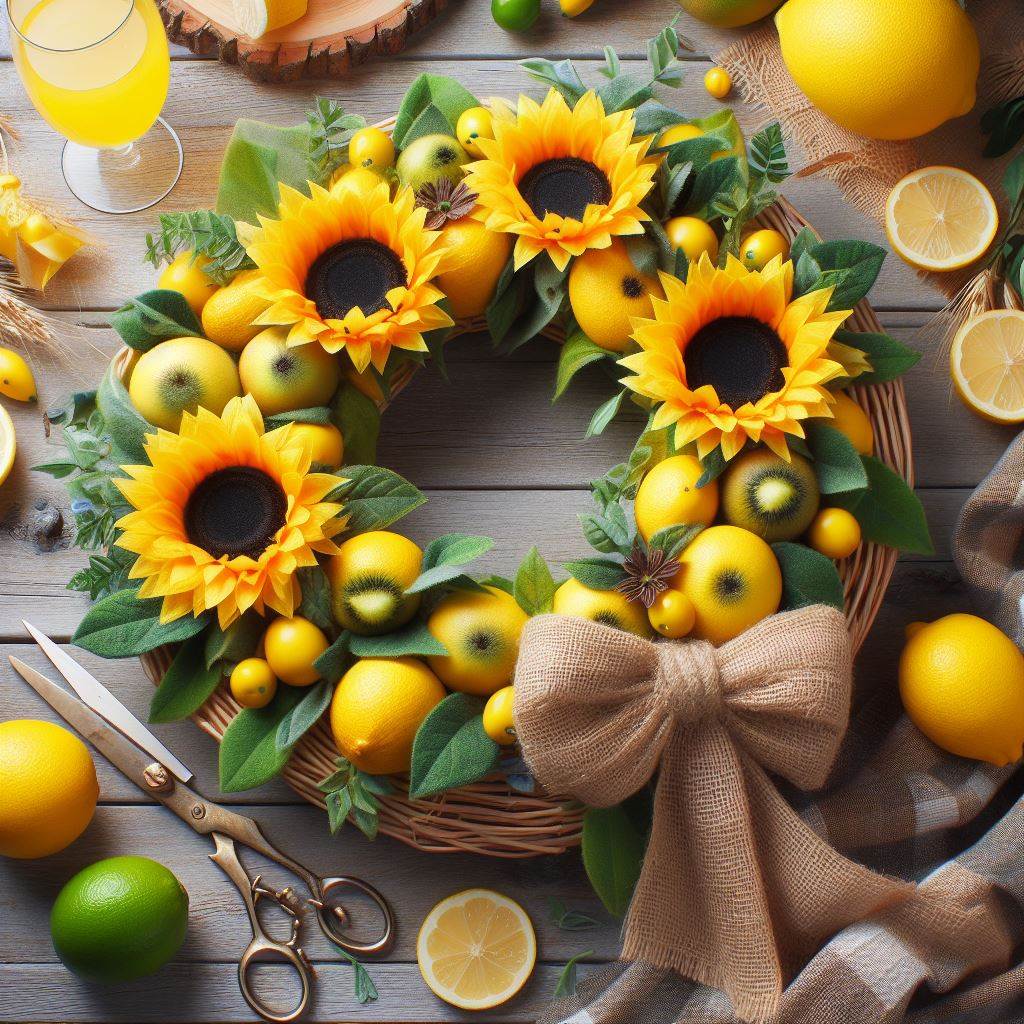
Sunflowers embody the warmth and cheer of summer. This bright and cheerful wreath is sure to bring a smile to your face and everyone who sees it.
Materials:
- Artificial sunflowers (various sizes and colors, if desired)
- Yellow burlap ribbon or fabric scraps
- Floral wire
- Wire wreath frame (size of your choosing)
- Hot glue gun and glue sticks (optional)
Instructions:
- Start by gathering your sunflowers. You can use a mix of sizes and colors for a more dynamic look.
- Cut pieces of floral wire long enough to securely attach each sunflower head to the wreath frame.
- Wrap the floral wire around the stem of the sunflower head and twist it tightly to secure.
- If using burlap ribbon or fabric scraps, loosely wrap the wire frame to create a base. Secure the ends with hot glue or by tucking them under the floral wire attachments. This step is optional, but it adds a touch of texture and can help conceal the wire frame.
- Now comes the fun part – arranging the sunflowers! Attach the sunflowers to the wire frame using the floral wire you secured earlier. Space them evenly or create a cluster in the center, depending on your preference.
- (Optional) Add other summery elements like small ladybugs, miniature pinecones, or even tiny butterflies cut from felt for a touch of whimsy.
9. The Coastal Seashell and Driftwood Wreath
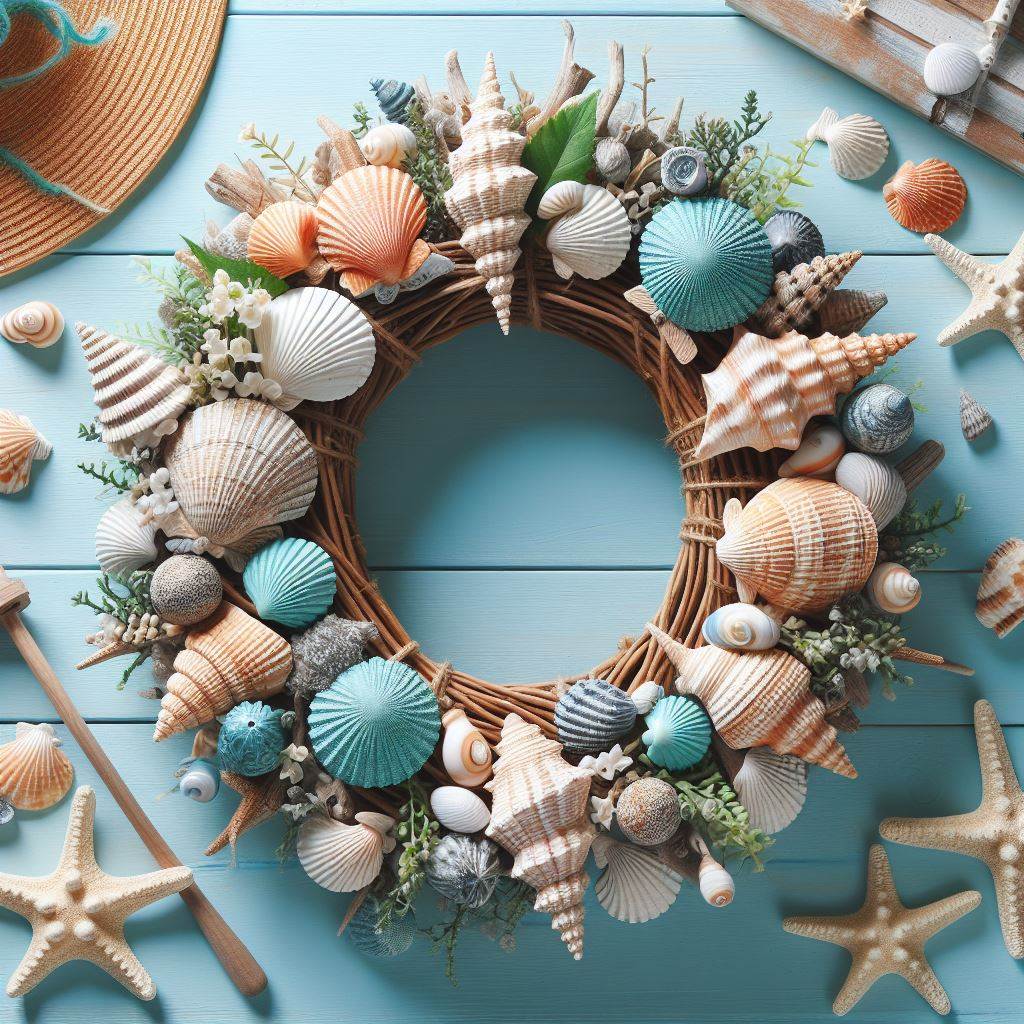
Capture the essence of the seashore with a wreath that combines natural beauty and coastal charm.
Materials:
- Seashells (various sizes and shapes)
- Driftwood pieces (in various sizes and shapes)
- Hot glue gun and glue sticks
- Spray paint (optional) – white, cream, or light blue can add a touch of uniformity.
- Wire wreath frame (size of your choosing)
Instructions:
- For a cohesive look, consider spraying the driftwood pieces with a light coat of paint in a summery color like white, cream, or light blue. Let the paint dry completely.
- Arrange the driftwood pieces on the wire frame to create a natural and organic base. Secure them in place with hot glue.
- Now it’s time to add the seashells! Arrange the seashells on the driftwood base, filling in any gaps and creating a visually pleasing composition. Use a mix of sizes and shapes for added interest.
- Securely hot glue each seashell to the driftwood base.
- (Optional) Add a touch of nautical flair with a small piece of twine tied in a bow or a miniature anchor attached with hot glue.
10. The Butterfly and Floral Mesh Wreath
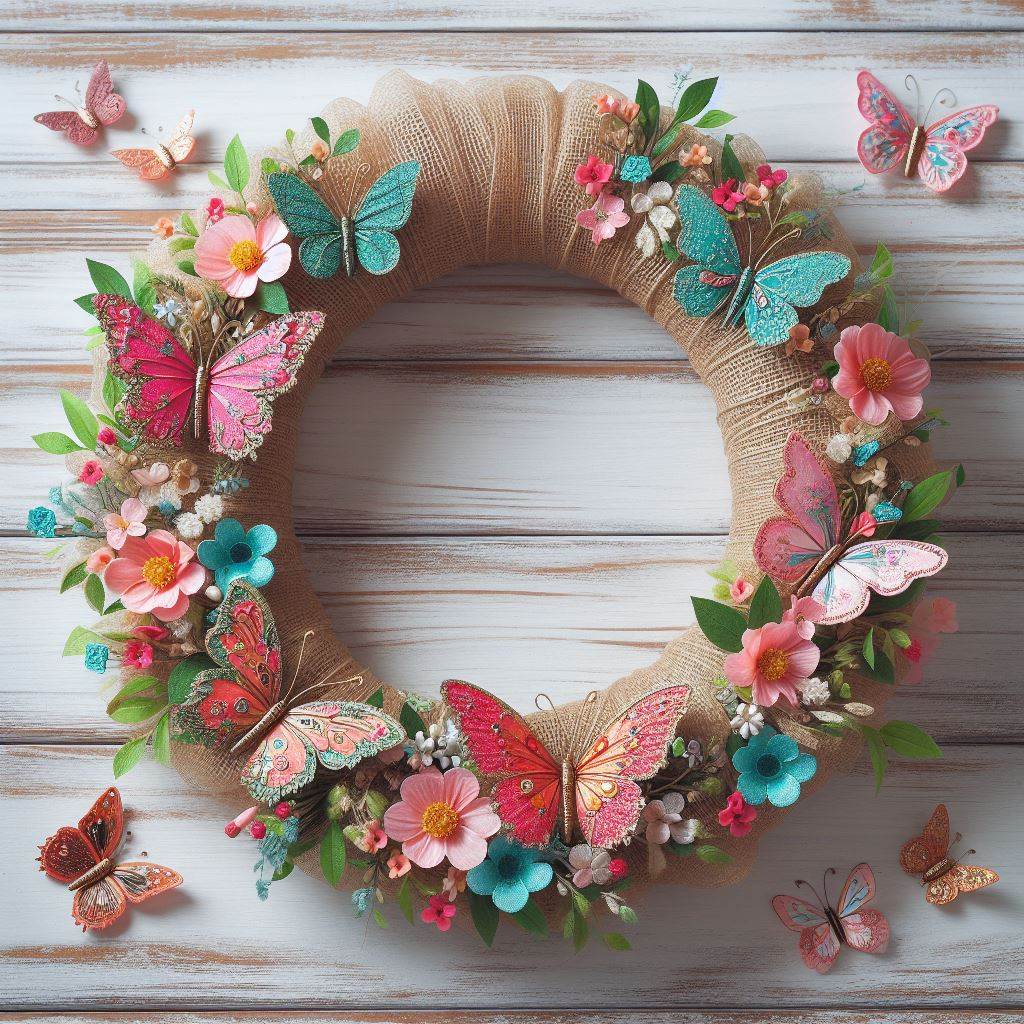
This delicate and ethereal wreath is a celebration of summer’s vibrant flowers and fluttering butterflies.
Materials:
- Decorative mesh ribbon in a summery color (like light yellow, lavender, or light green)
- Artificial butterflies in various colors and sizes
- Floral picks with summer blooms (optional)
- Pipe cleaners (optional)
- Wire wreath frame (size of your choosing)
- Zip ties or floral wire
Instructions:
- Begin by wrapping the decorative mesh ribbon around the wire frame. Secure the end with a zip tie or floral wire and continue wrapping tightly, overlapping slightly with each turn. Use zip ties or floral wire periodically to secure the mesh in place.
- Once the wire frame is completely covered with mesh, it’s time to add the butterflies! Attach the butterflies to the mesh using pipe cleaners (for a more flexible attachment) or hot glue.
- (Optional) Incorporate floral picks with summer blooms for a touch of added color and texture. Secure them to the mesh with floral wire or zip ties.
- Arrange the butterflies and flowers in a way that creates a balanced and visually pleasing composition.
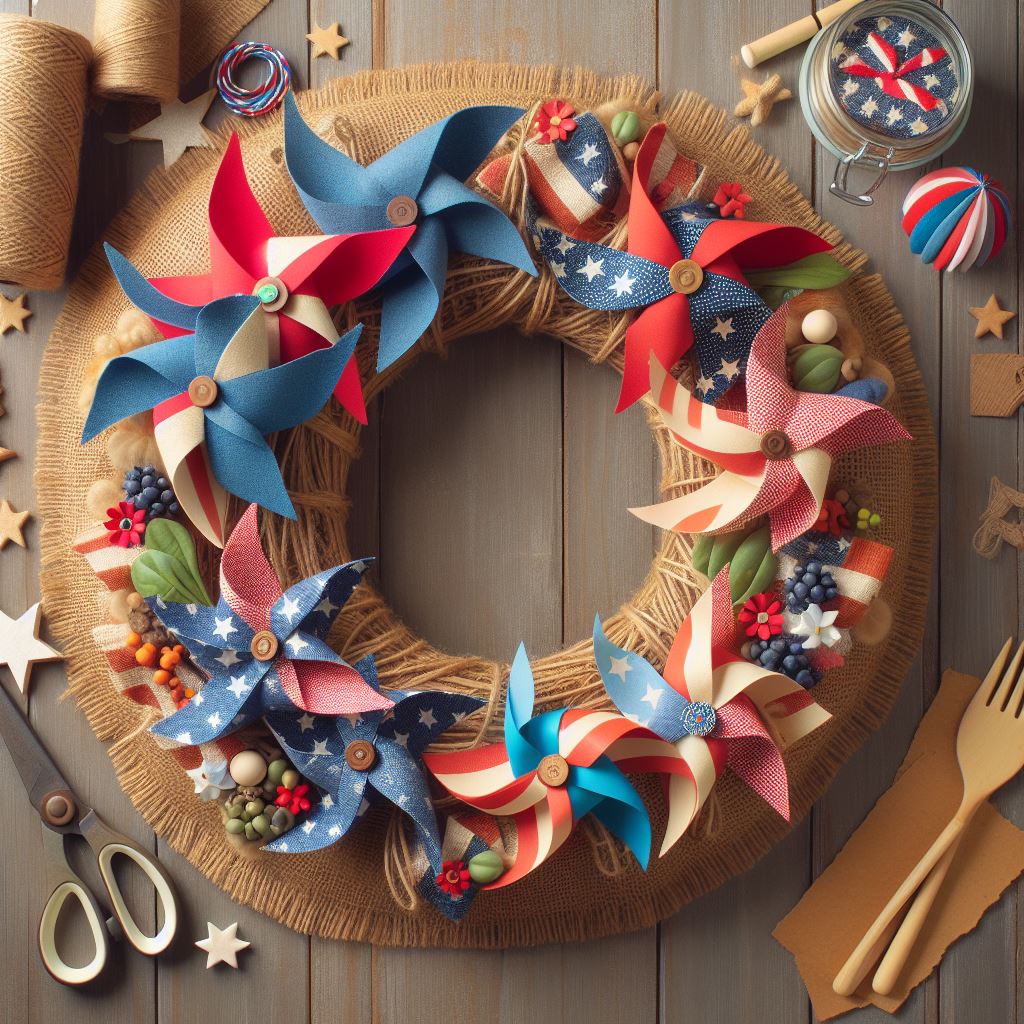
11. The Patriotic Pinwheel and Burlap Wreath
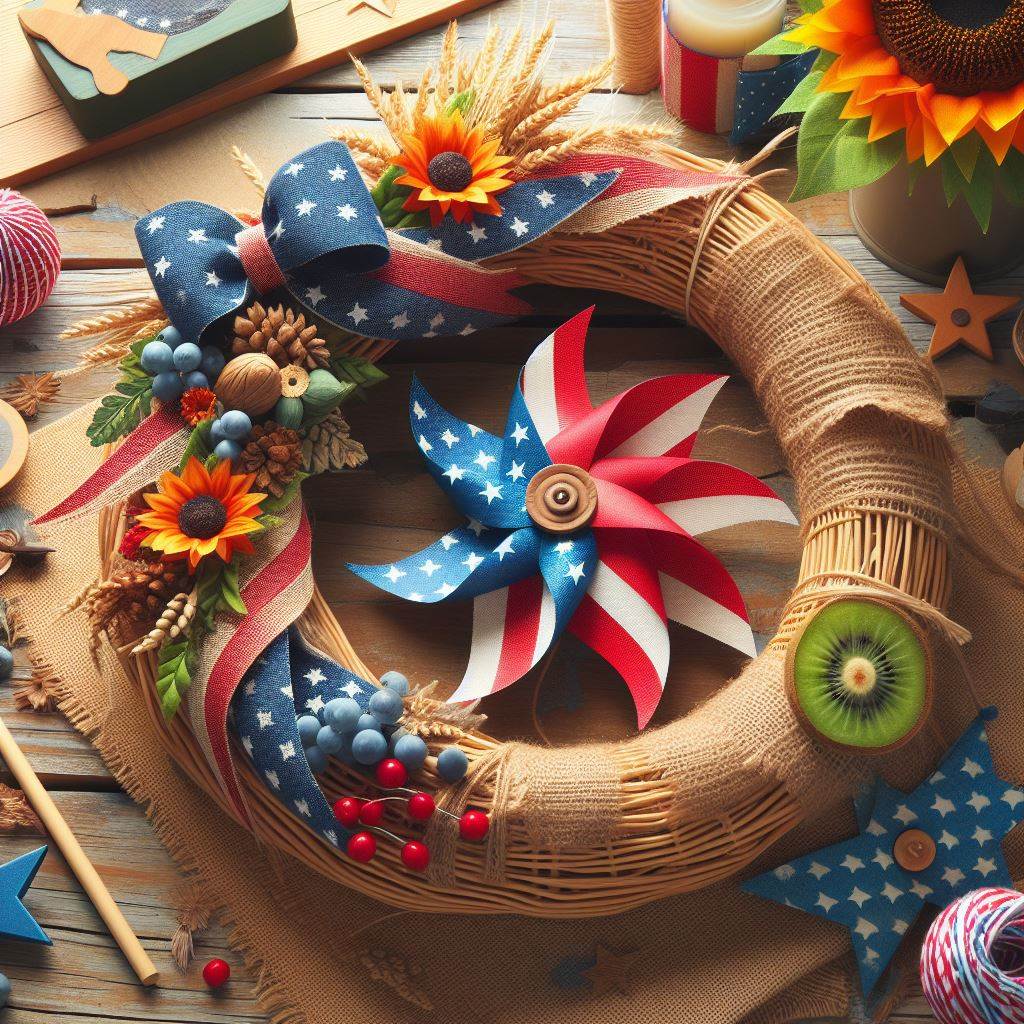
Celebrate summer holidays like Memorial Day or the Fourth of July with a wreath bursting with patriotic spirit.
Materials:
- Red, white, and blue burlap ribbon (at least 3-4 inches wide and several yards long)
- Decorative pinwheels in red, white, and blue (various sizes)
- Hot glue gun and glue sticks
- Wire wreath frame (size of your choosing)
Instructions:
- Wrap the burlap ribbon around the wire frame, alternating red, white, and blue colors for a festive look. Secure the end of the ribbon with hot glue and continue wrapping tightly, overlapping slightly with each turn. Use hot glue periodically to secure the ribbon in place.
- Once the wire frame is completely covered in burlap, it’s time to add the pinwheels! Arrange the pinwheels on the burlap base in a way that is pleasing to the eye. You can create a cluster in the center, scatter them evenly, or form a specific pattern like a star.
- Securely hot glue each pinwheel to the burlap base. For larger pinwheels, you may need to use multiple dots of hot glue for stability.
- (Optional) Add a finishing touch with a small American flag attached with a hot glue dot or a small star cut from felt and glued onto the center of a red pinwheel.
12. The Citrus Slice and Greenery Wreath
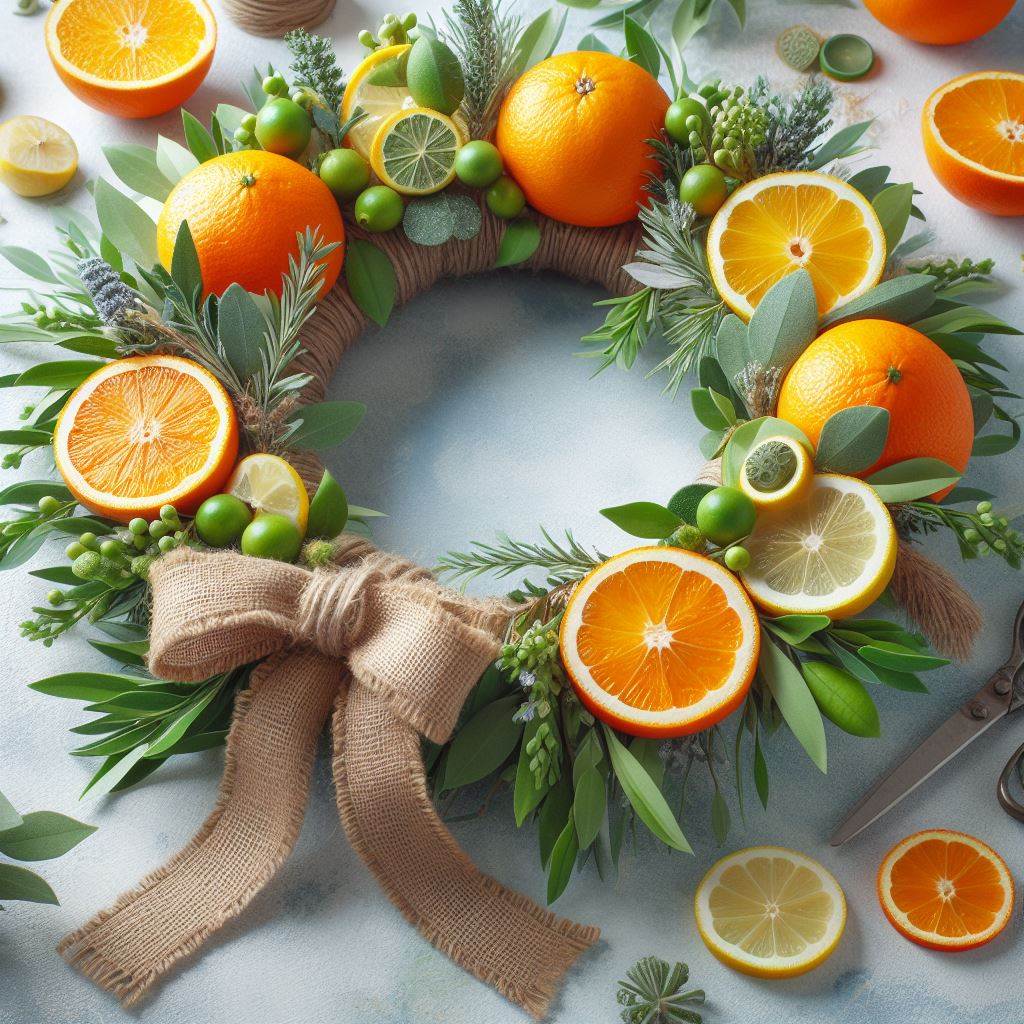
This refreshing wreath celebrates the vibrant colors and zesty flavors of summer fruits.
Materials:
- Artificial lemons, limes, and oranges (or a combination)
- Faux greenery sprigs (like eucalyptus or olive branches)
- Greenery garland (optional)
- Hot glue gun and glue sticks
- Wire wreath frame (size of your choosing)
Instructions:
- Arrange the faux citrus slices on a flat surface to visualize the overall design. You can create a random pattern, cluster them in the center, or arrange them in a specific color sequence.
- Once you’re happy with the layout, use your hot glue gun to secure the citrus slices onto the wire wreath frame. Leave a small gap between each slice to allow the greenery to peek through.
- Incorporate the faux greenery sprigs! Tuck them in between the citrus slices and secure them with hot glue. You can use a variety of greenery textures for added visual interest.
- (Optional) If using a greenery garland, wrap it around the wire frame, weaving it in between the citrus slices and greenery sprigs. Secure the ends with hot glue.
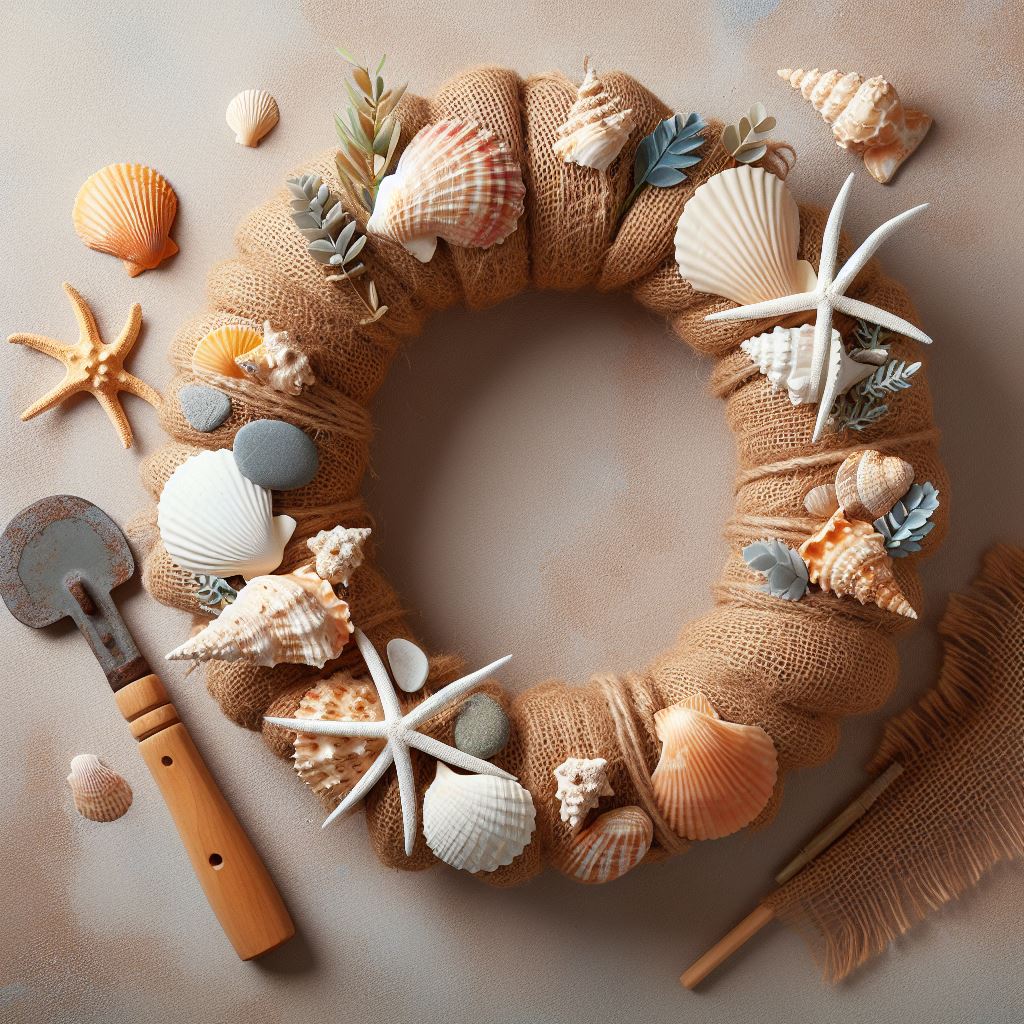
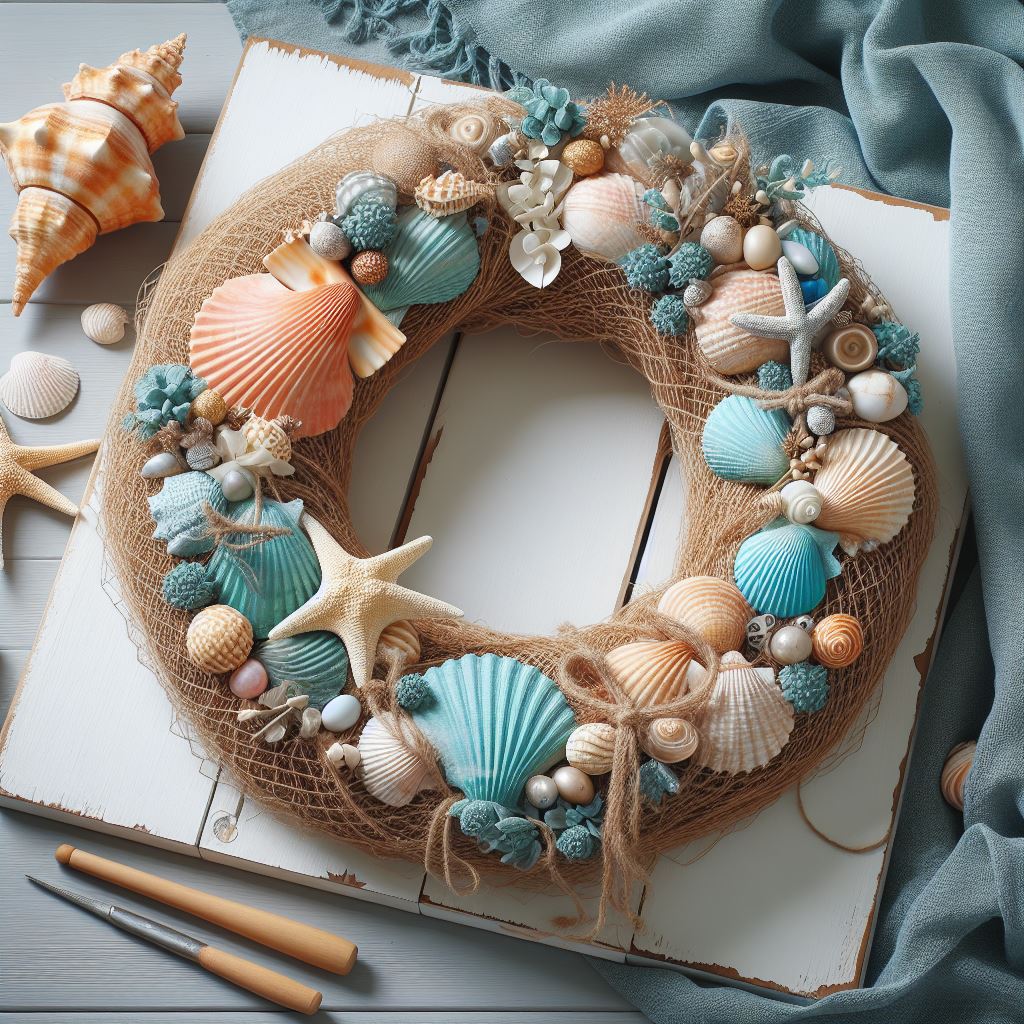
13. The Seashell and Netting Beachcomber’s Wreath
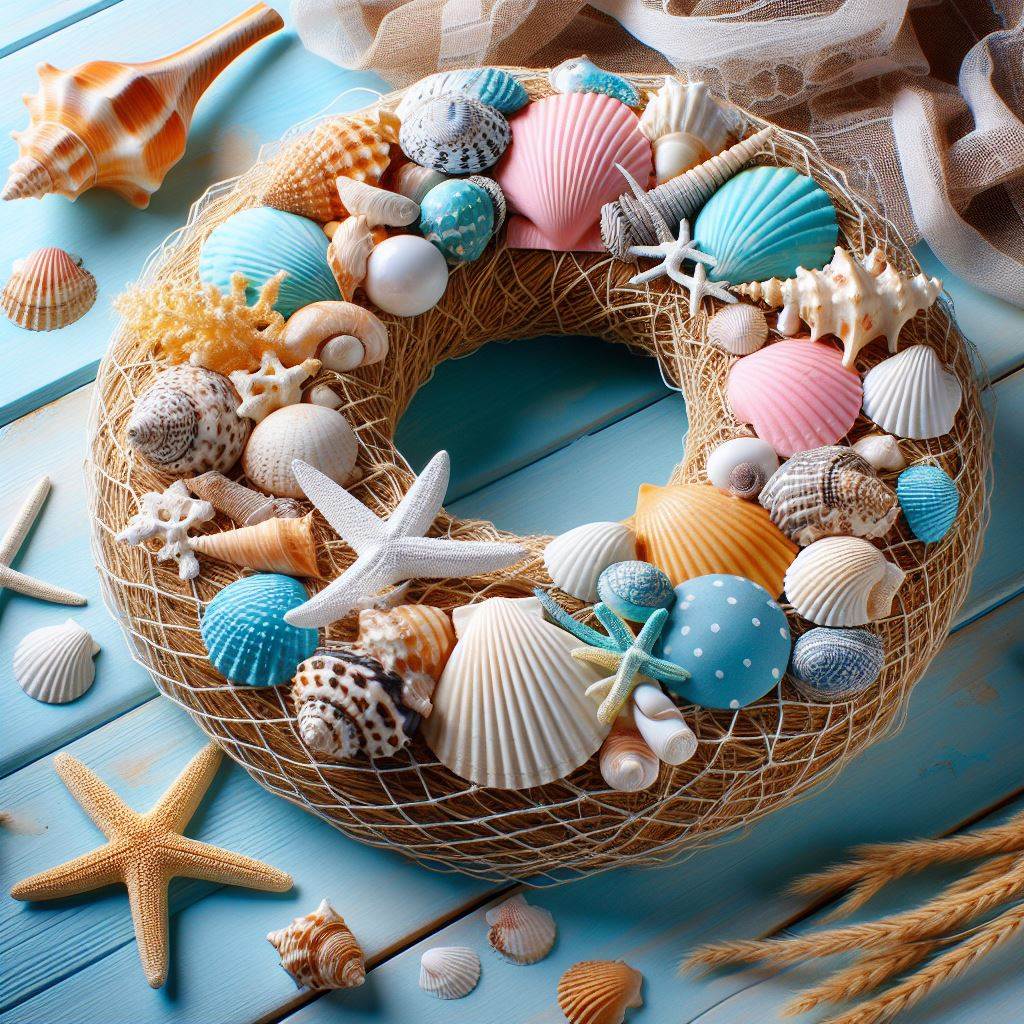
Embrace the spirit of beachcombing with a wreath that incorporates natural treasures and nautical elements.
Materials:
- Seashells (various sizes and shapes)
- Fishing net scraps (or a similar lightweight netting material)
- Twine or string in a natural color
- Hot glue gun and glue sticks
- Wire wreath frame (size of your choosing)
Instructions:
- Cut the fishing net scraps into manageable pieces. You can create long strips or smaller squares, depending on your preference.
- Begin by wrapping the fishing net scraps loosely around the wire frame. Overlap the pieces slightly and secure them with hot glue or by weaving the twine or string through the netting to hold it in place.
- Once the wire frame is partially covered with netting, it’s time to add the seashells! Arrange the seashells on the netting base, filling in any gaps and creating a visually pleasing composition.
- Securely hot glue each seashell to the netting base. Larger seashells may require multiple dots of glue for stability.
- Wrap the twine or string around the wreath several times, creating a decorative border and further securing the netting in place. Tie the ends in a bow at the top of the wreath.
14. The Mason Jar Lid and Twine Farmhouse Wreath
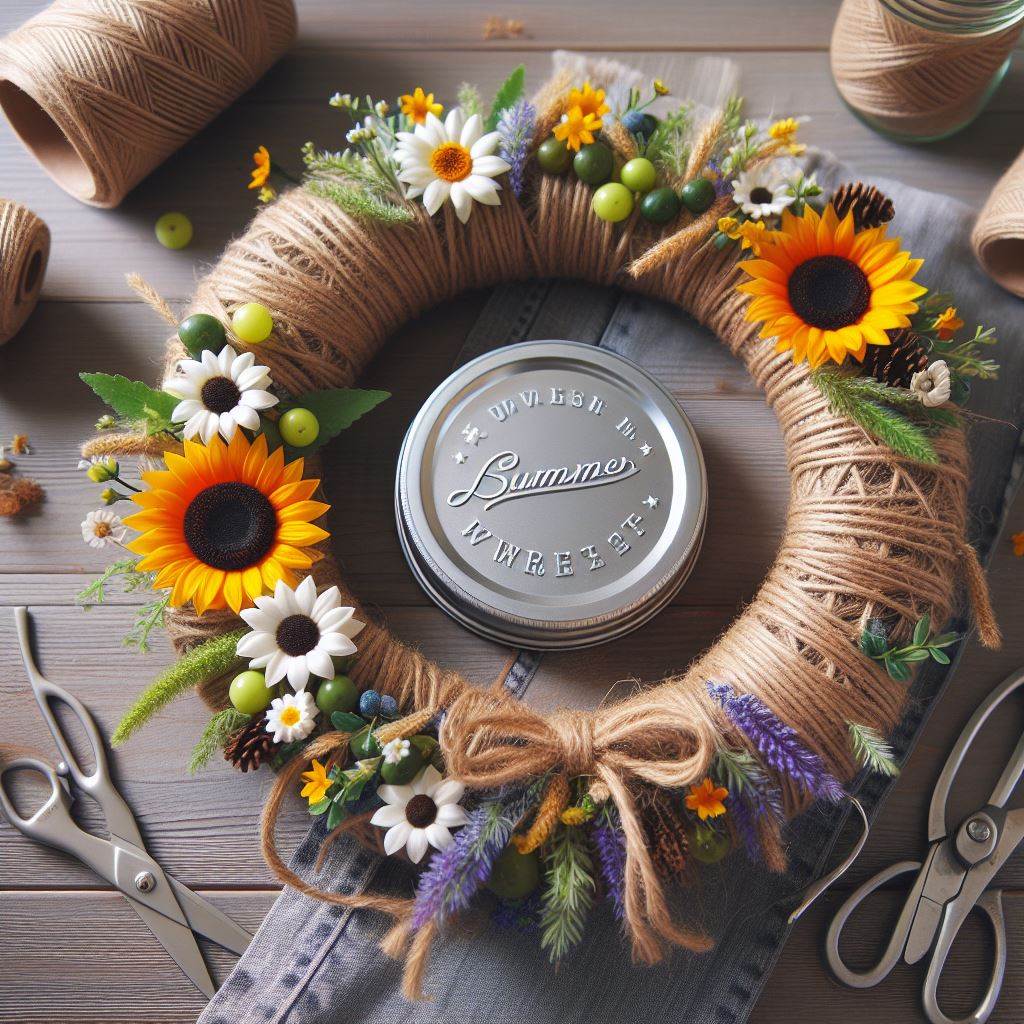
This rustic and charming wreath combines the vintage appeal of mason jar lids with the natural beauty of twine.
Materials:
- Mason jar lids (various sizes and colors, painted if desired)
- Ball of twine in a natural color (like jute or baker’s twine)
- Hot glue gun and glue sticks
- Wire wreath frame (size of your choosing)
Instructions:
- You can upcycle old mason jar lids or purchase them pre-painted at craft stores. If upcycling, consider painting them in soft summery colors like baby blue, lavender, or light yellow. Let the paint dry completely.
- Begin by wrapping the twine loosely around the wire frame. Overlap the twine slightly and secure it with hot glue periodically to create a base for the wreath.
- Once the wire frame is partially covered with twine, it’s time to add the mason jar lids! Arrange the lids on the twine base in a way that is pleasing to the eye. You can create a cluster in the center, scatter them evenly, or arrange them in a specific pattern.
- Securely hot glue each mason jar lid to the twine base. For larger lids, you may need multiple dots of glue for stability.
- (Optional) Add a touch of rustic charm with a small piece of burlap ribbon tied in a bow or a sprig of dried lavender tucked behind a few of the lids.
15. The Ice Cream Cone and Sprinkle Celebration Wreath

This playful and whimsical wreath is a delightful way to celebrate everyone’s favorite summertime treat – ice cream!
Materials:
- Styrofoam ice cream cones (various sizes and colors, if desired)
- Colorful felt scraps (in colors like pink, brown, yellow, and green)
- Hot glue gun and glue sticks
- Artificial sprinkles (or colorful pom poms)
- Wire wreath frame (size of your choosing)
Instructions:
- Cut out small circles, squares, or triangles from the felt scraps to represent colorful sprinkles. You can also use pink felt to cut out small cherries for added detail.
- Use hot glue to secure the felt “sprinkles” and felt cherries onto the Styrofoam ice cream cones. Get creative and cover the cones in a vibrant explosion of color!
- Once the ice cream cones are decorated, it’s time to assemble the wreath! Attach the ice cream cones to the wire frame using hot glue. Space them evenly or create a cluster in the center for a more playful look.
- (Optional) Add a few dollops of hot glue to the top of some of the ice cream cones and sprinkle on artificial sprinkles or colorful pom poms for extra texture and whimsy.
16. The Patriotic Paper Star and Burlap Wreath
This wreath offers a unique twist on traditional patriotic décor, using readily available materials to create a summery statement.
Materials:
- Red, white, and blue wrapping paper (or construction paper)
- Burlap ribbon (at least 3-4 inches wide and several yards long)
- Scissors
- Hot glue gun and glue sticks
- Wire wreath frame (size of your choosing)
Instructions:
- Cut out star shapes from the red, white, and blue paper. You can use a cookie cutter or create a template for perfect uniformity. Aim to create a variety of star sizes for added visual interest.
- Wrap the burlap ribbon around the wire frame, securing the end with hot glue. Continue wrapping tightly, overlapping slightly with each turn. Use hot glue periodically to secure the ribbon in place.
- Once the wire frame is completely covered with burlap, it’s time to add the paper stars! Layer the red, white, and blue paper stars on top of the burlap base. Arrange them in a way that creates a balanced and visually pleasing composition. You can cluster them in the center, create a random pattern, or form specific shapes like stripes or a star.
- Securely hot glue each paper star to the burlap base. For larger stars, you may need multiple dots of glue for stability.
- (Optional) Add a finishing touch with a small American flag attached with a hot glue dot or a small ribbon bow tied in the center of the wreath.
17. The Butterfly and Fairy Light Whimsy Wreath
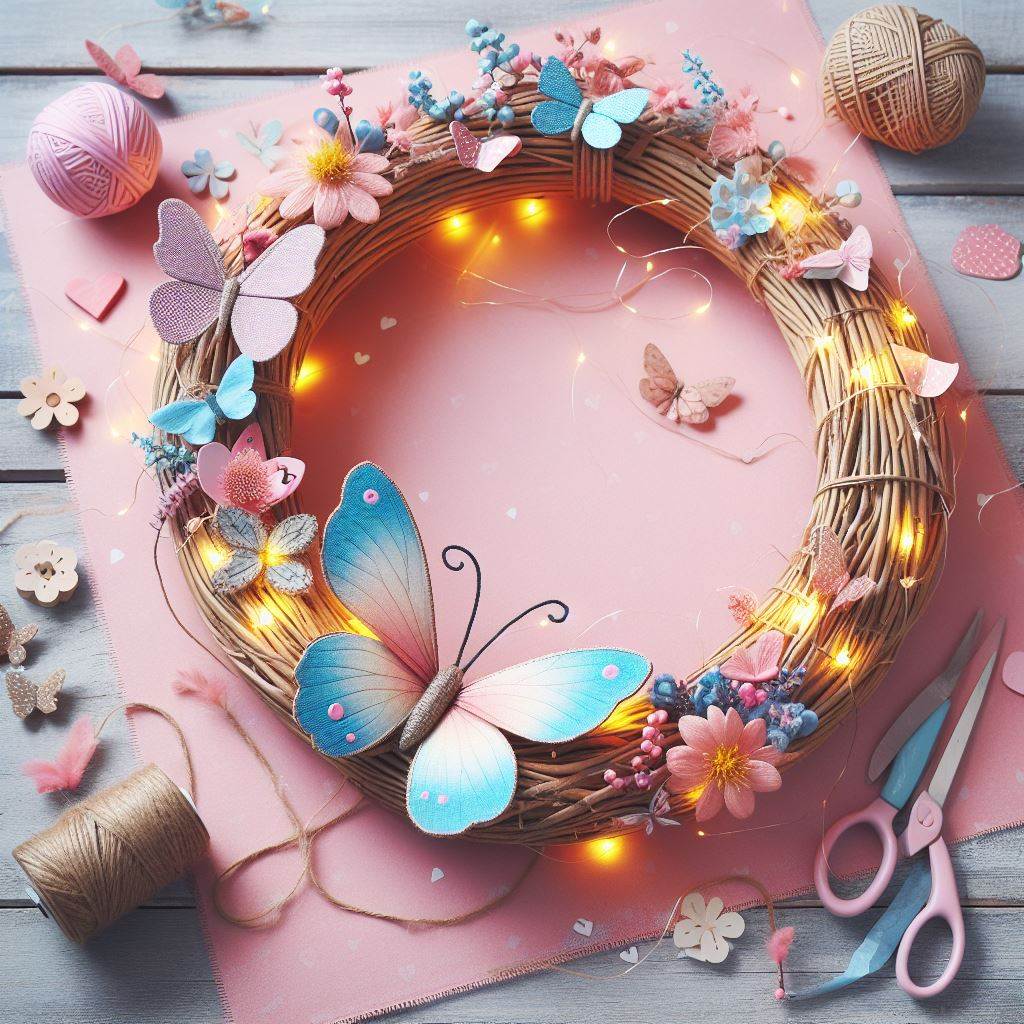
This enchanting wreath combines delicate butterflies with twinkling fairy lights to create a magical summer ambiance.
Materials:
- White mesh ribbon (or a light-colored fabric)
- Artificial butterflies in various colors and sizes
- Battery-operated fairy lights (warm white or multicolored)
- Pipe cleaners (optional)
- Hot glue gun and glue sticks
- Wire wreath frame (size of your choosing)
Instructions:
- Wrap the mesh ribbon or fabric loosely around the wire frame. Secure the end with hot glue and continue wrapping tightly, overlapping slightly with each turn. Use hot glue periodically to secure the fabric in place.
- Once the wire frame is completely covered with mesh or fabric, it’s time to add the butterflies! Attach the butterflies to the base using pipe cleaners (for a more flexible attachment) or hot glue.
- Arrange the butterflies in a way that creates a balanced and visually pleasing composition. You can create clusters in specific areas or scatter them evenly around the wreath.
- Wrap the fairy lights around the wire frame, weaving them in between the butterflies and the mesh or fabric base. Ensure the battery pack is easily accessible for turning the lights on and off.
- (Optional) Add a touch of whimsy with small artificial flowers or tiny ladybugs hot glued onto the wreath.
18. The Lemonade Stand and Citrus Slice Wreath

This cheerful wreath evokes the nostalgia of summer lemonade stands and the refreshing taste of citrus fruits.
Materials:
- Red and white striped fabric scraps (or red and white striped ribbon)
- Yellow felt
- Green felt
- Scissors
- Hot glue gun and glue sticks
- Artificial lemons and limes (or a combination)
- Wire wreath frame (size of your choosing)
Instructions:
- Cut out a small rectangular piece from the red and white striped fabric or ribbon. This will represent the awning of the lemonade stand.
- Cut out a small trapezoid shape from the yellow felt to represent the main body of the lemonade stand.
- Cut out a small rectangle from the green felt to represent the grass beneath the lemonade stand.
- Use hot glue to assemble the fabric pieces, creating a miniature lemonade stand with a red and white striped awning and a yellow body sitting on a green felt “grass” base.
- Arrange the artificial lemons and limes on the wire frame. You can create a cluster in the center, scatter them evenly, or form a specific pattern.
- Securely hot glue each lemon and lime to the wire frame.
- Once the lemons and limes are secured, hot glue the miniature lemonade stand onto the wreath, positioning it strategically to complement the arrangement of the citrus fruits.
- Add a finishing touch with a small wooden sign that says “Lemonade” or a tiny paper cup hot glued next to the lemonade stand for extra detail.
19. The Seashell and Driftwood Coastal Dream Wreath
This elegant wreath captures the essence of the seashore in a sophisticated way.
Materials:
- Seashells (various sizes and shapes, in natural or whitewashed finishes)
- Driftwood pieces (in various sizes and shapes)
- White spray paint (optional)
- Hot glue gun and glue sticks
- Spanish moss (optional)
- Wire wreath frame (size of your choosing)
Instructions:
- For a cohesive look, consider spray painting the driftwood pieces white. Let the paint dry completely.
- Arrange the driftwood pieces on the wire frame to create a natural and organic base. For a more elegant look, use driftwood pieces that are relatively straight and similar in size. Secure them in place with hot glue.
- Now it’s time to add the seashells! Arrange the seashells on the driftwood base, filling in any gaps and creating a visually pleasing composition. Use a mix of sizes and shapes for added interest. You can incorporate both natural and whitewashed seashells for a touch of variety.
- Securely hot glue each seashell to the driftwood base. For larger seashells, you may need to use multiple dots of hot glue for stability.
- (Optional) Add a touch of coastal charm with a small piece of fishing net draped over the wreath or a few wisps of Spanish moss tucked in between the driftwood and seashells.
20. The Patriotic Pinwheel and Mason Jar Lid Star Spangled Celebration

This wreath combines classic Americana elements with a touch of rustic charm.
Materials:
- Red, white, and blue mason jar lids (various sizes)
- Decorative pinwheels in red, white, and blue (various sizes)
- Red and blue burlap ribbon (at least 2-3 inches wide and several yards long)
- Hot glue gun and glue sticks
- Wire wreath frame (size of your choosing)
Instructions:
- Wrap the red and blue burlap ribbon together around the wire frame, alternating the colors for a festive look. Secure the end with hot glue and continue wrapping tightly, overlapping slightly with each turn. Use hot glue periodically to secure the ribbon in place.
- Once the wire frame is completely covered with burlap ribbon, it’s time to add the mason jar lids! Arrange the lids on the burlap base in a way that creates a star shape. You can use a combination of red, white, and blue lids to create a patchwork star pattern.
- Securely hot glue each mason jar lid to the burlap base.
- Arrange the pinwheels on the burlap base, filling in any gaps between the mason jar lids. You can create a cluster in the center of the star or scatter them evenly around the wreath.
- Securely hot glue each pinwheel to the burlap base. For larger pinwheels, you may need multiple dots of glue for stability.
21. The Patriotic Yarn and Button Banner Wreath
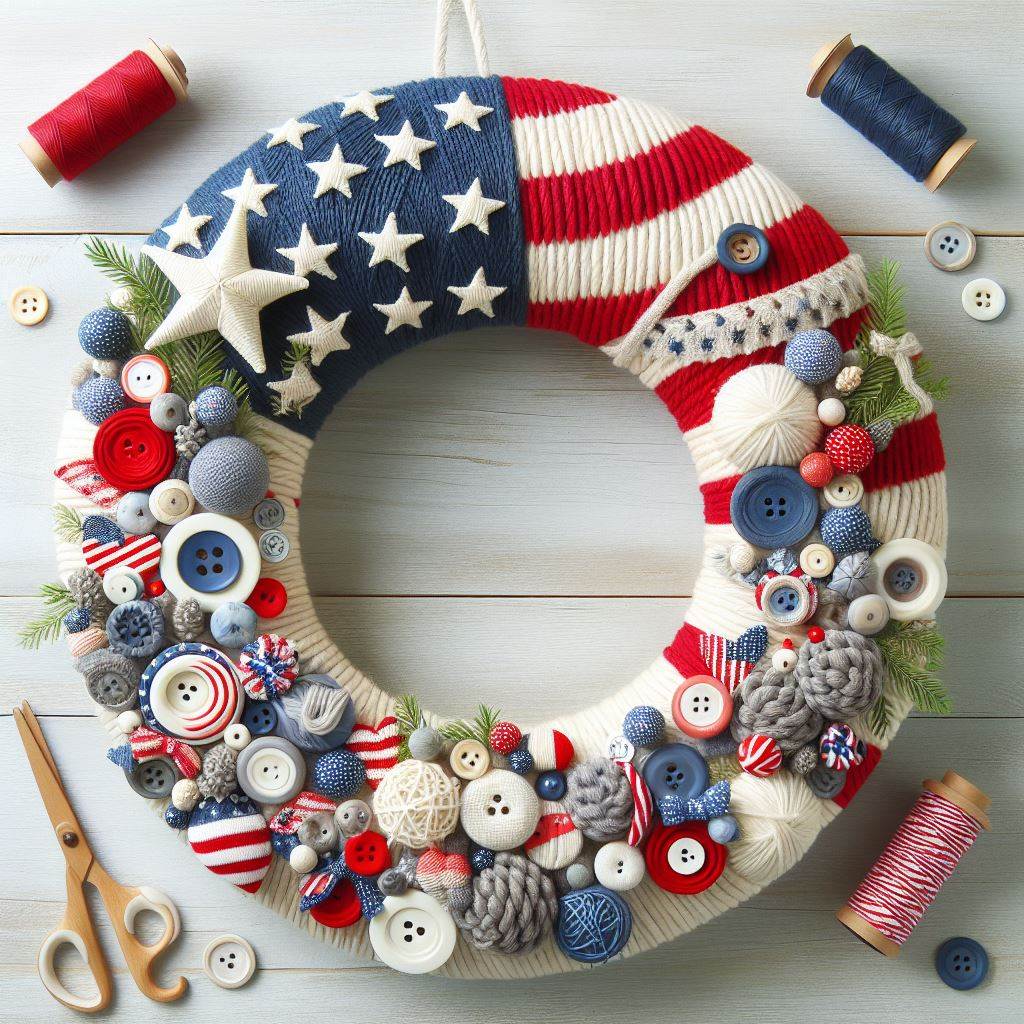
Celebrate summer holidays with a touch of homespun charm using readily available materials.
Materials:
- Red, white, and blue yarn (in various weights and textures)
- Buttons in red, white, and blue (various sizes and styles)
- Cardboard cutouts (star shapes or letter shapes to spell “USA”) (optional)
- Hot glue gun and glue sticks
- Wire wreath frame (size of your choosing)
Instructions:
- (Optional) Cut out star shapes or letter shapes to spell “USA” from cardboard. These will form the base for your yarn and button embellishments.
- Wrap the yarn colors together loosely around the wire frame. Overlap the yarn slightly and secure it with hot glue periodically to create a base for the wreath. You can use a variety of yarn weights and textures for added visual interest.
- Once the wire frame is partially covered with yarn, it’s time to add the buttons! Arrange the buttons on the yarn base, creating a pattern or design that complements the red, white, and blue color scheme.
- Securely hot glue each button to the yarn base. You can use a combination of sewing and gluing buttons for a more secure attachment, especially for heavier buttons.
- (Optional) If using cardboard cutouts, hot glue them onto the yarn base before adding the buttons. Arrange the buttons over the cardboard to create a cohesive design.
22. The Watermelon Wedge and Tiki Cocktail Summer Luau Wreath
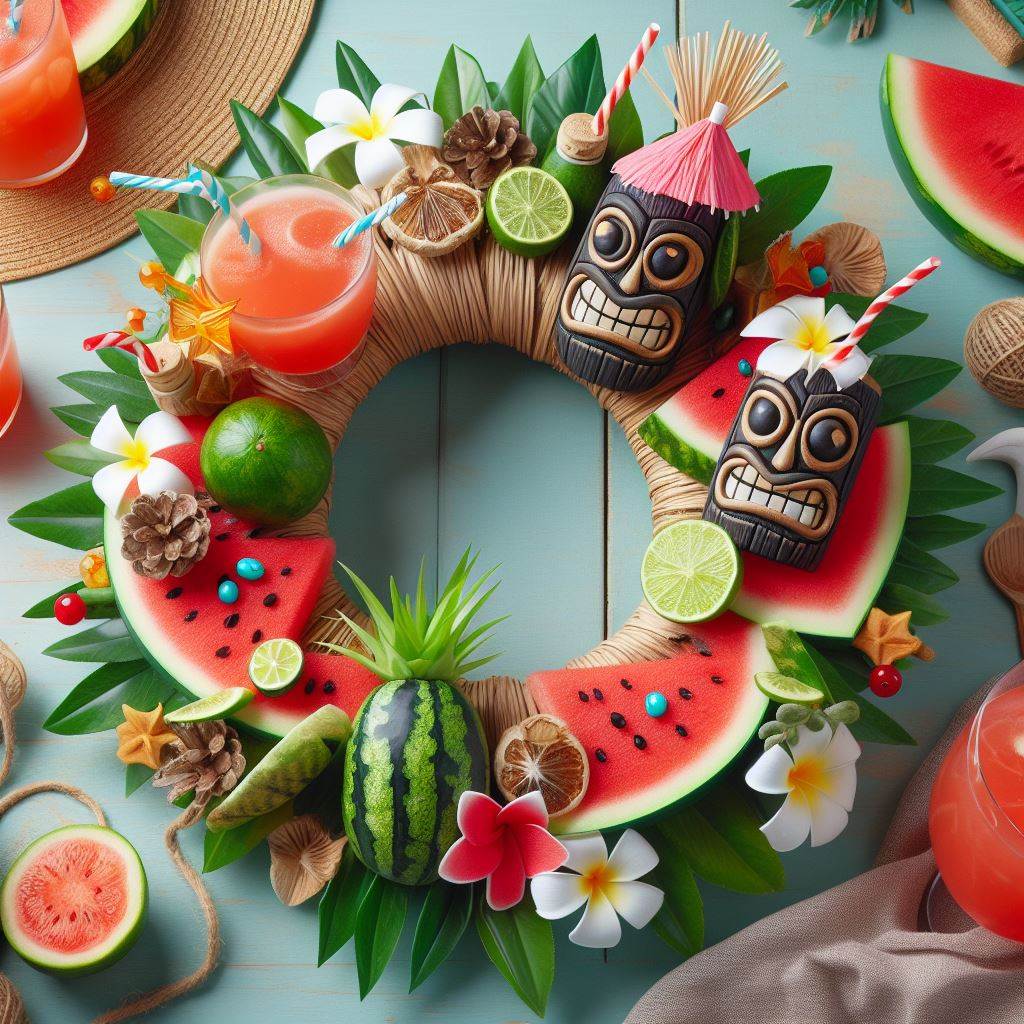
Embrace the spirit of summer fun with a vibrant wreath that evokes tropical vibes.
Materials:
- Pink felt
- Green felt
- Black sharpie marker
- Red felt or fabric scraps
- Artificial flowers ( plumeria or hibiscus flowers)
- Hot glue gun and glue sticks
- Wire wreath frame (size of your choosing)
Instructions:
- Cut out large watermelon wedge shapes from your pink felt. You can use a freehand approach or create a template for perfect uniformity.
- Cut out large watermelon rind shapes from your green felt. These slices will be slightly larger than the pink felt watermelon wedges.
- Use the black sharpie marker to add small details to the pink felt watermelon wedges. Draw curved lines to depict the texture of the watermelon flesh.
- Cut out small triangular shapes from the red felt or fabric scraps. These will represent the watermelon seeds.
- Use hot glue to assemble the watermelon wedges! Attach the red felt seed triangles onto the pink felt watermelon wedges.
- Layer the green felt watermelon rind (with rind) onto the pink felt watermelon wedge (with seeds). Secure them together with hot glue.
- Arrange the artificial flowers on the wire frame, creating a base of tropical blooms.
- Securely hot glue the watermelon wedge (layered with rind) onto the wreath frame, positioning it strategically among the flowers.
- (Optional) Add additional elements like small cocktail umbrellas or miniature pineapples for a touch of playful tiki charm.
23. The Recycled Flip Flop and Seashell Coastal Chic Wreath
Upcycle your old flip flops and seashells into a delightful reminder of summer beach days.
Materials:
- Old flip flops in various colors (mismatched is perfectly fine!)
- Seashells (various sizes and shapes)
- Hot glue gun and glue sticks
- Spray paint (optional) – white, cream, or light blue can add a touch of uniformity to the flip flops.
- Wire wreath frame (size of your choosing)
Instructions:
- Gather your old flip flops and unleash your creativity! You can cut the flip flops into strips of varying widths or create fun shapes like flowers or fish.
- (Optional) If desired, spray paint the flip flop pieces in a light summery color. Let the paint dry completely.
- Use hot glue to secure the cut flip flop pieces or shapes onto the wire wreath frame.
- Start by attaching the larger pieces first, building a base for the wreath. Then, fill in the gaps with smaller flip flop pieces or shapes.
- Overlap the flip flop pieces slightly for a more cohesive look.
- Arrange the seashells on the wreath frame, tucking them in between the flip flop pieces or hot gluing them securely in place.
- Add a finishing touch with a small piece of twine tied in a bow or a length of jute nautical rope wrapped around the outer edge of the wreath.
24. The Patriotic Fabric Scrap and Star Banner Wreath
Showcase your patriotic spirit with a vibrantly colored wreath made from upcycled fabric scraps.
Materials:
- Red, white, and blue fabric scraps (in various patterns and textures)
- Cardboard cutouts (star shapes)
- Scissors or rotary cutter
- Sewing machine (optional) – hand sewing can also work
- Hot glue gun and glue sticks
- Wire wreath frame (size of your choosing)
Instructions:
- Cut out star shapes from your red, white, and blue fabric scraps. You can use a cookie cutter or create a template for perfect uniformity. Aim to create a variety of star sizes for added visual interest.
- (Optional) If using a sewing machine, sew two or three fabric star shapes together, creating a more substantial and textured look for each fabric star.
- Arrange the fabric stars on a flat surface to visualize the overall design. You can create a random pattern, cluster them in the center, or form a specific pattern like stripes or a starburst.
- Once you’re happy with the layout, use hot glue to secure the fabric stars onto the wire wreath frame. Overlap the stars slightly for a fuller appearance.
25. The Lemon and Lavender Farmhouse Chic Wreath
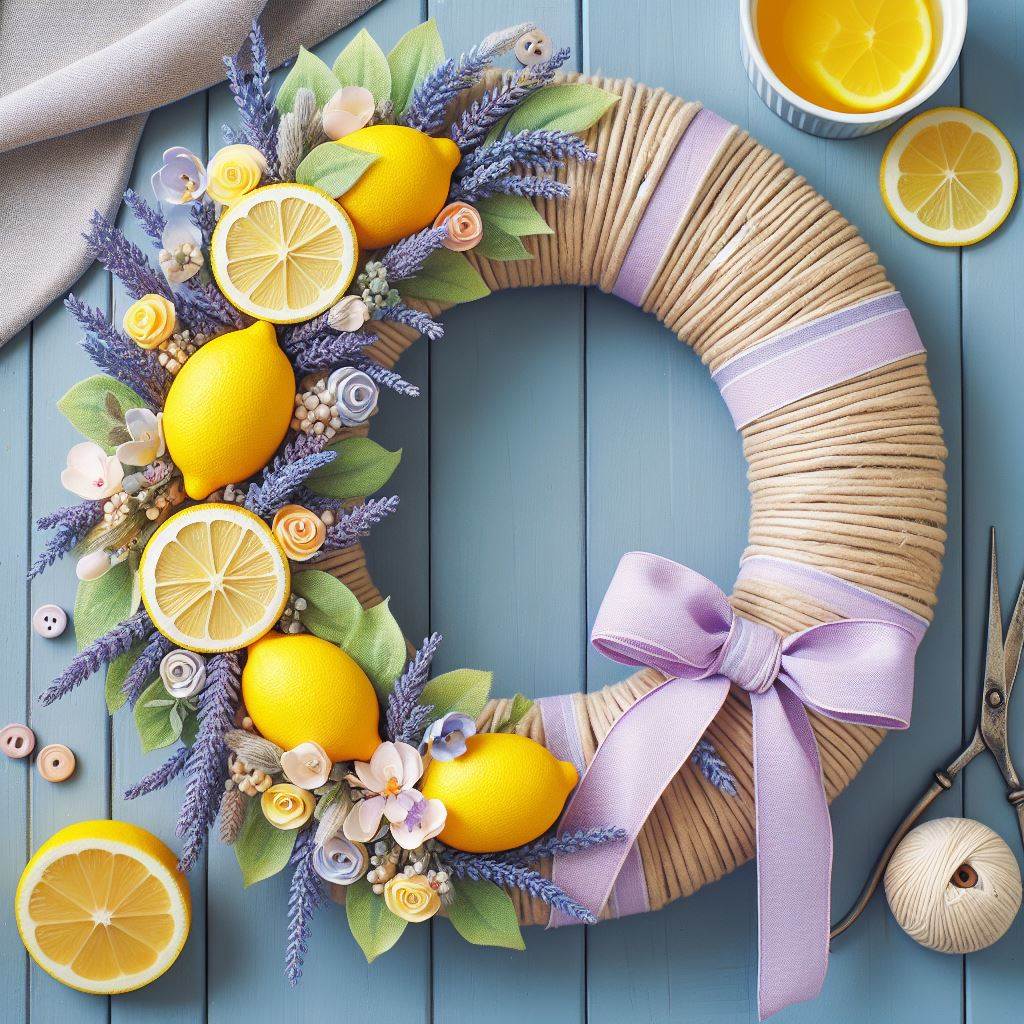
This elegant wreath combines the refreshing scent of lavender with the sunny charm of lemons for a delightful summer statement.
Materials:
- Artificial lemons (various sizes and shades of yellow)
- Dried lavender bundles
- Burlap ribbon (at least 3-4 inches wide and several yards long)
- Floral wire or pipe cleaners
- Hot glue gun and glue sticks
- Wire wreath frame (size of your choosing)
Instructions:
- Wrap the burlap ribbon around the wire frame, securing the end with hot glue. Continue wrapping tightly, overlapping slightly with each turn. Use hot glue periodically to secure the ribbon in place.
- Once the wire frame is completely covered with burlap ribbon, it’s time to add the lemons! Arrange the lemons on the burlap base in a way that is pleasing to the eye. You can create a cluster in the center, scatter them evenly, or arrange them in a specific pattern.
- Securely attach the lemons to the burlap base using floral wire or pipe cleaners. Wrap the wire or pipe cleaner around the stem of the lemon and twist it tightly to secure. Tuck the ends of the wire or pipe cleaner into the burlap base and hot glue them in place for added stability.
- Tuck the dried lavender bundles in between the lemons and the burlap base. You can secure them with floral wire or pipe cleaners if needed.
- (Optional) Add a touch of rustic charm with a small piece of twine tied in a bow or a small wooden bead hot glued onto the wreath for a finishing touch.
26. The Seashell and Netting Mermaid’s Treasure Wreath
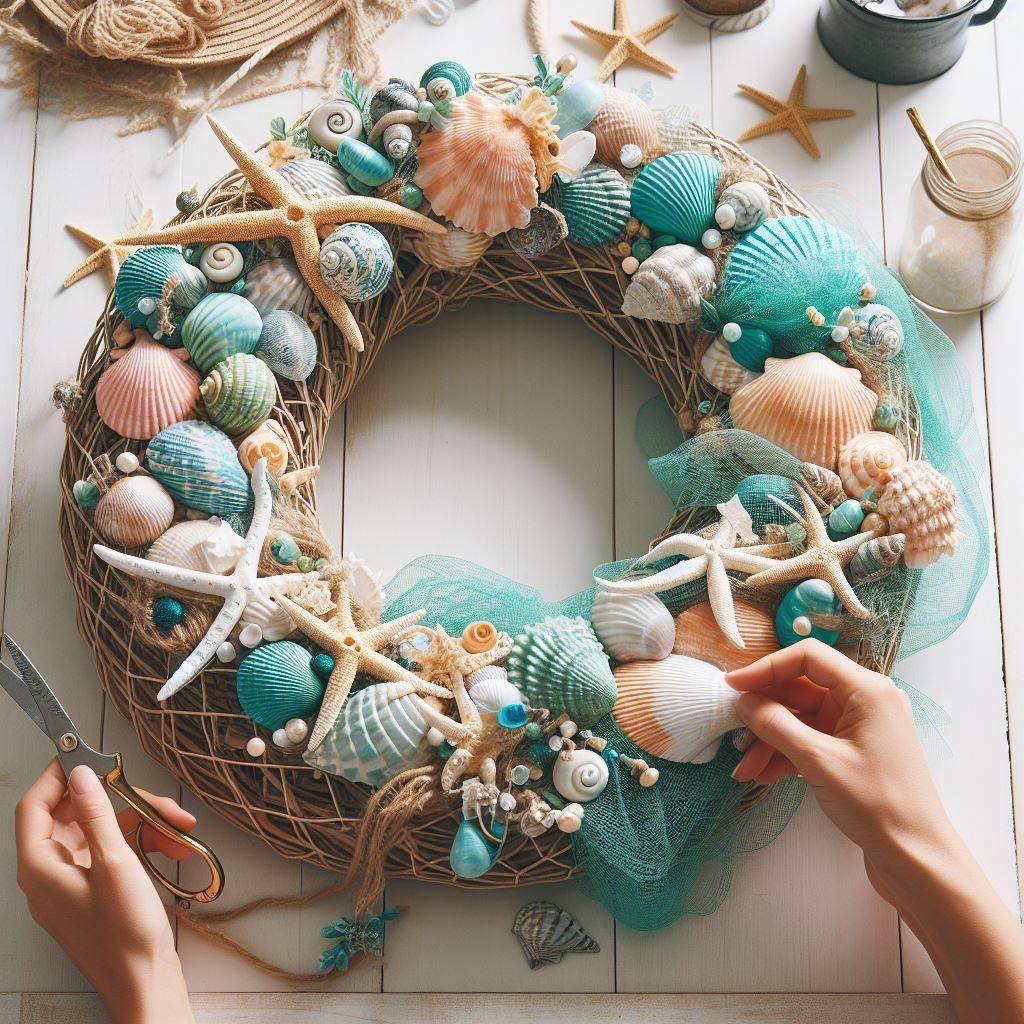
Embrace the magic of the ocean with a whimsical wreath that incorporates natural treasures and nautical elements.
Materials:
- Seashells (various sizes and shapes)
- Fishing net scraps (or a similar lightweight netting material)
- Twine or string in a natural color
- Hot glue gun and glue sticks
- Artificial starfish (optional)
- Wire wreath frame (size of your choosing)
Instructions:
- Cut the fishing net scraps into manageable pieces. You can create long strips or smaller squares, depending on your preference.
- Begin by wrapping the fishing net scraps loosely around the wire frame. Overlap the pieces slightly and secure them with hot glue or by weaving the twine or string through the netting to hold it in place.
- Once the wire frame is partially covered with netting, it’s time to add the seashells! Arrange the seashells on the netting base, filling in any gaps and creating a visually pleasing composition.
- Securely hot glue each seashell to the netting base. Larger seashells may require multiple dots of glue for stability.
- Wrap the twine or string around the wreath several times, creating a decorative border and further securing the netting in place. Tie the ends in a bow at the top of the wreath.
- (Optional) Add a touch of whimsy by hot gluing an artificial starfish or two onto the wreath, creating a focal point and enhancing the “mermaid’s treasure” theme.
27. The Butterfly and Lavender Dreamy Summer Wreath

This ethereal wreath combines delicate butterflies with fragrant lavender for a touch of romantic elegance.
Materials:
- White lace fabric or ribbon (at least 3-4 inches wide and several yards long)
- Artificial butterflies in various colors and sizes
- Dried lavender bundles (or a combination of dried lavender and other fragrant summer herbs like chamomile or lemon balm)
- Floral wire or pipe cleaners
- Hot glue gun and glue sticks
- Wire wreath frame (size of your choosing)
Instructions:
- Wrap the white lace fabric or ribbon loosely around the wire frame, securing the end with hot glue. Continue wrapping tightly, overlapping slightly with each turn. Use hot glue periodically to secure the lace in place.
- Once the wire frame is completely covered with lace, it’s time to add the butterflies! Arrange the butterflies on the lace base in a way that is pleasing to the eye. You can create a cluster in the center, scatter them evenly, or arrange them in a specific pattern like a swirling flight.
- Securely attach the butterflies to the lace base using floral wire or pipe cleaners. Wrap the wire or pipe cleaner around the body of the butterfly and twist it tightly to secure. Tuck the ends of the wire or pipe cleaner into the lace and hot glue them in place for added stability.
- Tuck the dried lavender bundles in between the butterflies and the lace base. You can secure them with floral wire or pipe cleaners if needed.
- (Optional) Add a touch of elegance with a small pearl bead or a tiny white satin ribbon bow hot glued onto the wreath for a finishing touch.
Bonus Tips
Don’t be afraid to experiment with non-traditional wreath shapes! Heart shapes, star shapes, or even a horseshoe shape can add a unique touch to your summer décor.
Here are some additional tips for crafting your summer wreath:
- Choose high-quality materials: While some projects involve upcycled materials, using good quality materials like burlap ribbon or colorful felt will ensure your wreath looks polished and lasts longer.
- Consider the size and scale: Make sure your wreath is proportionate to the door or space where it will be displayed.
- Think about balance and placement: Arrange the elements of your wreath in a way that is pleasing to the eye. Vary the sizes, textures, and colors for visual interest.
- Don’t forget the finishing touches: A simple ribbon bow, a small wooden sign with a summery saying, or a cluster of tiny pinecones can elevate your wreath and make it look more complete.
- Hang your wreath with pride! Display your handcrafted creation on your front door, a wall in your living space, or even a window for a touch of summer sunshine indoors.
With a little creativity and these easy-to-follow instructions, you can have a beautiful and unique summer wreath gracing your home in no time. So grab your crafting supplies, turn on some upbeat music, and get ready to celebrate the season with a DIY masterpiece!
Conclusion
With this collection of 27 inspiring DIY summer wreath ideas, you’re armed with a treasure trove of creative possibilities to celebrate the warm and vibrant spirit of summer. Remember, there are no hard and fast rules! Mix and match elements you love, personalize with meaningful touches, and let your imagination guide you. The ultimate goal is to create a wreath that reflects your unique style and adds a touch of summer magic to your home!