
A row of gladiolus spikes pushed against a fence can look stiff, like a line of soldiers waiting for orders. The same flowers, planted in staggered drifts among softer plants, look relaxed and generous. The difference is rarely the flower. It comes down to where you put it, what surrounds it, and whether you planted it at the right time to bloom when you want it.
Gladiolus grows from a corm, a swollen underground stem that looks like a flattened bulb, and most people call them bulbs anyway. The tall, sword-shaped leaves and the stacked flowers make them one of the most architectural summer flowers you can buy cheaply. They also come with quirks: they flop without support, they bloom for a short window, and in cold climates the corms have to be lifted every fall. A good landscape plan accounts for all three.
The ideas below come first, since that’s usually what people are searching for. The planting guide follows, covering depth, spacing, timing, staking, and what to do when the season ends.
Eleven Ways to Landscape with Gladiolus
1. Stagger Them in a Cottage Garden Border
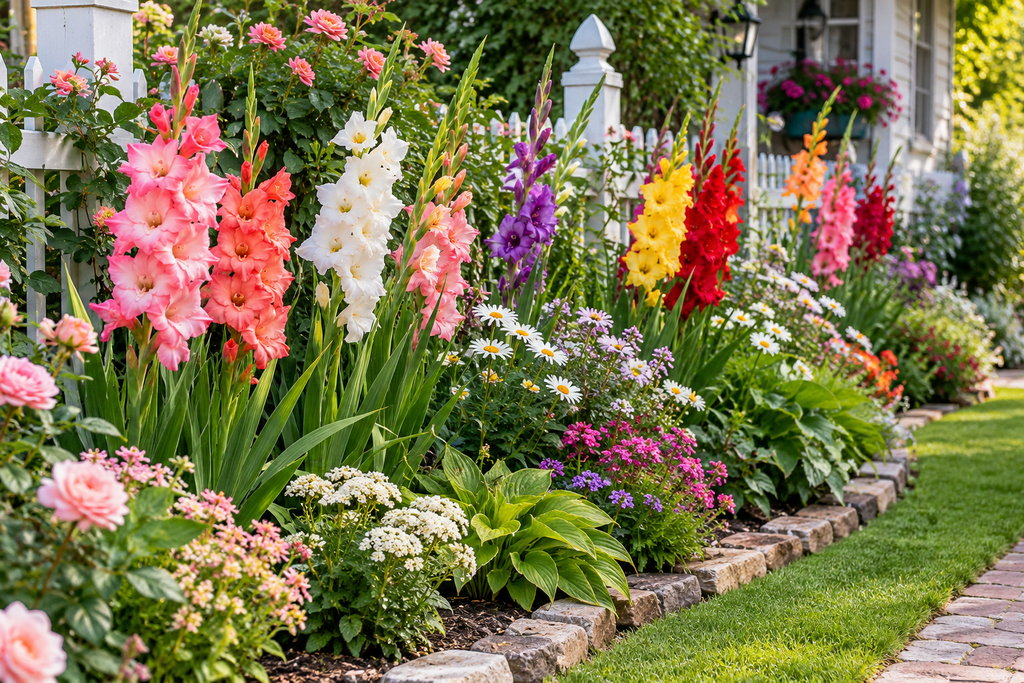
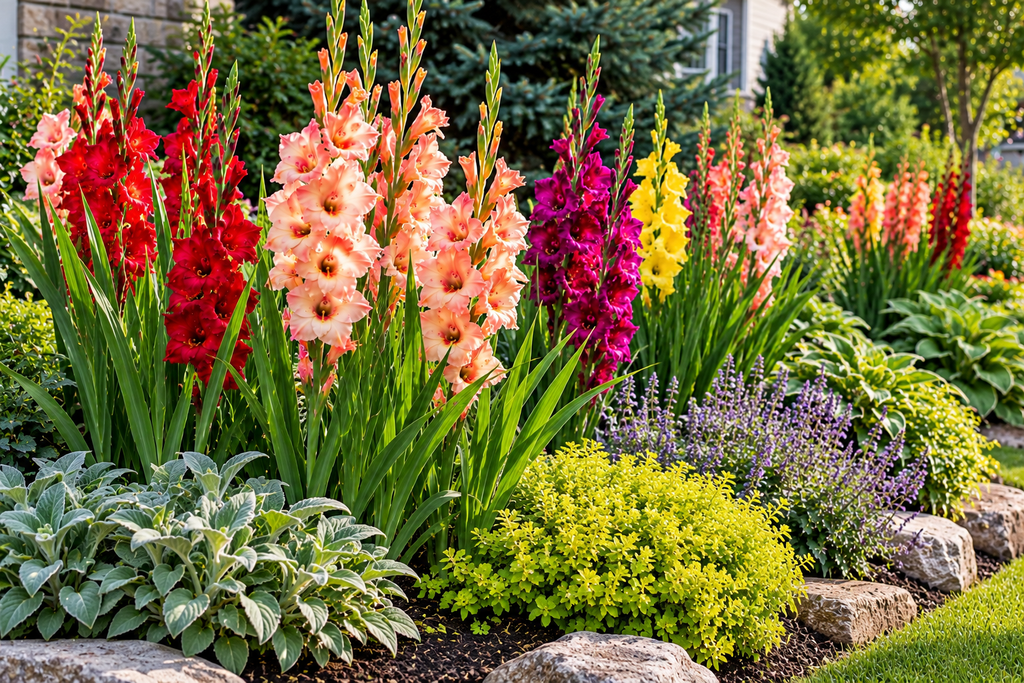
Cottage-style borders suit gladiolus because the look depends on a loose, slightly crowded mix, and gladiolus provides the vertical punch that cottage gardens often lack. Tall spikes behind shorter plants give the bed some height without a rigid structure.
The trick is to avoid planting them in a straight line. Set groups of five to nine corms in irregular clusters, and put one or two clusters toward the middle of the bed rather than only at the back. When the spikes rise above plants like catmint, cranesbill geranium, or lamb’s ear, they seem to float.
Pair them with plants that are already looking good in midsummer. Early bloomers like peonies and bearded iris are finished by then, so the gladiolus will be asked to carry the border on its own unless you add companions such as coneflower, daisies, or bee balm.
Practical note: plant companions that can hide the gladiolus foliage later in the season. After the flowers fade, the leaves yellow and look untidy for weeks. A mound of leafy perennials in front handles this well.
2. Plant Them in Rows for a Cutting Garden Edge
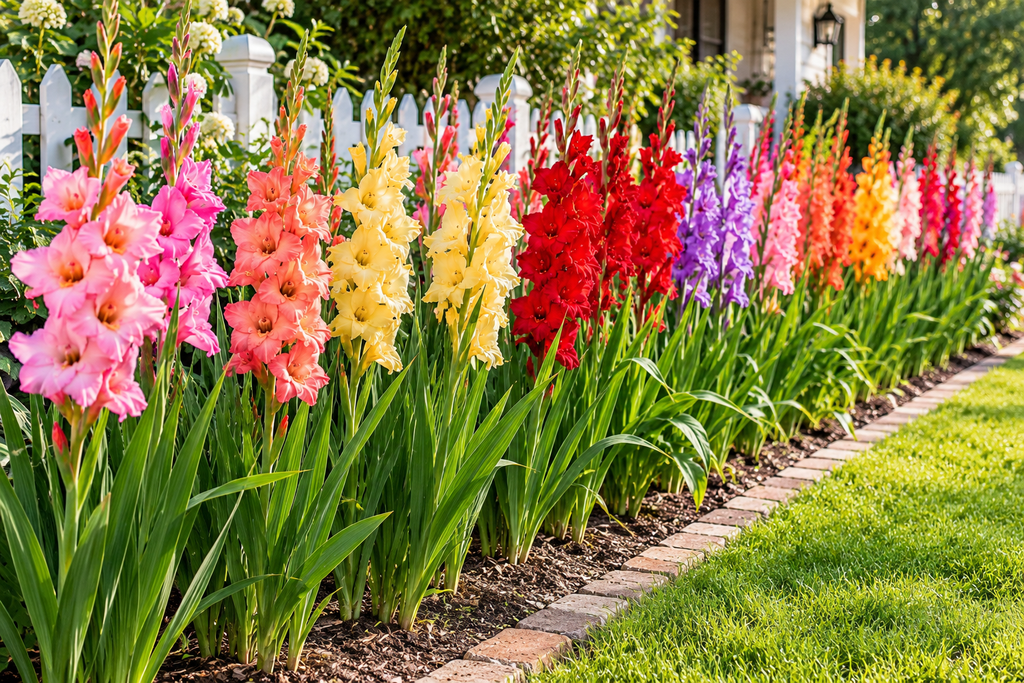
A gladiolus bed is one of the best cut-flower plantings because the spikes last well in a vase, and you cut them before they’re fully open anyway. If you want to bring flowers inside, a dedicated strip works better than scattering corms through an ornamental border, where cutting leaves holes.
This is the one situation where rows make sense. Plant in single or double rows about 4 to 6 inches apart within the row, with rows spaced 18 to 24 inches apart so you can reach in and cut without trampling neighbors. A narrow bed along a vegetable garden, a sunny side yard, or the edge of a fence all work.
Because gladiolus doesn’t rebloom from the same spike, many gardeners plant a new batch every two weeks from spring until about midsummer. This staggered schedule is called succession planting, and it extends bloom for weeks instead of leaving you with one flush that lasts about ten days.
3. Use Them as a Backdrop Along a Fence or Wall
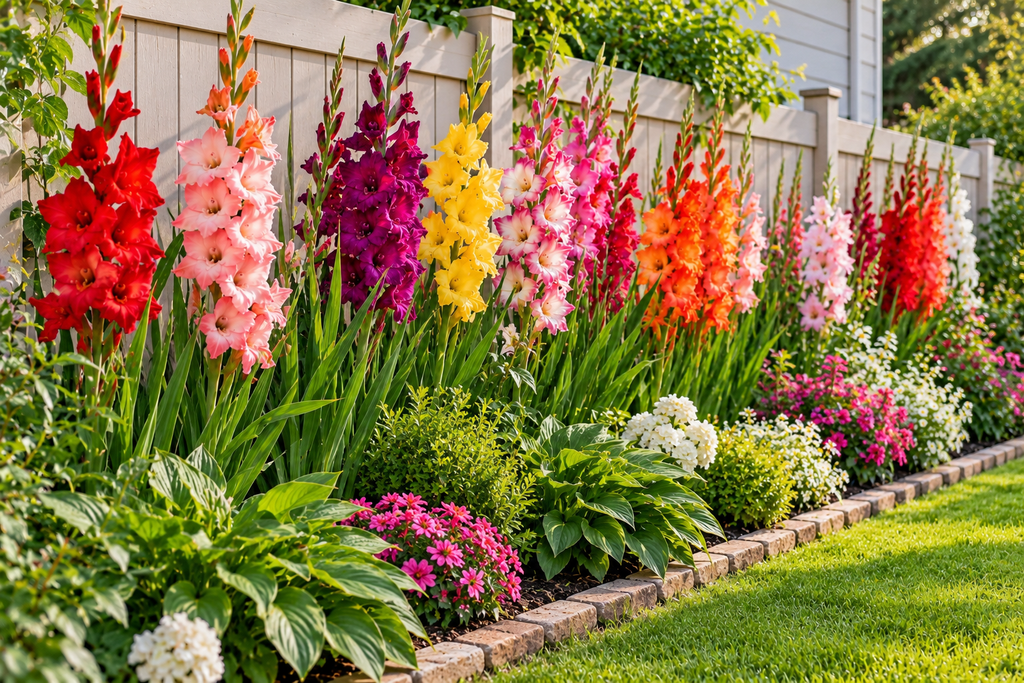
A plain fence is a natural stage for tall gladiolus. The structure behind them does two things: it gives you something to tie stems to, and it makes the colors read more clearly. Pale flowers such as cream, soft pink, and white show up especially well against a dark-stained or painted fence, while deep reds and purples look richer against light-colored siding or stone.
Leave a gap of about 8 to 12 inches between the fence and the first row for airflow. Crowded, damp corners can encourage fungal problems, and gladiolus leaves stay healthier when air can move around them.
If the fence faces north or sits in heavy shade, skip this idea. Gladiolus needs full sun, meaning at least six hours of direct light, and in shade it tends to produce weak, leaning stems and fewer flowers.
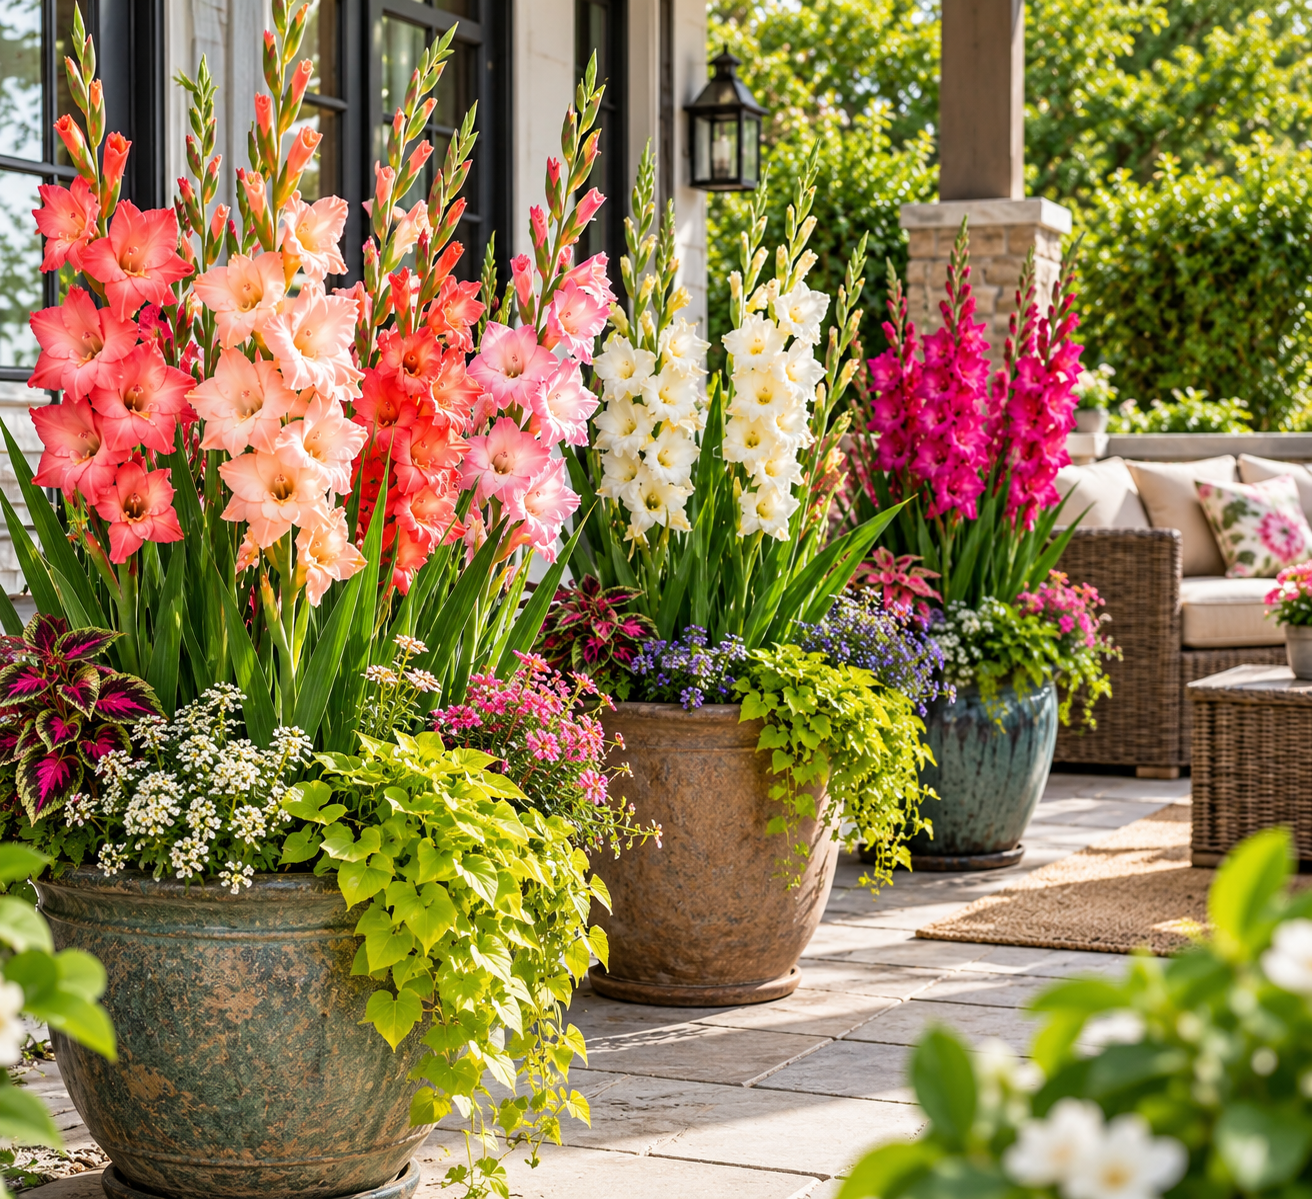
4. Plant Them in Large Containers on a Patio
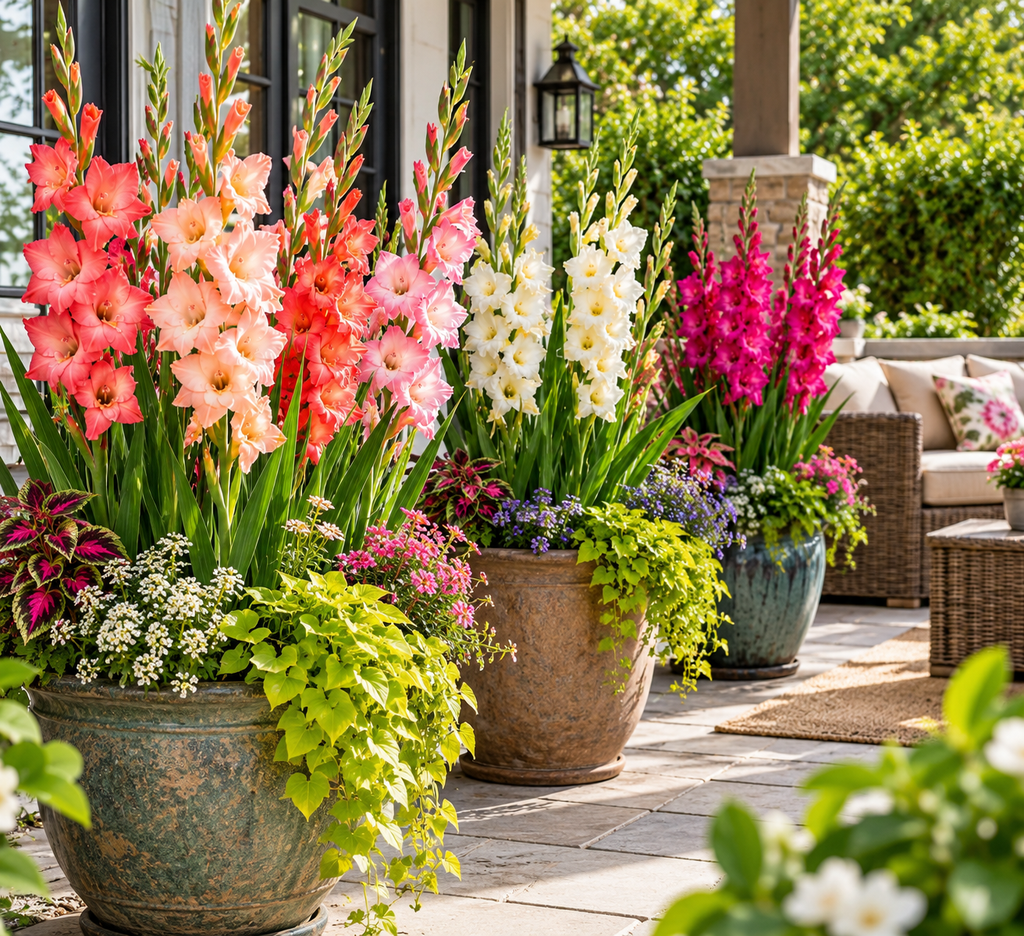
Gladiolus grows perfectly well in pots, which makes it a good option for renters, small patios, or anyone with poor native soil. The container should be at least 12 inches deep and wide, with drainage holes. Plant corms about 3 to 4 inches apart, which is closer than you would in the ground, and cover them with 4 inches of potting mix.
Container-grown gladiolus needs support too. A pot packed with tall spikes can tip over in wind, so choose a heavy container (ceramic, terra cotta, or thick resin) and consider adding stakes at planting time rather than after the stems are already leaning.
Choose shorter varieties for pots if wind is a problem. Dwarf and miniature types, often sold as “Nanus” or “Glamini” series, reach roughly 2 feet and don’t need the same level of staking. Check the plant tag or the seller’s description for mature height, since height varies a lot between cultivars.
Containers also make fall cleanup easy. When the season ends, you can move the pot to a garage or shed (see the storage section below) or tip the corms out and sort them without digging.
5. Mix Them with Ornamental Grasses
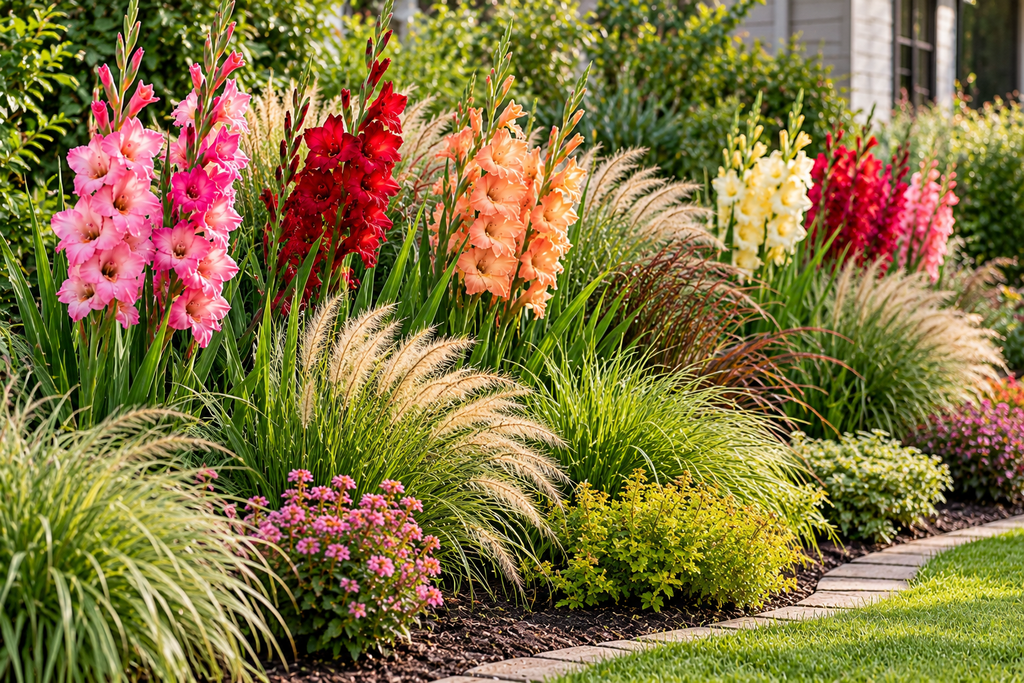
This pairing solves the stiffness problem. Gladiolus has a vertical, formal outline, and ornamental grasses add movement and softness. Medium grasses like feather reed grass, little bluestem, or fountain grass sway around the flower stems and cover the dying foliage later.
Plant the corms in the gaps between grass clumps instead of directly in them, because established grass roots compete heavily for water and nutrients. Leave at least a foot between a corm and the crown of a grass clump.
This combination works best in a sunny, relatively informal planting, such as a meadow-style border or the edge of a gravel garden. It doesn’t suit a precise, clipped landscape where grasses would look out of place.
6. Build a Color-Block Planting
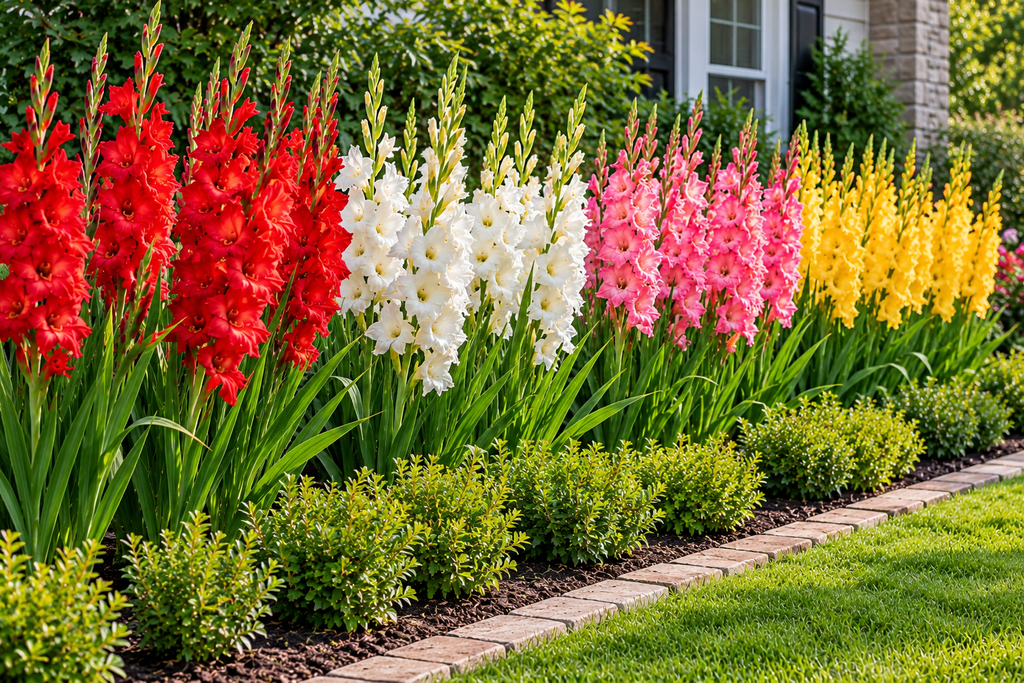
Instead of mixing every color, commit to one or two. A mass of a single color has more impact than a scatter of everything, and it’s easier to design around.
Some combinations that tend to work:
- Warm sunset palette: orange, coral, and yellow gladiolus with red-orange daylilies or crocosmia.
- Cool and calm: white and lavender spikes with silver foliage, such as artemisia or lamb’s ear.
- Bold contrast: deep purple gladiolus with chartreuse foliage like golden oregano or lime-green coleus.
- Monochrome pink: pale to deep pink gladiolus alongside pink phlox or cleome.
Gladiolus comes in nearly every color except true blue, and the flowers on a single stem open from the bottom upward. This means a block of one color will have a gradient of open and closed buds, which adds depth without needing a second color.
7. Create a Hot-Colored Island Bed
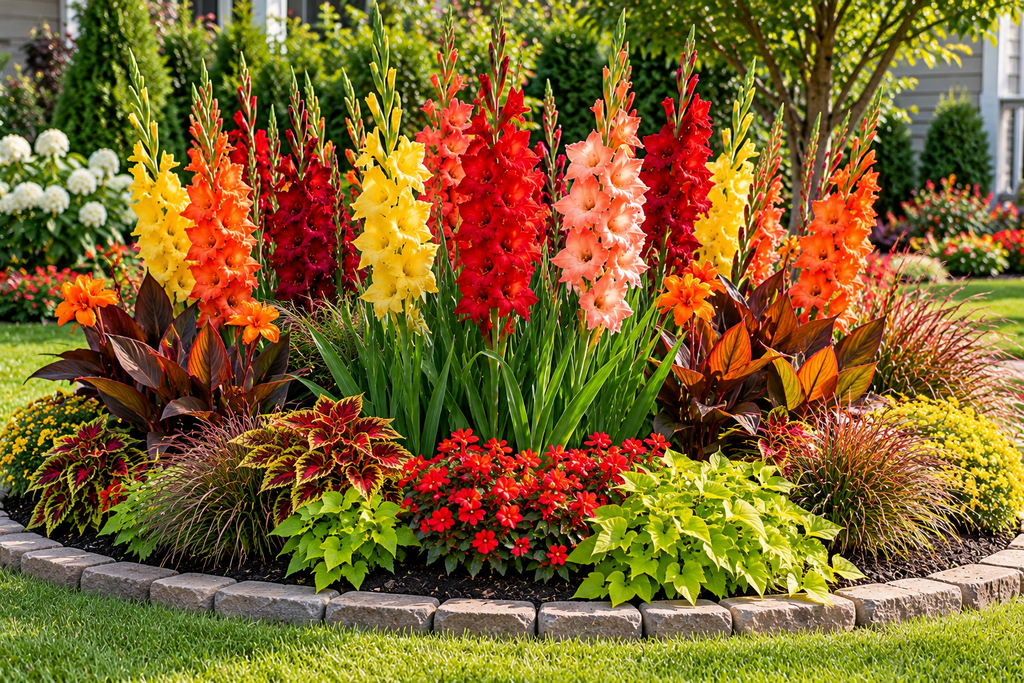
A freestanding bed in the middle of a lawn, sometimes called an island bed, can be viewed from every side, so the planting needs height in the center and lower plants around the edge. Gladiolus makes a good center column here.
Plant a core group of tall gladiolus in the middle, surround them with mid-height plants such as zinnias, dahlias, or rudbeckia, then edge the bed with low plants like sweet alyssum, creeping thyme, or dwarf marigolds. Mulch the whole bed to reduce weeding and hold moisture.
Island beds have one drawback: they need regular watering during dry spells because they have no shelter from wind. In a hot, dry summer, you may need to water deeply about once a week if rain is scarce, soaking the soil rather than sprinkling the surface.
8. Weave Them Through Vegetable Garden Edges
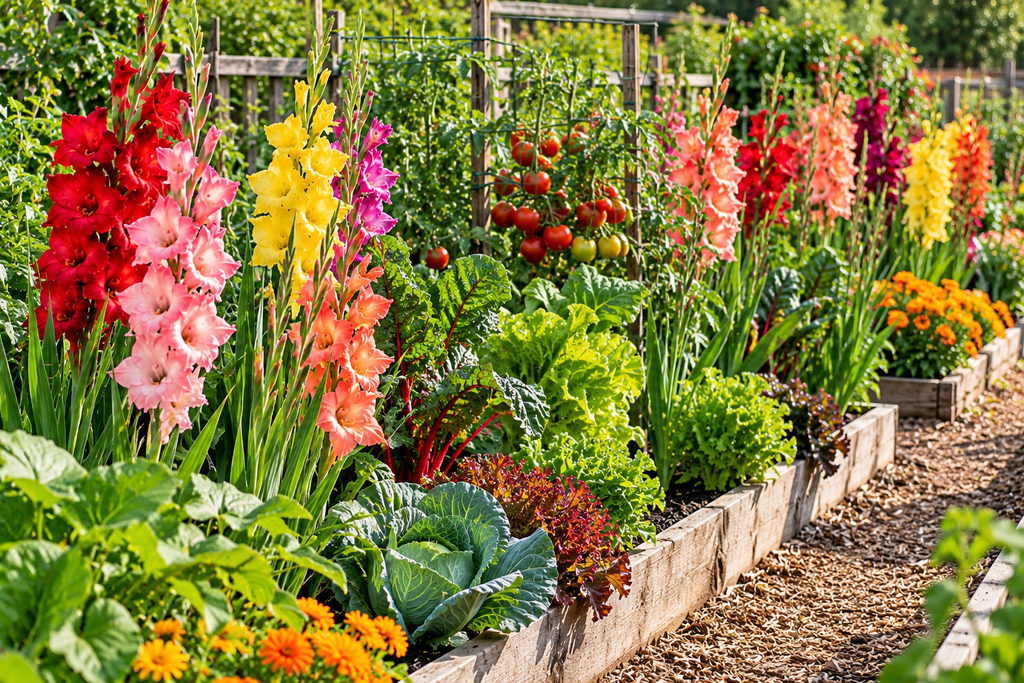
Flowers in a vegetable garden are a good habit. They attract pollinators, they add color, and they make the space more pleasant to work in. Gladiolus fits at the end of raised beds or along the border of a vegetable plot, where its height won’t shade shorter crops.
Plant them on the north side of low crops so the spikes don’t cast shadows over tomatoes or peppers. Keep them away from where you plan to rotate heavy feeders like squash and corn into the same soil later, because corms in the ground can complicate rotation.
Be aware that thrips, a tiny insect that scars petals and leaves, can move between gladiolus and nearby crops. Thrips are more of a flower problem than a vegetable problem, but healthy spacing and good airflow help reduce pressure. If you notice silvery streaks on the foliage or distorted buds, that’s a classic sign.
9. Frame a Walkway or Front Entry
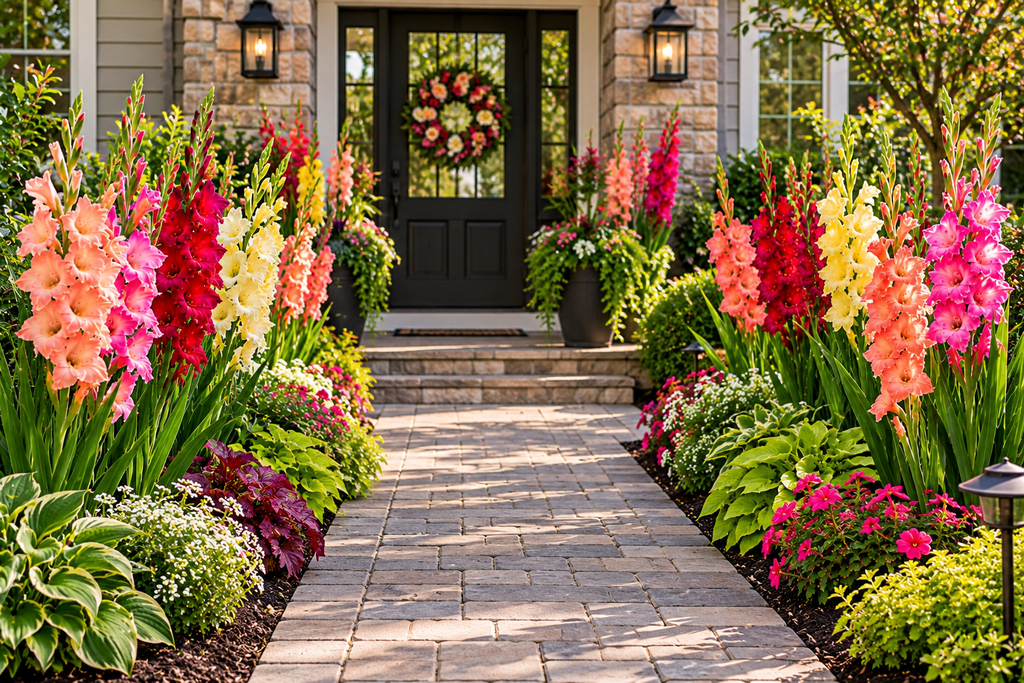
Gladiolus planted along a path can guide the eye to the door, but because the spikes get tall, they work best behind a shorter edging plant so the base of the stems and the yellowing lower leaves are hidden. Lavender, low catmint, and dianthus all fill that role.
Keep the planting set back from the walkway edge. Wet gladiolus stems bend over the path after a rainstorm, and a clump leaning across a narrow walkway quickly becomes a nuisance. Allow at least 12 inches between the corms and the edge, and stake taller varieties.
For an entry planting, think about the bloom window. Gladiolus flowers for roughly two to three weeks per planting. If the entry is where guests arrive for a summer party, count backward from the event date. Most varieties bloom 60 to 90 days after planting, though the exact number varies, so check the supplier’s information for the cultivar you buy.
10. Pair Them with Dahlias for Late Summer Drama
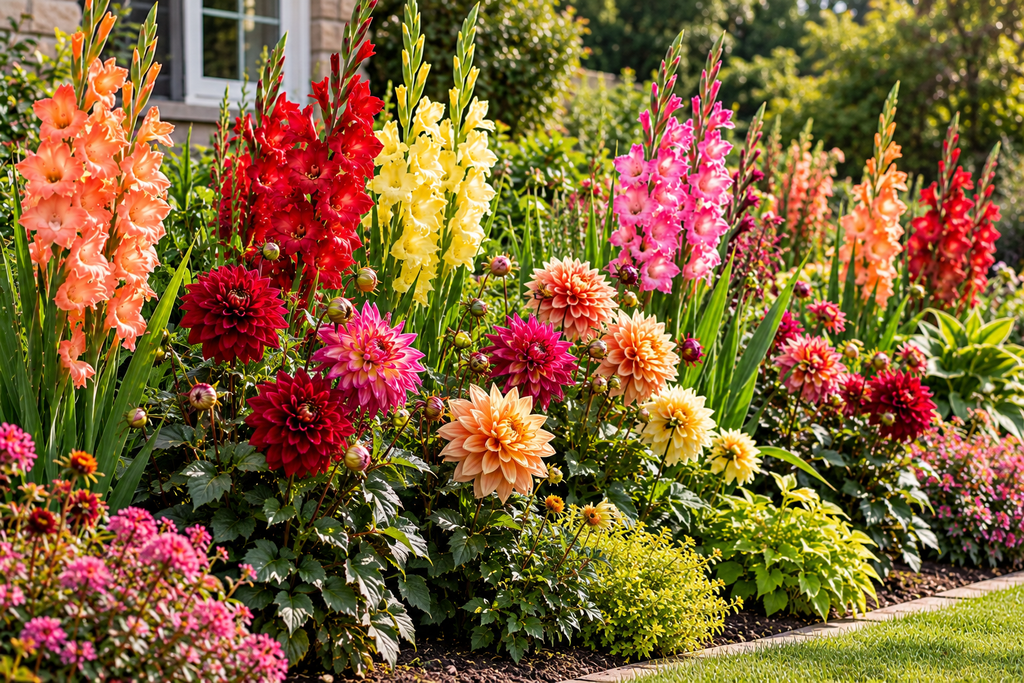
Gladiolus and dahlias have a lot in common: both are tender in cold climates, both are planted as tubers or corms in spring, both are dug in fall, and both love sun. That makes them easy to manage as a combined bed, because the planting and lifting schedule is the same.
Dahlias bulk up and flower heavily from mid to late summer, which covers the gap left when gladiolus finishes. Put the gladiolus toward the back or center and let the dahlias fill in around them. As the gladiolus foliage fades, the dahlia leaves take over visually.
The two also want similar soil: well-drained, fertile, and not constantly wet. Neither tolerates standing water around its storage organ.
11. Try Hardy Gladiolus in a Permanent Planting
Most garden gladiolus is not reliably winter-hardy in cold climates, but a few species and types are. Gladiolus communis subsp. byzantinus, often called the Byzantine or hardy gladiolus, produces magenta-pink flowers in late spring to early summer and can survive in the ground in many areas where the large-flowered hybrids can’t. The exact hardiness range varies by source, so confirm it for your zone with a nursery or your local extension office before relying on it.
The advantage is obvious: you plant once and skip the lifting. Hardy types usually have a looser, more delicate look, with smaller flowers on slimmer spikes, which suits naturalized plantings under shrubs, in meadow edges, or in informal borders.
The tradeoff is that they bloom earlier, so they won’t extend your summer color, and some can spread by cormlets. If that’s a concern, plant them where spread is welcome.
How to Plant Gladiolus Bulbs for Summer Blooms
Now for the practical part. Getting the planting right matters more than any design trick, since weak or late plants can’t deliver the effect you’re after.
Pick the Right Time
Plant gladiolus corms in spring, after the danger of hard frost has passed and the soil has started to warm. A common guideline is to start about two to four weeks before your average last frost date, as long as the soil is workable, since the corms can handle cool soil but not a hard freeze once shoots emerge. Many gardeners wait until the soil reaches around 55°F, which keeps the corms from sitting cold and wet and rotting.
If a late frost threatens after the shoots appear, cover them with a sheet or row cover overnight. Light frost can nip the leaf tips, but the plant usually recovers.
For continuous bloom, plant a new batch every one to two weeks, and stop about 8 to 10 weeks before your first expected fall frost. After that point, a late planting may not have time to flower.
Choose Healthy Corms
Buy firm corms that feel heavy for their size. Larger corms generally produce larger flowers and more stems. Skip any that are soft, shriveled, moldy, or have dark, sunken spots, which can signal rot or a fungal disease called Fusarium.
Size grading is common in catalogs. The bigger the diameter, the better the expected bloom, though small corms can still produce flowers and are cheaper. If you’re growing for show or cutting, buy the larger sizes.
Pick a Sunny, Well-Drained Site
Full sun is the main requirement, with at least six hours of direct light. Soil drainage matters nearly as much. Gladiolus corms rot in soggy ground, so avoid low spots where water pools after rain.
If your soil is heavy clay, work in compost to improve structure, or plant in a raised bed. If your soil is sandy and drains too fast, compost helps retain moisture. A soil pH in the slightly acidic to neutral range, roughly 6.0 to 7.0, is generally recommended, and a soil test through your local extension service will tell you where you stand.
Plant at the Right Depth and Spacing
A rule of thumb is to plant corms about 4 to 6 inches deep, with the pointed side up and the flat or slightly concave side down. Plant deeper, toward 6 inches, in light sandy soil, where the extra depth helps anchor tall stems, and a bit shallower in heavy clay.
Space corms about 4 to 6 inches apart for a dense, show-stopping group. Wider spacing, 6 to 8 inches, gives each plant more airflow, which is helpful if you’ve had fungal problems in the past.
If you have a handful of corms, planting in groups of at least five to seven gives a better display than single plants scattered around. Odd numbers tend to look more natural.
After planting, water once thoroughly to settle the soil. Don’t water heavily again until shoots appear, because the corms haven’t started growing and extra moisture can promote rot.
Water, Feed, and Mulch
Once growth begins, gladiolus needs roughly an inch of water per week, from rain or irrigation. Water at the base rather than from above, and do it in the morning so foliage dries during the day. Consistent moisture matters most when the flower spikes are forming, because drought stress at that stage can result in fewer or smaller blooms.
For fertilizer, a balanced fertilizer at planting, or a lower-nitrogen formula as the plants grow, is the usual advice. Too much nitrogen produces lush leaves at the expense of flowers. Follow the product label for rates, since concentrations vary widely.
A 2-inch layer of mulch, such as shredded bark or straw, keeps the soil cooler, holds moisture, and suppresses weeds. Keep it a little away from the stems.
Stake Before You Need To
Tall gladiolus often falls over in wind or heavy rain, especially once the flower spike gets heavy. Staking is easier and neater when done early.
Options include:
- Individual stakes: a bamboo cane or metal stake pushed in beside each stem, tied loosely with soft twine.
- Hilling soil: mounding soil 3 to 4 inches around the base of the stems as they grow adds some stability.
- Grow-through supports: a grid or netting stretched over the bed at about 12 inches high, so stems grow up through it.
- Fence or wall support: tying stems to a fence is the simplest method for a backdrop planting.
Planting deeper (toward 6 inches) also helps, because deeper corms produce sturdier stems.
Watch for Thrips and Other Problems
Gladiolus thrips are the most common pest. They’re slender and tiny, they feed on leaves and flowers, and they leave silvery streaks and brown, distorted petals. They can be difficult to see, so look for the damage rather than the insect.
Some practical measures:
- Plant on a staggered schedule so one outbreak doesn’t wipe out everything.
- Remove and dispose of heavily damaged spikes.
- Inspect stored corms in fall, because thrips can overwinter on them.
- For active infestations, use an insecticide labeled for gladiolus thrips, follow label directions exactly, and avoid spraying open flowers where pollinators are visiting. Check with your local extension office for products registered in your state.
Other issues include Fusarium and other fungal rots (avoid replanting gladiolus in the same spot year after year), and corm rot from poor drainage. Rotating the planting location every few years is the standard preventive advice.
Cutting Flowers for the House
Cut spikes when the first one to five flowers at the base have opened and color is showing on several more buds above. Use a sharp, clean knife or pruners and cut at an angle. Leave at least four leaves on the plant so the corm can still gather energy for next year.
Put stems in cool water right away. In a vase, trimming the stem ends and removing faded bottom flowers extends vase life. The top buds often continue to open as the lower ones fade.
What to Do After Blooming
After flowering, let the foliage keep growing and yellow naturally for about six weeks if possible, since the leaves are feeding the corm. Cut off the spent flower spike if you’re not cutting for the vase, so the plant doesn’t spend energy on seed.
In warm climates: In USDA zones 8 through 10 (check your local source, since recommendations vary), gladiolus corms can often stay in the ground over winter. They tend to bloom again, though flower quality may decline after a few years, and dividing clumps every few years helps.
In cold climates: In colder areas, corms need to be dug up. Dig them a few weeks after the first light frost or about six to eight weeks after bloom. Lift gently with a garden fork, cut the stalk down to about an inch, and set the corms in a warm, airy spot to cure for two to three weeks. Curing dries the corm skin and reduces rot in storage.
After curing, you’ll notice the old, shriveled corm beneath the new one. Remove the old one, and set aside the little cormlets that formed around the base. Those can be grown on to flowering size over a couple of seasons.
Store clean, dry corms in mesh bags, paper bags, or open crates in a cool, dry, well-ventilated place. A temperature range of about 40 to 50°F is often cited as ideal. Check them occasionally and discard any that go soft or moldy. Do not store them in sealed plastic, which traps moisture.
Questions Readers Often Ask
Can I leave gladiolus in the ground over winter?
It depends on your climate. In mild-winter areas, yes, and they may come back. In places where the ground freezes hard, most large-flowered hybrids won’t survive, so lift them. Hardy types like Gladiolus communis subsp. byzantinus are an exception.
Why didn’t my gladiolus bloom?
Common causes include corms that were too small, too little sun, planting too late in the season, drought during spike formation, thrips damage, or corm rot. Diagnosing it usually comes down to which of those fits your situation.
Do gladiolus come back every year?
In warm zones, often yes. Elsewhere, only if you dig and store the corms. Even in warm zones, performance can decline if the corms crowd or if disease builds up.
Are gladiolus safe for pets?
Gladiolus is listed as toxic to dogs, cats, and horses by the ASPCA, with the corms generally considered the most concerning part. If you have pets that dig or chew plants, consider keeping them away from the planting, and contact a veterinarian if ingestion is suspected. Handling corms can also irritate sensitive skin, so gloves are reasonable.
How many corms do I need for a nice display?
A cluster of 7 to 15 gives a noticeable effect in a border. For a cutting row, plan on a dozen or more per planting and repeat it every couple of weeks.
Wrapping It Up
Gladiolus rewards a little planning. Choose a sunny spot with good drainage, plant corms 4 to 6 inches deep in spring, stake early, and stagger plantings every couple of weeks if you want a longer show. For the design side, soften the vertical lines with grasses and billowy perennials, keep colors deliberate, and put something leafy in front to cover the foliage as it fades.
If you’re not sure where to start, plant one cluster of seven to nine corms in a sunny border this spring, with something low and bushy in front. See how it performs in your soil and climate before committing to a larger bed. And before lifting or leaving corms in the ground, check your zone’s guidance with your local extension office, since hardiness and timing recommendations vary by region.

About Syprose Kiche
Syprose Kiche is the creator and writer behind My Besuited Home, a practical home and garden website covering DIY projects, gardening, lawn care, landscaping, home improvement, and outdoor living. She focuses on turning everyday homeowner questions into clear, practical guides backed by careful research and useful real-world considerations.