
Your tomatoes are dead by October, your lettuce bolts the second summer hits, and every “affordable greenhouse kit” you’ve found online costs more than your car payment. Sound familiar? You want to grow something green in January without taking out a second mortgage on your backyard.
I get it. For years I stared at those glossy glass greenhouse photos on Pinterest and figured that kind of setup just wasn’t in the cards for me. Turns out, some of the best growing structures I’ve ever built cost less than a nice dinner out. You don’t need cedar framing and double-paned glass to keep basil alive in February. You need a plan, some scrap materials, and a willingness to get your hands a little dirty.
Below are seven budget backyard greenhouse ideas that actually work, plus the honest truth about which ones are worth your weekend and which ones will have you cursing by Sunday afternoon.
1. The PVC Hoop House (My Go-To for First-Timers)
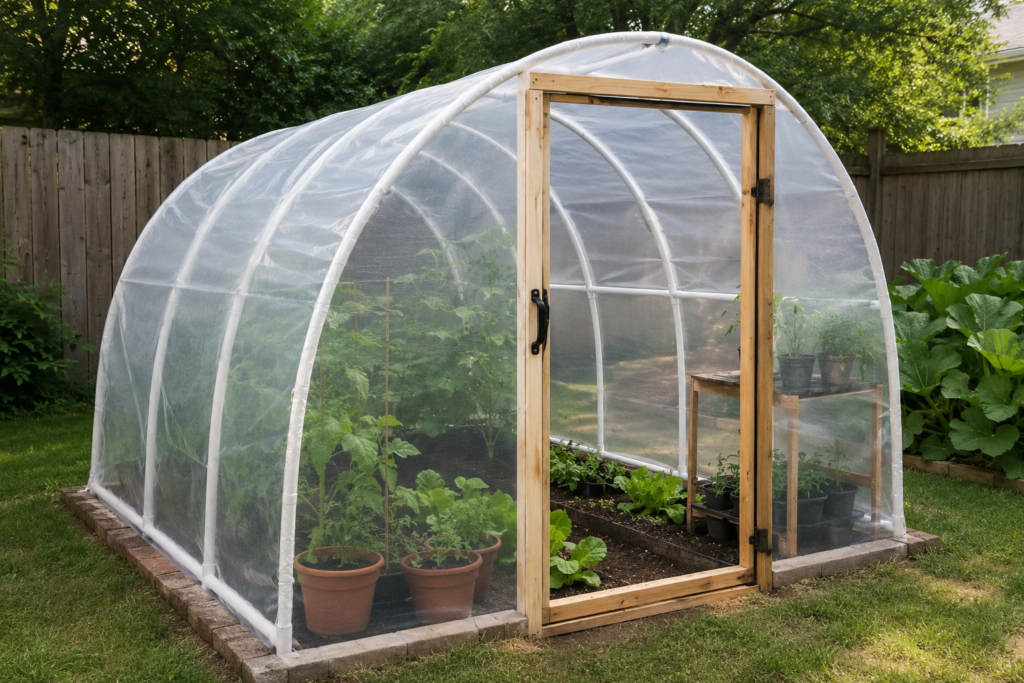
If you’ve never built anything in your life, start here. A PVC hoop house is basically a series of plastic pipe arches covered in greenhouse-grade plastic sheeting, and it’s the cheapest real greenhouse structure you can build.
Here’s the basic setup: you pound rebar stakes into the ground every few feet, slide half-inch PVC pipe over the stakes to form arches, then stretch 6-mil plastic sheeting over the whole frame and secure it with clips or wood furring strips. A 10-by-12-foot hoop house runs somewhere between $80 and $150 depending on how much PVC you need and whether you already own a staple gun.
I built my first one on a Saturday afternoon with my nephew, and neither of us had ever touched a PVC cutter before that day. We got the ends wrong twice, the plastic ripped once, and we still had it standing before dinner. That’s the beauty of this design: it forgives mistakes.
The keyword you’ll see people search for is “low tunnel greenhouse” or “hoop house for winter gardening,” and for good reason. This style extends your growing season by six to eight weeks on either end, which is huge if you’re trying to squeeze in a fall harvest of spinach or kale. Just know that a hoop house won’t hold heat the way a fully enclosed structure will, so it’s better suited for cold-hardy crops than for tropical plants that need consistent warmth.
One upgrade worth the extra ten dollars: buy the white greenhouse-grade plastic instead of clear painter’s plastic from the hardware store. Clear painter’s plastic yellows and gets brittle within a single season because it has zero UV protection built in. Greenhouse-grade sheeting costs a bit more up front, but I’ve had the same roll survive three winters, which more than makes up the difference. Also, don’t skip the wood furring strips when you attach the plastic to the base. Clips alone tend to pop loose in a strong gust, and I’ve chased a runaway sheet of plastic across my yard more times than I’d like to admit.
2. Old Window Cold Frame (Free If You Know Where to Look)
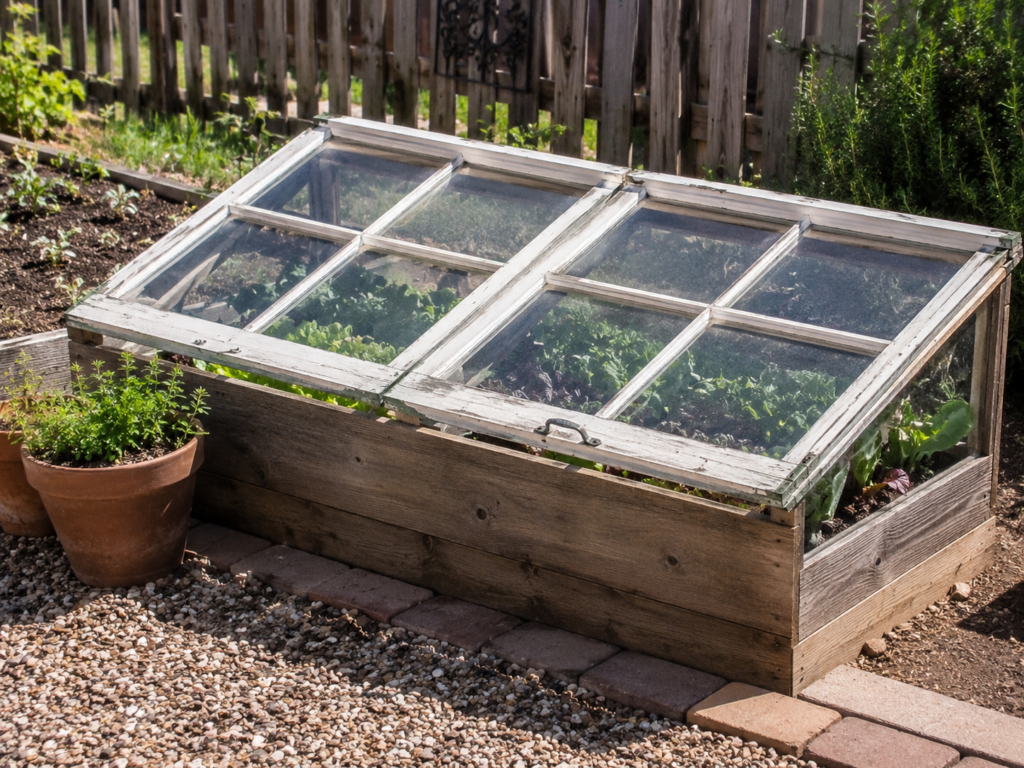
A cold frame is basically a mini greenhouse that sits low to the ground, and it’s the single cheapest option on this list if you can source materials for free. I’ve built three of these now, and every single one used old windows I picked up from a house being renovated down the street.
The construction is simple. Build a bottomless wooden box, angle the back higher than the front so rain runs off and sunlight hits at a better angle, then hinge an old window or storm door on top as the lid. That’s it. That’s the whole project.
Check community classifieds, salvage yards, or construction dumpsters (with permission, obviously) for old windows. Contractors replace windows constantly and most of them are thrilled to have someone haul the old ones away instead of paying disposal fees. I’ve gotten double-pane windows for free just by asking a contractor working two houses over if I could take what he was tossing.
Cold frames are perfect for hardening off seedlings in spring or keeping lettuce, spinach, and radishes going through a mild winter. Search terms like “DIY cold frame from old windows” or “recycled window greenhouse” will pull up dozens of variations, but the core concept stays the same: angled box, glass lid, done.
One thing people get wrong: they build the box too deep. You want enough room for your plants to grow without touching the glass, but a cold frame that’s too tall loses the compact heat-trapping effect that makes the whole thing work in the first place.
3. Repurposed Storm Windows Lean-To Against Your House
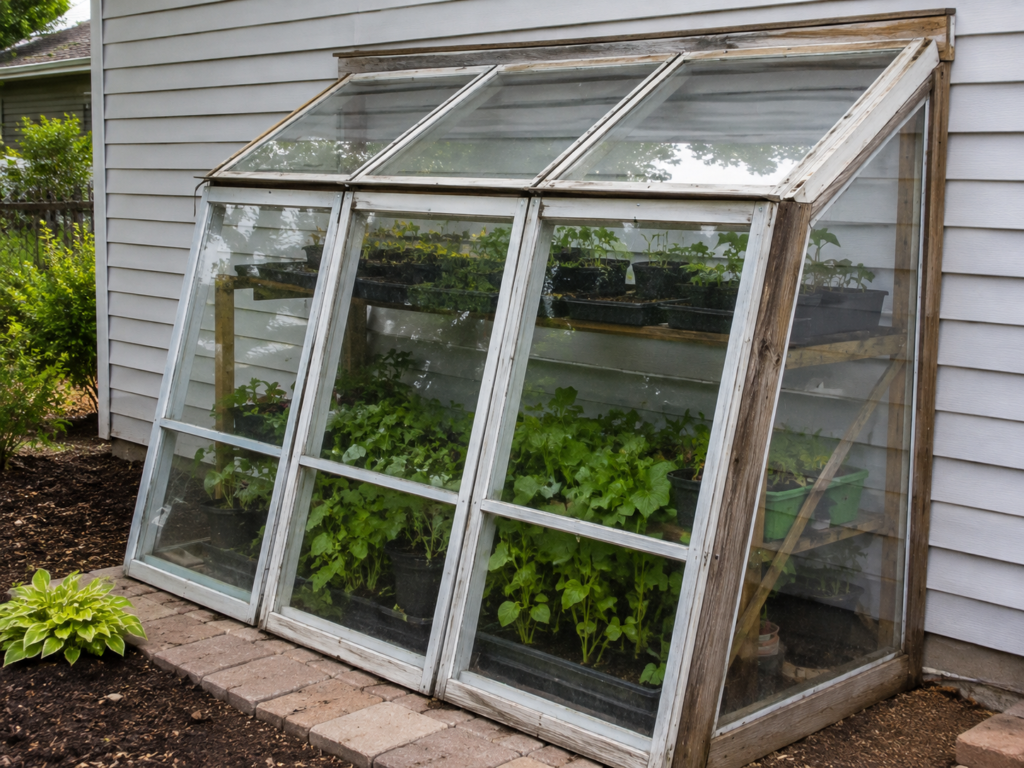
This one’s a personal favorite because it uses a surface you already have: the south-facing wall of your house or garage. A lean-to greenhouse leans its frame against an existing wall, which means you only need to build three sides instead of four, and you get free thermal mass from the wall itself.
Old storm windows or patio doors work great for the walls and roof panels. Frame it out with 2x4s, attach your salvaged glass or heavy-duty plastic panels, and seal the seams with clear silicone caulk. Because the structure shares a wall with your house, it actually stays warmer overnight than a freestanding hoop house, since your house is quietly leaking heat into it.
I put one of these against the south wall of my garage a few years back, and I still tell people about the difference it made. My rosemary and thyme survived a winter that killed the same plants in my neighbor’s freestanding cold frame just twenty feet away. The wall made that much of a difference.
The catch, and I’ll be straight with you, is that a lean-to requires more carpentry skill than a hoop house or cold frame. You’re dealing with a real roofline, real flashing to keep water out, and real angles to get right. If you’ve never framed anything before, this might not be your first greenhouse project. But if you’ve got basic tool skills, it’s one of the most efficient designs for the money because you’re leveraging a wall you already paid for.
Pay attention to your roof pitch on this one. I made the mistake on my first attempt of building the roof almost flat, figuring it would look sleeker against the garage wall. Big mistake. Rainwater pooled instead of running off, and within a month I had a slow leak dripping right onto my seed trays. A pitch of at least 15 to 20 degrees solves that problem and still looks tidy against most house exteriors. If you’re searching for plans, “lean-to greenhouse plans” and “attached greenhouse against house” will get you the most relevant results, and a lot of the free plans floating around online include roof pitch guides that I wish I’d read before my first build.
4. Cattle Panel Greenhouse (Sturdiest Budget Option, Hands Down)
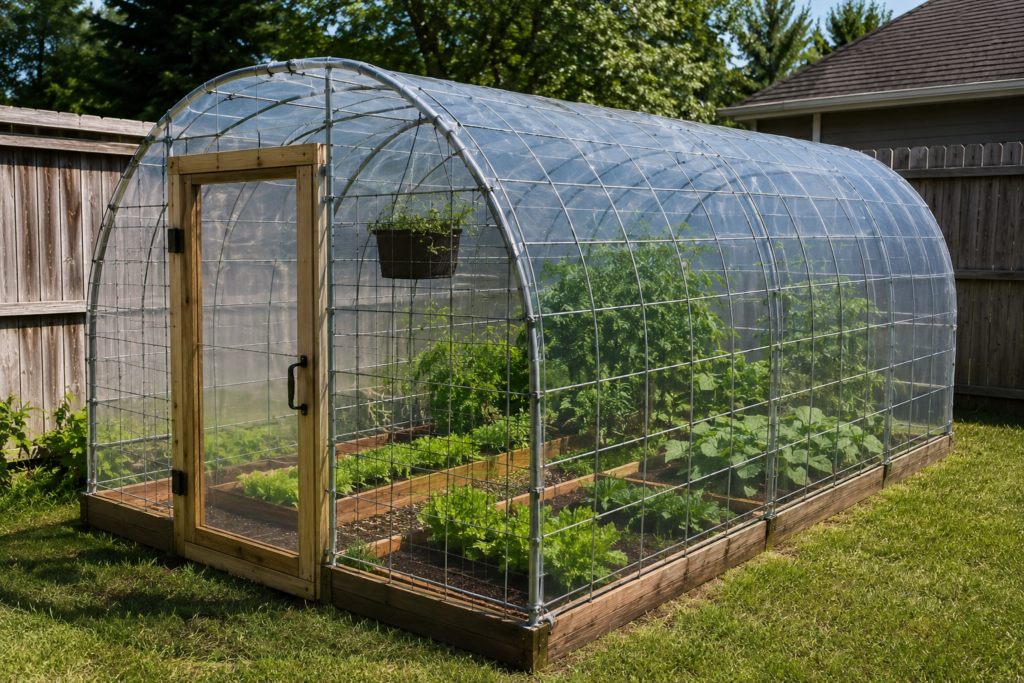
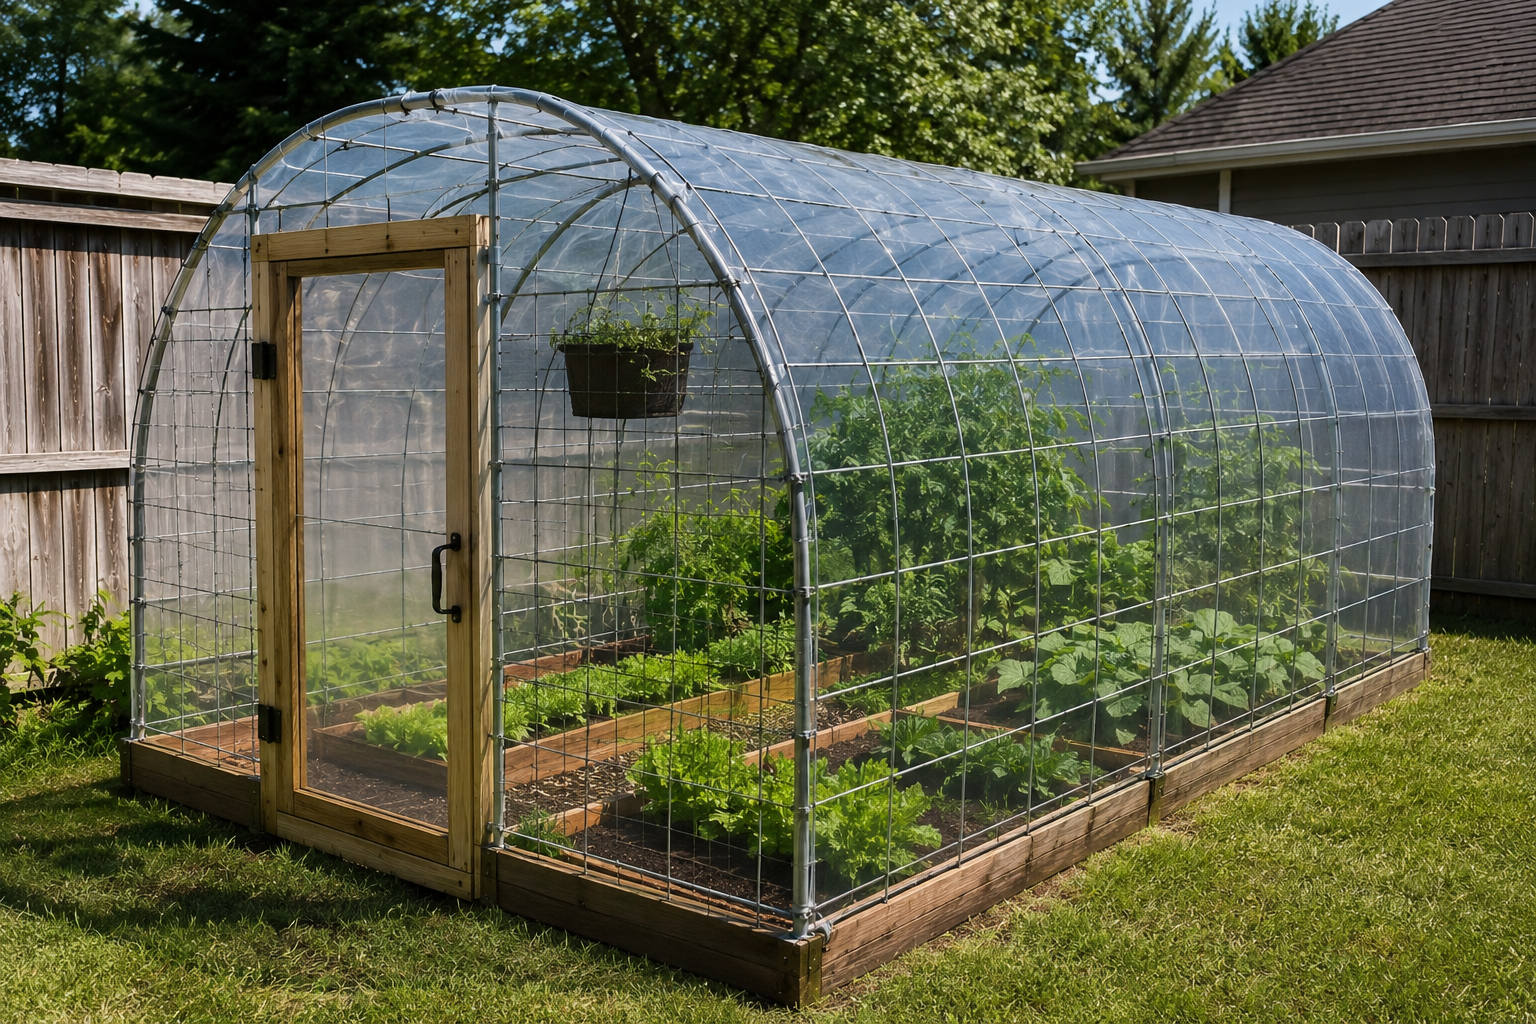
I’ve found that cattle panels are a total steal for anyone who wants something sturdier than PVC without spending greenhouse-kit money. A cattle panel is a rigid livestock fencing panel, usually 16 feet long and 4 or 5 feet tall, and you can bend it into a strong, self-supporting arch.
To build one, you sink the ends of the panel into the ground or attach them to a wooden base frame, bend the panel into an arch, and cover it with greenhouse plastic. Because the panels are galvanized steel, this structure holds up to snow load and wind far better than PVC pipe, which tends to crack in cold weather or bow under heavy snow.
Farm supply stores sell cattle panels for $25 to $40 each, and one panel is often enough for a small greenhouse. Two panels side by side can create a walk-in structure big enough for raised beds. This is the design I recommend to anyone in a region with real winters, because PVC gets brittle below freezing and cattle panels simply don’t care.
The search terms to know here are “cattle panel greenhouse” or “livestock panel hoop house,” both of which are popular in homesteading and rural gardening circles. It’s a design that started on farms out of necessity, and it’s slowly making its way into suburban backyards because people realized how tough and cheap it is.
Another thing I appreciate about cattle panels is how forgiving the arch shape is when it comes to snow and rain shedding. A rounded arch naturally sheds weight better than a structure with flat panels or sharp angles, which means less chance of a collapsed roof after a surprise snowstorm. I’ve also seen people combine two cattle panels into a taller, wider structure by overlapping the ends and wiring them together, which gives you almost a full standing-height greenhouse for well under $100 in panel costs.
Quick side note: if you’re in an HOA neighborhood, check your rules before building one of these. The galvanized steel arch shape is unmistakably agricultural, and some HOAs have opinions about that.
5. Shower Curtain Liner Mini Greenhouse (For Tight Budgets and Tiny Spaces)
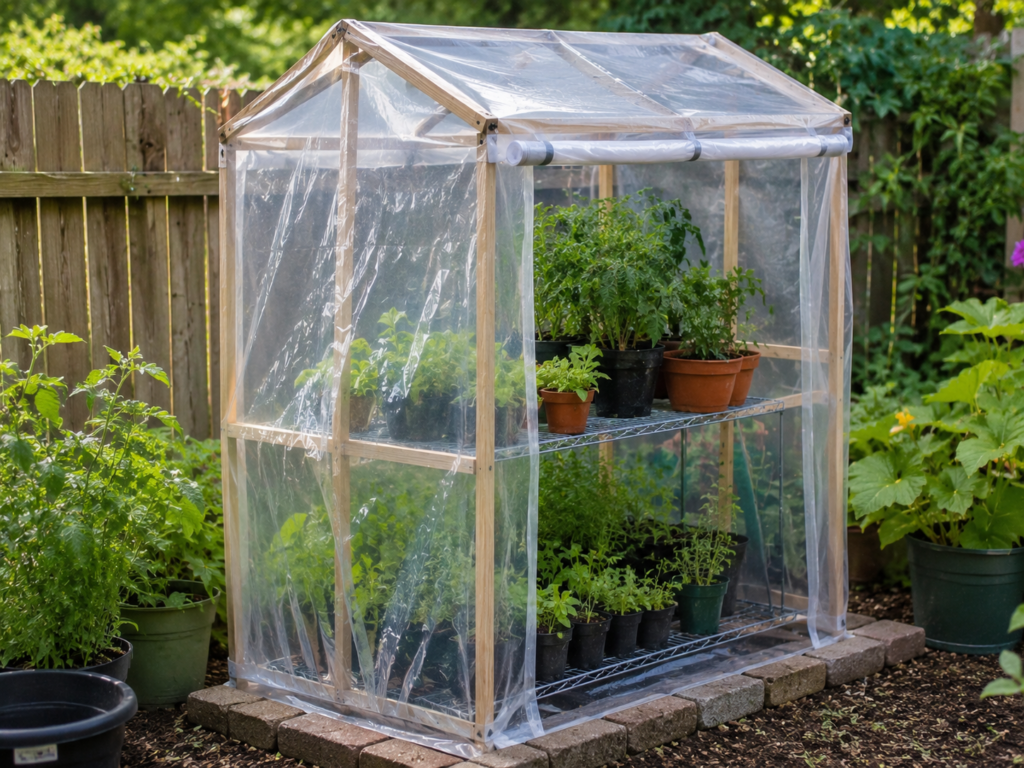
This is the smallest, cheapest option on the list, and I’m including it because not everyone has a backyard big enough for a walk-in structure. If you’ve got a balcony, a small patio, or just a few raised beds, a mini greenhouse made from PVC and a shower curtain liner will cost you under $30.
Build a small PVC frame, roughly waist-height, and drape a clear shower curtain liner over it instead of expensive greenhouse plastic. Shower curtain liners are already treated to resist moisture and mildew, they’re cut to a manageable size, and you can find them at any dollar store.
This won’t survive a harsh winter, and it’s not meant to. It’s meant to protect a handful of pots from frost, extend a container garden by a few weeks in fall, or give seedlings a head start in early spring. I used one of these on my apartment balcony for two seasons before I had a real yard, and it kept my herbs alive through three unexpected cold snaps that would have wiped them out otherwise.
People searching for this solution usually type things like “mini greenhouse for balcony” or “cheap greenhouse for container plants,” and that’s exactly the crowd this idea serves. It’s not glamorous, but it works, and it’s the kind of project you can finish on a lunch break.
6. Straw Bale Greenhouse Walls (Insulation You Can Compost Later)
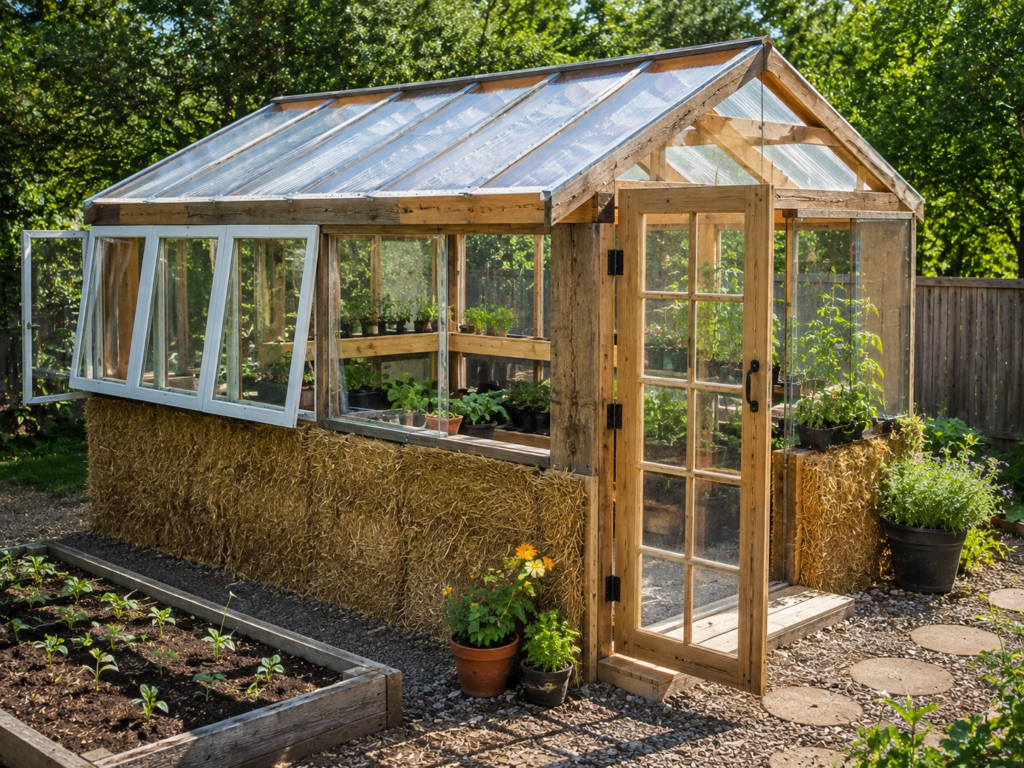
Here’s an idea most people have never considered: use straw bales as the walls of your greenhouse instead of wood or metal framing. Stack straw bales two or three high in a rectangle, top them with a simple wood frame and plastic sheeting or an old window for the roof, and you’ve got walls with insulation value that framed wood simply can’t match.
Straw bales run $5 to $10 each at most farm supply stores, and a small greenhouse might need 20 to 30 bales, which still lands well under $300 for something with genuinely impressive thermal performance. The straw traps air in its hollow stalks, creating a natural insulating barrier that keeps the interior warmer on cold nights than thin plastic sheeting alone.
The bonus with this design: when the bales start to break down after a season or two, you don’t throw them away. You compost them, or use the partially broken-down straw as mulch in your garden beds. Nothing goes to waste.
I’ll admit this isn’t the tidiest-looking greenhouse on the list. Straw bales look rustic at best, and if your neighborhood cares about curb appeal, this might raise a few eyebrows. But if performance matters more to you than looks, this is one of the most efficient budget options out there, especially for anyone growing through genuinely cold winters. Search around for “straw bale greenhouse” and you’ll find a small but devoted community of gardeners who swear by it.
7. Repurposed Trampoline Frame Greenhouse (The Ultimate Backyard Upcycle)
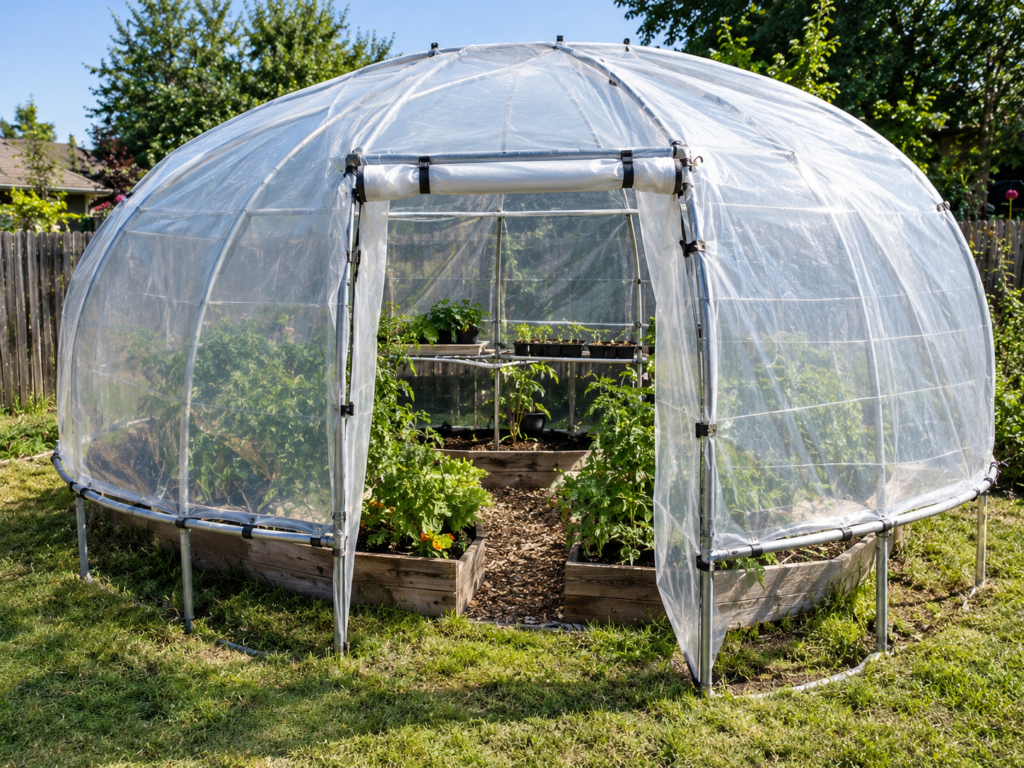
If you’ve got an old trampoline sitting in the corner of your yard because the mat wore out years ago, stop what you’re doing and go look at that frame right now. Trampoline frames are already circular or oval steel structures with springs and a support system built in, and with a little modification, they make a surprisingly solid greenhouse skeleton.
Remove the mat and springs, keep the round steel frame, and use it as the base for a dome-style greenhouse. Run PVC or flexible conduit pipe from the base frame up to a center point to create ribs, then cover the whole dome with greenhouse plastic. The trampoline frame gives you a rock-solid, already-level foundation, which is honestly the hardest part of building any freestanding greenhouse from scratch.
That summer my zucchini took over the entire ZIP code, I was also mid-project on my first trampoline greenhouse, and I remember thinking the frame alone probably saved me four hours of digging and leveling ground. If you already own the trampoline, your material cost for this project might be under $60, just PVC pipe and plastic sheeting.
This idea works especially well for round or dome-shaped greenhouses, which handle wind and snow load better than boxy designs anyway. Search terms like “trampoline greenhouse DIY” or “repurposed trampoline garden structure” are gaining traction as more people realize their busted backyard trampoline has a second life waiting.
Real Talk: What Actually Goes Wrong With Budget Greenhouses
I’d be doing you a disservice if I just hyped up every idea on this list without telling you where things go sideways. So here’s the truth.
Plastic sheeting degrades faster than you think. Most 6-mil greenhouse plastic lasts two to four years before UV rays make it brittle and cracked. Budget for replacing it, and don’t be shocked when it needs a refresh.
Ventilation gets ignored constantly, and it’s the number one mistake I see. A sealed-up greenhouse on a sunny 50-degree day can hit 100 degrees inside within an hour and cook every plant in there. You need roll-up sides, vents, or a door you actually open during the day.
Cheap hoop houses collapse under snow. If you live somewhere with real winter weather, PVC hoops without enough support will bow and sometimes snap under snow load. Cattle panels or added support ribs solve this, but a flimsy PVC frame in a heavy snow region is asking for trouble.
Ground moisture is an underestimated problem. Without proper drainage, a greenhouse floor turns into a swamp fast, especially with structures like cold frames or lean-tos that sit close to grade. Consider gravel or raised beds inside your structure instead of planting straight into native soil.
And honestly, straw bale and trampoline greenhouses aren’t going to win any beauty contests. If resale value or neighborhood aesthetics matter to you, stick with the cold frame or lean-to designs, which tend to look more intentional and finished.
One more thing nobody tells you upfront: budget greenhouses attract pests just as easily as expensive ones. A warm, humid enclosed space is basically a welcome sign for aphids, slugs, and fungus gnats, especially if ventilation is poor. Check under leaves regularly and don’t assume that because you spent less money, you get to skip basic pest monitoring. I lost an entire tray of pepper seedlings to aphids in my second hoop house because I got lazy about checking on things once the novelty wore off.
Final Thoughts
A greenhouse doesn’t have to be a five-figure investment to actually extend your growing season and keep you elbow-deep in dirt through the colder months. Some of my favorite structures over the years have been the cheapest ones, built from materials other people were throwing away. Start small, pick the design that matches your climate and your skill level, and you’ll be surprised how far a weekend and eighty bucks can go.
Which one of these are you tempted to try first, or have you already built a budget greenhouse that didn’t make this list? Drop your experience in the comment box below. I read every one, and I’m always looking for new ideas to steal.

About Syprose Kiche
Syprose Kiche is the creator and writer behind My Besuited Home, a practical home and garden website covering DIY projects, gardening, lawn care, landscaping, home improvement, and outdoor living. She focuses on turning everyday homeowner questions into clear, practical guides backed by careful research and useful real-world considerations.