
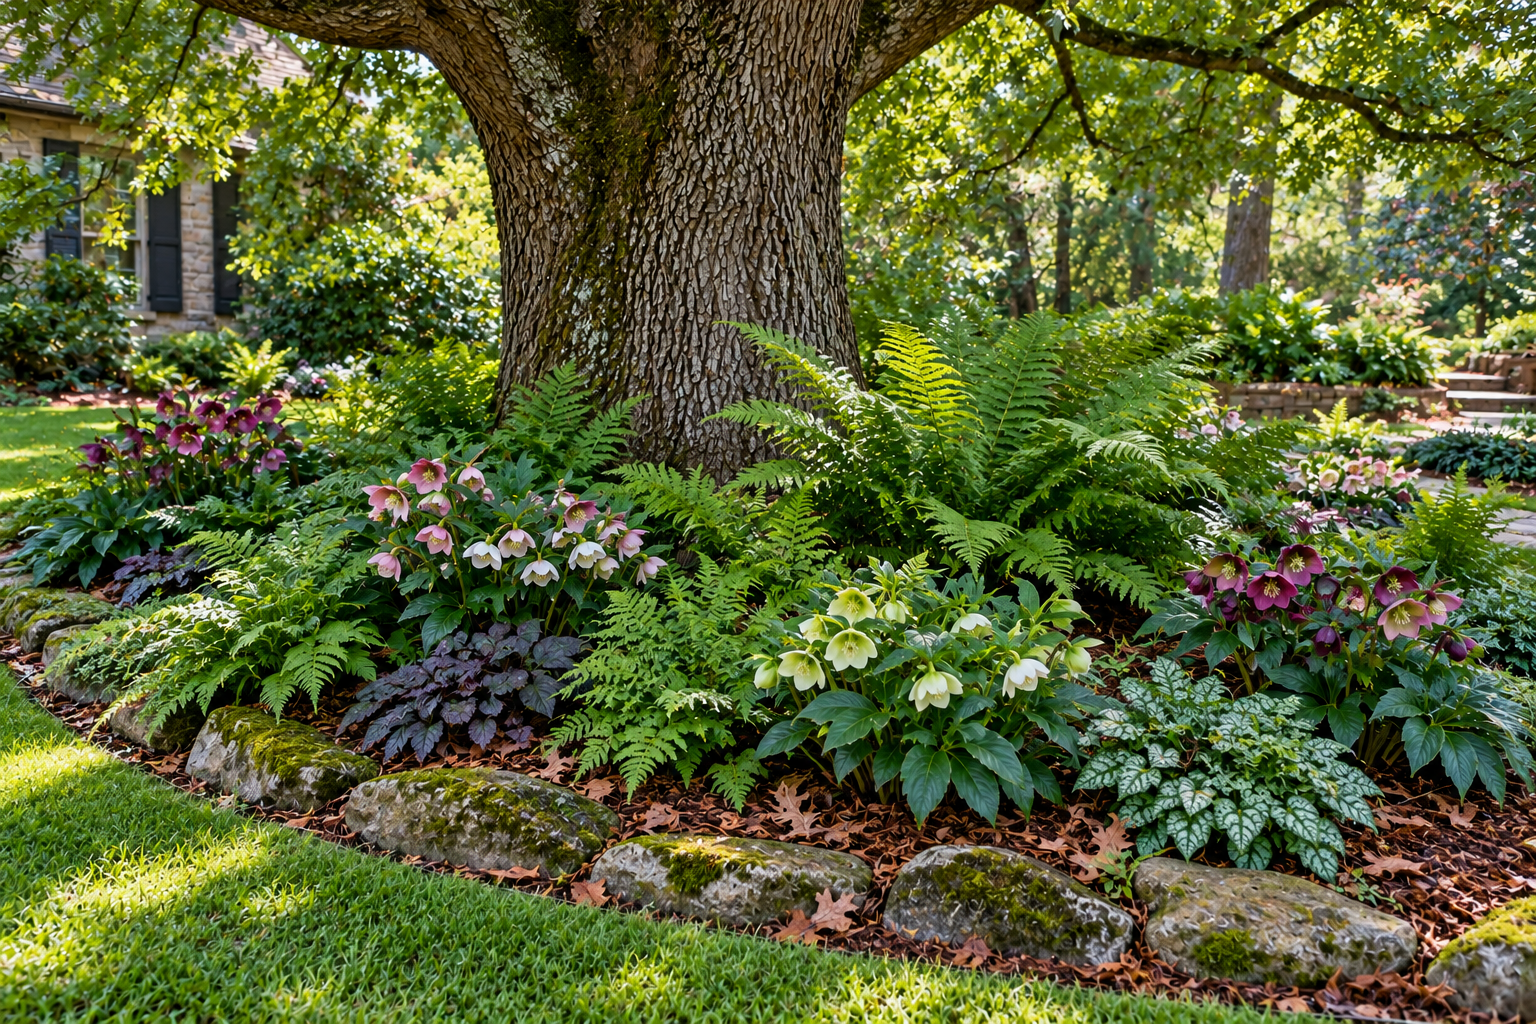
The bare, root-ridged ground under a mature oak looks like a problem that topsoil can solve. Haul in a few yards of loam, build a bed, plant it up. Plenty of well-meant projects start this way, and a good number end with a thinning canopy a few years later.
The damage happens below the surface. Most of an oak’s absorbing roots sit in the top foot or two of soil, and extension guidance notes that the lateral roots typically reach well beyond the drip line. Those roots need oxygen as much as they need water. Pile soil over them, compact the ground with a wheelbarrow or a mower, or irrigate the area every few days all summer, and the conditions the tree has adapted to over decades start to change.
None of this means the ground under an oak has to stay empty. It means the design works with the roots rather than over them: mulch instead of fill, small plants tucked into gaps, paths and seating that rest on the surface instead of cutting into it. The thirteen ideas below follow that principle, along with the practical details that decide whether each one helps or harms the tree.
What the Roots Are Doing, and Why It Shapes Every Choice
A few facts about oak roots explain nearly every recommendation in this article.
The root system is wide and shallow. Oaks do grow deeper roots, but the fine roots that take up water and nutrients are concentrated near the surface. The drip line (the ground below the outer edge of the canopy) is a rough guide to where they are, not a boundary. Roots commonly extend past it.
The root flare should be visible. Look at the base of the trunk. It should widen as it meets the ground, the way a column flares into its base. If the trunk goes straight into the soil like a fence post, soil or mulch has probably been piled against it over the years, and a certified arborist can confirm how deep the flare is buried.
Three kinds of disturbance do most of the harm. The first is fill, meaning soil added on top of the existing grade. Extension and county planning guidance from California’s oak country says fill tends to compact, reduces the exchange of air and water in the soil, and can trap moisture that encourages root and crown rot. The second is compaction and trenching: heavy foot traffic, equipment, parking, and digging runs for pipes or irrigation lines. The third is a change in summer moisture, which matters most for native western oaks that evolved with dry summers. Regular summer watering under those species invites soil fungi that can kill the tree. Eastern and midwestern oaks are generally less sensitive to irrigation than California’s native oaks, but compaction and buried roots are a problem for every species.
Because oak species and regional climates differ, check your state or county extension office for guidance specific to your tree before planting anything within the canopy. If you aren’t sure what species you have, a local arborist or nursery can identify it from the leaves and bark.
1. A Wide Mulch Ring That Looks Like a Forest Floor
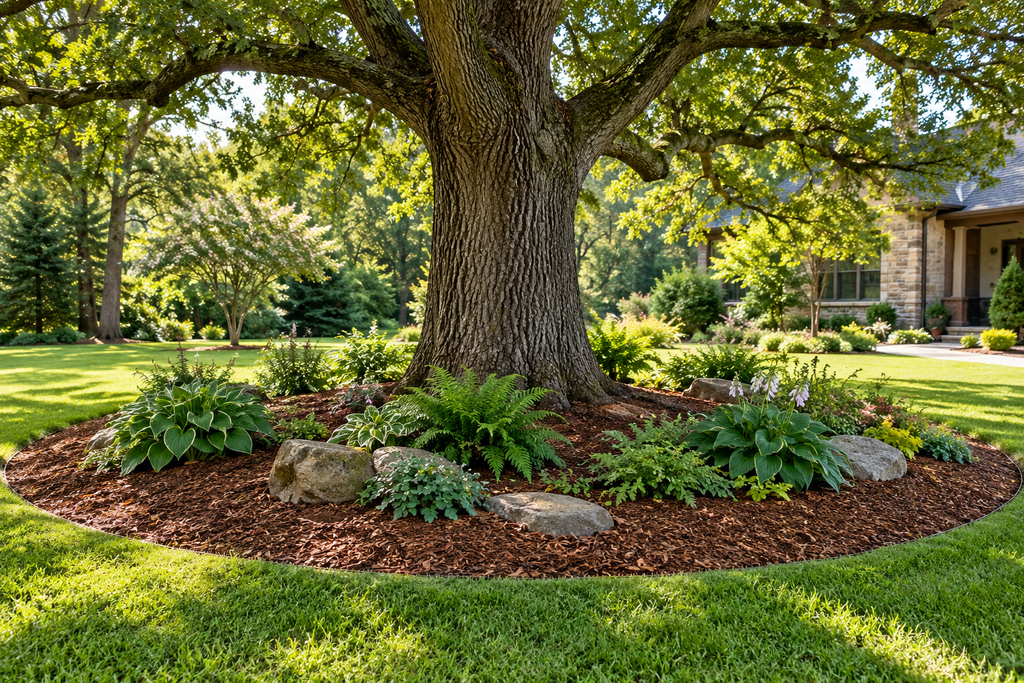
If you do only one thing, do this. A generous ring of mulch replaces turf competition, protects shallow roots from lawn equipment, keeps the soil cooler in summer, and gives the base of the tree a finished, deliberate look.
The shape matters more than the material. Think donut, never volcano. Mulch should be spread 2 to 4 inches deep and pulled back several inches from the trunk so the root flare stays exposed. Mulch piled against bark stays damp, which invites decay and gives rodents a sheltered place to chew. A common mistake is to refresh the mulch every spring by adding a new layer on top of the old one, which raises the depth a little each year. Rake the old layer loose and top it up only to the target depth.
Size the ring as wide as you can tolerate. Extending it halfway to the drip line is a good start; reaching the drip line is better. A larger ring also solves the practical problem of mowing right up to the trunk, which wounds bark and compacts roots.
Shredded hardwood, pine bark, and wood chips from an arborist all work. Chips delivered fresh by a tree service are often free or cheap, and they break down into the leaf-litter texture oaks grow in naturally. Skip landscape fabric and plastic sheeting under the mulch, since they interfere with air and water movement and eventually get tangled in roots and plant debris.
To turn existing lawn into a mulch ring without digging, mow the grass as short as possible, lay flattened cardboard over it, wet it down, and cover with mulch. The grass dies out over the following months. Digging out sod, by contrast, strips surface roots along with the grass.
2. A Dry-Shade Ground Cover Carpet
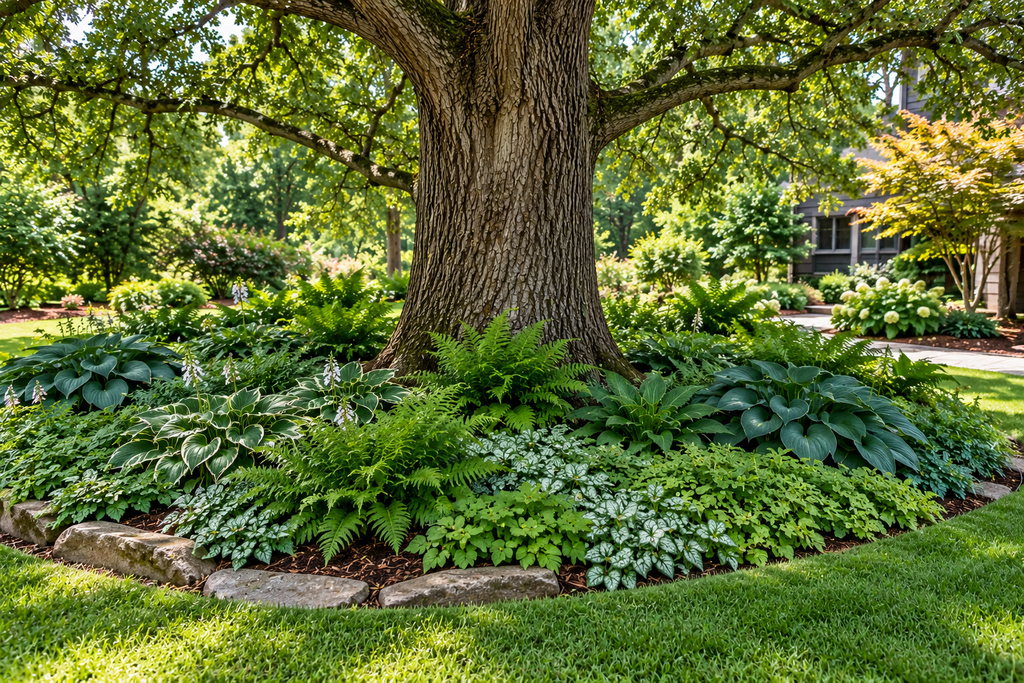
Deep summer shade, shallow competing roots, and soil that dries out: this is a hard site for ground covers, and many popular choices fail here. The ones that succeed share a few traits. They tolerate dry shade once established, they have shallow, fibrous roots rather than aggressive deep ones, and they can be planted from small pots so you aren’t digging large holes.
Good candidates include:
- Barrenwort (Epimedium): Heart-shaped leaves that often take on bronze or red tints, and delicate spring flowers. It is among the more reliable perennials for dry shade once its roots settle in.
- Lilyturf (Liriope) and mondo grass (Ophiopogon): Grassy evergreen foliage in warmer regions. Clumping lilyturf (Liriope muscari) stays put, while creeping lilyturf (L. spicata) spreads by runners and can overrun neighboring plants. Hardiness varies, so confirm your zone before buying.
- Sweet woodruff (Galium odoratum): Whorled leaves and tiny white spring flowers. It prefers soil that stays a bit moister, so it tends to do better near the outer edge of the canopy than close to the trunk.
Vinca and English ivy show up on a lot of “plants for under trees” lists, but both are classified as invasive in parts of the United States. Check your state’s invasive plant list before using either one.
Plant ground covers as small plugs or quart-size pots, spaced according to the label, and set them into pockets of mulch rather than amending the soil. Water new plants by hand during their first season, aiming at the plants and away from the trunk. A carpet takes two or three seasons to knit together. During that time, a thin mulch layer between plants keeps weeds down without smothering the new growth.
3. Ferns and Hellebores for Texture in Deep Shade
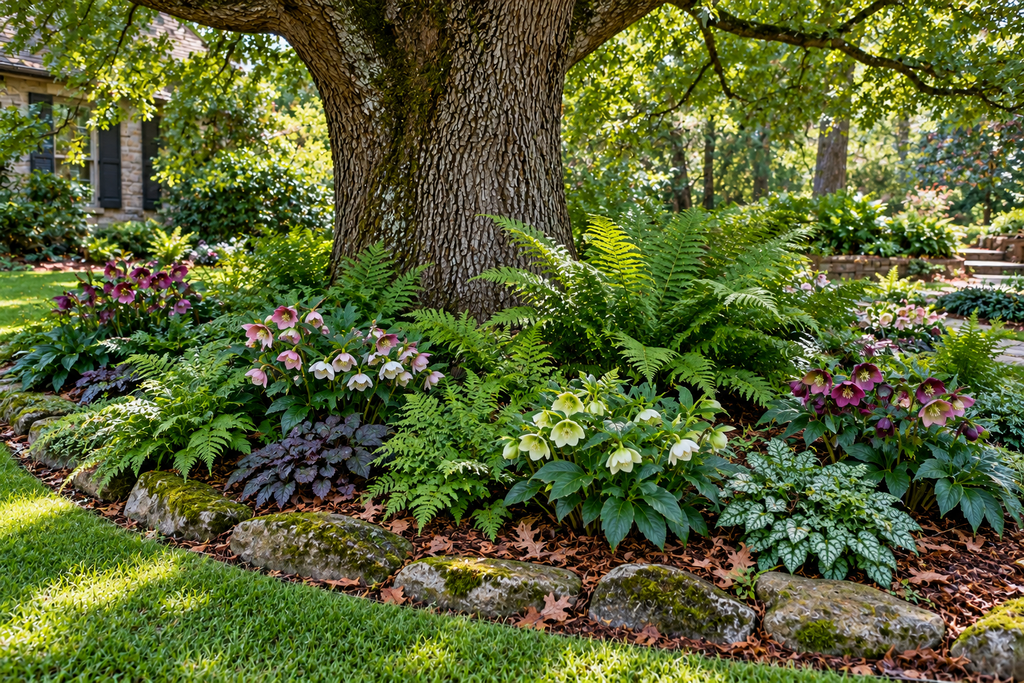
A ground cover carpet reads as flat green. Ferns and hellebores add height and contrast, and both cope with the dry conditions under an oak better than hostas, which usually want steady moisture and are a favorite meal for deer.
Christmas fern (Polystichum acrostichoides) is an evergreen native fern in eastern North America and tolerates dry shade once established. Lady fern prefers somewhat more moisture, so use it at the edge of the canopy where rainfall reaches the soil more evenly. Hellebores, sometimes sold as Lenten rose, bloom in late winter to early spring, when little else is flowering, and the leathery leaves stay attractive through the year. They tolerate dry shade after they establish. All parts of hellebores are toxic if eaten, and the sap can irritate skin, so wear gloves when cutting back old foliage and keep them in mind if small children or pets chew on plants.
The key to planting here is scale. A cluster of three to five ferns reads as intentional, while a single fern in a sea of mulch looks lost. Work in odd numbers, repeat the same two or three plants along the bed, and leave open mulch between groups. Open space is also what keeps root competition manageable, because dense planting under an oak competes with the tree for water and nutrients.
4. A Sedge Meadow in Place of Turf
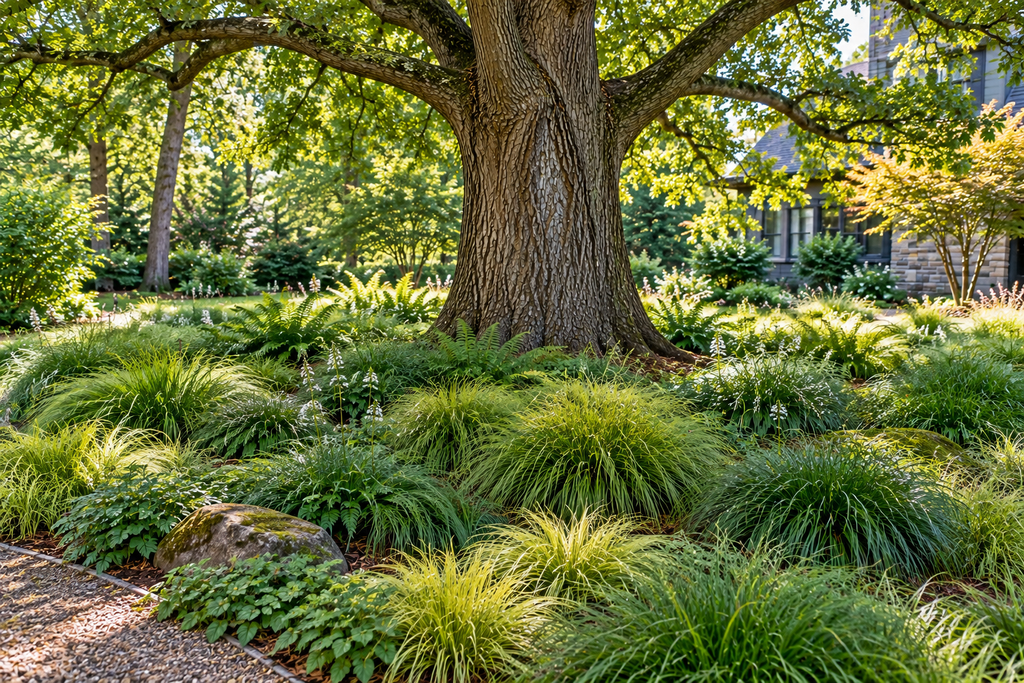
Grass is the plant most people try first and the one that fails most often under oaks. It wants sun and regular water, and getting it to grow tends to mean frequent shallow irrigation and fertilizer, which is the wrong treatment for the tree. Where lawn already exists and you want to keep it, University of Georgia extension advice is to mow it a bit higher under the tree (about an inch taller than normal) and fertilize it less than the rest of the yard.
Sedges offer a better alternative. Pennsylvania sedge (Carex pensylvanica), a native of eastern North America, forms a soft, fine-textured carpet that tolerates dry shade and can be left unmown or trimmed once or twice a year. It spreads slowly by rhizomes, so planting plugs about a foot apart gives good coverage in a couple of seasons. Plant in spring or early fall and water through the first summer.
The tradeoff is that a sedge meadow tolerates only light foot traffic. If the area is a play space or a regular cut-through, a mulch path through the sedge solves the problem without asking the plants to do something they weren’t built for. Other native sedges may suit your region better, so ask a local native plant nursery which species grow wild in the oak woodlands near you.
5. Spring Bulbs and Woodland Wildflowers
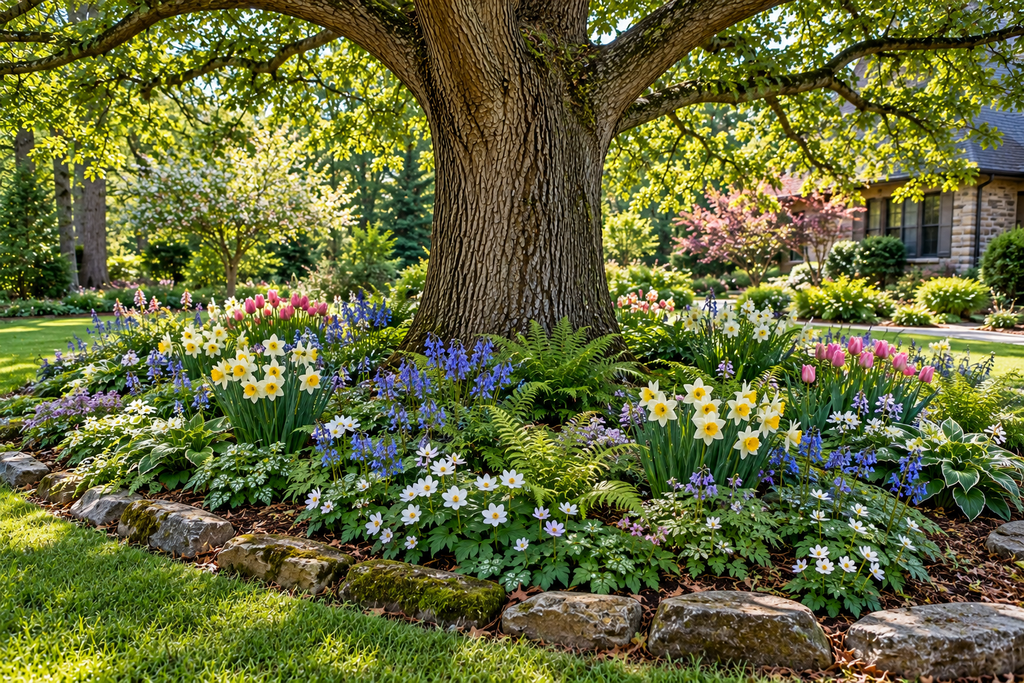
The logic of planting under a deciduous oak starts with timing. Before the leaves emerge in spring, the ground gets full sun. Bulbs and woodland wildflowers use that window to leaf out, bloom, and store energy, then go dormant by summer, just when the oak canopy closes and the soil dries. They avoid the hard part of the year.
Depth is the concern. Large bulbs such as tulips and many daffodils are planted deep enough that digging disturbs more root than you’d like. Smaller bulbs are planted shallower. Crocuses, for example, are set about 2 to 3 inches deep, so there is little chance of damaging oak roots. Snowdrops and Siberian squill are also small and plant at similar shallow depths, though squill can self-seed freely.
For woodland wildflowers, native options such as trout lily, bloodroot, wild geranium, and Virginia bluebells suit the same spring-to-dormancy cycle in many parts of the East and Midwest. Buy nursery-propagated plants and bulbs from reputable growers, and never dig them from the wild. Trilliums in particular are slow to establish from seed, which is why wild collection is a serious problem.
For planting, use a hand trowel, work from small holes spaced around roots rather than a trench, and if you hit a thick root, move over a few inches rather than cutting through it. Leave the foliage in place after flowering until it yellows, since that is when bulbs refill their reserves.
6. A Woodland Garden Built in Layers
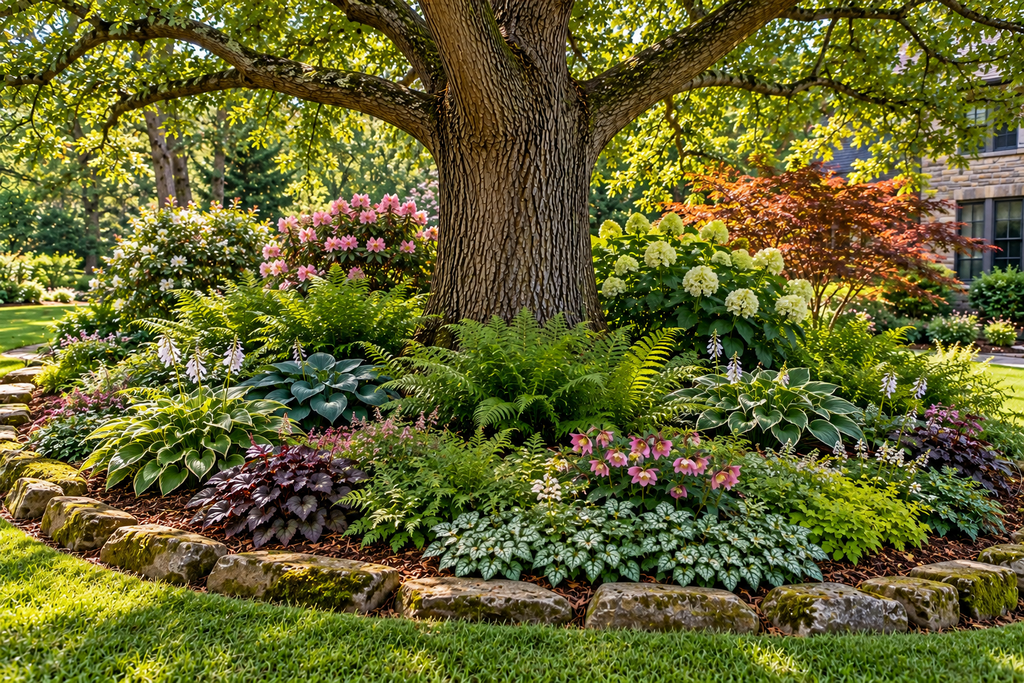
Natural woodlands aren’t one plant deep. They stack layers: a canopy, a layer of understory trees and shrubs, a perennial layer, and a ground layer over a floor of leaf litter. Copying that structure is what makes a woodland garden feel natural rather than like a flower bed that wandered under a tree.
The oak is already the canopy. For the others, think in terms of position. Shrubs and small understory trees belong at the edge of the canopy or beyond the drip line, where they won’t compete as intensely with major roots. Perennials such as ferns, hellebores, and wild geraniums fill the middle. Ground covers and sedges knit the surface.
The floor is the part people overlook. A woodland garden depends on leaf litter, and a tidy approach that strips every leaf each fall removes the thing that feeds and protects the soil. Oak leaves are thick and break down slowly, so a heavy layer can smother small plants. Running a mower over the leaves to shred them before spreading them as mulch speeds up decomposition and prevents matting. Acorns and fallen twigs can stay where they land in the planted areas.
The approach also asks for patience. A woodland garden planted from small pots can look sparse for the first two years. The temptation is to fill the gaps with more plants, which increases root competition. Leave breathing room.
7. A Curved Border That Follows the Canopy Edge
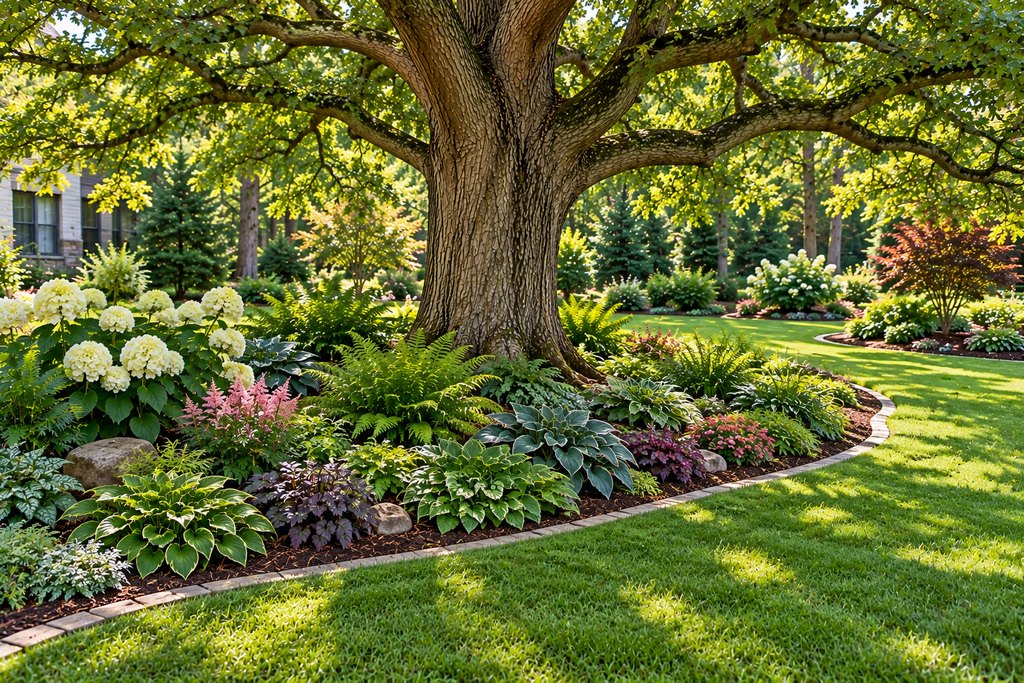
A curved bed along the outer edge of the canopy ties the tree into the rest of the yard and gives the planting a graceful outline. Straight lines and perfect circles around a trunk tend to look like a target. A soft, sweeping curve looks like part of the landscape.
Edge placement is also good for the tree. At the canopy’s edge, rainfall reaches the ground more evenly, light is better, and plantings are farther from the big structural roots near the base. This is where shrubs and small perennials have the best odds.
Lay out the curve with a garden hose or rope first, and adjust until it looks right from the windows you view it from most often. Then define the edge without trenching. Standard practice for a crisp bed edge is to cut a V-shaped trench with a spade. Under an oak, that cuts roots. Instead, mark the edge with mulch against turf, use low, surface-set stone or brick, or rely on a flexible edging that sits on top of the ground and is pinned with short stakes.
Plants that suit the fringe include native viburnums, serviceberry, and oakleaf hydrangea, though the last wants more water than the other two and does best where it isn’t competing hard with the oak. Choose plants whose mature size fits the space, because a shrub that outgrows its spot will eventually reach back under the canopy.
8. A Stepping-Stone or Mulch Path Across the Root Zone
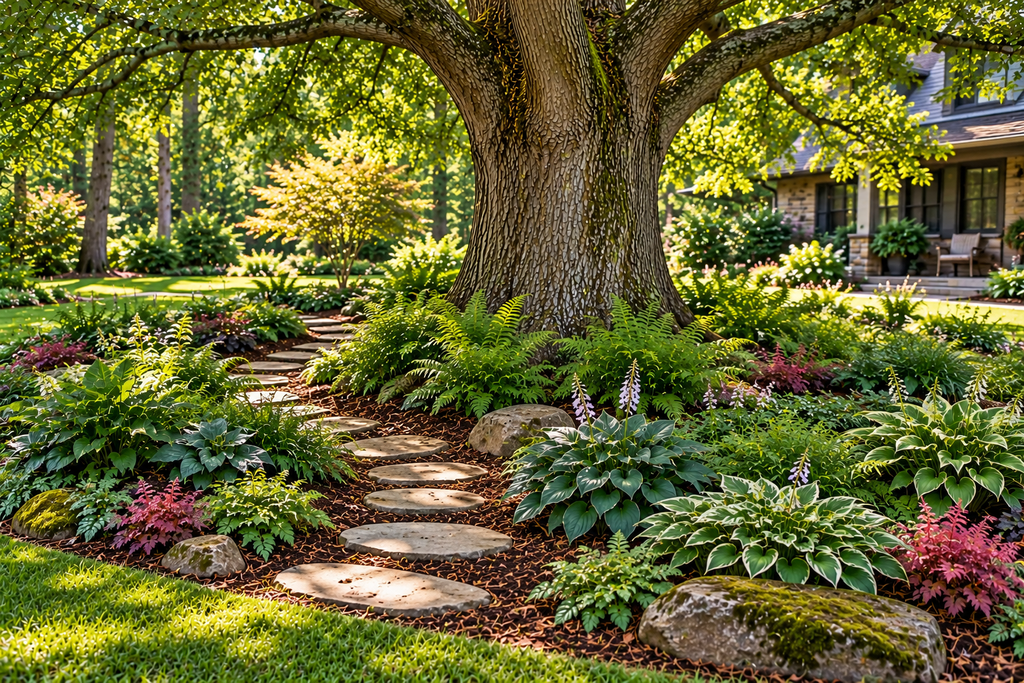
Paths are where design and root protection collide. A traditional patio-style path is built on excavated soil and a compacted gravel base, which is exactly what an oak root zone doesn’t tolerate. Two surface-set alternatives work better.
A wood-chip path is the gentlest option. Spread 3 to 4 inches of chips over the existing grade with no excavation. It cushions foot traffic and spreads weight. Refresh it every year or two as the chips decompose. A chip path also matches the mulch ring, so the two read as one design.
Stepping stones work if you skip the base preparation. Choose large, flat stones, clear only the mulch from the spot, and set each stone directly on the soil surface. If a stone wobbles, shift it slightly or shim it with a small amount of coarse material rather than digging out a bed. Space stones about a comfortable step apart, which is commonly 24 to 30 inches center to center, but test the stride of the people who will actually use the path.
If the path has to cross a visible surface root, route around it where possible. Where that isn’t possible, a short timber bridge or stone resting on either side of the root keeps foot traffic off it without covering it with soil.
Permanent paving, concrete, and mortared stone over the root zone are best left to a professional with oak experience, since the choice of footing and drainage can determine whether the tree survives.
9. A Seating Nook at the Edge of the Shade
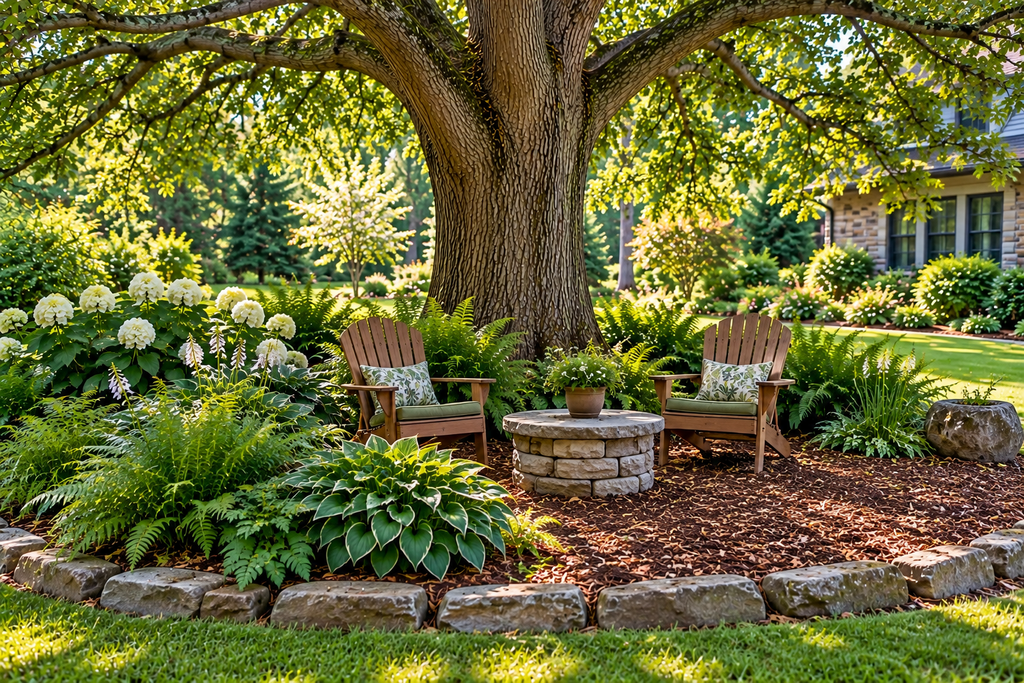
A mature oak provides what most backyard seating areas try to build: shade, scale, and a sense of enclosure. The difficulty is arranging seating that doesn’t turn the root zone into a patio.
Place the seating near the outer part of the canopy, not against the trunk. The shade is still good, foot traffic avoids the root flare, and chairs aren’t tucked into the area where the largest roots are. A mulch or wood-chip floor beneath lightweight chairs and a small table is the simplest solution. Compaction from chair legs is minimal compared with compaction from a paved patio.
For a more permanent look, a freestanding bench or a pair of Adirondack chairs on flat pavers set at grade works. Avoid pouring concrete footings or driving posts deep into the soil.
One safety point: oaks drop branches, and large dead limbs can fall without warning. Before putting seating under a tree, have a certified arborist look for dead wood, weak unions, and cracked limbs, and do the same every few years afterward. Deadwood removal on a healthy tree is routine. Hanging a swing from a limb is a separate question and needs the arborist’s approval of the specific branch.
10. A Bench Built Around the Trunk, Done Carefully
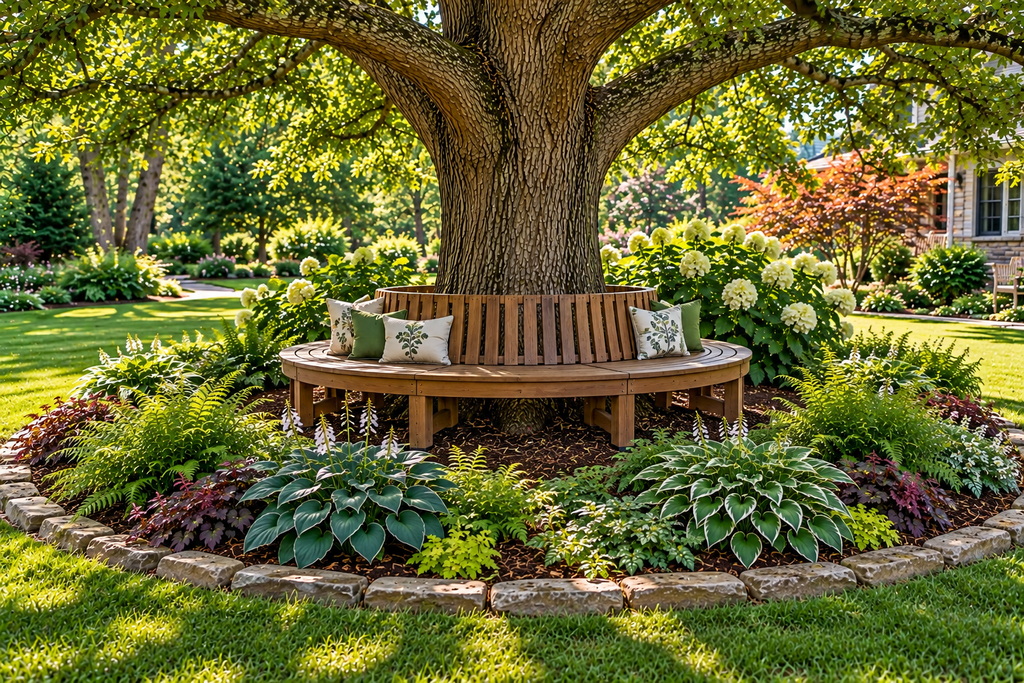
The circular bench around a big tree is a classic image, and it can be done without harm if a few rules are followed.
The bench ring should stand well away from the trunk, leaving the root flare visible and a gap wide enough for the trunk to keep growing, with room for mulch in between. A bench built tight against the bark will eventually press into it as the trunk thickens, and it blocks the airflow and inspection access that keep problems visible.
Foundations are where these projects go wrong. Digging a continuous footing in a ring around the trunk severs roots right where the biggest ones are. Pier blocks or timber skids set on the surface, with the bench frame spanning between them, distribute weight without trenching. If the design requires holes for posts, an arborist can advise on where holes can go without hitting large roots.
A bench ring also affects the mulch. Keep the interior of the ring mulched, and keep the same open margin around the trunk. Mulch that spills into the gap against the bark should be raked back.
If you can’t get the bench far enough from the trunk to leave room for growth, choose a different location. A freestanding bench near the tree is the safer compromise.
11. Natural Stone and Log Accents
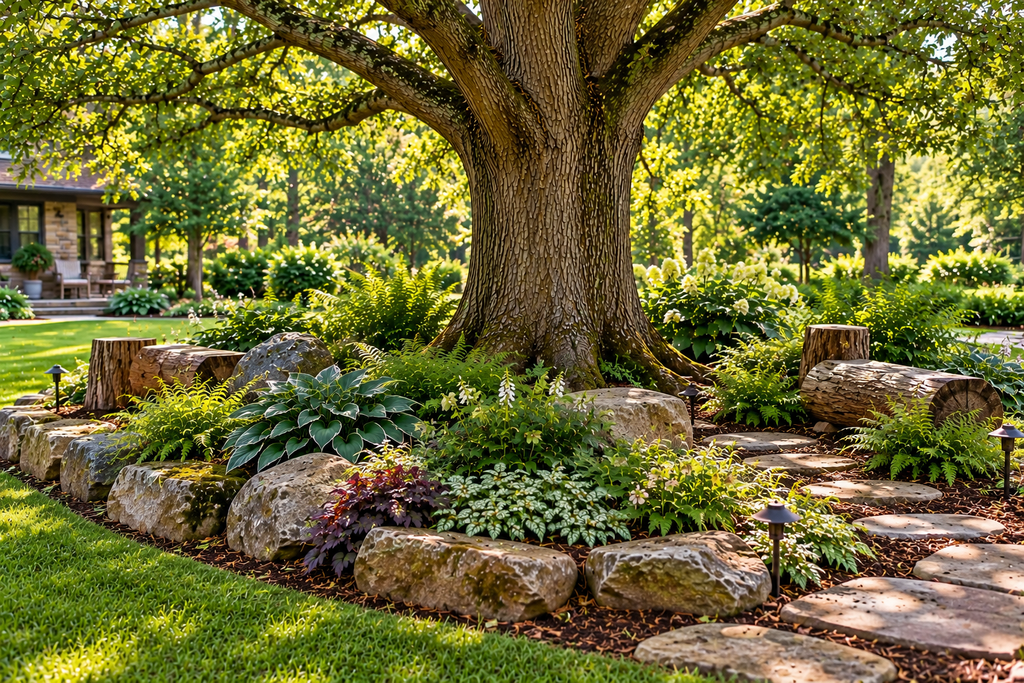
Boulders, flat stones, and logs make a shaded area feel finished and give the eye something to rest on between plantings. The oak itself supplies some of the best material: limbs from pruning can be cut to length and laid as a rustic bed border, or set on end as a low seat or a plant stand.
Choose small to medium stones that can be set by hand. Heavy boulders positioned with machinery compact the soil across the area the equipment crosses, and a very large stone can depress the roots beneath it. Place each stone on the surface, with at most a shallow seat cleared in the mulch, and avoid digging a pocket.
Logs left to decay slowly become habitat for beetles, fungi, and the birds that feed on them. If you want that effect, keep the logs at a distance from the trunk. Wood sitting against the bark keeps it damp.
Use stone and wood sparingly. One or two accents repeated at intervals look deliberate, while a bed overloaded with rocks looks like a storage yard.
12. Containers on the Surface, Not in the Ground
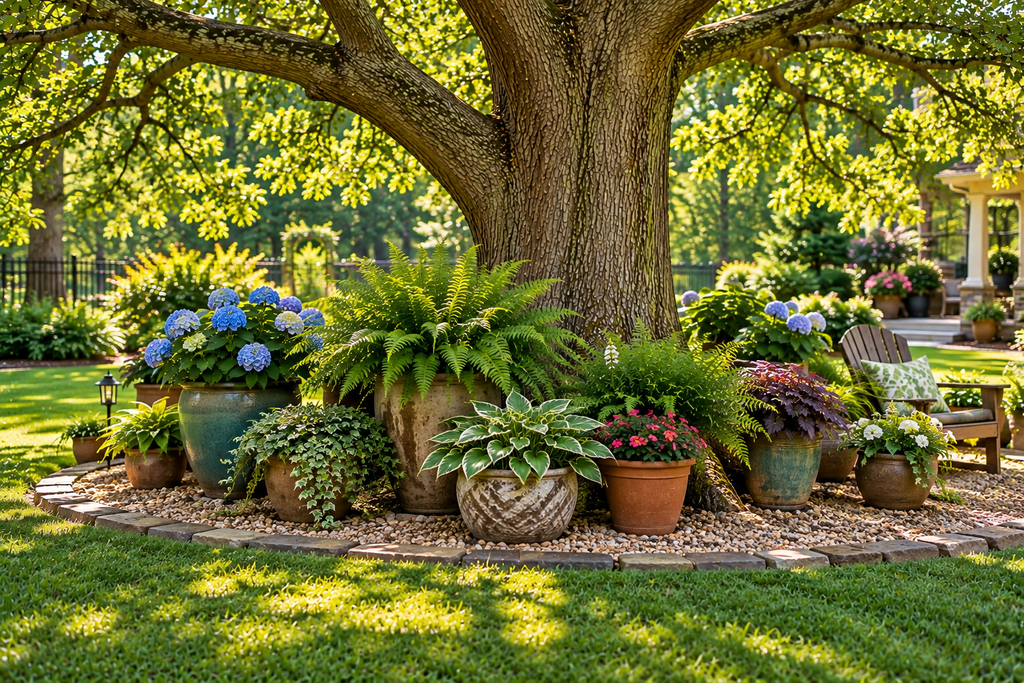
When the soil is too crowded with roots to plant in, pots offer a way to add color without digging. A grouping of three containers in different heights, set on the mulch or on flat stones at the edge of the canopy, reads as a planting.
Containers solve one problem and create another. They need regular watering, and in species sensitive to summer moisture, runoff near the trunk isn’t a good thing. Keep pots toward the canopy edge or on a surface that drains away from the tree. Choose plants that suit shade, such as hellebores, ferns, coral bells (Heuchera), and variegated foliage plants, and use a container mix with good drainage.
Use heavier pots for stability, but avoid piling many large, filled pots in one spot, since the combined weight adds up. Use pot feet or small stones to lift the bottom off the ground so air and water can move.
One caution about hanging baskets. Heavy baskets suspended from oak limbs can rub the bark, and wire or cord wrapped around a branch can cut into it as the branch grows. A freestanding shepherd’s hook or a post set outside the root zone is safer.
13. Soft Lighting and a Birdbath at the Edge
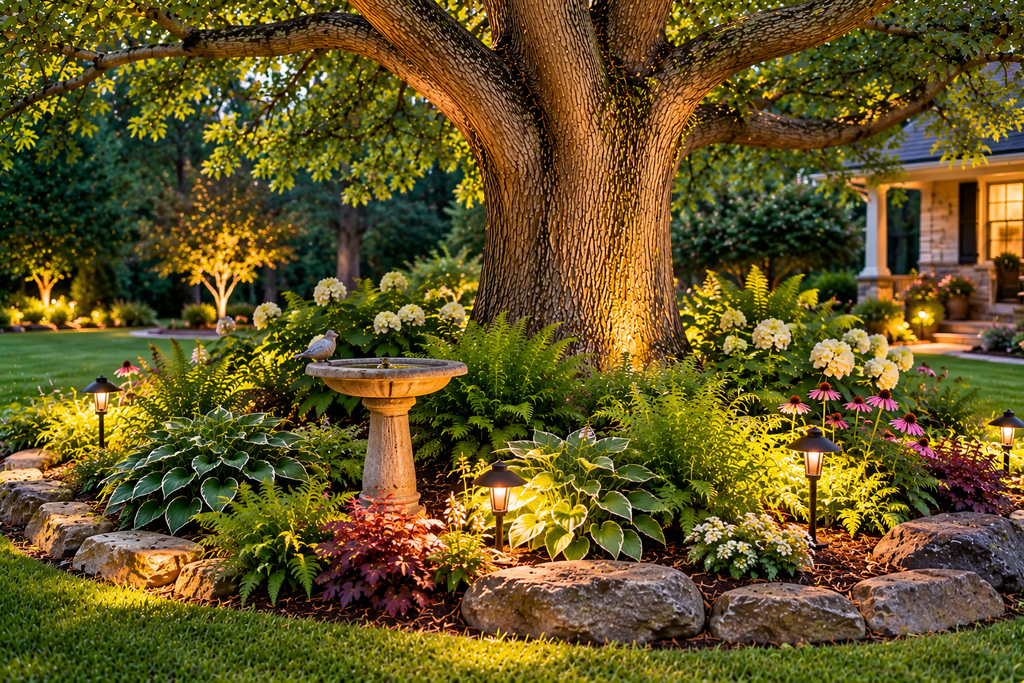
Lighting turns the area under an oak into an evening room. The tree’s structure is the subject: a pair of low-voltage uplights aimed into the canopy from a distance brings out the limbs and the texture of the bark, while a few small path lights mark the route.
Cabling is the root issue. Burying a cable run in a trench is routine in a lawn, but under an oak it means cutting roots. Instead, lay the cable on the surface and cover it with mulch, or choose solar fixtures that need no wiring. Use stake lights that push into the ground with a small footprint. Keep fixtures off the trunk, since nails and screws leave wounds that stay open for years. If you string lights through the branches, hang them in loose loops, not tight wraps, and check them each year so the wire doesn’t girdle growing limbs.
A birdbath makes a good companion feature. Position it at the edge of the canopy rather than at the base of the trunk, where spilled water repeatedly soaks the same patch of soil, and clean it regularly to prevent algae and mosquito larvae. Birds drawn to the tree also help with caterpillars and other insects that feed on oak leaves.
Planting Without Hurting the Roots: A Practical Method
The ideas above all come down to a few techniques for the planting itself.
Dig by hand, not with a tiller or an auger. Use a trowel or a small spade and make each hole only as large as the plant’s root ball. When the tool hits a root, stop, and move the hole a few inches. Many arborists use roughly 2 inches in diameter as the point beyond which a root shouldn’t be cut without professional advice, though the right threshold depends on the tree’s size and health. If you aren’t sure, ask a certified arborist (the International Society of Arboriculture maintains a directory) before cutting anything thicker than a pencil.
Choose small plants. A quart-size perennial or a plug adapts more readily than a five-gallon shrub and requires a smaller hole.
Don’t bring in topsoil. Backfill with the soil you removed. A small handful of compost in the hole is fine, but amending the whole bed or adding soil on top changes the grade and the soil structure around the roots.
Water plants by hand for the first season, then let them adjust. The goal is plants that survive on the moisture the site provides, which is why species recommended for dry shade matter so much.
Watch the tree for a year or two afterward. Thinning leaves, early fall color, dieback at the tips of branches, or a lot of small leaves are signs of stress and justify a call to an arborist.
Questions Readers Ask About Planting Under Oaks
Can I build a raised bed around an oak tree?
A raised bed filled with soil is a form of fill, which is the thing most guidance on oaks recommends avoiding. The soil layer reduces air exchange to the roots below it and can hold moisture against the trunk. Containers placed on the surface, or a very shallow layer of mulch, are safer alternatives.
When is the best time to prune an oak?
In many regions, late fall through winter, while the tree is dormant, is preferred. In areas affected by oak wilt, a fungal disease, state forestry agencies commonly recommend avoiding pruning or wounding oaks during the spring and early summer, when the beetles that spread the fungus are active. Rules vary by state, so check with your local extension office before scheduling work.
Will fallen acorns and leaves harm what I plant?
They generally don’t harm established plants, but thick layers of whole oak leaves can smother small seedlings and plugs. Shredding the leaves with a mower and using them as mulch handles most of the problem. In heavy acorn years, rake acorns off paths and seating areas, where they are hard to walk on.
My oak has surface roots. Should I cover them with soil to plant grass?
No. Covering surface roots with soil is the same as fill. A thin mulch layer is fine, and mulch over exposed roots protects them from mower damage and drying. If the roots keep rising, the tree is simply expanding its root system, and the fix is to change what you grow above it.
Do I need to avoid watering altogether?
It depends on the species and region. Native western oaks that evolved with dry summers are damaged by regular summer irrigation under their canopy, and extension guidance for those trees is to keep the root zone dry in summer except during extreme drought. Oaks in wetter eastern climates have different needs. Your county extension office can say what applies to your tree.
Final Thoughts
The best landscaping around an oak tree is mostly subtraction: no added soil, no trenching, no lawn that needs constant watering, and nothing built against the trunk. What remains is a wide mulch ring, small plants chosen for dry shade, and paths and seating that sit on the surface.
Start with the mulch ring and a few well-chosen plants, and add features slowly. Before any project that involves digging, grading, or building near the roots, get the tree assessed by a certified arborist. The cost of a consultation is small next to the cost of removing a mature oak.

About Syprose Kiche
Syprose Kiche is the creator and writer behind My Besuited Home, a practical home and garden website covering DIY projects, gardening, lawn care, landscaping, home improvement, and outdoor living. She focuses on turning everyday homeowner questions into clear, practical guides backed by careful research and useful real-world considerations.