
You’ve got a postage-stamp backyard, three kids who are somehow always “bored,” and a Pinterest board full of play areas that need at least a quarter acre to pull off. Sound familiar?
I get it. My own backyard is barely bigger than a two-car garage, and for years I thought that meant my kids were stuck choosing between a boring patch of grass or a plastic playset so big we’d have to climb over it to reach the back door. Neither option is good enough, and neither is necessary.
Small yards actually force better design decisions. When you can’t just throw a giant swing set in the corner and call it done, you start thinking about layers, multi-use zones, and stuff that grows with your kids instead of getting outgrown in two summers. That’s exactly what this list is about.
Below are 12 play area ideas that work in tight spaces, plus a bonus idea at the end that almost nobody talks about but should. I’ll also tell you where I’ve seen these ideas go sideways, because a lot of backyard advice online skips that part entirely.
1. Vertical Climbing Wall on the Fence Line
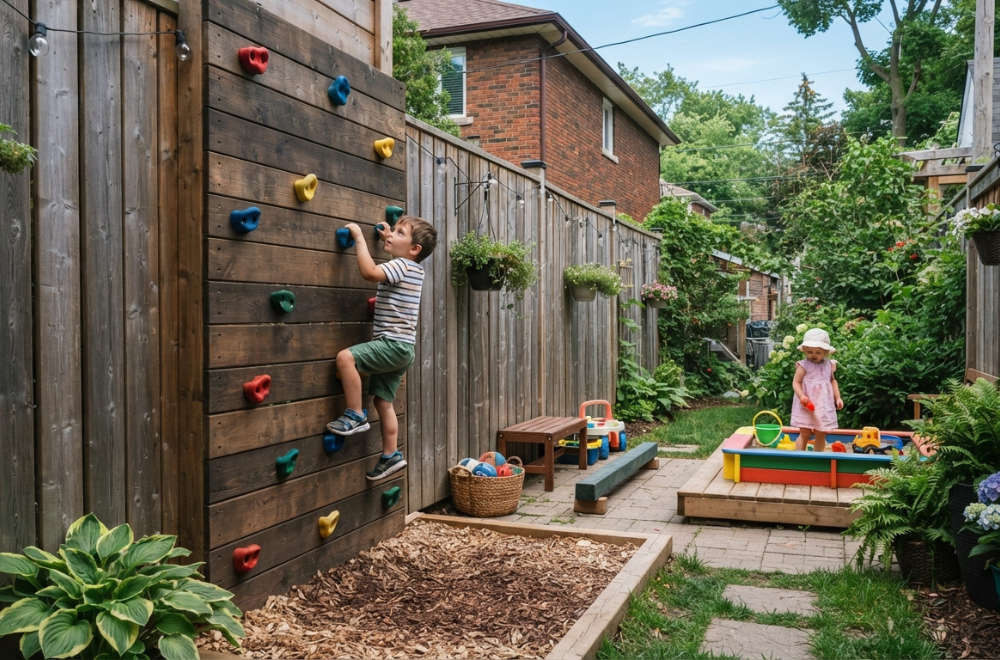
If your yard is narrow, your fence is your best friend. A climbing wall mounted directly onto an existing fence panel takes up zero extra ground space, which is huge when every square foot counts.
You don’t need a rock-climbing gym setup here. A single 4×8 sheet of exterior plywood bolted to the fence, painted, and fitted with commercial climbing holds does the job. Most hardware stores sell hold kits for under $60, and installation is an afternoon project if you’ve got a drill and a level.
I put one up on the side fence at my place three summers ago, and it’s still the first thing my nephew runs to when he visits. The trick is keeping the wall low enough that a fall isn’t a big deal — cap it around 4 feet high and toss a couple of old couch cushions or a secondhand gym mat underneath.
One thing I’ll say plainly: skip the pre-fab plastic climbing panels sold as all-in-one kits. They’re overpriced for what you get, and the holds are usually molded on instead of screwed in, so kids outgrow the limited hand placements within a year.
2. A Mini Mud Kitchen Tucked Into a Corner
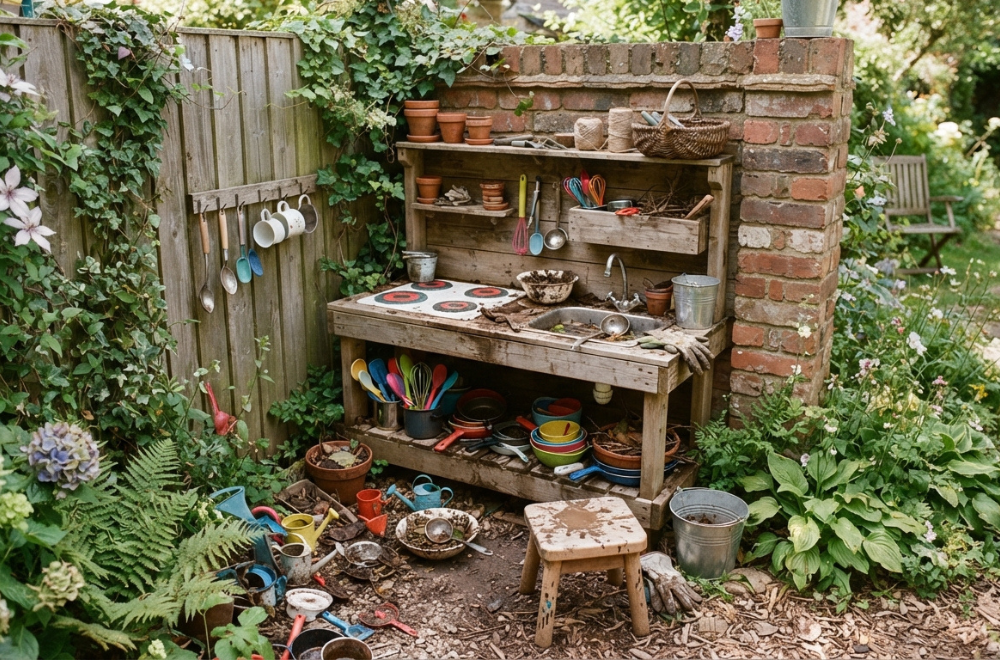
Mud kitchens are having a moment, and for good reason — they’re cheap, they’re endlessly reusable, and they don’t need much room. A dead corner next to a fence or shed wall is usually all you need.
Build one from an old dresser or kitchen cabinet you’d otherwise send to the curb. Strip the drawers, add a few hooks for pots and colanders, and mount it against a wall so it takes up almost no floor footprint. A stock pot sink with a garden hose hookup turns it from “pile of dirt” into a genuine sensory station.
My daughter spent an entire spring “baking” mud pies for every neighbor on the block, and I didn’t have to referee a single argument about turns on a swing. That’s the real value here — mud kitchens are naturally parallel play, so multiple kids can use one at once without the space getting crowded or the drama getting loud.
Keep the footprint under 3 feet wide and you can wedge this into almost any yard, even ones with awkward L-shapes or a lot of side-yard dead space.
3. A Sandbox That Doubles as a Bench
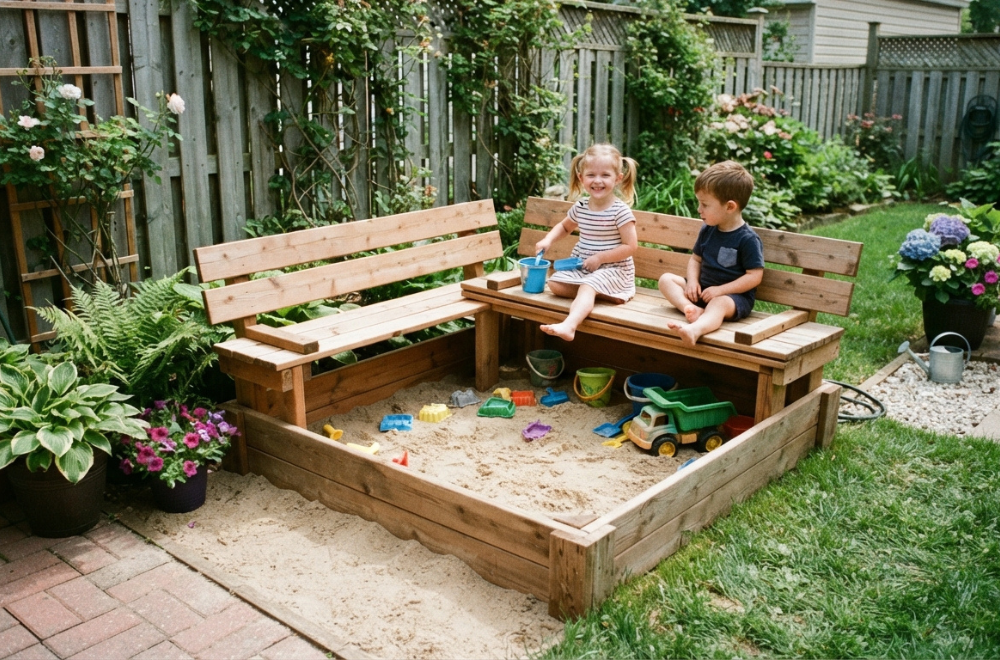
A standalone sandbox eats up ground space fast, especially the big plastic turtle-shaped ones that seem to multiply in every big box store aisle every spring. The fix is building the sandbox lid to double as bench seating.
Use a simple wood frame with hinged lids on two sides. When closed, it’s a bench for parents watching from the patio. When open, it’s full sand-play access for the kids. This single move can save you 15 to 20 square feet compared to a sandbox that needs walking room on all sides.
Line the bottom with landscape fabric before adding sand so drainage stays good and weeds don’t creep up from underneath. I’d also recommend play sand over regular construction sand — it’s finer, doesn’t stain clothes as badly, and won’t have the dust that construction-grade stuff kicks up.
Quick side note: get a real cover, not a tarp. Cats treat uncovered sandboxes like a litter box, and once that happens, that sandbox is done. A hinged lid solves both the space problem and the cat problem in one move.
4. Balance Beam Made From Landscape Timbers
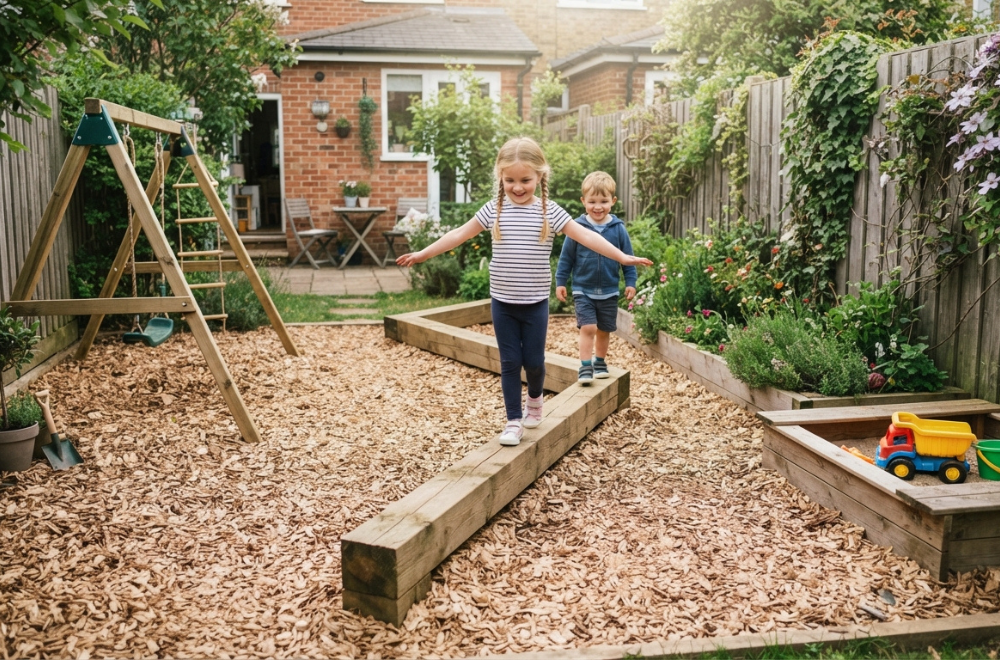
This is the single cheapest idea on this whole list, and it might be the one with the best return on investment for tiny yards. A balance beam takes up almost no ground footprint, costs under $30 in materials, and works for toddlers through elementary-age kids.
Grab two or three 8-foot landscape timbers from the hardware store. Bury a section of each end in the ground so they sit low, around 4 to 6 inches off the soil, and connect them end to end in a zigzag or curve to fit your yard’s shape. Sand down any rough edges and you’re done in an hour.
Kids use balance beams differently at every age. Toddlers hold hands and toddle across. Six-year-olds turn it into an obstacle course with imaginary lava on both sides. Older kids use it for actual balance practice, which is honestly good for gross motor development whether or not they’re thinking about it that way.
This is also one of the few play features that works well tucked along a fence line or a narrow side yard where nothing else would fit. If you’ve got 8 feet of unused space between your house and the property line, this is where it goes.
5. Chalkboard Fence Panel for Art and Games
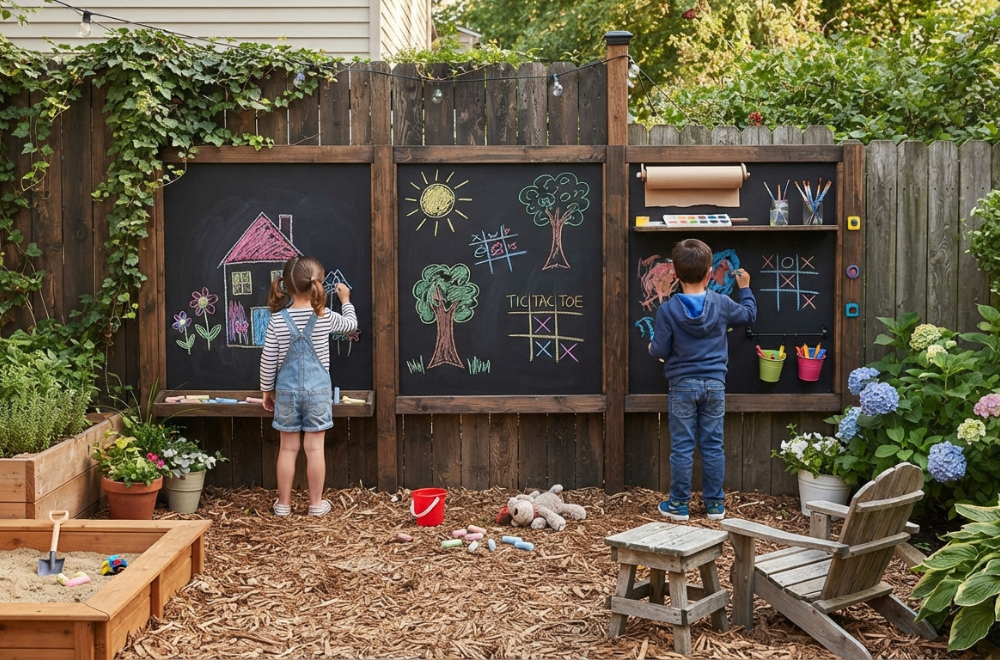
Not every play area needs equipment. Painting one fence panel with chalkboard paint gives you an art station, a hopscotch scoreboard, a spot for tic-tac-toe, and a message board, all without taking up a single inch of ground space.
Chalkboard paint runs about $15 a quart and covers a standard 6-foot fence panel with two coats. Prime the wood first if it’s raw, and let each coat cure for a full 24 hours before letting kids near it with chalk.
This idea sounds almost too simple, but I’ve watched it hold my kids’ attention longer than some of the pricier stuff on this list. There’s something about a giant chalkboard that feels different from a sidewalk — kids treat it like a canvas instead of just a game surface, and it becomes a rotating art gallery all summer.
Rinse it down with a hose once a week and it stays usable for years. If your fence backs up to a neighbor’s yard, maybe give them a heads-up before you turn your shared fence line into a public art project.
6. Tire Swing on a Single Tree Branch
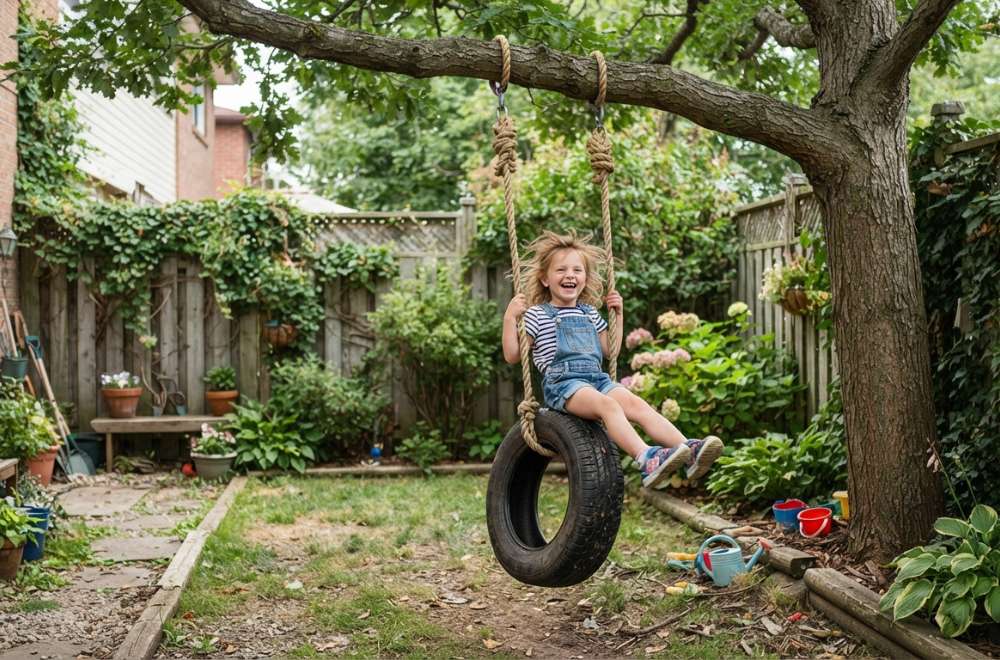
A traditional swing set needs a wide clearance zone on all sides for safety, which is exactly what a small yard doesn’t have. A single tire swing hung from one sturdy branch solves the space problem because it only swings in a limited arc, not the full pendulum range of a two-post swing set.
Find a branch at least 8 inches in diameter and use a rated swing rope or chain kit, not just a length of rope from the garage. Hang the tire so the bottom sits about 18 inches off the ground for younger kids.
I’ll be honest, my first attempt at this used regular nylon rope, and it stretched and frayed within a season. Spend the extra $20 on a proper swing kit with weatherproof rope or coated chain — it’s not the place to cut corners, since this is the one item on the list where safety failure means an actual kid getting hurt.
If you don’t have a tree, a single stand-alone swing post takes up far less room than a full swing set frame and can be positioned right along a fence line instead of in the middle of your yard.
7. Stepping Stone Path With a Purpose
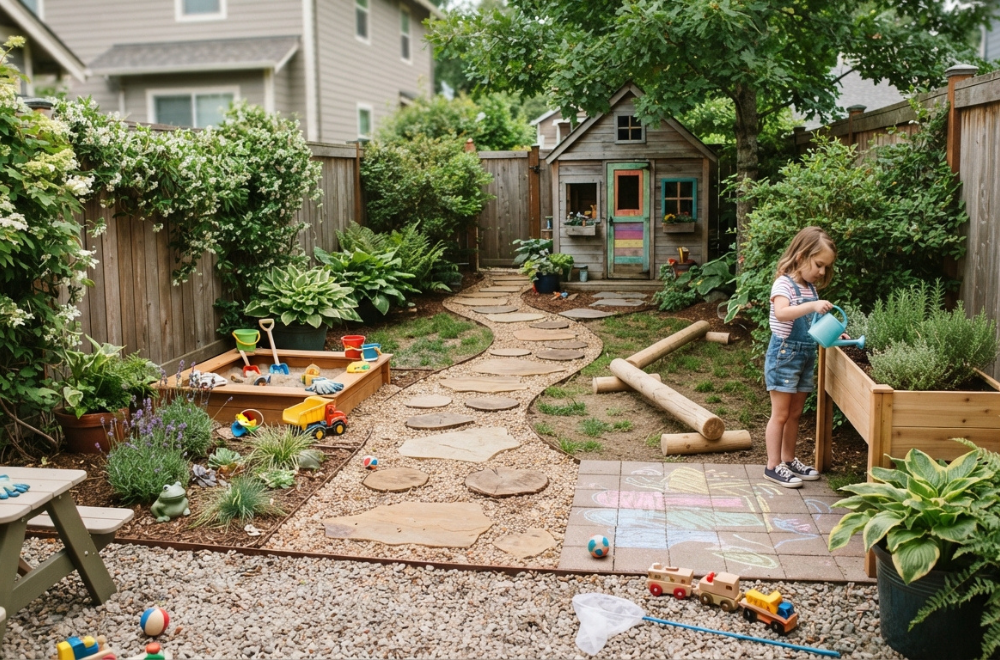
A winding stepping stone path might not sound like a “play area,” but kids treat pathways as games automatically. Add a little intention to the layout and you get built-in play value from something that also just looks nice.
Space concrete or flagstone pavers at slightly uneven, kid-sized jumping distances instead of a uniform walking gait. Paint numbers, letters, or shapes on each stone for younger kids learning their ABCs, or leave them blank for older kids who’ll turn it into their own version of “the floor is lava.”
This works especially well in narrow side yards or the strip of space between a patio and a fence, areas that are usually wasted dead zones in small yards anyway. You’re not creating a new play zone from scratch — you’re upgrading a space you already have to serve double duty.
Set the stones in sand or gravel rather than concrete if you want flexibility to rearrange the path as your kids get older and their games change.
8. Vertical Garden Bed for Little Hands
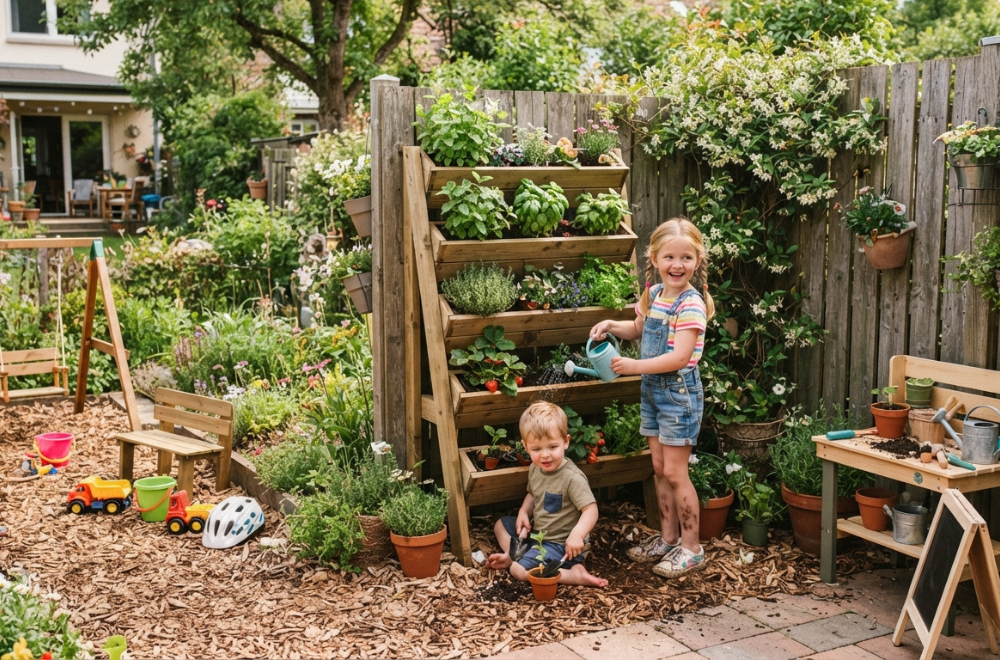
Gardening is play too, and a vertical garden bed gives kids their own growing space without eating up ground area. Wall-mounted planter boxes, a repurposed pallet standing upright, or a ladder shelf loaded with pots all work.
Keep the lowest shelf or box at toddler height and the upper ones for older siblings or parent supervision. Fast-growing, kid-friendly plants like cherry tomatoes, snap peas, sunflowers, and strawberries give quick feedback, which matters a lot when you’re dealing with a 5-year-old’s patience level.
The summer my daughter grew a single sunflower taller than our fence, she checked on it every single morning before breakfast, rain or shine. That kind of ownership over a living thing does something that store-bought toys just can’t replicate.
Mount everything securely to a stud or fence post, not just drywall anchors — a loaded planter box is heavier than people expect once the soil is wet, and a fallen box near small kids is a real hazard.
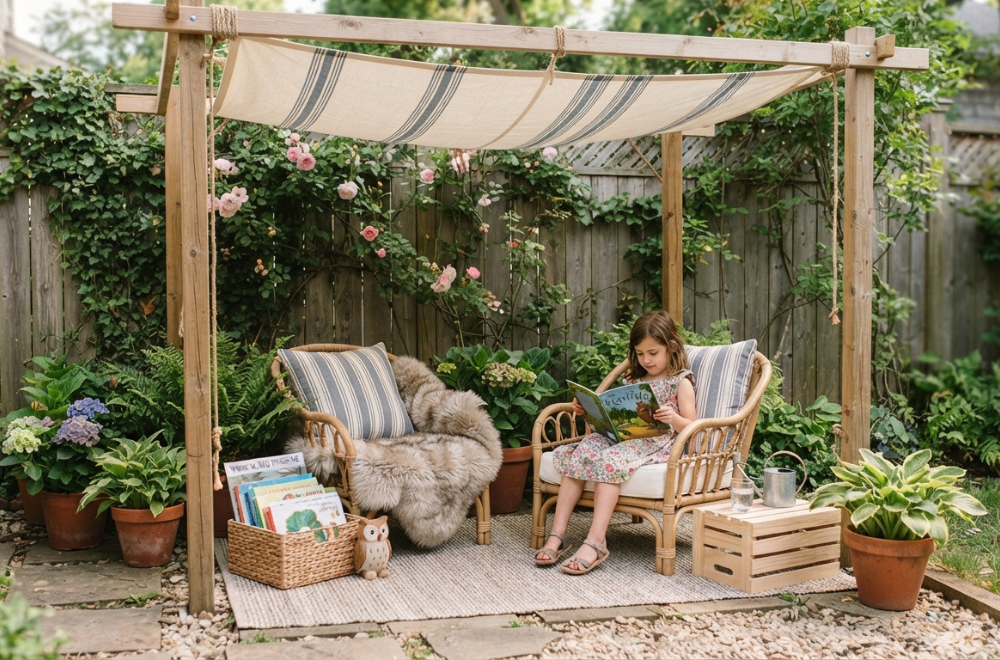
9. A Reading Nook Under a Simple Canopy
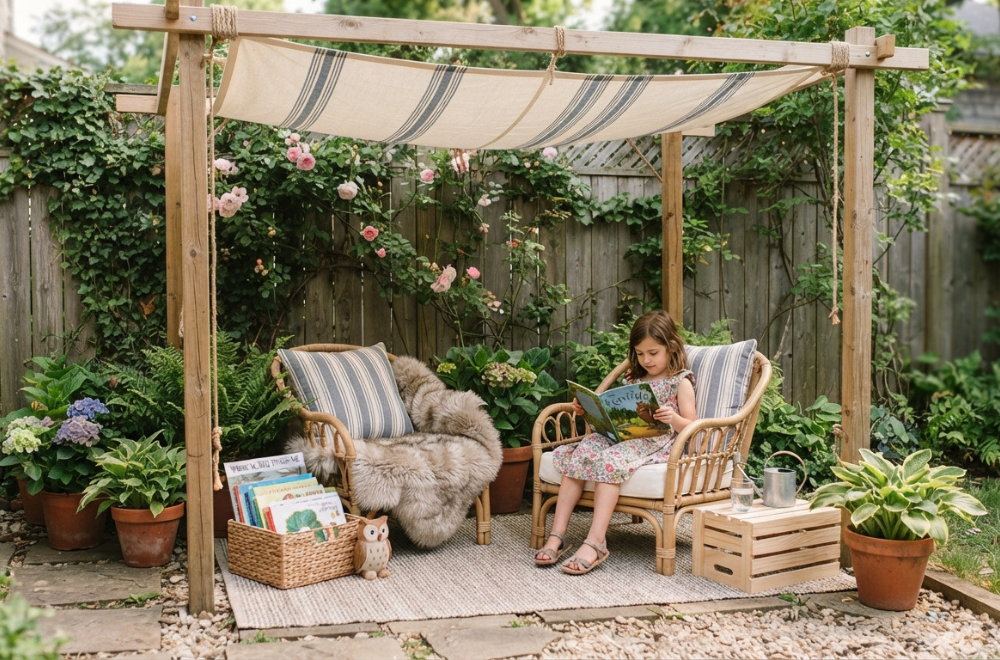
Not every kid wants to be running around every second. A shaded reading nook gives quieter kids a retreat, and it takes up a surprisingly small footprint — often just a 4×4 foot corner.
A simple shade sail or canopy stretched between the fence and a single post creates the shelter. Add an outdoor rug, a couple of weatherproof cushions, and a small bin for books, and you’ve got a legitimate outdoor room.
I added one of these to a shady corner behind our shed, and it’s become the spot my introverted kid disappears to with a stack of graphic novels for an hour at a time. It’s also become my own favorite spot for an iced coffee once the kids are at school, so consider it a dual-purpose investment.
Pick furniture and books rated for outdoor humidity, or plan to bring the books in overnight. Cardboard covers do not survive dew, no matter how careful you think you’ll be about it.
10. Repurposed Playhouse Using a Garden Shed
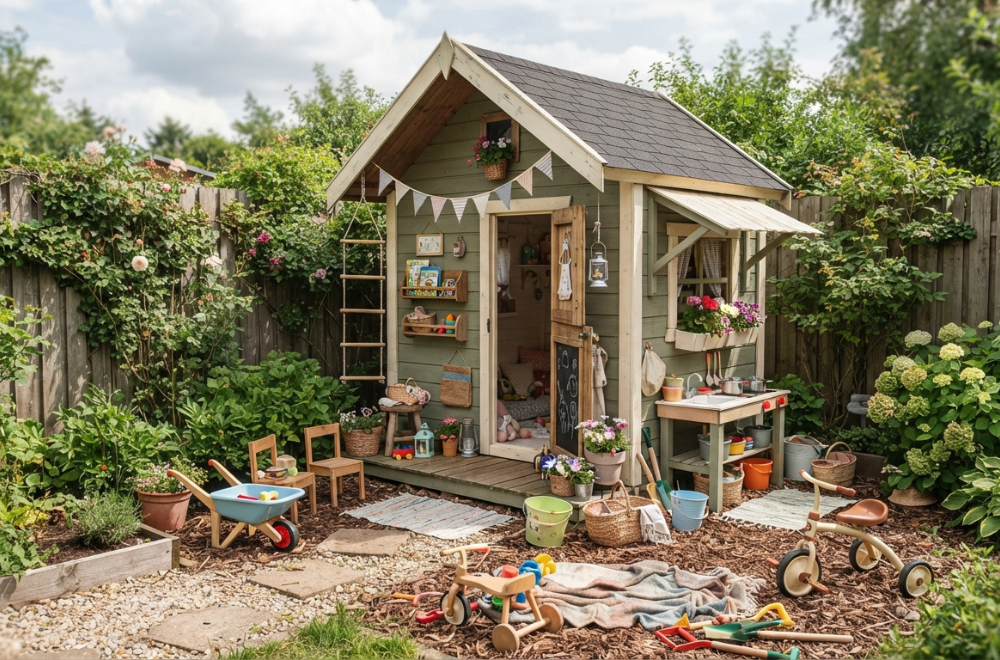
Building a full playhouse from scratch takes up ground space you probably don’t have. Converting part of an existing garden shed, or adding a small lean-to extension onto one, gets you a playhouse without a second structure competing for yard real estate.
Section off a portion of the shed with a simple stud wall or even just a curtain if you’re renting and can’t modify the structure. Add a Dutch door, some paint, and a window if the shed already has a rough opening, and it starts to feel like a genuine kid space instead of a tool storage overflow.
This idea works especially well if your shed already sits along the property line or fence, since it means the playhouse portion isn’t stealing usable lawn space that would otherwise host the swing set or sandbox.
The trade-off is obvious: you lose some storage space. I’d recommend a small outdoor storage bench or wall-mounted tool rack elsewhere in the yard to make up the difference rather than giving up the shed conversion idea entirely.
11. Musical Wall With Repurposed Kitchenware
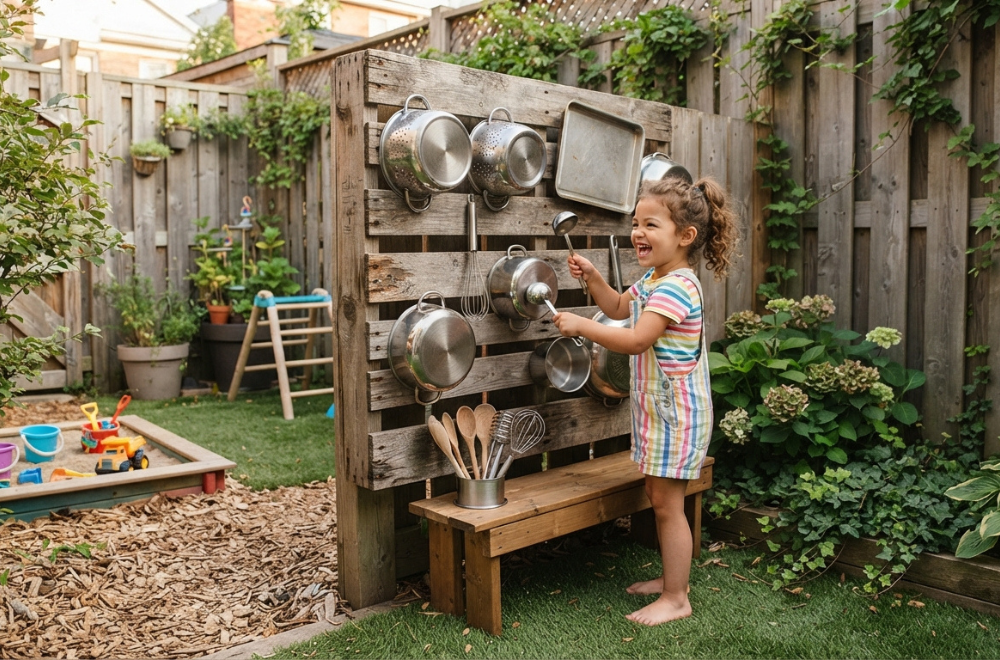
An outdoor musical wall costs almost nothing, uses vertical space instead of ground space, and holds toddler attention shockingly well. Mount old pots, pans, wooden spoons, and metal bowls to a fence panel at kid height using zip ties or eye hooks.
Group items by rough tone if you want to get fancy — bigger pots for lower, boomier sounds, smaller lids and bowls for higher pitched clangs. Attach a couple of wooden spoons on strings nearby so kids don’t have to go hunting for mallets.
Fair warning to any nearby neighbors: this is loud. I learned this one from a friend’s backyard, not my own, and her neighbor was noticeably less enthusiastic about the “musical wall” than her toddler was. Consider positioning it away from shared fence lines if you want to stay on good terms with whoever lives behind you.
This idea costs essentially nothing if you’re pulling items from a thrift store or your own kitchen drawer of mismatched lids, which makes it a nice low-stakes addition if you’re not sure your kids will even like it.
12. Multi-Use Turf Circle for Games and Gathering
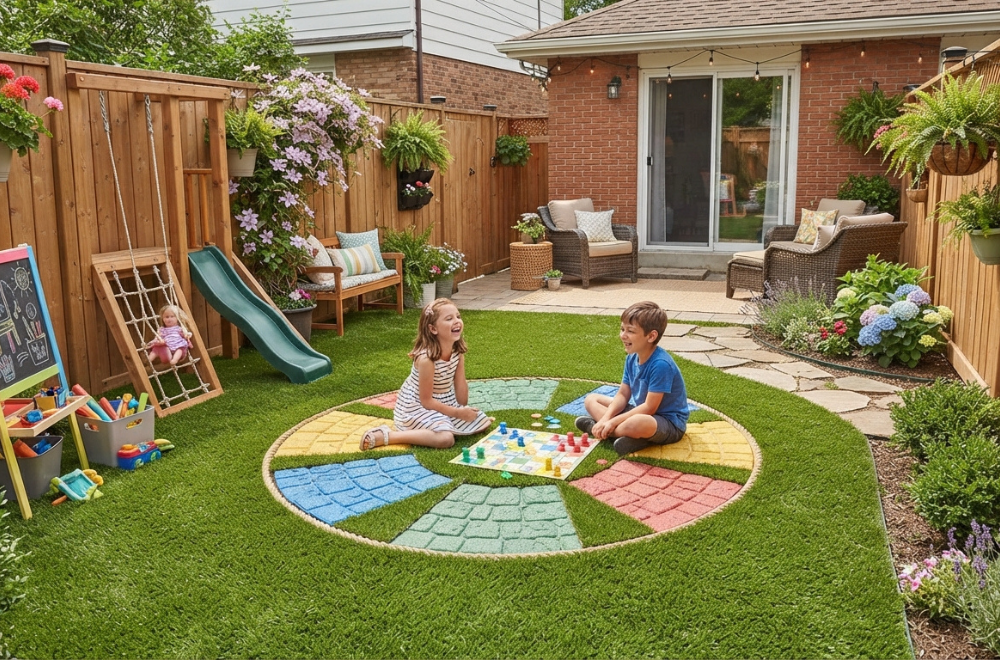
A small circle or oval of artificial turf, roughly 8 to 10 feet across, gives you a flexible, low-maintenance play surface that works for everything from tag to picnic blankets to a portable soccer goal. It’s not one specific “activity,” it’s a blank canvas.
Artificial turf costs more upfront than seeding grass, but it holds up to heavy kid traffic without turning into a muddy, worn-down patch by mid-summer, which is exactly what happens to real grass in a small yard that gets used hard every single day.
Border the circle with pavers or a simple wood edge to keep it defined and to stop mulch or mud from migrating in from the surrounding beds. This also gives the space a finished, intentional look instead of looking like a random patch someone forgot to landscape.
I resisted turf for years because it felt like giving up on a “real” lawn, but after watching real grass die under a trampoline’s shadow for two summers straight, I caved. It was the right call for a yard this small, even if it took me longer than it should have to admit it.
Bonus idea: A Freestanding Chalkboard/Mirror Panel on Casters
If you don’t want to paint your actual fence, a freestanding double-sided panel — chalkboard on one side, safety mirror on the other — mounted on locking casters gives you portability instead of a fixed feature. Roll it wherever the sun or shade currently is, and roll it out of the way entirely when you need the space back for a birthday party or a game of tag. It’s not flashy, but it might be the single most flexible item on this whole list.
Real Talk: What’s Not Worth the Effort in a Small Yard
Not everything that looks good online actually earns its keep in a tiny backyard. A few honest warnings before you start buying supplies:
Full-size swing sets are almost always a mistake in small yards. They need clearance zones on every side for safety, and in a small yard that clearance eats up basically the whole usable space. You end up with a yard that’s 80% swing set and 20% everything else.
Trampolines shade out your grass and take up a shocking amount of real ground space. Even a 10-foot trampoline needs safety clearance around it, and I’ve seen more than one small yard become basically unusable for anything else once the trampoline goes in.
Elaborate multi-level wooden play structures rarely fit the scale of a small yard. They look incredible in the catalog photo taken from a wide-angle lens in someone’s half-acre lot, and then you realize your actual yard is a third that size and the structure dwarfs everything else, including the house.
Water features and splash pads sound great in July and become a mosquito problem and a mud pit by September. If you want water play, go with a portable option you can drain and store rather than a permanent fixture that takes up ground space year-round for three months of actual use.
None of this means skip fun stuff. It means match the scale of the feature to the scale of your yard, and be honest with yourself about how many months a year each item actually earns its square footage.
Parting Wisdom
The best small-yard play areas aren’t the ones that try to cram in every idea on a list like this one. They’re the ones that pick two or three features that actually fit your kids’ ages and your yard’s shape, and commit to doing those well instead of doing everything halfway.
Start with whatever your kids already gravitate toward — climbing, digging, art, quiet time — and build outward from there. A tiny yard with one great feature beats a tiny yard crammed with five mediocre ones every time.
What’s the trickiest part of your backyard to work with — a weird corner, a slope, a shady patch that nothing grows in? Drop it in the comments below and I’ll tell you what I’d try there.

About Syprose Kiche
Syprose Kiche is the creator and writer behind My Besuited Home, a practical home and garden website covering DIY projects, gardening, lawn care, landscaping, home improvement, and outdoor living. She focuses on turning everyday homeowner questions into clear, practical guides backed by careful research and useful real-world considerations.