
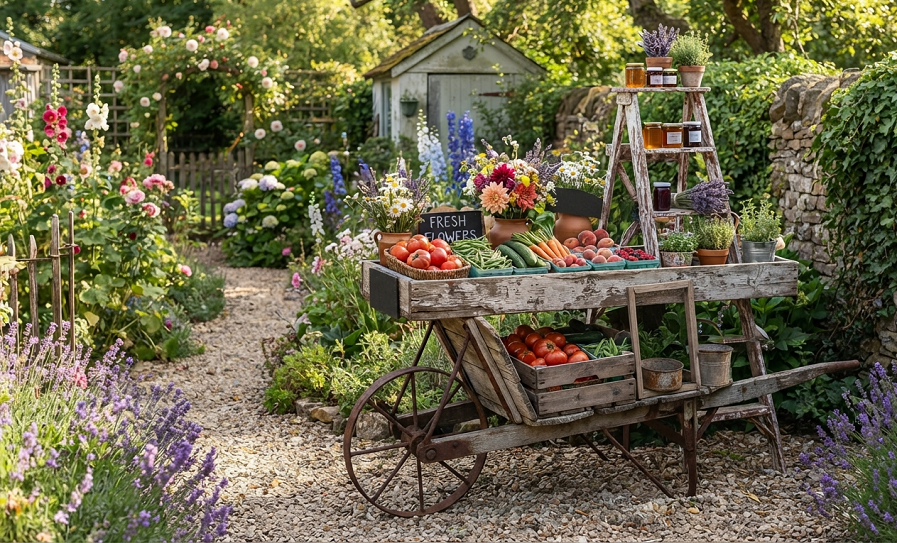
You know that feeling when you scroll past a photo of some dreamy little produce stand tucked against a cottage covered in climbing roses, and you immediately want to burn your plastic patio furniture to the ground? Yeah, me too. My backyard used to look like a big-box store threw up on it. Now it looks like something out of a storybook, and it all started with one wobbly wooden stand I built from scrap fence boards.
A farmstand isn’t just for people who grow enough zucchini to feed a small county (although if you’ve ever grown zucchini, you know that happens whether you want it to or not). It’s a design feature. It’s the thing that turns a backyard from “yard with some plants in it” into a space that feels lived-in, storied, and just a little bit magical. Cottagecore isn’t about spending a fortune at a farmhouse decor boutique. It’s about looking like your grandmother homesteaded the place, even if your grandmother actually lived in a condo in Scottsdale.
I’ve built, rebuilt, and completely torn out more farmstands than I care to admit. Some were gorgeous. Some attracted so many wasps that my kids refused to walk past them. Below are the seven ideas that actually worked, along with the honest reasons some of my earlier attempts flopped.
What I love most about this whole project is how forgiving it is. You don’t need a woodworking background, a big budget, or a sprawling half-acre lot. Most of these ideas work in a corner of a small suburban yard just as well as they do on a proper homestead. I’ve seen versions of these tucked next to a garage, leaned against a chain-link fence, and even squeezed onto an apartment patio using a mini tabletop version of idea one. The scale bends to whatever space you’re working with, which is part of why this particular garden trend has stuck around so much longer than most.
What Makes a Farmstand “Cottagecore” Instead of Just… a Table With Vegetables On It?
Before we get into the ideas, let’s talk about what separates a true cottagecore farmstand from a card table with a tomato on it.
Cottagecore farmstand aesthetics lean on a few repeating elements: reclaimed or weathered wood, hand-lettered signage, mismatched vintage containers, climbing florals, and a general sense that nothing was bought new and everything was built with love (or at least with a lot of wood glue and mild frustration, which is basically the same thing).
The goal is imperfection with intention. A perfectly symmetrical, laser-cut farmstand with matching uniform crates looks like a Pinterest ad. A slightly crooked stand with a hand-painted sign, a rusty scale, and flowers growing up through the slats looks like it’s been there for eighty years. That’s the difference, and it’s the thing I remind myself of every single time I get tempted to buy something too polished for this look.
Keep that “lovingly imperfect” mindset in your back pocket as you go through this list, because it applies to every single idea below.
1. Build a Reclaimed Wood Stand With a Slanted Display Shelf
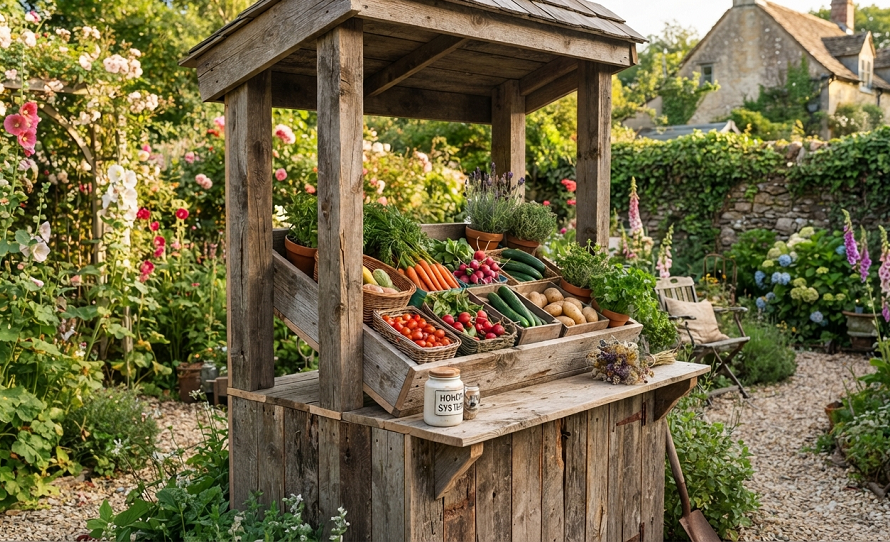
This is the classic. If you search “farmstand ideas backyard” or “DIY vegetable stand plans,” this is what shows up ninety percent of the time, and for good reason. It works.
Start with reclaimed lumber if you can get your hands on it. Old fence boards, pallet wood, barn siding scraps from a local salvage yard, anything with some age and character. New lumber looks fine too, but you’ll want to stain or weather it so it doesn’t scream “I bought this at the hardware store on Tuesday.”
The slanted shelf is what sells the whole look. Instead of a flat table, angle your main display surface about 15 to 20 degrees. This does two things: it makes your produce or flowers more visible from a distance, and it instantly reads as “market stand” instead of “table I dragged outside.” I built my first one with a flat top and it just looked like a folding table with a produce problem. The second version, angled and stained a soft gray, actually got compliments from neighbors who assumed I’d bought it somewhere fancy.
Add a small lip or trim along the bottom edge of the slanted shelf so things don’t roll off when you set down a basket of apples or a stack of pumpkins in the fall. I skipped this step once and spent twenty minutes chasing squash across the lawn. Not my finest afternoon, but it taught me that a half-inch strip of trim wood is worth the extra ten minutes of build time.
2. Hang a Hand-Painted Sign With Chalkboard or Chippy Paint Lettering
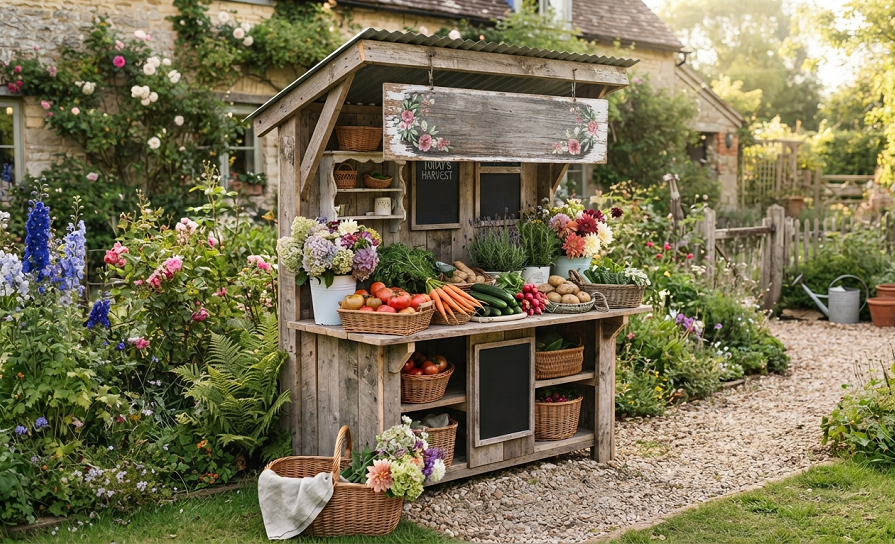
A farmstand without signage is just furniture. The sign is what tells your brain “this is a farmstand” before your eyes even process what’s sitting on it.
You’ve got two main routes here. The first is a small chalkboard panel where you write out what’s “for sale” that week, like “Fresh Basil” or “Free Zinnias, Take Some.” Even if nobody’s actually buying anything and it’s purely decorative, the rotating chalkboard message makes the whole setup feel active and alive instead of staged.
The second route is a permanently painted sign with distressed or “chippy” lettering, the kind where the paint looks like it’s been peeling for decades. You can fake this pretty easily with a technique called dry brushing, where you layer a base coat, let it dry, rub a candle or piece of wax over random spots, then paint a second color over top. When it dries, you sand the waxed areas and the base coat shows through in these perfectly imperfect chips. It takes maybe twenty minutes and it looks like it took twenty years.
Whatever route you choose, keep the font hand-drawn and a little wobbly. A perfectly straight stenciled sign kills the whole vibe. I made this mistake with my first sign, used a laser-cut stencil kit, and it looked like it belonged outside a chain restaurant, not a backyard garden.
3. Stack Vintage Crates and Baskets Instead of Using Matching Shelving
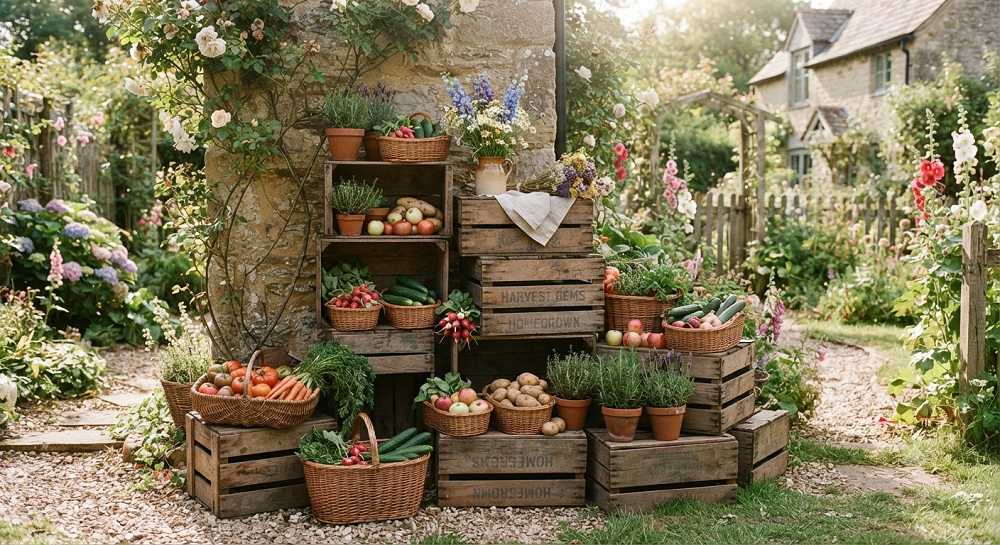
Here’s an opinion that might ruffle some feathers: matching shelving units are a total waste of money for this look, even the “farmhouse style” ones sold at big home decor stores. They’re too uniform. Cottagecore thrives on mismatch.
Instead, collect wooden crates, wire baskets, old berry boxes, and enamelware bowls from thrift stores, flea markets, and estate sales. None of it needs to match. In fact, it shouldn’t. Different heights, different woods, different wear patterns, that’s what creates depth and makes your farmstand look like it accumulated over years instead of arriving in one Amazon order.
Stack a couple of crates upside down to create tiered height variation, then set baskets and bowls on top and around them. This layering trick is what professional stylists use to make flat surfaces look interesting, and it works just as well with $2 thrift store finds as it does with anything expensive.
One quick side note: if you’re using real wooden crates that once held produce, give them a light scrub and a coat of clear sealant before they go outside permanently. Untreated crates left out in the rain will start to mildew and rot within a season, and trust me, moldy crates are not the cottagecore aesthetic anyone’s going for.
I’ve also found that farmers markets and orchard stands will sometimes sell their old, damaged crates for next to nothing once they’ve replaced them with newer ones. Ask around at your local market before assuming you need to buy “vintage” crates from an antique dealer at triple the price. A little scuffing and a broken slat here or there only adds to the character once it’s sitting in your yard.
4. Train Climbing Roses or Clematis Up the Stand’s Frame
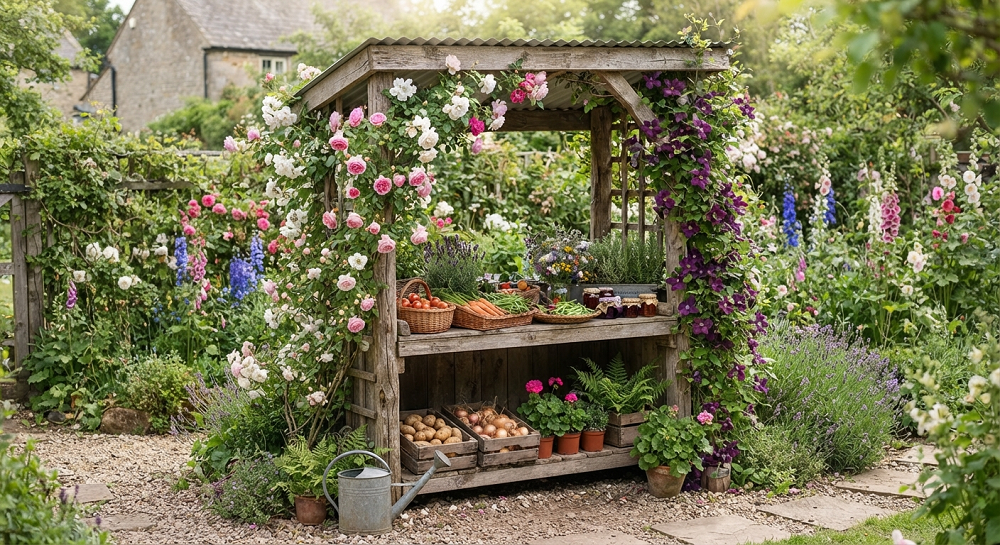
This is the single fastest way to make a plain wooden structure look like it belongs in a fairy tale, and it’s shockingly underused by most backyard farmstand builders.
Choose a repeat-blooming climbing rose (I’m partial to ‘New Dawn’ for its soft pink blooms and its tolerance for a little neglect) or a clematis variety if you want something that climbs faster and blooms in a wider color range. Plant it at the base of one corner post and gently tie the new growth to the frame with soft garden twine as it grows. Within one to two seasons, you’ll have flowers weaving through the structure like it’s always been there.
A word of caution from someone who’s done this wrong: don’t plant an aggressive climber like trumpet vine or wisteria near a farmstand you actually want to use for display purposes. These plants grow fast enough to swallow the entire structure within a couple of years, and their root systems can eventually damage wooden joints. I made this mistake with a wisteria near my first stand, and within three years I couldn’t see the shelves anymore, just a wall of green.
Stick to roses, clematis, or a well-behaved honeysuckle, and prune consistently so the blooms frame the stand instead of hiding it entirely.
5. Use an Old Wagon Wheel, Ladder, or Wheelbarrow as the Base Structure
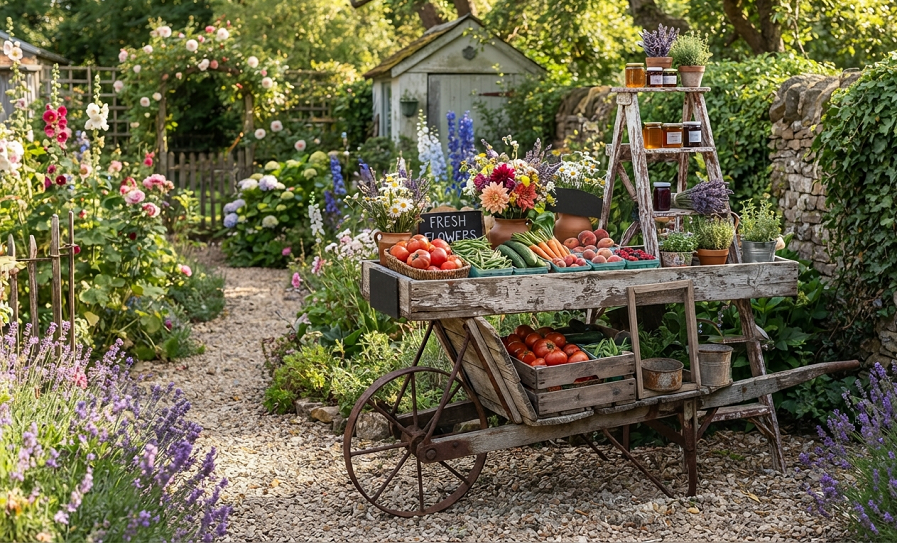
If full-on carpentry isn’t your thing, repurposing an existing farm relic is a great shortcut, and honestly it often looks more authentic than something built from scratch.
An old wooden ladder leaned against a fence and fitted with wide boards between the rungs creates instant tiered shelving with zero measuring or cutting required. A rusted wheelbarrow, especially one with a little character (dents, a chipped paint job, maybe some real rust around the edges) makes an incredible planted display when filled with soil and spilling flowers, or lined with a tray and used to hold produce for a more temporary “harvest day” display.
Wagon wheels are trickier to find secondhand these days since they’ve become a popular decor item, but if you can source one from an estate sale, a farm auction, or a salvage yard, propping it against your stand or using it as a trellis backdrop adds instant old-world character that’s nearly impossible to fake with new materials.
The appeal here isn’t just aesthetic laziness (though I won’t pretend that’s not part of it for me). Repurposed farm equipment has real, honest wear on it: dents from actual use, rust that took actual years to form, paint that chipped from actual weather. You genuinely cannot buy that at a store, no matter how much a “farmhouse decor” retailer wants to sell you a pre-rusted version.
6. Add a Small Overhead Trellis or Arbor for Shade and Vertical Interest
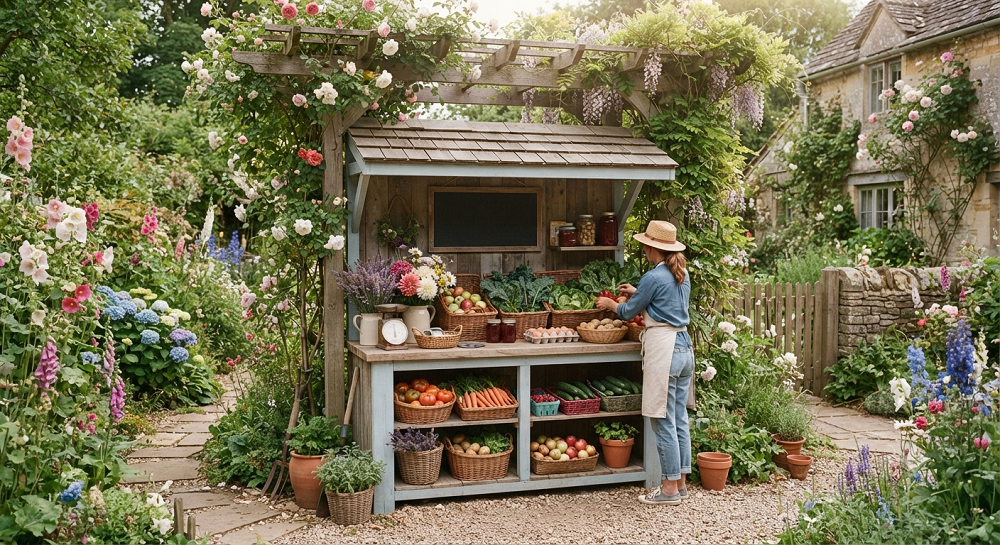
A flat farmstand sitting alone in an open yard looks fine. A farmstand with a small arched trellis over the top, dripping with climbing flowers or even just a bit of shade cloth, looks like a scene from a cottage garden magazine.
The trellis doesn’t need to be elaborate. A simple arched frame made from cattle panel bent into a curve and secured to two posts costs very little and can support a surprising amount of climbing growth. Cover it with sweet peas for fragrance, morning glories for fast color, or a repeat of whatever climber you used on the stand itself for a cohesive look.
Beyond looks, the overhead structure does something practical too: it gives you a shaded spot to actually stand and arrange your display without wilting in direct August sun, and it protects delicate flowers or produce from scorching on hot afternoon light.
If you’re working with a smaller space or a tighter budget, even a simple wooden ladder leaned at an angle over the back corner of the stand, threaded with a vining plant, gets you most of the visual benefit without the extra construction.
7 (Bonus). Light It With Solar Lanterns or Fairy Lights for Evening Charm
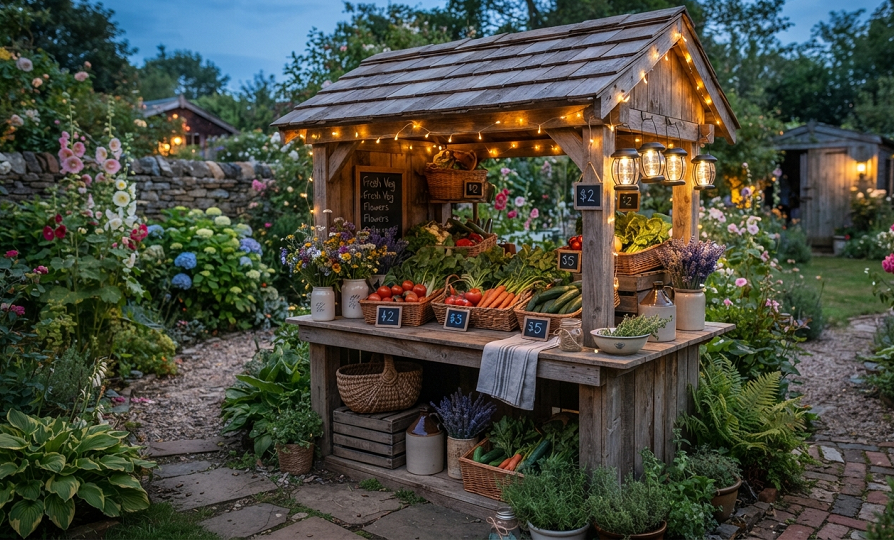
I’m counting this one as a bonus because it’s less about the structure itself and more about how you experience it after the sun goes down, but skipping it means missing half the magic.
String warm white fairy lights (skip the cool blue-toned ones, they read as modern, not cottage) along the frame of your stand or woven through the climbing flowers you planted in idea four. Solar-powered options mean you don’t have to run an extension cord across your lawn, which is both a safety win and a much cleaner look with no visible wiring.
A couple of small solar lanterns set on the shelves themselves, especially old-style ones with an amber glow instead of a harsh white LED, complete the look and make your farmstand a genuine evening hangout spot instead of something you only glance at during the day.
I’ll admit I underestimated this one for years. My farmstand always looked great in daylight photos, but it basically disappeared after dinner. The first summer I added lighting, my family started eating dinner outside near it almost every night. Sometimes the smallest addition makes the biggest difference in how much you actually use a space.
Real Talk: What Can Go Wrong (and What’s Honestly Not Worth the Effort)
Not everything about building a cottagecore farmstand goes smoothly, and I think it’s worth being upfront about the stuff that trips people up.
- Untreated wood rots fast. If you’re using reclaimed lumber, seal it. I lost an entire beautiful stand to rot within eighteen months because I loved the raw, weathered look so much that I refused to put any protective finish on it. Turns out “weathered” and “actively decomposing” look pretty similar from a few feet away, and only one of them holds your grandmother’s mixing bowls without collapsing.
- Aggressive climbers will take over. I mentioned this above, but it deserves repeating: wisteria, trumpet vine, and some varieties of honeysuckle grow fast and strong enough to structurally damage wooden stands over a few years. Stick with better-behaved climbers unless you’re prepared for serious pruning maintenance.
- Wasps love hollow structures and untreated wood gaps. If your stand has open joints or hollow posts, wasps will find them. I had an entire nest build up inside a hollow ladder-turned-shelf one summer and didn’t discover it until my daughter got stung reaching for a basket. Fill gaps, seal hollow posts, and check regularly during warm months.
- Real produce displays attract real pests. If you’re actually displaying edible produce rather than using the stand purely for decoration, expect visits from squirrels, birds, and the occasional very determined raccoon. A decorative stand with faux produce or cut flowers avoids this problem entirely, so decide early which purpose your stand is serving.
- Fairy lights left out year-round fade and fail faster than you’d think. Solar lights especially take a beating from sun exposure. I replace mine roughly every one to two seasons rather than expecting them to last forever, and I’ve made peace with that as just part of the maintenance routine.
None of these problems are dealbreakers. They’re just the honest, unfiltered version of what building this kind of feature actually involves, past the pretty photos.
Parting Wisdom
A cottagecore farmstand isn’t about recreating a perfect Pinterest board in your backyard. It’s about building something a little imperfect, a little weathered, and completely yours, then letting time and climbing roses do the rest of the work for you. Start with one idea from this list instead of trying to do all seven at once. Mine started as a single crooked shelf, and eight years later it’s become the spot my whole family gathers around most evenings.
What’s stopping you from building yours this weekend? Drop a comment below and let me know which idea you’re trying first, or tell me about a farmstand disaster of your own. I promise mine aren’t the only ones out there.

About Syprose Kiche
Syprose Kiche is the creator and writer behind My Besuited Home, a practical home and garden website covering DIY projects, gardening, lawn care, landscaping, home improvement, and outdoor living. She focuses on turning everyday homeowner questions into clear, practical guides backed by careful research and useful real-world considerations.