
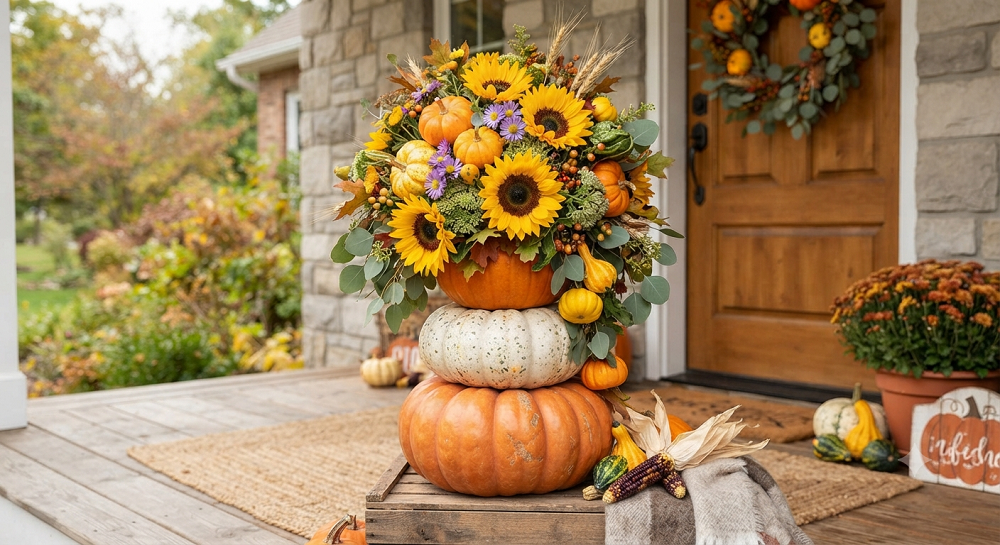
My porch used to be that porch. One sad, unpainted pumpkin sitting next to a doormat, doing absolutely nothing for the season. Then my neighbor set out this gorgeous white pumpkin stuffed with mums and trailing ivy, and I felt a little competitive fire light up in my chest. Twenty minutes and a pair of pruning shears later, I had my own version, and I haven’t bought a florist centerpiece in October since.
If you’ve been eyeing those $60 pumpkin arrangements at the grocery store and wondering why anyone would pay that much for a gourd with some flowers stuck in it, you’re right to wonder. These arrangements are stupid easy to make yourself, and they cost a fraction of the price once you know a few tricks. Below are 11 ideas I’ve actually built in my own yard and kitchen, ranked from beginner-friendly to “okay, now you’re showing off.”
Grab a pumpkin, a knife, and whatever’s left in your garden, and let’s get into it.
1. Classic Pumpkin Vase with Mums and Kale
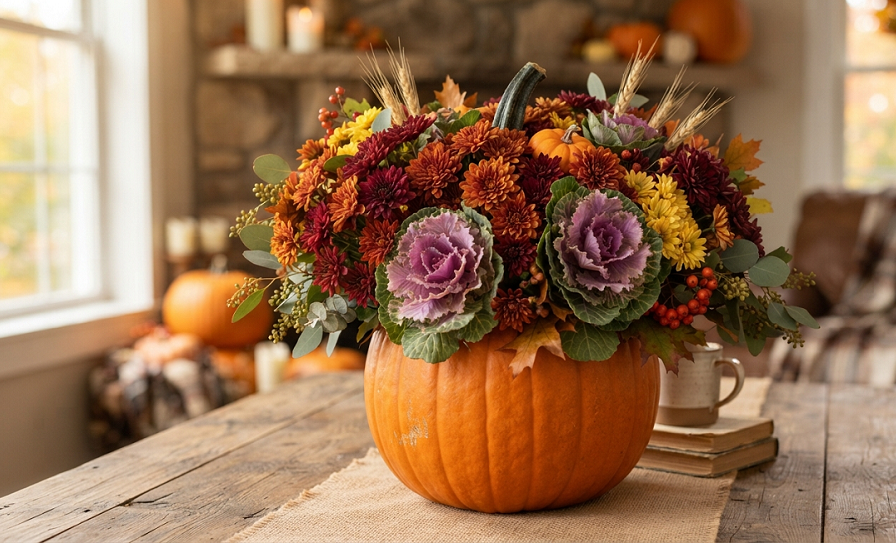
This is the arrangement that started my whole obsession, and it’s still the one I recommend to anyone trying this for the first time. You’ll want a medium pumpkin, roughly the size of a soccer ball, with a flat bottom so it doesn’t roll off your table mid-dinner-party.
Cut a circle around the stem with a sharp knife, angling the blade slightly inward like you’re carving a jack-o-lantern lid. Scoop out all the seeds and stringy guts, then scrape the inner walls down until they’re about an inch thick. A thinner wall means less structure, so don’t get too aggressive here.
Drop a small plastic container or a soaked floral foam block inside, then start building. I always go mums first since they’re sturdy and cheap, then fill gaps with ornamental kale for texture and color contrast. Purple kale against an orange pumpkin is one of those combinations that just works without any design skills required.
One quick side note: soak your floral foam in water for a full hour before you use it, not just a quick dunk. If you rush this step, the foam dries out in the center and your flowers wilt within two days instead of lasting a week or more.
2. Mini Pumpkin Bud Vases for the Table
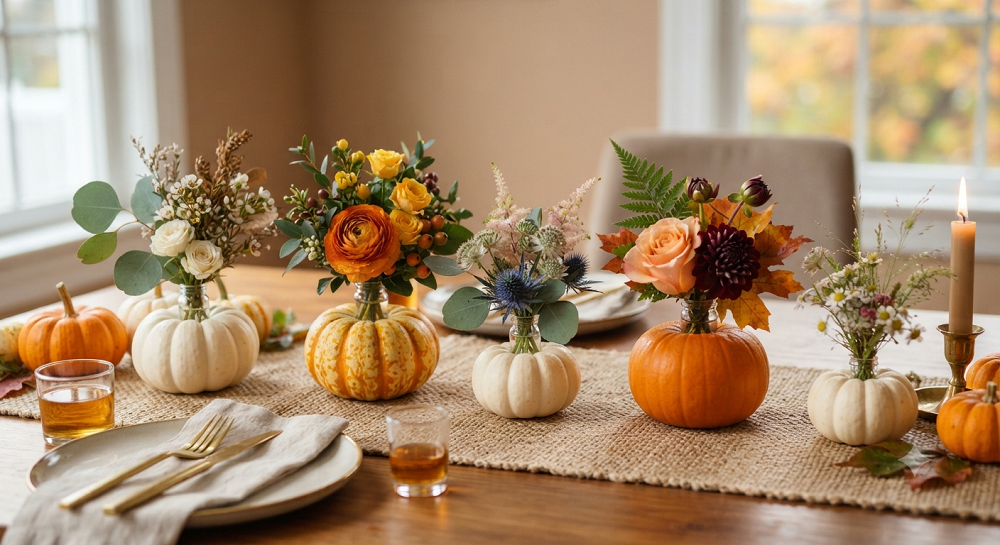
Miniature pumpkins, the ones about the size of a baseball, make fantastic individual bud vases for a dinner table or a mantel row. I like to line up five or six of these down the center of the table instead of one giant centerpiece that blocks everyone’s view of each other.
Hollow each one out the same way as the larger version, just with a smaller knife and a lot more patience since the walls are thinner and crack more easily. Line the inside with a small plastic cup or a shot glass filled with water, since these little pumpkins don’t hold structure well enough for floral foam.
Fill each mini pumpkin with a single stem or two of something bold like a spray rose, a ranunculus, or even a stalk of wheat for texture. The beauty of this approach is that each pumpkin becomes its own little sculpture, so mismatched flowers actually look intentional rather than sloppy.
These mini arrangements also make great party favors if you’re hosting a fall gathering. I’ve sent guests home with one tucked in a paper bag, and every single time someone asks where I bought it, which feels pretty good to answer with “I made it in ten minutes.”
3. Succulent-Topped Pumpkin for the No-Water Crowd
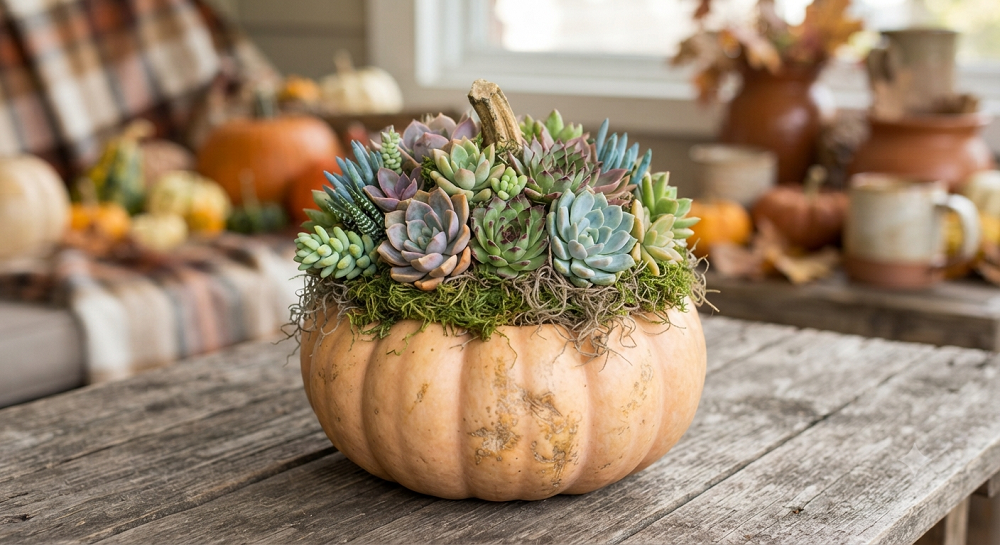
If you’re the type of person who forgets to water anything, including houseplants that practically water themselves, this arrangement solves that problem completely. Succulents don’t need a water source inside the pumpkin, which means no rot from standing water and a display that lasts weeks longer than fresh-cut flowers.
Start with a small to medium pumpkin and skip the deep hollowing process entirely. Instead, cut just enough of a shallow bowl on top to hold a thin layer of potting soil, maybe two inches deep. You’re not trying to plant a garden in there, just enough dirt to anchor roots.
Arrange your succulent cuttings by pushing the stems directly into the soil, clustering them by height with taller varieties like echeveria in the back and low spreaders like sedum trailing over the front edge. Succulents actually root into loose soil over time, so this arrangement can technically keep growing if you get lucky with your climate.
The only real maintenance is a light misting once a week and keeping the pumpkin out of direct rain, since too much moisture defeats the entire purpose of choosing succulents in the first place.
4. White Pumpkin with Dried Hydrangea and Wheat
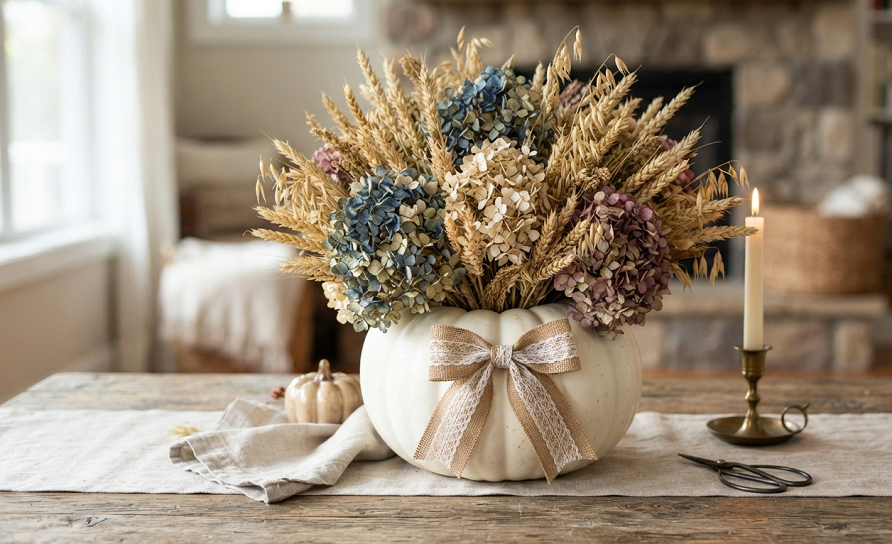
White pumpkins photograph beautifully, which is probably why they show up in every fall wedding shoot on the internet. Pairing one with dried hydrangea and a few stalks of wheat gives you that soft, neutral, farmhouse look without spending money on a florist’s dried arrangement.
Hollow the pumpkin the same way as the classic version, but use dry floral foam instead of the soaked kind since dried flowers rot faster in moisture, not slower. This trips people up constantly because they assume all floral foam works the same way for every project.
Layer the dried hydrangea heads first since they’re the biggest and fill space fast, then tuck the wheat stalks in at varying heights around the edges for movement. I’ve found that adding a few sprigs of dried lavender around the base ties the whole thing together and makes the arrangement smell faintly amazing for weeks.
This one lasts the longest of anything on this list, easily two to three months if you keep it away from humidity, which makes it a smart choice if you’re setting up a display in early September and want it to survive through Thanksgiving.
5. Pumpkin Cornucopia with Trailing Vines
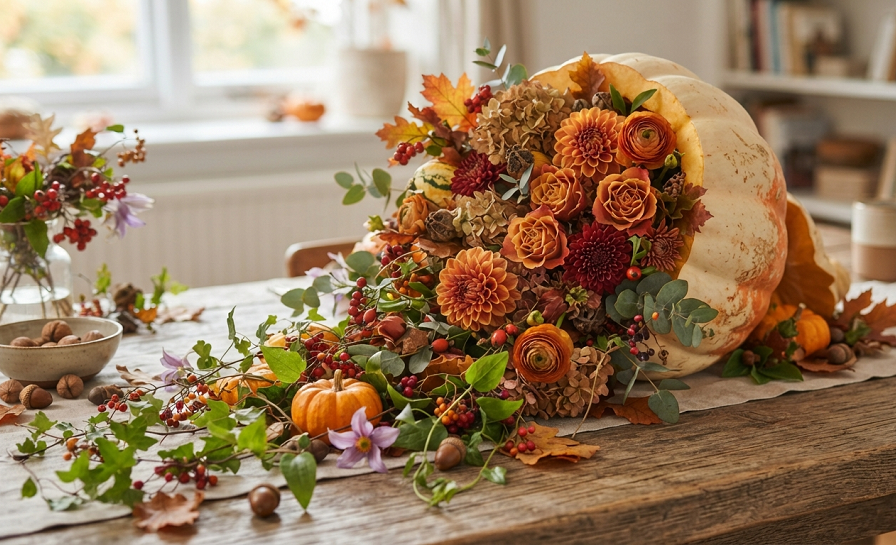
This arrangement leans into the abundance of the season, and it’s my go-to when I’m hosting a bigger dinner and want something that fills a lot of visual space without feeling cluttered. You’ll want a larger pumpkin here, laid on its side rather than upright.
Cut an oval opening on what would normally be the top, positioned more toward one end so the pumpkin looks like it’s spilling contents out the front, cornucopia-style. This takes some trial and error to get the angle right, so don’t be afraid to sketch a line with a marker before you commit with the knife.
Fill the cavity with floral foam or a lined container, then build your arrangement so flowers and greenery seem to tumble out the opening rather than sitting neatly inside it. Sweet potato vine or ivy works great for the trailing effect, draped over the edge and down onto the table.
Mix in seasonal flowers like celosia, marigolds, and dahlias for color, plus a few decorative mini gourds tucked around the base for that overflowing harvest look. It’s a bigger project than most on this list, closer to an hour of work, but it makes a serious statement on a holiday table.
6. Painted Pumpkin with Silk Flowers for the Long Haul
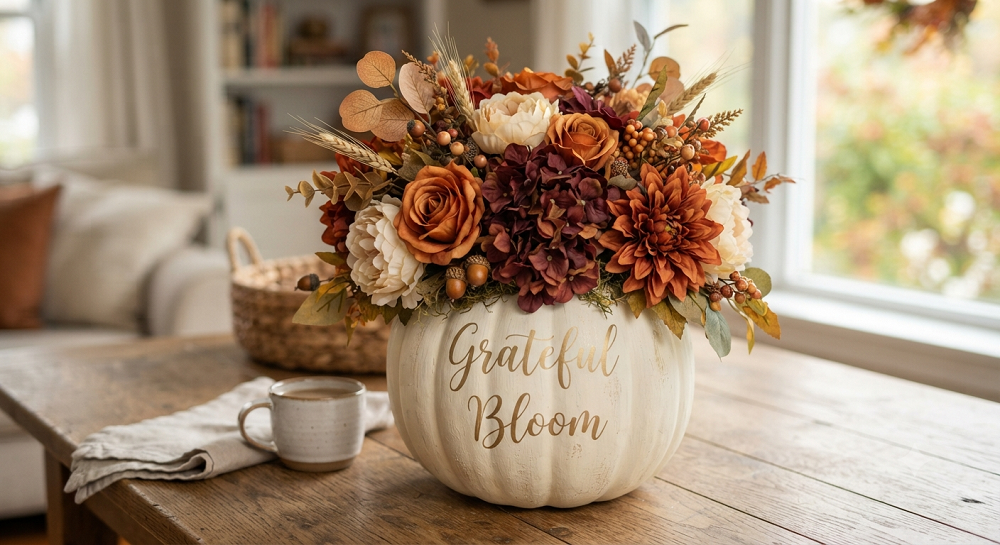
Real talk: fresh flowers in a pumpkin have a shelf life, and if you want something that survives from Labor Day all the way to Christmas without wilting, silk flowers are the honest answer. I resisted this idea for years because it felt like cheating, but my opinion changed after one too many arrangements rotted after a week.
Skip hollowing the pumpkin at all for this version, since you don’t need a water reservoir. Instead, give the whole pumpkin a coat of matte spray paint in white, cream, or a deep charcoal, which instantly makes it look more expensive than an orange field pumpkin ever could.
Once the paint dries, hot glue a small block of floral foam or foam board directly to the top of the pumpkin, then insert your silk stems into that. Faux eucalyptus, silk sunflowers, and dried-look faux wheat all hold up beautifully and never need a single drop of water.
I’ve kept one of these on my dining table for an entire fall season with zero maintenance beyond an occasional dusting. If you have a real pumpkin allergy to bugs or mold, or you just want something low-effort, this is genuinely the smartest option on the list.
7. Pumpkin and Eucalyptus Wreath Base
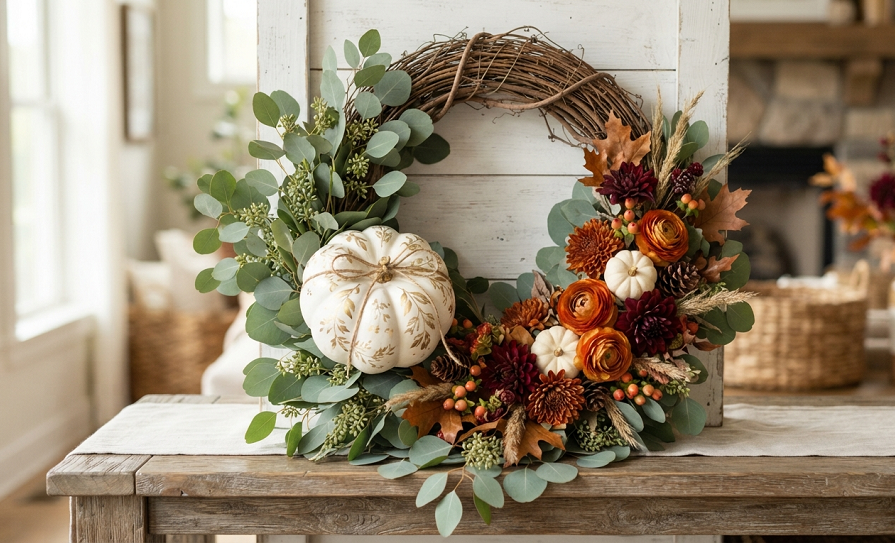
This one surprises people because they don’t expect a pumpkin to work as a wreath base, but a flattened, wide pumpkin makes a fantastic anchor for a tabletop wreath arrangement. Think of it as a wreath that got lazy and decided to sit down.
Use a pumpkin with a naturally flat, wide shape, and instead of hollowing the top, hollow a shallow ring around the outer edge, leaving the center solid. This ring holds a thin layer of floral foam that circles the entire top surface like a donut.
Insert short sprigs of eucalyptus around the entire ring first to establish the wreath shape, then add small clusters of dried orange or red flowers like strawflower or globe amaranth every few inches for pops of color. Keep the center of the pumpkin bare so you can set a candle there for a finished, table-ready look.
I like using this one as the centerpiece for a smaller dinner table since it doesn’t block sightlines the way a tall arrangement does. Everyone can see across the table, and you still get all the seasonal charm.
8. Tall Pumpkin Stack with Sunflowers
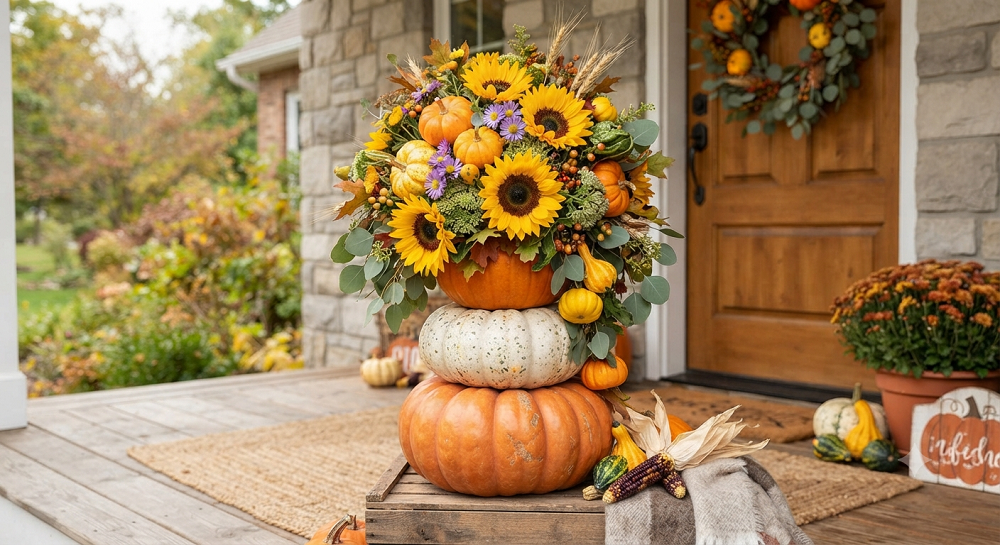
If you want height and drama, stacking pumpkins is the move. I usually go three pumpkins tall, largest on the bottom, working up to a small one on top, secured together with wooden skewers pushed straight through the centers.
Hollow out just the top pumpkin in the stack, since that’s the only one holding flowers. A soaked floral foam block goes inside, and you build your arrangement upward and outward so it looks like the flowers are erupting from the very top of the stack.
Sunflowers are the obvious choice here because their scale matches the boldness of a pumpkin stack, but I’ve also used tall celosia plumes and dried bunny tail grass for a softer look. Whatever you choose, pick stems with real height so the proportions don’t feel top-heavy or awkward.
This arrangement takes up serious floor or entryway space, so it’s better suited to a porch step or an entry table than a dinner table. It’s also the arrangement that gets the most compliments from neighbors walking by, in my experience.
9. Pumpkin Lantern Arrangement with Candlelight
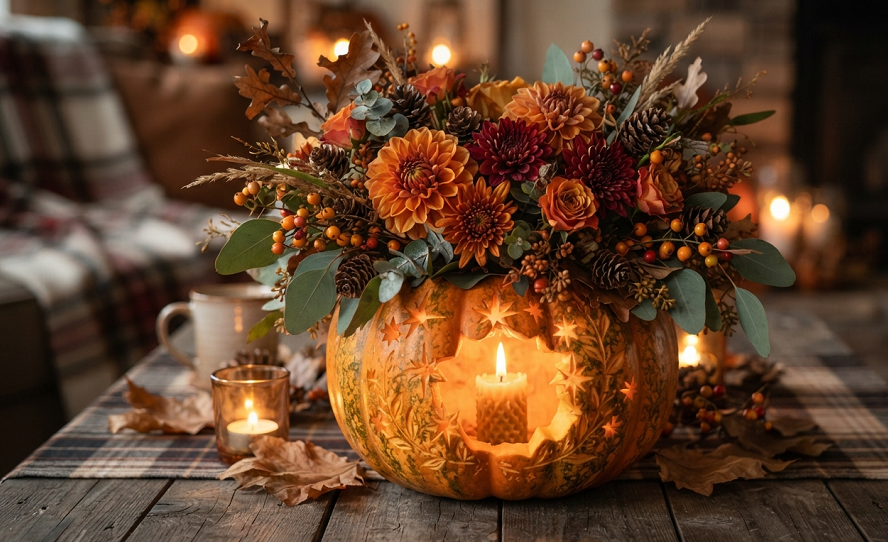
Combining a jack-o-lantern with a floral arrangement sounds like it shouldn’t work, but hollowing a pumpkin for a candle and surrounding the base with flowers creates this warm, glowing display that’s perfect for an outdoor evening gathering.
Carve the pumpkin like you normally would for a candle lantern, keeping the cuts simple, maybe just a few geometric shapes rather than a full face, since you want light to shine through evenly. Place a flameless LED candle inside rather than a real flame, both for safety and because real candles heat the pumpkin flesh and speed up rotting.
Around the base of the lantern, arrange a low ring of flowers and greenery directly on the table or in a shallow dish, using mums, marigolds, and a few sprigs of rosemary for a fragrant touch. The glow from the candle lights up the flower colors beautifully once the sun goes down.
This is less about a traditional arrangement and more about atmosphere, and it’s become a fixture at every fall dinner I host outdoors. Guests always end up gathering near it, which tells you everything about how well it works as a centerpiece.
10. Heirloom Pumpkin with Wildflower Meadow Look
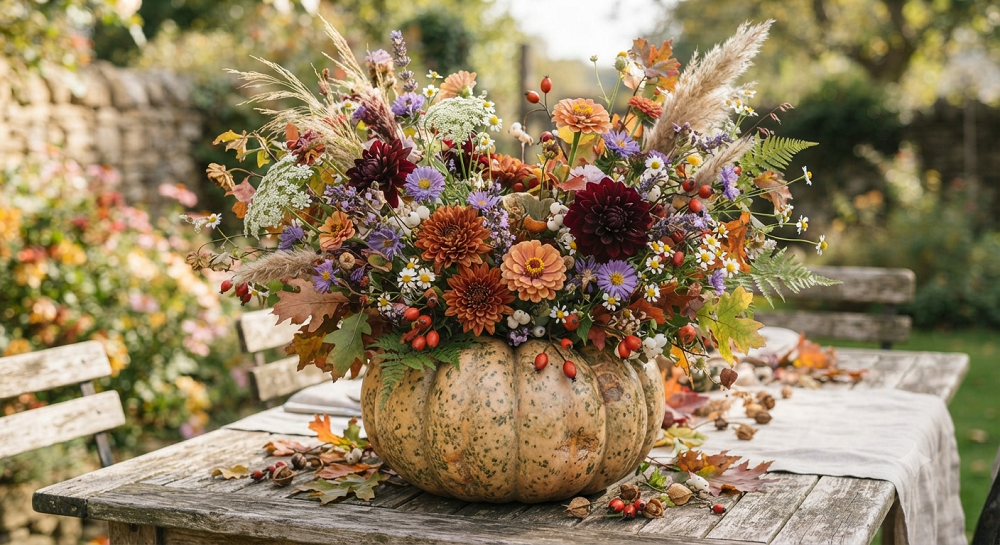
Heirloom pumpkins, the bumpy, ridged, oddly colored ones you find at farmers markets, have so much natural character that they barely need dressing up. For this arrangement, I lean into that texture instead of fighting it with a perfectly manicured floral design.
Hollow the pumpkin as usual, then fill it with a loose, wild mix of flowers rather than a tightly composed arrangement. Cosmos, black-eyed Susan, zinnias, and whatever’s still blooming in your garden at the tail end of summer all work here, mixed together without much regard for symmetry.
The trick to nailing this look is resisting the urge to trim every stem to the same length. Let a few flowers pop up higher than the rest, let some greenery flop over the edge, and don’t worry about gaps. The whole point is that it looks like it grew that way naturally.
I use this one every year with pumpkins from my own garden, partly because the imperfect shapes match the imperfect arrangement style, and partly because it feels like the most honest representation of what fall actually looks like outside my window.
11. Bonus: The Reusable Faux-Pumpkin Shell Hack
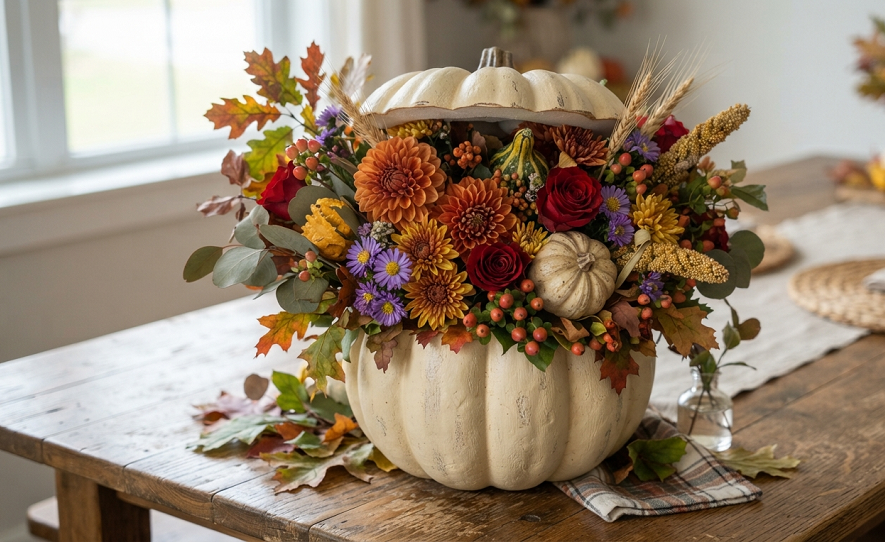
Here’s a trick I picked up after replacing one too many rotted real pumpkins mid-season: buy a hollow plastic or foam craft pumpkin shell, the kind sold at craft stores for painting projects, and use it as your permanent floral base instead of a real pumpkin.
You get all the same visual payoff, since these shells are molded to look exactly like real pumpkins, ridges and all, but you can drop a fresh floral foam insert into the top every couple of weeks without ever dealing with mold or a collapsing shell. Just cut a hole in the top the same way you would with a real pumpkin, and keep the insert removable.
This is especially handy if you’re building arrangements for events, photo shoots, or anything where you need the display to survive multiple days of setup and travel without a real pumpkin softening and sagging under its own weight.
It’s not quite as charming as carving into an actual pumpkin from the patch, and I’ll admit part of me feels a little guilty using a fake one. But for anyone doing this at scale, or anyone who just doesn’t want to deal with pumpkin guts more than once a season, it’s worth having in your back pocket.
Real Talk: What Actually Goes Wrong With Pumpkin Arrangements
Pumpkins rot. That’s the blunt truth nobody puts on the Pinterest photo, and it’s the single biggest issue you’ll run into with any of these projects. Once you cut into a pumpkin and expose the inner flesh to air and moisture, decomposition starts almost immediately, and warm weather speeds it up dramatically.
Standing water inside a hollowed pumpkin is usually the real culprit, not just the passage of time. If you’re using floral foam, keep it damp but never let excess water pool at the bottom of the pumpkin cavity, since that pooled water softens the inner walls and creates the perfect environment for mold. A thin layer of plastic wrap or a lined container between the foam and the pumpkin flesh extends the life of your arrangement by days, sometimes longer.
Bugs are the other thing nobody warns you about. Fruit flies and gnats show up fast once a pumpkin starts breaking down, especially indoors in a warm kitchen. If you’re setting one of these on a dining table, I’d genuinely reconsider the fresh-flower versions for anything longer than a week and lean toward the painted silk-flower option instead.
Direct sun is a killer too. A pumpkin that looks perfectly solid on your porch in the morning can look visibly caved in by evening if it’s baking in full afternoon sun. Shade, or at least partial shade, roughly doubles how long these arrangements hold their shape.
And honestly, some of these projects just aren’t worth the effort for everyone. The tall pumpkin stack, while impressive, takes real time to skewer together properly and balance, and if you’ve got small kids or pets running through the house, it’s a display that’s one bump away from becoming a floor full of pumpkin chunks. Save that one for a spot where it won’t get knocked over.
Final Thoughts
The best pumpkin arrangement isn’t the one that looks the most polished, it’s the one that actually fits how you live. If you’ve got a busy household, go faux. If you’ve got a garden full of flowers you’re not sure what to do with, go wild and heirloom. Either way, you’ll spend a fraction of what a florist charges and end up with something that genuinely feels like yours.
Which one of these are you trying first, and what’s growing in your own garden right now that you’d want to work in? Drop your answer in the comments below, I read every one and I’m always looking for new combinations to try next season.

About Syprose Kiche
Syprose Kiche is the creator and writer behind My Besuited Home, a practical home and garden website covering DIY projects, gardening, lawn care, landscaping, home improvement, and outdoor living. She focuses on turning everyday homeowner questions into clear, practical guides backed by careful research and useful real-world considerations.