

Most folks treat azaleas like a “set it and forget it” shrub, usually shoving a row of them against the foundation of their house and calling it a day. I’ve been there. My first garden looked like a suburban waiting room because I didn’t know these plants could do more than just sit there and look pink for two weeks. If you’re tired of the same old “builder-grade” landscaping and want your yard to actually have some personality, you’re in the right place.
I’ve spent fifteen years trial-and-erroring my way through acidic soil and root rot. I’ve accidentally drowned a few “Encore” varieties and watched others get swallowed by the shade. Along the way, I discovered that azaleas are secretly the most versatile tools in a gardener’s shed—if you know how to position them.
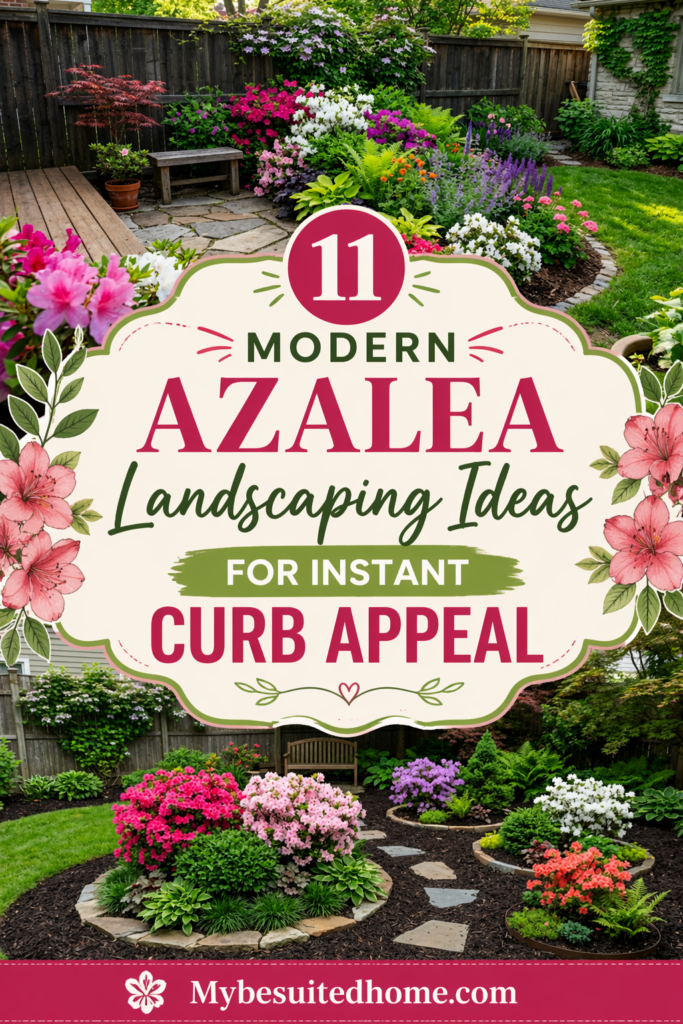
Here are 11 unique azalea landscaping ideas that actually work in the real world, not just in glossy magazines.
1. Create a Privacy Screen with Tall Deciduous Azaleas
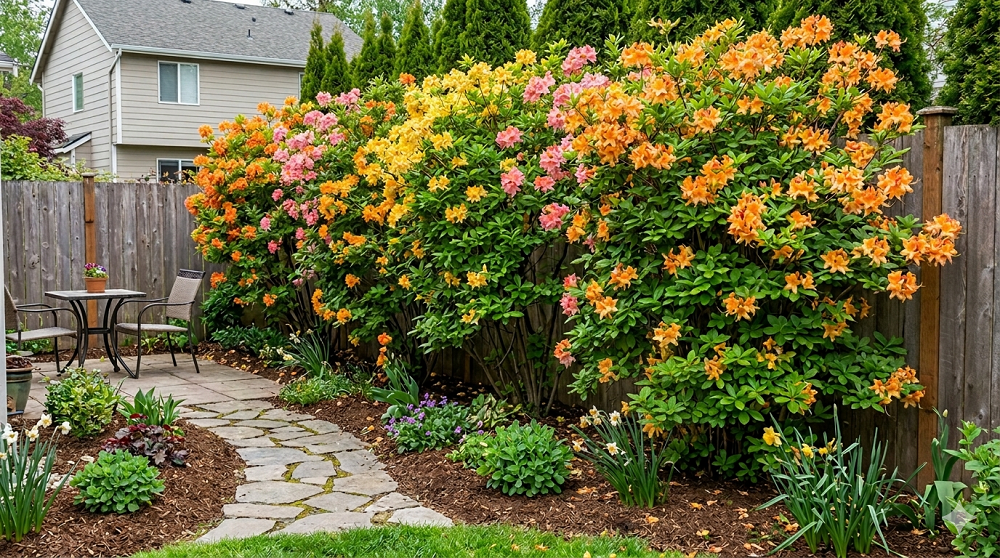
Most people think of azaleas as low-growing mounds, but some varieties, like the Flame Azalea (Rhododendron calendulaceum), can reach over 10 feet tall. I used a row of these to block out my neighbor’s unsightly collection of “project cars” that hadn’t moved since 1998. It was much prettier than a chain-link fence and smelled a whole lot better.
When you’re looking for privacy, don’t just buy the first thing you see at the big-box store. Look for “upright” or “native deciduous” types. These aren’t your typical evergreen bushes; they lose their leaves in winter, but the structural branching still provides a decent visual break. Plus, the spring bloom is explosive.
I recommend spacing them about 4 to 5 feet apart. If you plant them too close, you’re just begging for powdery mildew to move in and ruin the party. They need airflow. Think of it like a living wall that breathes.
The best part about using tall azaleas for privacy is the vertical interest. Most suburban yards are incredibly flat. By bringing the “color line” up to eye level, you make the space feel more enclosed and intimate. Just make sure you’ve got the soil acidity right, or they’ll pout and refuse to grow an inch.
2. Azaleas in Containers for Small Patios
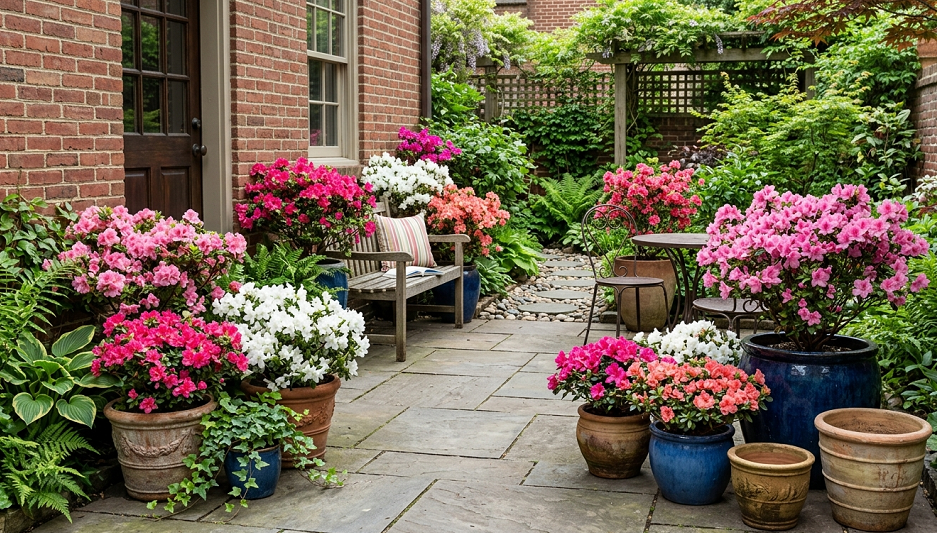
I used to think putting shrubs in pots was a waste of a perfectly good shrub. Then I moved to a place with a tiny concrete patio and realized that if I wanted green, I had to get creative. Azaleas are surprisingly happy in containers because they have shallow root systems. They don’t need a massive 50-gallon drum to thrive.
The key is the drainage. I once lost a gorgeous ‘Gumpo White’ because I used a pot without enough holes. The roots sat in water for a week after a heavy rain and turned to mush. Now, I always drill extra holes in the bottom of my planters and use a potting mix specifically for acid-loving plants.
Don’t use standard “all-purpose” potting soil. It’s usually too heavy and lacks the peat or pine bark that azaleas crave. I like to mix in a bit of perlite to keep things fluffy. If the soil stays too wet, you’re just growing a slow-motion funeral for your plant.
Keep your potted azaleas in a spot that gets morning sun and afternoon shade. Concrete patios get incredibly hot in July, and a black plastic pot can basically cook the roots. Stick with ceramic or terracotta, and maybe give them a “mulch hat” of pine needles to keep the moisture in.
3. Mass Planting for Low-Maintenance Ground Cover
If you have a slope or a large empty patch of dirt that you’re tired of weeding, stop looking for grass seed and start looking for dwarf azaleas. I have a steep bank on the side of my driveway that was a nightmare to mow. I almost flipped my mower twice before I finally wised up and planted a mass of ‘North Tisbury’ hybrids.
Mass planting isn’t just about putting a bunch of plants in a row. You want to stagger them in a “W” pattern. This covers the ground faster and prevents erosion. Within three years, my “weed hill” became a solid carpet of green that turns into a sea of red every April.
I’ll be honest: the first year is a pain because you still have to weed between the small plants. But once they knit together, they shade out the soil so effectively that nothing else can grow. It’s the ultimate lazy gardener’s hack for a professional-looking yard.
Avoid the urge to buy five different colors and mix them like a bowl of Skittles. It looks messy. Pick one or two complementary shades—like a deep purple and a pale lavender—and stick to them. It creates a much more intentional, high-end look than a random rainbow.
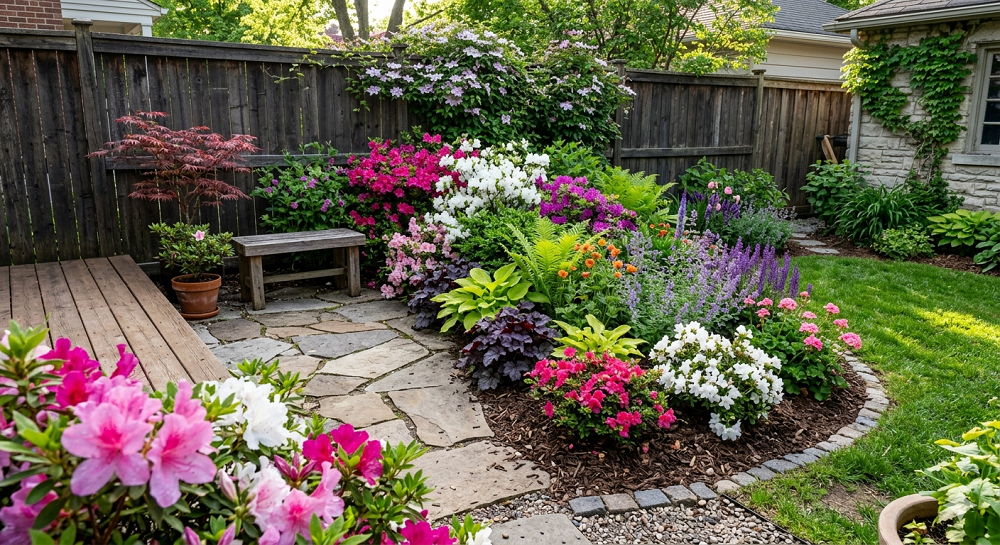
4. Layering Azaleas in a Woodland Garden
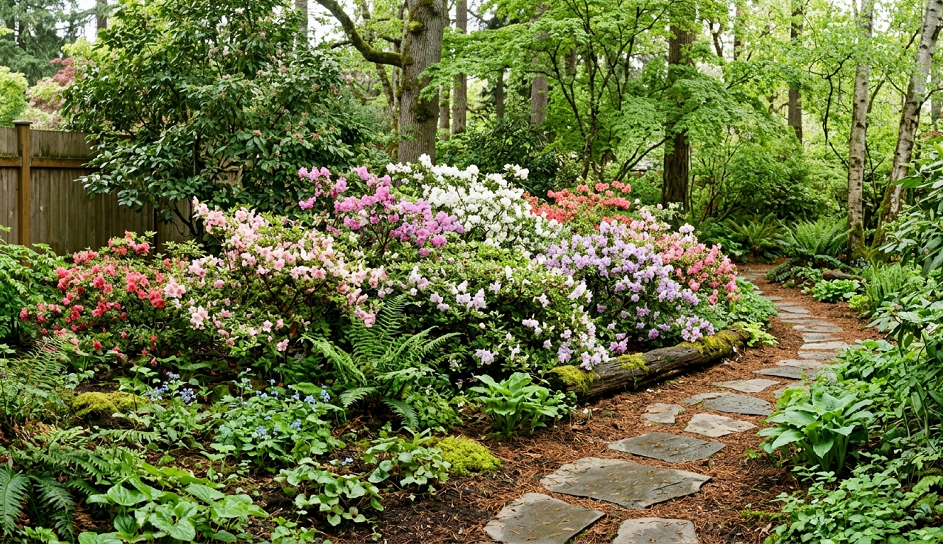
The biggest mistake I see is people planting azaleas out in the middle of a blazing hot lawn. Azaleas are woodland creatures. They want to be under the canopy of taller trees where the light is dappled. I’ve built my favorite garden bed under a massive old oak, and the azaleas there are the happiest plants I own.
To make this look “unique” rather than “accidental,” you need to layer. Put your tallest native azaleas in the back, mid-sized evergreens in the middle, and tiny dwarf varieties in the front. It creates depth that makes your yard look twice as big as it actually is.
I like to intersperse them with hostas and ferns. The big, broad leaves of a hosta provide a great textural contrast to the small, glossy leaves of the azalea. When the flowers fade, you still have a lush, multi-textured green space that doesn’t look like a graveyard of dead blooms.
The “woods” look also means you don’t have to be a perfectionist about pruning. Let them take on their natural, slightly wild shapes. A sheared, boxy azalea in a woodland setting looks like a tuxedo at a backyard BBQ—it just doesn’t fit the vibe.
5. Using White Azaleas for a “Moon Garden”
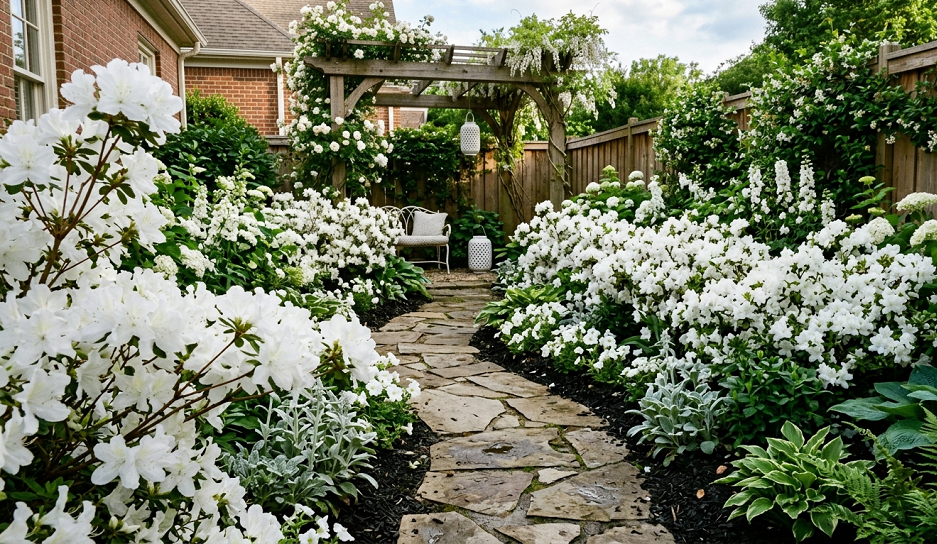
A few years back, I went through a phase where I was working late and only saw my garden at night. That’s when I discovered the power of white flowers. While my bright pink and orange azaleas disappeared into the shadows, the white ones practically glowed in the moonlight.
Designing a “Moon Garden” is a fantastic way to use azaleas if you enjoy sitting outside with a glass of wine after the sun goes down. Use varieties like ‘Delaware Valley White’ or ‘Pleasant White.’ These reflect the moonlight and create a ghostly, peaceful atmosphere that colored flowers can’t match.
I usually plant these near a patio or a walkway. It’s functional, too—they act like natural path lights. I once tripped over a rogue garden gnome in the dark, and that’s when I decided I needed more white flowers near the steps.
Pair them with silver-foliage plants like Artemisia or Lamb’s Ear. The combination of silver leaves and white azalea blooms is stunning. It’s a sophisticated look that usually gets more compliments than the flashy, bright beds I spend way more time on.
6. Formal Hedging with Evergreen Varieties
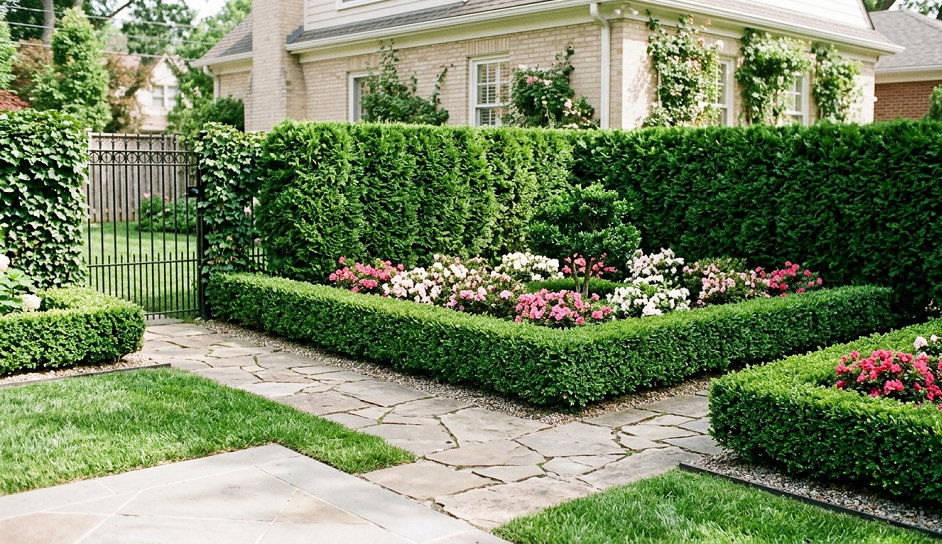
I know I just complained about sheared azaleas, but there is one place where it works: the formal hedge. If you have a traditional-style home, a low, neatly clipped azalea hedge can look incredibly sharp. I use ‘Gumpo’ azaleas for this because they stay naturally compact and take to light shearing very well.
The trick is timing. If you prune them at the wrong time, you’re cutting off next year’s flowers. I always prune mine about two weeks after the last bloom drops. This gives the plant enough time to grow “new wood” and set buds for the following spring.
Don’t try to make a 4-foot hedge out of a plant that wants to be 2 feet tall. You’ll end up with a spindly, stressed-out mess. Match the variety to the height you want. It saves you from having to be out there with the shears every Saturday morning.
One quick side note: if you’re going for the formal look, you have to be vigilant about pests like lace bugs. On a wild, natural plant, a little leaf damage blends in. On a pristine, clipped hedge, every yellow spot sticks out like a sore thumb.
7. Espalier Azaleas Against a Bare Wall

Most people think you can only espalier fruit trees or ivy. I’ve found that certain flexible, long-limbed azaleas can actually be trained to grow flat against a wall or a trellis. I did this with an ‘Indica’ variety on a north-facing brick wall that was looking a bit bleak.
You’ll need a sturdy trellis or a system of eye-hooks and wire. It takes patience—you’re basically telling the plant where to go for three years—but the result is a vertical tapestry of flowers. It’s a great solution for narrow side yards where you don’t have room for a wide bush.
The key is to prune out the branches that want to grow “out” and keep the ones that grow “across.” It sounds complicated, but it’s really just a matter of checking on it once a month and snipping off the rebels.
Be careful with brick walls, though. They can hold a lot of heat. If your wall gets direct afternoon sun, you’ll bake the plant. This trick works best on east or north-facing walls where the temperature stays a bit more consistent.
8. Specimen Planting in a Japanese-Inspired Garden
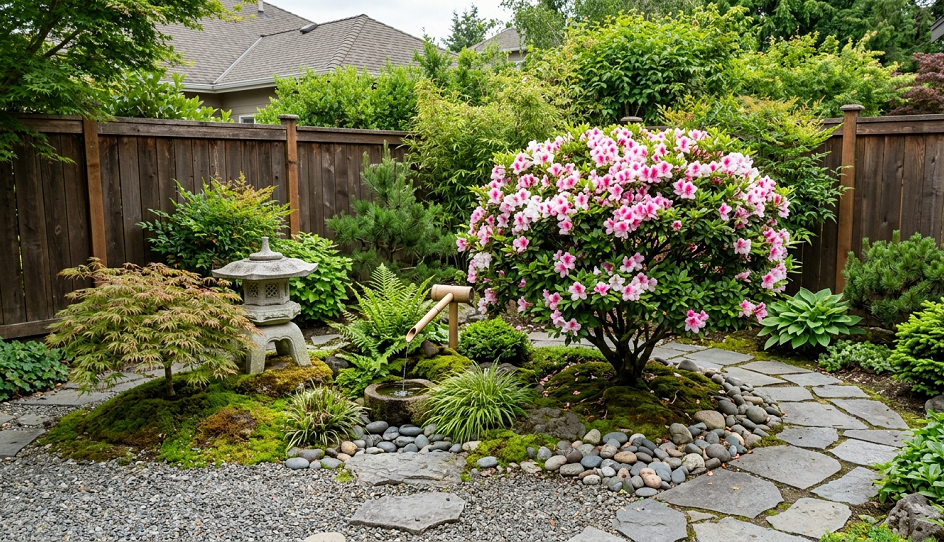
Azaleas are a staple of Japanese garden design for a reason. They represent the fleeting nature of life (mostly because the blooms don’t last forever). I like to take one spectacular, old-growth azalea and treat it like a piece of living sculpture.
This means giving it space. Don’t crowd it. I have one ‘Satsuki’ azalea that I’ve carefully pruned over the years to show off its gnarly, twisting trunk. I’ve surrounded it with smooth river rocks and a single Japanese Maple. It’s the focal point of my entire backyard.
This approach requires “cloud pruning” or niwaki style. You aren’t just hacking it back; you’re thinning out the branches so you can see through the plant. It creates a sense of age and wisdom that you don’t get from a bushy, overgrown shrub.
Don’t buy a cheap, young plant for this. Go to a nursery and look for the “ugly duckling” in the back—the one with the weird, bent trunk. That’s the one with the most character for a specimen plant.
9. Mixing Azaleas with Spring Bulbs
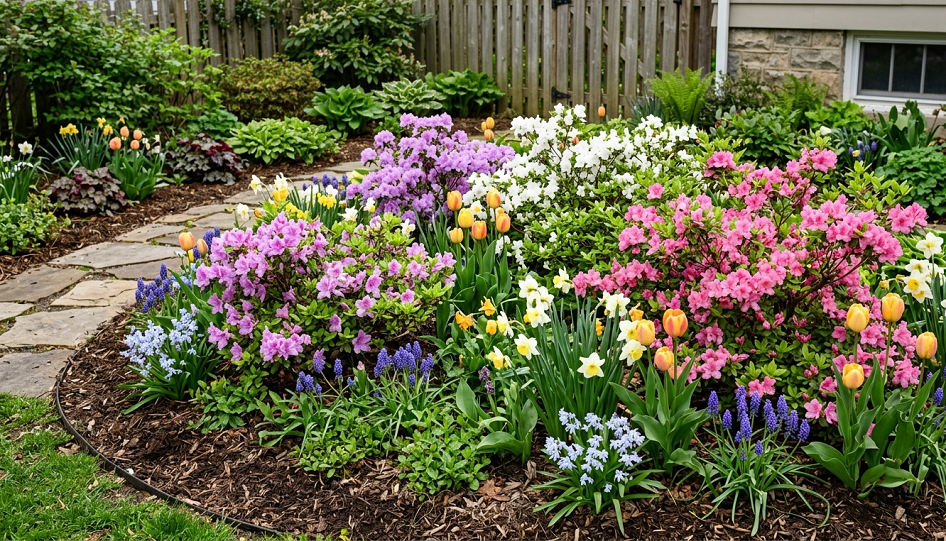
I used to hate that “in-between” time when the snow melts but the azaleas haven’t popped yet. Then I realized I could just plant bulbs right underneath them. Since azaleas have shallow roots, you can tuck tulips, daffodils, and grape hyacinths in the gaps without hurting the shrub.
The bulbs come up first, providing a “base layer” of color while the azaleas are still waking up. By the time the tulips are fading, the azaleas are exploding, which conveniently hides the dying, yellowing tulip leaves. It’s a perfect cycle of camouflage.
I’m a big fan of contrasting colors here. Planting bright blue Grape Hyacinth (Muscari) under a yellow deciduous azalea is a color combination that will make your neighbors stop their cars to look.
Just be careful when you’re digging. Use a small hand trowel and feel for the azalea’s roots. If you hit something woody, move an inch to the left. You don’t want to butcher the main root system just to plant a few 50-cent bulbs.
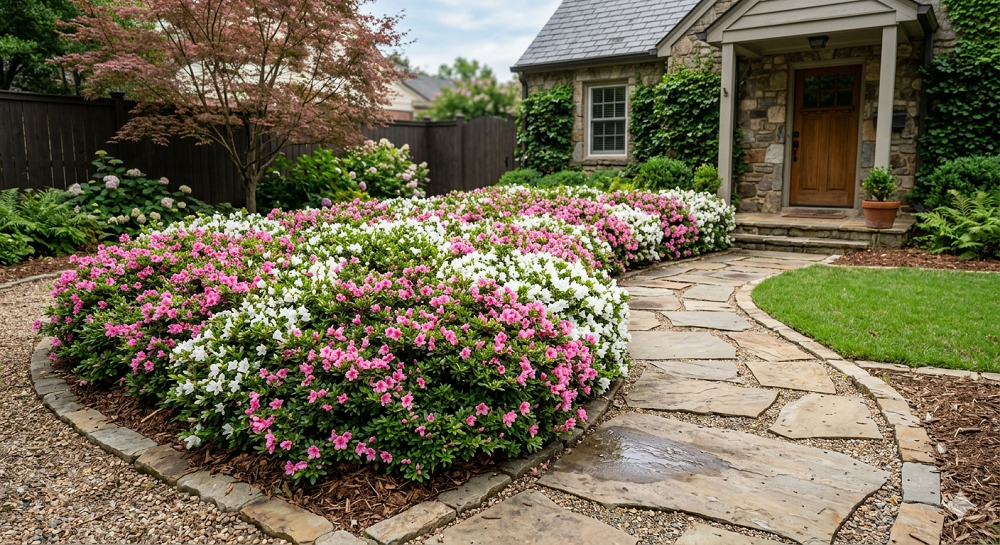
10. Floating Azalea “Islands” in a Sea of Mulch
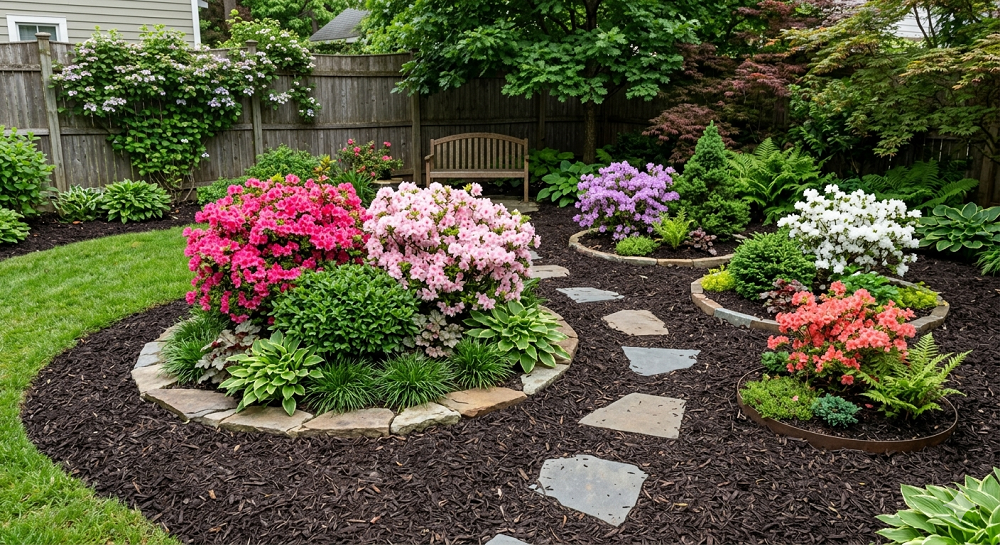
If you have a massive lawn and you’re tired of the gas bill for your mower, start carving out “islands.” I’ve created several circular beds in my yard, each anchored by a cluster of three azaleas. It breaks up the monotony of the grass and makes the landscape feel more designed.
I like to use three different heights of the same color. It looks like a natural hill of flowers. I then surround them with a thick layer of dark brown mulch (avoid that dyed red stuff—it looks tacky and ruins the natural vibe).
These islands are also great for drainage. If you have a low spot in your yard where water pools, you can build a slightly raised mound (a “berm”) and plant your azaleas on top. They get the moisture they love, but their “feet” stay dry because they’re elevated.
Pro tip: Make your islands kidney-shaped rather than perfect circles. Curves look more natural in a landscape. Straight lines and perfect circles are for architects; gardeners should stick to the “S” curve.
11. The “Ever-Blooming” Corner
For the longest time, my biggest gripe with azaleas was that they were “one-hit wonders.” They’d be gorgeous for ten days and then just be a green bush for the rest of the year. That changed when the re-blooming varieties hit the market.
My “bonus” tip is to create a dedicated corner using only re-bloomers like the ‘Encore’ or ‘Bloom-A-Thon’ series. These plants bloom in the spring, take a little nap in the heat of summer, and then burst back into flower in the fall.
I’ve found that these varieties are a bit hungrier than the old-fashioned types. Because they are working twice as hard to produce flowers, they need more “food.” I fertilize mine twice a year—once in early spring and again in mid-summer—to keep the fall show just as bright as the spring one.
Don’t expect the fall bloom to be quite as heavy as the spring one, but it’s still enough to make your garden stand out when everyone else’s yard is turning brown and crispy. It’s the best way to get the most “bang for your buck.”
The Real Talk: Why Your Azaleas Might Fail
I’m going to be blunt: azaleas are kind of divas. If you don’t give them what they want, they won’t just “grow poorly”—they will actively try to die. The biggest mistake is planting them too deep. I’ve killed more than my fair share by burying the crown. The top of the root ball should actually be a tiny bit above the soil line. Cover it with mulch, not dirt.
The second thing is water. They have “Goldilocks” syndrome. Too much water and the roots rot; too little and the leaves turn into potato chips. If you have heavy clay soil, you must amend it with organic matter or plant in raised beds. I tried planting directly into my Georgia clay once, and it was like putting the plant in a ceramic bowl with no drainage. It didn’t end well.
Also, don’t buy into the “sun-tolerant” hype too much. Even the ones that say they love sun usually appreciate a break in the afternoon. If you see the leaves wilting every day at 3:00 PM, your plant is telling you it’s miserable. Move it or give it some shade.
Lastly, stop over-fertilizing. I once got over-ambitious with some high-nitrogen lawn fertilizer and accidentally turned my azaleas into giant green bushes with zero flowers. They don’t need much. A little bit of acid-tone fertilizer once a year is plenty.
Parting Wisdom
The best garden is one that looks like it grew there on its own, even if you spent three weekends sweating over it. Azaleas are the perfect “anchor” for that look. They’re classic, but they don’t have to be boring if you use some of the tricks I’ve learned the hard way.
Which of these styles are you thinking about trying in your yard? Are you a “wild woodland” person or a “neat and tidy hedge” person? Let me know in the comments below—I’d love to hear your horror stories (or your wins!) with these beautiful shrubs.
What’s the biggest challenge you’ve faced when trying to keep your azaleas happy?