
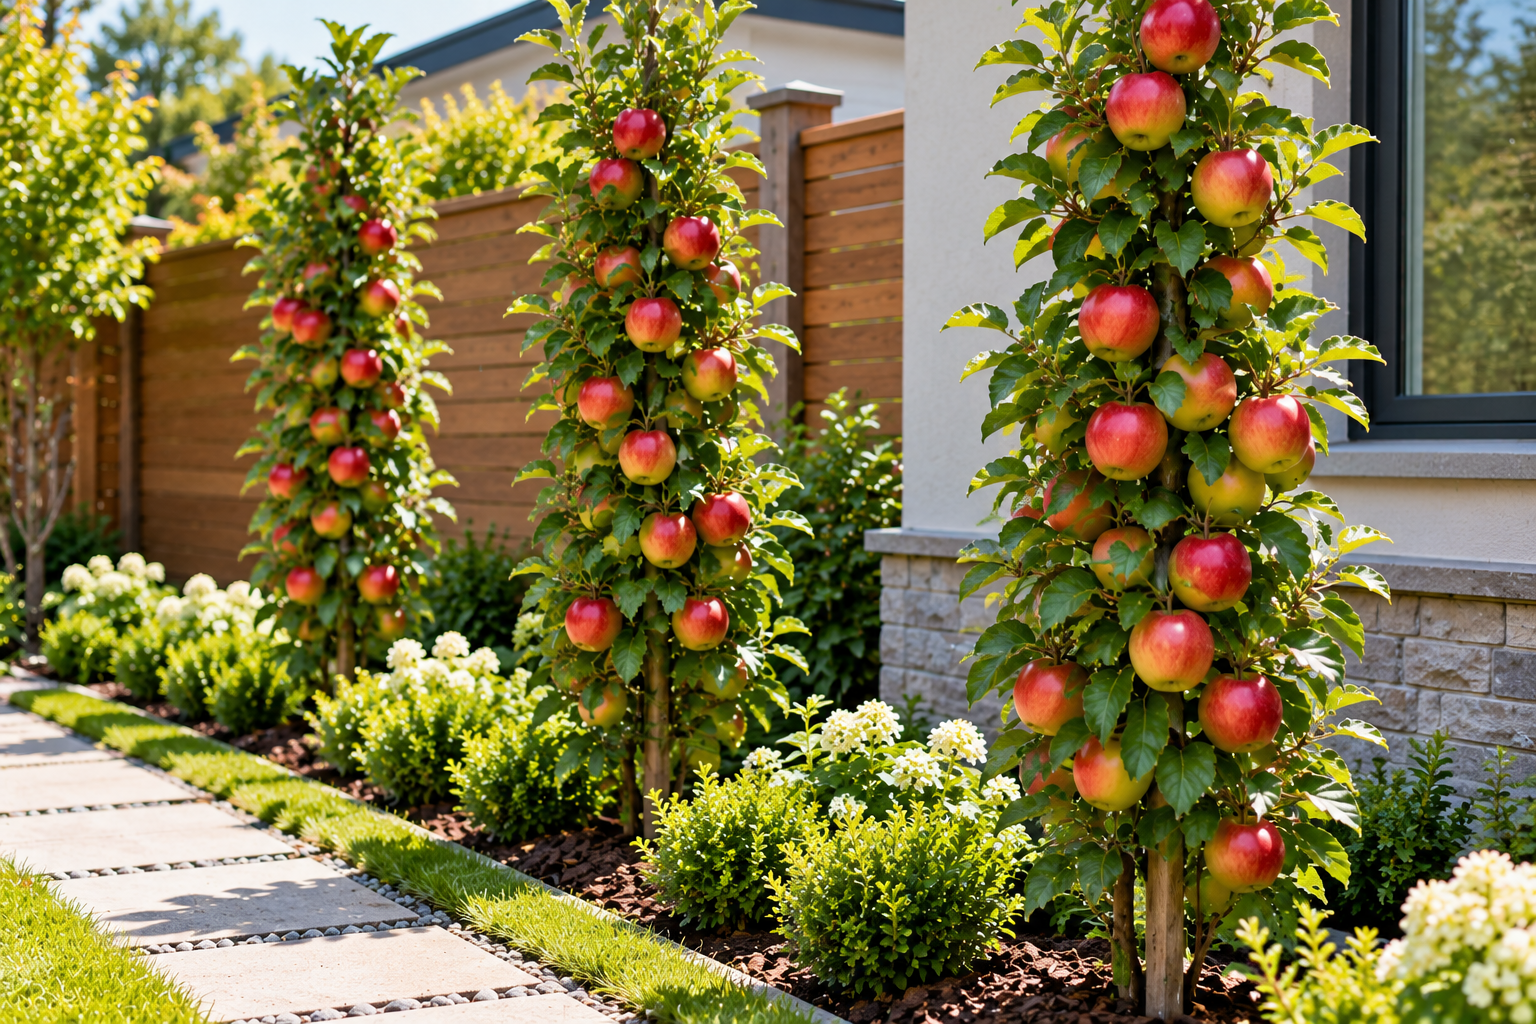
Most backyard apple trees get planted the same way: a hole in the middle of the lawn, a stake, and a ring of mulch that grows lopsided over the years. The tree may fruit, but it ends up looking like an afterthought. Meanwhile, it can be one of the most useful design elements in a yard. It gives you spring blossoms, summer shade, fall fruit, and a bare-branch silhouette in winter.
The ideas below treat the apple tree as a structural feature that works hard in a small or large space. Some are weekend projects. Others, like training an arch, take a few seasons. All of them depend on a few basics about how apple trees grow, so those come first.
What to Settle Before You Design Anything
Rootstock decides the size, not the label
Nearly every apple tree sold is two plants joined together: a fruiting variety grafted onto a rootstock. The rootstock controls how big the tree gets. The same variety can reach 16 to 18 feet on a vigorous rootstock like MM111, or stay around 7 to 8 feet on M9. The catch is that many trees sold as dwarf don’t tell the buyer how dwarfing the rootstock actually is. Before buying, ask which rootstock the tree is on. If the tag doesn’t say, assume the tree will grow larger than the word “dwarf” suggests.
Spacing guidance varies a lot
One gardening reference suggests 30 to 35 feet between standard trees, 20 to 25 feet for semi-dwarfs, and 15 to 20 feet for dwarfs. Nursery guidance for trained, pruned trees is much tighter, and fruit-tree growers often plant very dwarf trees only a few feet apart in rows. Both are correct for different goals. Wide spacing suits free-standing trees you plan to prune lightly. Tight spacing works only if you commit to regular training and summer pruning. Use the wide numbers for any idea below that involves an unpruned, free-standing tree, and ask the nursery for the specific rootstock’s spacing if you plan to train it.
One more rule applies to everything except wall-trained trees. A nursery guide recommends keeping trees at least 6 feet from a structure or fence line. Branches, roots, and falling fruit all cause trouble closer than that.
Sun, frost, and cold hours
Apples want full sun, meaning about six to eight hours of direct light. Fruit set also depends on what the weather does during bloom. Extension guidance from Virginia Tech notes that air temperatures below 28°F while the trees are in bloom can damage the flowers. Cold air flows downhill and pools in low spots, so a frost pocket at the bottom of a slope is a poor place for an apple tree, however pretty the spot looks.
Climate also matters in the other direction. Apples need a certain amount of winter chilling to bloom properly, so gardeners in mild-winter regions should look for low-chill varieties. A local extension office or independent nursery can tell you which ones suit your area.
Pollination shapes your planting plan
Most apples need pollen from a different variety that blooms at the same time. WSU’s tree fruit program says all apple varieties need some cross-pollination for fruit set, and even self-fruitful types produce more heavily and reliably when cross-pollinated. Several ideas below are really pollination strategies in disguise, so keep this in mind as you read.
Training Ideas: Making the Tree Fit the Space
1. Espalier an Apple Against a Fence or Wall
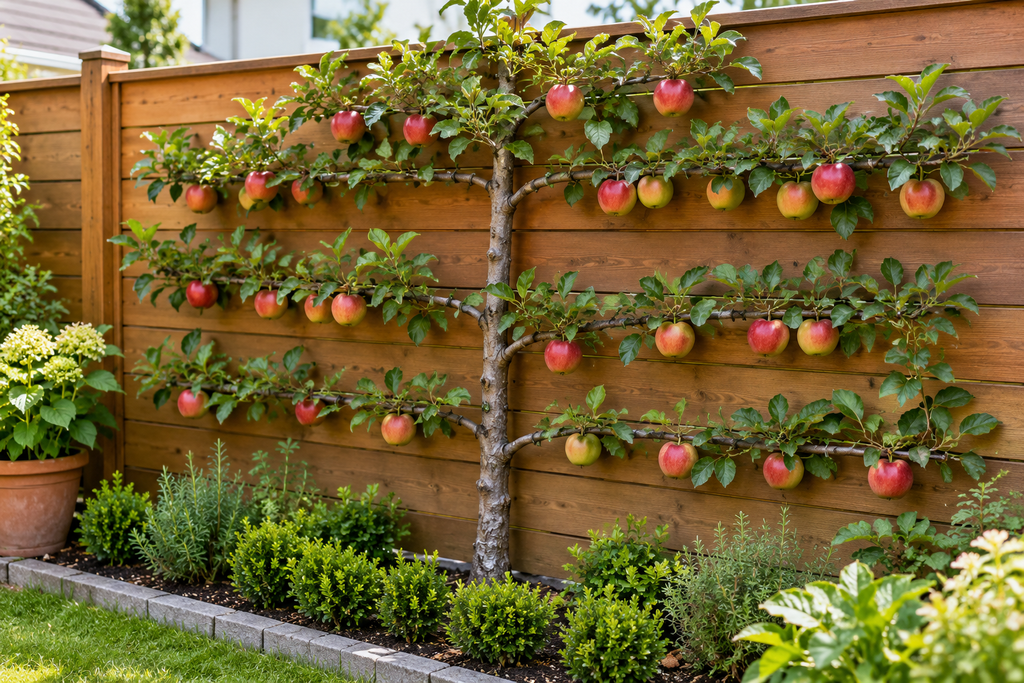
Espalier means training a tree to grow flat in a pattern, usually horizontal tiers branching from a central trunk. It turns a bare fence into a living feature and lets you grow fruit in a bed only 12 to 18 inches deep.
Gardening references recommend a south-, east-, or west-facing wall or fence, and a dwarf or semi-dwarf spur-type variety for horizontal cordon training, with a wire trellis and tiers spaced about 2 feet apart. Spur-type trees produce fruit on short, compact spurs, so they stay tidy.
A few practical points:
- Use galvanized wire and eye bolts, not staples, so the wires can be tightened as the tree thickens.
- Leave a few inches between the wires and the wall. Air circulation behind the tree matters for disease. A tree pressed flat against masonry stays damp.
- Expect three to four years of patient bending before the framework looks like the photos. Branches should be tied loosely with soft ties and bent gradually, not forced in one go.
- Don’t choose a wall that reflects heat all afternoon. In hot climates, a west-facing stone wall can scorch fruit and stress the tree.
2. Plant a Step-Over Apple Border Along a Path
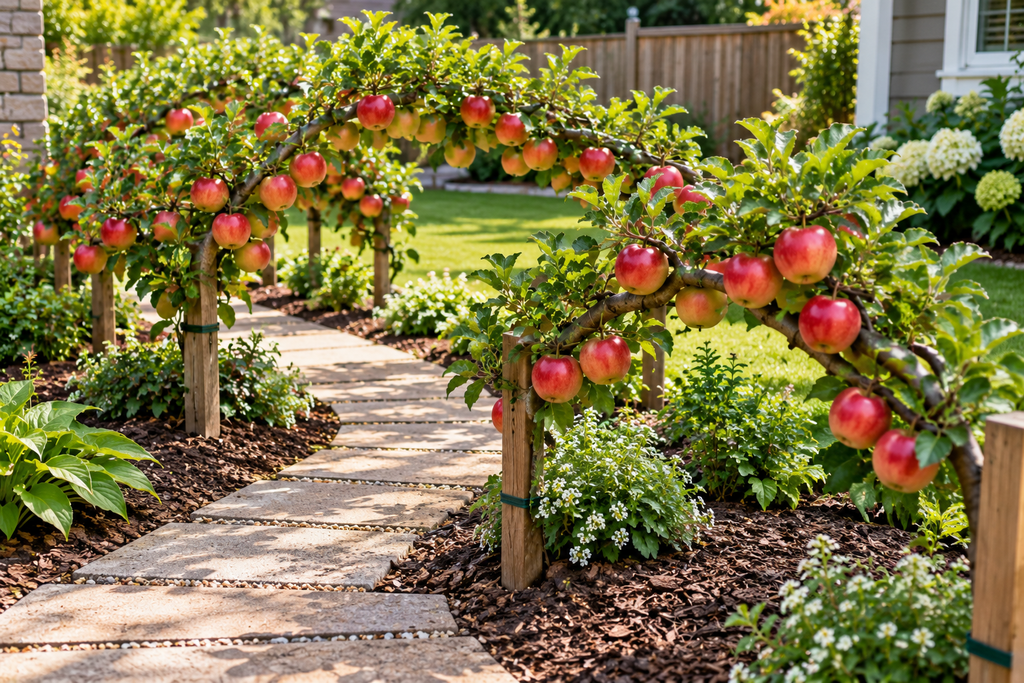
Step-over apples are trained as a single low horizontal tier, usually 12 to 18 inches off the ground, and planted along the edge of a path or bed. You can literally step over them. They are grown on very dwarfing rootstock, so check what the nursery uses.
The effect is a low, flowering edge in spring that bears a few apples in fall. It’s a good way to separate a vegetable garden from a lawn, or to line a walkway where a full tree would be too much. Each tree needs a stout stake or a post-and-wire support for its first few years. Water them more often than you would a larger tree, since they sit on the weakest roots available.
3. Use Columnar Apples as Vertical Accents
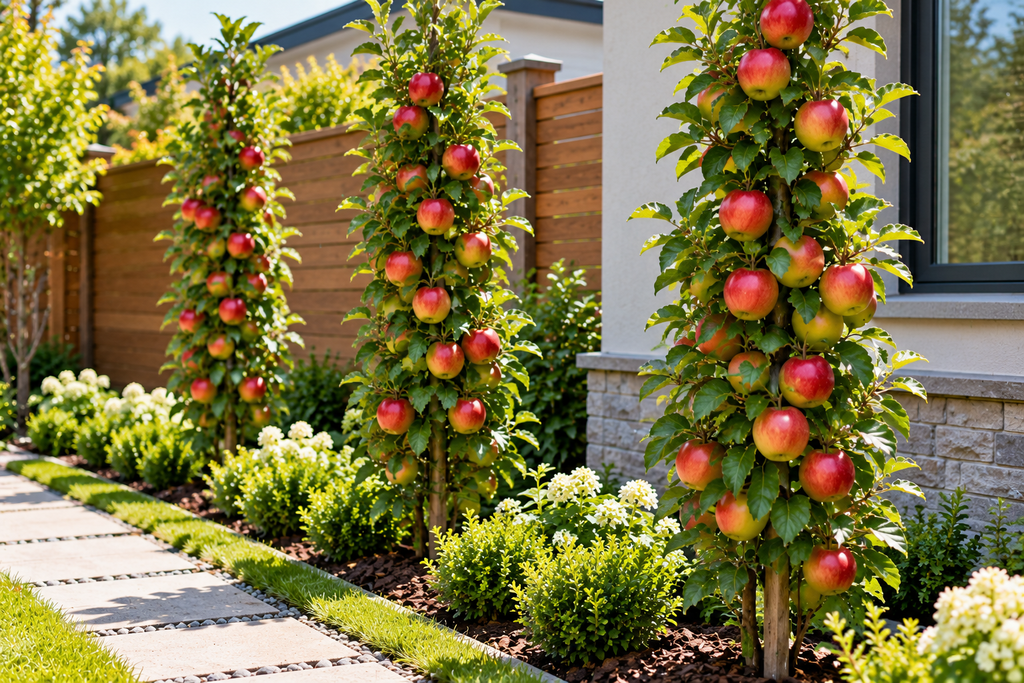
Columnar apple trees grow as narrow upright spires, often only 2 to 3 feet wide, with fruit borne along the trunk on short spurs. They can flank a gate or front door, mark the corners of a patio, or sit in large containers in a row.
Treat them as accent plants, not as an orchard. Yields are modest, and they need pollination like any other apple, so plant at least two compatible varieties or put a flowering crabapple within reach. The variety information from the nursery should state mature height and spread. Check it before you commit to a tight spot.
4. Build a Miniature Allée Along a Driveway or Garden Path
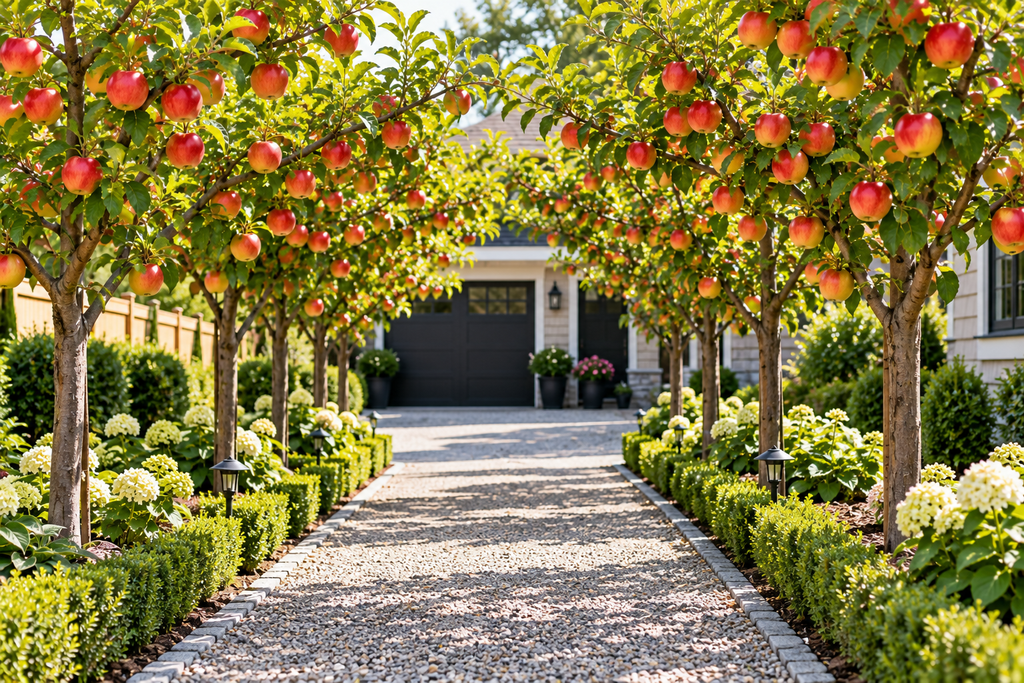
An allée is a row of trees lining both sides of a path, meeting overhead as they mature. Full-size versions need massive space, but a row of semi-dwarf apples on each side of a garden path gives a scaled-down version of the same effect.
The common mistake is spacing the two rows too close to the path. Branches should clear walkers’ heads, and fallen fruit should land in the planting bed, not on the walking surface. Give each side at least 5 to 6 feet of planting width, and keep mulch or low groundcover under the trees so fruit drops somewhere soft. Rotting apples on pavers or gravel attract wasps and make footing slippery, so plan to gather them every few days in fall.
5. Train Apples Over an Arch or Tunnel
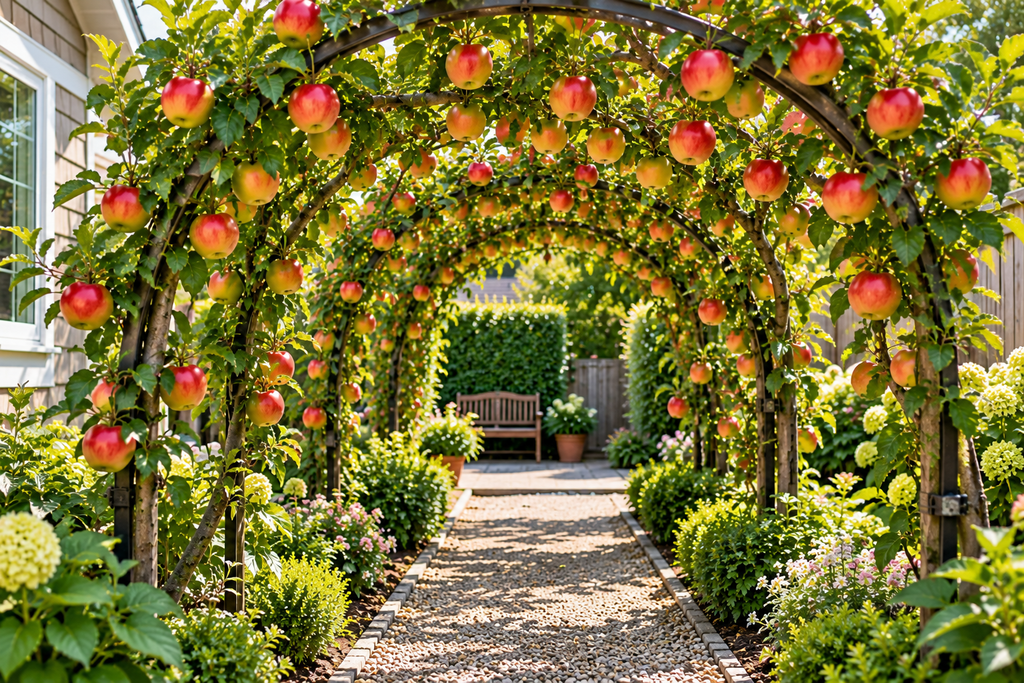
An apple arch is a classic in kitchen gardens. Two trees, one on each side of a path, are trained up opposite legs of a metal arch and tied together at the top. A longer series of arches becomes a tunnel.
Some varieties bend more easily than others, so ask the nursery which ones train well. The arch also needs to be sturdy. A mature fruiting apple branch carries real weight, and thin decorative arches meant for roses will sag or collapse. Use heavy-gauge metal or timber set in concrete footings. Expect five or more years before the two sides meet in the middle.
6. Grow a Dwarf Apple in a Large Patio Container
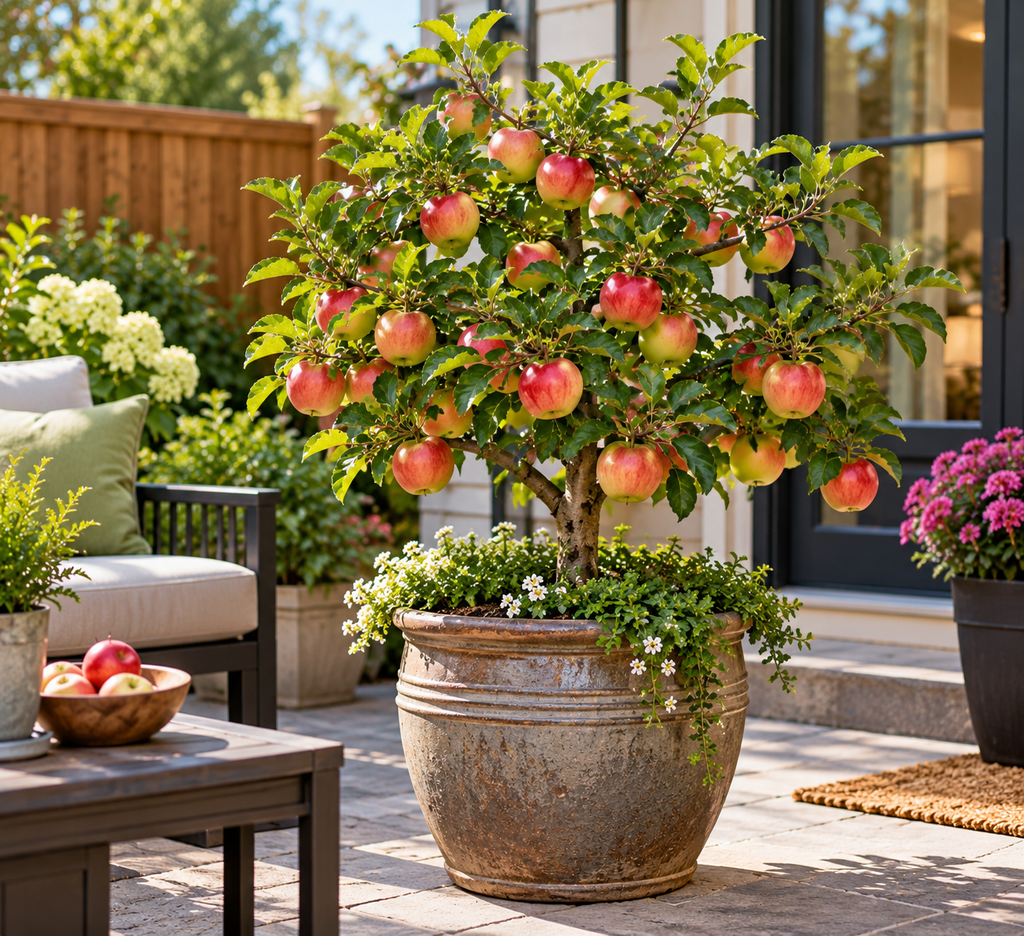
A dwarf apple on a very dwarfing rootstock can live in a big pot for years. Choose a container at least 20 inches wide and deep, with real drainage holes, and set it where it gets full sun. Wooden half-barrels work, and so do heavy glazed planters. Very lightweight plastic pots tip over in wind once the tree has leaves.
Containers dry out fast and freeze harder than ground soil in cold climates, because roots have no surrounding earth for insulation. In freezing regions, wrap the pot or move it against a sheltered wall in winter. Plan to repot or root-prune every few years. A container tree also needs a pollination partner nearby, so two pots side by side is the standard pairing.
7. Choose a Multi-Variety “Family Tree” for a Small Yard
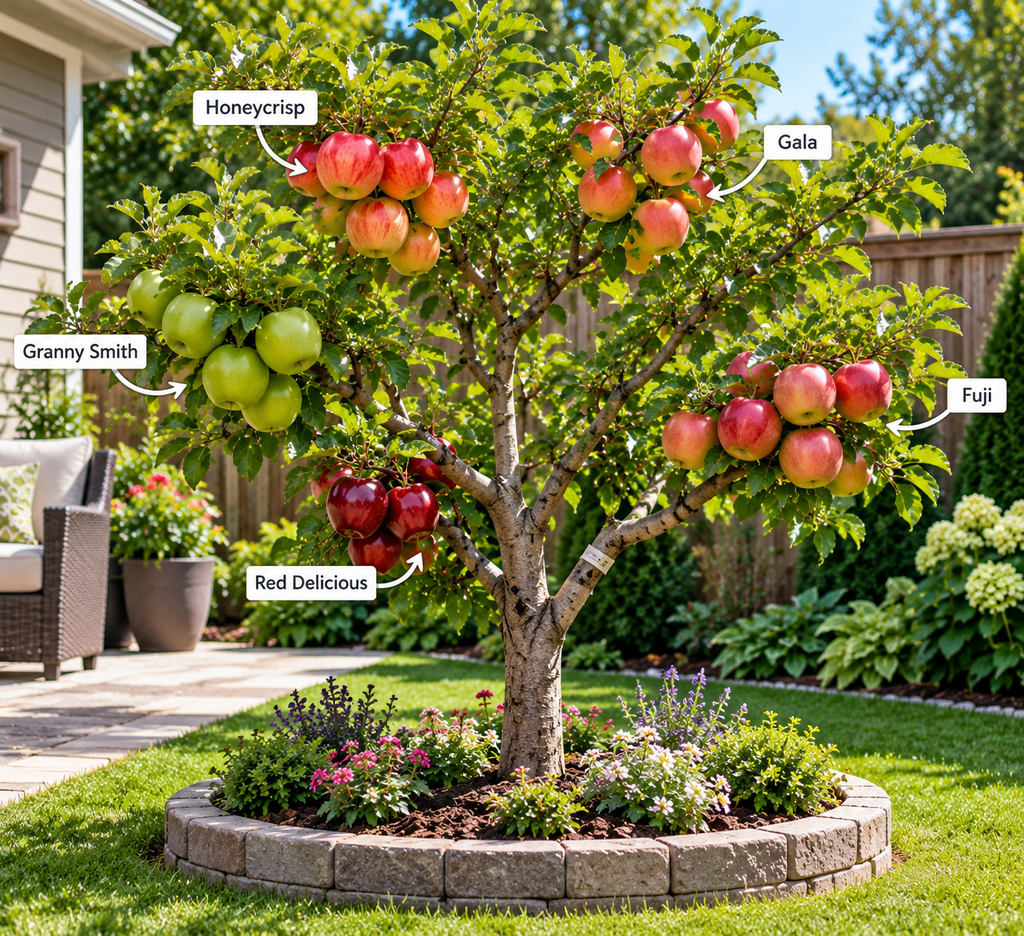
Some nurseries sell a single tree with two, three, or more compatible varieties grafted onto one trunk. In a small yard, this can solve the pollination problem in a single planting. Because the varieties are chosen to bloom together, the tree can pollinate itself.
There is a trade-off. Different varieties grow at different speeds, and the strongest one tends to dominate the others. Prune the vigorous branches harder and the weak ones lighter, or the tree gradually becomes one variety with a few stragglers. If you want to know what you’re buying, ask the nursery for the variety list.
Flowers and Underplanting: Designing Around the Blossoms
8. Pair Your Apple With a Flowering Crabapple
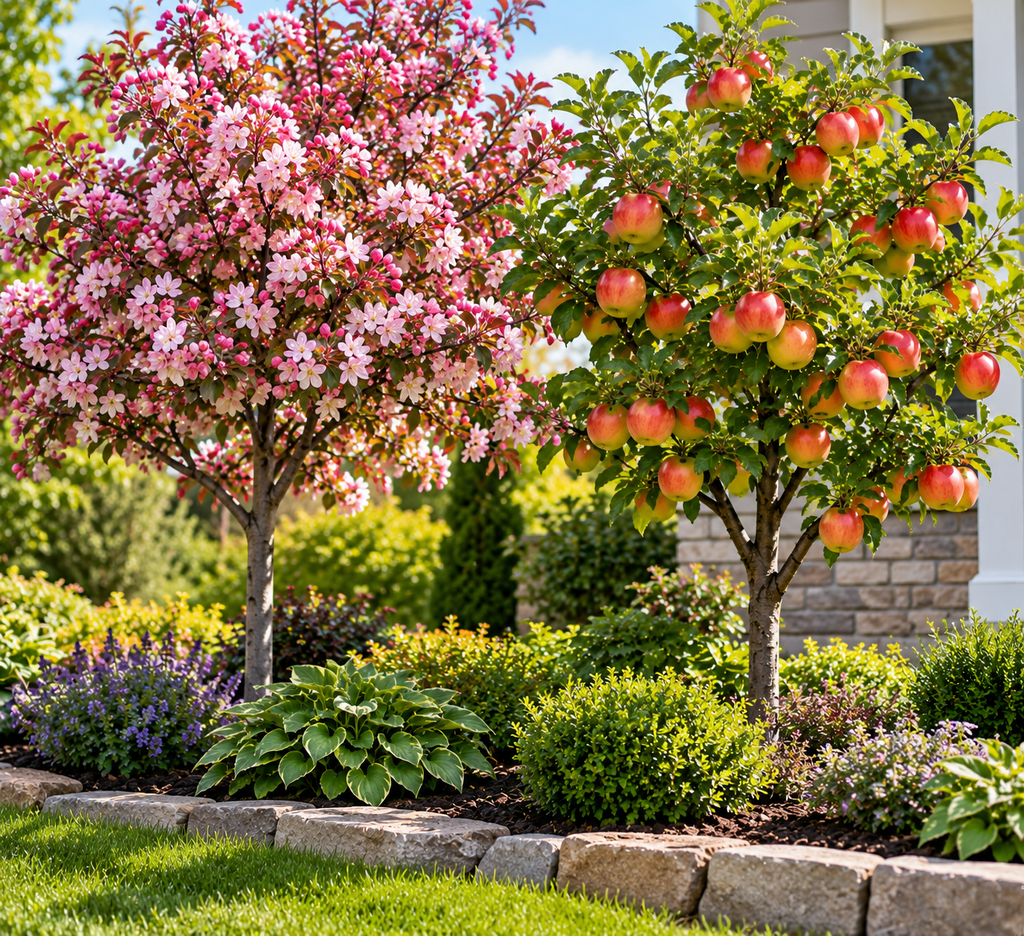
Pollination and ornament overlap here. Virginia Tech’s guidance says a crabapple within about 100 feet of an apple tree will usually provide adequate pollination. WSU adds that crabapples have become popular pollen donors because they generally bloom longer than apples and are easy to care for. Their list of reliable pollinizers includes Snowdrift, Whitney, and Wickson, among others.
Design-wise, a crabapple gives you a second flowering tree in a contrasting color, often deeper pink or rose, with ornamental fruit that birds eat in winter. Use it as a corner anchor. Check disease resistance before you buy, because crabapples can be prone to apple scab, and choose a variety whose bloom time overlaps your apple. Bloom charts from nurseries make this easy to check.
9. Underplant With Spring Bulbs and Low Perennials
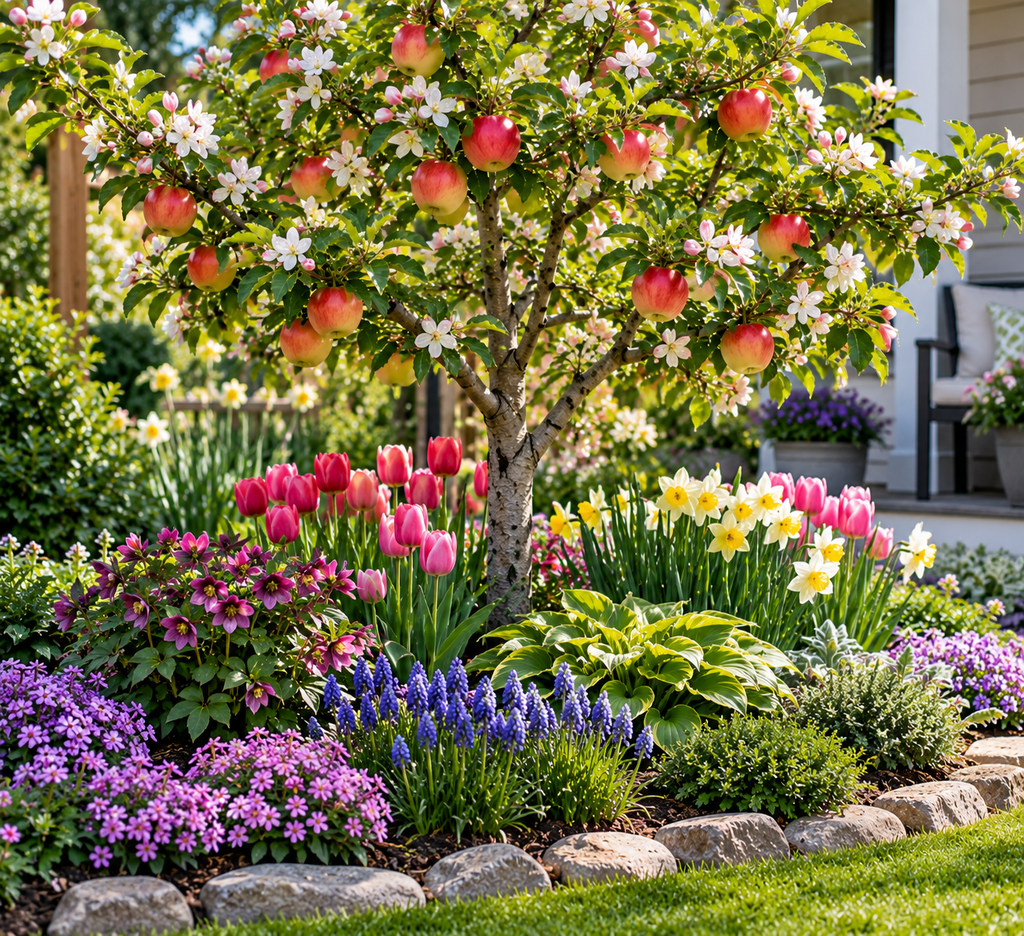
The circle under an apple tree is prime planting space. Spring bulbs such as daffodils, crocus, and grape hyacinth bloom before the tree leafs out, so they get full sun. By the time the apple canopy closes in summer, the bulb foliage is already dying back. Daffodils also have a practical bonus: the bulbs are toxic, and rodents tend to leave them alone, though that’s a general observation, not a guarantee against voles.
Keep a few rules in mind:
- Leave bare mulch right around the trunk. Plants pressed against the bark hold moisture against it and create hiding spots for mice.
- Choose shallow-rooted plants. Tough, low growers like creeping thyme, chives, and wild strawberry compete less with the tree than deep-rooted perennials.
- Avoid digging deep into the root zone. Most feeder roots sit in the top foot or so of soil, and planting a bed means cutting some of them.
- Keep grass away from young trees. Turf competes hard for water and nitrogen, which is one reason a planted bed under a young tree usually outperforms lawn.
10. Build a Cottage-Style Border Around the Tree
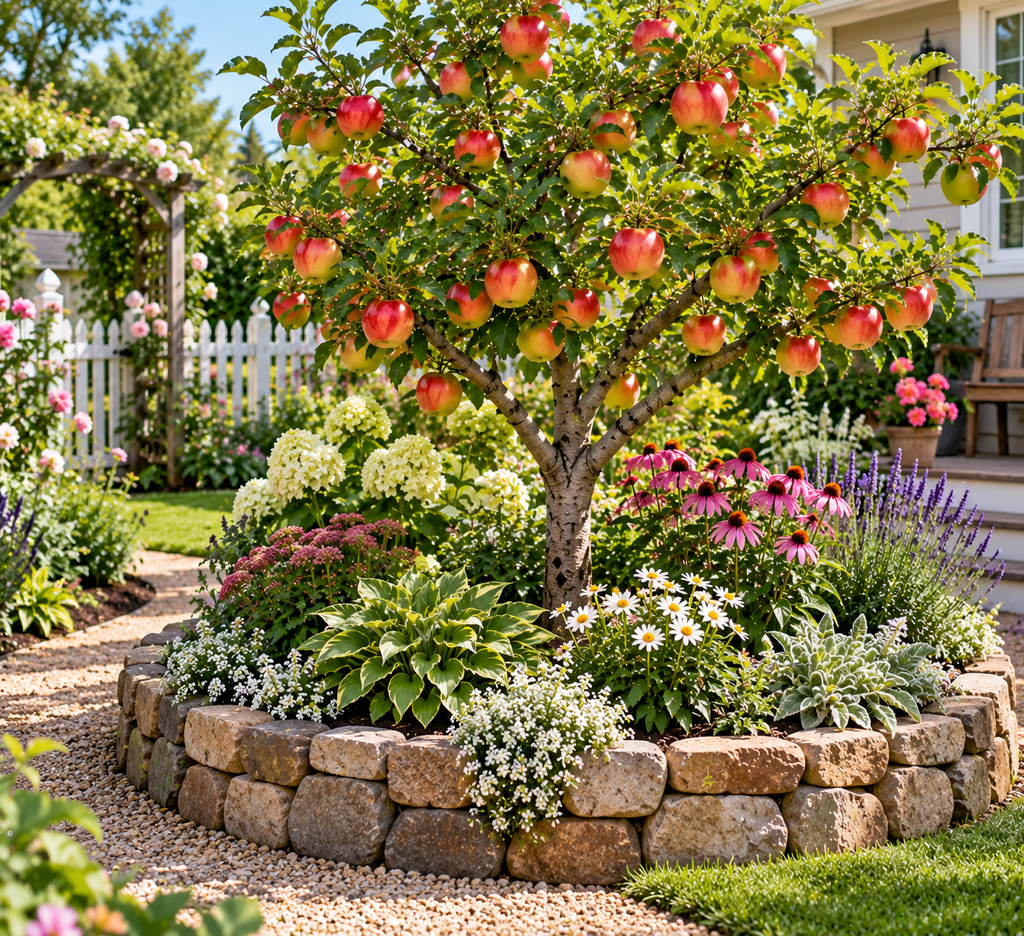
If you want more color, you can extend the planting from a small ring into a full border. Apples pair well with plants that tolerate the dappled light and root competition: catmint, lavender (in full-sun gaps), salvia, alliums, and hardy geraniums. Many of these draw pollinators during the apple’s bloom and again later in summer, when the tree itself offers nothing.
The main design problem is timing. The apple blooms in spring, then goes green for months. A border that peaks at the same time as the tree is lovely for two weeks and dull for the rest of the year. Choose perennials that start blooming as the apple blossoms finish, so the space always has something happening.
Hardscape and Structure
11. Edge the Tree Ring With Stone or Brick
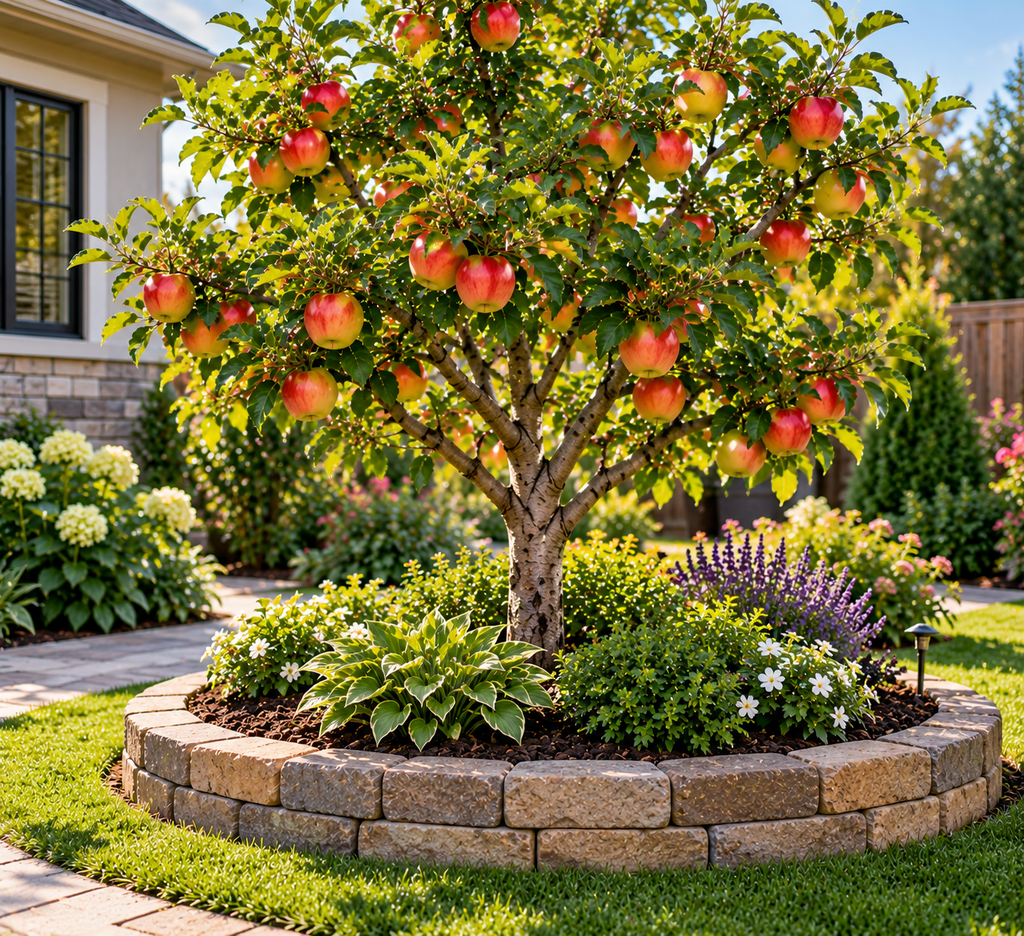
A low stone or brick edge turns a loose mulch circle into a defined garden bed. It also keeps mowers and string trimmers away from the trunk, which is a significant cause of damage on young apple trees. Bark wounds from trimmers let in disease and can girdle a trunk.
The ring needs to be wide enough. A good target is a radius that reaches at least to the edge of the canopy for young trees, and you can expand the ring each year as the tree grows. Keep the edging loose around the base: mulch should taper to a thin layer, or stop a few inches from the trunk. A mound of mulch piled against the bark is a common mistake. It holds moisture against the trunk and gives rodents cover.
Young trees in cold-winter regions benefit from a rigid guard around the trunk. The garden.org planting guide recommends surrounding each tree with a mouse guard before filling the planting hole. Install it low and tight enough that mice can’t squeeze under it.
12. Let a Standard Tree Grow Up Out of Meadow Grass
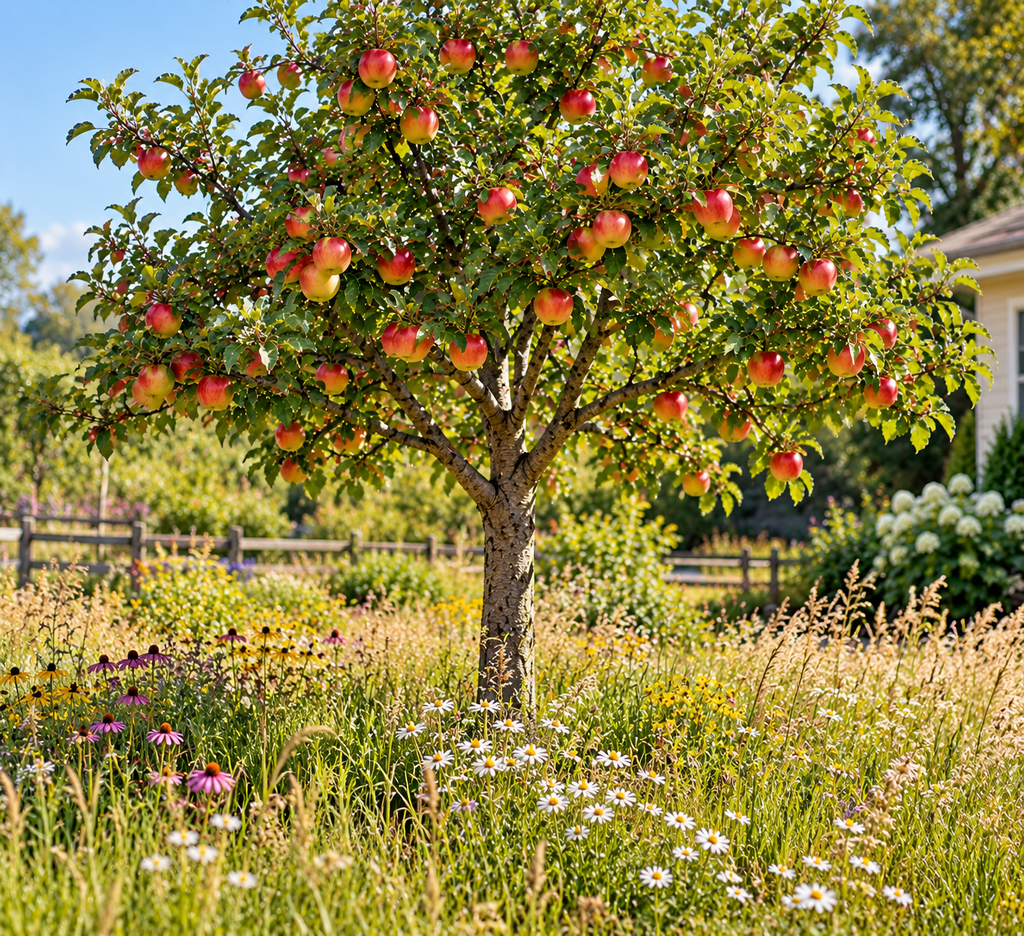
Traditional orchards were not tidy. Large standard trees stood in long grass, mown once or twice a year, and the effect was soft and natural. You can copy that look with one or two full-size trees in a corner of a large yard.
It works best on mature trees, not young ones. Young trees need competition-free soil for their first several years, so plant them with a cleared ring and switch to meadow-style underplanting once the roots are established. Mow a path through the grass so the area looks intentional. This design also needs space, and standard trees demand it. Under the spacing guidance above, that means 30 feet or more between trees.
13. Create a Seating Nook Under or Beside the Tree
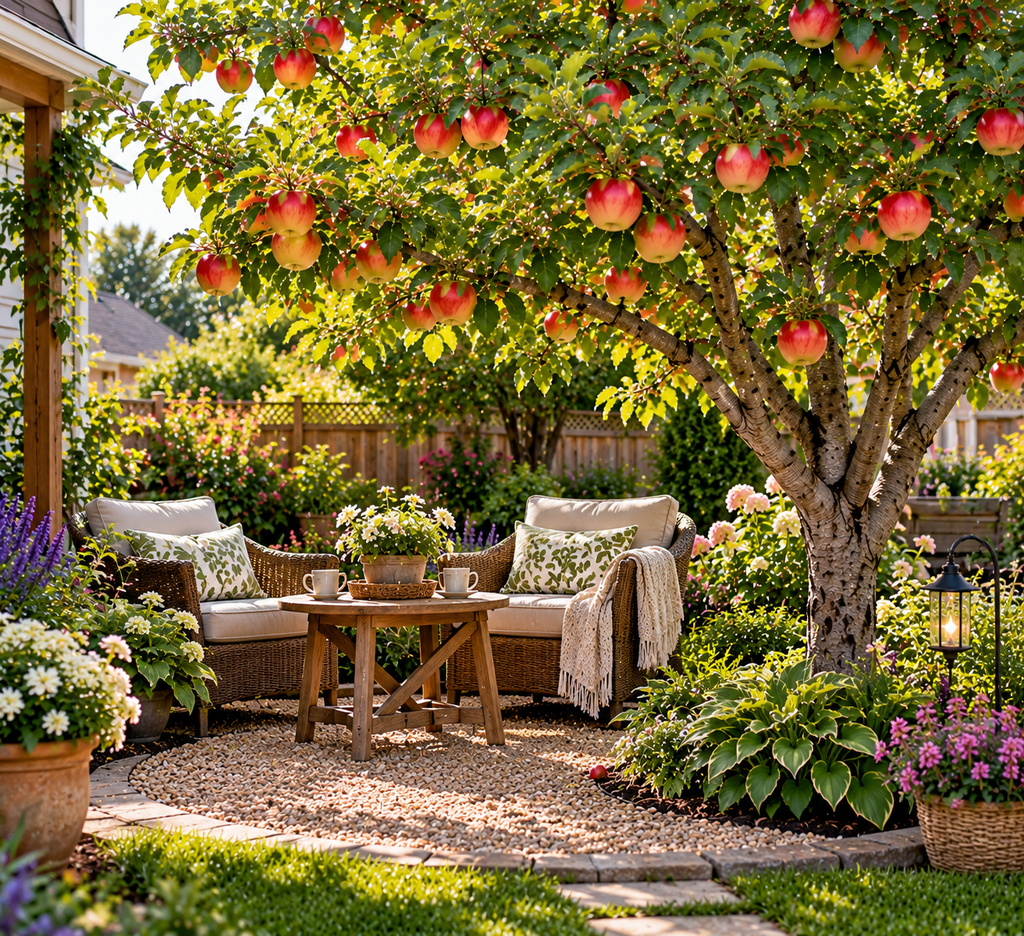
A bench under a blooming apple is a lovely idea, with one catch: fruit drops. A semi-dwarf or dwarf tree is easier to manage here than a standard, and a seat positioned just outside the canopy line gives you the shade without the bombardment.
A few practical choices help. Use gravel or mulch under the seating area, not a paved patio that fruit will stain. Keep the seat out of the main drop zone if you can. Wasps feed on fallen, fermenting fruit, so if anyone in the household is allergic to stings, plan for regular fruit cleanup or place the bench away from the tree altogether.
14. Light the Tree With Low-Voltage Fixtures
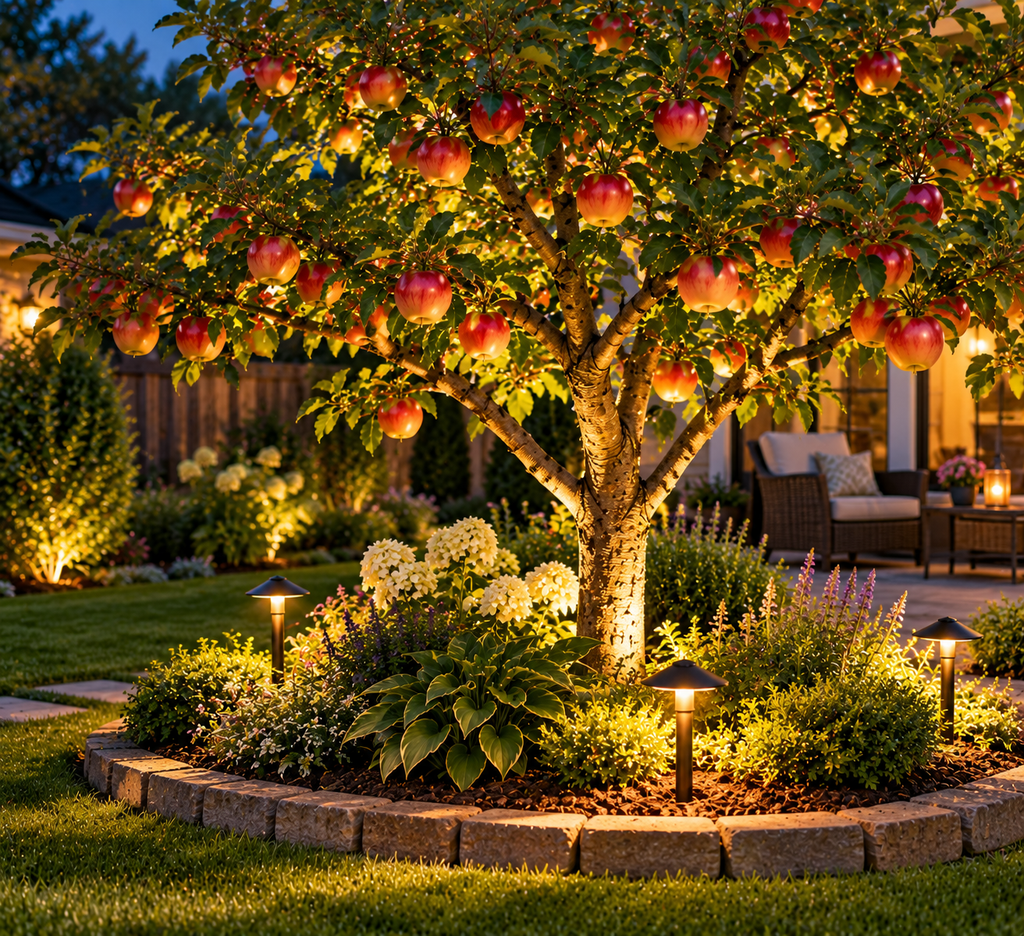
Apple trees look good lit at night, especially in spring when white blossoms catch the light. Low-voltage landscape uplights placed a few feet from the trunk, aimed up through the canopy, give a soft glow. Use fixtures rated for outdoor use, and keep any mains-voltage wiring and connections to a licensed electrician.
Decorative string lights are popular too, but don’t wrap them tightly around the trunk or branch collars, which can restrict growth as the tree thickens. Hang them from stakes or loosely draped lines, and take them down or check them each year as the branches grow.
15. Turn the Tree Into a Wildlife Corner
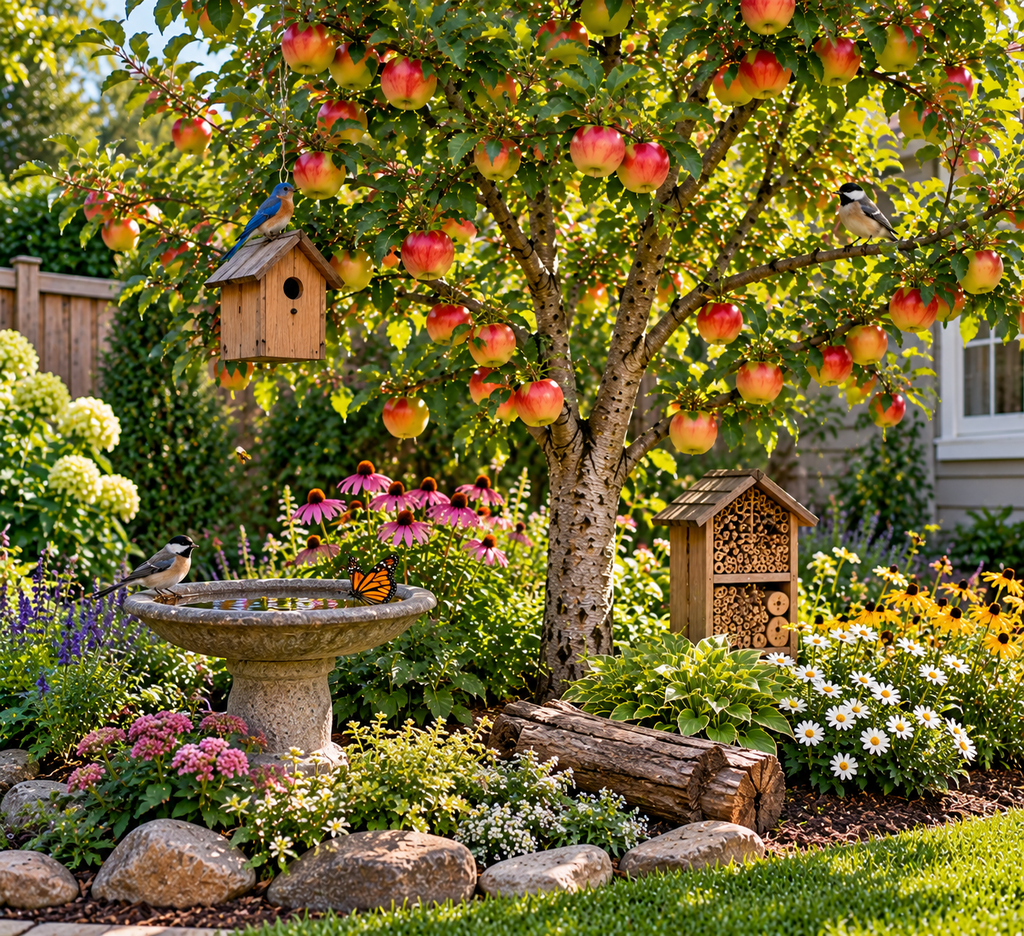
An apple tree already feeds pollinators in spring and birds in fall. A few additions make that deliberate: a shallow bird bath within sight of the tree, a brush pile tucked behind it, or a bee-friendly planting of the flowers from idea 10. Nest boxes should be placed where predators can’t easily reach them.
This is also where pest management matters. WSU’s guidance warns that most pesticides are toxic to bees and shouldn’t be used during bloom. If the tree is meant to support pollinators, spray timing needs to be built around that, and some sprays can’t be used on the tree at all if you want a wildlife corner. A local extension service can give you a spray schedule that protects bees.
Mistakes Worth Avoiding
Planting a juniper near an apple. Cedar-apple rust is one of the three main apple diseases, along with scab and powdery mildew. The rust fungus alternates between apples and cedars or junipers, so a nearby red cedar can contribute to infection. You can’t always control a neighbor’s trees, but you can avoid planting your own junipers close by. Resistant apple varieties are worth considering if rust is common in your area.
Expecting fruit in year one. The first real harvest usually comes three or more years after planting. If a design depends on fruit for the first year or two, it will disappoint. Plan on the flowers and form, with fruit as a later reward.
Over-fertilizing. Heavy nitrogen pushes soft, leafy growth, which is more vulnerable to fire blight, a bacterial disease that blackens shoot tips into a shepherd’s-crook shape. Feed based on a soil test and tree age, not a fixed schedule.
Burying the graft union. Planting instructions for dwarfing rootstocks specify that the graft union stays at least 1 inch above ground. Burying it can let the grafted variety root on its own, which defeats the rootstock’s size control. Look for the swollen bump near the base of the trunk and keep it above the soil line.
Climbing a ladder alone to prune. Pruning large trees causes real falls. Keep trees at a height you can work from the ground or a short stable stepladder, which is another argument for dwarfing rootstocks.
Frequently Asked Questions
Do I need two apple trees to get fruit?
Usually, yes, though not always two apple trees. As noted above, a crabapple within range, or a neighbor’s apple, can supply the pollen. Both must bloom at the same time.
When do apple trees flower?
Mid-spring in most regions, though the exact timing depends on variety and the weather that year. The buds usually open pink and fade toward white. Individual trees stay in bloom for roughly a week or two, and a warm spell shortens it.
Are apple seeds or fallen apples a hazard to pets?
Apple seeds contain compounds that release cyanide when crushed and digested. A few seeds are generally not a concern for a dog, but large quantities could be. Fermenting windfalls can also upset animals. If your pet has eaten a lot of fruit or seeds, contact a veterinarian.
How close to the house can I plant an apple tree?
At least 6 feet is the baseline for free-standing trees, and farther for semi-dwarf and standard trees, which spread wider than their rootstock label suggests. Espaliers can sit closer to walls because they’re kept flat.
Key Takeaways
Pick the rootstock before the design. Everything else, from spacing to pruning workload to how soon the tree looks established, follows from how big the tree will actually get. Match the idea to the space: espalier and step-over borders for narrow strips, containers and columnar trees for patios, arches and allées where you’re willing to wait several years for the effect.
Then plan for pollination and bloom frost, since a beautiful tree with no fruit is a common outcome of ignoring them. Plant a flowering crabapple if no second apple is nearby. Keep mulch off the trunk, keep turf away from young trees, and put the graft union above the soil. A practical first step is to check which apple and crabapple varieties are recommended by your local extension office, then sketch the tree’s mature width on the ground with a hose or rope before digging.

About Syprose Kiche
Syprose Kiche is the creator and writer behind My Besuited Home, a practical home and garden website covering DIY projects, gardening, lawn care, landscaping, home improvement, and outdoor living. She focuses on turning everyday homeowner questions into clear, practical guides backed by careful research and useful real-world considerations.