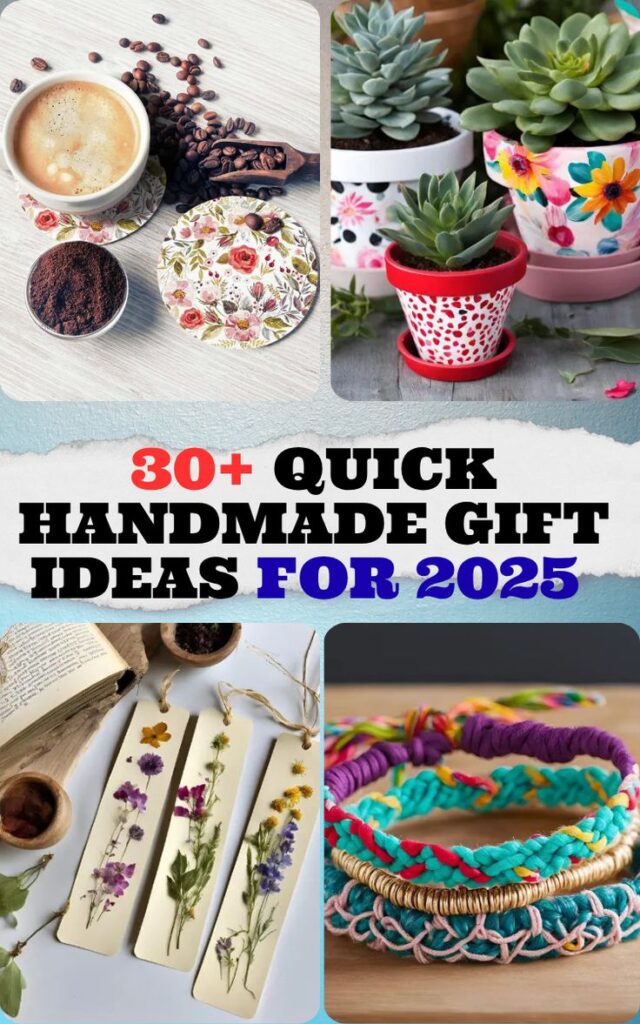
In our fast-paced lives, it can be easy to rely on store-bought gifts for birthdays, holidays, or just to show someone we care. But there’s something truly special about a handmade gift. It shows you put time and thought into the recipient, creating something unique and heartfelt. The problem? Time. We often feel strapped for it, making crafting seem like a luxury.
Well, fret no more! This blog is here to show you that handmade gifts don’t have to be elaborate or time-consuming. We’ve compiled 30+ quick and easy gift ideas that you can whip up in no time, using readily available materials. From charming home decor to delightful treats, these gifts are sure to impress your loved ones with their thoughtfulness and creativity.
1. Decorated Coasters: A Touch of Whimsy for Every Drink
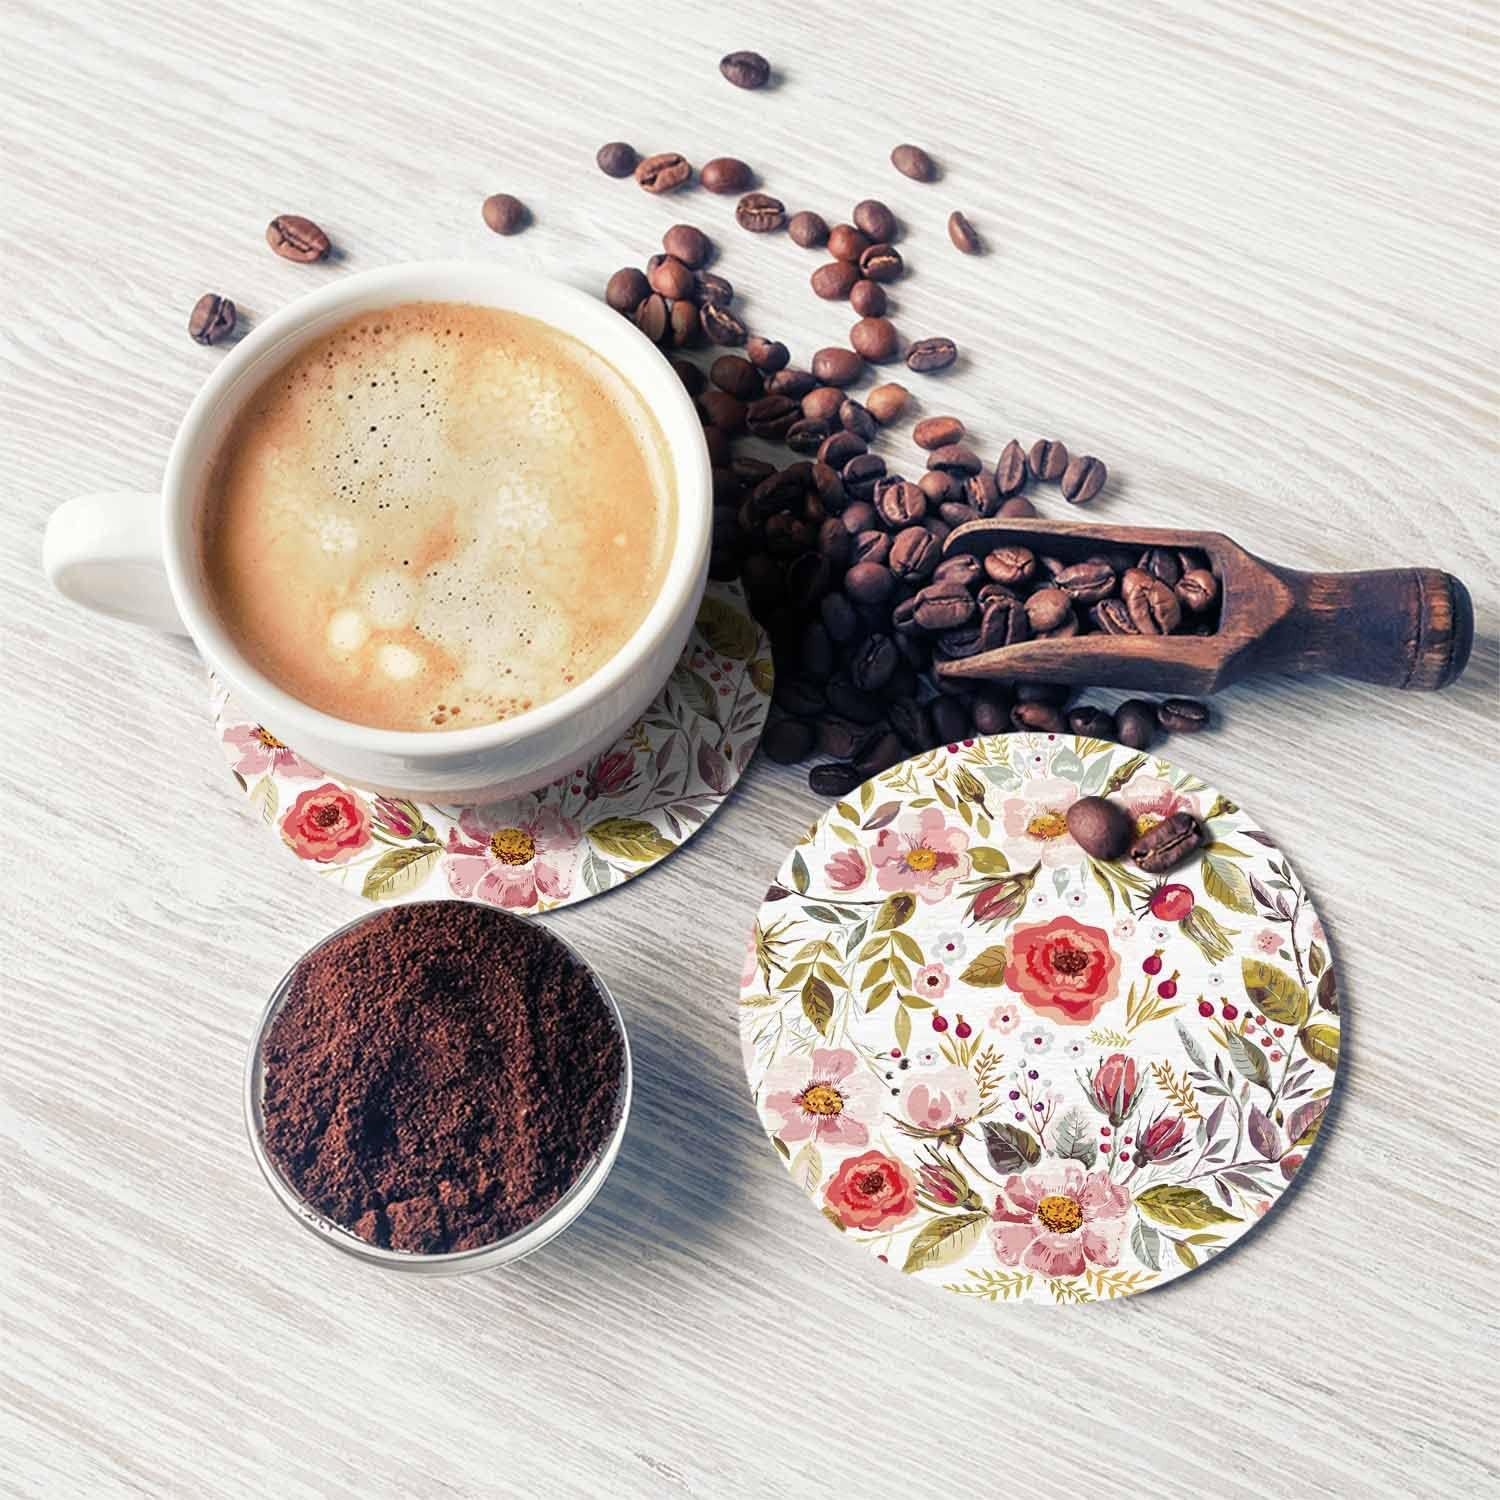
Coasters are a practical and stylish gift anyone can appreciate. The beauty of making them yourself is the endless possibilities for personalization.
What you’ll need:
- Felt sheets in various colors
- Fabric scraps (optional)
- Scissors
- Aleene’s Fabric Glue or similar strong glue
- Embroidery floss (optional)
- Stencils (optional)
Let’s get crafting!
- Cut your felt: Decide on the size and shape of your coasters. Circular coasters are classic, but feel free to get creative with squares, hexagons, or even hearts. Use a sharp object like a cup or plate as a stencil to trace perfect circles onto your felt sheets. Cut out the desired number of coasters.
- Embellish with fabric scraps (optional): This is your chance to add a pop of color or pattern. Cut out shapes from your fabric scraps or use a pinking shears to create a decorative edge. Glue these embellishments onto your felt coasters, arranging them however you like.
- Embroidery magic (optional): If you’re feeling a little more adventurous, try adding embroidery details to your coasters. Use a simple running stitch or backstitch to create initials, geometric patterns, or even small flowers.
- Stenciled designs (optional): Stencils offer another way to personalize your coasters. Choose stencils with themes or motifs that suit the recipient’s taste. Secure the stencil onto your felt coaster and apply acrylic paint with a light dabbing motion. Allow the paint to dry completely before removing the stencil.
- Finishing touches: Once you’re happy with the design, apply a thin layer of glue around the edges of your felt coaster. This will help prevent fraying and add a polished look. Let the glue dry completely before using your coasters.
Customization tips:
- Play with color: Use a single bold color for a sophisticated look, or create a playful patchwork design with different colored felt scraps.
- Add texture: Experiment with different types of fabrics, like burlap or velvet, for a unique tactile experience.
- Think practical: Consider adding a layer of cork backing to your coasters for extra heat resistance and to prevent slipping.
2. DIY Bath Salts: A Relaxing Gift for the Soul

A luxurious bath soak is a wonderful way to unwind after a long day. Gift someone a spa-like experience with homemade bath salts infused with their favorite scents.
What you’ll need:
- Epsom salts (2 cups)
- Dried herbs or flowers (such as lavender, chamomile, or rose petals) (1/2 cup)
- Essential oils (10-15 drops) of your choice (popular options include lavender, chamomile, or lemongrass)
- Mason jar (medium size)
- Food coloring (optional)
Let’s create a bathtime sanctuary!
- Combine the dry ingredients: In a large bowl, mix together the Epsom salts and dried herbs or flowers. Ensure everything is evenly distributed.
- Essential oil magic: Add your chosen essential oils to the dry mixture. Start with a few drops and mix well. You can always add more for a stronger scent, but remember, a little goes a long way with essential oils.
- A splash of color (optional): If you want to add a visual element to your bath salts, mix a few drops of food coloring with a tablespoon of water. Add this colored water to the dry ingredients a little at a time, mixing thoroughly after each addition. Stop when you achieve the desired color intensity.
- Layer it up: Carefully pour the fragrant mixture into your mason jar. You can layer the bath salts with different colors for a visually appealing presentation.
- Seal the deal: Tightly close the mason jar lid and decorate it with a ribbon or twine for a finishing touch. Consider adding a small tag with a personalized message or instructions for use (e.g., “Add ½ cup to a warm bath and soak for 20 minutes”).
Customization tips:
- Match the scent to the recipient: Consider the recipient’s preferences when choosing essential oils. Lavender and chamomile are popular for relaxation, while lemongrass or grapefruit can be invigorating.
- Create a custom blend: Don’t be afraid to experiment! Mix different essential oils to create a unique and personalized scent. Research online for safe essential oil combinations.
- Add a touch of luxury: Include a small wooden scoop or a decorative bath pouf with your bath salts for an extra pampering experience.
3. Painted Flower Pots: A Burst of Color for Any Plant
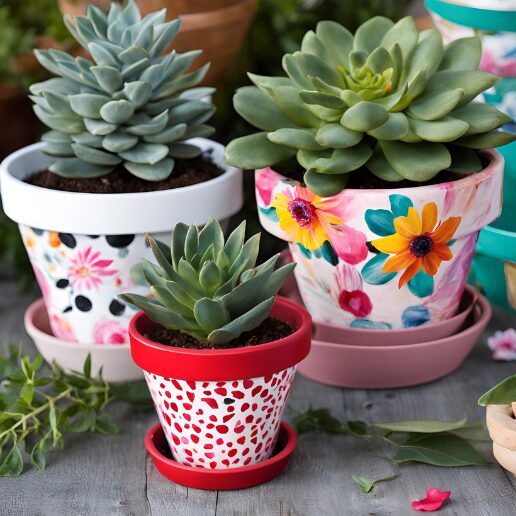
Plain terracotta pots are a common sight, but they don’t have to be boring! Transform them into vibrant and personalized planters with a little paint and creativity.
What you’ll need:
- Terracotta pots (various sizes)
- Acrylic paint in various colors
- Paint brushes (different sizes)
- Stencils (optional)
- Markers (optional)
Let’s paint some life into those pots!
- Clean the pots: Wipe down the terracotta pots with a damp cloth to remove any dirt or dust. Allow them to dry completely before painting.
- Prime it (optional): For a smoother finish and better paint adherence, apply a thin layer of white acrylic primer to your pots. Let the primer dry completely before proceeding.
- Base coat magic: Choose a base color for your pot. This could be a solid color or a gradient effect using two or more colors. Apply the paint with smooth, even strokes, allowing each layer to dry before adding another.
- Design time: Now comes the fun part – decorating! You can create simple geometric patterns, stripes, polka dots, or even freehand designs. Use stencils for more intricate details, or unleash your inner artist with freehand painting.
- Marker magic (optional): Once the paint dries, you can add details or outlines with acrylic paint markers.
- Seal it (optional): To protect your artwork and prevent paint chipping, apply a coat of clear acrylic sealer once everything is dry.
Customization tips:
- Theme it up: Choose a color scheme or design that complements the type of plant that will go in the pot. For example, a cactus might look great in a pot with desert-inspired colors and patterns.
- Get the kids involved: This is a fun activity to do with children. Let them unleash their creativity and create their own unique plant pots.
- Think beyond paint: Explore other decorative options like decoupage with patterned paper or adding embellishments like buttons or small rocks.
4. Microwaveable Bowl Cozy: A Hug in a Mug (or Bowl)

Microwaveable meals are a convenient option for busy lifestyles. But hot bowls straight from the microwave can be uncomfortable to hold. Here’s where a cozy bowl cozy comes in! This simple project creates a heat-resistant barrier, making it easier and safer to grab a hot bowl.
What you’ll need:
- Quilting cotton fabric (2 fat quarters in coordinating colors)
- Batting (a piece slightly larger than your fabric squares)
- Needle and thread (in a color that matches your fabric)
- Sewing machine (optional, but makes sewing much easier)
Let’s stitch up some comfort!
- Cut the fabric: Cut two squares of fabric from your quilting cotton, ensuring they are the same size. The size will depend on the bowls you want the cozy to fit. For standard soup bowls, 8-inch squares are a good starting point.
- Layer it up: Place the two fabric squares right sides together. On top of this, lay your batting square, ensuring it’s centered between the fabric pieces.
- Sewing time: If you’re using a sewing machine, pin the three layers together and sew a straight stitch around the edges, leaving a 2-inch gap on one side. You can also sew this by hand using a simple whip stitch.
- Turning it right side out: Carefully turn the cozy right side out through the gap you left in the sewing. Use a blunt object like a chopstick to push out the corners and ensure everything is nice and even.
- Closing the gap: Fold the raw edges of the gap inwards and pin them closed. Sew a neat topstitch all around the perimeter of the cozy, closing the gap and securing all the layers together.
Customization tips:
- Play with patterns: Choose fabrics with fun patterns or colors that suit the recipient’s taste. Consider using coordinating prints for the two fabric squares.
- Add pockets (optional): If you’re feeling a little more adventurous, you can add a small pocket to the cozy for holding utensils like spoons or napkins. Simply cut a rectangle of fabric, fold it in half lengthwise, and sew it onto one side of the cozy before completing the final topstitch.
- Make it a set: Create a matching cozy for a mug or travel coffee cup for a complete microwaveable set.
5. Friendship Bracelets: A Token of Camaraderie
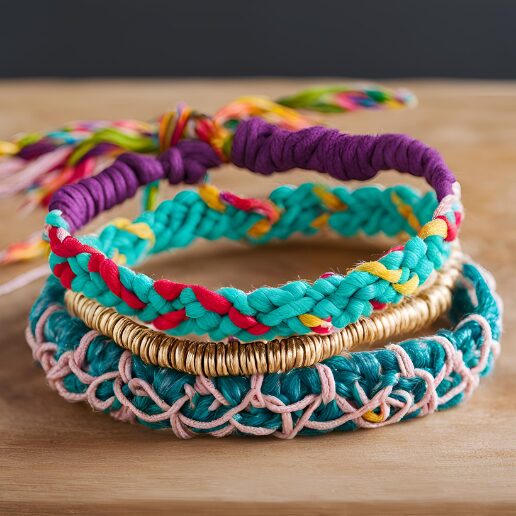
Friendship bracelets are a timeless symbol of connection and friendship. They’re surprisingly easy to make and can be customized with endless color combinations and patterns.
What you’ll need:
- Embroidery floss in various colors
- Scissors
- Friendship bracelet loom (optional, but helpful for beginners)
Let’s weave some friendship!
- Choose your colors: Select a few colors of embroidery floss that complement each other or hold special meaning for you and the recipient.
- Loom or no loom? Decide whether you want to use a friendship bracelet loom or create the braid by hand. A loom can be helpful for beginners as it keeps the threads organized and prevents tangling. However, basic friendship bracelets can be made without a loom using a simple knotting technique.
- Looming fun (optional): If you’re using a loom, follow the instructions that come with it to tie your chosen number of embroidery floss strands onto the loom pegs.
- Knotting by hand: For a hand-braided bracelet, cut several strands of floss in your desired length (about 30 inches each). Tie all the strands together in a secure knot, leaving a tail for the bracelet closure. Secure the knot to a table or doorknob using a piece of tape.
- Braiding magic: There are many friendship bracelet braiding patterns available online. Start with a simple forward-backward knotting technique to get the hang of it. Once you’re comfortable, you can explore more complex patterns like chevron or stripes.
- Finishing touches: Once your bracelet reaches the desired length, tie a secure knot at the end. You can braid the remaining floss into the bracelet or trim it close to the knot.
Customization tips:
- Meaningful colors: Choose colors that represent your friendship or a shared memory.
- Add beads or charms (optional): For an extra touch, weave in small beads or charms into your bracelet design.
- Make it a pair: Create matching bracelets for you and your friend to solidify the bond!
6. Flavored Popcorn: A Sweet or Savory Treat

Who doesn’t love popcorn? Take this classic snack to a whole new level with homemade flavored popcorn! It’s a fun and delicious gift that’s perfect for movie nights, game nights, or just a casual treat.
What you’ll need:
- Popcorn kernels (1/2 cup)
- Cooking oil (enough to coat the bottom of your pot)
- Seasonings of your choice (ideas include salt, pepper, garlic powder, onion powder, nutritional yeast, dried herbs, spices)
- Large pot with a lid
- Bowl for serving (optional)
- Decorative bags or containers (optional)
Let’s pop some flavor!
- Heat up the pot: Add the cooking oil to your large pot and heat it over medium heat. You can test if the oil is hot enough by dropping a few popcorn kernels. If they sizzle and pop quickly, the oil is ready.
- Popping time: Add the popcorn kernels to the hot oil in a single layer. Cover the pot with the lid, leaving a small gap for steam to escape. Shake the pot gently every few seconds to prevent burning.
- Listen for the pops: Once the popping slows down significantly (with only a few pops between intervals), remove the pot from the heat.
- Flavor explosion: Immediately transfer the popcorn to a large bowl. Now comes the fun part – adding your chosen flavors! Sprinkle your desired seasonings onto the hot popcorn and toss gently to ensure even distribution.
Customization tips:
- Sweet or savory: Choose your flavor profile! Popular options include classic butter and salt, cheesy (with grated parmesan cheese and dried herbs), or a spicy kick with chili powder and cayenne pepper.
- Get creative: Experiment with different herbs and spices to create unique flavor combinations. Try a blend of rosemary and garlic for a gourmet touch, or a sprinkle of cinnamon and sugar for a sweet treat.
- Presentation matters: Package your flavored popcorn in decorative bags or containers for gifting. Brown paper lunch bags with hand-drawn designs or colorful cellophane bags tied with ribbons are simple yet charming options. You can even get creative and create popcorn boxes out of recycled cardboard and decorate them with movie-themed stickers or popcorn kernels glued on for a fun touch.
7. Photo Memory Jar: A Treasure Trove of Memories
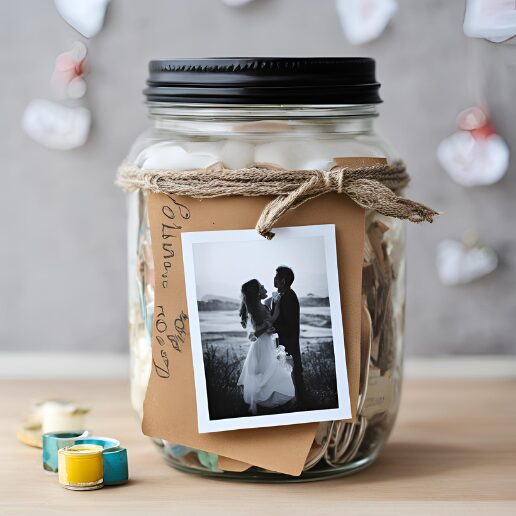
A photo memory jar is a sentimental and heartwarming gift that captures special moments in a unique way. It’s a lovely way to show someone you care and cherish the time you’ve spent together.
What you’ll need:
- Mason jar (medium size)
- Decorative paper (optional)
- Scissors
- Glue
- Small photos (printed on good quality photo paper)
- Ribbon or twine (optional)
Let’s capture those memories!
- Dress up the jar (optional): If you want to personalize the jar itself, you can decorate it with decorative paper. Cut the paper to fit the size of the jar and adhere it with glue. You can also add embellishments like lace or ribbons for a more finished look.
- Photo selection: Choose a variety of small photos that represent special moments, inside jokes, or shared experiences with the recipient.
- Rolling memories: Here’s the fun part! Take each photo and roll it up tightly from the short end. This creates a more whimsical and space-saving way to store the photos in the jar.
- Filling the jar: Start adding the rolled-up photos to the mason jar. You can layer them in any way you like, or arrange them chronologically for a trip down memory lane.
- Finishing touches: Once the jar is filled with photos, tie a decorative ribbon or twine around the lid for a nice finishing touch. You can also add a small tag with a heartfelt message or a reminder to “Unroll a memory whenever you need a smile.”
Customization tips:
- Themed memories: If the jar is for a specific occasion, like a birthday or graduation, choose photos that capture those specific memories.
- Add captions (optional): On the back of each photo, you can write a short caption or a funny anecdote related to the picture. This will add a personal touch and jog the recipient’s memory.
- Get creative with size: You can use this concept with different sized jars and photos. For instance, a smaller jar could hold tiny polaroid photos for a more intimate collection of memories.
8. DIY Sugar Scrub: A Touch of Spa Luxury at Home
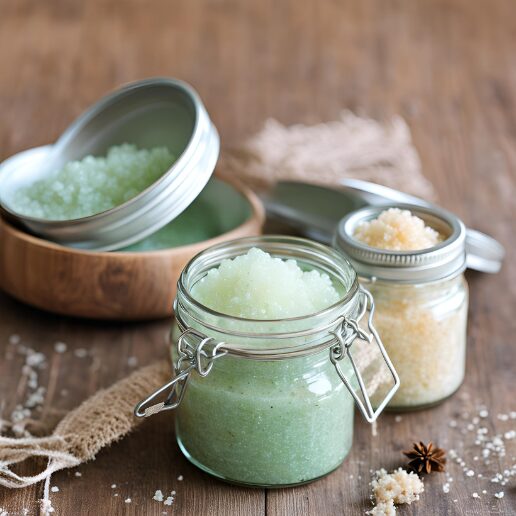
Indulge someone’s senses with a homemade sugar scrub that buffs away dead skin cells and leaves them feeling pampered.
What you’ll need:
- Granulated sugar (1 cup)
- Coconut oil (1/2 cup, melted)
- Essential oil(s) of your choice (10-15 drops) (popular options include lavender, lemon, or peppermint)
- Optional additions: Ground coffee (for an exfoliating boost), dried rose petals or lavender buds (for a fragrant touch)
- Small airtight container
Let’s create a mini spa experience!
- Mix the dry ingredients: In a bowl, combine the granulated sugar and any dry additions like coffee grounds or dried flowers.
- Melt the coconut oil: Gently heat the coconut oil in a microwave-safe bowl until it melts but is not too hot.
- Scent it up: Add the essential oil(s) of your choice to the melted coconut oil and stir well.
- Combine it all: Pour the melted coconut oil mixture into the dry ingredients and mix thoroughly until everything is evenly distributed. The consistency should be slightly wet but still hold its shape.
- Spoon it in: Transfer the finished sugar scrub to your chosen airtight container.
Customization tips:
- Match the scent to the recipient: Consider the recipient’s preferences when choosing essential oils. Lavender is known for relaxation, while lemon offers a refreshing citrusy scent.
- Color it up: If you want to add a visual element, mix a few drops of food coloring with the melted coconut oil for a touch of whimsy.
- Label it with love: Create a cute label for your container with the ingredients and instructions for use.
9. Pressed Flower Bookmarks: A Touch of Nature for Bookworms
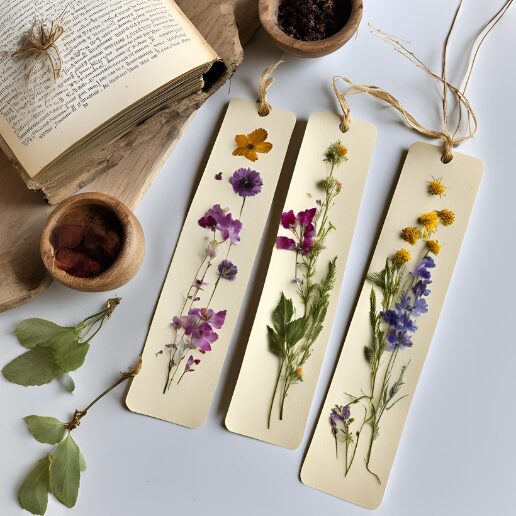
These beautiful bookmarks featuring real pressed flowers are a unique and thoughtful gift for book lovers.
What you’ll need:
- Flowers and leaves (freshly picked or dried)
- Heavy books (for pressing)
- Parchment paper
- Bookmark blanks (made of cardstock or wood) (optional)
- Mod Podge or clear craft glue
- Scissors
- Paintbrush (optional)
Let’s press some floral beauty!
- Pick your flowers: Choose a variety of small flowers and leaves with vibrant colors and interesting shapes. Ensure they are clean and free of moisture.
- Pressing time: Place the flowers and leaves between sheets of parchment paper. Stack heavy books on top to press them flat. Leave them undisturbed for at least 2-3 weeks, or until the flowers are completely dry and brittle.
- Prepare your bookmark (optional): If you’re not using pre-made bookmark blanks, cut out bookmark shapes from sturdy cardstock or thin wood. You can also paint them with a base coat if desired.
- Arrange and adhere: Once your flowers are pressed, lay them out on your chosen bookmark surface in a design you like. Use a small paintbrush to apply a thin layer of Mod Podge or clear craft glue to the back of each flower, securing them onto the bookmark.
- Finishing touches: Allow the glue to dry completely. You can apply an additional thin layer of Mod Podge over the entire bookmark to seal the design and protect the pressed flowers.
Customization tips:
- Get creative with placement: Experiment with different flower arrangements to create unique and personalized bookmark designs.
- Add a message (optional): Use a permanent marker to write a short message or the recipient’s initials on the back of the bookmark before applying the final coat of Mod Podge.
- Explore other materials: Consider using pressed leaves, feathers, or even small pieces of lace for a more eclectic look.
10. DIY Candle: A Warm Glow for Any Occasion
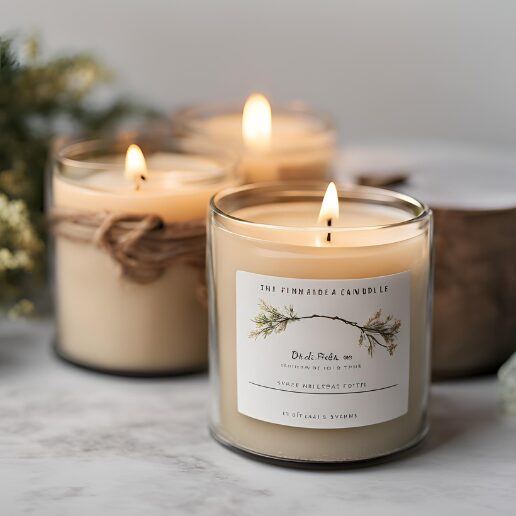
The soft glow and calming fragrance of a homemade candle make it a universally appreciated gift.
What you’ll need:
- Soy wax flakes (1 cup)
- Candle wick (sized for your container)
- Essential oil(s) of your choice (10-15 drops) (popular options include lavender, vanilla, or citrus)
- Heat-resistant glass jar or container
- Pot holder
- Thermometer (optional)
Let’s create a little ambiance!
- Prepare your container: Ensure your chosen glass jar or container is clean and dry. Secure the wick to the bottom center of the jar using a wick sticker or a small dab of hot glue.
- Melt the wax: Fill a saucepan halfway with water and bring it to a simmer. Place a heat-resistant bowl on top of the saucepan, creating a double boiler effect. Add the soy wax flakes to the bowl and heat them gently, stirring occasionally, until completely melted.
Safety tip: Never leave melted wax unattended on the stovetop.
- Heat it right (optional): If you have a thermometer, aim for a temperature between 180-190°F (82-88°C) for the melted wax.
- Scent it up: Once the wax is melted and removed from the heat source, stir in your chosen essential oil(s).
- Pour and wait: Carefully pour the melted wax into your prepared jar with the wick. Center the wick and ensure it remains upright. Allow the candle to cool completely and solidify for at least 24 hours before burning.
Customization tips:
- Layer different colors: For a visually striking effect, you can pour the wax in layers with different colors. Allow each layer to cool and solidify slightly before pouring the next.
- Add dried elements (optional): Once the wax is poured but not completely set, you can gently press in dried flowers, herbs, or coffee beans for a decorative touch.
- Label it with love: Create a cute label for your candle jar with the scent and any burning instructions.
11. Decorative Tea Towels: A Practical Gift with Personality
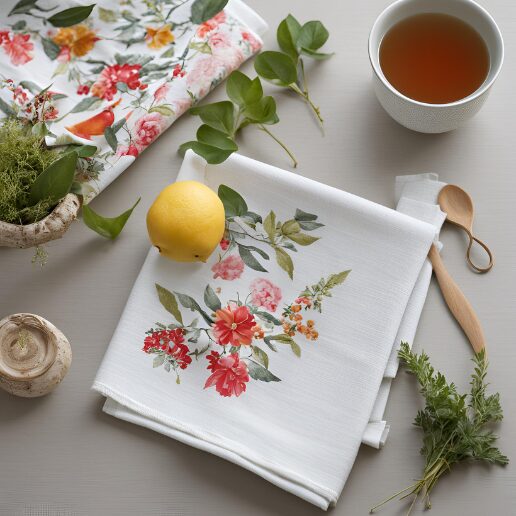
Tea towels are a kitchen staple, but they can also be stylish and personalized. With a little fabric paint and creativity, you can create unique tea towels as thoughtful gifts.
What you’t need:
- Plain cotton tea towels
- Fabric paint in various colors
- Stencils (optional)
- Paint brushes
- Freezer paper (optional)
Let’s spruce up those dish towels!
- Protect your surface: Cover your workspace with newspaper or a plastic sheet.
- Iron the tea towels: Ensure the tea towels are clean and ironed flat to remove any wrinkles.
- Freezer paper trick (optional): If you want to create sharp lines or geometric patterns, you can use freezer paper stencils. Cut out your desired design from the freezer paper and iron it onto the tea towel, creating a negative space for painting.
- Painting fun: Use fabric paint brushes to paint your design onto the tea towel. You can use stencils for more intricate details or freehand your own designs.
- Setting the paint: Once the paint is dry, follow the instructions on the fabric paint for heat setting. This typically involves ironing the painted area on a high heat setting (with a piece of cloth between the iron and the paint) to ensure the paint becomes permanent.
Customization tips:
- Match the theme: Choose colors and designs that complement the recipient’s kitchen decor.
- Add a message: Stencil or hand-paint a short message like “Happy Cooking” or the recipient’s initials onto the tea towel.
- Get the kids involved: This is a fun activity to do with children. Let them unleash their creativity and design their own tea towels for a special handmade touch.
12. Custom Herb Mix: A Gift that Keeps on Giving
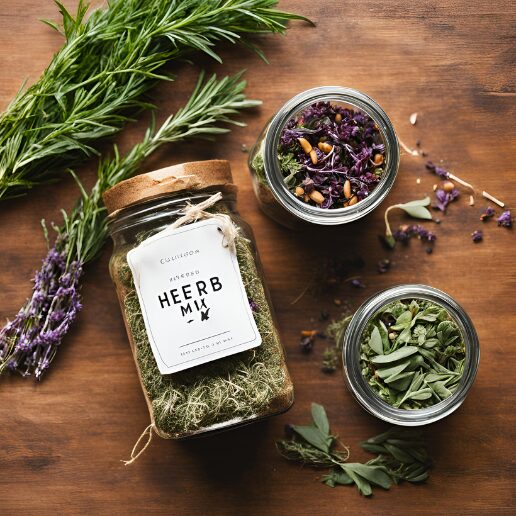
Fresh herbs elevate any dish, and a custom herb mix allows the recipient to add a burst of flavor to their cooking.
What you’ll need:
- Dried herbs of your choice (popular options include oregano, basil, thyme, rosemary, parsley)
- Spice jars or decorative tins
- Small funnel (optional)
- Labels
Let’s create a flavor explosion!
- Choose your herbs: Select a combination of dried herbs that complement each other and suit the recipient’s cooking style. Consider Italian herbs for Mediterranean dishes, or a blend of chili flakes, garlic powder, and smoked paprika for a smoky kick.
- Measure and mix: Measure out the desired quantities of each herb and combine them in a bowl. Ensure all the herbs are well-distributed.
- Fill ‘er up: Using a small funnel (if needed), carefully fill your chosen spice jars or decorative tins with the custom herb mix.
- Label it with love: Create beautiful labels for your jars or tins that specify the herb mix and any suggested uses.
Customization tips:
- Get specific: If you know the recipient’s favorite cuisine, tailor the herb mix accordingly. For example, a Thai herb mix might include lemongrass, ginger, and kaffir lime leaves.
- Add a recipe (optional): Include a small recipe card with a dish that utilizes your custom herb mix, inspiring the recipient to put it to good use.
- Presentation matters: Choose decorative tins or spice jars that complement your labels and add a touch of visual appeal to the gift.
13. Scented Drawer Liners: A Fresh Touch for Clothes and Drawers
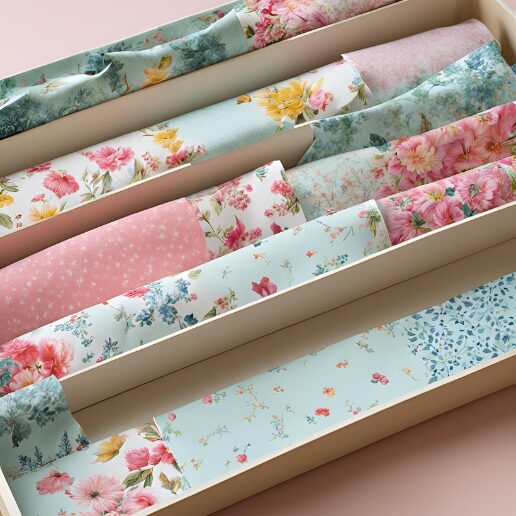
Linen closets and drawers can often develop a stale odor. Scented drawer liners offer a practical and delightful solution, keeping clothes smelling fresh and adding a touch of fragrance.
What you’ll need:
- Fabric scraps (lightweight cotton or muslin work best)
- Fabric softener sheets (unused)
- Pinking shears (optional)
- Scissors
- Sewing machine (optional)
- Iron (optional)
Let’s freshen up those drawers!
- Cut the fabric: Decide on the size of your drawer liners. Measure the length and width of the drawer you want to line and cut out rectangles of fabric from your chosen material. You can create multiple smaller liners for different compartments within the drawer, or a single large liner to cover the entire base.
- Softener sheets to the rescue: Take a fresh, unused fabric softener sheet and cut it into smaller squares or rectangles. The size will depend on the size of your drawer liners and how strong you want the scent to be.
- Fabric magic: Here, you have a few options. You can simply place the fabric softener squares on top of the wrong side of your fabric liner and leave them loose. However, for a more finished look and to prevent the squares from shifting, you can:
- Sewing method (optional): If you have a sewing machine, stitch around the perimeter of each fabric softener square, creating small fabric pockets that enclose them within the drawer liner.
- Ironing method (optional): If you don’t have a sewing machine, you can carefully iron the edges of the fabric liner over the fabric softener squares, creating a fold that holds them in place. Be sure to use a low heat setting to avoid scorching the fabric softener or melting the scented beads.
- Finishing touches (optional): If you want to add a decorative touch, use pinking shears to create a scalloped edge on your fabric liners before adding the fabric softener squares.
Customization tips:
- Match the scent: Choose fabric softener sheets with a scent that complements the recipient’s preferences. Popular options include lavender for a calming effect or fresh linen for a clean and airy feel.
- DIY alternative: If you prefer a more natural approach, you can skip the fabric softener sheets and sprinkle dried herbs or lavender flowers onto your fabric liners before folding them.
- Consider washability: If you want the drawer liners to be washable, choose cotton fabric and ensure any sewing methods used won’t unravel when washed.
14. DIY Bath Bombs: A Fizzy Escape for Relaxation
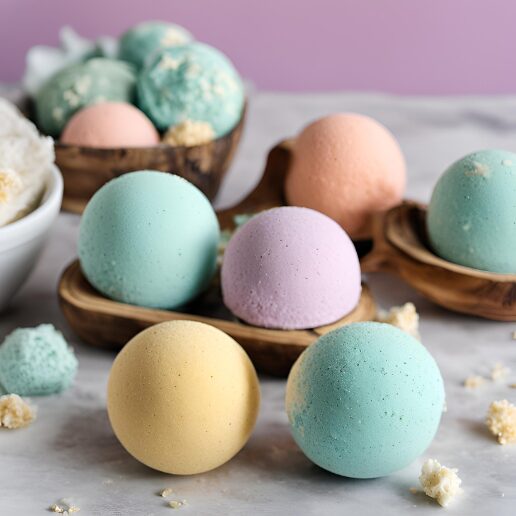
Transform bath time into a luxurious spa experience with homemade bath bombs.
What you’ll need:
- Baking soda (1 cup)
- Citric acid (1/2 cup)
- Epsom salts (1/2 cup)
- Cornstarch (1/4 cup)
- Carrier oil (like coconut oil or almond oil) (1/4 cup, melted)
- Essential oils of your choice (10-15 drops) (popular options include lavender, chamomile, or ylang-ylang)
- Silicone mold (various shapes available)
- Spray bottle with water
Let’s create a fizzy paradise!
- In a large bowl, whisk together the dry ingredients: baking soda, citric acid, Epsom salts, and cornstarch.
- In a separate bowl, combine the melted carrier oil and essential oils.
- Slowly add the wet ingredients to the dry ingredients, mixing well until everything is evenly distributed. A few spritzes of water from the spray bottle may be needed to achieve a moldable consistency.
- Pack the mixture firmly into your silicone molds, pressing it down to ensure there are no air pockets.
- Let the bath bombs dry completely in the molds for at least 24 hours.
- Gently pop the bath bombs out of the molds and store them in an airtight container until ready for use.
Customization tips:
- Color it up: Add a few drops of food coloring to the wet ingredients for vibrant bath bombs.
- Get floral: Include dried rose petals, lavender buds, or chamomile flowers for a touch of fragrance and visual appeal.
- Create a variety pack: Make a set of bath bombs in different colors and scents to cater to different preferences.
15. Hand-Painted Coasters: A Splash of Color for Drinks
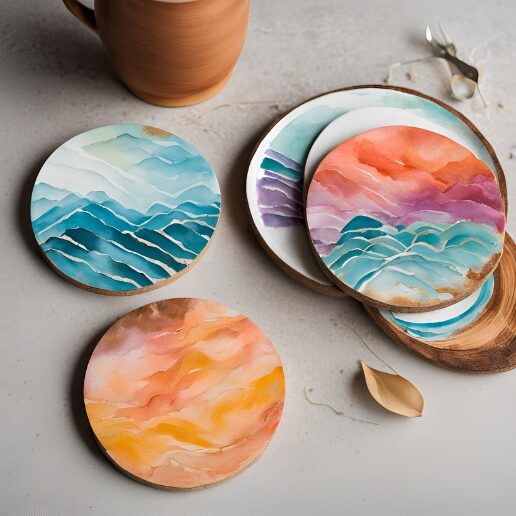
Protect furniture and add a personal touch with hand-painted coasters.
What you’ll need:
- Plain wooden coaster blanks
- Acrylic paint in various colors
- Paint brushes
- Stencils (optional)
- Clear gloss sealant (optional)
Let’s paint some coasters!
- Apply a base coat of acrylic paint to your wooden coaster blanks. Choose a solid color or create a gradient effect using multiple colors. Let the base coat dry completely.
- Unleash your creativity! You can paint simple geometric patterns, stripes, polka dots, or even freehand designs. Use stencils for more intricate details or create your own unique artwork.
- Sealing the deal (optional): Once the paint is dry, apply a thin coat of clear gloss sealant to protect your artwork and add a nice shine. Let the sealant dry completely before using the coasters.
Customization tips:
- Match the recipient’s style: Choose colors and designs that complement the recipient’s home decor.
- Theme it up: Consider creating a set of coasters with a specific theme, like a beach theme with seashells or a floral theme with painted flowers.
- Add a message (optional): Use a permanent marker to write a short message or the recipient’s initials on the back of the coasters before sealing them.
16. DIY Lip Balm: A Touch of Pampering for Soft Lips
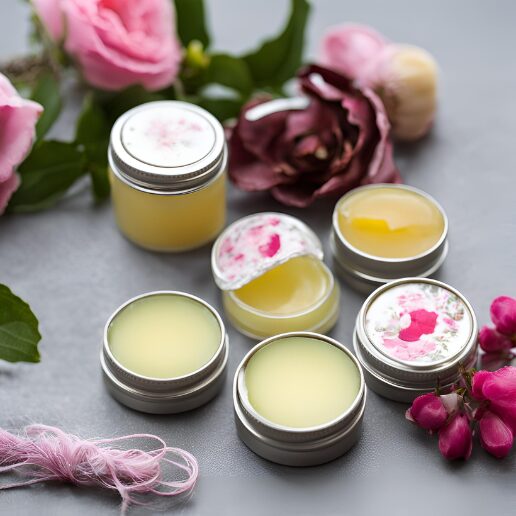
This homemade lip balm recipe offers a natural and nourishing way to keep lips soft and hydrated.
What you’ll need:
- Beeswax pastilles (1 tablespoon)
- Shea butter (1 tablespoon)
- Coconut oil (1 tablespoon)
- Sweet almond oil (1/2 tablespoon)
- Essential oil(s) of your choice (2-3 drops) (popular options include peppermint, vanilla, or lavender)
- Small lip balm tins
- Microwave-safe bowl
Let’s create some lip-loving magic!
- In a microwave-safe bowl, combine the beeswax pastilles, shea butter, coconut oil, and sweet almond oil. Heat on low power in short bursts, stirring in between, until everything melts and is well combined.
- Remove from the heat and let the mixture cool slightly. Stir in your chosen essential oil(s).
- Carefully pour the melted mixture into your clean lip balm tins. Allow the lip balm to cool and solidify completely before using.
Customization tips:
- Flavor it up: Experiment with different essential oils to create various flavor profiles. Opt for peppermint for a refreshing feel or vanilla for a sweet touch.
- Add a touch of color (optional): If you want to add a hint of color, include a few drops of natural mica powder to the melted mixture before pouring it into the tins. Choose a color that complements the chosen essential oil or the recipient’s preferences.
17. Custom Engraved Spoons: A Personalized Touch for Every Meal
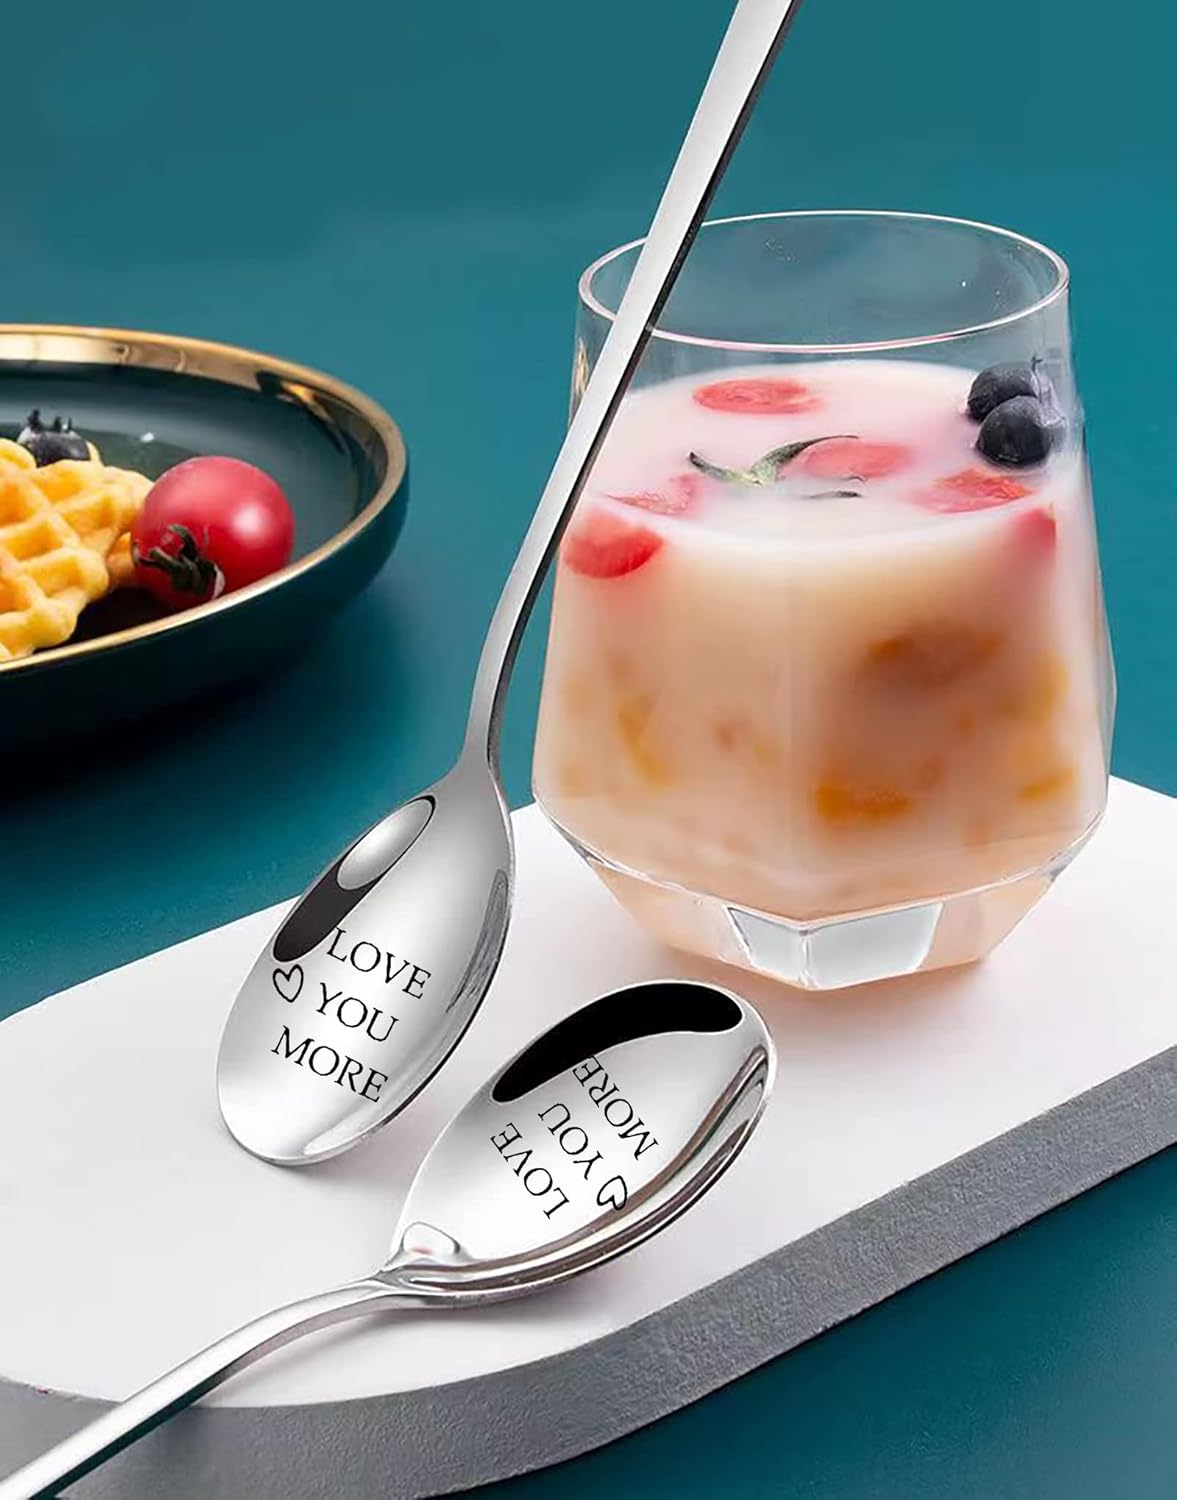
Gift a set of personalized spoons with a special message or design engraved on the handle.
What you’ll need:
- Plain metal spoons (stainless steel works well)
- An engraving tool (electric engraver or a Dremel tool with an engraving bit)
- Stencils (optional)
- Permanent marker (optional)
Let’s get engraving!
- Safety first: Ensure you follow all safety instructions when using an engraving tool. Wear safety glasses and gloves if required.
- Plan your design: Decide on the message or design you want to engrave on the spoon handles. You can use stencils for lettering or simple shapes, or freehand your own design.
- Practice makes perfect (optional): If you’re new to engraving, practice on a scrap piece of metal before engraving on the actual spoons.
- Engraving time: Gently engrave your chosen design onto the handle of each spoon. Be sure to apply even pressure and maintain a steady hand.
Customization tips:
- Engrave initials or names: Personalize the spoons by engraving the recipient’s initials or name on the handle.
- Add a special message: Engrave a short and heartfelt message like “Enjoy Every Bite” or “Made with Love” on the spoons.
- Get creative with designs: Consider engraving simple symbols, hearts, or even small flowers onto the spoon handles.
When life gets busy, finding time to create meaningful gifts can feel overwhelming. But even when you’re short on time, there’s something truly special about a handmade gift. Whether it’s a thoughtful touch on a simple item or a delicious treat made with love, these gifts show that you care far beyond just buying something off the shelf.
The good news? You don’t need hours or complicated skills to craft something unique. Below are 17 quick handmade gift ideas that can be created in under an hour, so you can make someone’s day without sacrificing yours.
18. Customized Photo Frames
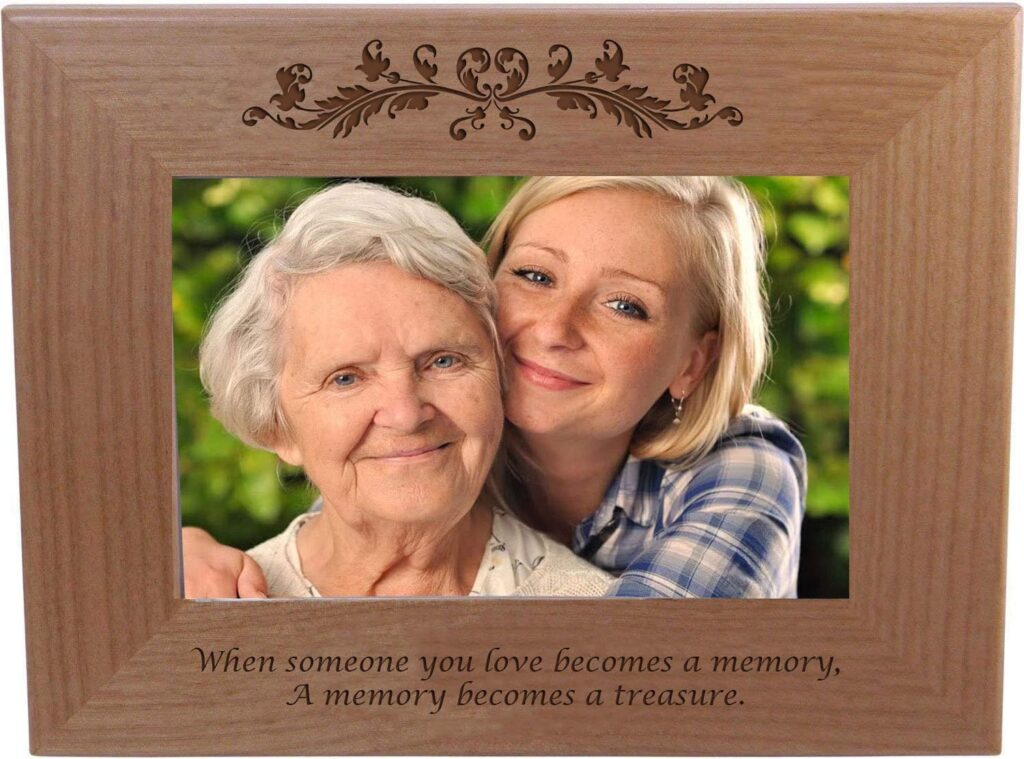
A picture is worth a thousand words, but a personalized frame speaks volumes. You can easily transform a plain photo frame into a heartfelt keepsake by adding your own creative flair. All you need is a simple frame from a craft store, and a few embellishments like paint, stickers, or ribbons.
Materials Needed:
- Basic frame
- Acrylic paint or spray paint
- Decorative stickers, ribbons, or buttons
- Glue gun
How to Make It:
- Paint the frame in a color that matches the recipient’s style or the photo you plan to include.
- Once dry, add small embellishments like buttons, ribbons, or stickers. You can even paint their name or a special date directly onto the frame.
- Insert a photo that’s meaningful to both of you.
Time to Make: 15-30 minutes
Why It Shows You Care: It’s more than just a frame; it’s a personalized memory holder that they’ll treasure forever.
19. Handwritten Recipe Cards
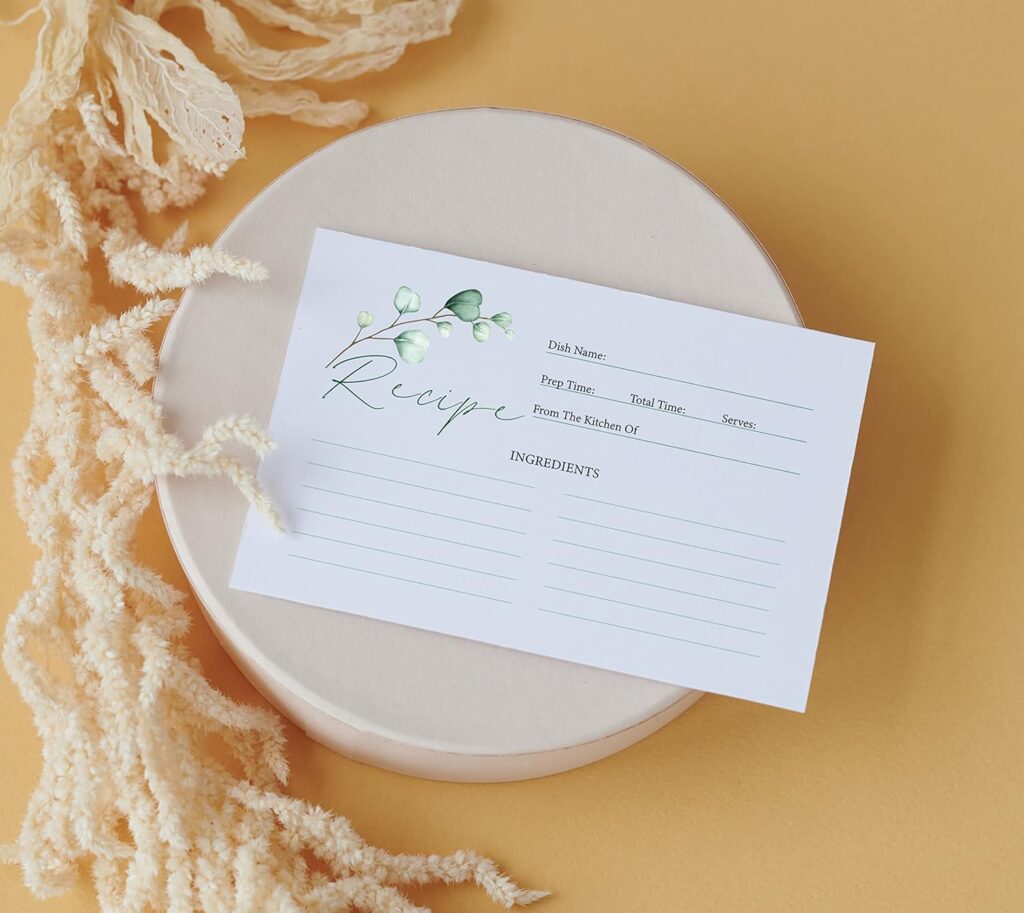
Sharing a cherished family recipe is like giving a piece of your history. For a quick and meaningful gift, write out your favorite recipe or a dish that has significance between you and the recipient. Decorate the card with a personal touch to make it even more special.
Materials Needed:
- Blank recipe cards
- Decorative pens or calligraphy markers
- Optional: Laminator to protect the card
How to Make It:
- Write the recipe in your best handwriting. If you want to go the extra mile, try calligraphy or use decorative pens to embellish the card.
- Laminate it for longevity, or simply tuck it into a pretty envelope for an elegant touch.
Time to Make: 10-15 minutes
Why It Shows You Care: This gift shares a part of your life and traditions, creating a lasting bond.
20. DIY Monogrammed Mug
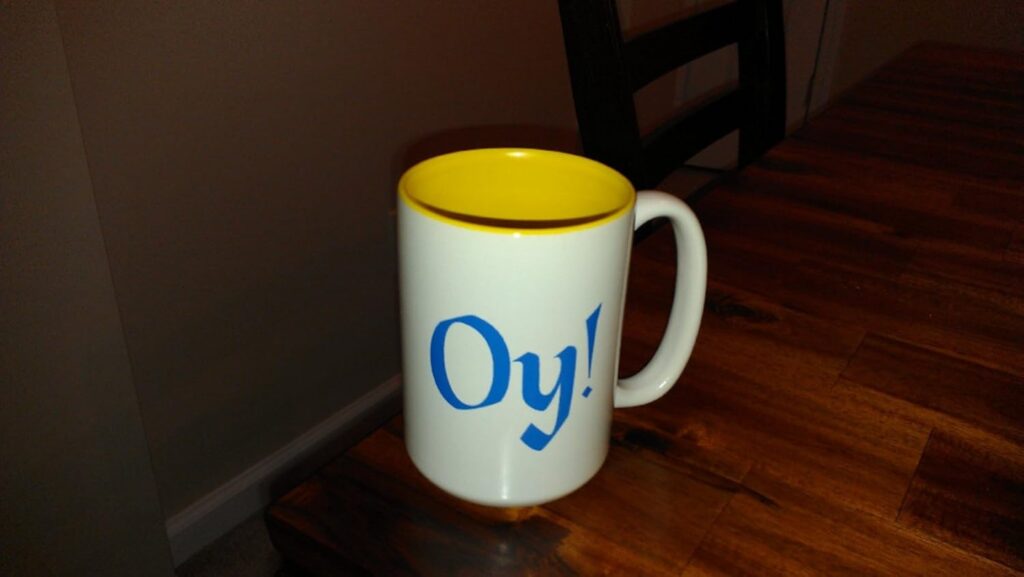
A monogrammed mug is a personal and practical gift that can be whipped up in no time. Start with a plain white mug, and using ceramic markers, create a customized design that features the recipient’s initials.
Materials Needed:
- Plain white mug
- Ceramic markers or paint pens
- Oven (to set the design)
How to Make It:
- Write the recipient’s initials on the mug using ceramic markers. You can get as creative as you want with colors and patterns.
- Once the design is finished, let it dry for a few minutes.
- Bake the mug in the oven at 350°F for 30 minutes to set the design permanently.
Time to Make: 20 minutes (plus baking time)
Why It Shows You Care: Every time they sip from this mug, they’ll be reminded of your thoughtful gesture.
21. Homemade Cookie Jars
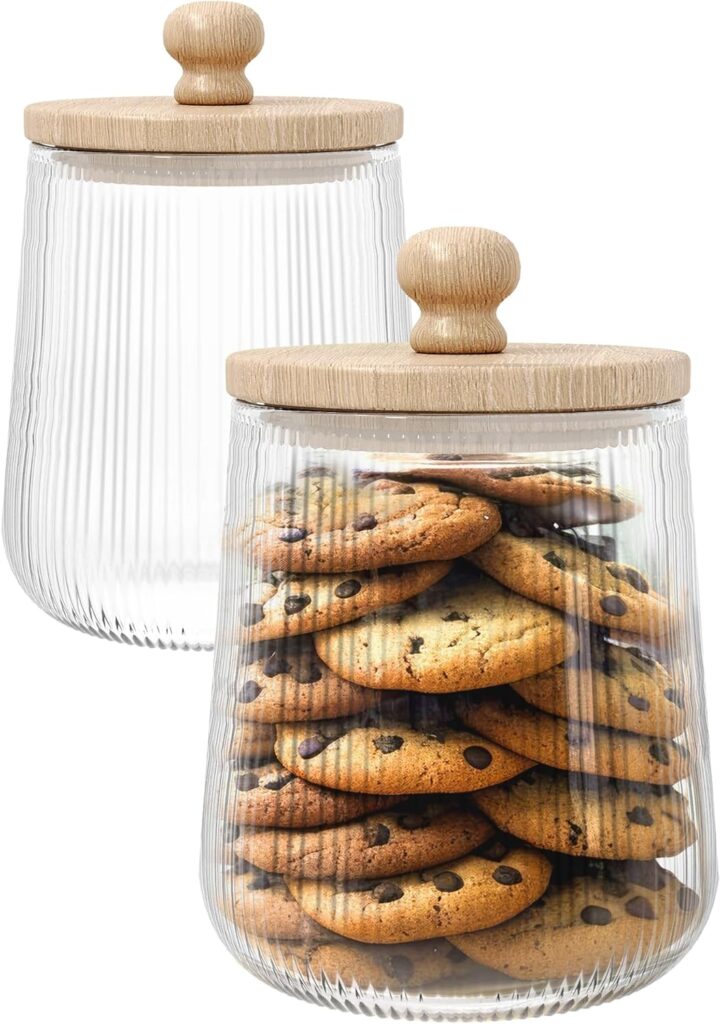
If you love baking but are short on time, a cookie jar gift is a perfect solution. Simply layer the dry ingredients for cookies in a mason jar and attach a handwritten tag with baking instructions.
Materials Needed:
- Mason jar
- Ingredients for your favorite cookie recipe (flour, sugar, chocolate chips, etc.)
- Decorative ribbon or fabric for the jar lid
- Recipe card with baking instructions
How to Make It:
- Layer the dry ingredients in the jar, making sure each layer is level and distinct.
- Close the jar and decorate it with fabric or ribbon.
- Write out the instructions on a tag, then attach it to the jar.
Time to Make: 10-20 minutes
Why It Shows You Care: This is a gift that gives them the chance to enjoy homemade cookies without having to do all the prep work themselves.
22. Quick Chocolate Bark
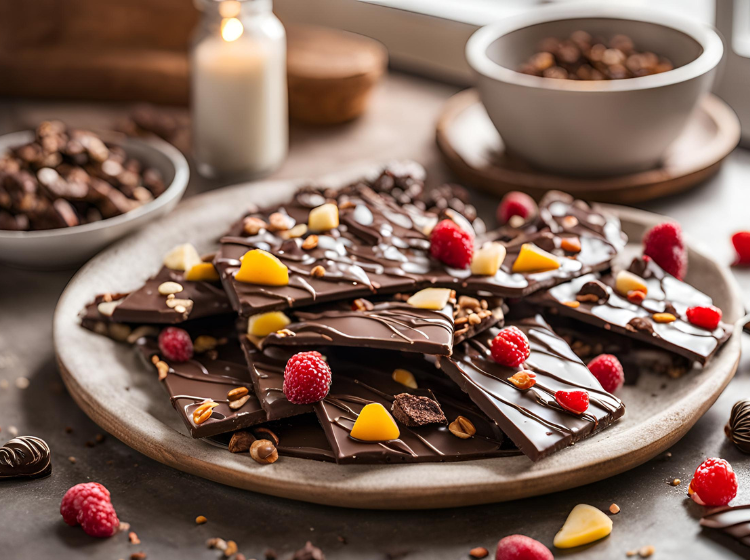
This simple yet delicious treat can be customized with your recipient’s favorite toppings. Plus, it only takes a few minutes to make!
Materials Needed:
- Chocolate (dark, milk, or white)
- Toppings like chopped nuts, dried fruit, or sprinkles
- Parchment paper
How to Make It:
- Melt the chocolate in a double boiler or microwave.
- Pour the melted chocolate onto a parchment-lined baking sheet, spreading it into an even layer.
- Sprinkle the toppings over the chocolate before it hardens.
- Let it set in the fridge for 20-30 minutes, then break it into pieces.
Time to Make: 15 minutes
Why It Shows You Care: A handmade gourmet treat feels luxurious and shows you put thought into their preferences.
23. Flavored Infused Oils or Vinegars
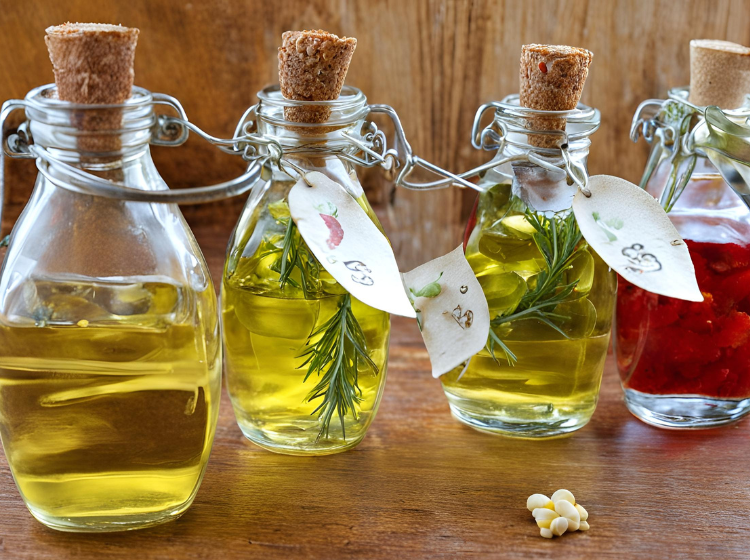
Infused oils and vinegars make for a sophisticated and practical gift. They’re easy to prepare and can elevate any home-cooked meal.
Materials Needed:
- Olive oil or vinegar
- Fresh herbs (like rosemary or thyme), garlic cloves, or chili peppers
- Glass bottles with lids
How to Make It:
- Place the herbs, garlic, or peppers into the bottle.
- Pour in the oil or vinegar, making sure the ingredients are fully submerged.
- Seal the bottle and let it infuse for at least 24 hours.
Time to Make: 10 minutes (plus infusion time)
Why It Shows You Care: It’s a thoughtful, gourmet touch that adds flavor to their kitchen.
24. DIY Scented Candles
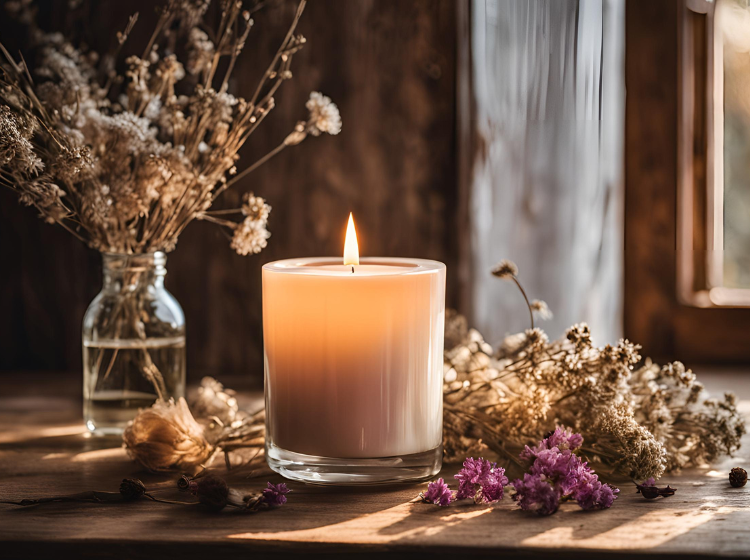
Creating your own candles can be surprisingly simple, and they make for a beautifully calming gift. Use mason jars or decorative tins for a stylish touch.
Materials Needed:
- Candle wax
- Wicks
- Essential oils
- Containers (mason jars or tins)
How to Make It:
- Melt the candle wax in a double boiler.
- Add a few drops of essential oil for fragrance.
- Pour the wax into the container, placing the wick in the center.
- Let the candle cool and harden completely before trimming the wick.
Time to Make: 20-30 minutes
Why It Shows You Care: It’s a warm, relaxing gift that adds coziness to their space.
25. Simple DIY Planters
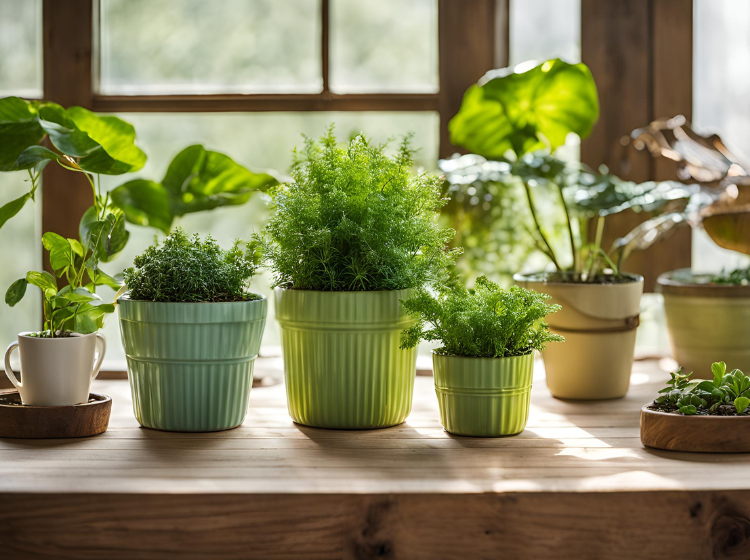
Transform a plain planter into a chic home décor piece with some paint and a little creativity. Then, add a low-maintenance succulent or plant to complete the gift.
Materials Needed:
- Small plant pots or mason jars
- Paint and brushes
- Succulent or small plant
How to Make It:
- Paint the planter in a color or design that matches the recipient’s style.
- Once dry, pot a small succulent or plant inside.
Time to Make: 20 minutes
Why It Shows You Care: This gift adds a fresh, green touch to their home and is easy to maintain.
26. Decorated Picture Ledges
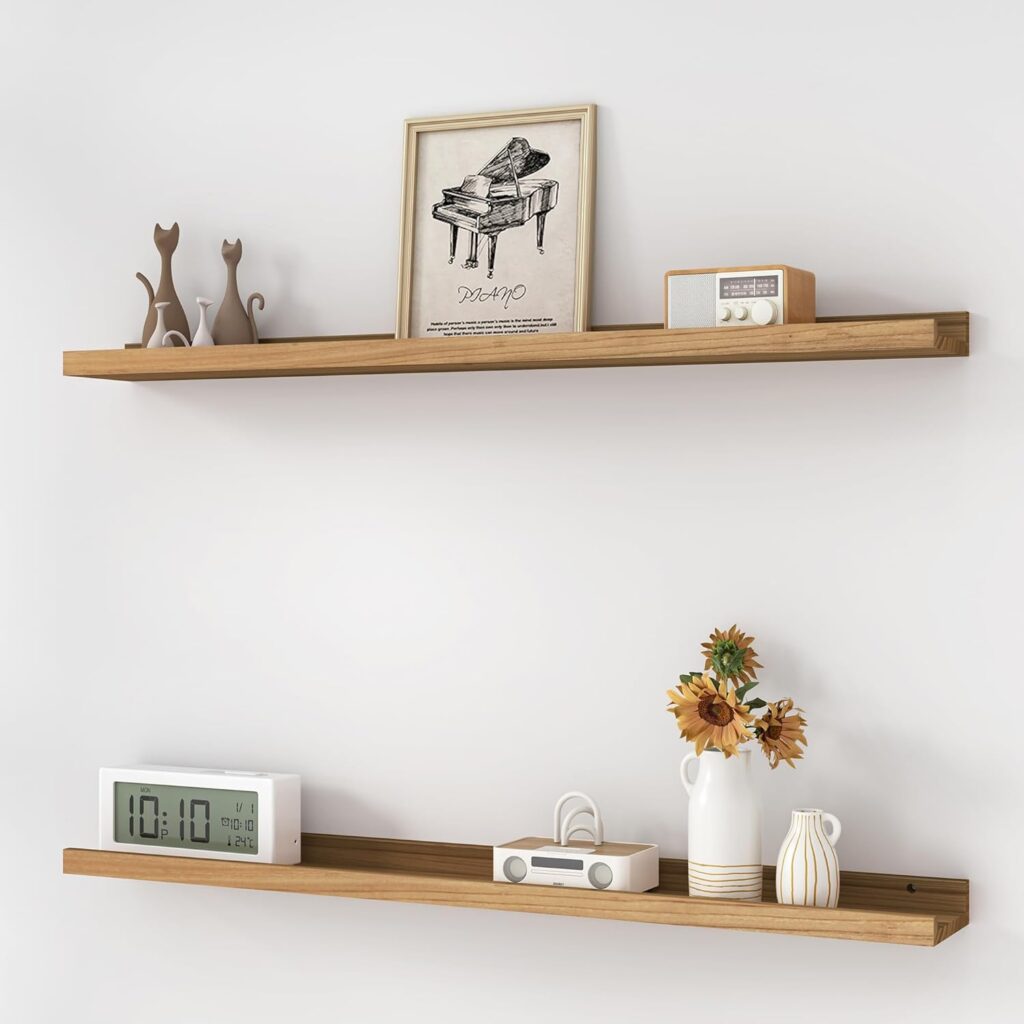
Create a picture ledge that they can hang on their wall to display photos, small plants, or décor items.
Materials Needed:
- Wood boards
- Nails or screws
- Paint or stain
- Hanging hardware
How to Make It:
- Sand down the wood and paint or stain it to match their style.
- Attach the boards together to create a shelf or ledge.
- Add hanging hardware, and it’s ready to gift.
Time to Make: 30-45 minutes
Why It Shows You Care: You’re giving them something they can use to personalize their space.
27. DIY Throw Pillows
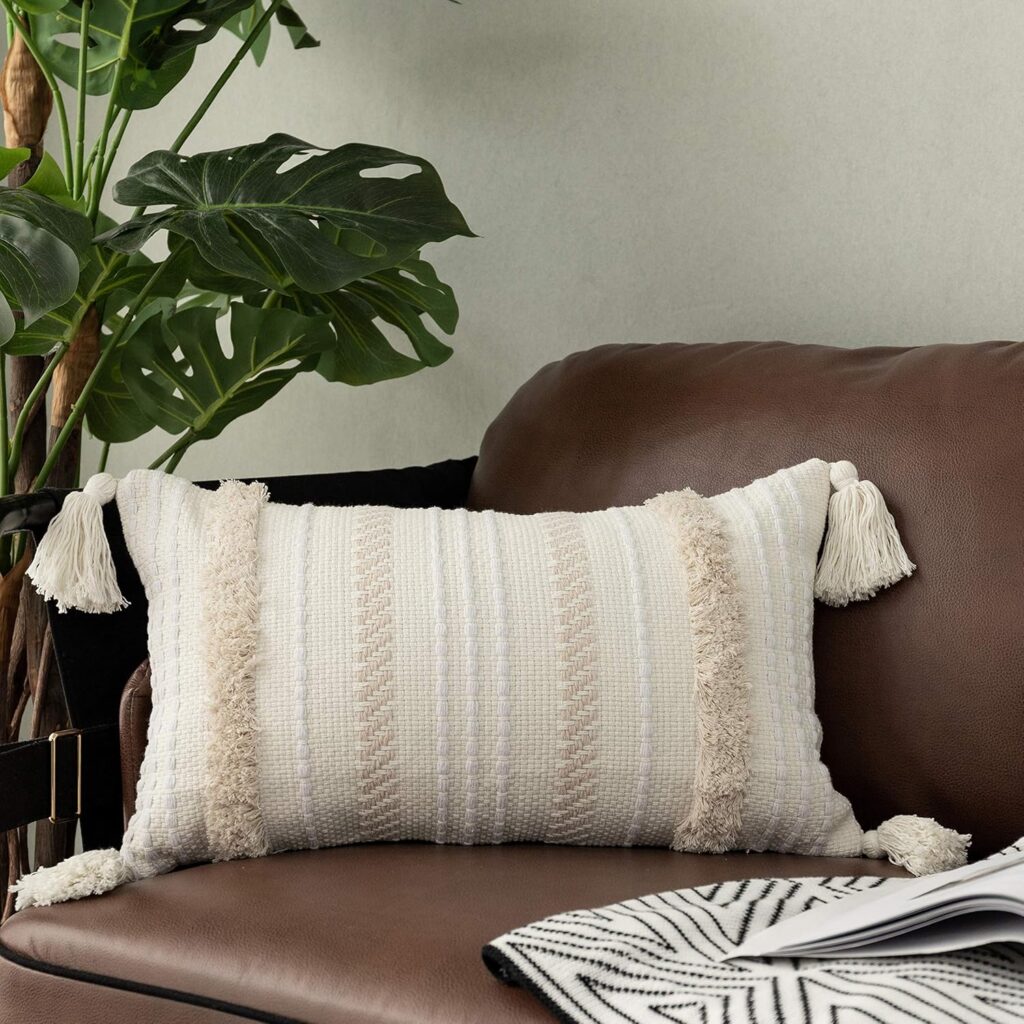
For a quick and stylish gift, sew or decorate a throw pillow cover. You can either start from scratch or buy a plain pillowcase and add your own design with fabric paint or markers.
Materials Needed:
- Plain pillowcases or fabric
- Fabric paint or markers
- Sewing machine (if making from scratch)
How to Make It:
- If sewing: Cut the fabric into two squares, sew the edges, and leave a gap to insert the pillow stuffing.
- If decorating: Use fabric paint or markers to create a custom design on a plain pillowcase.
Time to Make: 30 minutes
Why It Shows You Care: Every time they relax with the pillow, they’ll think of your thoughtful gift.
28. Knitted Scarves or Headbands
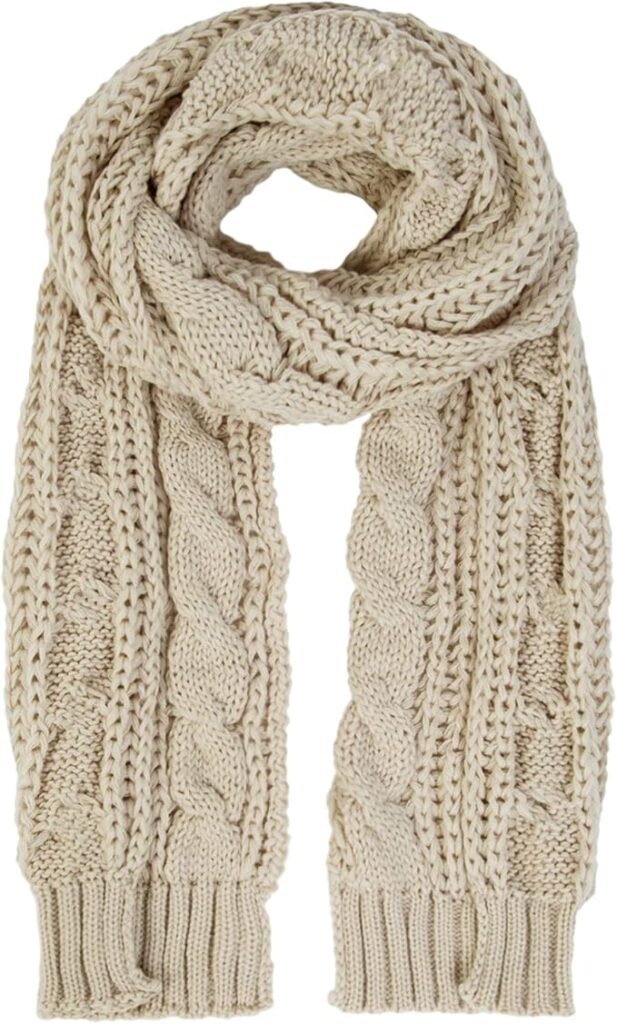
If you know how to knit or crochet, a simple scarf or headband is a cozy and thoughtful handmade gift.
Materials Needed:
- Yarn
- Knitting needles or crochet hook
How to Make It:
- Choose a simple knitting or crochet pattern that can be completed in an hour or less, like a basic scarf or headband.
Time to Make: 30-60 minutes
Why It Shows You Care: Handmade accessories are perfect for chilly days and show a lot of effort went into the gift.
29. DIY Bookmark Set
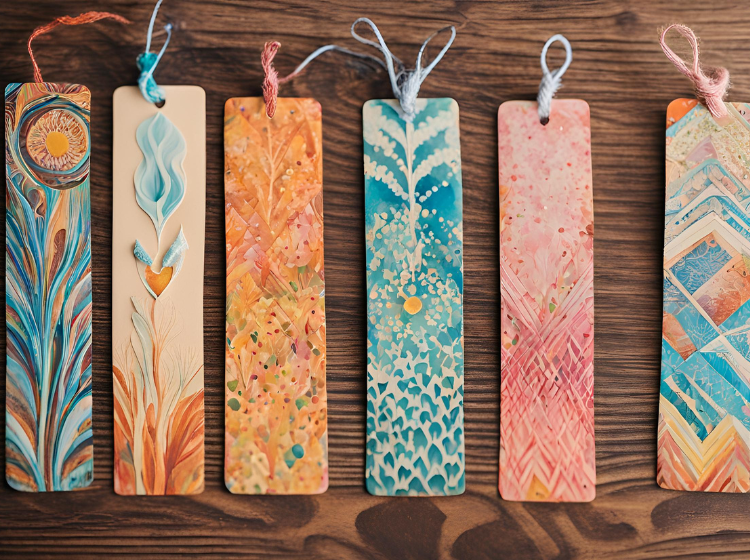
For the book lover in your life, a set of handmade bookmarks is a thoughtful gift. You can customize each one to fit their favorite books or genres.
Materials Needed:
- Cardstock or scrapbook paper
- Laminating sheets (optional)
- Decorative ribbons or tassels
How to Make It:
- Cut the cardstock into bookmark-sized strips.
- Decorate the bookmarks with designs, quotes, or their favorite literary references.
- Laminate the bookmarks if desired for extra durability.
Time to Make: 15-20 minutes
Why It Shows You Care: This gift pairs perfectly with a book, showing you thought about their interests.
30. Handmade Jewelry
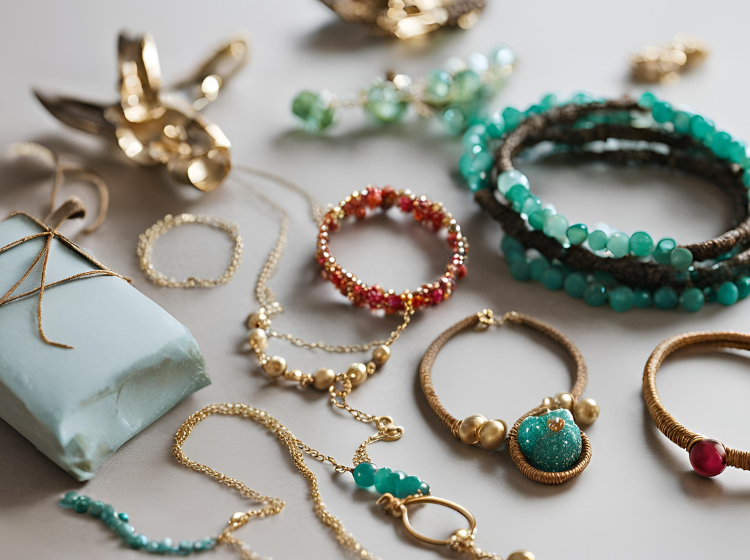
Create custom bracelets, necklaces, or earrings with a few basic jewelry-making supplies. You can personalize the jewelry with beads, charms, or initials for an extra special touch.
Materials Needed:
- Beads, charms, or pendants
- Jewelry wire or elastic
- Clasp or closures
How to Make It:
- String the beads or charms onto the wire or elastic, then secure the ends with a clasp.
- For earrings, attach the charms or beads to earring hooks.
Time to Make: 20-30 minutes
Why It Shows You Care: Handmade jewelry feels like a luxury item and can be customized to their style.
31. DIY Wall Art

If you enjoy painting or drawing, creating a piece of wall art is a great way to give a one-of-a-kind gift.
Materials Needed:
- Canvas or paper
- Paint, markers, or colored pencils
- Picture frame (optional)
How to Make It:
- Create a simple abstract design or something that reflects the recipient’s personality or home décor style.
- Once finished, frame the artwork for a polished gift.
Time to Make: 30-45 minutes
Why It Shows You Care: This is a highly personal and unique gift that they can display in their home.
32. Personalized Digital Art Prints
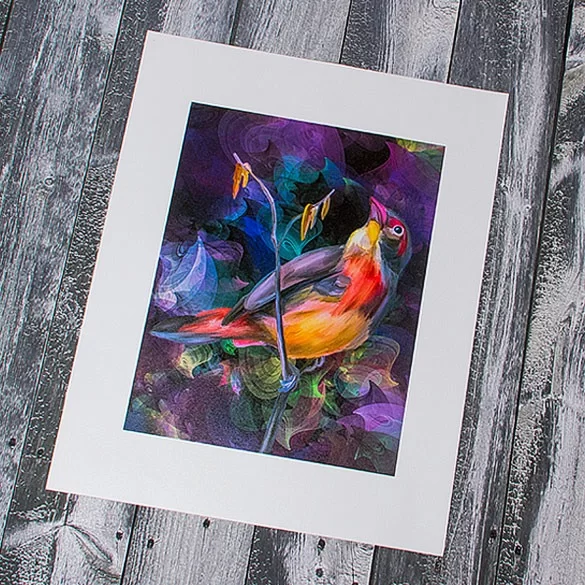
Digital art prints are one of the fastest and trendiest gifts you can make. With free tools like Canva or Procreate, you can design something thoughtful in minutes. Whether it’s a minimalist line drawing, a sleek monogram, or a motivational quote, you can tailor the design to the recipient’s style.
The beauty of this gift is flexibility—you can print it at home for a physical piece or send it digitally for a modern, eco-friendly option. It’s ideal for last-minute gifting and still feels polished and intentional.
Materials Required:
- Computer, tablet, or phone with design software (Canva, Photoshop, or Procreate)
- Printer (optional if you want a physical print)
- Quality paper or cardstock (for physical prints)
- Simple frame (optional)
Steps:
- Open your design software and choose a template or blank canvas.
- Select a theme: line art, quotes, or personalized names.
- Add modern fonts and minimalist design elements.
- Export your design as a PDF or PNG.
- Print on high-quality paper or gift it digitally.
33. Handmade Polymer Clay Jewelry
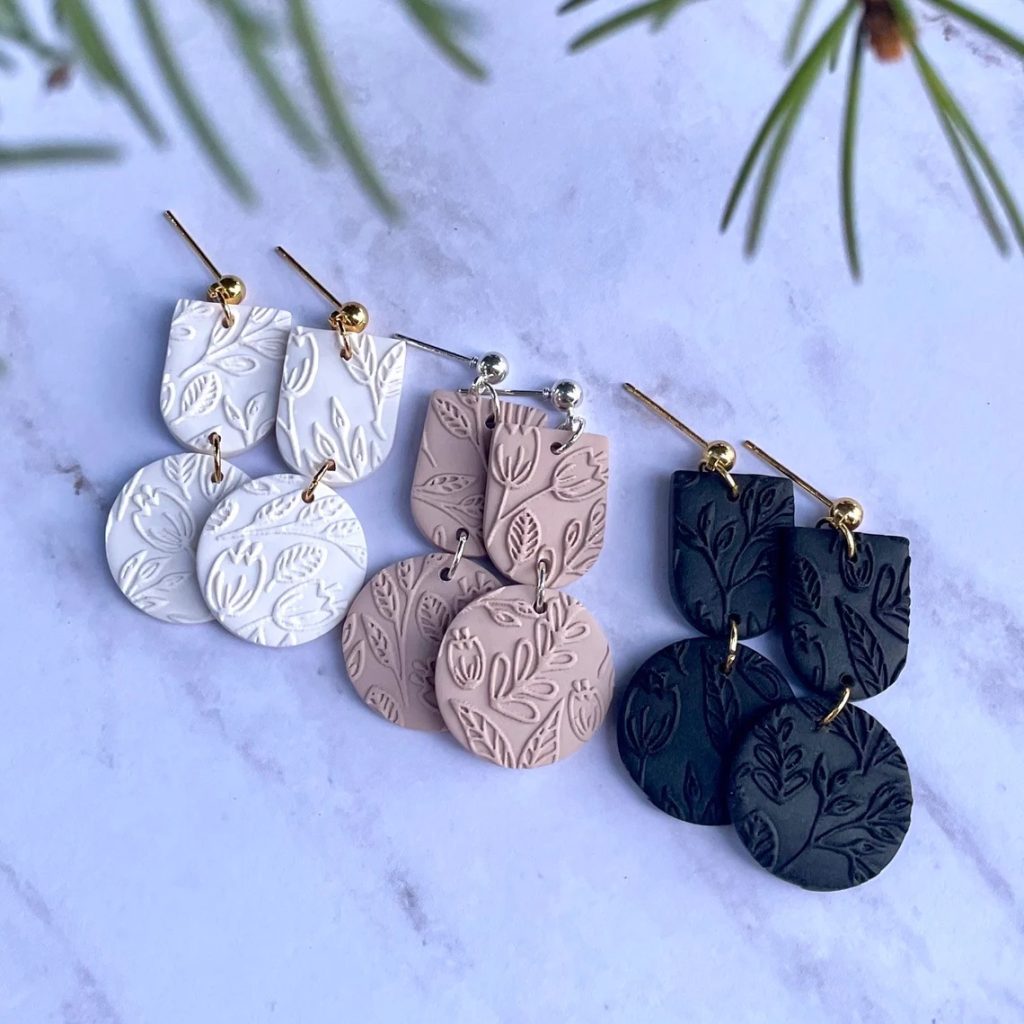
Polymer clay has made a huge comeback in modern jewelry trends. You can create chic earrings, rings, or pendants in just a few hours. The possibilities are endless—terrazzo patterns, geometric shapes, or soft neutral tones that match any outfit.
Handmade jewelry feels deeply personal, and when it’s made with modern design in mind, it’s also stylish enough to rival store-bought pieces. Plus, clay jewelry is lightweight and durable, making it the perfect everyday accessory.
Materials Required:
- Polymer clay (in assorted colors)
- Rolling pin or smooth surface
- Earring hooks, jump rings, or pendant chains
- Craft knife or clay cutters
- Oven for baking clay
Steps:
- Condition clay by kneading until soft.
- Roll out the clay and cut into desired shapes.
- Create terrazzo or marble effects by mixing small clay pieces.
- Bake the clay according to package instructions.
- Attach hooks, rings, or chains to finish.
34. DIY Tech Accessories
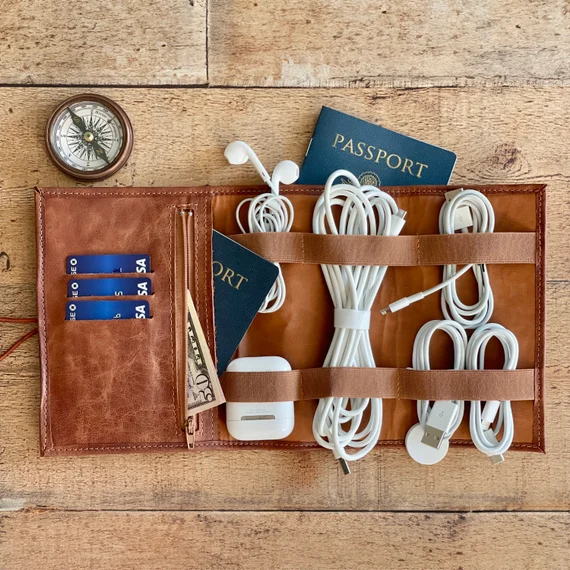
For a modern twist, why not make tech-friendly gifts? Handmade cord organizers or phone stands are quick to create and super useful. Faux leather cord wraps are especially sleek and can be made in less than 30 minutes.
This kind of gift feels thoughtful because it shows you understand the recipient’s lifestyle—practical yet stylish accessories they’ll use daily.
Materials Required:
- Faux leather or thick felt
- Snaps or buttons
- Scissors
- Small wood or resin molds (optional for stands)
Steps:
- Cut faux leather into small rectangles.
- Punch a hole and secure snap/button.
- Wrap cords neatly with organizer.
- For stands, pour resin or cut wood to size.
- Smooth edges and gift!
35. Homemade Gourmet Food Jars

Food gifts never go out of style, but modern presentation makes them feel extra special. From layered hot cocoa mixes to flavored oils, these can be assembled in under 20 minutes. Choose flavors you know the recipient loves for a thoughtful touch.
Packaged in glass jars with kraft paper labels, they have a modern, artisanal feel. It’s the kind of handmade gift that looks like it came from a gourmet shop.
Materials Required:
- Glass jars with lids
- Ingredients (cocoa mix, nuts, granola, or oils)
- Labels and ribbon
Steps:
- Layer dry ingredients neatly inside the jar.
- Seal the lid tightly.
- Add a simple label with instructions.
- Wrap with twine or ribbon for a modern finish.
36. Hand-Poured Resin Coasters
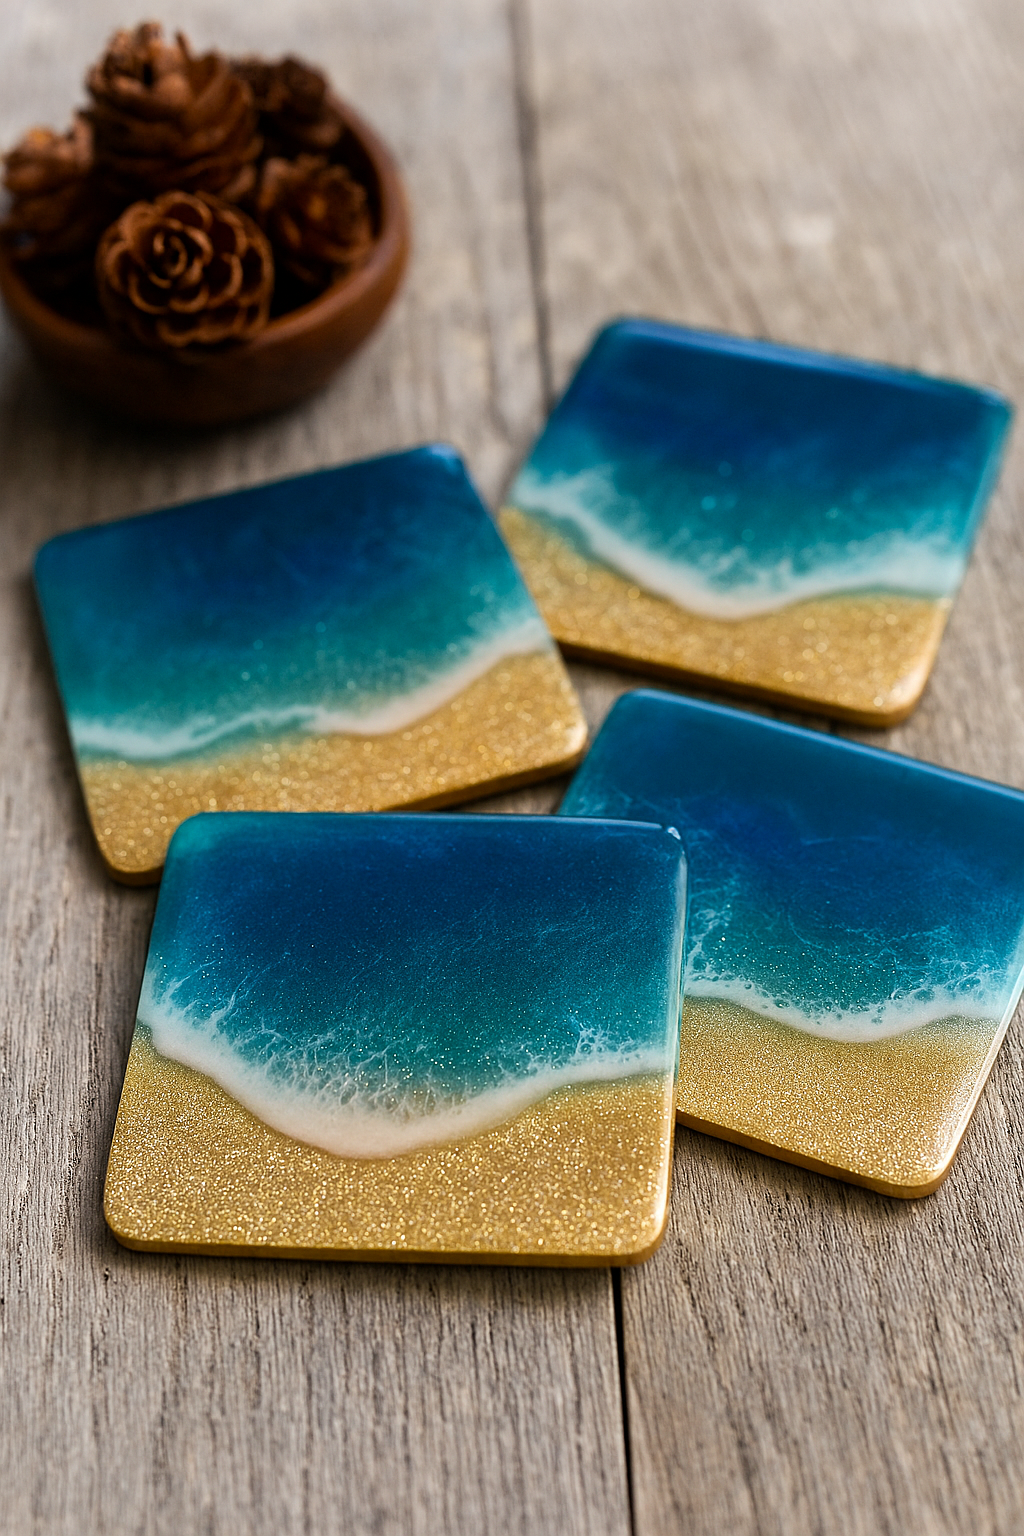
Resin crafts are all the rage right now, and coasters are one of the easiest projects. You can add dried flowers, metallic flakes, or marbled swirls for a stunning look. The result is a trendy, functional gift that feels custom-made.
These coasters are durable, waterproof, and endlessly customizable. They also pair perfectly with a coffee mug gift for a thoughtful set.
Materials Required:
- Resin kit
- Silicone coaster molds
- Dried flowers, glitter, or metallic flakes
- Mixing cups and sticks
Steps:
- Mix resin and hardener according to instructions.
- Pour a thin layer into the mold.
- Add decorations (flowers, flakes, etc.).
- Pour remaining resin and let cure.
- Remove from mold once hardened.
Wrapping Up
Handmade gifts don’t need to take days or cost a fortune to make a big impact. Whether you’re creating a personalized photo frame or whipping up a batch of homemade bath salts, the thought and effort behind the gift is what truly counts. These 30+ quick handmade gift ideas are perfect for any occasion and can be made in under an hour, ensuring you always have time to show someone how much you care.
Here are some additional tips for making your handmade gifts extra special:
- Presentation is key: Don’t underestimate the power of beautiful presentation. Wrap your handmade gifts in colorful tissue paper or decorate them with ribbons, twine, or small sprigs of rosemary for a charming touch.
- Add a personal touch: Include a handwritten card with a heartfelt message expressing your appreciation for the recipient. You can even mention the inspiration behind your gift or a special memory you share.
- Think outside the box: Don’t be afraid to get creative and combine elements from different ideas to create a unique and personalized gift.
- Embrace imperfections: Handmade gifts have a unique charm that comes from the love and effort poured into their creation. Don’t strive for absolute perfection; embrace the slight imperfections that make your gift one-of-a-kind.
With a little planning and creativity, you can create beautiful and thoughtful handmade gifts that will be cherished by your loved ones. So next time you’re looking for a gift that shows you care, consider crafting something special from the heart.

