17 Charming Spring Porch Decor Ideas to Welcome the Season

Spring Porch Decor Ideas

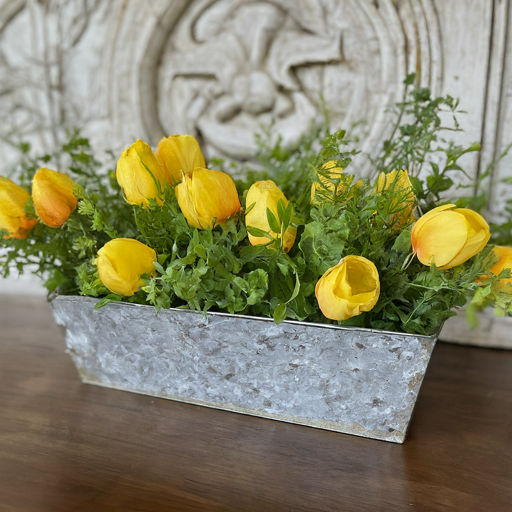
Spring has sprung! The days are longer, the air is warmer, and everything feels fresh and alive. As the world outside bursts with color, it’s the perfect time to extend that vibrant energy to your porch. After all, your porch is the first impression your home makes, and a charming spring makeover is a delightful way to welcome guests and create a cozy spot to enjoy the beautiful weather. Here are 17 inspiring ideas to transform your porch into a springtime oasis: 1. Blooming Beauties with Plants and Flowers There’s no better way to embrace the season’s vibrancy than with a profusion of flowers. Vibrant potted plants like pansies, tulips, or hyacinths in cheerful colors instantly add a touch of spring cheer. Hanging baskets overflowing with cascading petunias, geraniums, or trailing verbena create a stunning vertical display. Arrange your planters strategically for a balanced look – flank your doorway with matching pots, cluster them on a side table, or hang them from the porch ceiling. Pro Tip: Don’t be afraid to mix real and faux flowers. High-quality artificial blooms can extend your display throughout the season and require minimal maintenance. 2. Welcome Spring with a Wreath A spring-themed wreath is a classic way to set the tone for your porch decor. Wreaths come in a vast array of styles, so you can find one that perfectly complements your taste. Opt for pastel colors like soft pink, lavender, or yellow to capture the essence of spring. Wreaths adorned with floral elements, such as silk flowers or dried botanicals, add a touch of whimsy. Feeling crafty? Create your own DIY wreath using grapevines, colorful twigs, or even fabric scraps for a personal touch. Hang your wreath proudly on your front door or a side railing for maximum visual impact. 3. A Pop of Color with a Fresh Door For a truly transformative update, consider giving your front door a fresh coat of paint in a spring hue. A bright yellow door exudes sunshine and cheer, while a cool aqua adds a touch of serenity. Lavender or lilac add a touch of romance, and a bold coral makes a real statement. Remember to choose a weather-resistant paint specifically designed for outdoor use. Pro Tip: When opting for a vibrant door color, keep the rest of your porch decor more neutral. This will ensure the door remains the focal point and prevents your porch from feeling visually overwhelming. 4. Cozy Seating for Spring Evenings Extend your living space outdoors by creating a comfortable haven on your porch. Arrange inviting outdoor furniture like comfy chairs, a porch swing, or a small bistro set. Add pops of color and spring flair with throw pillows and cushions in floral patterns, pastel colors, or bold stripes. Don’t forget a small side table to hold drinks, snacks, or decorative items for a complete and functional space. 5. String Lights for a Touch of Magic As the days grow longer, create a magical ambiance for spring evenings with outdoor string lights or fairy lights. Drape them across your porch ceiling, railings, or even around potted plants for a whimsical touch. Solar-powered lights are a great option, as they’re energy-efficient and require no electrical outlets. String lights cast a warm, inviting glow, perfect for enjoying the outdoors after sunset. 6. Welcome Guests with a Spring-Themed Doormat Your doormat is the first thing guests see, so make it a spring sensation! Choose a doormat with a spring-themed design, message, or a colorful pattern that reflects the season.  For extra functionality, layer your spring doormat on top of a neutral coir mat. This way, you can enjoy the spring design while maintaining a durable base for wiping shoes. 7. Spring-Inspired Touches with Outdoor Decor Don’t forget the finishing touches! Personalize your porch with charming accents that echo the spirit of spring. Hang a colorful birdhouse to attract feathered friends.  Place a brightly painted watering can or a vintage watering pot filled with colorful blooms by the door.  For a touch of whimsy, a playful garden gnome can add a quirky touch. Spring signs with inspirational messages or playful sayings add another layer of personality. Consider placing a small potted herb garden on a side table, not only for visual interest but also for a touch of fresh flavor for spring recipes. 8. A Burst of Color with Painted Planters Elevate your potted plants by giving their planters a makeover. Paint them in cheerful spring colors that complement your door or your chosen color palette. Polka dots, stripes, or even floral stencils can add a playful touch.  For a rustic vibe, consider staining old wooden planters or using terracotta pots in natural hues. 9. A Touch of Whimsy with Wind Chimes Wind chimes dancing in the spring breeze add a touch of melody and visual interest to your porch. Choose chimes with a nature theme, like those adorned with butterflies, dragonflies, or colorful glass droplets. The tinkling sound creates a peaceful ambiance, perfect for relaxing on your porch with a good book. 10. Welcome the Season with a Spring Banner Make a bold statement with a spring-themed banner displayed proudly on your porch. Banners come in various sizes, materials, and designs. Choose one with a cheerful message, a vibrant floral pattern, or a silhouette of springtime creatures like birds or bunnies. Hang it above your doorway, across the porch railing, or on a side wall for a touch of springtime cheer. 11. Springtime Scents with Outdoor Candles Engage another sense and create a truly inviting atmosphere with outdoor candles. Opt for citronella candles for a dual purpose – they’ll keep pesky mosquitoes at bay while filling the air with a fresh, citrusy scent.  Jar candles with pastel-colored wax or candles housed in decorative holders add a touch of ambiance and elegance. Light them up as the evening sets in for a magical touch. 12. A Natural Welcome with a Springtime Coir Mat Coir mats are a natural and eco-friendly choice for your porch.  … Read more

21 Easy and Lovely Spring Centerpieces to Breathe New Life into Your Home

Spring Centerpieces

Spring has sprung! With the arrival of warmer weather and blooming flowers, there’s a natural desire to bring the vibrant energy of the outdoors into our homes.  One of the simplest ways to achieve this is by creating a beautiful spring centerpiece for your table. Centerpieces not only add a festive touch to your gatherings but also help set the tone for a meal.  The best part? You don’t need to be a floral arranging expert to create stunning centerpieces. Here are 21 easy and lovely spring centerpiece ideas that are perfect for any occasion: 1. Blooming Bulb Garden: Witness the Magic of Gradual Growth This centerpiece is a gift that keeps on giving. Materials: Step-by-Step Instructions: The beauty of this centerpiece lies in witnessing the gradual growth process.  Within a few weeks, you’ll be rewarded with stunning blooms emerging from the soil, adding a touch of springtime magic to your table. 2. Mason Jar Magic: Simple Elegance in a Rustic Vessel Mason jars are a versatile and budget-friendly option for creating a charming centerpiece. Materials: Step-by-Step Instructions: This centerpiece is incredibly easy to customize. Use different colored mason jars or wildflowers from your garden for a unique touch. The beauty of mason jars lies in their simplicity and elegance, making them a perfect vessel for showcasing the delicate beauty of spring flowers. 3. Rustic Wreath Centerpiece: A Touch of Nature’s Charm Embrace the natural beauty of spring with this rustic wreath centerpiece. Materials: Step-by-Step Instructions: 4. The Citrus Celebration: A Burst of Color and Refreshment This centerpiece is perfect for a light and airy spring brunch. Materials: Step-by-Step Instructions: This centerpiece is not only visually appealing but also adds a delightful citrusy aroma to your table. The vibrant colors of the citrus fruits are sure to brighten up your space and add a touch of spring cheer. 5. Nest & Egg Extravaganza: A Playful Easter-Themed Centerpiece Celebrate the springtime tradition of Easter with this adorable centerpiece. Materials: Step-by-Step Instructions: This playful centerpiece is perfect for an Easter brunch or any spring gathering. It’s a fun way to incorporate traditional Easter elements into your table decor and is sure to be a conversation starter among your guests. 6. The Candlelit Garden: A Romantic and Elegant Ambiance Create a soft and romantic atmosphere with this candlelit garden centerpiece. Materials: Step-by-Step Instructions: The combination of flickering candlelight, lush greenery, and delicate flowers creates a truly enchanting centerpiece. This is a perfect choice for an intimate spring dinner or a special occasion. 7. The Succulent Symphony: Modern Simplicity with Low Maintenance For a modern and low-maintenance centerpiece, consider the beauty of succulents. Materials: Step-by-Step Instructions: Succulents are a popular choice for centerpieces due to their unique beauty and low-maintenance requirements. They require minimal watering and can thrive indoors for extended periods. This centerpiece is a perfect choice for busy individuals who still want to enjoy the beauty of a living centerpiece on their table. 8. The Butterfly Bonanza: A Whimsical Flight of Fancy This centerpiece is perfect for a baby shower, children’s birthday party, or any occasion that calls for a touch of whimsy. Materials: Step-by-Step Instructions: This whimsical centerpiece will surely capture the hearts of your guests, young and old alike. 9. The Birdhouse Bonanza: A Touch of Country Charm Embrace the spirit of spring with a charming birdhouse centerpiece. Materials: Step-by-Step Instructions: This charming centerpiece is a delightful way to bring a touch of the outdoors to your table. 10. The Rustic Chandelier: Recycled Elegance with a Spring Twist Turn recycled materials into a unique and eye-catching centerpiece. Materials: Step-by-Step Instructions: This unique centerpiece is a conversation starter and a great way to showcase your creativity. 11. The Citrus & Herb Garden: A Fragrant and Refreshing Symphony Indulge your senses with a centerpiece that combines the beauty of flowers with the refreshing aroma of herbs. Materials: Step-by-Step Instructions: This centerpiece is not only visually appealing but also provides a source of fresh herbs for your culinary creations. 12. The Teacup Trio: A Vintage Touch with Spring Flair Embrace vintage charm with a whimsical teacup centerpiece. Materials: Step-by-Step Instructions: This vintage-inspired centerpiece is perfect for an afternoon tea party or a baby shower. 13. The Upcycled Basket Bonanza: A Sustainable and Charming Centerpiece Give new life to a pre-loved basket with this creative centerpiece idea. Materials: Step-by-Step Instructions: This upcycled centerpiece is a fun way to showcase your eco-conscious style and creativity. 14. The Bookworm’s Delight: A Literary Springtime Escape Incorporate your love of literature into a unique centerpiece. Materials: Step-by-Step Instructions: This unique centerpiece is perfect for a book club gathering or a celebration of spring. 15. The Honeycomb Haven: A Buzzing with Springtime Delight This centerpiece offers a touch of rustic sweetness. Materials: Step-by-Step Instructions: This whimsical centerpiece is perfect for a spring brunch or a celebration focused on the beauty of pollinators. 16. The Rainbow Wreath: A Burst of Colorful Cheer Embrace the vibrancy of spring with a rainbow-hued wreath. Materials: Step-by-by Instructions: This cheerful centerpiece is sure to brighten up your table and add a playful touch to any spring gathering. 17. The Floating Candle Oasis: A Serene and Elegant Display Create a calming and elegant atmosphere with a floating candle centerpiece. Materials: Step-by-Step Instructions: This serene centerpiece creates a beautiful reflection of flickering candlelight and delicate flowers, perfect for an intimate dinner or a relaxing evening gathering. 18. The Spring Vegetable Patch: A Whimsical and Functional Centerpiece Embrace the spirit of spring with a vegetable garden-inspired centerpiece. Materials: Step-by-Step Instructions: This unique centerpiece not only adds a touch of springtime charm but also provides a conversation starter and a reminder of the beauty of fresh produce. 19. The Rustic Lantern Light: A Warm and Inviting Glow Create a warm and inviting atmosphere with a rustic lantern centerpiece. Materials: Step-by-Step Instructions: This rustic centerpiece creates a warm and inviting atmosphere, perfect for an evening gathering or a romantic dinner. 20. The Feathered Nest Fantasia: A Touch of … Read more

17 Simple Ways to Add Spring to Your Home & Breathe in the Fresh Air

Ways to Add Spring to Your Home

Spring whispers promises of renewal and fresh beginnings. As the days lengthen, the air warms, and nature bursts into vibrant color, it’s only natural to crave a change within our homes as well.  Bringing the essence of spring indoors can not only elevate your space but also uplift your mood and create a more inviting atmosphere. Here are 17 simple ways to add a touch of springtime charm to your home: 1. Spring Cleaning for a Fresh Start: Spring is the perfect time for a deep clean, a chance to shed the winter blues and dust along with them.  Decluttering your space not only creates a sense of order but also allows natural light to flow more freely, enhancing the feeling of spaciousness.  Tackle areas like windows, which have likely accumulated dust and grime over the winter months, allowing the sunshine to pour in.  Revitalize furniture with a good dusting or polishing, and don’t forget to declutter shelves and countertops to create a sense of calm and organization.  A clean and organized space can have a profound impact on your mental well-being, fostering a sense of peace and clarity. 2. Blooms & Botanical Bliss: There’s nothing quite like the transformative power of fresh flowers to add a touch of spring to your home. The vibrant colors and delicate scents instantly elevate the atmosphere and create a sense of connection with nature.  Don’t be discouraged if you’re on a budget.  Seasonal blooms from your local farmer’s market or grocery store can be just as delightful.  Opt for cheerful tulips, fragrant hyacinths, or a bouquet of mixed spring flowers to brighten a corner of your living room or kitchen. For a more long-lasting touch of spring, consider incorporating houseplants into your decor.  Plants not only add a touch of greenery and vibrancy but also improve air quality and contribute to a sense of well-being.  Choose low-maintenance plants like succulents, snake plants, or spider plants that thrive indoors with minimal care. 3. Lighten Up with Color & Textiles: Color has a powerful effect on our mood and the overall atmosphere of a space.  As the days grow longer and brighter, consider swapping out wintery neutrals for lighter and airier colors that reflect the fresh energy of spring.  Pastel shades, light blues, and pale yellows evoke feelings of calmness and serenity, while pops of vibrant green or coral can add a touch of playful energy. Refresh your living space by updating throw pillows and blankets with spring-inspired patterns or fabrics.  Light and airy linen or cotton throws add texture and warmth while staying cool in the warming temperatures.  Swap out dark, heavy curtains for lighter options that allow natural light to flood the room.  Even a small change in color or texture can make a significant impact on the overall feel of your space. 4. Open the Windows & Let the Sunshine In: Spring is a time to embrace fresh air and natural light.  Whenever possible, open your windows to allow the invigorating spring breeze to circulate through your home.  Natural light not only brightens your space but also has  mood-boosting effects.  Studies have shown that exposure to sunlight can elevate your mood, increase energy levels, and improve sleep quality. So, throw open the curtains, let the sunshine in, and enjoy the invigorating energy of spring. 5. Scentsational Spring Scents: Our sense of smell plays a powerful role in how we experience our surroundings.  Certain scents can evoke emotions, memories, and even create a specific ambiance.  Embrace the spirit of spring by incorporating fresh and evocative scents into your home.  Citrus aromas like lemon, grapefruit, or bergamot are invigorating and uplifting. Light and floral scents like lavender, rose, or lily of the valley create a sense of calm and peace. There are many ways to infuse your home with these delightful spring scents.  Candles are a popular choice, but diffusers, essential oils, or even scented drawer liners can subtly add a touch of spring fragrance to your home.  Choose scents that resonate with you and create a welcoming and uplifting atmosphere. 6. Spring Spruce Up with Decorative Touches: Spring is the perfect time to add a touch of seasonal whimsy to your decor.  However, avoid overwhelming your space.  The key is to incorporate spring-themed elements subtly and thoughtfully. Hang a beautiful wreath adorned with pastel flowers on your front door to welcome guests with a touch of spring cheer.  Create a charming centerpiece for your dining table using colorful Easter eggs, seasonal branches, or a collection of colorful candles.  Swap out wintery artwork for pieces with springtime themes like landscapes, floral prints, or even photographs of nature in bloom. The possibilities are endless! Remember, the best spring decor often comes from personal touches.  Use items you already own, like seashells or colorful glass vases, and breathe new life into them with a splash of spring color. You can give old picture frames a fresh coat of paint in a cheerful hue and use them to display spring-themed artwork or photos. Don’t be afraid to get creative and personalize your spring decor to reflect your style and what brings you joy. 7. Embrace the Sounds of Spring: Our sense of hearing also plays a role in creating a spring atmosphere.  Open your windows and let the sounds of spring fill your home: the chirping of birds, the rustling of leaves in the breeze, or the gentle pitter-patter of spring rain.  These natural sounds can be incredibly soothing and have a calming effect on the mind. If you live in an urban environment or simply want to amplify the sounds of spring, consider playing nature sounds like birdsong or the gentle flow of a stream in the background. Alternatively, classical music can also create a peaceful and uplifting atmosphere.  Choose music that evokes feelings of serenity and joy, and let the sounds transport you to a springtime oasis. 8. Embrace Natural Textures: Spring is a time of awakening and growth. Weave the essence of the … Read more

17 Beautiful Spring Mantel Decorating Ideas

17 Beautiful Spring Mantel Decorating Ideas

Spring whispers promises of renewal and awakens a desire to bring the vibrant energy of the outdoors into our homes. The mantel, a natural focal point in many living spaces, presents the perfect canvas for showcasing the beauty of the season. Here are 17 beautiful spring mantel decorating ideas to inspire you and transform your mantel into a breathtaking display: 1. Blooming Beauty: A Symphony of Spring Flowers Fresh flowers have the transformative power to instantly elevate a space, and spring offers a dazzling array of blooms to choose from. Tulips, with their vibrant colors and elegant forms, are a classic spring choice. Hyacinths, with their intoxicating fragrance and clusters of delicate blooms, add a touch of sweetness. Daffodils, symbolizing rebirth and new beginnings, bring a cheerful burst of sunshine to your mantel. Don’t be limited to just flowers! Incorporate greenery and branches for added texture and dimension. Eucalyptus branches with their silvery-green hue create a calming effect, while forsythia branches bursting with yellow blooms add a touch of sunshine. Arrange your flowers and greenery in a beautiful vase or ceramic planter. Cluster them in the center of the mantel or create a cascading display on either side for a dramatic effect. 2. Rustic Elegance: Natural Elements Take Center Stage For a timeless and elegant look, embrace the beauty of natural materials. Pinecones, with their textural richness, add a touch of the outdoors. Arrange them in a rustic wooden bowl or basket, or scatter them amongst branches and greenery for a natural aesthetic. Woven baskets, in various shapes and sizes, offer both functionality and visual interest. Fill them with colorful spring blooms, foraged feathers, or decorative moss balls. Birdhouses, nests, and small animal figurines add a touch of whimsy and evoke the feeling of springtime renewal. When arranging your natural elements, create a balanced composition with varying heights and textures. Group taller branches or decorative figurines in the back, while placing smaller items like pinecones and nests towards the front for a visually pleasing display. 3. Citrus Splash: A Burst of Color and Freshness Spring is a time for fresh starts and renewed energy. Capture this spirit with a burst of citrus color on your mantel. Lemons, limes, and oranges, with their vibrant hues and refreshing scent, are perfect for a cheerful springtime display. Arrange them in a colorful ceramic bowl, a rustic wooden crate, or a woven tray for a touch of texture. For a more long-lasting display, consider incorporating high-quality faux citrus fruits. They offer the same visual impact without the worry of spoilage. Add a touch of whimsy with decorative butterflies or ladybugs nestled amongst the citrus fruits. This citrus-inspired display is guaranteed to bring a burst of sunshine and positive energy to your living space. 4. Pastel Perfection: A Soft and Serene Springtime Scene Pastel colors evoke feelings of calmness and serenity, making them perfect for creating a peaceful spring mantel display. Light pinks, soft blues, and delicate lavenders create a soothing and inviting atmosphere. Introduce these colors through pastel-colored candles in various sizes, ceramic vases filled with delicate spring flowers, or a collection of decorative Easter eggs in various pastel shades. Feathers, with their soft texture and airy quality, add a touch of whimsy to your pastel palette. Arrange them in a vase or scatter them gently around your display. Soft fabric flowers, in pastel shades and delicate textures, create a romantic and charming ambiance. Springtime artwork depicting blooming flowers or peaceful landscapes can complete your pastel haven. Remember to coordinate the color scheme of your mantel display with the existing colors in your living space to create a cohesive and inviting atmosphere. 5. Springtime Soiree: Celebrate with Whimsical Touches Spring is a season of celebration and new beginnings. Embrace the festive spirit with playful elements on your mantel.  Colorful Easter eggs, in various patterns and sizes, add a touch of whimsy and tradition to your display. Arrange them in a decorative bowl, nestle them amongst greenery, or create a playful Easter egg garland to drape across the mantel. Bunny figurines, with their charming presence, are a delightful addition to your springtime soiree. For an extra touch of festivity, create a spring-themed garland or banner using colorful fabric, paper, or even natural materials like dried flowers or feathers.  Remember, while incorporating playful elements, it’s important to maintain a sense of balance on your mantel. Avoid overcrowding the space and ensure your whimsical touches complement each other for a cohesive and visually appealing display. 6. Monochromatic Magic: A Sophisticated Take on Spring Decor For a modern and sophisticated take on spring mantel decorating, consider a monochromatic color scheme. Choose a single spring color, like a vibrant green, a cheerful yellow, or a soft pink, and use variations of that color throughout your display. This creates a visually unified and elegant look. A monochromatic spring mantel display is a perfect choice for those who appreciate a clean and modern aesthetic.  By utilizing variations in texture, scale, and a touch of shine, you can create a visually stunning and sophisticated display that celebrates the beauty of spring. 7. DIY Delight: Showcase Your Creativity with Handmade Touches For a truly personalized touch, incorporate handcrafted elements into your spring mantel display.  The possibilities are endless! Don’t be afraid to upcycle old items or use natural materials like branches, stones, or pinecones in your DIY projects.  The satisfaction of creating your own spring decor adds a personal touch and allows you to showcase your creativity on your mantel. 8. Rustic Charm: A Touch of Farmhouse Freshness Channel the rustic charm of a farmhouse spring with natural elements and vintage accents. Galvanized metal buckets, weathered wooden crates, and chipped enamelware jugs add a touch of timeworn character. Fill them with colorful spring blooms, fragrant herbs in mason jars, or a collection of mismatched vintage watering cans. Woven placemats, positioned under decorative pitchers or vases, add a textural layer. String fairy lights across the back of the mantel for a touch of … Read more

13 Simple Yet Stunning Fall Mantel Decor Ideas to Welcome Autumn

Fall Mantel Decor Ideas

As the summer sun fades and crisp autumn air sets in, our homes beckon for a touch of cozy seasonal flair. The fireplace mantle, a natural focal point in many living spaces, presents a prime opportunity to embrace the beauty of fall. With a few simple and stylish touches, you can transform your mantle into a warm and inviting haven that celebrates the season’s rich colors and textures. This blog unveils 13 easy-to-implement fall mantle decor ideas that require minimal effort but deliver maximum impact. 1. Rustic Elegance with Pumpkins and Leaves Pumpkins and leaves are the quintessential symbols of fall, and incorporating them into your mantle decor is a timeless choice. Opt for a variety of pumpkins in different sizes, colors, and textures. Real pumpkins add a touch of natural beauty and a delightful fragrance, but high-quality artificial pumpkins offer a long-lasting and versatile option. Nestle them together on the mantle, creating visual interest with varying heights. To enhance the rustic charm, gather colorful fall leaves in shades of red, orange, and yellow. Scatter them loosely around the base of the pumpkins or create a bed of leaves for them to rest upon. You can also craft a simple burlap garland adorned with leaves or faux berries for a touch of whimsy. Layering is key! Arrange pumpkins at different levels and tuck leaves underneath for a more visually captivating display. 2. Warm and Inviting with Candles and Cozy Textiles Fall is all about creating a warm and inviting atmosphere in your living space. Candles play a crucial role in achieving this ambiance. Utilize candles in various sizes and styles – chunky pillars for a bold statement, delicate votives for a touch of elegance, or flickering tea lights for a soft, intimate glow. Strategically placing them along the mantle or nestled amidst the fall decor creates a warm and welcoming atmosphere. Don’t forget the power of cozy textiles! Drape a textured throw or a chunky knit blanket across the mantle for an extra layer of warmth and visual appeal. Opt for fall colors like burnt orange, deep red, golden yellow, and rich brown to complement your overall decor theme. Scatter some decorative knit pillows in similar hues on your couch or armchair for a cohesive look. 3. A Touch of Nature with Pinecones and Greenery Fall brings with it a bounty of natural beauty, and incorporating these elements into your mantle decor is a fantastic way to celebrate the season. Pinecones, with their rustic charm and unique textures, are a wonderful addition. Arrange them in a basket or bowl on the mantle, or scatter them individually in various sizes. For a pop of color, add branches adorned with vibrant fall berries or brightly colored autumn foliage. Embrace the natural bounty further by incorporating other elements like acorns, gourds, or stalks of wheat. These additions create a textured and visually interesting display that captures the essence of the season. 4. Modern Minimalism with Simple Lines and Metallic Accents Minimalist fall decor is a growing trend, and it can be surprisingly stunning. If you prefer a clean and sophisticated look, this approach might be perfect for your mantle. Opt for a few statement pieces with clean lines, like a single large pumpkin in a neutral color or a sleek metallic vase filled with fall-colored branches. Metallic accents in gold, silver, or copper can add a touch of glamor to your minimalist display. Consider metallic candle holders, decorative orbs, or picture frames to elevate the look.  Don’t forget the power of fall-colored candles or artwork with simple geometric patterns to complete the modern minimalist theme. 5. Festive Fun with Garland and Banners Fall is a time for celebration, and adding a touch of whimsy to your mantle decor can bring joy to your space. String up a fall-themed garland adorned with leaves, pumpkins, or acorns for a festive touch.  A burlap or fabric banner with a warm fall greeting like “Happy Harvest” or “Welcome Autumn” adds a personalized touch. Don’t be afraid to include playful elements like miniature scarecrows, small figurines, or even mini hay bales. These playful additions create a sense of fun and whimsy, perfect for families with young children. 6. Rustic Chic with Mason Jars and Fairy Lights Mason jars are incredibly versatile decor items, and they perfectly complement a fall theme. Use a variety of sizes and shapes for visual interest. Fill them with colorful fall foliage, faux berries, or pinecones for a touch of rustic charm. Alternatively, transform them into enchanting light fixtures by adding fairy lights inside. String them together or cluster them on the mantle for a warm and inviting glow. 7. A Touch of Harvest with Wheat Sheaves and Natural Textures Wheat sheaves embody the essence of fall’s harvest season. Place a single large sheaf upright against the back of the mantle for a dramatic statement. Alternatively, use smaller bundles tucked around pumpkins or candles for a more rustic touch.  Embrace the beauty of natural textures by incorporating elements like woven baskets, burlap runners, or wooden bowls to further enhance the harvest theme. 8. Rustic Elegance with Painted Gourds and Fall Florals Gourds come in various shapes and sizes, offering a unique canvas for creative expression. Paint them in classic fall colors like orange, red, and yellow, or embrace a more whimsical approach with polka dots, stripes, or even fall-themed patterns. Group them together for a vibrant display on the mantle. Fall blooms like mums, sunflowers, and bittersweet add a pop of color and life to your display. Arrange them in a rustic vase or a vintage watering can for a charming touch. 9. Natural Elegance with Branches and Artwork Fall foliage offers a breathtaking range of vibrant colors. Gather branches adorned with crimson leaves, golden yellows, or burnt oranges. Place them in a tall vase on the mantle for a statement piece, or use smaller branches scattered around pumpkins or candles for a touch of natural beauty. Elevate the look further by incorporating … Read more

13 Ways Baking Soda Can Work Wonders in Your Garden

Ways Baking Soda Can Work Wonders in Your Garden

For many of us, gardening is a source of joy and relaxation. But keeping our precious plants healthy can sometimes feel like a constant battle against pests, diseases, and less-than-ideal soil conditions. Thankfully, there’s a world of natural alternatives waiting to be explored! One such surprising hero in the garden is baking soda, a common pantry staple. Don’t relegate it just to the kitchen – baking soda boasts a surprising range of benefits for your plants. Let’s discuss 13 ways this household item can become your secret weapon for a thriving garden. 1. Natural Pest Control Tired of pesky insects munching on your precious greenery? Baking soda can be a lifesaver! Here’s how to target specific critters: 2. Fungal Disease Prevention Fungal diseases like powdery mildew can wreak havoc on your plants. Baking soda’s magic lies in its ability to raise the pH level, creating a less acidic environment that discourages fungal growth. Here’s how to create a baking soda fungicide spray: Remember, this solution is most effective as a preventative measure. Apply it regularly throughout the growing season, especially after periods of heavy rain or high humidity. 3. Soil pH Test Understanding your soil’s pH level is crucial for plant health. Different plants thrive in specific pH ranges. Baking soda can be used for a simple DIY test, though it’s not a substitute for a professional soil test: While this is a basic test, it can give you a starting point to determine if your soil might benefit from adjustments. 4. Boost Bloom for Certain Plants As mentioned earlier, baking soda can raise soil pH. This can be beneficial for plants that prefer alkaline soil, such as hydrangeas, begonias, and geraniums. Here’s how to use it to potentially encourage blooms: 5. Keep Cut Flowers Fresh The beauty of fresh cut flowers can brighten up any space. But keeping them looking vibrant can be a challenge. Baking soda can come to the rescue here as well! To extend the vase life of your cut flowers, mix a teaspoon of baking soda with a tablespoon of sugar in your flower vase. Fill the vase with lukewarm water and add your blooms. The sugar provides nourishment, while the baking soda helps regulate the water’s pH level, preventing the growth of bacteria that can shorten the lifespan of your flowers. 6. Deodorize Compost Piles Composting is a fantastic way to create nutrient-rich soil for your garden. However, sometimes compost piles can develop unpleasant odors. Baking soda can come to the rescue! Sprinkle a thin layer of baking soda over your compost pile every few weeks. This helps neutralize odors by absorbing ammonia, a common culprit behind compost smells. Remember, moderation is key. Too much baking soda can disrupt the delicate balance of microorganisms needed for successful composting. 7. Clean Garden Tools and Supplies Keeping your gardening tools clean and free of rust is essential for preventing the spread of disease and ensuring optimal performance. Baking soda is a gentle yet effective cleaning agent: 8. Extend the Life of Seeds While not a guaranteed method, some gardeners swear by using baking soda to improve seed germination and shelf life. Here’s how to try it: Important Note: There is limited scientific evidence to support this method’s effectiveness. It’s always best to follow the recommended storage guidelines for your seeds. 9. Control Powdery Mildew on Pumpkins Powdery mildew, a fungal disease, can cause white spots to form on the leaves of your pumpkin plants.  Baking soda can be a natural remedy: 10. Neutralize Salt Damage Winter road salt or accidental spills of de-icing products can harm your plants by raising soil salinity. Baking soda can help counteract this: To address mild salt damage, water your affected plants thoroughly with a solution of 1 tablespoon of baking soda per gallon of water. The baking soda helps to leach out some of the excess salt from the soil. In severe cases, soil replacement may be necessary. 11. Deter Unwanted Wildlife Certain animals can be a nuisance in the garden, munching on your precious plants. Baking soda can act as a deterrent for some critters: 12. Prevent Blossom End Rot Blossom end rot, a calcium deficiency, can cause the ends of fruits like tomatoes and peppers to develop dark, sunken spots. Baking soda may offer some help: 13. Clean Clay Pots Clay pots add a touch of rustic charm to your garden, but over time, white mineral deposits can form on their surfaces. Baking soda can help restore their beauty: Conclusion Baking soda is a versatile and affordable addition to your gardening arsenal.  It can be a natural alternative for pest control, fungal disease prevention, and even soil pH modification for specific plants. Remember, when using baking soda in your garden, “less is more.” Always test on a small area first and observe the results before widespread application. Now go ahead and embrace the power of natural solutions alongside traditional gardening practices, and watch your garden flourish!

13 Container Water Garden Ideas: Transform Your Space into a Miniature Oasis

Container Water Garden Ideas

Imagine stepping out onto your patio and being greeted by the gentle sound of trickling water, surrounded by vibrant aquatic plants. Container water gardens, also known as pond-in-a-pots, offer a delightful way to bring a touch of serenity and natural beauty to even the most compact outdoor spaces. They’re low-maintenance, surprisingly easy to create, and provide a habitat for a variety of colorful plants and even friendly fish. This guide will equip you with the knowledge and inspiration to create your very own container water garden. We’ll explore 13 unique container water garden ideas to spark your creativity and later discuss the essentials of setting up a thriving miniature pond. 13 Container Water Garden Ideas to Inspire You Let’s explore some creative container water garden ideas to personalize your miniature aquatic paradise: 1. The Classic Mini Pond This is a perfect starter project for beginners. It’s simple, elegant, and allows you to focus on the beauty and serenity of the water plants. Materials: Instructions: 2. The Vibrant Flower Pot Pond This design combines the beauty of aquatic plants with the charm of colorful flowering plants, creating a vibrant and visually interesting focal point on your patio. Materials: Instructions: 3. The Zen Water Garden Embrace tranquility with this minimalist design that incorporates natural elements for a calming and peaceful atmosphere. Materials: Instructions: 4. The DIY Water Fountain Pond Add a touch of movement and sound to your container water garden with a small water fountain. Materials: Instructions: 5. The Multi-Level Container Water Garden This design creates a cascading effect with multiple pots, perfect for showcasing a variety of aquatic plants with different height requirements. Materials: Instructions: 6. The Culinary Herb Haven: Turn your container water garden into a functional and flavorful addition to your patio by incorporating culinary herbs that thrive in moist environments. Materials: Instructions: 7. The Fairy Tale Frog Pond: Create a whimsical and enchanting miniature world for tiny amphibians with this design. Materials: Instructions: 8. The Mini Waterfall Paradise: Combine the soothing sound of trickling water with lush greenery for a truly relaxing outdoor retreat. Materials: Instructions: 9. The Container Water Garden Terrarium: Create a miniature underwater world under glass for a unique and captivating addition to your patio table or deck. Materials: Instructions: 10. The Recycled Container Water Garden: Upcycle an old container into a charming and eco-friendly miniature pond. Materials: Instructions: Remember: When using recycled containers, ensure they are made from a sturdy and waterproof material. Conduct a leak test before planting to identify any potential issues. 11. The Carnivorous Container: Intrigued by the fascinating world of carnivorous plants? Create a captivating container water garden featuring these unusual botanical wonders. Materials: Instructions: 12. The Container Water Garden Bonsai: Combine the serenity of a miniature water garden with the artistry of bonsai cultivation in this unique design. Materials: Instructions: 13. The Self-Contained Ecosystem: Create a miniature closed ecosystem within a sealed container, allowing you to observe the natural cycle of plants and tiny aquatic creatures thriving in a self-sustaining environment. Materials: Instructions: Remember: Closed terrariums require minimal maintenance but need to be monitored for proper humidity levels and potential mold growth. Conduct thorough research on the specific needs of the plants and tiny creatures you choose for your self-contained ecosystem. The Essentials of Creating a Container Water Garden Before going into specific designs, let’s establish the foundation for a healthy and visually stunning container water garden. Choosing the Right Container: Material: Selecting Suitable Plants: Types of aquatic plants: Preparing the Container: Caring for Your Container Water Garden Now that your container water garden is up and running, here are some key tips for keeping it healthy and thriving: Water Quality: Sunlight Exposure: Most aquatic plants prefer at least 6-8 hours of direct sunlight per day. However, monitor your container water garden and adjust placement if necessary to prevent excessive water temperature or plant stress. Algae Control: Fertilization: Aquatic plants generally don’t require frequent fertilization. However, you can use slow-release fertilizer tablets specifically formulated for aquatic plants according to the package instructions. Overwintering: In colder climates, bring your container water garden indoors before the first frost. You can either place it in a sunny location or allow the plants to go dormant in a cool, protected area. If keeping it indoors, provide some supplemental light to prevent leggy growth. Conclusion Container water gardens offer a charming and surprisingly low-maintenance way to add a touch of aquatic serenity to your outdoor space. With a little planning and these creative ideas, you can create your own miniature pond teeming with life and visual interest. So, unleash your creativity, choose your favorite design, and watch your container water garden flourish!

17 Creative DIY Ideas to Spruce Up Your Outdoor Space

DIY Ideas to Spruce Up Your Outdoor Space

Sunshine, fresh air, and a touch of creativity – isn’t that the perfect recipe for a rejuvenating escape in your own backyard? But sometimes, a plain patio or a bare patch of green can feel a little uninspired. That’s where DIY comes in! With a few simple projects and readily available materials, you can transform your outdoor space into a personalized oasis. Not only is DIY cost-effective, but it allows you to inject your unique style and create something truly special. So, grab your tools, unleash your inner artist, and get ready to bring the outdoors to life with these 17 creative DIY ideas: 1. Upcycled Tire Poufs: Comfy Seating with Eco-Conscious Flair Let’s be honest, old tires rarely find a glamorous second life. But with a little TLC, they can become the coziest addition to your patio or deck. Here’s what you need: Instructions: Tips & Variations: 2. Mason Jar Fairy Lights: Enchanting Illumination for Your Evenings String lights are lovely, but mason jars add a touch of whimsical charm to your outdoor ambiance. Gather these materials: Instructions: Tips & Variations: 3. Painted Rock Garden Markers: Functional and Fun Plant Identification Let your artistic side shine with these adorable plant markers! Here’s what you’ll need: Instructions: Tips & Variations: 4. Solar-Powered Wind Chimes: A Sustainable Symphony for Your Ears Wind chimes add a touch of melody to any outdoor space.  Take it a step further with this eco-friendly version: Instructions: Tips & Variations: 5. Herb Spiral Garden: A Space-Saving and Sustainable Herb Haven Fresh herbs add a delightful touch to any meal.  Grow your own with this beautiful and functional herb spiral: Instructions: Tips & Variations: 6. Bohemian Dream Catchers: Filter Your Dreams and Enhance Your Patio Materials: Instructions: Tips & Variations: 7. Painted Stepping Stones: A Colorful Path Through Your Garden Materials: Instructions: Tips & Variations: 8. DIY Fire Pit: Gather Around a Cozy Gathering Spot Materials: Instructions: Tips & Variations: 9. Recycled Tire Swing: A Nostalgic Addition for the Young (and Young at Heart!) Materials: Instructions: Tips & Variations: 10. DIY Outdoor Movie Screen: Transform Your Backyard into a Cinema Under the Stars Materials: Instructions (using PVC pipes): Instructions (using branches): Tips & Variations: 11. Upcycled Tin Can Planters: Give New Life to Cans and Add Color to Your Patio Materials: Instructions: Tips & Variations: 12. DIY Citronella Torches: Keep Mosquitoes at Bay with a Natural Glow Materials: Instructions: Tips & Variations: 13. DIY Hammock Stand: Relaxation Awaits Between Two Trees Materials: Instructions: Tips & Variations: 14. DIY Solar String Lights: Light Up Your Evenings with Eco-Friendly Charm Materials: Instructions: Tips & Variations: 15. DIY Bird Feeder: Attract Feathery Friends and Enjoy a Little Nature Show Materials: Instructions: Tips & Variations: 16. Recycled Wine Bottle Wind Chimes: A Sustainable Symphony for Your Ears Materials: Instructions: Tips & Variations: 17. DIY Pallet Bar: Upcycled Chic for Entertaining Outdoors Materials: Instructions: Tips & Variations: Conclusion These are just a few ideas to get your DIY juices flowing!  The beauty of these projects lies in their customizability.  Let your imagination run wild, experiment with colors, textures, and embellishments to create a truly unique outdoor space that reflects your personality.  There’s immense satisfaction in creating something beautiful and functional for your backyard. So, grab your tools, channel your inner artist, and get ready to breathe new life into your outdoor haven! Don’t forget to share your creations! We’d love to see your DIY masterpieces.  Snap a photo and share them in the comments section below.   Let’s inspire each other and create a community of outdoor oasis architects!

Easy DIY Solar Fountain in 1 Hour! With Aquatic Plants

Easy DIY Solar Fountain in 1 Hour!

Imagine the gentle sound of trickling water adding a touch of serenity to your garden or patio. Now imagine achieving that with a beautiful, eco-friendly solar fountain – and all in about an hour! This DIY solar fountain project is perfect for anyone who wants to add a charming focal point to their outdoor space without breaking the bank or spending a whole day on construction. It’s surprisingly easy to create, even for beginners, and the best part? It harnesses the power of the sun, so you can enjoy the calming sound of water without adding to your electricity bill. What You’ll Need: Step-by-Step Guide: 1. Prepping the Base (10 minutes) The first step is to find the perfect spot for your solar fountain. Remember, this little oasis needs sunshine! Choose a location in your garden or patio that receives several hours of direct sunlight throughout the day. This ensures optimal performance for your solar pump. Once you’ve chosen your sunny spot, make sure the ground is level. A wobbly fountain is not ideal, so use a shovel to even out any uneven patches of soil if necessary. Now, go ahead and place your larger pot in its designated location. 2. Creating a Raised Platform (15 minutes) Here’s the clever part that creates the perfect platform for your pump! Take your smaller pot and, like a magician about to reveal a surprise, flip it upside down! Place it gently in the center of your larger pot. This inverted pot will create a raised platform in the center of your fountain. Now, to ensure proper drainage and prevent water from pooling around the base of your raised platform, we need to fill the gap between the two pots. Grab your packing peanuts, gravel, or broken pieces of pottery (recycled!) and carefully fill the space between the inner and outer pots all the way up to the rim of the smaller, inverted pot. This creates a drainage layer that allows excess water to escape and prevents the soil from becoming waterlogged. 3. Planting and Decoration (20 minutes) Time to get creative and personalize your fountain! Fill your larger pot with potting soil, leaving a few inches of space at the top. This allows room for the water and prevents overflowing. Now, if you opted to include aquatic plants in your design, here’s your chance to add them! Choose plants that thrive in wet environments and are suitable for your climate. Gently dig holes in the potting soil and plant your chosen aquatic beauties. Water them lightly to help them settle in. Feeling particularly artistic? This is where you can unleash your inner designer! Use decorative elements like rocks, pebbles, or driftwood to create a natural and visually appealing landscape around the base of your plants. You can even get creative and add colorful glass stones or other decorative accents to personalize your fountain’s look. 4. Setting Up the Solar Pump (25 minutes) Before moving to this step, it’s always a good idea to consult the instructions that come with your specific solar fountain pump model.  However, most pumps follow a similar setup process. The solar pump will typically have a nozzle or sprayer attachment that determines the water flow pattern of your fountain.  Take a look at the different nozzle options and choose the one that creates the water effect you desire. Sparkling jets, gentle streams, or a cascading waterfall – the choice is yours! Once you’ve selected your nozzle, go ahead and attach it securely to the pump. Now, carefully place the pump in the center of the smaller pot, ensuring the water outlet faces upwards. Remember, the pump needs to be completely submerged in the water for it to function properly. 5. Positioning the Solar Panel (10 minutes) The solar panel is the heart of your eco-friendly fountain. It converts sunlight into energy, powering your pump and creating that mesmerizing flow of water. Locate the cord connecting the pump to the solar panel and ensure it has enough slack to reach its designated spot. Here comes sunshine hunting again! Find a location for the solar panel where it will receive direct sunlight for most of the day. Ideally, this should be close enough to the fountain for the cord to reach comfortably, but not positioned directly in the fountain’s spray zone to avoid potential damage. You might need to get a little creative depending on your chosen location.  Consider placing the solar panel on a stake specifically designed for this purpose (often sold separately), mounting it on a nearby wall using appropriate brackets, or even resting it on a flat surface like a patio table (as long as it receives enough sunlight). 6. Let There Be Flow! (5 minutes) Now for the moment of truth! Fill the larger pot with water until it reaches the desired level. The water level should be high enough to completely submerge the pump but low enough to leave some space at the top to prevent overflowing. On a sunny day, with everything properly connected and positioned, your DIY solar fountain should spring to life automatically! The solar panel will convert sunlight into energy, powering the pump to draw water and create a beautiful water flow. Congratulations!  In just about an hour, you’ve transformed a simple pot into a charming and eco-friendly focal point for your outdoor space. Adding Pond Water Plants to Your Solar Fountain While not essential for the functionality of your solar fountain, incorporating pond water plants can elevate its aesthetic and create a more natural ecosystem. Here’s what to consider if you choose to add some aquatic flora to your DIY creation: Choosing the Right Plants: Planting Options: Plant Care: Additional Tips: Bonus Tips and Tricks: Conclusion With this easy DIY project, you’ve created a beautiful and sustainable addition to your outdoor space. Enjoy the calming sound of trickling water, the visual interest of a water feature, and the satisfaction of knowing you’ve harnessed the power of the sun! Feel … Read more

13 Best Climbing Vegetables for Vertical Gardening

Vertical Gardening: 13 Vegetables that Love to Climb

Vertical gardening has exploded in popularity in recent years, offering a clever solution for maximizing garden space, especially in urban environments.  This innovative approach not only allows you to cultivate a bountiful harvest in a limited area, but it also boasts several other advantages. Vertical gardens improve air circulation, create a visually stunning display, and can even deter certain pests. One of the most rewarding aspects of vertical gardening is the ability to grow climbing vegetables.  These vining plants, with a little help, can be trained to ascend trellises, fences, or netting, maximizing their yield and minimizing the ground space they occupy.  Let’s explore 13 fantastic climbing vegetables that will thrive in your vertical garden: 1. Pole Beans (Green Beans, Kidney Beans, etc.) Pole beans are a classic choice for vertical gardens.  These easy-to-grow, prolific producers offer a delicious and nutritious harvest throughout the season.  Pole beans, unlike their bush bean counterparts, boast a vining growth habit, sending out long runners that readily grasp onto any available support.  Trellises, fences, or even sturdy netting are all suitable structures for your pole bean plants. Planting pole beans in your vertical garden is straightforward.  Sow seeds directly at the base of your chosen support structure, ensuring a depth of about 1 inch.  Space your seeds according to the specific variety you’ve chosen, typically around 4-6 inches apart.  As the seedlings emerge, gently guide their tendrils to wrap around the support.  For optimal results, maintain consistent moisture in the soil and provide at least 6-8 hours of sunlight daily. There are a multitude of pole bean varieties available, each offering a slightly different flavor profile and maturity time.  Popular choices for vertical gardens include Kentucky Wonder (classic green bean), Scarlet Runner (vibrant red bean with edible pods), and Royal Burgundy (purple bean with a nutty flavor). 2. Cucumbers Cucumbers are another fantastic addition to your vertical garden.  These refreshing and space-saving vegetables add a delightful crunch to salads and sandwiches.  Cucumber plants, like pole beans, possess a vining growth habit, making them ideal candidates for vertical cultivation.  Trellises or netting are the preferred support structures for cucumbers, allowing the vines to climb freely and produce a bountiful harvest. Planting cucumbers in your vertical garden is similar to pole beans.  Sow seeds directly at the base of your support, ensuring a depth of about ½ inch.  Space your seeds  12-18 inches apart to allow for proper vine growth.  Once seedlings emerge, train their tendrils to grasp onto the support structure.  Cucumbers thrive in warm temperatures and require consistent moisture.  Water deeply and regularly, especially during hot weather. When selecting cucumber varieties for your vertical garden, consider options with smaller fruit size.  Lemon cucumbers, for instance, are compact and prolific, making them well-suited for vertical spaces.  Other popular choices include Burpee Hybrid II (disease-resistant and high-yielding) and Spacemaster (climbing variety perfect for limited space). 3. Tomatoes (Indeterminate Varieties) Indeterminate tomatoes, unlike their bush counterparts, boast a vining growth habit, making them ideal for vertical gardens. These versatile vegetables offer the joy of enjoying fresh, homegrown tomatoes throughout the season.  Indeterminate tomato plants can grow quite tall, so a sturdy support system is crucial.  Sturdy trellises or large tomato cages are ideal for these vigorous climbers. Planting indeterminate tomatoes in your vertical garden requires proper staking or caging from the outset.  Insert your chosen support structure deeply into the soil before planting your tomatoes.  Sow seeds or transplant seedlings at the base of the support, ensuring a depth of about 6-8 inches.  As your tomato plants grow, gently guide their stems to twine around the support structure.  Regular pruning and pinching off suckers (offshoots that grow between the main stem and branches) will encourage better fruit production. There are a vast number of indeterminate tomato varieties available, each offering a unique flavor profile and maturity time.  For vertical gardens, consider cherry tomato varieties like Sungold (sweet and prolific) or Black Cherry (deep red with a rich flavor).  Other popular choices include Brandywine Red (large, heirloom variety) and Big Boy (high-yielding and disease-resistant). 4. Peas (Snap Peas, Snow Peas) Peas are a delightful cool-season crop that thrives in vertical gardens.  These climbing vegetables, with their delicate tendrils, add a touch of elegance to your vertical space while offering a delicious and nutritious harvest.  Snap peas and snow peas are the preferred varieties for vertical gardens due to their manageable size and climbing ability.  Lightweight trellises or netting are suitable support structures for these delicate plants. Planting peas in your vertical garden is quite simple.  Sow seeds directly at the base of your chosen support, ensuring a depth of about 1-2 inches.  Space your seeds according to the specific variety, typically 2-3 inches apart.  Peas prefer cooler temperatures, so aim for planting in early spring or late fall depending on your climate.  Maintain consistent moisture in the soil, particularly during germination and pod development. When selecting pea varieties for your vertical garden, consider options with shorter maturity times.  Sugar Snap peas, for instance, are a popular choice due to their sweetness and quick growth cycle.  Other suitable varieties include  Dwarf Snow Peas (compact and prolific) and Alderman ( shelling pea with excellent yields). 5. Melons (Cantaloupe, Honeydew) Melons might seem like an unconventional choice for vertical gardens, but with proper support, they can be a rewarding addition to your climbing vegetable repertoire.  Important to note:  Growing melons vertically requires a sturdy support system due to the weight of the fruit.  Heavy-duty trellises or a combination of trellis and slings/hammocks are necessary to prevent the melons from breaking the vines. Planting melons in your vertical garden requires careful planning and a strong support structure.  Sow seeds directly at the base of the trellis, ensuring a depth of about ½ inch.  Space your seeds  36-48 inches apart to allow for proper vine growth.  Once seedlings emerge, train their tendrils to grasp onto the support structure.  Melons are heat-loving plants and require consistent moisture.  Water deeply and regularly, especially during … Read more