Pansies Drooping or Wilting? Here’s How to Bring Them Back to Life

Pansies Drooping or Wilting?

Pansies are cheerful little flowers that brighten up gardens and containers with their vibrant blooms. These cool-season beauties are known for their resilience, but even the sturdiest pansy can experience drooping or wilting. If you notice your pansies looking a little worse for wear, don’t despair! With a little detective work and some TLC, you can often revive them and get them back to their flowering glory. Understanding Pansies: Their Needs and Preferences Before we discuss the reasons behind drooping pansies, let’s take a moment to understand these charming flowers. Pansies (Viola x wittrockiana) are cool-season annuals or biennials, depending on the variety. They thrive in temperatures between 40-70°F (4-21°C) and prefer well-drained soil that stays consistently moist. Pansies are light lovers, needing at least 6 hours of direct sunlight daily to produce abundant blooms. The Culprits Behind Wilting Pansies Several factors can contribute to drooping pansies. Identifying the root cause is crucial for taking the right steps to revive them. Here are the most common culprits: Bringing Your Pansies Back to Life: A Step-by-Step Guide Now that you know the potential culprits, let’s get down to reviving your drooping pansies! Assess the Cause: The first step is to determine the reason behind your pansies’ wilting. Here’s how to use the information from the previous section to diagnose the issue: Solutions Based on Cause: Once you’ve identified the cause, it’s time to take action! Here’s a tailored approach to revive your pansies: General Care Tips for Healthy Pansies: While addressing the specific cause is crucial, here are some general care tips to promote healthy pansies that are less susceptible to wilting: Preventing Drooping Pansies in the First Place An ounce of prevention is worth a pound of cure! Here are some proactive steps you can take to minimize the chances of your pansies wilting: When to Consider Replacing Your Pansies Unfortunately, despite your best efforts, there might be situations where reviving your pansies is not possible. Here are some signs that replacement might be necessary: Wrapping Up Pansies are delightful flowers that add a pop of color to any garden or container. By understanding their needs and addressing potential causes of wilting, you can revive drooping pansies and enjoy their cheerful blooms for longer. Remember, with a little TLC and proactive care, you can keep your pansies happy and thriving throughout the cool season!

Does Cauliflower Regrow After Cutting? A Gardener’s Guide to Harvesting This Versatile Veggie

Does Cauliflower Regrow After Cutting?

Cauliflower, with its beautiful white florets and mild, slightly nutty flavor, is a popular vegetable enjoyed around the world. Home gardeners often wonder if they can get multiple harvests from a single cauliflower plant, similar to some leafy greens. This article dives into the fascinating world of cauliflower growth and explores the possibilities of secondary harvests. Understanding the Nature of Cauliflower: An Annual Plant Cauliflower belongs to the Brassicaceae family, also known as the cruciferous vegetables. This family includes other favorites like broccoli, cabbage, and Brussels sprouts. Unlike some perennial vegetables that return year after year, cauliflower is an annual plant. This means it completes its entire life cycle, from seed to flower to seed production, within a single growing season. A cauliflower plant consists of three main parts: The Main Harvest: Enjoying the Cauliflower Crown The primary purpose of growing cauliflower is to harvest the head. When the head reaches maturity, it becomes firm and white, with tightly packed florets. The ideal size for harvesting depends on the variety, but generally, a cauliflower head should be 6-8 inches in diameter. Here are some tips for harvesting the main head of cauliflower: Once the main head is harvested, the question arises: can you get more cauliflower from the same plant? Secondary Harvest: A Chance for Bonus Florets Unlike its close relative, broccoli, which readily produces side shoots after the main head is harvested, cauliflower is less likely to offer a substantial secondary harvest. This is because cauliflower focuses its energy on developing the central head, leaving less for lateral growth. However, there’s still a chance for some additional cauliflower florets after the main harvest. Here’s what you can expect: Making the Most of Your Cauliflower Plant: Beyond the Head While the main head is the most prized part of the cauliflower plant, don’t discard the remaining leaves and stem! These parts are also edible and can be used in various culinary ways. Here are some recipe ideas for using cauliflower leaves and stems: Optional: Saving Seeds for Future Planting If you’d like to continue your cauliflower adventure beyond the current season, you can save seeds from your mature cauliflower plant. Here’s how: Important Note: Saving seeds is only recommended for open-pollinated cauliflower varieties. Factors Affecting Secondary Harvest Potential While the chances of a significant secondary harvest with cauliflower are lower compared to broccoli, several factors can influence the likelihood of getting some bonus florets: Techniques to Encourage Secondary Growth While there’s no guaranteed way to get a substantial secondary harvest from cauliflower, some techniques might encourage some additional florets: Important Note: When attempting techniques to encourage secondary growth, prioritize the overall health of the plant. If the plant appears stressed, it’s best to focus on maintaining its health rather than forcing additional growth. Beyond the Harvest: Enjoying the Journey Growing your own cauliflower, even if the secondary harvest is modest, offers a rewarding experience. Here are some additional tips to make the most of your cauliflower adventure: Wrapping Up When you understand the growth cycle of cauliflower and manage expectations, you can enjoy a bountiful harvest and explore the versatility of this delicious vegetable. Remember, even if the secondary harvest is limited, the journey of growing your own cauliflower is a rewarding and educational experience.

Bitter Swiss Chard? 7 Causes and How to Fix the Problem

Bitter Swiss Chard

Swiss chard, with its vibrant green leaves and colorful stalks, is a versatile leafy green vegetable prized for its mild, earthy flavor and impressive nutritional profile. However, sometimes you might encounter a batch of Swiss chard that tastes unpleasantly bitter. Don’t despair! This bitterness has several potential causes, and with a little knowledge, you can easily fix the problem and enjoy the full flavor potential of this delicious veggie. What Triggers the Bitterness in Swiss Chard? Swiss chard has a naturally occurring compound called geosmin, which contributes slightly to its flavor profile. This bitterness is usually mild and pleasant, but certain factors can intensify it. Let’s look into the seven main culprits behind bitter Swiss chard: 1. Stressful Growing Conditions Swiss chard thrives in cool, moist environments. When stressed by hot weather, lack of water, overcrowding, or bolting (flowering), the plant produces more geosmin, leading to bitter leaves. Here’s how these stressors manifest: Solutions for Stressful Growing Conditions: 2. Harvest Time Matters The age of Swiss chard leaves significantly impacts their taste. Here’s what to consider: Solutions for Harvest Time Issues: 3. Variety While most Swiss chard varieties have a similar flavor profile, some might naturally have a slightly more bitter taste. This bitterness is usually mild and a matter of personal preference. Don’t hesitate to experiment with different varieties to find your favorite. Solution for Variety 4. Cooking Method Plays a Role Overcooking Swiss chard can intensify its bitterness. Here’s how cooking techniques can affect flavor: Solutions for Cooking Method: 5. Soil Conditions Can Affect Taste Nutrient deficiencies, particularly nitrogen deficiency, can contribute to bitterness in Swiss chard. Here’s how soil plays a role: Solutions for Soil Conditions: 6. Watering Issues: Too Much or Too Little Both underwatering and overwatering can negatively impact the taste of Swiss chard: Solutions for Watering Issus: 7. Contamination (Less Likely Cause) In rare cases, Swiss chard bitterness might be caused by pest infestation or disease. However, this is less likely than the previously mentioned factors. Regularly inspect your plants for signs of pests or diseases and address them organically whenever possible. Solutions for Contamination Issues Enjoying Delicious Swiss Chard: Recipes and Tips Now that you’re armed with the knowledge to prevent and fix bitter Swiss chard, here are some tips and recipe ideas to help you enjoy this versatile vegetable: Recipe Ideas: Wrapping Up Swiss chard is a delicious and nutritious leafy green that deserves a place in your garden and on your plate. However, you need to understand the factors that contribute to bitterness and implement the right solutions to ensure that your Swiss chard dishes are consistently flavorful and enjoyable. So, don’t be discouraged by the occasional bitter encounter! With a little know-how, you can transform even the most bitter Swiss chard into a delightful culinary experience.

Tomato Plant Stems Turning Purple: 7 Causes and How to Fix

Tomato Plant Stems Turning Purple

Have you noticed a disconcerting purple hue creeping up the stems of your beloved tomato plants? Don’t panic just yet! While purple stems in tomato plants can be a cause for concern, it doesn’t necessarily spell disaster. This article will highlight seven main reasons why your tomato plant stems might be turning purple, and equip you with the knowledge to address the issue and get your plants thriving again. Understanding the Significance of Color in Plants Plants rely on a complex interplay of pigments to function. Chlorophyll, the green pigment, plays a vital role in photosynthesis, the process by which plants convert sunlight into energy. However, plants also contain anthocyanins, pigments that contribute to the vibrant reds, purples, and blues we see in fruits, flowers, and sometimes even stems. 7 Reasons Behind Purple Stems in Tomato Plants Here are some common reasons your tomato steps are turning purple and the possible solutions: 1: Nutrient Deficiency (Phosphorus Deficiency Being the Main Culprit) The most common reason for purple stems in tomato plants is a deficiency in phosphorus, a crucial nutrient for plant growth and development. Phosphorus plays a key role in various plant functions, including root development, energy transfer, and flower and fruit production. When phosphorus is in short supply, plants struggle to produce chlorophyll, leading to the green pigment being masked by anthocyanins, resulting in the characteristic purple coloration. Symptoms of phosphorus deficiency, in addition to purple stems, include: Solutions for Nutrient Deficiency (Phosphorus Deficiency): 2: Cool Temperatures A temporary dip in temperature, particularly during the night, can also trigger purpling in tomato stems. This is a natural response by the plant to protect itself from cold stress. Anthocyanins are thought to act as a sort of antifreeze, helping to regulate cell temperature and protect plant tissues. While the purple coloration may be alarming, it’s usually a temporary response and doesn’t necessarily harm the plant. Solutions for Cool Temperatures: 3: Genetics Believe it or not, some tomato varieties naturally have purple or anthocyanin-rich stems. These varieties are perfectly healthy and will still produce delicious tomatoes. Popular examples include: If you’re growing any of these varieties, the purple stems are likely a normal characteristic and not a cause for concern. 4: Light Stress Tomato plants thrive in around 6-8 hours of daily sunlight. However, both excessive sunlight and insufficient light can lead to purpling in the stems. Solutions for Light Stress: 5: Magnesium Deficiency (Less Common) While less frequent than phosphorus deficiency, a lack of magnesium can also cause purpling in tomato stems. Magnesium is essential for chlorophyll production and various plant functions. However, unlike phosphorus deficiency, where the entire leaf might turn purple, magnesium deficiency typically shows as yellowing leaves with green veins (interveinal chlorosis). Solutions for Magnesium Deficiency: 6: Physical Damage Occasionally, localized purple discoloration on stems can be caused by physical damage. This could be due to accidental injury during pruning, insect bites, or even rubbing against support structures. While the discoloration might look concerning, it’s usually a cosmetic issue and doesn’t significantly impact plant health. 7: Disease (Rare Case) In rare instances, diseases like Botrytis Blight (gray mold) can cause the stems and leaves of tomato plants to turn purple or brownish-purple. This is usually accompanied by other symptoms like rotting fruit, wilting, and fuzzy gray mold growth. If you suspect a disease, it’s best to consult a gardening professional for diagnosis and treatment recommendations. Prevention is Key: Avoiding Purple Stems in the Future By taking proactive measures, you can minimize the chances of your tomato plants developing purple stems: Wrapping Up While purple stems in tomato plants can be alarming at first glance, it’s important to remember that it’s not always a sign of a serious problem. By understanding the various causes and taking appropriate action, you can often turn things around and ensure your tomato plants continue to thrive and produce delicious fruit. Remember, tomato plants are generally quite resilient, and with a little TLC, you can overcome this challenge and enjoy a bountiful harvest.

Is Blood Meal Good for Tomatoes? When and How to Use It

Is Blood Meal Good for Tomatoes?

Tomatoes are a favorite summer staple, gracing gardens and dinner tables across the globe. But these delicious fruits (yes, tomatoes are technically fruits!) require specific nutrients to thrive and produce a bountiful harvest. One popular option for feeding your tomato plants is blood meal, an organic fertilizer derived from dried animal blood. But is blood meal truly good for tomatoes, and if so, how do you use it effectively? This article reveals everything you need to know about blood meal and its impact on tomato plants. We’ll explore the benefits of blood meal, potential drawbacks to consider, and the ideal timing and methods for application. Benefits of Blood Meal for Tomatoes Blood meal boasts several key advantages for tomato plants, making it a popular choice among organic gardeners. Here’s why you might consider incorporating it into your tomato-growing regimen. A. Nitrogen Powerhouse: Nitrogen is a crucial building block for healthy plant growth. It promotes strong stems and lush foliage, both essential for your tomato plants. Blood meal shines as a rich source of slow-release nitrogen. Unlike synthetic fertilizers, blood meal releases its nitrogen gradually over time, providing a consistent supply throughout the growing season. This helps your tomato plants grow steadily and vigorously, setting the stage for abundant fruit production. B. Potential Pest Repellent While more research is needed, some gardeners swear by blood meal’s ability to deter certain pests. The strong odor of blood meal may be unappealing to some insects, potentially offering a layer of protection for your precious tomatoes. However, it’s important to note that blood meal isn’ a guaranteed pest control solution. Combining it with other organic pest control methods for a well-rounded approach is recommended. Drawbacks and Considerations of Blood Meal Before rushing out to buy blood meal, let’s address some potential drawbacks to consider. A. Burning Potential: Blood meal packs a powerful nitrogen punch, and too much of a good thing can be detrimental. Over-applying blood meal, especially around delicate seedlings, can burn the plants. Always follow the recommended application rates on the specific blood meal product you choose. Remember, “less is more” when it comes to blood meal. B. Attracting Unwanted Guests: The same strong odor that may deter some pests can attract others. Blood meal’s rich scent might lure in unwanted animals like rodents or scavengers. If this is a concern, consider alternative organic fertilizers or implement deterrents to keep these critters at bay. C. Suitability for Your Soil: Blood meal can make your soil slightly more acidic. While tomatoes can tolerate a slightly acidic environment, some plants prefer more neutral soil. If you’re unsure about your soil’s pH level, a simple soil test can help you determine if blood meal is the right choice for your garden. When to Use Blood Meal for Tomatoes Timing is key when it comes to applying blood meal to your tomato plants. Let’s explore the optimal application window. A. Early Spring Awakening: The best time to introduce blood meal to your tomato plants is in early spring, just as they begin showing signs of new growth. During this vegetative stage, your tomato plants are focusing on developing strong stems and healthy foliage. The slow-release nitrogen from blood meal provides the perfect fuel for this critical growth phase, laying the foundation for future fruit production. B. Reapplication (Optional): Depending on your soil conditions and the specific needs of your tomato plants, you may consider a second application of blood meal later in the season. However, this is not always necessary. If your plants are thriving and producing healthy foliage, there may be no need for additional nitrogen. A good indicator of nitrogen deficiency is pale or yellowing leaves. If you observe this, a second application of blood meal, following the recommended rates, can be beneficial. Remember, conducting a soil test before applying any fertilizer, including blood meal, is always a good practice. This will help you determine your soil’s existing nutrient levels and avoid over-fertilizing. How to Use Blood Meal for Tomatoes: A Step-by-Step Guide Now that you understand the benefits and considerations of blood meal, let’s delve into the practicalities of application. A. Two Effective Methods: There are two primary methods for applying blood meal to your tomato plants: B. Maintaining a Safe Distance: When side-dressing with blood meal, it’s crucial to maintain a safe distance between the product and the stem of your tomato plant. Blood meal’s concentrated nitrogen can scorch the delicate stems, hindering growth. As a general rule, aim to sprinkle the blood meal at least 4-6 inches away from the base of the plant. C. Watering Thoroughly: After applying blood meal, regardless of the chosen method, it’s essential to water your tomato plants thoroughly. This helps activate the nutrients in the blood meal and distribute them evenly through the soil, making them readily available for your plants to absorb. D. Avoiding Overapplication: Blood meal is potent, and even a small amount can go a long way. Always adhere to the recommended application rates on the specific product you’re using. Remember, it’s always better to start with a slightly lower amount and observe the response of your plants. You can always add more later if needed, but correcting damage caused by overapplication can be tricky. E. Repeat Applications (if needed): As mentioned earlier, a single application of blood meal in early spring might be sufficient for the entire growing season, especially if your soil is rich in nutrients. However, if your tomato plants start exhibiting signs of nitrogen deficiency (pale or yellowing leaves), a second application of blood meal, following the recommended rates and timing, can be beneficial. F. Safety Precautions: While blood meal is generally considered safe, it’s always wise to take some basic precautions when handling it. Wear gloves and a mask to avoid inhaling dust particles. Wash your hands thoroughly after handling the product. Alternatives to Blood Meal for Tomatoes If you’re hesitant about using blood meal for various reasons, there are several excellent alternative organic fertilizers that … Read more

What Causes Cucumbers to Curl When Growing? 7 Causes and Solutions

What Causes Cucumbers to Curl When Growing?

Cucumbers are a favorite summertime vegetable, known for their refreshing taste and versatility in the kitchen. But sometimes, as you nurture your cucumber plants, you might encounter a frustrating sight: curled cucumbers. While these curvy veggies might look a little odd, they are usually perfectly safe to eat. However, understanding the reasons behind the curl can help you prevent it and ensure a bountiful harvest of straight, delicious cucumbers. This article unravels seven main culprits behind curled cucumbers and provides solutions to keep your cucumbers growing long and strong. The Mystery of the Curled Cucumber Cucumbers, like all living things, thrive under specific conditions. When those conditions aren’t met, the plant can exhibit signs of stress, one of which is the development of misshapen fruit. While a curled cucumber doesn’t necessarily affect its taste or safety for consumption, it can be aesthetically displeasing and might indicate a deeper issue within the plant. Let’s explore the seven most common reasons why cucumbers decide to take a twisty turn: 7 Culprits Behind Curled Cucumbers 1. Inconsistent Watering Cucumbers are thirsty plants that require consistent moisture throughout their growing season. However, both underwatering and overwatering can lead to curling. Solution: Employ Consistent Watering Techniques: 2. Lack of Nutrients Cucumbers need a balanced diet of essential nutrients like nitrogen, phosphorus, and potassium for healthy growth. Deficiencies in any of these elements can negatively affect fruit development, leading to curling. Solution: Proper Nutrient Management: 3. Direct Sunlight While cucumbers need plenty of sunlight to thrive, too much direct sun exposure can be detrimental. Solution: Providing Shade When Needed: 4. Pollination Issues Proper pollination is vital for successful fruit development in cucumbers. Various factors can hinder this process, resulting in misshapen fruit. Solution: Use Hand Pollination Techniques: 5. Pest Damage Sap-sucking pests like aphids, squash bugs, and thrips can damage developing cucumbers as they feed. This damage can cause the fruit to grow unevenly, leading to curling. Solution: Effective Pest Control Methods: 6. Temperature Stress Cucumbers are warm-season vegetables that thrive in temperatures between 65°F (18°C) and 85°F (29°C). Solution: Maintaining Ideal Temperatures: 7. Varietal Predisposition While less common, some cucumber varieties are simply more prone to curling than others. This can be due to inherent genetic factors or specific growth requirements of the variety. Bonus Tips for Straight and Delicious Cucumbers: Conclusion: Happy Cucumbers, Happy Harvest! When you understand the reasons behind curled cucumbers, you can implement the right solutions and create a healthy and supportive environment for your cucumber plants to thrive. With consistent care and attention, you’ll be well on your way to enjoying a bountiful harvest of straight, delicious cucumbers throughout the growing season. Remember, even if you encounter a few curvy cucumbers here and there, don’t despair! They are usually safe to eat and can still be enjoyed in your favorite recipes. So, get out there, nurture your cucumber plants, and enjoy the satisfaction of a successful and rewarding vegetable gardening experience!

21 Secret Garden Ideas To Create Your Peaceful Retreat

Secret Garden Ideas

In the hustle and bustle of daily life, everyone craves a place to unwind, de-stress, and reconnect with themselves. For many, a hidden sanctuary tucked away in the heart of their own backyard offers the perfect escape. This haven, known as a secret garden, becomes a personal oasis, a refuge where peace and tranquility reign supreme. Imagine pushing past a hidden entrance, stepping into a world of lush greenery, and being enveloped by the gentle sounds of nature. Your secret garden can be anything you desire – a whimsical wonderland, a haven for meditation, or a vibrant haven teeming with life. With a little creativity and planning, you can transform a forgotten corner of your yard into this magical retreat. This guide unveils 21 secret garden ideas to inspire you to create your own peaceful escape: 1. Design for Seclusion: Creating a Hidden Paradise The essence of a secret garden lies in its hidden nature. It’s a place where you can disappear from the outside world and immerse yourself in tranquility. Here are some strategies to achieve this sense of seclusion: 2. Cozy Seating Nooks: Your Personal Sanctuary No secret garden is complete without a comfortable spot to relax and unwind. This could be a simple wooden bench nestled beneath a shady tree, a plush hammock strung between two mature trees, or even a hanging swing chair swaying gently in the breeze. Here’s how to elevate your seating nook for ultimate comfort and ambiance: 3. Lush Landscaping: A Feast for the Senses The heart of any secret garden lies in its verdant landscape. Lush greenery not only provides a visual escape but also helps purify the air and create a calming atmosphere. Here’s how to create a truly captivating landscape: 4. A Water Feature for Serenity The gentle sound of trickling water has a calming and therapeutic effect, making it a perfect addition to your secret garden. Here are some ideas for incorporating a water feature: 5. Lighting for Ambiance: Let Your Garden Glow As the sun sets, your secret garden can transform into a magical nighttime haven with the right lighting. Strategic lighting allows you to extend the enjoyment of your secret garden into the evening hours and create a truly magical atmosphere. Here are some options to consider: 6. A Touch of Whimsy: Unleash Your Creativity Your secret garden is a reflection of your personality, so don’t be afraid to add a touch of whimsy! Here are some ideas to spark your creativity: Remember: When incorporating whimsical elements, maintain a balance. Too many elements can create a cluttered look and detract from the overall tranquility of your secret garden. 7. Inviting Wildlife: Share Your Sanctuary Your secret garden doesn’t have to be a solitary haven. By creating a welcoming environment, you can attract a variety of beneficial wildlife, adding beauty, life, and the joy of connection with nature to your retreat. By incorporating these elements, you create a balanced ecosystem that attracts a variety of fascinating creatures, enriching your secret garden experience. 8. A Calming Color Palette: Nature’s Tranquil Hues Colors have a profound impact on our mood and emotions. By incorporating a calming color palette into your secret garden, you can enhance the sense of peace and tranquility. Here are some tips: 9. The Power of Scent: A Multisensory Experience Our sense of smell plays a powerful role in creating a memorable and relaxing experience. Incorporate fragrant plants and elements to elevate your secret garden into a multisensory haven: 10. Create a Reading Nook: A Literary Escape For bookworms, a dedicated reading nook within the secret garden offers the perfect escape. Here’s how to create a haven for literary adventures: 11. The Art of Vertical Gardening: Maximize Your Space Limited space shouldn’t hinder your secret garden dreams. Vertical gardening techniques allow you to create a lush and vibrant space even in a compact area. Here are some ideas: 12. A Cascading Waterfall: The Soothing Sound of Water The sound of cascading water creates a sense of tranquility and adds a touch of drama to your secret garden. Here are some options to consider: 13. Create a Path for Meditation: A Journey Within Your secret garden can be a place for not only relaxation but also mindful reflection. Here’s how to create a dedicated path for meditation: 14. Embrace Upcycled Treasures: A Touch of Whimsy and Sustainability Your secret garden doesn’t have to be expensive to create. By upcycling old items, you can add a touch of whimsy, personality, and sustainability to your haven. Here are some ideas: 15. A Hammock Hideaway: Swaying Serenity Imagine gently swaying in a hammock nestled amongst the trees, enveloped by the calming sounds of nature. A hammock provides the perfect spot for an afternoon nap, reading a book, or simply gazing at the clouds. 16. A Dedicated Tea Time Corner: A Ritual for Relaxation For many, a steaming cup of tea embodies relaxation and mindfulness. Create a dedicated tea time corner in your secret garden to elevate this ritual into a truly serene experience. 17. A Stargazing Sanctuary: Connect with the Cosmos Transform your secret garden into a haven for stargazing on clear nights. Here are some tips to create the perfect environment: 18. A Calming Water Feature: The Tranquil Sound of Trickling Water While grand fountains were explored previously, consider a simpler approach to incorporate the soothing sounds of water: 19. Create a Natural Carpet: A Patch of Moss For a unique and low-maintenance ground cover, consider creating a moss garden: A moss garden adds a touch of whimsy and creates a soft, natural carpet underfoot, further enhancing the peaceful ambiance of your secret garden. 20. Attract Pollinators: A Buzzing with Life Your secret garden can become a haven for pollinators like bees, butterflies, and hummingbirds, adding a touch of life and vibrancy. Here are some additional tips: By attracting pollinators, you not only enhance the beauty and life of your secret garden but also contribute to a healthy ecosystem. … Read more

17 Budget-Friendly DIY Walkway Ideas to Transform Your Garden & Backyard

DIY Walkway Ideas

The feeling of strolling through your garden and navigating a charming pathway that seamlessly blends with the surrounding beauty is unmatched. A well-designed walkway not only adds functionality to your outdoor space, guiding guests and highlighting key features, but it also injects a touch of personality and elegance. However, creating a stunning walkway doesn’t have to break the bank. With a little creativity and some readily available materials, you can transform your backyard into a haven of style and functionality with a budget-friendly DIY walkway. This guide explores 17 inspiring walkway ideas that are easy on the wallet and big on charm. From classic stepping stones to whimsical recycled materials, we’ll unveil the materials needed, step-by-step instructions for building each walkway, and tips for adding a personalized touch. Unleashing the Power of DIY Walkways Walkways serve a dual purpose in our gardens and backyards. First and foremost, they provide a designated path for navigating the space, ensuring safe and comfortable passage, especially during wet weather. But beyond practicality, walkways also enhance the aesthetics of your outdoor haven. A well-placed walkway can visually connect different areas of your garden, draw attention to focal points, and create a sense of flow and invitation. The beauty of DIY walkways lies in their affordability and freedom for personalization. You can tailor the materials and design to perfectly complement your garden’s style, whether it’s rustic, modern, whimsical, or anything in between. With a little planning and effort, you can create a walkway that reflects your unique taste and adds significant value to your outdoor space. Budget-Friendly Materials and Techniques The key to creating a budget-friendly walkway lies in utilizing readily available materials and employing simple construction techniques. Here are some general tips to keep in mind: Now, let’s go into the specifics of creating 17 unique and budget-friendly walkways: 1. The Classic Stepping Stone Path: A Timeless Choice Stepping stone paths are a timeless addition to any garden, offering a charming and functional way to navigate the space. This pathway is perfect for winding its way through flower beds or connecting different areas of your garden. Materials: Instructions: 2. The Rustic Charm of a Gravel Walkway Gravel walkways offer a natural and low-maintenance solution for navigating your garden. This easy-to-build path is perfect for creating a relaxed and rustic ambiance. Materials: Instructions: 3. A Touch of History with a Brick Path Brick walkways exude a timeless elegance and can add a touch of history to your garden. Recycled bricks are a budget-friendly option for creating this classic pathway. Materials: Instructions: Tip: If using unevenly sized recycled bricks, you might need to cut or chip some bricks to achieve a tighter fit (use a brick hammer and chisel with caution and proper safety gear). 4. Natural Beauty with a Flagstone Path Flagstone walkways offer a unique and organic aesthetic, blending seamlessly with natural surroundings. Uneven flagstones with their natural textures and colors create a visually captivating path. Materials: Instructions: Tip: Leave some space between the flagstones for a more natural look. You can adjust the spacing based on the size and shape of your flagstones. Aim for gaps of 1-2 inches. 5. The Easy-Care Option: A Mulch Path Mulch walkways offer a low-maintenance solution for creating a soft and natural path in your garden. This option is perfect for areas with light foot traffic. Materials: Instructions: Important Note: Mulch paths require regular maintenance (topping up the mulch) as the mulch decomposes over time. 6. Unleash Your Creativity: A Recycled Material Path Embrace sustainability and unleash your creativity with a recycled material path! This option allows you to upcycle various materials into a unique and personalized walkway. Materials: Instructions: Tip: For materials like wine corks, ensure they are secured in a way that prevents them from becoming loose or displaced underfoot. You can embed them in a concrete base or use a sealant to hold them together in a grid pattern. 7. A Touch of Warmth: A Wooden Path Wooden walkways offer a charming and inviting addition to your garden, creating a warm and natural feel. Materials: Instructions: Option 1: Ground-Level Wooden Path: Option 2: Elevated Wooden Walkway: Option 1: Option 2: Remember: Regular maintenance is crucial for wooden walkways. Inspect the wood for signs of rot or damage and apply a fresh coat of sealant periodically to ensure its longevity. 8. The Enchanting Glow: A Luminous Walkway Transform your garden into a magical wonderland with a walkway that incorporates subtle lighting. This option adds a touch of whimsy and enhances safety during evening strolls. Materials: Instructions: 9. A Touch of the Mediterranean: A Pebble Mosaic Path Create a unique and artistic walkway with a pebble mosaic design. This option allows you to personalize the path with colors and patterns that complement your garden’s theme. Materials: Instructions: 10. Rustic Elegance: A Cinder Path Cinder, a byproduct of burning coal, offers a surprisingly elegant and budget-friendly option for walkways. Its dark color creates a striking contrast with surrounding greenery, adding a touch of rustic charm. Materials: Instructions: 11. A Walk Through Time: A Recycled Brick Path Give new life to salvaged bricks and create a charming walkway steeped in history. This option is perfect for adding a touch of vintage character to your garden. Materials: Instructions: Tip: If using significantly uneven bricks, you might need to cut or chip some bricks to achieve a tighter fit (use a brick hammer and chisel with caution and proper safety gear). 12. A Coastal Breeze: A Seashell Path Embrace the coastal vibe with a walkway adorned with seashells. This option adds a touch of whimsy and evokes a sense of relaxation in your garden. Materials: Instructions: Tip: For a more secure walkway, you can partially embed the larger seashells into the sand base. 13. A Path of Fire: A Glowing Gravel Walkway Create a mesmerizing walkway that illuminates your garden at night with glow-in-the-dark gravel. This option offers a unique and eye-catching addition to your outdoor space. Materials: Instructions: 14. … Read more

5 Best Outdoor Fountains for Small Gardens

Fountains for Small Gardens

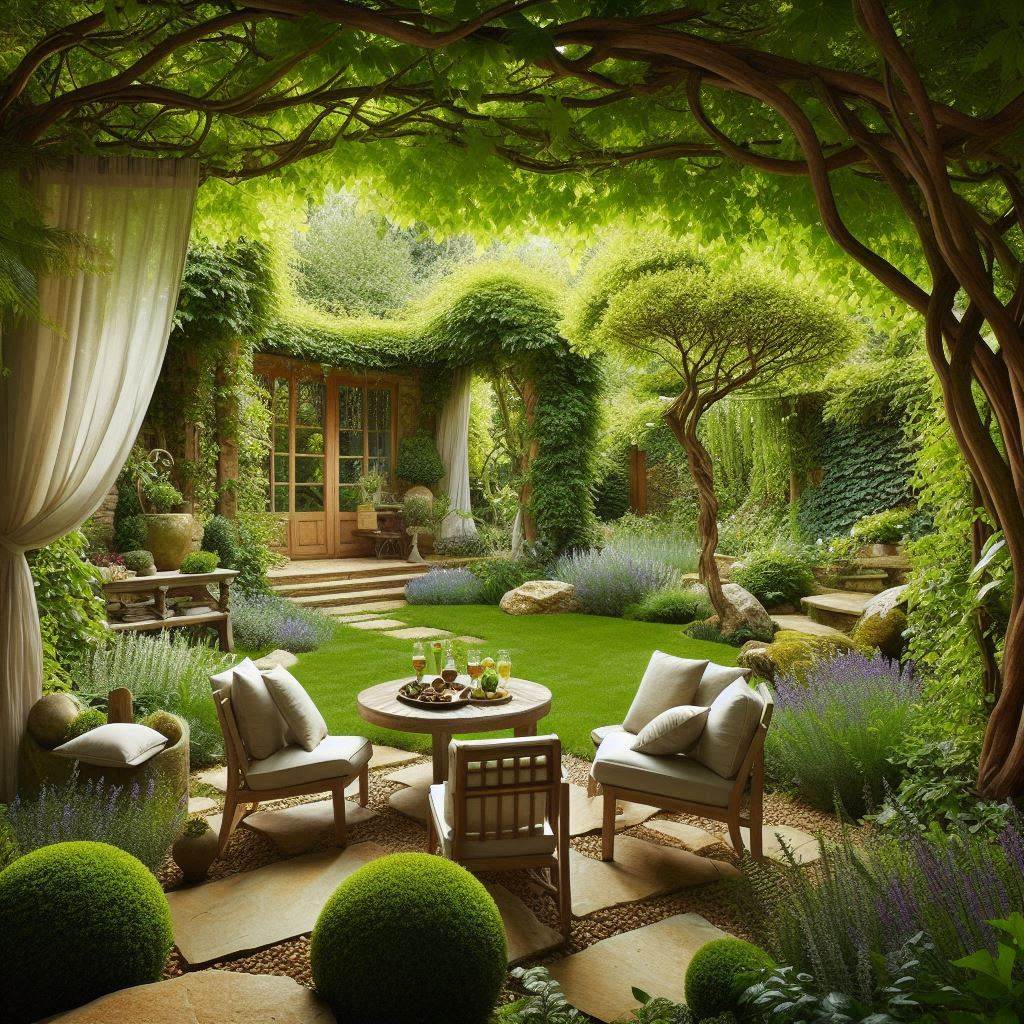
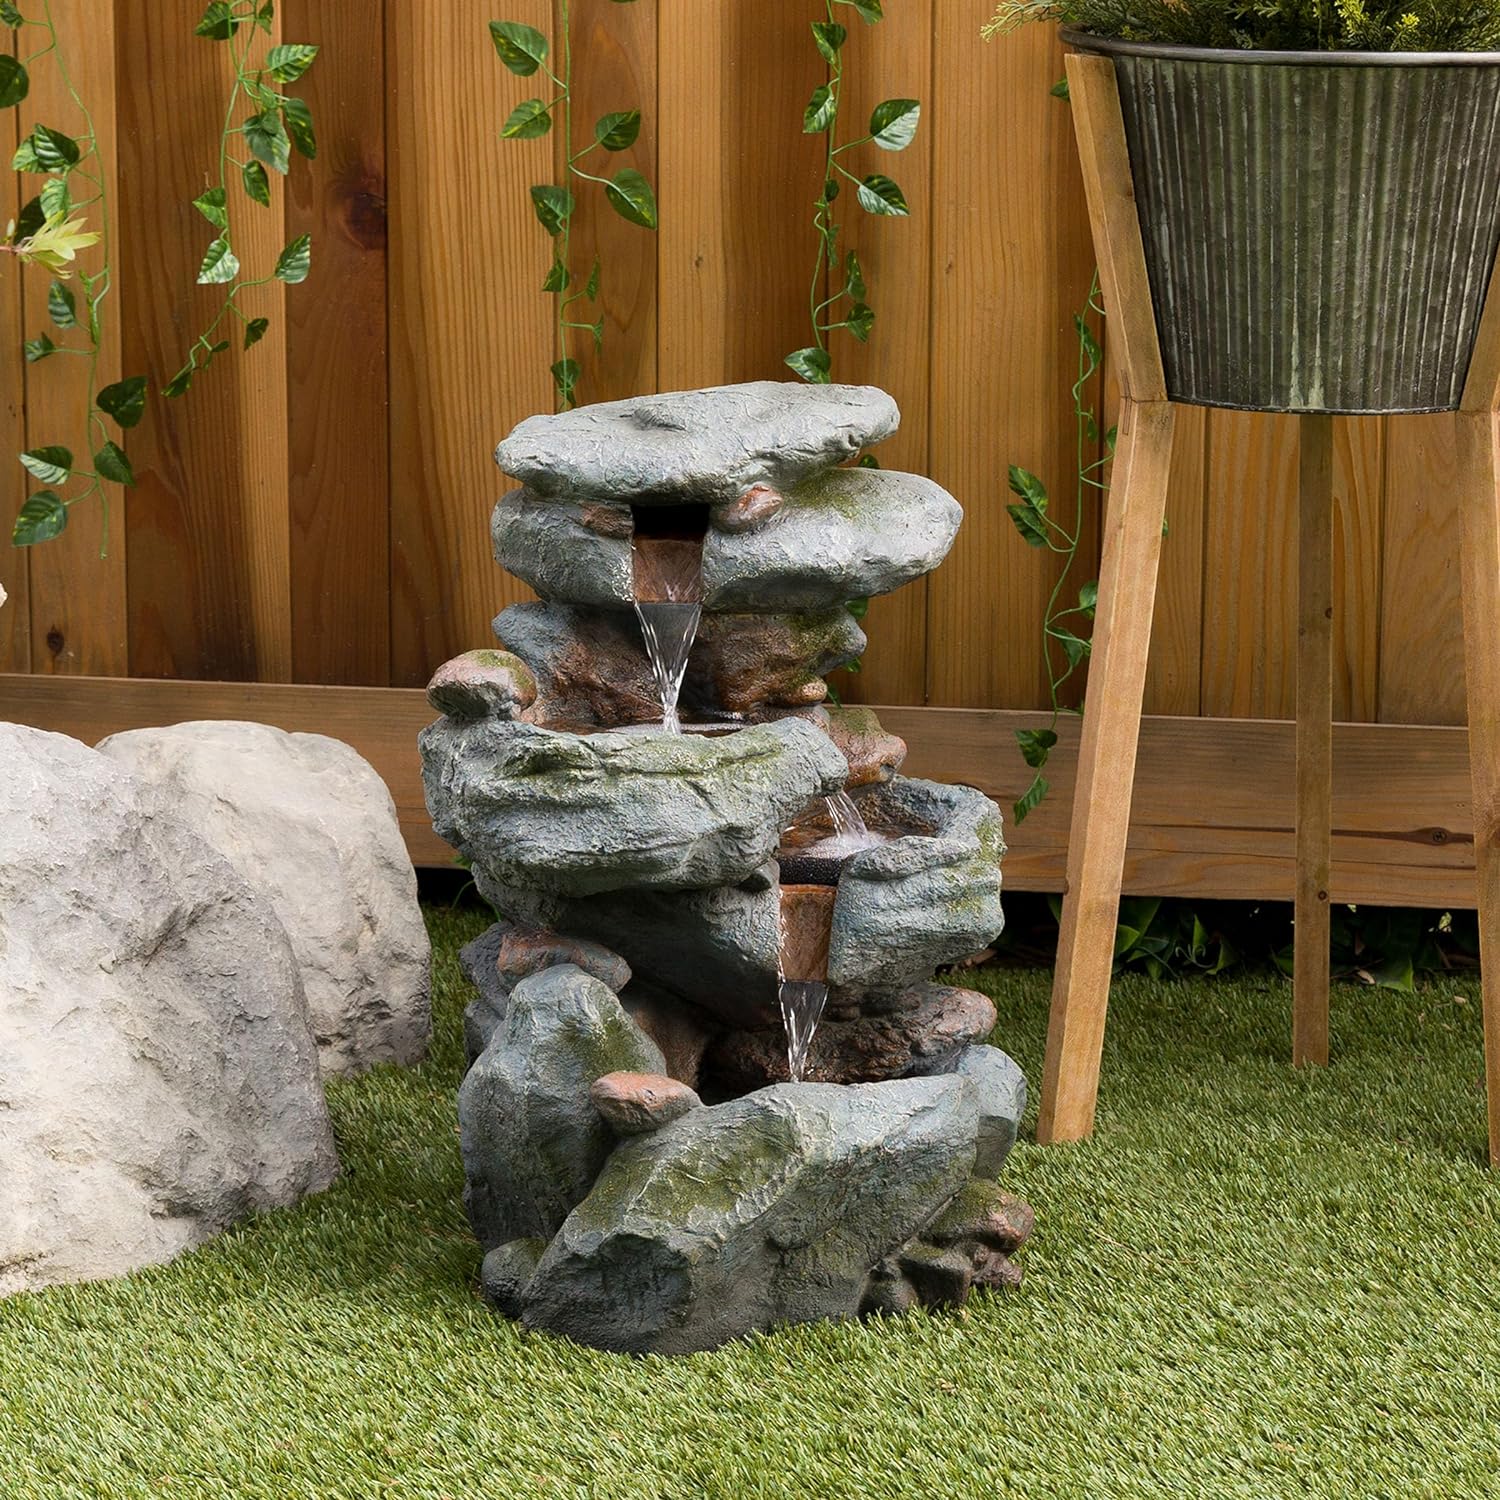
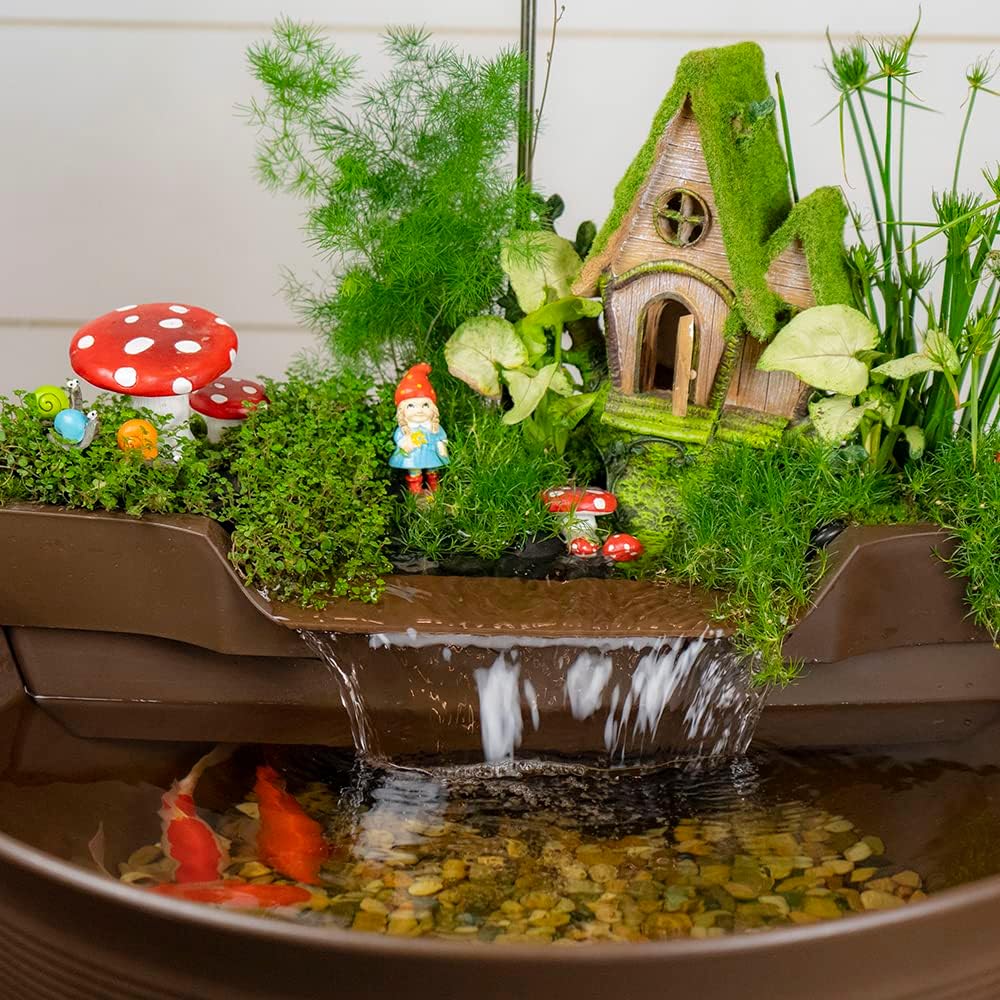
The gentle trickle of water, the calming sound of a cascade, the vibrant dance of light on droplets – a fountain can transform a small garden into a tranquil oasis. Beyond aesthetics, fountains offer numerous benefits for compact outdoor spaces. The constant water movement creates a soothing ambiance, attracts beautiful wildlife like birds and butterflies, and adds a touch of serenity to even the most bustling backyard. This article unveils 5 of the best outdoor fountains for small gardens. 5 Best Outdoor Fountains for Small Gardens Let’s go straight to our curated list of top rated outdoor fountains for small gardens: 1: Best Overall: Pure Garden 50-0006 Outdoor Water, Natural Looking Soothing Sound for Patio and Gaden Stone Waterfall Fountain with LED Lights, Dreaming of a babbling brook in your miniature garden? The Pure Garden 50-0006 might be the answer to your prayers. This compact waterfall fountain boasts a natural-looking, tiered “stone” design that brings a touch of tranquility to any outdoor space. Standing at just under 20 inches tall, it’s ideal for patios, decks, or even cramped gardens where a larger water feature just wouldn’t fit. The water cascades down the tiers, creating a calming sound that can drown out everyday noise and lull you into relaxation. Plus, built-in LED lights illuminate the water at night, adding a touch of magic when the sun dips low. Crafted from weatherproof resin, the fountain is built to last and endure the elements. Assembly seems like a breeze – simply fill the bottom tier with water, plug it in, and you’re good to go! Pros: Cons: Verdict: A Charming Choice for Small Gardens The Pure Garden 50-0006 is a compelling option for anyone looking to add a touch of water serenity to their small outdoor space. The compact size, calming water sounds, and built-in lights make it a delightful focal point. Just keep in mind that you might need to refill the water reservoir more often and there’s a chance of hearing the pump running. Overall, for its size and features, the Pure Garden 50-0006 is a solid choice for transforming your tiny garden into a tranquil escape. 2: Best Runner-Up: Teamson Home Floor Glazed Pot Water Fountain with Built-in LED Light and Pump for Outdoor Indoor Patio Garden Backyard Does your pocket-sized garden crave a touch of tranquility? Look no further than the Teamson Home Glazed Pot Water Fountain. This fountain ditches the traditional, bulky rock look for a charming pot design, making it a perfect fit for patios, decks, or even the most modestly sized gardens. At around 17 inches tall, it won’t overwhelm your space, but it packs a punch in the relaxation department. Water trickles down the sides of the glazed pot, creating a calming sound that can drown out everyday noise and bring a touch of zen to your outdoor haven. Plus, built-in LED lights illuminate the water flow at night, adding a touch of magic when the day is done. The fountain is crafted from durable polyresin and fiberglass with a beautiful glazed finish, making it weatherproof and sure to withstand the elements. And the best part? Setting it up is a breeze. Simply fill the pot with water, plug it in, and enjoy the sights and sounds! Pros: Cons: Verdict: A Charming Addition to Compact Gardens If you’re looking for a way to add a touch of tranquility to your small garden without sacrificing precious space, the Teamson Home Glazed Pot Fountain is a delightful option. The compact size, soothing water sounds, and built-in lights make it a visually appealing and relaxing focal point. Just remember that you might need to top up the water more often and there’s a chance of hearing the pump running. Overall, for its size and features, the Teamson Home Glazed Pot Fountain is a charming choice for transforming your tiny garden into a peaceful retreat. 3: Best Cascaded Design: Alpine Corporation WIN316 4-Tiered Outdoor Floor Rock Water Fountain for Garden or Patio with Natural Stone Look, Light Gray Craving the sound of babbling water but lacking the square footage for a grand water feature? The Alpine Corporation WIN316 might be your saving grace. This 4-tiered rock fountain offers the visual appeal of a cascading waterfall in a compact package, measuring just 40 inches tall and 23 inches wide. That makes it ideal for patios, decks, or even those cute little gardens where space is a precious commodity. Water trickles down each tier, creating a relaxing sound that can drown out everyday noise and bring a touch of tranquility to your outdoor haven. Plus, integrated LED lights illuminate the water at night, adding a touch of magic when the sun dips below the horizon. The fountain is constructed from a weatherproof blend of polystone and fiberglass, giving it a natural stone look that blends seamlessly with your outdoor décor. Durability is another perk – this little fountain is built to withstand the elements. And like most modern water features, setup is a breeze. Simply fill the bottom tier with water, plug it in, and you’re good to go! Pros: Cons: Verdict: A Solid Choice for Compact Gardens The Alpine Corporation WIN316 strikes a great balance between size, aesthetics, and functionality. If you have a small outdoor space craving a touch of water serenity, this fountain is a solid choice. The trickling water, built-in lights, and compact size make it a delightful focal point. Just keep in mind that refilling might be a more frequent chore and there’s a possibility of hearing the pump running. Overall, for its size and features, the WIN316 is a charming way to transform your tiny garden into a peaceful escape. 4: Best Towering Beauty: Sunlinua 49.6″ Tall Outdoor Waterfall Fountain 5-Tier Indoor Floor Standing Water Fountains with LED Lights&Pump for Garden, Living Dreaming of a cascading waterfall in your garden but tight on space? The Sunlinua 49.6″ Waterfall Fountain might sound like a dream come true at first glance. Boasting five tiers and reaching … Read more

5 Best Small Garden Water Falls that Bring Tranquility in Tight Spaces

Best Small Garden Water Falls

The gentle trickle of water cascading down a miniature waterfall can transform your garden into a tranquil oasis. Small garden waterfalls offer a delightful blend of sight and sound, creating a visual spectacle while masking unwanted noise and attracting beautiful wildlife. This article showcases 5 of the best small garden water falls on the market today. We have also included a buyer’s guide to equip you with the knowledge you need to choose the perfect small waterfall for your garden, navigate the different types and styles, and ensure a successful installation and ongoing enjoyment. 5 Best Small Garden Water Falls Here are our best picks for small garden water falls: 1: Best Overall: Aquascape 78325 AquaGarden Pond and Waterfall Kit Container Water Garden, Measures 23. 5-inch in Diameter and 9 7/8-inch Living in a shoebox-sized garden but craving the calming sound of water? Look no further than the Aquascape AquaGarden. This petite container water garden kit is a lifesaver for those with limited space. Measuring just under 24 inches in diameter and a mere 10 inches tall, it can comfortably fit on a patio table, balcony ledge, or even a small corner of your garden. Yet, it packs a punch in the relaxation department. The integrated waterfall trickles gently, creating a soothing sound that can mask outdoor noise and bring a touch of tranquility to your little oasis. This all-in-one kit includes everything you need to get started. The lightweight, injection-molded pond features a rippled texture that mimics a natural pond, while the integrated plant shelf and filter media provide a place for both your favorite water plants and the beneficial bacteria that keep the water clean. Plus, an LED waterfall light adds a touch of magic during nighttime hours. Pros: Cons: Verdict: A Perfect Fit for Tiny Paradises If you have a miniature garden yearning for a touch of water serenity, the Aquascape AquaGarden is a fantastic choice. The small size, built-in waterfall with light, and ease of use make it a delightful addition to any compact space. Just keep in mind the limitations on plant and fish life, the potential need for frequent refilling, and the possibility of hearing the pump running. Overall, for its size and features, the Aquascape AquaGarden is a winning solution for transforming your small garden into a peaceful escape. 2: Best Runner-Up: Alpine Corporation WIN582 Outdoor Floor 3-Tiered Rock Waterfall Fountain with LED Lights and Natural Stone Look Does the idea of a babbling brook in your miniature garden sound like a dream? The Alpine Corporation WIN582 might be your answer to those zen yearnings. This 3-tiered rock waterfall fountain boasts a compact design, measuring just 22 inches tall, making it ideal for patios, decks, or even the most space-challenged gardens. Don’t let its size fool you though – it packs a punch in the relaxation department. Water cascades down each tier, creating a calming sound that can drown out everyday noise and bring a touch of tranquility to your outdoor haven. Plus, built-in LED lights illuminate the water features at night, adding a touch of magic when the sun dips below the horizon. The fountain itself is crafted from weatherproof resin with a natural stone look, offering both durability and a visually pleasing resemblance to a real rock formation. Setting it up is a breeze – simply fill the bottom tier with water, plug it in, and you’re good to go! Weighing the Pros and Cons: A Gardener’s Perspective Pros: Cons: Verdict: A Charming Choice for Small Gardens The Alpine Corporation WIN582 strikes a great balance between size, aesthetics, and functionality. If you have a small outdoor space craving a touch of water serenity, this fountain is a solid choice. The trickling water, built-in lights, and compact size make it a delightful focal point. Just remember that refilling might be a more frequent chore and there’s a possibility of hearing the pump running. Overall, for its size and features, the WIN582 is a charming way to transform your tiny garden into a peaceful escape. 3: Best Stylish Stream: Teamson Home 38.58 in. Modern Curved Faux Slate Waterfall Fountain for Indoors or Outdoors with LED Light Accents Craving the sound of trickling water but lacking the square footage for a grand water feature? The Teamson Home Modern Curved Faux Slate Fountain might be the answer to your prayers. This contemporary fountain ditches the traditional, bulky rock look for a sleek, curved design, making it a perfect fit for modern patios, decks, or even the tiniest of gardens. Standing at just under 39 inches tall, it won’t overwhelm your space, but it injects a touch of modern elegance while offering relaxation benefits. Water cascades down the gentle curve, creating a calming sound that can drown out everyday noise and bring a touch of zen to your outdoor haven. Plus, built-in LED light accents illuminate the water flow at night, adding a touch of modern ambiance. The fountain is crafted from durable polyresin with a beautiful faux slate finish, making it weatherproof and sure to withstand the elements. And the best part? Setting it up is simple – simply fill the bottom basin with water, plug it in, and enjoy the sights and sounds! Pros: Cons: Verdict: A Stylish Addition to Compact Gardens If you’re looking for a way to add a touch of tranquility and modern style to your small garden without sacrificing precious space, the Teamson Home Modern Curved Faux Slate Fountain is a delightful option. The compact size, soothing water sounds, and built-in light accents make it a visually appealing and relaxing focal point. Just remember that you might need to top up the water more often and there’s a chance of hearing the pump running. Overall, for its size and features, the Teamson Home Modern Curved Fountain is a charming choice for transforming your tiny garden into a peaceful retreat. 4: Best Industrial Zen: Alpine Corporation CPS182 Outdoor Floor Industrial Multi-Tiered Soothing Waterfall Fountain, 43″, Gray Do you dream of … Read more