
Easter is a time for joy, celebration, and of course, chocolate! But beyond the egg hunts and sugary treats, Easter crafts offer a wonderful opportunity to create lasting memories with your children. Engaging in these creative activities provides a wealth of benefits for young minds and fosters a sense of wonder around the holiday.
Benefits Of Easter Crafts With Kids
Crafting with kids isn’t just about fun (although there’s plenty of that!), it also helps with:
- Developing Creativity and Imagination: Easter crafts allow children to explore their creative side, experiment with different colors and textures, and express themselves through their artwork.
- Fine Motor Skills Development: From cutting and gluing to manipulating yarn and pipe cleaners, these activities help refine hand-eye coordination and dexterity in little hands.
- Color Recognition: Working with a variety of colors throughout the crafting process helps children learn and identify different color names and shades.
- Bonding and Togetherness: Crafting provides a fun and relaxed way to spend quality time with your children. Working together on projects fosters communication, collaboration, and creates cherished memories that will last a lifetime.
- Celebrating Easter Traditions: Engaging in Easter crafts allows children to connect with the traditions and symbols of the holiday in a fun and interactive way.
21 Easy and Fun Easter Crafts for Kids:
So, gather your little bunnies (and chicks!), dust off the craft supplies, and get ready for some egg-cellent Easter fun with these 21 easy and adorable crafts!
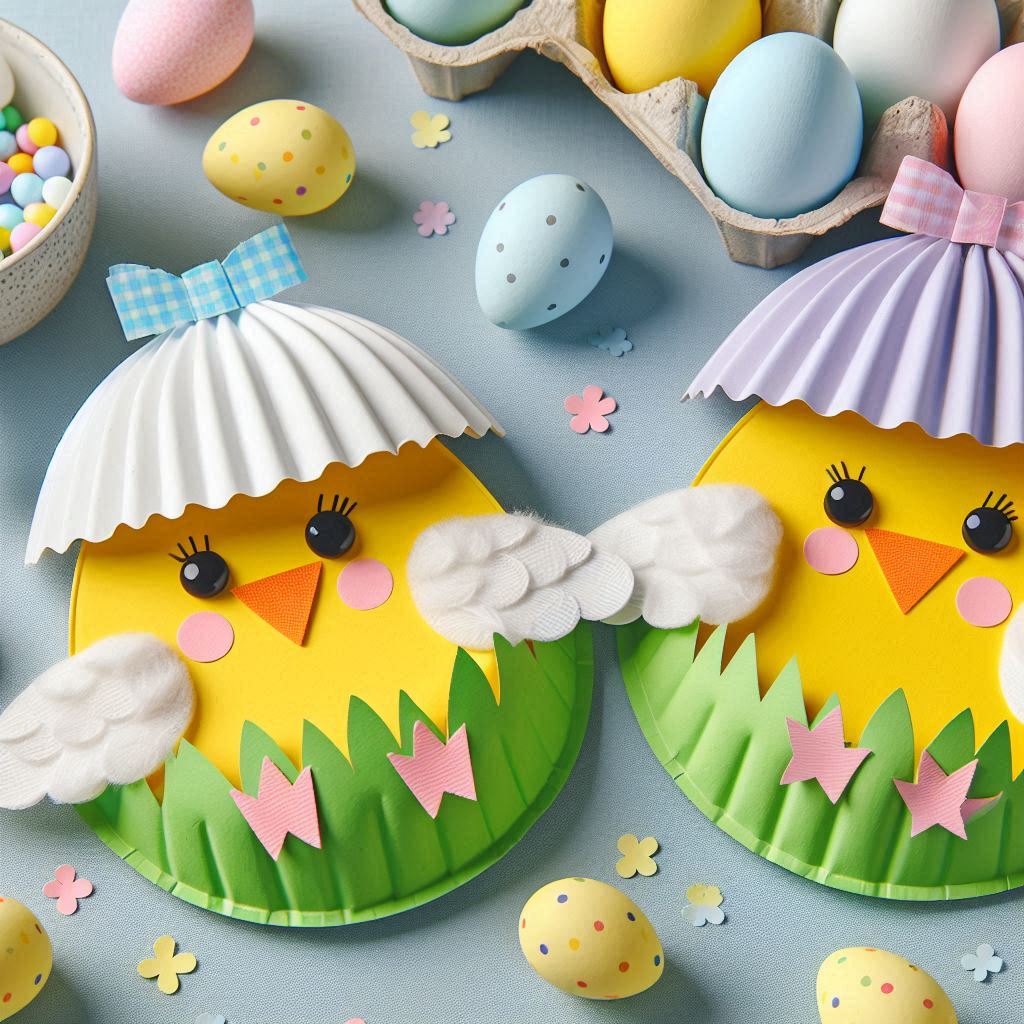
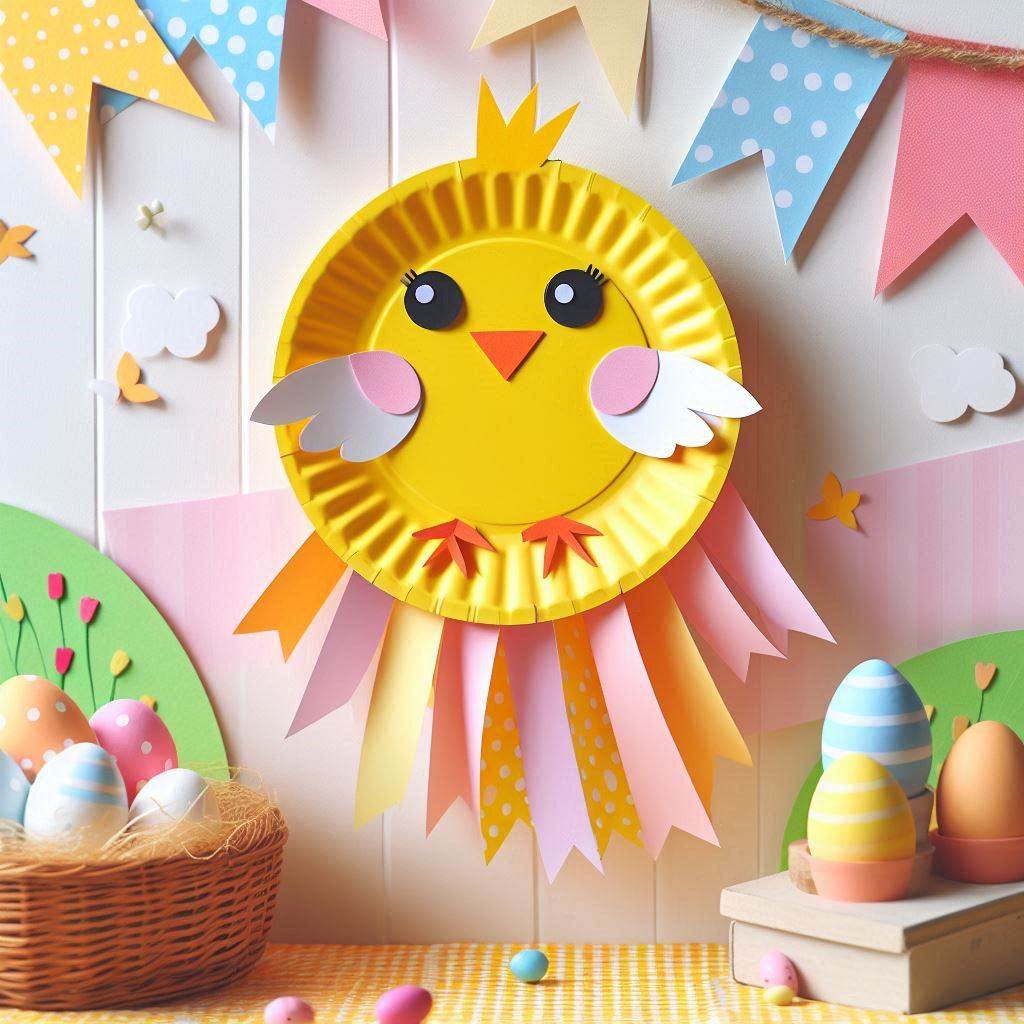
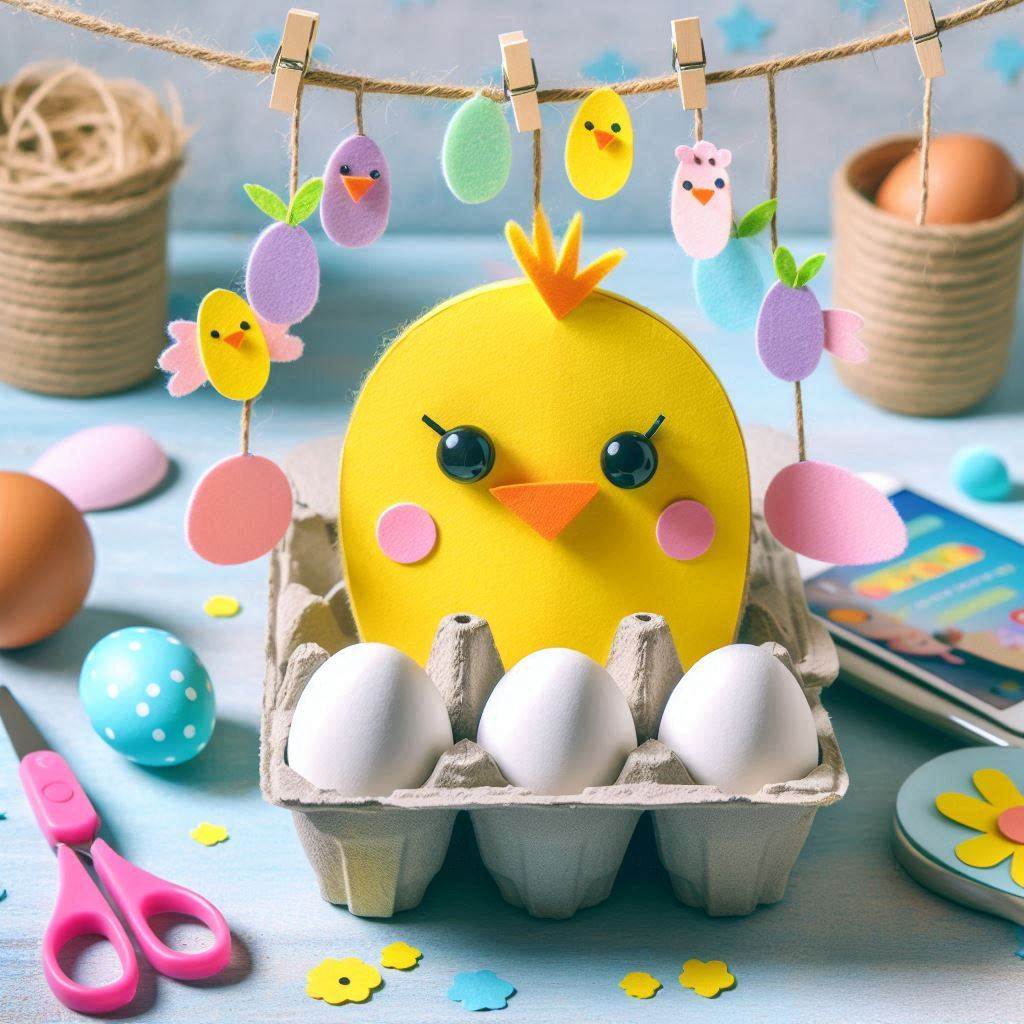
1. Adorable Paper Plate Chick Craft:
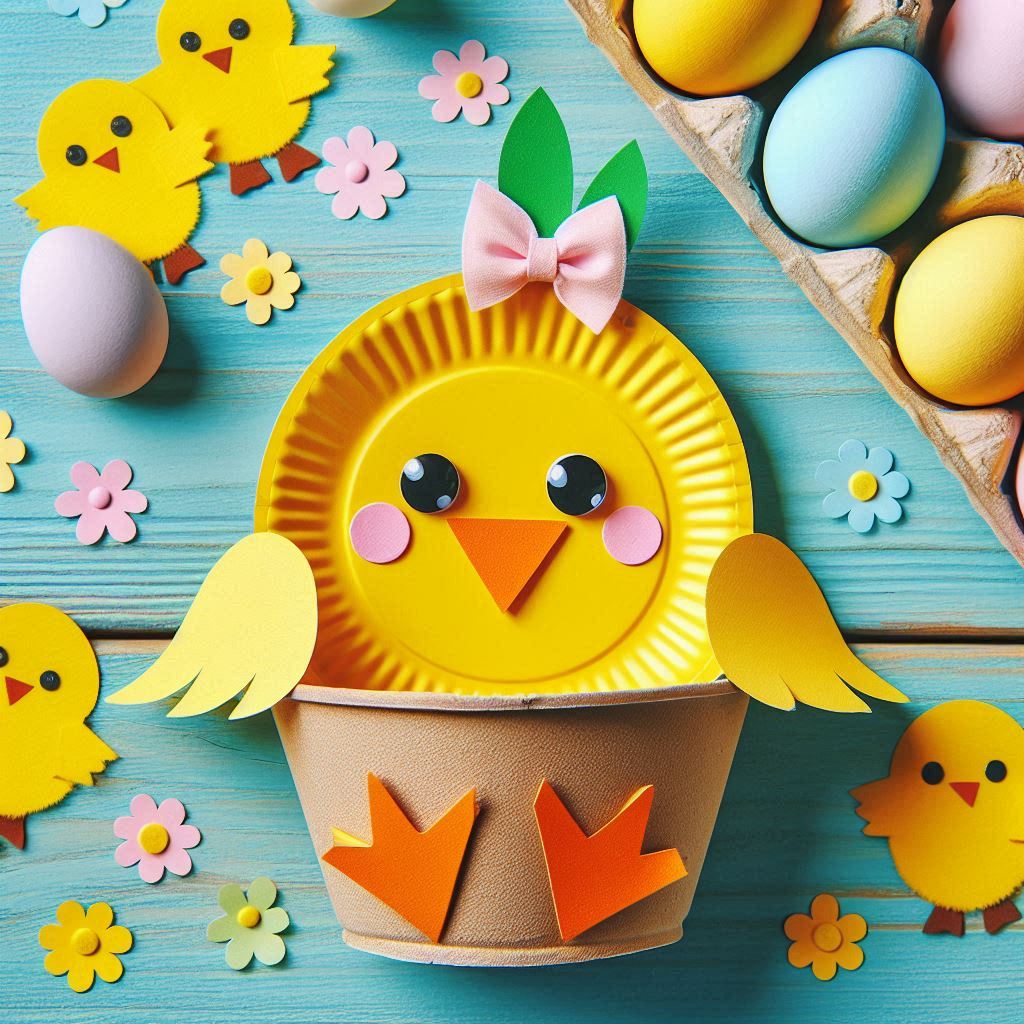
These cheerful paper plate chicks are a classic Easter craft that’s perfect for young children. Let their creativity run wild as they personalize their little feathered friends!
Materials List:
- Yellow paper plates
- Construction paper scraps (various colors for eyes, beak, wings)
- Googly eyes
- Orange construction paper for beak
- Yellow yarn or pipe cleaners for feet
- Scissors
- Glue stick
- Markers
Instructions:
- Cut the Chick Shape: Cut the yellow paper plate in half to create two chick shapes.
- Create the Details: From the construction paper scraps, cut out smaller shapes for the chick’s eyes, beak, and wings.
- Assemble the Chick: Glue the googly eyes and beak onto one chick half.
- Add Wings and Feet: Glue the wings and yarn/pipe cleaner feet onto the assembled chick.
- Personalize with Details: Use markers to draw additional features like feathers or a patch of grass for the chick to stand on.
Tips:
Encourage your child to personalize their chick! Let them choose different colors for the wings and beaks, or add glitter glue or sequins for a sparkly touch.
You can also use buttons or small cutouts from construction paper to create a variety of chick expressions.
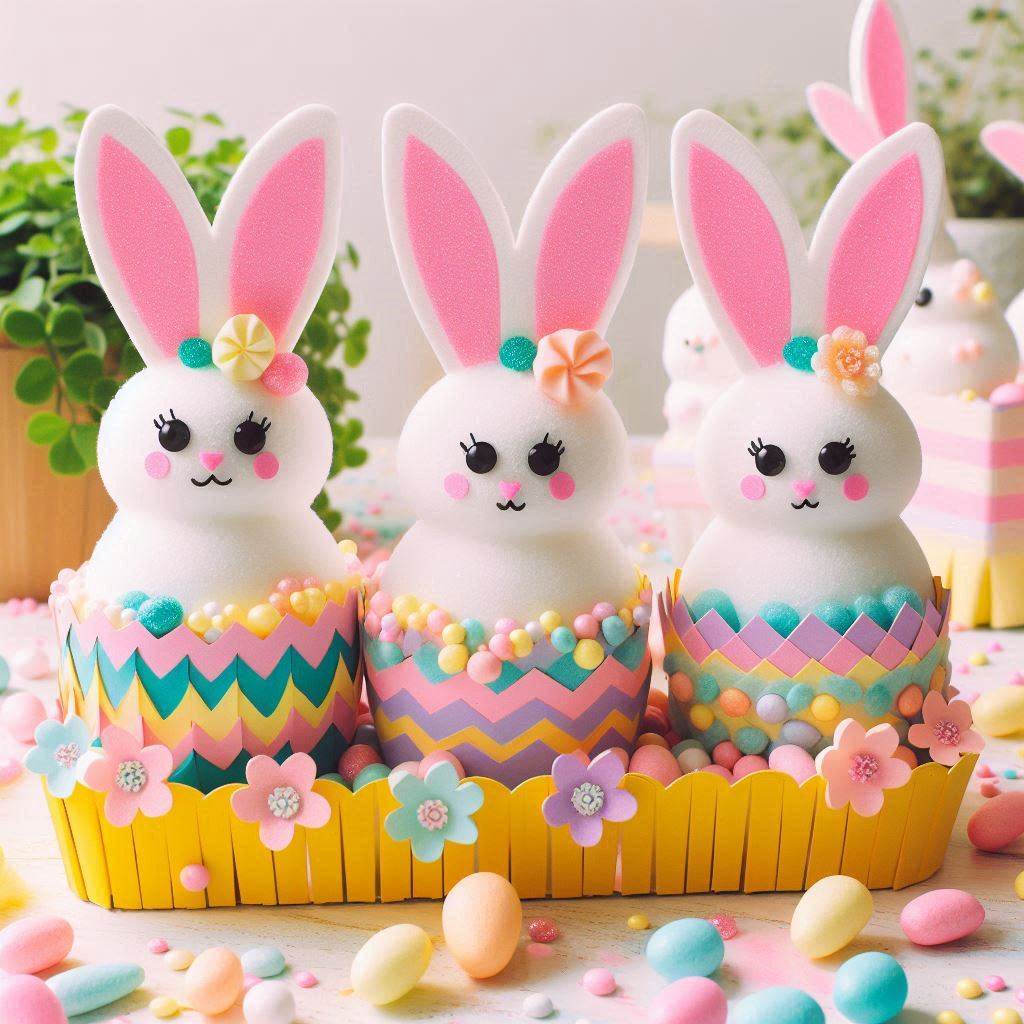
2. Colorful Handprint Bunnies:
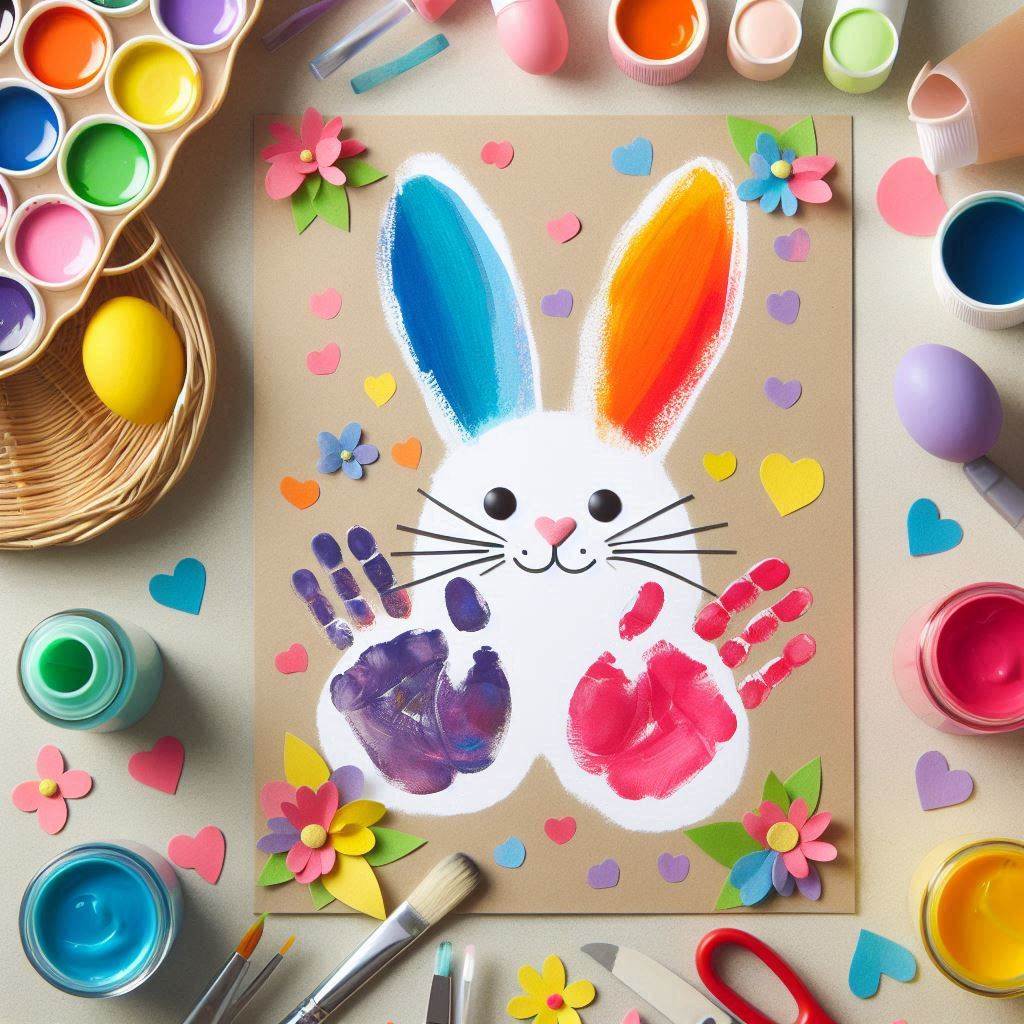
This adorable craft captures the joy of Easter in a heartwarming way. It’s a fantastic keepsake that parents will cherish for years to come.
Materials List:
- White cardstock
- Tempera paint (various colors)
- Paintbrushes
- Black marker
- Cotton balls or white pom poms
Instructions:
- Painting the Bunny Body: Help each child paint their hand with a chosen color for the bunny body. Encourage them to explore different colors – pink, brown, yellow, or even a speckled pattern!
- Creating the Bunny Print: Press the painted hand firmly onto the cardstock, creating a bunny shape.
- Adding Details: Once the paint dries completely, use a black marker to add details like bunny ears, eyes, nose, and whiskers. This is where your child’s personality can shine!
- A Fluffy Tail: Glue cotton balls or white pom poms onto the bunny’s tail for a delightfully fluffy touch.
Tips:
Use a variety of bright and cheerful paint colors to create a vibrant collection of bunnies.
Don’t be afraid to get messy! The beauty of this craft lies in the unique handprint, so embrace the individual creativity of each child.
To complete the Easter scene, consider cutting out additional shapes from construction paper for carrots or flowers and arranging them around the handprint bunny on the cardstock.
3. Egg-cellent Yarn Chicks:
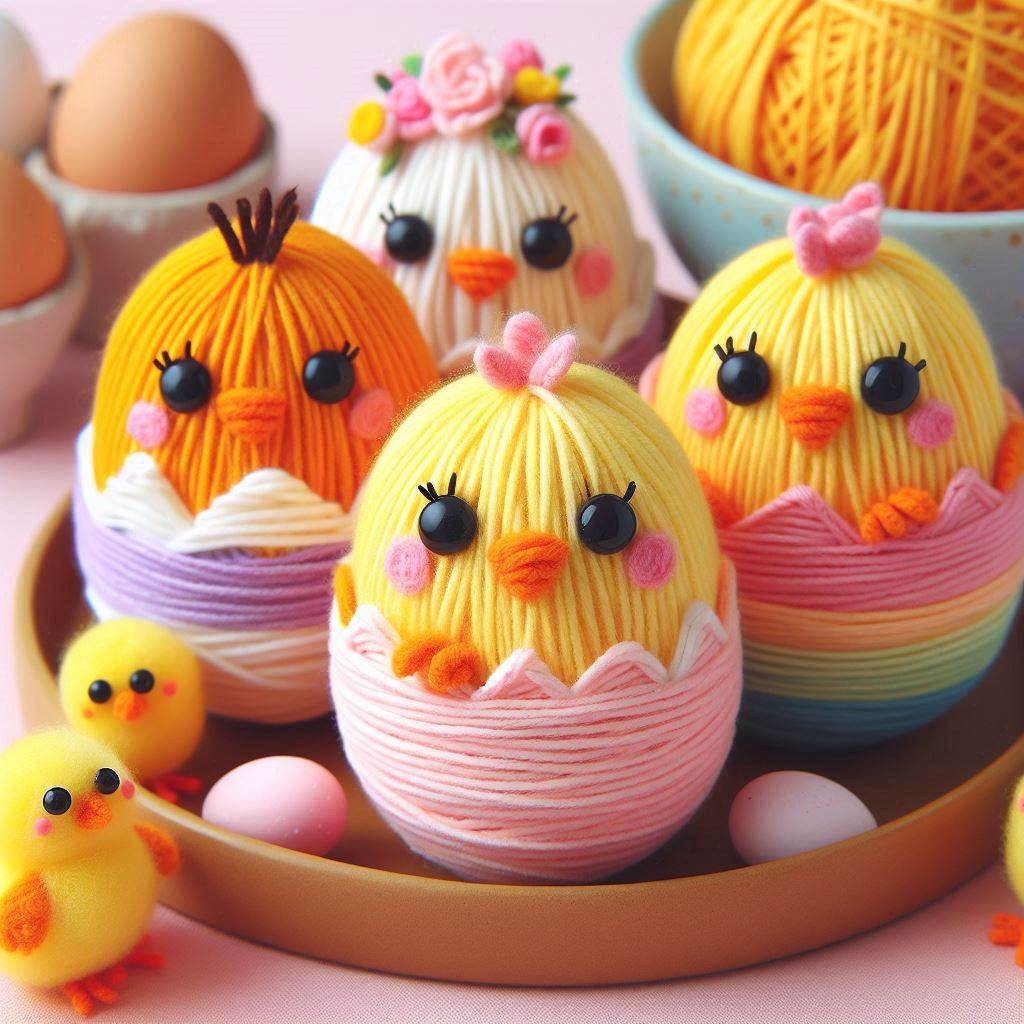
This engaging craft transforms simple balloons and yarn into adorable and fuzzy chicks. It’s a fun sensory experience for kids who love to get their hands dirty!
Materials List:
- Balloons (white preferred)
- Yarn (various colors)
- White glue
- Petroleum jelly or cooking spray (optional)
- Scissors
Instructions:
- Blow Up the Balloon: Blow up the balloons to your desired chick size. White balloons work best, but feel free to experiment with pastel colors for a more whimsical look.
- Prep the Balloon (Optional): For easier yarn removal later, apply a thin layer of petroleum jelly or cooking spray to the balloon surface. This step is optional, but it can help prevent the yarn from sticking too firmly.
- Wrap the Yarn: Begin wrapping the yarn around the balloon in all directions. Aim to create a thick layer with minimal gaps between the yarn strands.
- Secure the Yarn: Once the balloon is completely covered, tie the end of the yarn securely and snip off any excess yarn with scissors.
- Drying Time: Allow the glue to dry completely. Overnight drying is ideal to ensure the yarn structure holds its shape.
- Pop and Peel: Carefully pop the balloon and gently peel it away from the yarn structure. The yarn should now hold its chick-like shape.
- Adding Details: Use leftover yarn or construction paper to add details like eyes, a beak, and wings. Googly eyes or buttons can also be used for a more defined look.
Tips:
Experiment with different yarn colors to create a variety of colorful chicks. You can even use a combination of colors for a more playful effect.
Consider pre-cutting the yarn into smaller strips for younger children who might find it challenging to manage a long strand.
Let your child personalize their chick with additional details like a tiny fabric bowtie or a piece of construction paper for a seed in its beak.
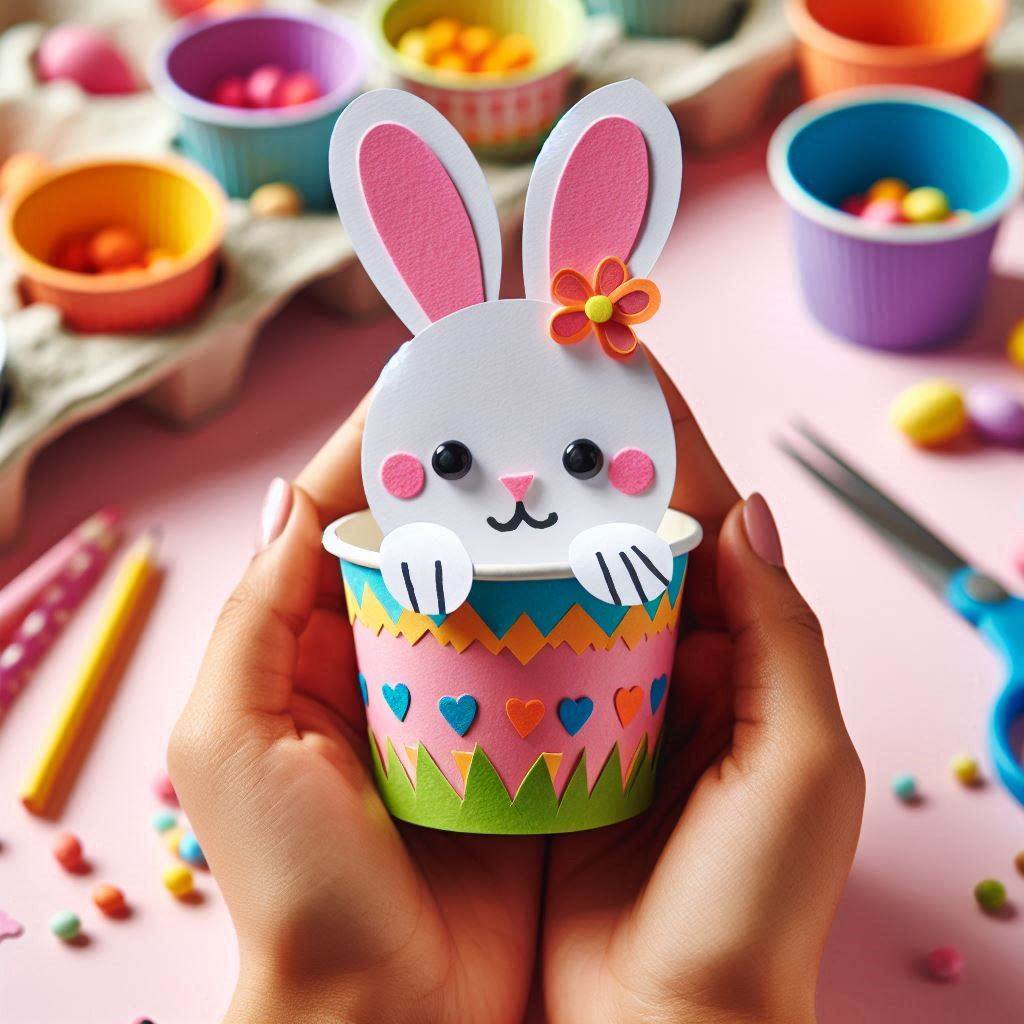
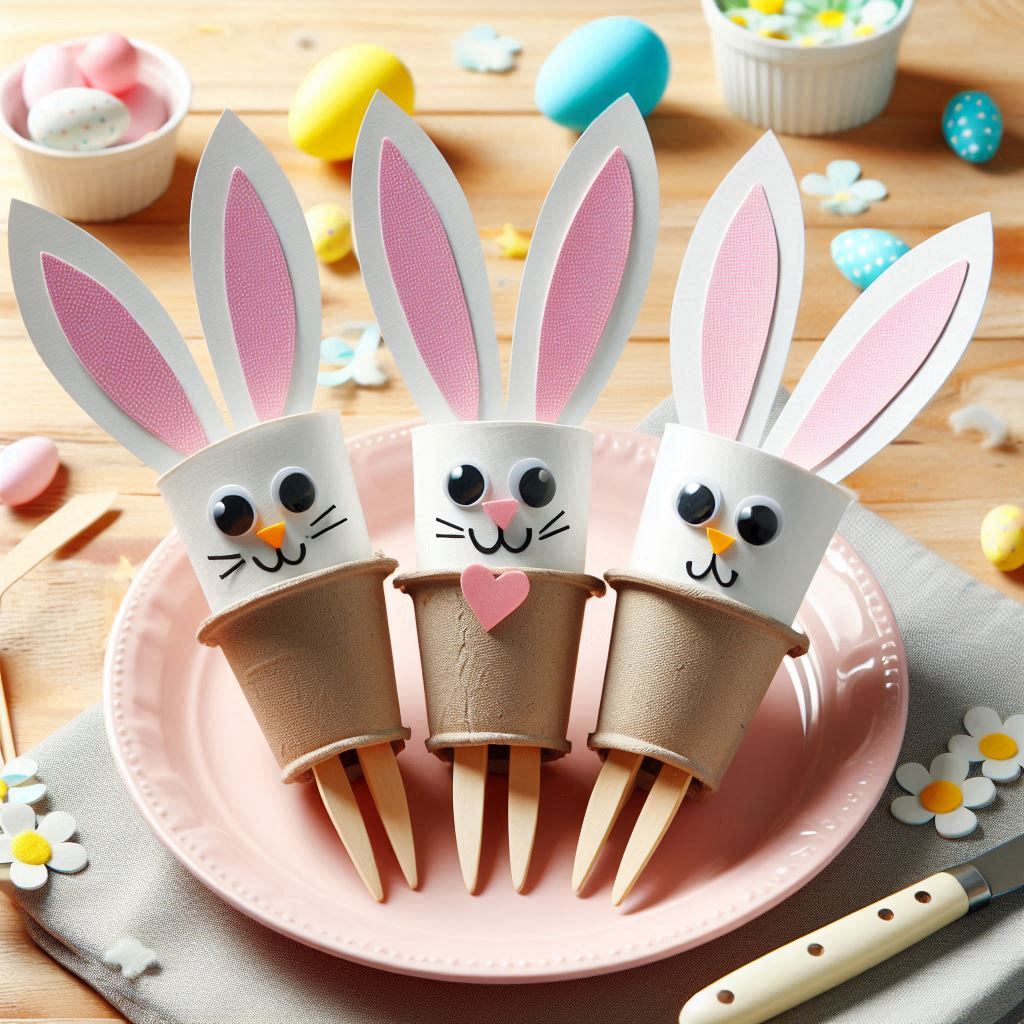
4. Bouncy Bunny Paper Cups:
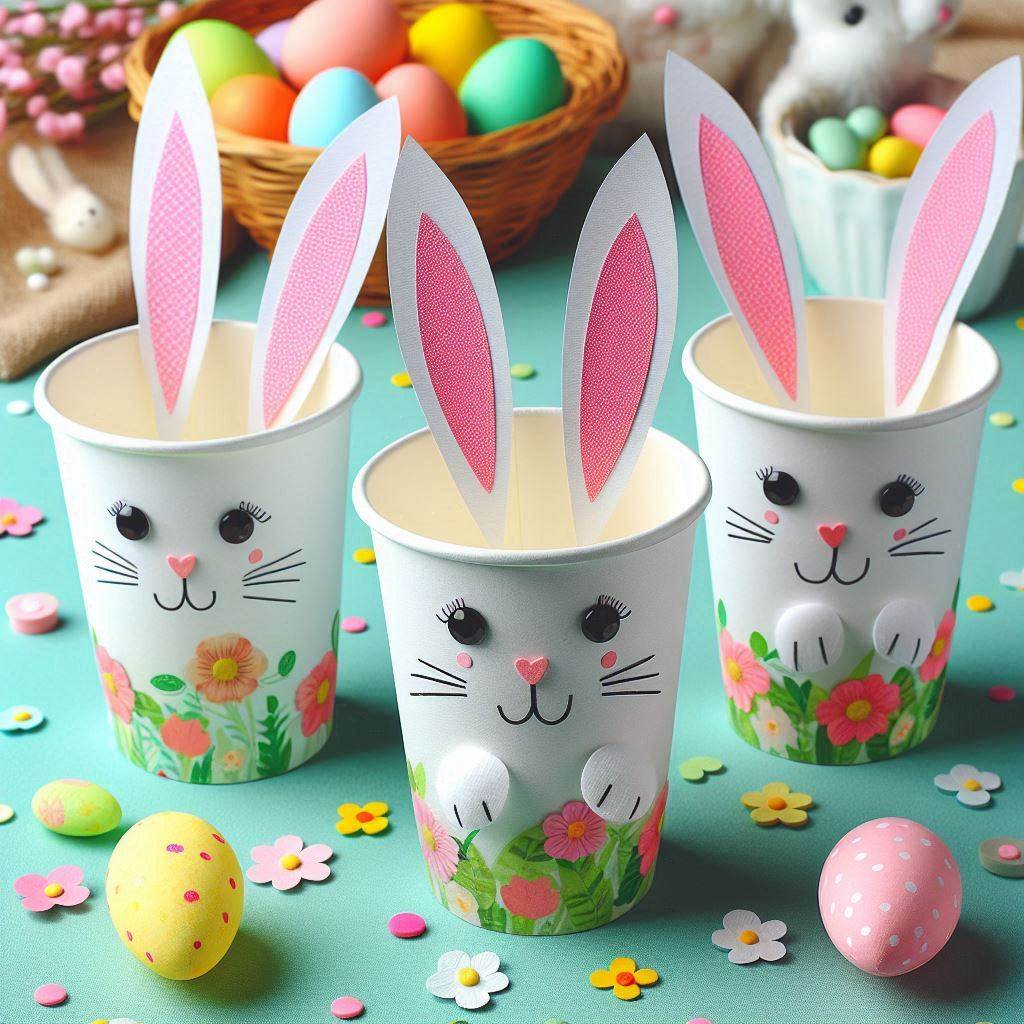
These adorable and functional bunny paper cups are perfect for Easter egg hunts or classroom celebrations. They can be filled with candy, small toys, or even used as festive planters for Easter grass.
Materials List:
- Paper cups (white or pastel colors)
- Construction paper (various colors)
- Googly eyes
- Pink pipe cleaners
- White craft foam (optional)
- Scissors
- Glue stick
- Stapler
Instructions:
- Cut Out the Features: From the construction paper, cut out bunny ears, nose, and mouth shapes. The size and shape can be customized based on your preference.
- Assemble the Face: Glue the googly eyes and paper features onto the paper cup to create the bunny’s face.
- Create the Arms: Cut two small slits near the bottom rim of the cup on opposite sides. These will be the slots for the bunny’s arms.
- Attach the Arms: Thread the pink pipe cleaners through the slits you created for the arms. These will be the bunny’s arms that can be gently bent and posed.
- Bunny Feet (Optional): Cut out small bunny feet shapes from white craft foam (optional) and glue them to the bottom ends of the pipe cleaners for added detail.
Tips:
Encourage your child to decorate the cups further with markers or stickers to personalize their bunny creations.
Fill the cups with Easter treats like jelly beans or chocolate eggs for a festive surprise.
You can also use these bunny paper cups as small planters for Easter grass or wheatgrass seeds. Simply add a small amount of potting soil to the cup and plant a few seeds. As the grass grows, it will create a green “hair” effect for your bunny.
5. Egg Carton Caterpillar:
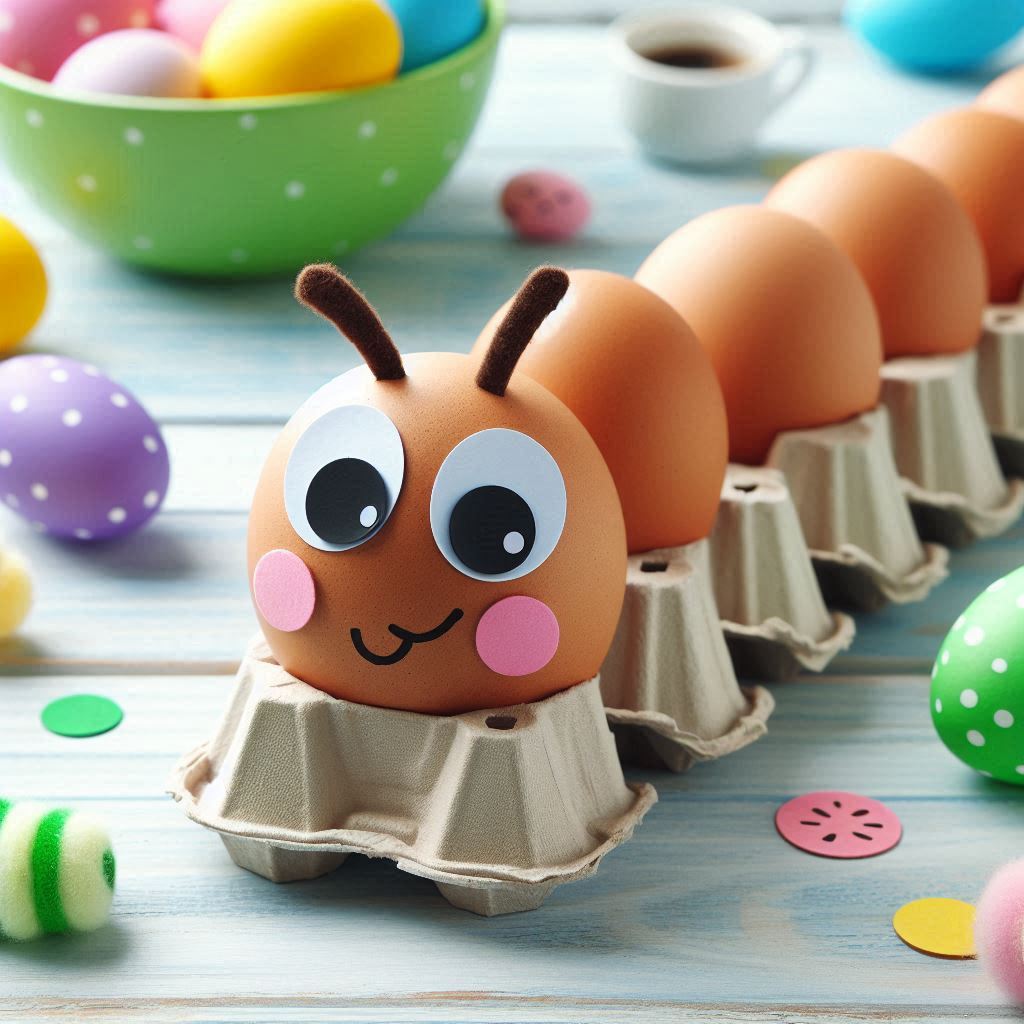
This vibrant craft transforms an ordinary egg carton into a playful and colorful caterpillar. It’s a fantastic way to introduce the concept of recycling and upcycling to young children.
Materials List:
- Empty egg carton (cardboard)
- Tempera paint (various colors)
- Paintbrushes
- Googly eyes
- Pipe cleaners
- Scissors
Instructions:
- Prepare the Egg Cups: Cut the egg carton sections apart to create individual egg cups.
- Painting Time: Let your child unleash their creativity! Help them paint each egg cup section a different color. Encourage them to experiment with different patterns and designs.
- Adding Eyes: Once the paint dries completely, glue googly eyes onto the front section of one egg cup to create the caterpillar’s head.
- Crafting the Legs: Cut pipe cleaners into small segments for the caterpillar’s legs. Glue these segments onto the sides of each egg cup section along the bottom edge.
- Assembling the Caterpillar: Attach the egg cup sections together in a row using glue or staples to form the caterpillar’s body. You can adjust the length of your caterpillar by using more or fewer egg cup sections.
Tips:
Use different sizes of egg cartons to create a segmented caterpillar with varying body widths. This adds a fun and whimsical touch.
Consider cutting out additional construction paper leaves or pipe cleaner antennae for extra detail. You can even create a small flower out of construction paper and glue it next to the caterpillar for a complete scene.
6. Fluffy Sheep Craft:
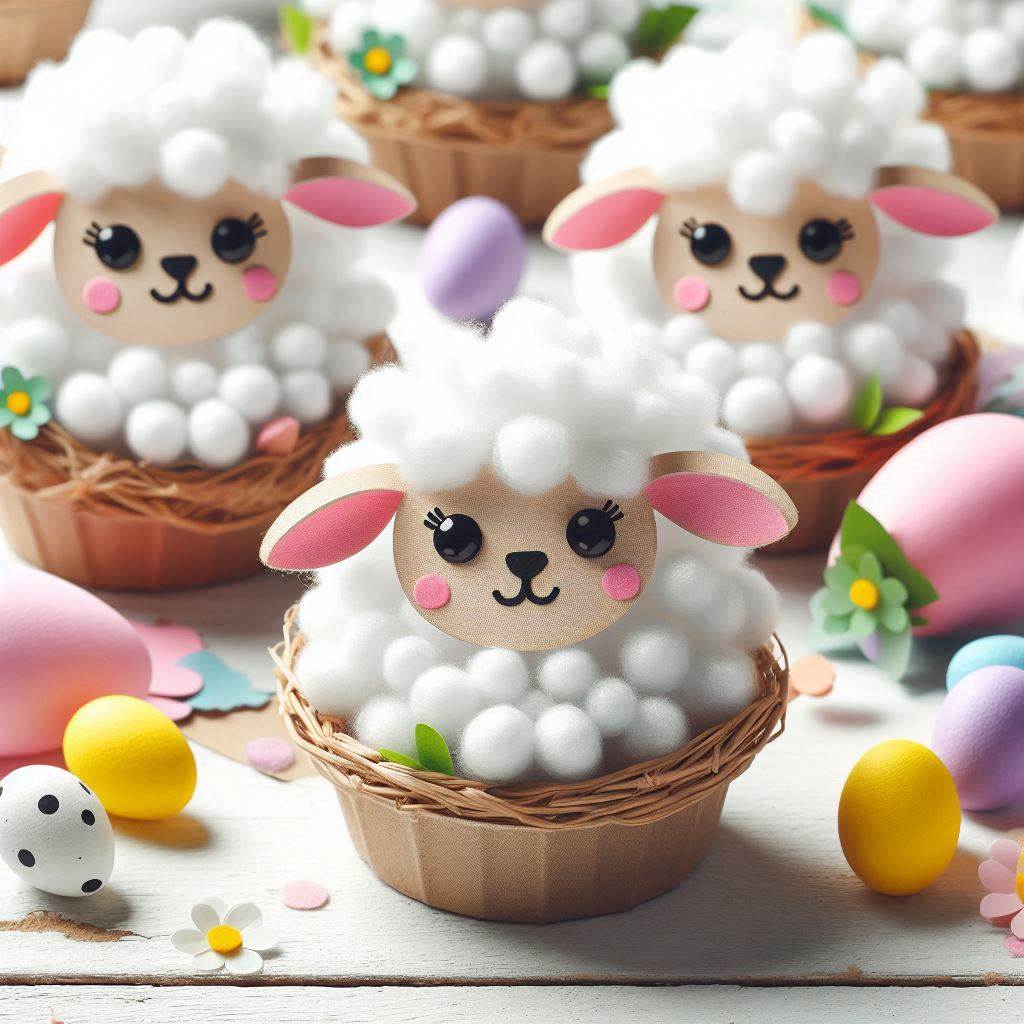
This adorable and cuddly craft is sure to win the hearts of any little lamb lover!
Materials List:
- Paper plates (white)
- Cotton balls
- White yarn
- Black construction paper
- Scissors
- Glue stick
- Markers
Instructions:
- Cutting the Features: Cut out a head and leg shape from black construction paper. The size and shape can be customized based on your child’s preference.
- Assemble the Face: Glue the head shape onto the center of a paper plate. This will be the sheep’s face.
- Creating the Fluffy Body: This is where the fun gets fluffy! Glue cotton balls all over the paper plate, covering the entire surface to create a soft and fluffy sheep body.
- Attaching the Legs: Cut small slits at the bottom of the paper plate for the legs. Slide the black construction paper leg shapes into the slits and glue them in place.
- Crafting the Tail: Wrap white yarn around your fingers several times to create small loops. Carefully cut the loops open to form a small pom pom. Glue the pom pom onto the back of the sheep for a fluffy tail.
- Adding Details: Use markers to draw eyes and a small mouth on the sheep’s face. You can also add a pink blush mark on the cheeks for extra cuteness.
Tips:
Experiment with different textures of cotton balls or yarn to add variety to your sheep’s fluffiness. You can even use a combination of both for a more interesting look.
Consider creating a background scene for your sheep. Cut out a green construction paper base to represent grass and add a few construction paper flowers for a complete farmyard picture.
7. Sprouting Seed Heads:
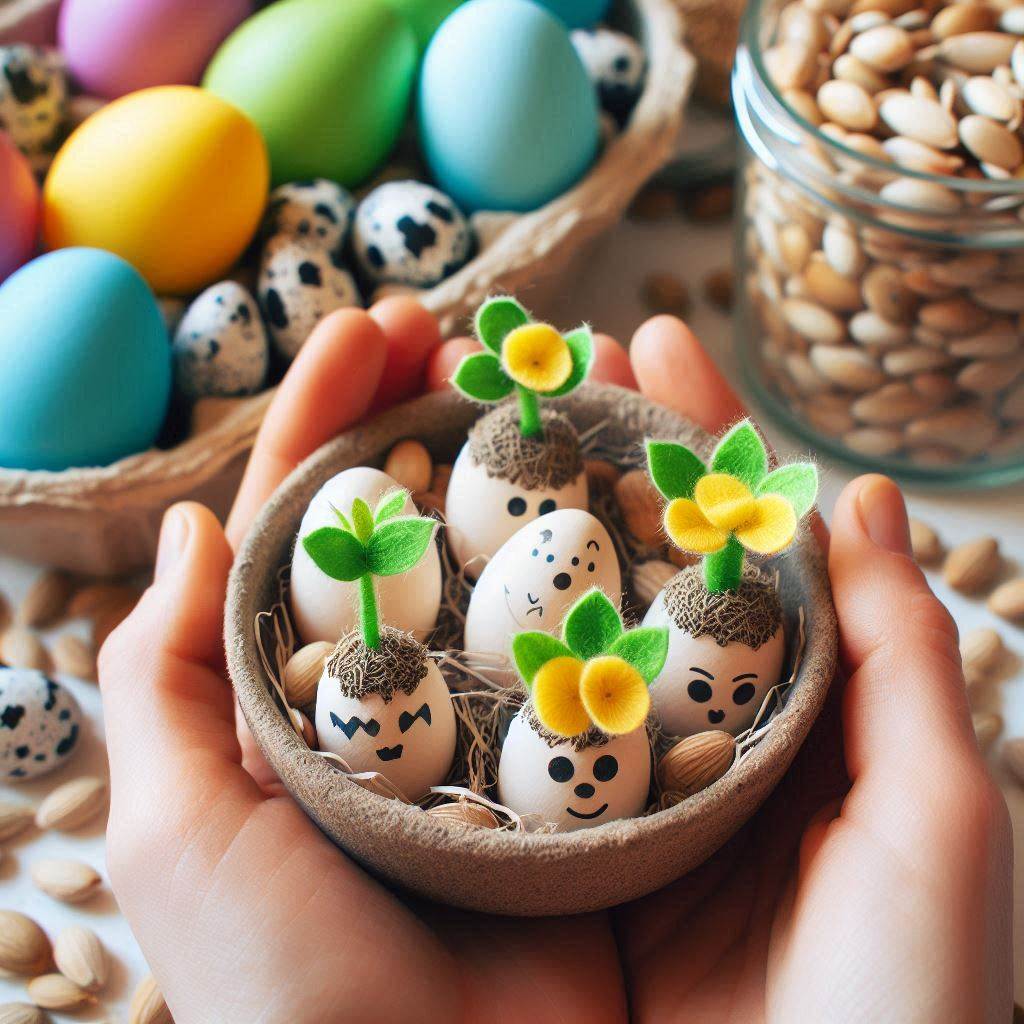
This educational and eco-friendly craft allows children to witness the magic of nature firsthand. It’s a fantastic way to spark their interest in plant growth and responsibility.
Materials List:
- Nylon stockings (knee-high preferred)
- Potting soil
- Grass seeds
- Rubber bands
- Yarn or ribbon (optional)
- Markers (optional)
Instructions:
- Filling the Head: Fill the toe section of the nylon stocking with potting soil. Don’t overstuff it, leave some room at the top for shaping.
- Creating the Head Shape: Secure the top of the filled stocking with a rubber band, creating a round head shape.
- Adding a Face (Optional): If you want to personalize your sprouting seed head, use markers to draw eyes, a nose, and a smile on the front of the head.
- Hair Decoration (Optional): Tie a piece of yarn or ribbon around the neck of the head for an added decorative touch.
- Planting Time: Place the sprouting seed head in a sunny location and water it regularly. Make sure the soil stays moist but not soggy.
- Sprouting Surprise: Over time, the grass seeds will sprout and grow, creating a green “hair” effect for your sprouting seed head. Be patient, it might take a week or two for the seeds to germinate.
Tips:
Use different colored stockings for a variety of characters. Pink stockings can create a cute bunny head, while brown stockings can be transformed into a bear head.
You can also plant different types of fast-germinating seeds like chia seeds or wheatgrass for quicker results. These options will allow your child to see the sprouting process within a few days.
8. Bouncy Bunny Ears Headband:
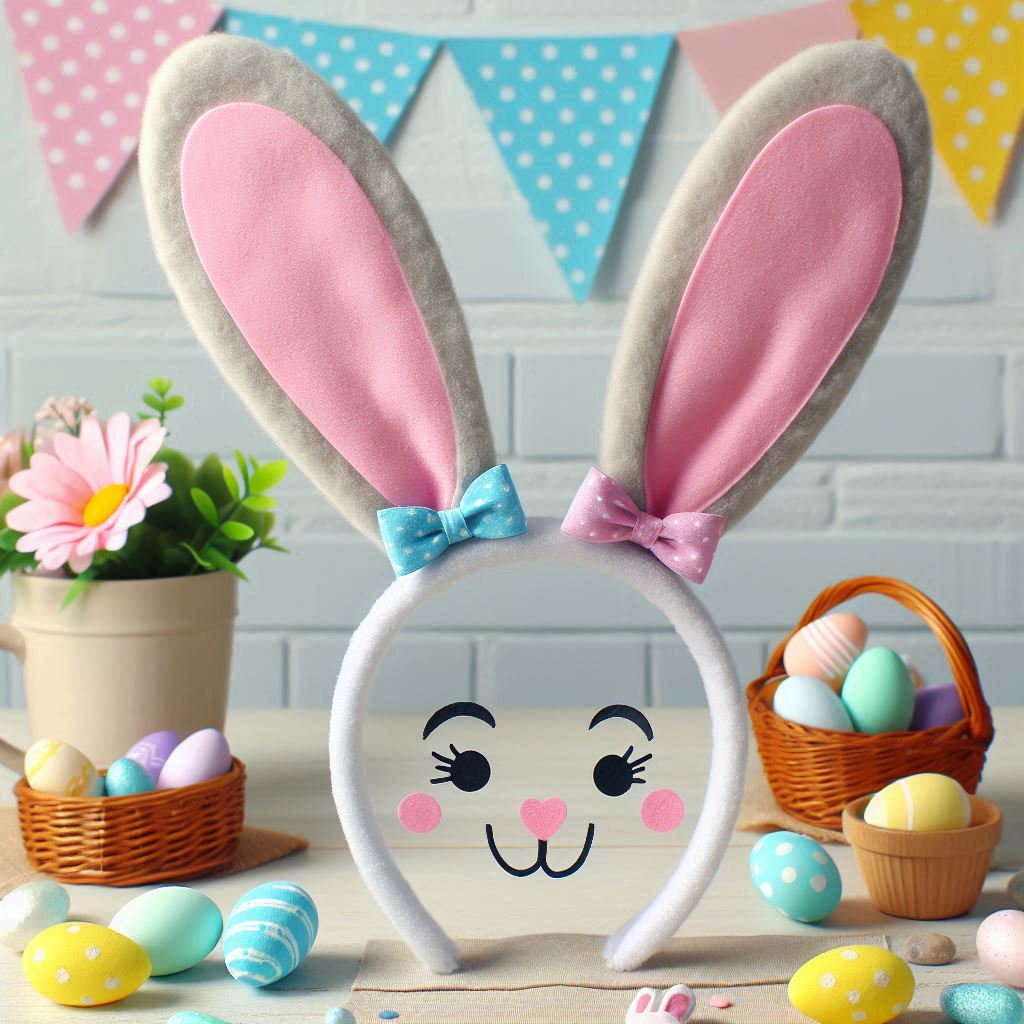
Hop into Easter fun with these adorable and bouncy bunny ear headbands! They’re perfect for Easter egg hunts, classroom celebrations, or simply adding a touch of festive flair to any outfit.
Materials List:
- White headband (plastic or fabric)
- Pink felt (or other colors for variety)
- Pipe cleaners (white or pink)
- Scissors
- Glue gun (or strong craft glue)
- Optional: Sequins, glitter, or buttons for decoration
Instructions:
- Cut the Bunny Ears: Cut out two large bunny ear shapes from the felt. Experiment with different sizes and shapes for a more playful look.
- Create the Inner Ear (Optional): Cut out slightly smaller ear shapes from a different colored felt (optional) to create a layered effect for the bunny ears. Glue these smaller shapes onto the larger felt pieces.
- Attach the Pipe Cleaners: Cut two pipe cleaners in half. These will be the inner support wires for the bunny ears, helping them stand upright. Insert one pipe cleaner half into the bottom edge of each felt ear and secure it in place with hot glue.
- Attaching the Ears to the Headband: Use the hot glue gun to attach the bottom of each felt ear (with the pipe cleaner inside) to the headband. Ensure even spacing for a balanced look.
- Decorate (Optional): Let your child unleash their creativity! Decorate the bunny ears with sequins, glitter, buttons, or markers to add a personal touch.
Tips:
Use different colored felt for each bunny ear to create a vibrant and whimsical headband.
For younger children, pre-cut the felt shapes and pipe cleaners to make the crafting process easier.
If you don’t have a hot glue gun, strong craft glue can be used as well, but allow extra drying time to ensure the ears stay securely attached to the headband.
9. Beaded Chick Necklaces:
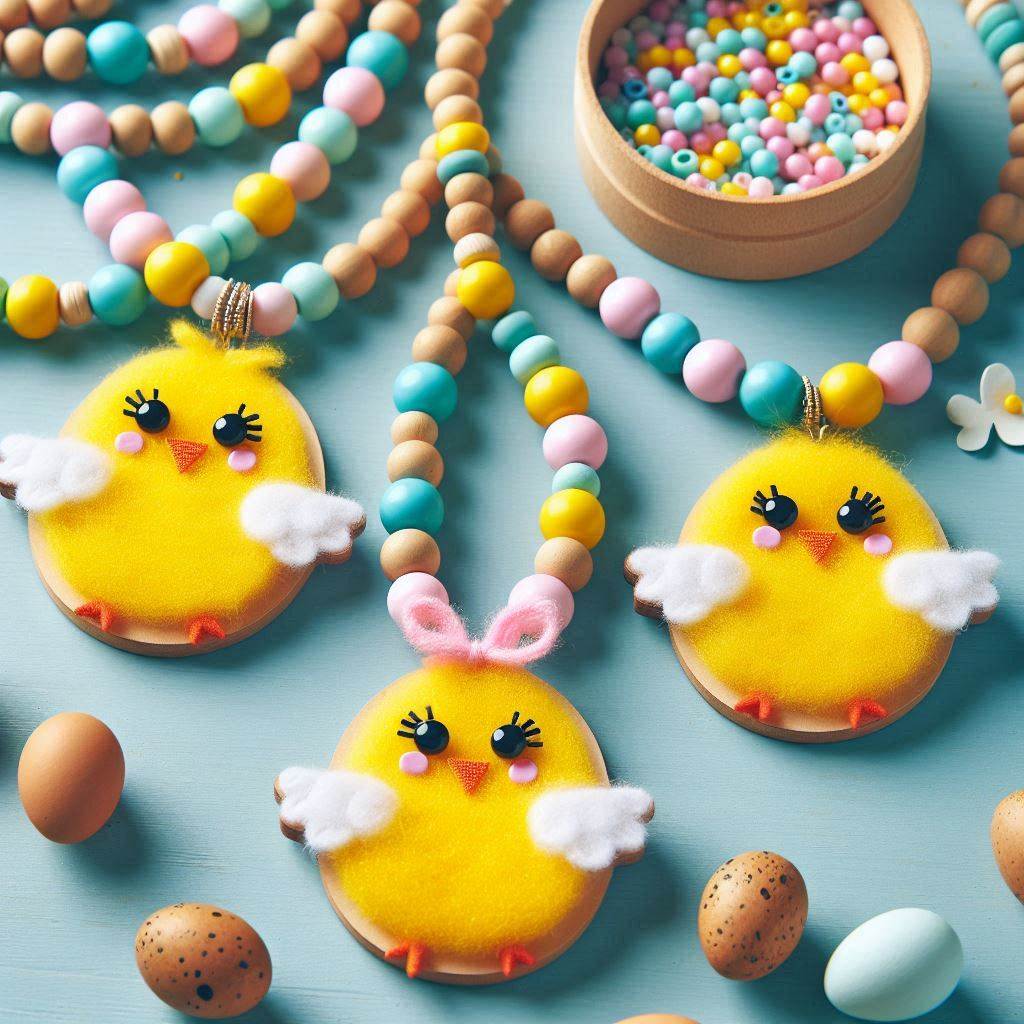
This colorful and sparkly craft is perfect for little crafters who love beads! It’s a fun and personalized Easter accessory they can wear with pride.
Materials List:
- Pony beads (various bright colors)
- Elastic cord (stretchy and strong)
- Scissors
- Optional: Large yellow bead for the chick’s head (optional)
Instructions:
- Choosing the Beads: Help your child select a variety of colorful pony beads to create their chick design. They can choose beads in yellow, orange, black, or any colors they like!
- Stringing the Beads: Thread the elastic cord through a needle (optional, for younger children) or simply by hand. Begin stringing the pony beads onto the elastic cord, creating a pattern or design.
- Adding the Chick’s Head (Optional): If you’re using a large yellow bead for the chick’s head, thread it onto the elastic cord before adding other beads. This will be the focal point of the necklace.
- Tying the Ends: Once the desired length is reached, tie the two ends of the elastic cord together securely to form a loop. You can use a simple knot or double knot for added security.
- Adjusting the Size (Optional): If the necklace is too big, gently pull on the elastic cord to tighten the loop. However, be careful not to overstretch or break the elastic.
Tips:
Encourage your child to experiment with different bead patterns for a unique and personalized necklace. They can create stripes, zigzags, or even spell out their name with letter beads.
Use a variety of bead shapes and sizes for added visual interest.
You can also create matching bracelets using the same technique.
10. Button Bunny Picture Frames:
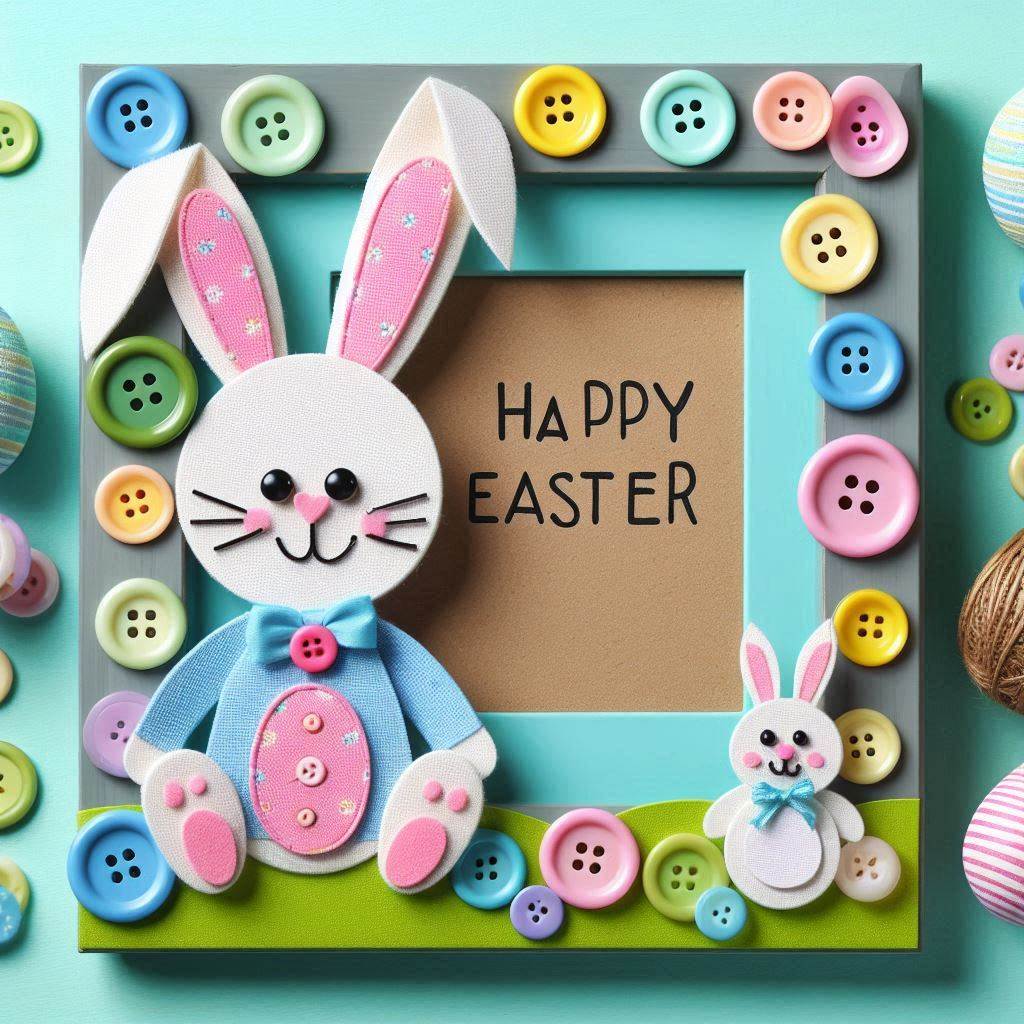
This craft is a fantastic way to upcycle old buttons and create a personalized Easter keepsake. It’s perfect for displaying cherished family photos or Easter artwork.
Materials List:
- Cardboard picture frame (pre-cut or made from scratch)
- Buttons (various sizes and colors)
- Glue gun (or strong craft glue)
- Paint (optional)
- Paintbrush (optional)
- Googly eyes (optional)
- Markers (optional)
Instructions:
- Painting the Frame (Optional): If desired, you can paint the cardboard picture frame a solid color or create a fun Easter-themed design using markers or paint. Let the paint dry completely before proceeding.
- Arrange the Buttons (Continued): Lay out the buttons on the picture frame surface to create the design of a bunny. Use larger buttons for the body and smaller buttons for the head and details like the ears and nose. Experiment with different button sizes, colors, and textures to create a unique bunny design.
- Gluing the Buttons: Once you’re happy with the button arrangement, use the hot glue gun (or strong craft glue) to adhere each button securely to the picture frame surface.
- Adding the Finishing Touches: Use googly eyes or markers to create the bunny’s eyes. You can also add a pink pipe cleaner for a mouth or a small piece of ribbon for a bowtie.
- Inserting the Picture: Carefully insert a cherished family photo or a piece of Easter artwork into the picture frame opening.
Tips:
Sort through old button jars or ask friends and family for button donations to create a larger selection for your bunny picture frame design.
You can also use other small craft embellishments like sequins, beads, or felt scraps to add details to your bunny picture frame.
Consider creating multiple bunny picture frames with different button arrangements and color schemes for a charming Easter display.
11. Peeps Bunny Treat Cups:
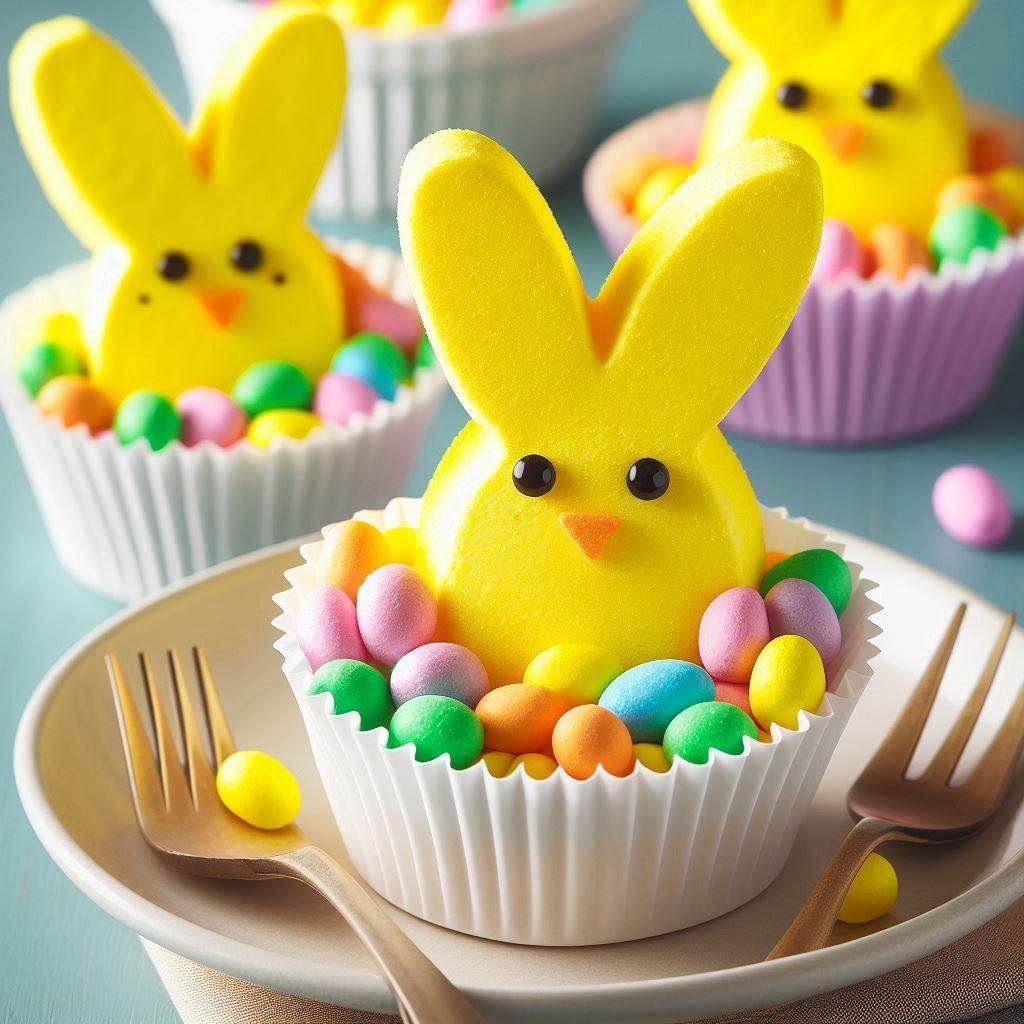
These adorable treat cups are a fun and festive way to dress up store-bought Peeps candies for Easter celebrations. They can be filled with additional candy, popcorn, or small toys for an extra Easter surprise.
Materials List:
- Paper cups (white or pastel colors)
- Construction paper (various colors)
- Googly eyes
- Pipe cleaners (pink or white)
- Scissors
- Glue stick
- Stapler (optional)
Instructions:
- Cut Out the Features: From the construction paper, cut out bunny ear shapes, a small nose, and a mouth shape.
- Assemble the Face: Glue the googly eyes and paper features onto the paper cup to create the bunny’s face.
- Creating the Ears: Cut two small slits near the top rim of the cup on opposite sides. These will be the slots for the bunny ears.
- Attaching the Ears: Fold the bottom ends of the construction paper bunny ears inwards slightly to create a small tab. Slide these tabs into the slits you created on the cup and secure them in place with glue or staples (optional).
- Adding the Arms (Optional): Cut two short pieces of pipe cleaner and bend them slightly to create a slight curve. Glue these pipe cleaner pieces onto the sides of the cup near the bottom for bunny arms.
- Filling the Treat Cup: Carefully place a Peep candy (or other treat) inside the decorated paper cup. Your bunny treat cup is now complete!
Tips:
Use different colored construction paper for the bunny features to create a variety of colorful treat cups.
You can also decorate the paper cup further with markers or stickers for added personalization.
Consider using different types of candies or small toys to fill your bunny treat cups, depending on the occasion.
12. Paper Bag Bunny Puppets:
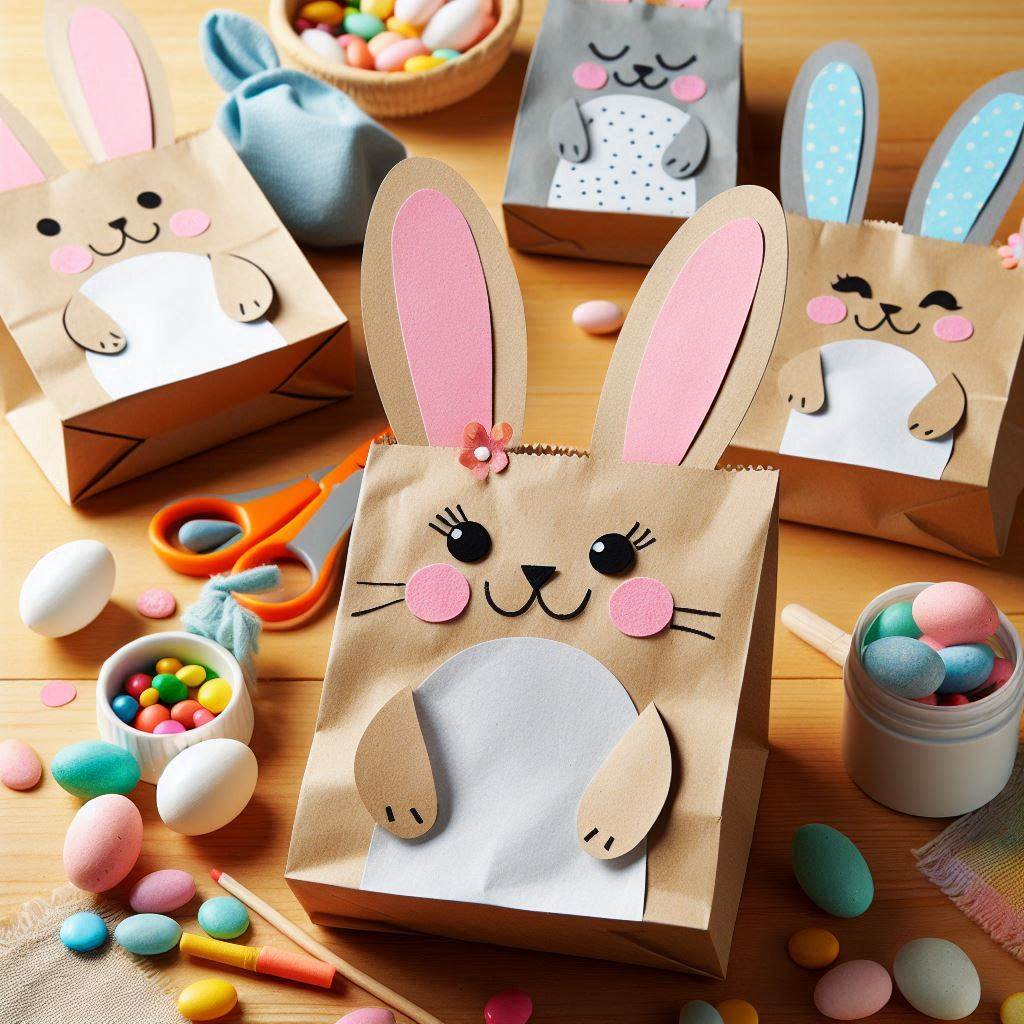
These interactive bunny puppets are perfect for storytelling, Easter plays, or simply imaginative playtime. They’re easy to make and encourage creative expression in children.
Materials List:
- Brown paper bags (lunch size)
- Construction paper (various colors)
- Markers
- Scissors
- Glue stick
- Yarn or ribbon (optional)
Instructions:
- Decorate the Bag: Let your child use markers to decorate the brown paper bag. They can draw a bunny face, whiskers, and other details.
- Cutting Out the Ears: From construction paper, cut out two large bunny ear shapes.
- Attaching the Ears: Fold the bottom edge of each bunny ear inwards slightly to create a small tab. Apply glue to the tab and adhere the ears to the top corners of the paper bag.
- Creating the Arms (Optional): Cut two small slits on either side of the bottom part of the paper bag. These will be the openings for the puppet’s arms.
- Adding the Arms (Optional): If desired, thread a piece of yarn or ribbon through each slit from the inside of the bag. These strings will allow your child to control the puppet’s arms during playtime.
Tips:
Use different colors of construction paper for the bunny ears to create a variety of puppet designs. You can even add glitter glue or sequins for extra sparkle.
Encourage your child to come up with a name and personality for their bunny puppet. This adds to the storytelling experience and helps them connect with their creation.
13. Crepe Paper Chick Wreath:

This colorful and cheerful wreath is a fantastic way to decorate your front door or classroom for Easter.
Materials List:
- Cardboard wreath form (any size)
- Crepe paper (various bright colors)
- Scissors
- Glue gun (or strong craft glue)
- Ribbon (optional)
- Construction paper (optional)
Instructions:
- Cutting the Crepe Paper Strips: Cut long strips of crepe paper in various colors. Aim for a width of about 1-2 inches and a length that can comfortably wrap around the wreath form several times.
- Creating the Crepe Paper Curls: Here comes the fun part! Stretch a crepe paper strip gently between your thumb and forefinger along its entire length. Once stretched, use scissors to cut one edge of the crepe paper into fringe (without cutting all the way through the other end). Now, carefully roll the crepe paper strip upwards, creating a ruffled curl.
- Attaching the Curls: Use the hot glue gun (or strong craft glue) to secure the bottom end of each crepe paper curl to the cardboard wreath form. Layer the curls close together, covering the entire wreath form for a full and vibrant look.
- Adding a Bow (Optional): Cut a piece of ribbon and tie it into a bow. Attach the bow to the top of the wreath for a decorative touch.
- Chick Details (Optional): Cut out small chick shapes from construction paper. Glue googly eyes and a beak onto each chick shape. You can then glue these paper chicks onto the wreath form for added detail.
Tips:
Experiment with different color combinations for your crepe paper curls to create a truly unique and eye-catching wreath.
You can also use pre-cut crepe paper streamers instead of cutting your own strips.
Consider creating a variety of chick shapes from construction paper. You can even add tiny paper wings for a more complete look.
14. Salt Dough Easter Egg Ornaments:

These colorful and customizable ornaments are a fantastic way to create personalized Easter decorations. They’re also a great option for a keepsake craft that can be treasured for years to come.
Materials List:
- 2 cups all-purpose flour
- 1/2 cup salt
- 1 cup warm water
- Food coloring (optional)
- Cookie cutters (egg-shaped preferred)
- String or ribbon
- Baking sheet
- Parchment paper (optional)
- Paint (optional)
- Glitter (optional)
- Markers (optional)
Instructions:
- Mixing the Dough: In a large bowl, combine the flour and salt. Slowly add the warm water and knead until a smooth dough forms. If desired, add a few drops of food coloring to create a pastel dough color.
- Rolling Out the Dough: Lightly flour a clean surface and roll out the dough to a thickness of about 1/4 inch.
- Cutting Out the Shapes: Use your egg-shaped cookie cutter to cut out shapes from the dough.
- Creating a Hole for Hanging: Using a straw or toothpick, gently poke a small hole at the top of each egg shape before baking. This will be used for hanging the ornament later.
- Baking Time: Preheat your oven to 300°F (150°C). Line a baking sheet with parchment paper (optional) and place the dough cutouts on the baking sheet. Bake for 30-45 minutes, or until the dough is firm and dry to the touch.
- Cooling Down: Once baked, remove the ornaments from the oven and let them cool completely on the baking sheet.
- Decorating (Optional): Now comes the fun part – decorating! You can paint your ornaments with acrylic paints, add glitter for extra sparkle, or use markers to draw designs or messages.
- Threading the String: Cut a piece of string or ribbon and thread it through the hole you created earlier. Tie a knot at the end to secure the ornament and it’s ready for hanging!
Tips:
Experiment with different cookie cutter shapes beyond eggs for a variety of Easter ornament designs. Bunny shapes, chicks, or crosses are all fun options.
You can also create designs on the ornaments before baking by pressing small buttons, beads, or other craft embellishments into the dough.
If you plan to store your salt dough ornaments for a long time, consider coating them with a layer of clear varnish after they are completely dry. This will help protect them from dust and damage.
15. Paper Plate Chick Windsock:
This adorable and colorful windsock is a fun way to add some Easter cheer to your yard or balcony. Children will love watching it flutter in the spring breeze!
Materials List:
- Large paper plate
- Construction paper (various colors)
- Scissors
- Glue stick
- Yarn or string
- Hole punch
- Markers (optional)
Instructions:
- Cutting Out the Chick Shape: Cut out a large oval shape from the center of the paper plate. This will be the body of the chick.
- Creating the Chick’s Features: From construction paper, cut out smaller shapes for the chick’s head, eyes, beak, and wings.
- Assemble the Chick: Glue the construction paper chick head onto the top of the paper plate oval. Add the eyes, beak, and wings using glue. You can also use markers to draw additional details like feathers or a happy chick expression.
- Attaching the String: Use a hole punch to create a small hole near the top edge of the paper plate. Thread a long piece of yarn or string through the hole and tie a knot at the end to secure it.
- Hanging the Windsock: Find a suitable location outdoors, like a tree branch or a porch railing, and tie the loose end of the string to hang the chick windsock. Now let the spring breeze do its magic!
Tips:
Experiment with different colors and patterns for the construction paper to create a variety of colorful chick designs. You can even add glitter glue or sequins for extra sparkle.
Consider creating multiple chick windsocks in different sizes and colors for a charming Easter display outdoors.
If you don’t have construction paper, you can cut out the chick features from the leftover paper plate scraps, creating a more rustic and recycled look.
16. Popsicle Stick Bunny Lanterns:

These adorable bunny lanterns are a fun and festive way to decorate your home or classroom for Easter celebrations.
Materials List:
- Popsicle sticks (enough to make a square or rectangular frame)
- Tissue paper (various colors)
- Glue stick
- Scissors
- Stapler
- Pipe cleaners (pink or white)
- Googly eyes
- Markers (optional)
- Ribbon (optional)
Instructions:
- Creating the Frame: Use popsicle sticks to create a square or rectangular frame by gluing them together at the corners. The size of the frame will determine the size of your lantern.
- Cutting the Tissue Paper: Cut squares of tissue paper in various colors slightly larger than the popsicle stick frame.
- Attaching the Tissue Paper: Scrunch each tissue paper square into a loose ball. Apply glue to the edges of the popsicle stick frame and carefully adhere the scrunched tissue paper balls all over the frame, covering any gaps.
- Creating the Bunny Ears: Cut two long pipe cleaner pieces and bend them into floppy bunny ear shapes.
- Attaching the Bunny Ears: Secure the pipe cleaner bunny ears to the top of the popsicle stick frame using glue or staples.
- Adding the Face: Glue googly eyes onto the front of the lantern frame. You can also use markers to draw a bunny nose and mouth.
- Hanging the Lantern (Optional): Cut a piece of ribbon and tie it to the top of the lantern for hanging.
Tips:
Experiment with different color combinations for the tissue paper to create a truly unique and vibrant lantern.
You can also use pre-cut tissue paper squares for easier crafting, especially with younger children.
Consider creating multiple bunny lanterns in different sizes for a delightful Easter display.
17. Nature Walk Easter Baskets:
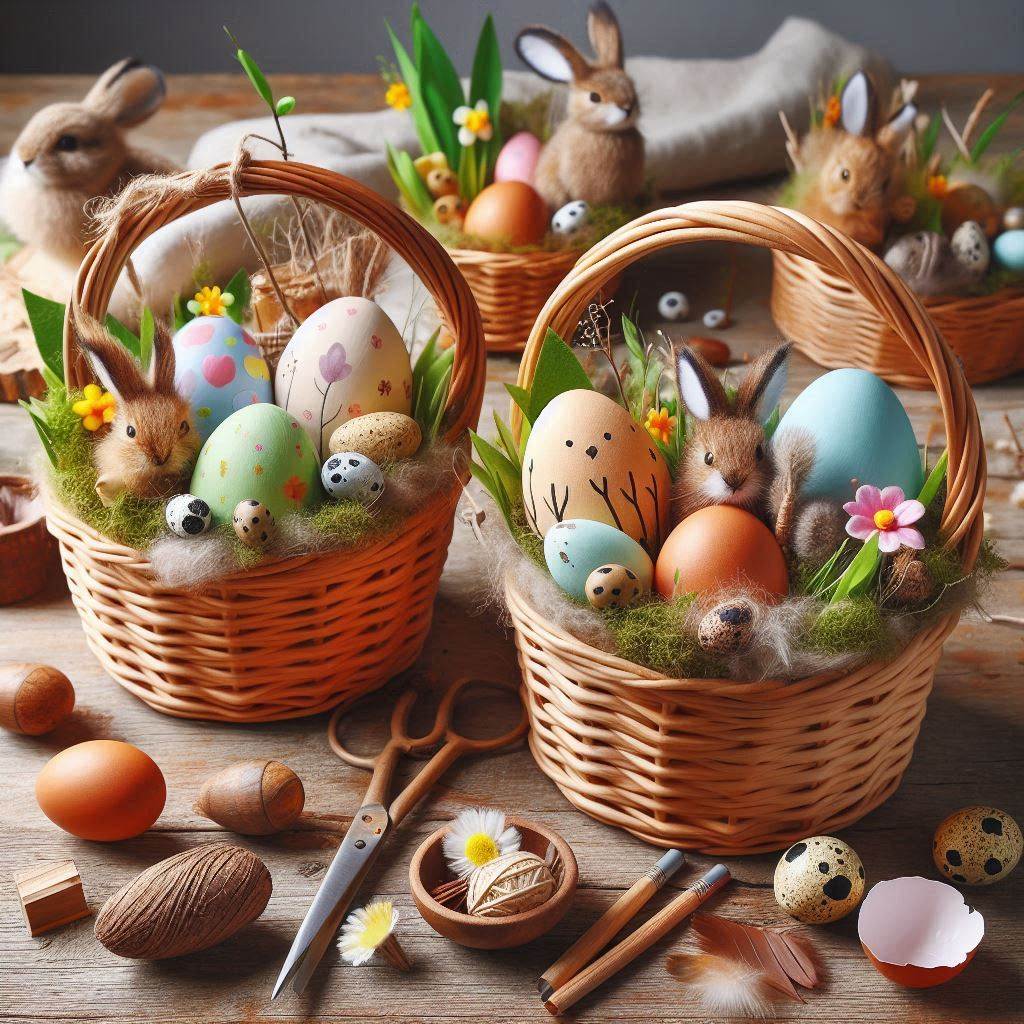
This eco-friendly craft is a fun way to get children outdoors and explore the beauty of nature. They can then use their collected treasures to create personalized Easter baskets.
Materials List:
- Paper bags (brown or white)
- Scissors (optional)
- Glue stick (optional)
- Ribbon or yarn (optional)
- Natural materials (leaves, flowers, twigs, small pinecones)
Instructions:
- Nature Walk Adventure: Head outdoors for a nature walk with your child. Encourage them to collect a variety of natural materials like leaves, flowers, twigs, and small pinecones.
- Decorating the Basket: Help your child arrange the collected natural materials on the paper bag. You can use them to create a design or simply adhere them randomly for a more rustic look.
- Securing the Materials: Use a glue stick to secure the natural materials onto the paper bag. Be gentle with delicate items like flowers.
- Adding a Personal Touch (Optional): Let your child personalize their basket further by adding a name tag made from construction paper or by tying a colorful ribbon or yarn around the handle (if the paper bag has one).
Tips:
Look for natural materials in different shapes, sizes, and colors to create a visually interesting Easter basket.
You can also incorporate other natural elements like colorful pebbles or small seashells (if you live near a beach) for a unique touch.
Encourage your child to use their imagination and creativity when decorating their nature walk Easter basket.
18. Bouncy Bunny Paper Cup Friends:
These adorable bouncing bunnies are perfect for playtime or Easter egg hunts. They’re a simple yet entertaining craft that encourages creativity and imagination.
Materials List:
- Plastic cups (small size)
- Construction paper (various colors)
- Wiggle eyes (or googly eyes)
- Pom poms (small size)
- Craft pipe cleaners (various colors)
- Scissors
- Glue stick
Instructions:
- Cutting Out Features: From construction paper, cut out bunny ears, a small nose, and a mouth shape. You can personalize the shapes and sizes based on your child’s preference.
- Decorating the Cup: Let your child use markers or crayons to decorate the plastic cup. This can be the bunny’s body or fur.
- Assembling the Face: Glue the wiggle eyes or googly eyes onto the front of the cup to create the bunny’s face. Add the paper nose and mouth below the eyes.
- Creating the Ears: Fold the bottom edge of each bunny ear inwards slightly to create a small tab. Apply glue to the tab and adhere the ears to the top rim of the plastic cup on opposite sides.
- Attaching the Tail (Optional): Cut a small piece of pipe cleaner and bend it into a curly tail shape. Glue the curly pipe cleaner tail to the back of the cup for a playful touch.
- Adding the Pom Pom (Optional): Glue a small pom pom onto the back of the cup above the tail (optional) to create a fluffy cottontail effect.
Tips:
Experiment with different colors of construction paper and pipe cleaners for a variety of colorful bunny designs.
You can also use felt scraps instead of construction paper for a softer and more textured look.
Consider filling the bunny cups with small candies or Easter confetti for a surprise element during playtime.
19. Peeps Bunny Parade Floats:
Transform store-bought Peeps candies into the stars of a whimsical Easter parade! This playful craft encourages storytelling and imaginative play.
Materials List:
- Peeps candies (various colors)
- Cardboard scraps (cut into small squares or rectangles)
- Craft sticks (long popsicle sticks or wooden dowels)
- Construction paper (various colors)
- Scissors
- Glue stick
- Markers (optional)
- Sequins, glitter, or other decorations (optional)
Instructions:
- Decorating the Floats: Use construction paper, markers, sequins, and glitter to decorate the cardboard squares or rectangles. You can create flags, banners, or any other parade float decorations your child imagines.
- Attaching the Floats to Sticks: Secure the decorated cardboard pieces to the craft sticks using glue.
- Adding the Peeps: Carefully glue a Peep candy onto the top of each decorated float, creating the “passengers” for the parade.
- Creating a Parade (Optional): Cut out a long strip of construction paper or use a roll of brown paper to represent the parade route. Line up the Peep bunny parade floats on the paper and let your child narrate their Easter parade story!
Tips:
Use different colored Peeps candies to create a diverse and vibrant parade.
Encourage your child to come up with names and personalities for their Peep characters, adding to the storytelling fun.
Consider creating a backdrop scene for the parade using construction paper or drawing on a large sheet of paper. This will further enhance the imaginative play experience.
20. Egg Carton Chick Mobile:
This adorable mobile is a charming Easter decoration for a nursery, bedroom, or classroom. It’s easy to make and uses recycled materials, making it an eco-friendly craft as well.
Materials List:
- Empty egg carton (cardboard)
- Tempera paint (various colors)
- Paintbrushes
- Yellow yarn
- Scissors
- Construction paper (orange or yellow)
- Googly eyes
- Hole punch
- String or fishing line
Instructions:
- Painting the Egg Cups: Separate the egg carton cups from the main carton section. Let your child unleash their creativity and paint each egg cup section a different color. Encourage them to experiment with patterns and designs.
- Drying Time: Allow the paint to dry completely.
- Cutting Out Beaks: From construction paper, cut out small triangle shapes for the chicks’ beak.
- Creating the Chicks: Glue googly eyes onto the front of each painted egg cup section. Add the paper beak below the googly eyes to complete the chick’s face.
- Punching Holes: Using a hole punch, create a small hole near the top of each painted egg cup section.
- Cutting the Yarn: Cut several pieces of yellow yarn, each about 12-15 inches long.
- Attaching the Yarn: Thread one end of each yarn piece through the hole you created in a painted egg cup section. Tie a knot at the top of the yarn to secure the chick to the string. Repeat this for each painted egg cup section.
- Assembling the Mobile: Cut a long piece of string or fishing line and tie it to a sturdy coat hanger or a stick.
- Hanging the Chicks: Tie the other ends of the yarn strings (where the chicks are attached) to the long string or fishing line at varying heights. This will create a tiered mobile effect.
- Hanging the Mobile: Find a suitable location to hang your Easter egg carton chick mobile, such as a ceiling hook, a window, or a mobile stand.
Tips:
You can use different colored construction paper for the chick’s beak to create a variety of chick designs.
Experiment with different lengths of yarn for the chick hangers to create a more dynamic and visually interesting mobile.
Consider adding other Easter-themed decorations to the mobile, such as small cutout bunnies, flowers, or colorful paper eggs.
21. Forky Bunnies:
Upcycle plastic forks into adorable and silly bunny characters! This craft is perfect for younger children who are still developing their fine motor skills.
Materials List:
- Plastic forks (white or pastel colors)
- Pipe cleaners (various colors)
- Googly eyes
- Pom poms (small size)
- Markers (optional)
- Scissors (optional)
Instructions:
- Bending the Tines: Carefully bend the two outer tines of the plastic fork upwards to create the bunny ears. You can adjust the angle of the bend to create floppy or perky bunny ears.
- Attaching the Eyes: Glue googly eyes onto the center part of the plastic fork handle, where the tines meet, to create the bunny’s face.
- Creating the Nose (Optional): Cut a small circle from a black or pink pipe cleaner and glue it onto the handle of the fork below the eyes for a bunny nose.
- Adding the Tail (Optional): Cut a short piece of pipe cleaner and bend it into a small curl. Glue the curly pipe cleaner to the back of the fork handle for a fluffy bunny tail.
- Adding the Pom Pom (Optional): Glue a small pom pom onto the back of the fork handle above the tail (optional) to create a fluffy cottontail effect.
- Decorating (Optional): Use markers to draw whiskers, a mouth, or other details onto the bunny face.
Tips:
Experiment with different colors of pipe cleaners for the nose and tail to create a variety of colorful bunny designs.
You can also use felt scraps instead of pipe cleaners for a softer and more textured look.
Consider using the bunny forks as decorations for cupcakes or Easter baskets.
Conclusion
Crafting with your children is a gift that keeps on giving. It fosters creativity, strengthens bonds, and creates cherished memories that will last a lifetime. These 21 Easter crafts offer a starting point for your springtime crafting adventures! Don’t be afraid to experiment, get messy, and have fun together.
We hope you have a fun-filled and creative Easter season filled with egg-cellent crafts and happy memories with your loved ones!