

Garden arches are a timeless addition to any outdoor space, creating stunning focal points and inviting pathways that enhance the overall charm of your backyard. Whether you’re aiming to define an entryway, provide support for climbing plants, or simply add an artistic touch to your garden, DIY garden arches offer endless possibilities. Not only are they functional, but they also bring a sense of elegance and structure to your landscape. In this article, we’ll explore 13 creative DIY garden arch ideas that can help frame your beautiful backyard, making it an even more enchanting retreat.
1. Rustic Wooden Arch
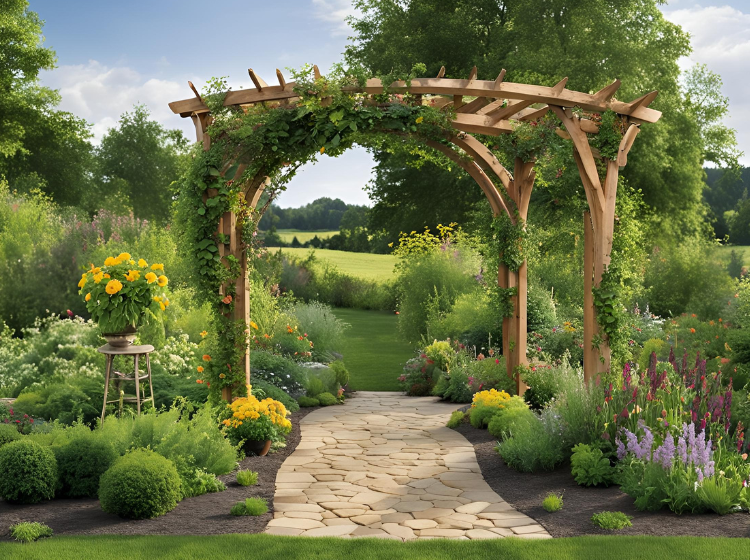
A rustic wooden arch adds a touch of natural charm to any garden. This DIY project is perfect for those who love the warmth and simplicity of wood.
Materials Needed:
- Reclaimed wood (or new wood if preferred)
- Nails or screws
- Hammer or drill
- Wood stain or paint (optional)
Step-by-Step Instructions:
- Measure and Cut the Wood: Start by measuring the desired height and width of your arch. Cut the wood accordingly.
- Assemble the Frame: Nail or screw the pieces of wood together to form a sturdy frame. Ensure that the structure is stable and level.
- Add Crossbeams: For added strength and aesthetic appeal, add horizontal crossbeams across the top and sides of the arch.
- Stain or Paint (Optional): To protect the wood from the elements and give it a polished look, stain or paint the arch.
Tips:
- If using reclaimed wood, be sure to sand it down to remove any rough edges.
- For added durability, use weather-resistant wood, such as cedar or redwood.
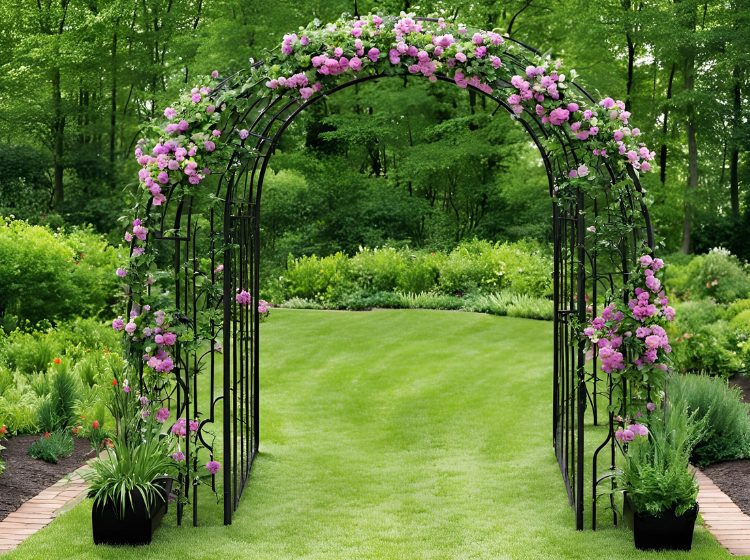
2. Metal Pipe Arch
A metal pipe arch offers a sleek and industrial aesthetic that contrasts beautifully with lush greenery.
Materials Needed:
- Metal pipes (galvanized or black steel)
- Pipe fittings and brackets
- Pipe cutter or hacksaw
- Drill and screws
Step-by-Step Instructions:
- Cut the Pipes: Measure and cut the metal pipes to your desired arch height and width.
- Assemble the Arch: Connect the pipes using the appropriate fittings and brackets. Ensure that all connections are secure.
- Install the Arch: Position the arch in your garden and secure it to the ground using metal stakes or by anchoring it to a solid base.
Tips:
- For a magical evening effect, wrap string lights or hang lanterns from the arch.
- If you prefer a more polished look, consider painting the pipes with rust-resistant spray paint.
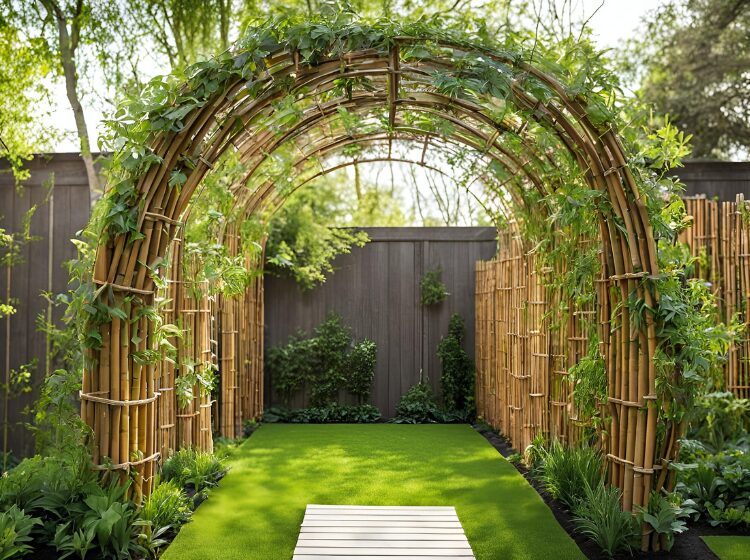
3. Bamboo Arch

Bamboo is a sustainable and lightweight material that can create a beautiful, natural-looking arch.
Materials Needed:
- Bamboo poles
- Rope or wire
- Garden stakes
Step-by-Step Instructions:
- Prepare the Bamboo: Cut the bamboo poles to your desired length. Bamboo is strong yet flexible, making it easy to work with.
- Create the Frame: Arrange the bamboo poles into an arch shape, securing them together with rope or wire.
- Anchor the Arch: Secure the arch to the ground by driving garden stakes into the soil and tying the bamboo poles to the stakes.
Tips:
- Bamboo is ideal for supporting lightweight climbing plants like morning glories or sweet peas.
- Consider applying a sealant to the bamboo to protect it from weathering.
4. PVC Pipe Arch
PVC pipes offer a budget-friendly and flexible option for creating a garden arch. This material is easy to work with and can be customized to fit your garden’s theme.
Materials Needed:
- PVC pipes
- PVC connectors
- Spray paint (optional)
- PVC cutter or saw
Step-by-Step Instructions:
- Cut the PVC Pipes: Measure and cut the PVC pipes to your desired dimensions using a PVC cutter or saw.
- Assemble the Arch: Connect the PVC pipes using PVC connectors to form the arch shape.
- Secure the Arch: Anchor the arch in the ground using PVC stakes or by securing it to a stable base.
Tips:
- PVC pipes can be painted to match your garden’s color scheme. Use spray paint designed for plastic for the best results.
- This arch is perfect for areas where you need a lightweight, easily movable structure.
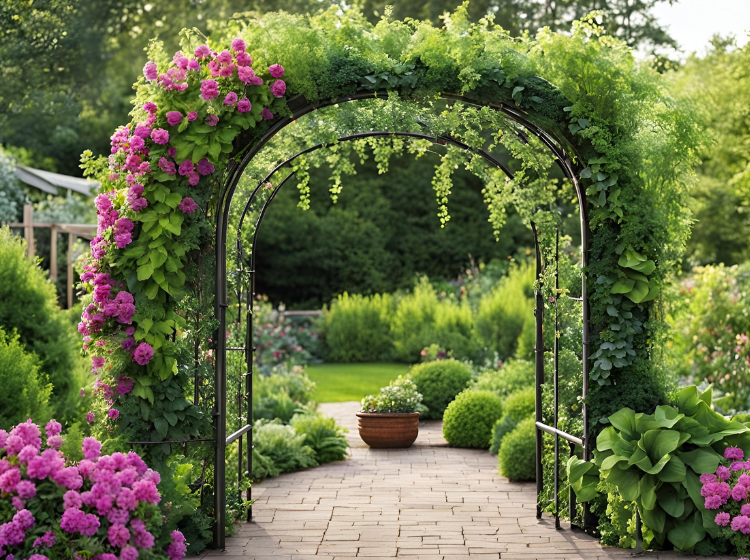
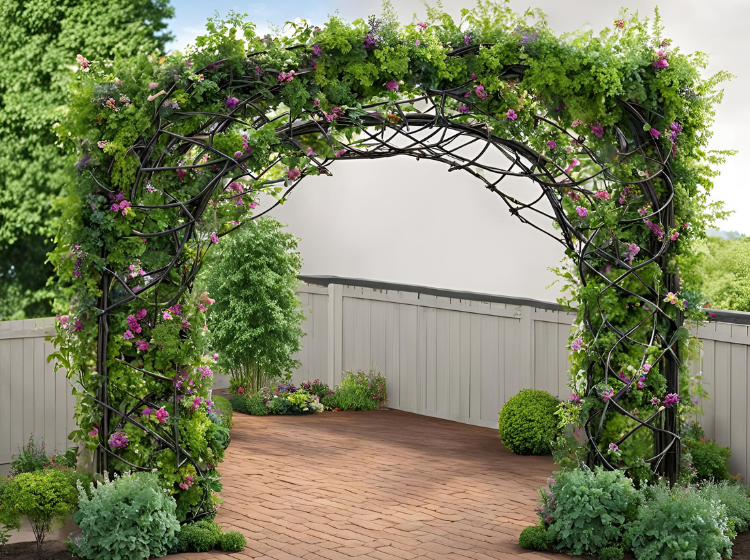
5. Wrought Iron Arch
For a classic and timeless look, consider crafting or assembling a wrought iron arch. Wrought iron is durable and adds an elegant touch to any garden.
Materials Needed:
- Pre-made wrought iron arch or iron bars for DIY
- Welding equipment (if building from scratch)
- Anchoring materials (cement or ground stakes)
Step-by-Step Instructions:
- Assemble the Arch: If using a pre-made arch, follow the manufacturer’s instructions for assembly. If building from scratch, weld the iron bars together to form the arch shape.
- Install the Arch: Secure the arch in place by anchoring it into the ground with stakes or by setting the base in concrete.
Tips:
- A wrought iron arch pairs beautifully with climbing roses or ivy, creating a romantic garden entrance.
- To maintain its beauty, periodically apply a rust-preventative coating.
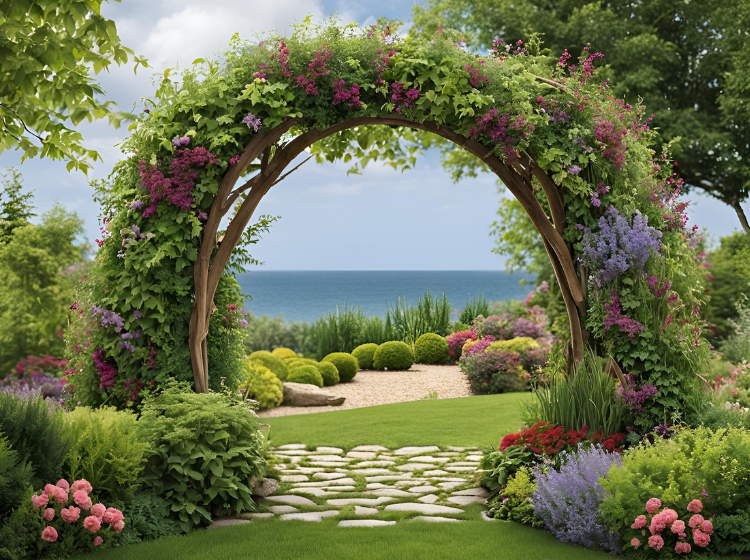
6. Living Willow Arch

A living willow arch adds a dynamic and evolving element to your garden as it grows and changes over time.
Materials Needed:
- Fresh willow branches
- Twine or garden wire
- Garden stakes
Step-by-Step Instructions:
- Prepare the Willow Branches: Cut fresh willow branches to the desired length. Willow is pliable and can be bent into various shapes.
- Weave the Branches: Weave the willow branches together to form an arch, securing them with twine or garden wire.
- Anchor the Arch: Secure the arch to the ground with garden stakes to keep it stable as it grows.
Tips:
- Regularly prune and guide the growth of the willow branches to maintain the shape of the arch.
- This living structure will continue to grow and fill out over time, becoming even more beautiful as it matures.
7. Upcycled Window Frame Arch
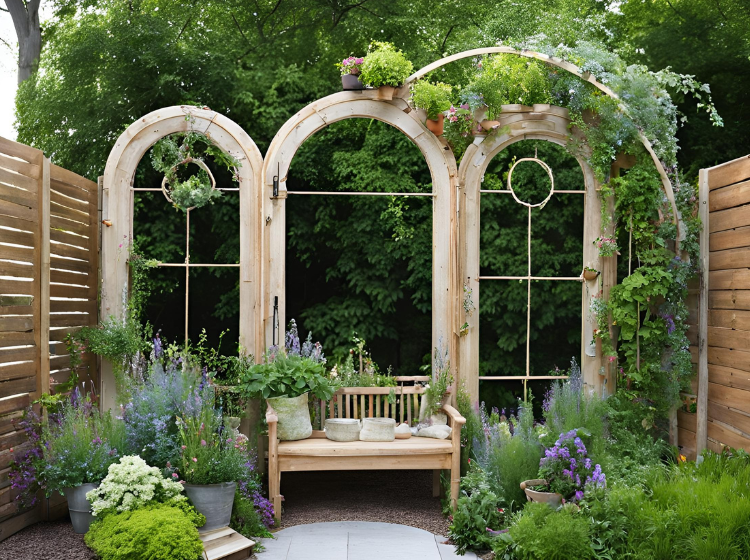
For a truly unique and eco-friendly garden arch, repurpose old window frames. This DIY project combines creativity with sustainability.
Materials Needed:
- Old window frames
- Screws and hinges
- Paint or sealant (optional)
Step-by-Step Instructions:
- Prepare the Frames: Clean and, if desired, paint or seal the old window frames to protect them from the elements.
- Assemble the Arch: Connect the window frames together using screws and hinges, forming an arch shape.
- Install the Arch: Anchor the arch in place in your garden, ensuring it is stable and secure.
Tips:
- Decorate the arch with climbing plants or hanging pots to add a touch of greenery.
- This arch is perfect for those who love a vintage or eclectic garden aesthetic.
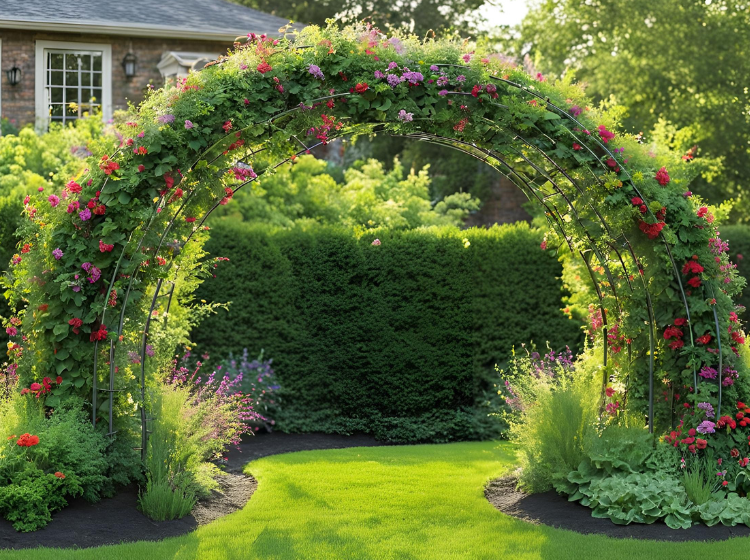
8. Rebar Garden Arch
A rebar garden arch is minimalist and modern, providing a strong structure that can withstand the elements.
Materials Needed:
- Rebar
- Metal cutters
- Rebar ties or wire
- Paint (optional)
Step-by-Step Instructions:
- Cut the Rebar: Use metal cutters to cut the rebar to the desired length.
- Form the Arch: Bend the rebar into an arch shape and secure the pieces together with rebar ties or wire.
- Install the Arch: Anchor the rebar arch in the ground, ensuring it is stable.
Tips:
- Paint the rebar with rust-resistant paint for a more polished look and to protect it from corrosion.
- This arch works well with heavy or vigorous climbers like wisteria or grapevines.
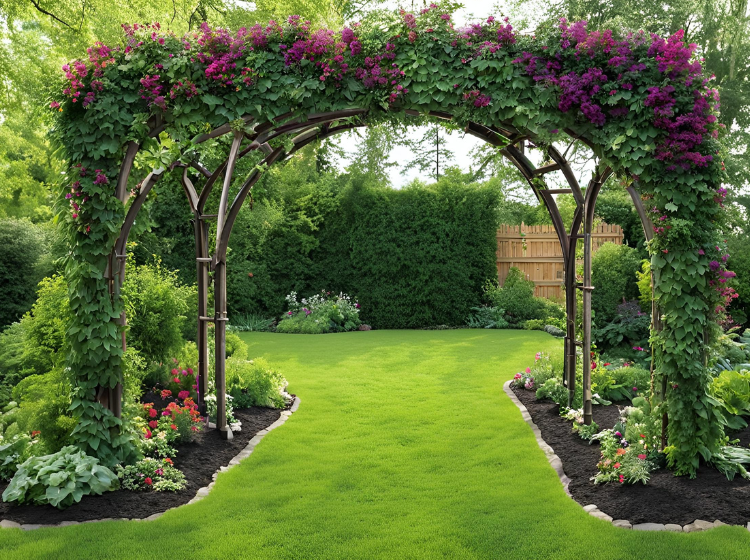
9. Wooden Lattice Arch
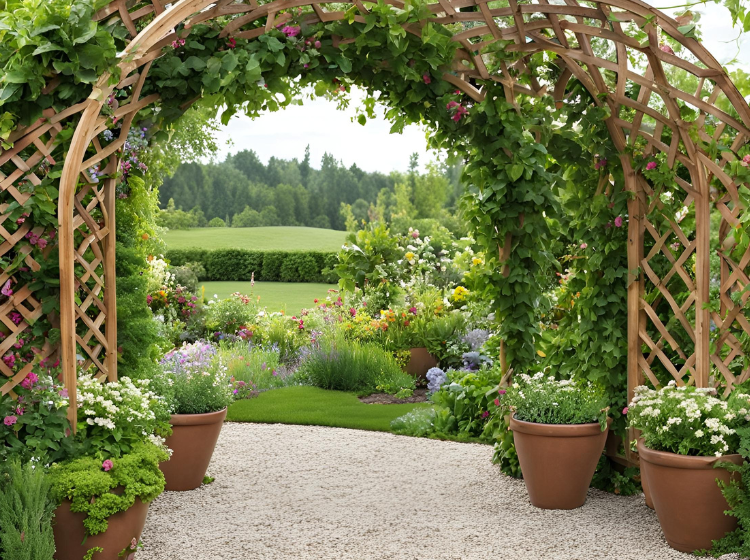
A wooden lattice arch is both functional and decorative, providing ample support for climbing plants while adding visual interest to your garden.
Materials Needed:
- Lattice panels
- Wooden posts
- Screws or nails
- Wood stain or paint (optional)
Step-by-Step Instructions:
- Assemble the Frame: Attach the lattice panels to the wooden posts using screws or nails to create the arch structure.
- Install the Arch: Secure the arch in place in your garden, ensuring that it is stable and level.
- Finish the Arch: If desired, stain or paint the wood to match your garden’s color scheme.
Tips:
- Use treated wood to prevent rot and increase the lifespan of your lattice arch.
- This arch is perfect for supporting flowering climbers like clematis or honeysuckle.
10. Garden Hose Arch
If you’re looking for a whimsical and playful addition to your garden, consider making an arch out of old garden hoses. This upcycling project is both fun and functional.
Materials Needed:
- Old garden hoses
- Stakes
- Zip ties or wire
Step-by-Step Instructions:
- Shape the Hose: Bend the garden hose into an arch shape and secure it with zip ties or wire.
- Anchor the Arch: Use stakes to secure the hose arch in the ground, ensuring it is stable.
- Decorate the Arch: Add flowers or plants around the base of the arch for a playful touch.
Tips:
- This is a great option for those who want to reuse materials they already have on hand.
- You can also paint the hoses in bright colors to add a fun element to your garden.
11. Pallet Wood Arch
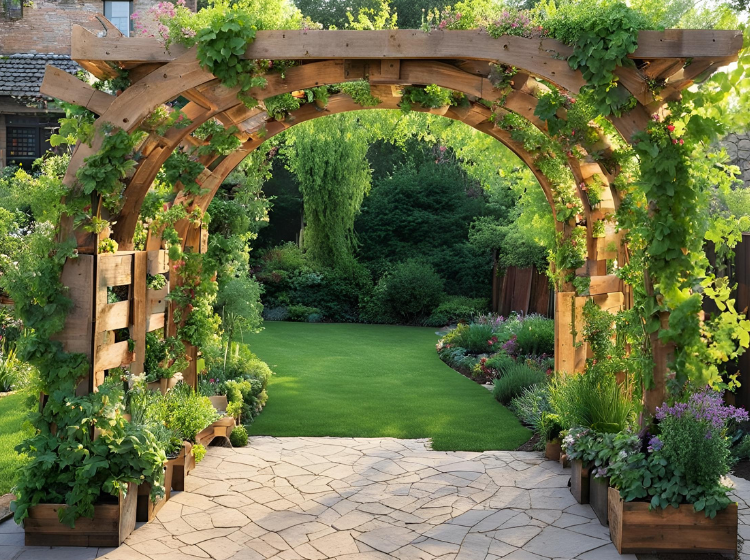
Wooden pallets are a versatile and budget-friendly material that can be used to create a rustic garden arch.
Materials Needed:
- Wooden pallets
- Nails or screws
- Hammer or drill
- Sandpaper
- Wood stain or sealant (optional)
Step-by-Step Instructions:
- Disassemble the Pallets: Remove the slats from the wooden pallets, then sand them down to remove rough edges.
- 2. Assemble the Arch: Arrange and attach the pallet slats to create an arch shape. Secure the pieces with nails or screws.
- 3. Finish the Arch: Stain or seal the wood to protect it from the elements and enhance its appearance.
Tips:
- This arch is ideal for a rustic or farmhouse garden theme.
- Add climbing plants or decorative elements to personalize the look.
12. Garden Trellis Arch
A garden trellis arch is both practical and elegant, offering a framework that supports climbing plants while adding visual appeal to your garden.
Materials Needed:
- Trellis panels
- Wooden posts
- Brackets or screws
Step-by-Step Instructions:
- Prepare the Trellis Panels: If needed, cut the trellis panels to fit your desired arch dimensions.
- Assemble the Arch: Attach the trellis panels to the wooden posts using brackets or screws to form the arch shape.
- Install the Arch: Secure the arch in place in your garden, ensuring it is stable and level.
Tips:
- This arch works well for creating a focal point in your garden or as an entryway to another garden area.
- Choose trellis panels that complement your garden’s overall style and design.
13. Driftwood Arch
A driftwood arch brings a touch of the beach to your garden, creating a unique and natural focal point.
Materials Needed:
- Driftwood pieces
- Screws or nails
- Wire
- Wood sealant (optional)
Step-by-Step Instructions:
- Select the Driftwood: Choose driftwood pieces of varying sizes and shapes for a natural and organic look.
- Assemble the Arch: Arrange the driftwood pieces into an arch shape and secure them together with screws or nails. Use wire to reinforce any weak spots.
- Finish the Arch: Apply a wood sealant if desired to protect the driftwood from the elements.
Tips:
- This arch is perfect for coastal or beach-themed gardens.
- Add shells or coastal-themed decorations for extra flair.
How to Decorate and Maintain Your DIY Garden Arches
Plant Selection:
- Choose climbing plants that complement the style of your arch. For example, roses and clematis work well with wooden or wrought iron arches, while morning glories thrive on bamboo or PVC arches.
Seasonal Decor:
- Change the decorations on your arch according to the season. Add festive lights for the holidays, or drape garlands of seasonal flowers for a fresh look.
Maintenance Tips:
- Regularly check the stability of your arch and make any necessary repairs.
- Prune climbing plants to prevent them from becoming too heavy and to maintain the desired shape of the arch.
Final Thoughts
Adding a garden arch to your backyard can completely transform the space, offering both beauty and functionality. Whether you choose a rustic wooden arch, a modern metal design, or a lush floral-covered structure, these DIY ideas provide inspiration for creating a stunning focal point in your garden. With a little creativity and effort, you can craft an arch that complements your style and enhances your outdoor living experience. Start your project today, and watch as your backyard becomes a picturesque haven framed by your very own garden arch.