
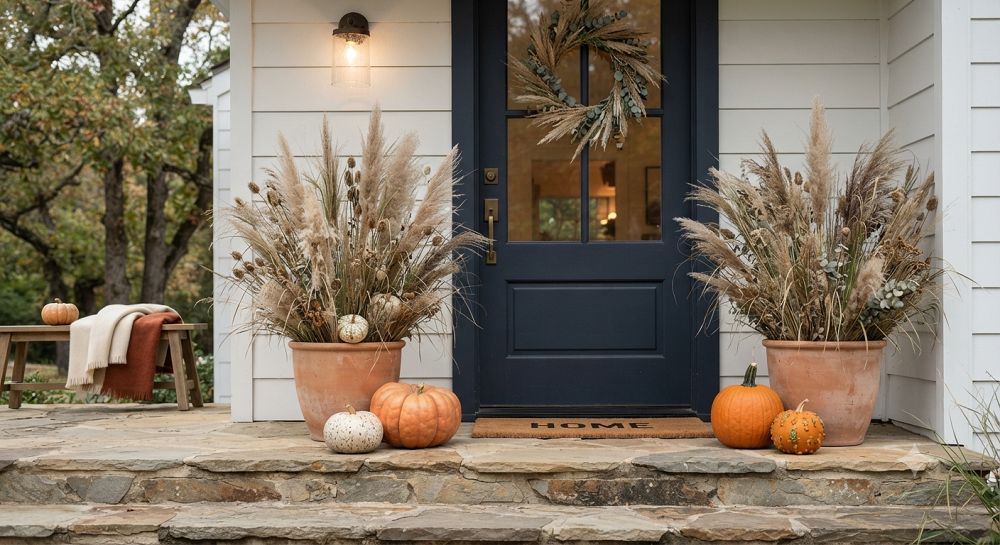
My porch used to be a pumpkin graveyard by mid-November. Every year I’d buy the same orange gourds, watch them cave in on themselves after two frosty nights, and then scrape moldy squash guts off my steps with a putty knife. Not exactly the cozy autumn welcome I was going for.
Then a neighbor gave me a fat bundle of little bluestem she’d cut from her back field, and something clicked. Dried native grasses don’t rot. They don’t attract raccoons looking for a snack. They don’t need to be replaced every three weeks. You cut them once in September and they’ll look good clear through Thanksgiving, sometimes into January if you pick the right species.
If your porch decorating budget usually evaporates on decorative gourds and mums that die in a week, this is your sign to switch things up. Below are seven projects I’ve actually built, torn apart, rebuilt, and cursed at on my own front steps. I’ll tell you which ones are worth your Saturday afternoon and which ones look cute in a magazine but fall apart the second real wind shows up.
Why Native Dried Grasses Beat Store-Bought Fall Decor
Quick reality check before we get into the projects. Native grasses like little bluestem, broomsedge, switchgrass, and northern sea oats aren’t just cheaper than florist-bought stems — they’re built for your climate already. That’s the whole point of “native.” They’ve been drying out and standing tall through wind, frost, and the occasional deer stampede for thousands of years without anyone babying them.
I’ve found that craft store dried grass bundles are a total waste of money, even if the packaging looks pretty on Pinterest. They’re usually bleached, stripped of seed heads, and priced like they’re rare. Meanwhile the real stuff is often growing in a ditch three miles from your house, completely free, and it looks about ten times more interesting because it still has texture, seed pods, and that slightly wild, un-styled look that actually reads as “fall” instead of “craft aisle.”
The other thing nobody tells you: native grasses hold color longer. Broomsedge turns this coppery orange-red that store-bought pampas grass just can’t fake. Little bluestem goes a deep burgundy. You’re not fighting against a plant that wants to look fake — you’re working with something that was built to look exactly like autumn.
1. The Classic Front Door Grass Bundle (Beginner Friendly)
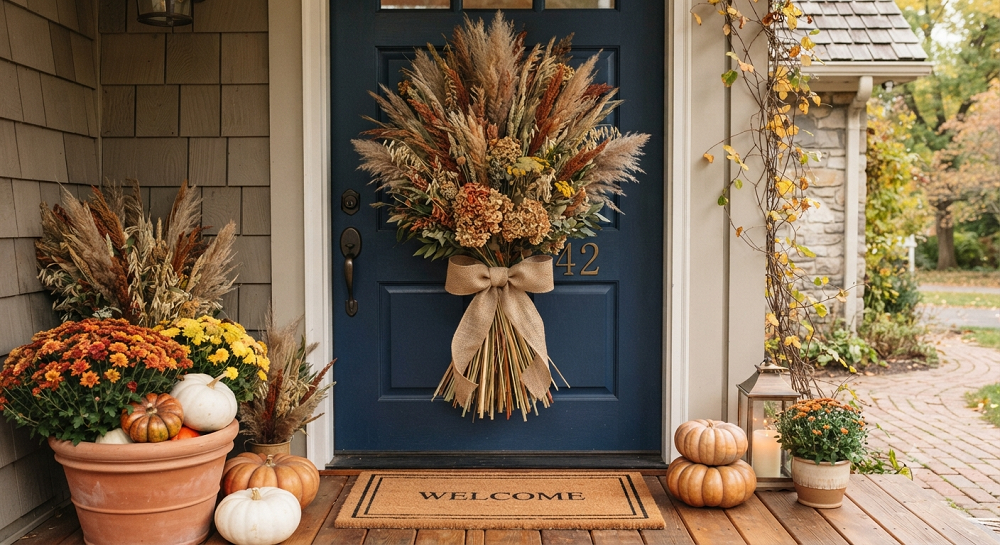
This is the one I tell every single person to start with, no exceptions. It’s the DIY fall porch decor equivalent of learning to boil water before you attempt a soufflé.
What you need: A big double handful of dried native grass (little bluestem or broomsedge work great), jute twine, sharp garden shears, and a hook or nail by your door.
Cut your grass at the base, about 24 to 30 inches long if you can get it. Let it dry somewhere with airflow for about a week if it’s still got any green in the stems — a garage or covered porch works fine. Once it’s fully crispy and golden, gather a bundle about the width of a soda can. Wrap jute twine tightly around the base three or four times and knot it hard. Trim the bottoms flush so they sit even.
Hang the bundle upside down or right-side up on your door — both look good, and honestly this is one of those decisions where there’s no wrong answer, just a style preference. I like mine right-side up because it looks more like a bouquet and less like something drying in a barn.
Here’s the part people skip: spray it lightly with unscented hairspray or a cheap clear craft sealant. That summer my zucchini took over the entire ZIP code, I also learned the hard way that unsealed dried grass sheds like a golden retriever in June. One good gust and you’ve got seed fluff all over your welcome mat. Thirty seconds of sealant spray saves you weeks of sweeping.
2. Layered Grass and Wheat Porch Urns
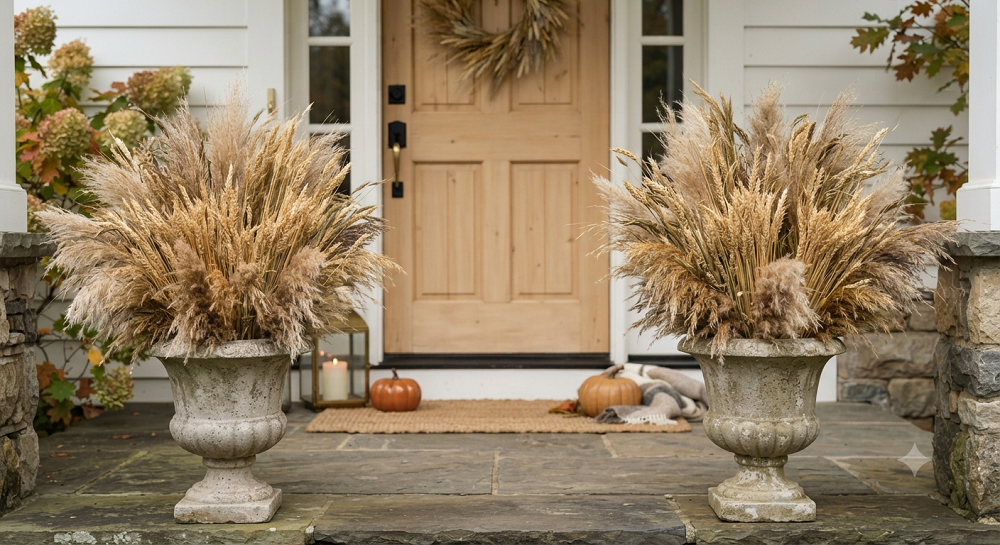
If you’ve got porch urns or big planters sitting empty after your summer annuals give up, this fixes that problem in about twenty minutes per pot.
Start with florist foam or, if you’re trying to keep this budget-friendly like I always am, just crumple up chicken wire into a loose ball and shove it into the bottom of your urn. That gives your grass stems something to grip instead of sliding around every time the wind picks up.
Build your layers from tallest to shortest. I go big native grasses in the back and center — switchgrass or Indian grass, anything that’s got some height to it — then work outward and downward with shorter pieces like little bluestem toward the front edge. Tuck in a few stems of dried wheat or oats for contrast in color and texture. The wheat’s pale gold plays really nicely against the darker, rustier tones of the native grass.
Add one more layer people forget: dried seed pods. Milkweed pods, okra pods, even dried hydrangea heads if you grow them, tucked in at varying heights breaks up what would otherwise be a solid wall of grass blades. It gives the eye somewhere to land instead of just scanning past a beige blob.
Water isn’t a concern here obviously, but wind is. If your porch gets hit hard, anchor your urn arrangement with a couple of bamboo garden stakes pushed down into the wire, then wire the tallest grass stems to the stakes. It’s an extra ten minutes of work that saves you from finding your whole arrangement three houses down after a windstorm.
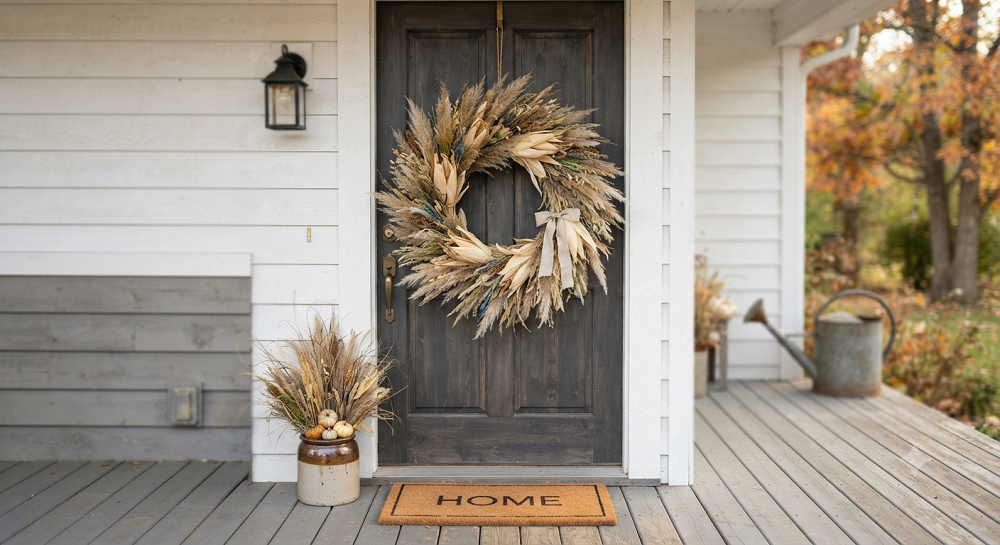
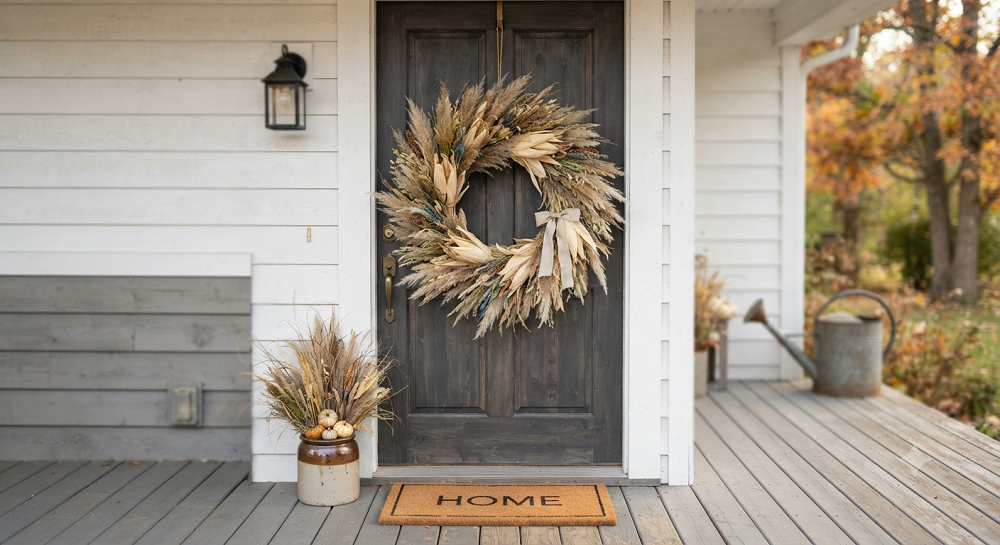
3. Grass and Corn Husk Door Wreath
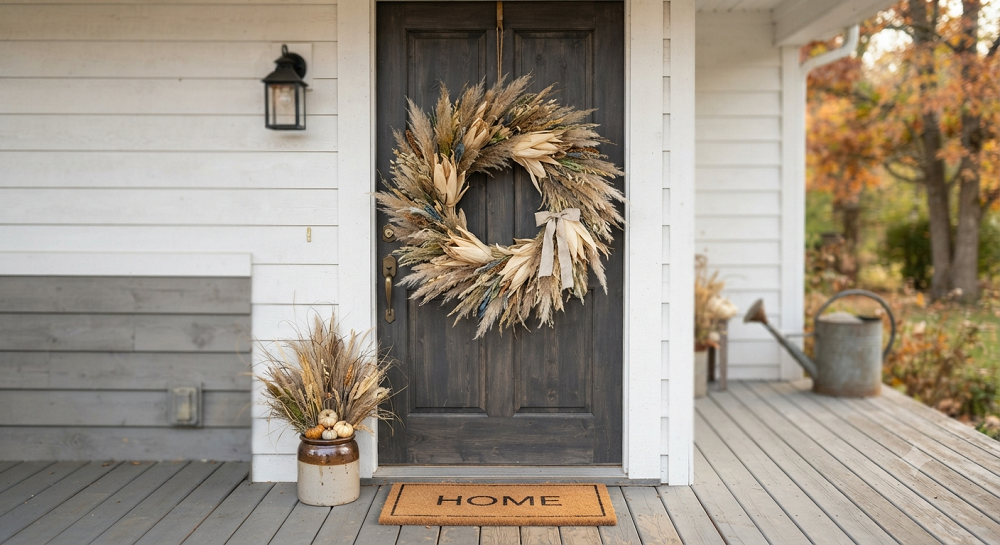
I resisted making a wreath for years because I figured it was too fussy for someone like me who once knocked out a load-bearing stud trying to hang a shelf. Turns out wreath-making is way more forgiving than home renovation.
Grab a plain grapevine wreath base — you can buy these cheap or twist your own from wild grapevine if you’ve got it growing nearby. Cut your dried grass into roughly 8-inch lengths. Working in small bundles of five or six stems, wire each bundle to the wreath form, overlapping so the base of one bundle hides under the seed heads of the last. Work your way around the whole ring in one direction so everything lays consistently, like shingles on a roof.
Once your grass base is solid, weave in dried corn husks. Peel them into strips while they’re still a little pliable, twist a few together into loose knots, and wire those in as accent clusters every few inches. The husks add a papery, warm-toned texture that pure grass doesn’t have on its own.
For a bonus touch that people always ask about, tuck in three or four dried okra pods or milkweed pods near the bottom of the wreath, off to one side instead of dead center. Perfectly symmetrical wreaths look store-bought. A slightly off-kilter cluster reads as handmade in a good way.
Hang it with wide ribbon or more jute twine, and give it the same light coat of sealant spray as the door bundle. This wreath held up on my door through an actual hailstorm last October, so I trust it more than most of the fabric fall wreaths I used to buy.
4. Grass-Filled Galvanized Buckets or Baskets
This is the laziest project on this list and I mean that as a compliment. Some days you don’t want a project, you want fall porch decor that takes twelve minutes total.
Find a galvanized bucket, an old wire basket, a wooden crate, whatever rustic-looking container you’ve got lying around. Fill the bottom third with sand, gravel, or even just crumpled newspaper for weight and stability, since an empty container full of tall grass turns into a sail in strong wind.
Gather your dried grass into one big loose bundle rather than tight individual bunches this time. The look you want here is “just cut from the field,” not “florist arrangement.” Set the bundle upright in your container and let the stems fan out naturally instead of forcing them into a tight cone shape.
Set two or three buckets in a cluster at different heights near your front steps — maybe one on the step itself, one on the ground beside it, one on a small stool or overturned crate. Odd numbers and mismatched heights look intentional. Two identical buckets side by side look like you ran out of ideas halfway through.
Quick side note: this is the project I recommend to renters or anyone who might be moving in a year or two, since nothing here gets attached to your actual house. Everything’s portable. When you move, the buckets go with you, minus whatever’s left of the grass.
5. Grass and Pumpkin Combo Displays (Skip the Real Pumpkins)
I know, I know — a fall porch without a single pumpkin feels wrong to some people. Hear me out on this one though.
Real pumpkins look great for about two weeks and then turn into a science experiment. Foam or resin pumpkins, on the other hand, last forever, and when you pair them with dried native grass, honestly most visitors can’t tell the difference from ten feet away.
Buy a few foam pumpkins in varying sizes — I like a mix of orange, white, and that muted sage green color that’s everywhere now. Arrange your dried grass bundles standing up in clusters, then nestle the pumpkins into the base of the grass like they grew there naturally. The grass hides the flat pumpkin bottoms and gives the whole display a “found in a meadow” quality instead of “bought at a craft store and set on the porch.”
For extra texture, hot glue small clusters of dried grass seed heads directly onto a couple of the smaller pumpkins, like a little grass toupee. It sounds silly written out but it looks genuinely great and gives you a signature detail nobody else on the block has.
The math on this one is simple. Real pumpkins run me $8 to $15 each and die every single year without fail. Foam ones cost more upfront but I’ve reused the same set for four fall seasons now. They’ve already paid for themselves twice over.
6. Tall Grass Corner Arrangements in Wire or Tomato Cages
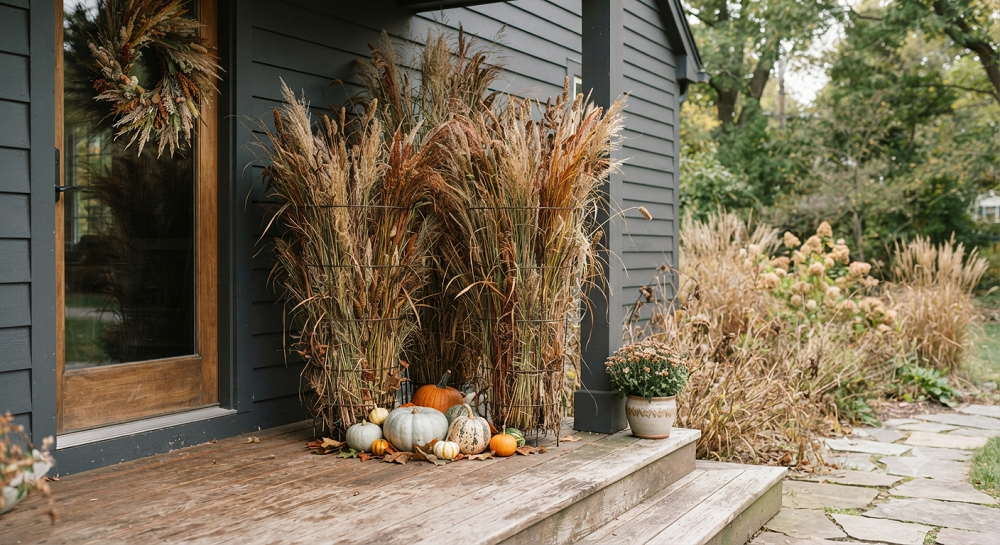
If you’ve got an awkward empty corner on your porch that never quite works with furniture, this project was basically designed for that exact spot.
Take an old tomato cage — the cone-shaped wire kind, not the newer square style — and flip it upside down so the wide end sits on the ground. This gives you a built-in frame to stuff grass into, and it holds everything upright without any extra hardware.
Cut your tallest native grasses, ideally anything over three feet, and work them into the cage from the outside in, letting the seed heads spill out over the top edge. Switchgrass and Indian grass are your best bet here since they naturally grow tall and have that dramatic, feathery seed head that looks impressive at height.
Wrap the visible wire base with burlap or more jute twine so the cage itself disappears and all you see is a tall, wild-looking grass column. This works as a pair flanking your front door too, and honestly a matched pair here is one of the few spots where symmetry actually looks good instead of stiff, since it frames the entrance like a gate.
One thing worth mentioning: this arrangement gets top-heavy in a hurry. Weight the base with a couple of bricks or a bag of sand inside the cage before you start layering grass in, or the first strong gust will send the whole thing tipping into your flower bed.
7. Mini Grass Bundles for Railings and Steps
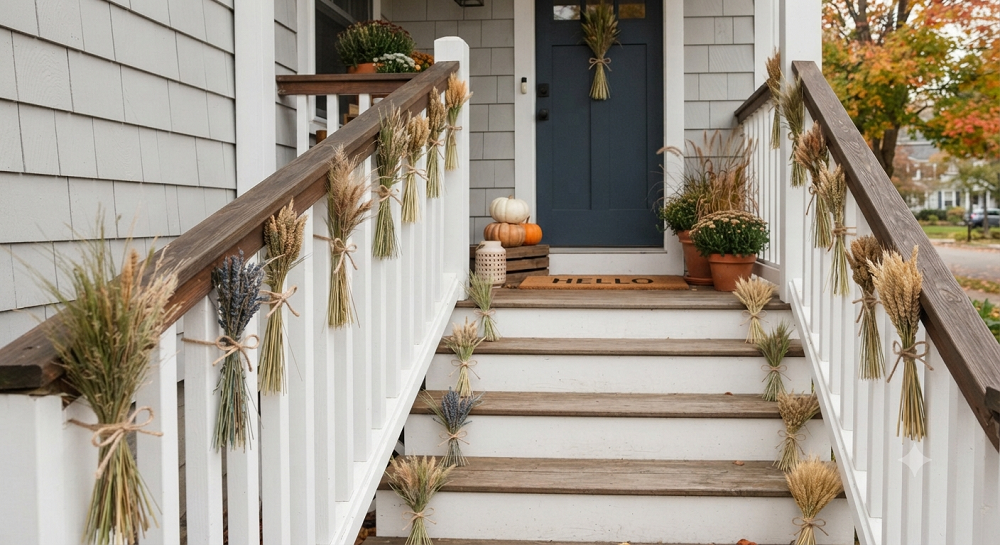
Last one, and it’s the project that gets the most compliments for the least effort, which is exactly the kind of return on investment I like.
Cut a bunch of small grass bundles, each one about the diameter of a quarter, roughly 10 to 12 inches long. Tie each with a small piece of raffia or twine, leaving long tails you can use for attaching them.
Tie one bundle to each porch railing baluster, spaced evenly, or line them up along your front steps tucked against the riser of each stair. Alternate the direction they lean slightly — some pointing left, some right — so it doesn’t look robotic and repetitive.
Mix in a few bundles that include a single dried flower head, like a coneflower or black-eyed Susan seed head, for a pop of visual interest every third or fourth bundle instead of every single one. That’s your “not perfectly balanced” move — uniform spacing but varied content keeps it from looking mass-produced.
These mini bundles are also the first thing to sacrifice if a big storm rolls through, which honestly makes them the perfect low-stakes way to test dried grass decor before committing to the bigger projects on this list.
Real Talk: What Actually Goes Wrong With Dried Grass Porch Decor
Nobody’s Pinterest board shows you the failures, so let me save you some grief.
Moisture is the real enemy, not sun. I used to think fading was my biggest worry. Wrong. Grass that gets rained on repeatedly without good drainage or airflow will mold and turn a gross gray-brown instead of holding its golden color. If your porch isn’t covered, either bring arrangements in during long rain stretches or accept you’ll be replacing things more often.
Wind will humble you. I mentioned this a few times above because it genuinely is the number one complaint I hear from people who try this. Anything not weighted or anchored is going to end up in your neighbor’s yard eventually. Budget the extra ten minutes for sand, gravel, or stakes. Every single time.
Seed heads shed everywhere if you skip the sealant. This isn’t optional if you want to avoid sweeping your porch daily. A cheap can of clear sealant spray or even unscented hairspray fixes this in under a minute per project.
Not every “wild-looking” grass is actually native, and some are invasive. Before you go cutting armfuls of grass from a roadside ditch, double check what you’re harvesting. Phragmites and some ornamental grasses that have escaped cultivation look similar to natives at a glance but spread aggressively and cause real ecological problems if you’re transporting seed heads around. When in doubt, source from your own yard, a local prairie restoration group, or a native plant nursery that sells cut stems specifically for this purpose.
Fire risk is a real thing, not me being paranoid. Dried grass is, functionally, kindling. Keep bundles and wreaths away from porch lights that run hot, candles, or anything with an open flame. I learned to keep mine a solid two feet from my porch light fixture after noticing how warm the bulb got on an unusually hot October afternoon.
Some projects just aren’t worth the effort. I’ll be honest, the tomato cage corner arrangement (project six) takes real time and looks fantastic, but if you’re short on weekend hours, skip straight to the mini bundles or the bucket arrangement. You’ll get 80% of the visual payoff for 20% of the work.
Final Thoughts
Fall porch decor doesn’t have to mean another trip to the store for pumpkins that’ll be mush by Halloween. Native dried grasses cost you almost nothing beyond your own time, they hold up through actual weather, and they look genuinely different from the same orange-and-white display every other house on your street has going on.
Start small. Pick one project, maybe the classic door bundle since it’s the fastest, and see how it holds up on your own porch through a couple weeks of real weather before you commit to a full corner arrangement or wreath. You’ll learn your specific porch’s wind patterns and sun exposure faster that way than I ever did by reading about it.
Have you tried decorating with native grasses before, or are you a die-hard pumpkin person who thinks I’m completely wrong about this? Drop a comment below and let me know what’s growing wild near you — I’m always looking for new species to try on my own steps next season.

About Syprose Kiche
Syprose Kiche is the creator and writer behind My Besuited Home, a practical home and garden website covering DIY projects, gardening, lawn care, landscaping, home improvement, and outdoor living. She focuses on turning everyday homeowner questions into clear, practical guides backed by careful research and useful real-world considerations.