
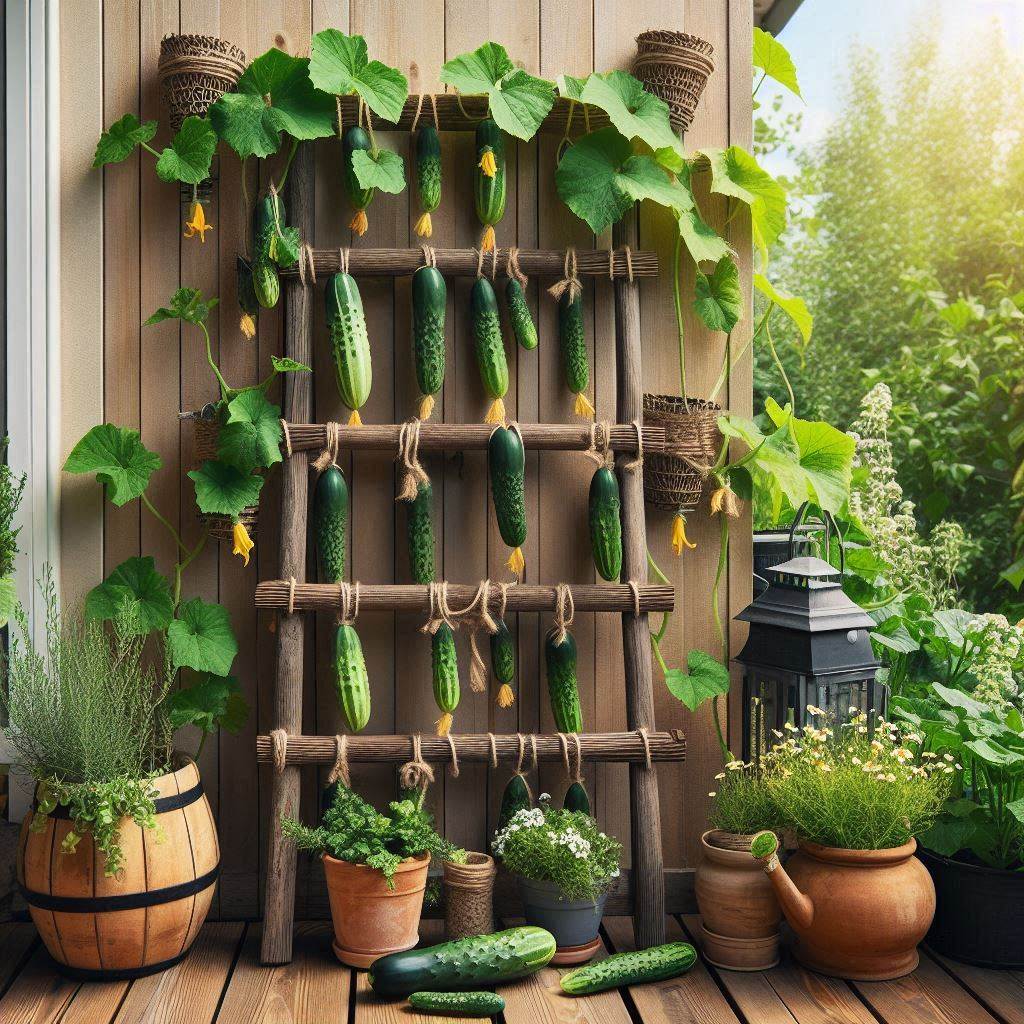
Cucumbers are a favorite summer vegetable, known for their refreshing taste and versatility in the kitchen. But growing healthy, productive cucumber plants requires some support. Here’s where trellises come in!
Trellises offer a multitude of benefits for your cucumber plants, including:
- Improved Air Circulation: By keeping cucumbers off the ground, trellises allow for better air circulation around the leaves and fruits. This reduces the risk of fungal diseases that thrive in moist environments.
- Enhanced Fruit Quality: Trellis-grown cucumbers are less prone to blemishes and deformities that can occur when fruits rub against the soil.
- Space-Saving Efficiency: Vertical trellises allow you to maximize your garden space by allowing cucumber plants to grow upwards instead of sprawling on the ground. This is especially beneficial for smaller gardens or raised beds.
- Easier Harvesting: Cucumbers grown on a trellis are easier to see, reach, and pick, making harvesting a breeze.
The best part? You don’t need to break the bank to give your cucumbers the support they need. Here are 11 easy DIY trellis ideas you can create with readily available materials:
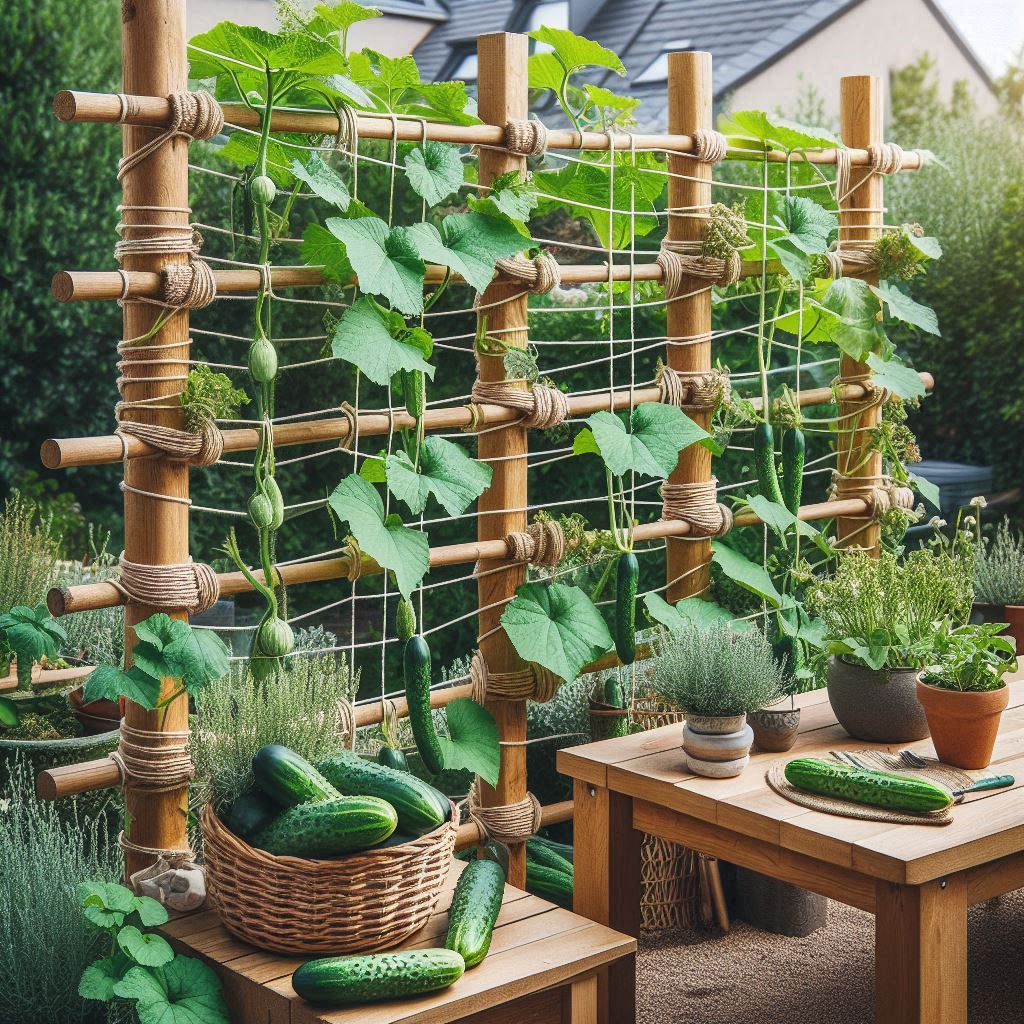
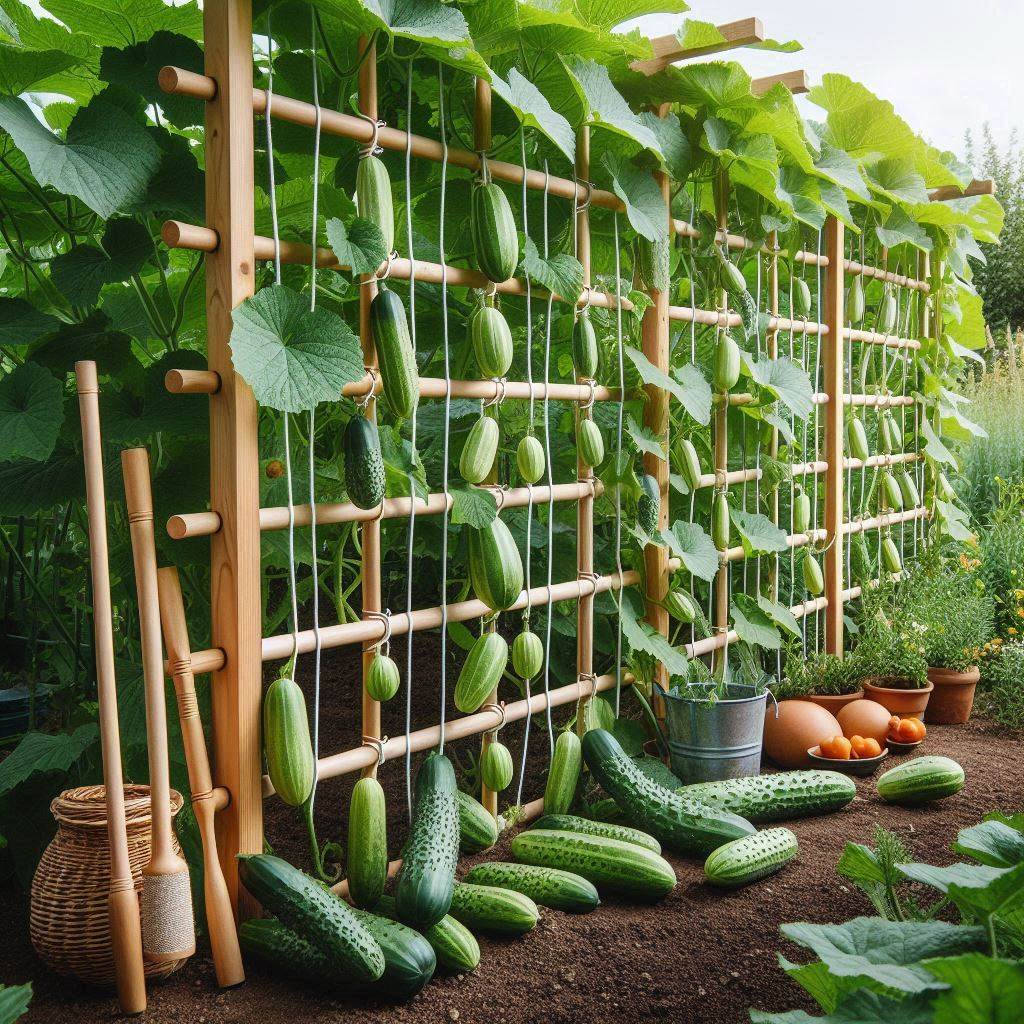
1. String Trellis (Simple & Budget-Friendly)
This is the most basic and budget-friendly trellis option, perfect for beginners or those with limited space.
Materials:
- Sturdy stakes (wood, metal, or PVC pipes) – Choose a height appropriate for your cucumber variety (typically 6-8 feet)
- Strong twine or jute rope
- Optional: Hooks or eye screws (for attaching the twine to walls or fences)
Instructions:
- Mark your planting area: Decide where you want your cucumber row to be and mark the positions for your stakes. Space the stakes 4-6 feet apart depending on your desired row width.
- Drive in the stakes: Securely hammer the stakes into the ground, ensuring they are deep enough to support the weight of the cucumber plants as they grow.
- Attach the twine: Tie one end of the twine to a stake at the bottom. Run the twine horizontally to the next stake, making sure it’s taut but not constricting. Repeat this process, running the twine back and forth between each stake until you reach the desired height.
- Optional: Secure to walls or fences: If your planting area borders a wall or fence, you can use hooks or eye screws to secure the ends of the twine for additional stability.
Tips:
- Use a level to ensure your stakes are straight before securing the twine.
- For raised beds, you can attach the top twine to the edges of the raised bed for added support.
- As your cucumber plants grow, you can gently guide their tendrils to wrap around the twine for climbing support.
2. Bamboo Teepee Trellis (Natural & Attractive)

This visually appealing trellis option creates a charming focal point in your garden while providing excellent support for your cucumbers.
Materials:
- Sturdy bamboo poles (around 6-8 feet tall, depending on your desired trellis height) – Choose poles with a diameter of at least 1 inch for stability.
- Twine or rope for securing
Instructions:
- Prepare the bamboo poles: Cut the bamboo poles to your desired height if necessary. If the poles are fresh, they might benefit from drying out for a few days to prevent warping.
- Assemble the teepee: Lay three bamboo poles on the ground, forming a triangle with the ends overlapping slightly at the center. Secure the overlapping points with twine tightly wrapped around the poles several times.
- Raise the teepee: Carefully lift the assembled teepee structure upright. Adjust the poles so the base of the teepee is stable.
- Secure the poles: Tie the top ends of the bamboo poles together with twine to create a peak. Optionally, you can tie additional twine around the middle section of the teepee for added stability.
Tips:
- For thicker bamboo poles, you might need a drill to create holes for easier twine fastening.
- Get creative! You can paint the bamboo poles in different colors or add decorative ribbons for a whimsical touch.
3. Recycled Tomato Cage Trellis (Upcycle & Functional)
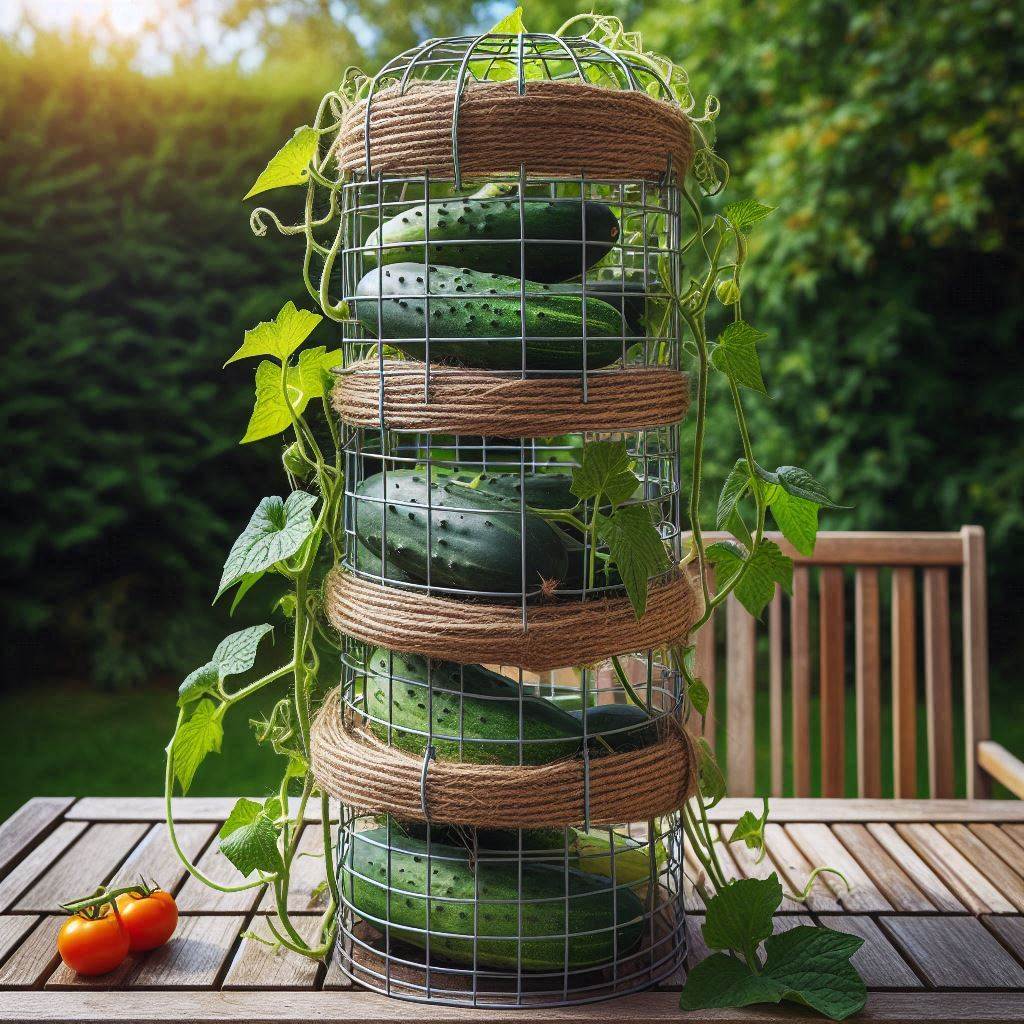
Got leftover tomato cages from a previous season? Don’t toss them out! You can easily repurpose them into a sturdy trellis for your cucumbers.
Materials:
- Recycled tomato cages (minimum of 2 per trellis)
- Zip ties or strong twine
Instructions:
- Prepare the tomato cages: Ensure the tomato cages are in good condition and free of any rust or damage.
- Connect the cages: There are two main options for connecting the cages.
Option 1: Stacking Vertically
- Place one tomato cage upright on the ground.
- Position the second tomato cage on top of the first, aligning the vertical bars as much as possible.
- Use zip ties or twine to securely fasten the cages together at several connection points. Make sure the connections are strong enough to support the weight of the growing plants.
Option 2: Creating a Cage Wall
- Lay two or more tomato cages flat on the ground, side by side.
- Use zip ties or twine to connect the corresponding vertical bars of each cage together, creating a rectangular or square trellis structure.
- You can add additional tomato cages to create a longer trellis wall if needed, following the same connection method.
Tips:
- For taller cucumber varieties, consider stacking three or even four tomato cages for optimal support.
- If the tomato cages are a bit flimsy, use additional zip ties or twine for reinforcement, creating a crisscross pattern for increased stability.
- To create a more aesthetically pleasing structure, you can spray paint the tomato cages a uniform color before assembling the trellis.
4. A-Frame Trellis (Sturdy & Versatile)
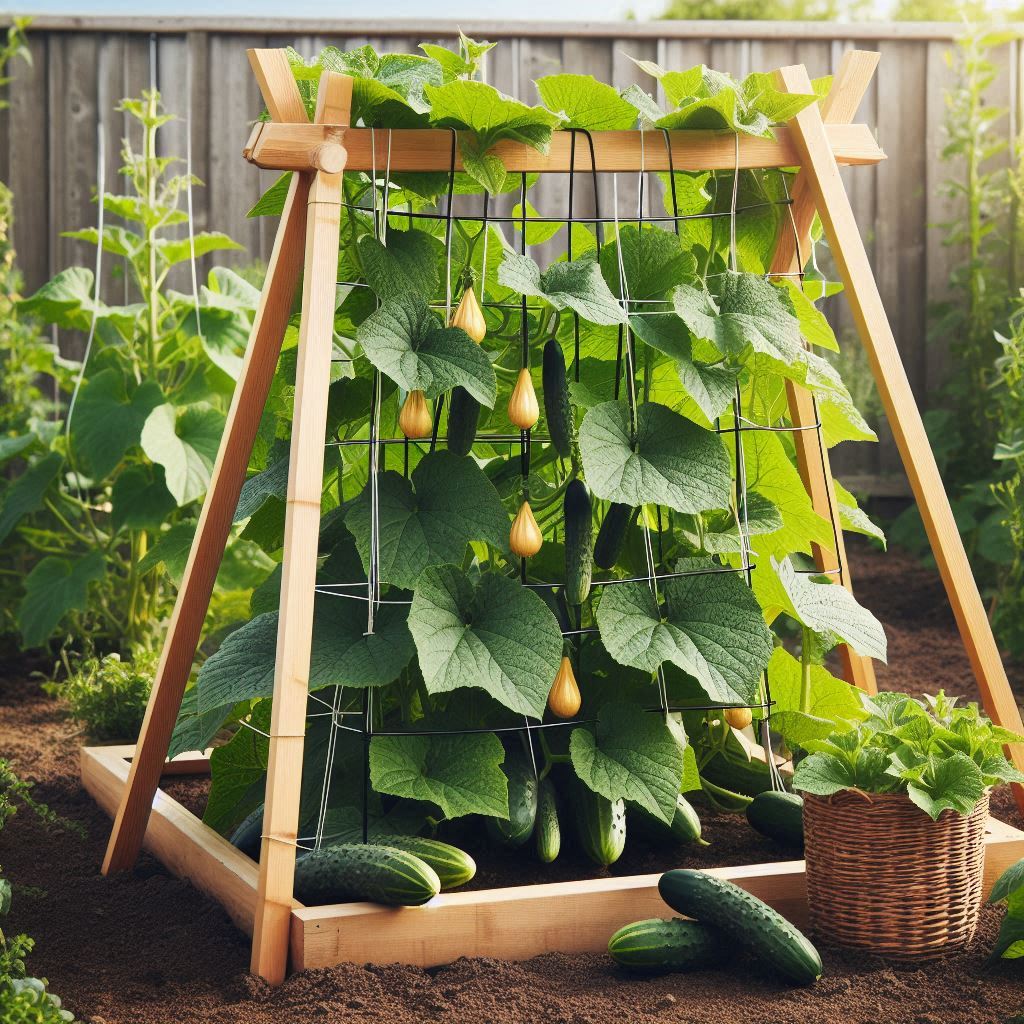
This A-frame trellis offers excellent stability and can be customized to different sizes depending on your garden space and cucumber variety.
Materials:
- Wood planks (2x4s or similar) – Cut to desired lengths for the legs and top crossbar (length will vary depending on your preferred trellis height and width)
- Screws
- Optional: Wire mesh (hardware cloth) for additional climbing support
Instructions:
- Cut the wood planks: Cut two wood planks for the legs of the A-frame to your desired height. Cut a third plank to size for the top crossbar, ensuring it’s long enough to bridge the width you want for the trellis base.
- Assemble the A-frame: Lay the two leg pieces flat on the ground, forming an upside-down V shape. Position the top crossbar at the desired height on the legs and screw them together securely.
- Optional: Attach wire mesh: If using wire mesh for added climbing support, cut a piece to fit the desired dimensions of the trellis. Secure the mesh to the A-frame using staples or zip ties.
Tips:
- Pre-drill holes in the wood planks before screwing them together to prevent splitting.
- For extra stability, you can bury the bottom ends of the A-frame legs a few inches into the ground before securing them with soil.
- Choose wood that is weather-resistant or apply a sealant to ensure the trellis lasts for several seasons.
5. Leaning Trellis (Space-Saving & Easy Access)
This space-saving option is perfect for smaller gardens or planting cucumbers along fences or walls.
Materials:
- Sturdy posts (wood, metal, or PVC pipes) – Cut to a height appropriate for your cucumber variety
- Trellis panel (pre-made lattice panel, wooden slats, or wire mesh) – Choose a size that complements the height of your posts
- Hinges (optional, depending on desired trellis angle)
Instructions:
- Attach the trellis panel to the posts: Secure the trellis panel to the top of one or both posts using screws, nails, or zip ties, depending on the materials used.
- Position the trellis: Lean the assembled structure against a fence, wall, or other sturdy support.
- Optional: Secure the angle (using hinges): If you want the trellis to be at a specific angle from the wall or fence, attach hinges to the back of the posts and screw the other side of the hinges to the wall/fence for a more permanent setup.
Tips:
- Ensure the posts you use are strong enough to support the weight of the trellis and the climbing cucumber plants.
- When choosing a pre-made trellis panel, select one with openings large enough for the cucumber tendrils to easily grasp and climb.
- If using a heavy trellis panel, you might need additional support at the base of the posts to prevent them from leaning too far forward.
6. Repurposed Ladder Trellis (Creative & Functional)
Got an old wooden ladder lying around? Give it a new lease on life as a unique and functional trellis for your cucumbers!
Materials:
- Old wooden ladder (sturdy and in good condition)
- Zip ties or twine
- Optional: Paint
Instructions:
- Prepare the ladder: Ensure the ladder is structurally sound and free of any loose rungs or rotting wood. You can lightly sand the ladder and apply a fresh coat of paint for a refreshed look (optional).
- Position the ladder: There are two main ways to use a ladder as a trellis:
- Leaning ladder: Simply lean the ladder against a sturdy fence, wall, or another stable structure.
- Freestanding ladder (optional for very sturdy ladders): Open the ladder completely flat and secure the rungs with zip ties or twine to prevent them from collapsing.
Tips:
- Choose a ladder that’s tall enough to support the desired growth of your cucumber plants.
- When leaning the ladder against a structure, ensure it’s at a slight angle for better climbing support for the cucumbers.
- If using the ladder freestanding, make sure it’s positioned in a location where it won’t be easily knocked over by wind or bumped into.
- To add a decorative touch, you can hang colorful planters or wind chimes from the rungs of the ladder.
7. PVC Pipe Trellis (Durable & Lightweight)

PVC pipes offer a lightweight and affordable option for creating a sturdy trellis for your cucumbers.
Materials:
- PVC pipes (diameter and length will depend on your desired trellis size)
- PVC elbows (to create right-angle connections)
- PVC pipe cutters
- PVC cement
- Optional: Mesh fencing (hardware cloth) for additional climbing support
Instructions:
- Cut the PVC pipes: Use the pipe cutters to cut the PVC pipes to your desired lengths according to your trellis design.
- Assemble the frame: Use the PVC elbows and PVC cement to connect the pipes together, creating a rectangular or square frame for the trellis. You can also create a more complex design with additional elbows and pipe lengths.
- Optional: Attach mesh fencing: Cut a piece of mesh fencing to fit the dimensions of the PVC frame. Secure the mesh to the PVC pipes using zip ties or metal clamps.
Tips:
- Choose a PVC pipe diameter that is thick enough to provide stability for the trellis, especially if you plan on using a large mesh panel.
- When cutting the PVC pipes, ensure the cuts are clean and square for a proper fit with the elbows.
- Allow the PVC cement to dry completely before adding any weight or stress to the assembled frame.
- For a more permanent setup, you can drive rebar or metal stakes into the ground and secure the PVC frame to them using zip ties or wire.
8. Net Trellis (Simple & Adaptable)

This versatile option is perfect for various garden layouts and allows for easy expansion as your cucumber plants grow.
Materials:
- Sturdy netting (nylon or plastic garden netting) – Choose a mesh size large enough for cucumber tendrils to grasp (around 4-6 inches)
- Support posts (wood, metal, or PVC pipes) – Cut to a height appropriate for your cucumber variety
- Zip ties or twine
Instructions:
- Position the support posts: Drive or secure the support posts into the ground at your desired spacing, depending on the width you want for the trellis.
- Attach the netting: Cut a piece of netting to a size that reaches between the support posts and extends a few feet beyond the desired height of the trellis. Secure the top edge of the netting to the posts using zip ties or twine.
- Loosen the bottom edge: Leave the bottom edge of the netting loose to allow for some slack as the cucumber plants grow and fill the trellis. You can gradually tighten the bottom edge as needed throughout the season.
Tips:
- Use a strong and UV-resistant netting to ensure it lasts throughout the growing season.
- For a more permanent setup, you can screw eye hooks into the top of the posts and use carabiners to attach and detach the netting easily.
- This trellis system is easily expandable. Simply add additional support posts and netting as your cucumber plants climb and require more space.
9. Hoop House Trellis (Versatile & Protective)
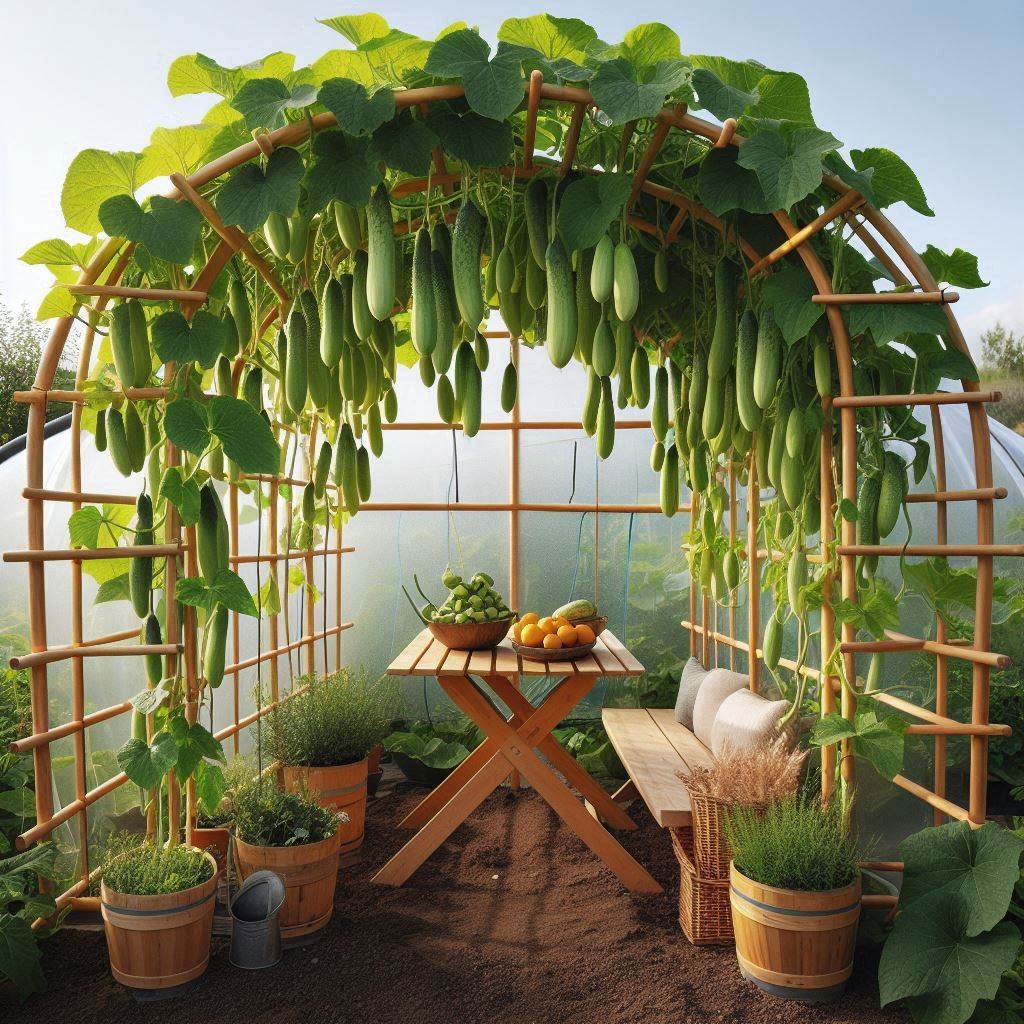
This unique trellis option provides excellent support for your cucumbers while offering some protection from harsh weather elements.
Materials:
- Sturdy bendable poles (PVC pipes, metal conduit, or willow branches) – Choose a length appropriate for creating hoops
- Twine or rope
- Optional: Row cover fabric (for added protection)
Instructions:
- Create the hoops: Bend the poles into arch shapes to create hoops. You can use heat (for PVC pipes) or bending tools (for metal conduit) to achieve the desired shape.
- Assemble the structure: Push the ends of the hoops into the ground at a suitable distance apart for your cucumber row. Secure the tops of the hoops together with twine or rope to create a stable structure.
- Optional: Add row cover fabric: Drape the row cover fabric over the assembled hoops and secure the edges with soil or clips to create a mini greenhouse environment for your cucumbers (especially beneficial in cooler climates).
Tips:
- Choose a material for the hoops that is strong enough to hold its shape and support the weight of the cucumber plants.
- Ensure the hoops are securely anchored into the ground to withstand wind gusts.
- Open or remove the row cover fabric on warm days to allow for proper ventilation and prevent overheating.
10. Recycled Pallet Trellis (Eco-Friendly & Budget-Stretched)
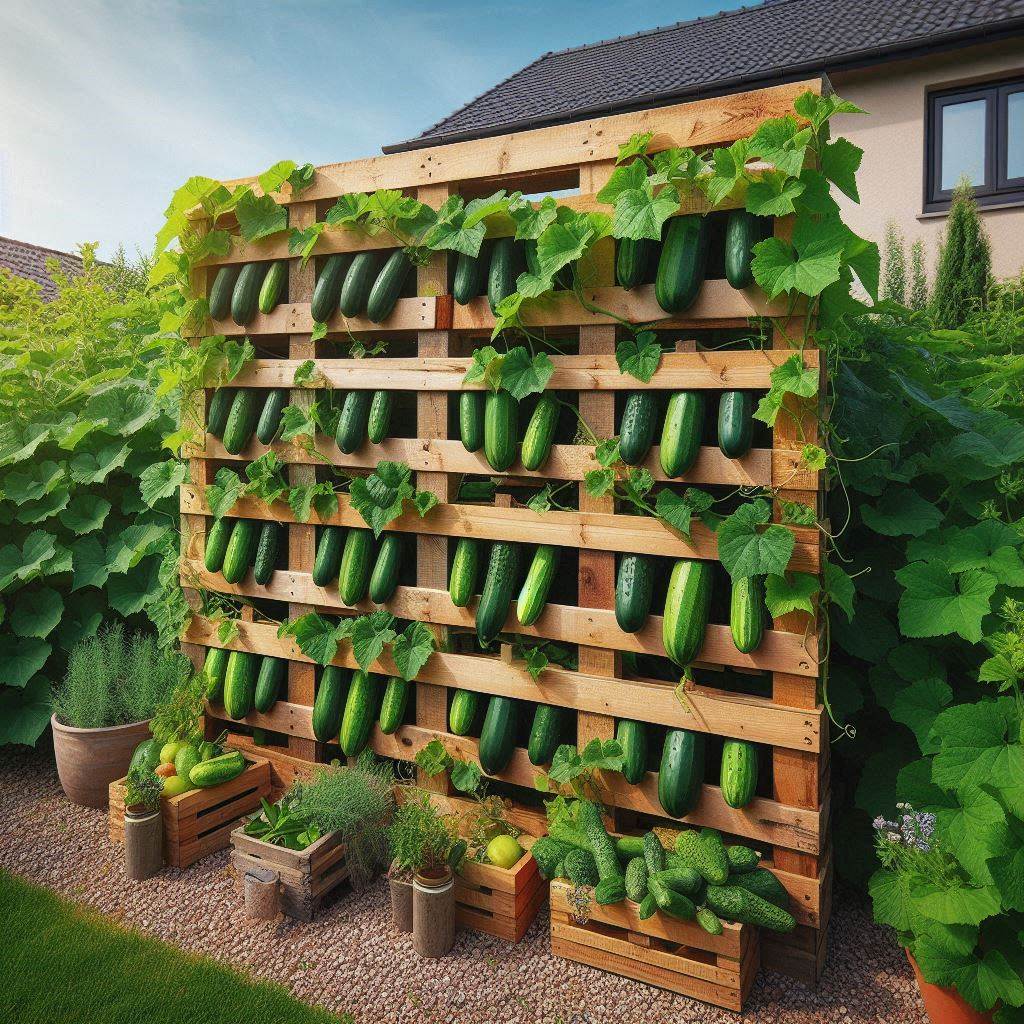
Turn those leftover pallets into a functional and eco-friendly trellis for your climbing cucumbers!
Materials:
- Wooden pallet (in good condition)
- Wire mesh (hardware cloth) – Cut to a size that fits the dimensions of the pallet
- Zip ties or wire
Instructions:
- Prepare the pallet: Inspect the pallet for any loose boards or nails and make any necessary repairs. You can also sand the pallet lightly for a smoother finish (optional).
- Attach the mesh: Lay the wire mesh on top of the pallet, ensuring it covers the entire surface. Secure the mesh to the pallet frame using zip ties or wire threaded through the holes in the mesh and around the pallet slats.
- Position the trellis: Lean the assembled pallet trellis against a fence, wall, or another sturdy structure for support.
Tips:
- Choose a pallet that is a manageable size for your garden space.
- If the pallet is wobbly, you can secure the bottom to the ground using stakes or zip ties.
- For a more polished look, you can paint the pallet before attaching the mesh.
11. Hanging Basket Trellis (Compact & Decorative)
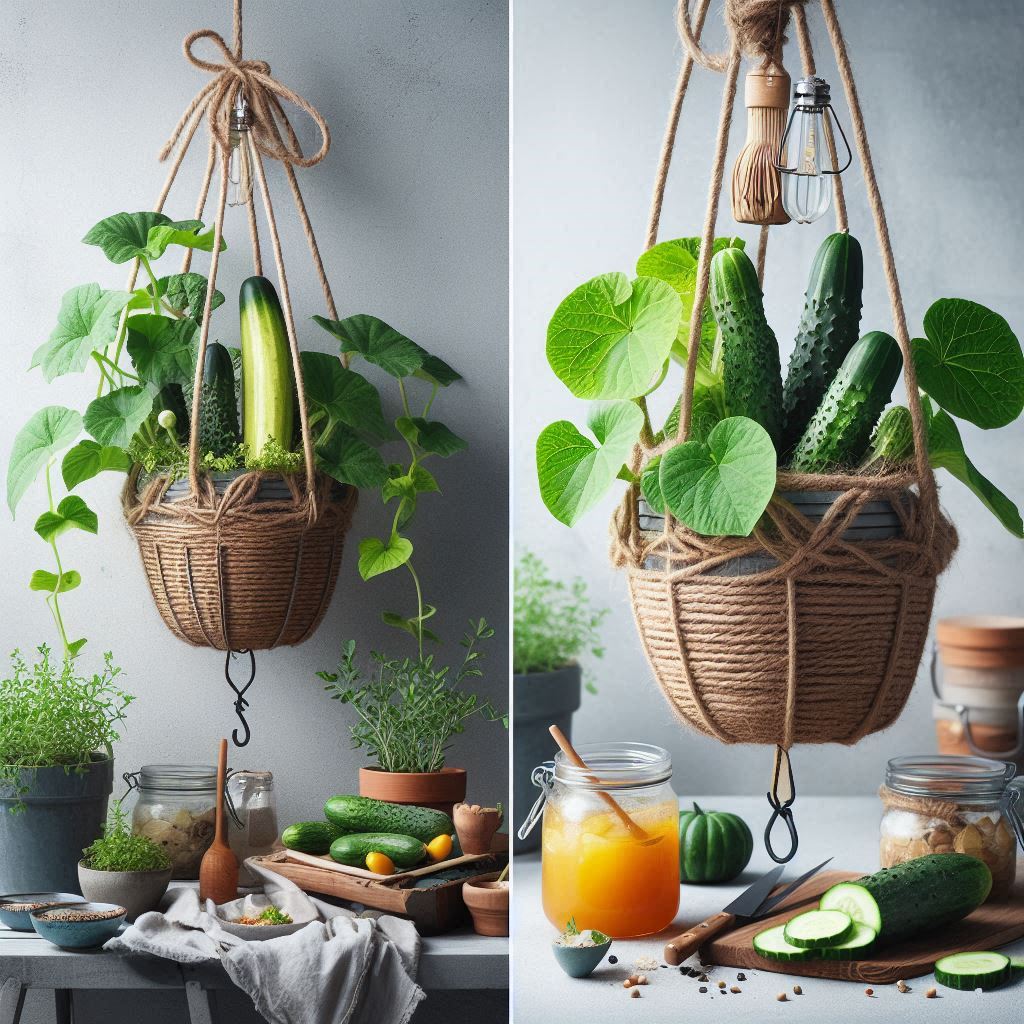
This space-saving option is perfect for balconies, patios, or smaller gardens where growing space is limited.
Materials:
- Large hanging basket (choose a sturdy basket with a strong frame)
- Coir liner (optional, for better moisture retention)
- Coco twine or strong rope
Instructions:
- Prepare the basket: If using a coir liner, line the hanging basket with it according to the manufacturer’s instructions.
- Attach the twine: Cut several long lengths of coco twine or strong rope. Thread one end of each twine through the gaps in the hanging basket frame, ensuring it’s securely fastened. You can create a crisscross pattern or evenly spaced vertical lines depending on your preference.
- Tie the top ends: Bring the free ends of the twine together at the top of the hanging basket and tie them securely to create a central support point for the cucumber plants to climb.
Tips:
- Choose a hanging basket that is large enough to accommodate the root system of your mature cucumber plant.
- Use a strong and weather-resistant twine that can support the weight of the growing cucumber vine and fruits.
- You can plant multiple cucumber seeds directly in the hanging basket, or transplant established seedlings once they have a few sets of true leaves.
- Regularly train the cucumber tendrils to wrap around the hanging twine as the plants grow.
Conclusion
DIY trellises are a fantastic way to support your cucumber plants, promote healthy growth, and maximize your harvest. They’re not only functional but can also add a touch of charm and personality to your garden. With a little creativity and readily available materials, you can create a trellis that perfectly suits your needs and garden space.
Remember, these are just a few ideas to get you started. There are endless possibilities for DIY trellises, so don’t be afraid to experiment and personalize your design!
We’d love to see your DIY trellis creations! Share photos of your cucumber trellises in the comments below and tell us about your experiences. Do you have any questions about growing cucumbers or using trellises? Feel free to ask!
Happy gardening!