
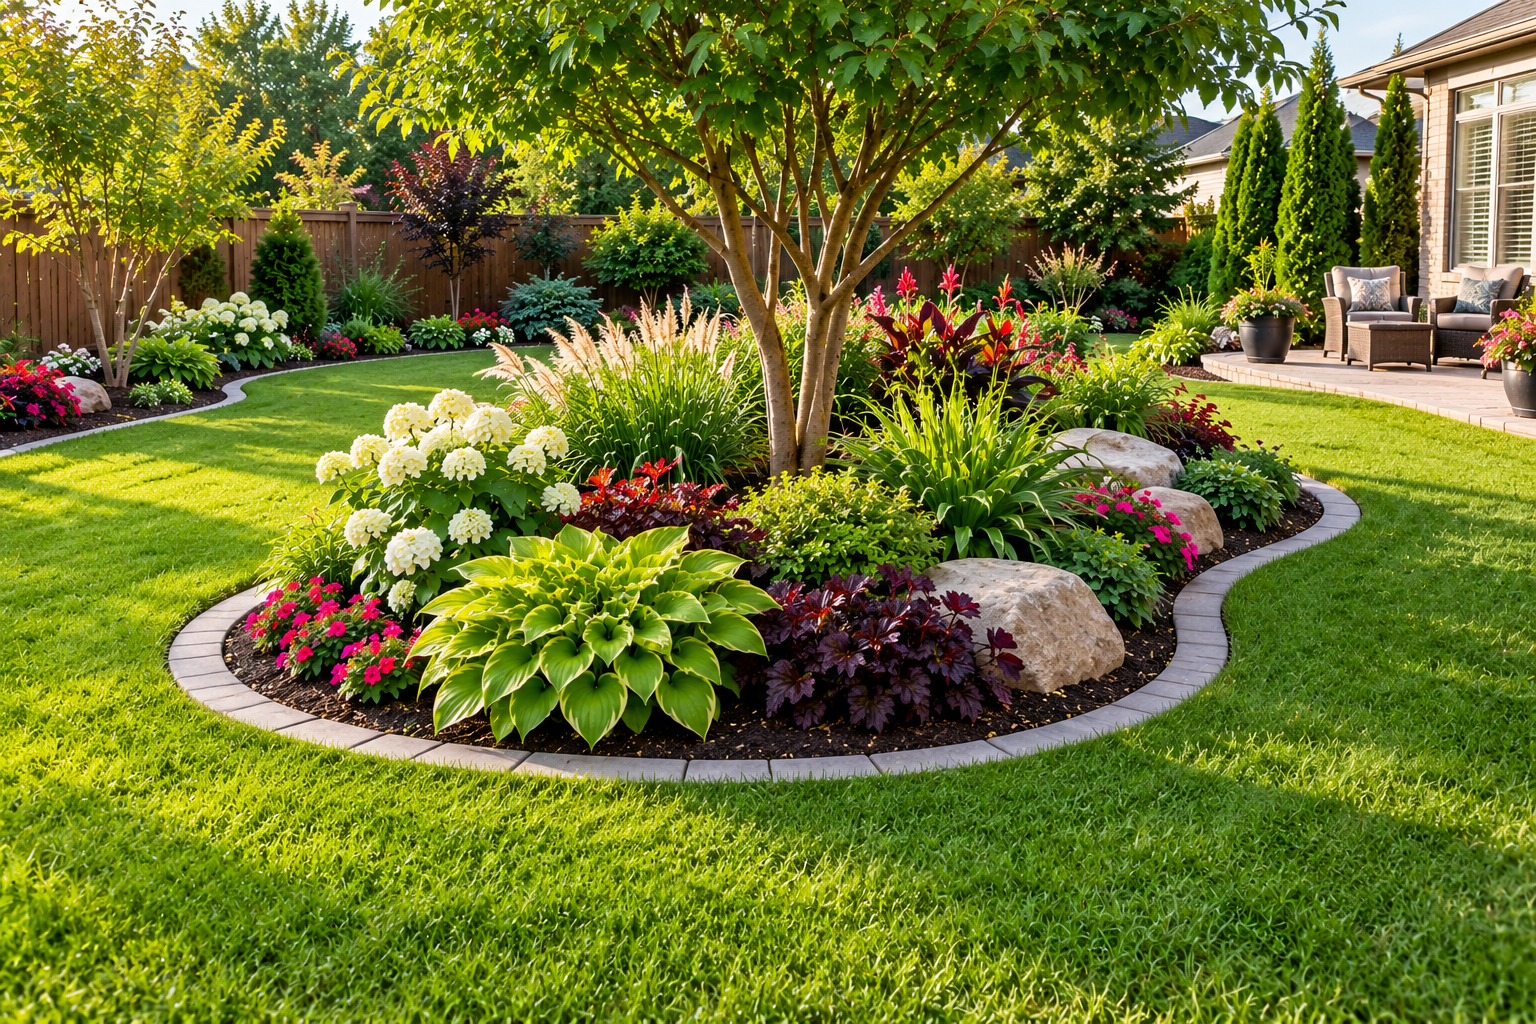
Most backyard garden plans fail before a single plant goes in. The usual cause is a rectangle of lawn with a few beds scattered along the fence, drawn without any thought for where the sun falls, where people walk, or where the water goes. The result is a yard that looks fine in a photo and feels awkward to use. The vegetables sit in the shadiest corner, the seating faces the neighbor’s garage, and the mower can’t fit between the beds.
A good design starts with three questions: how the space gets used, where the light lands, and how much maintenance you will realistically do. The fifteen designs below are organized around those questions. Some suit a narrow city lot, others a wide suburban yard. A few lean modern and architectural, and several are built around growing food. Before the designs, it helps to understand the layout decisions that apply to nearly all of them.
Before You Pick a Design: Four Layout Decisions That Shape Everything
Map the sun before you draw anything
Most vegetables and fruiting plants, including tomatoes, peppers, squash, and cucumbers, generally need about six to eight hours of direct sun a day to produce well. Leafy crops like lettuce, spinach, and chard tolerate less, and many shade-tolerant ornamentals will happily live in the spots vegetables would sulk in.
To find out what your yard actually gets, check it at three points in the day, such as mid-morning, early afternoon, and late afternoon, on a sunny day during the growing season. Sketch which areas are lit at each check. Trees and buildings throw longer shadows in spring and fall than in midsummer, so a spot that looks sunny in June may be shaded by April. Anything that gets sun in only one of the three checks is a shade zone, whatever the plant tag claims.
Decide how you move through the space
Paths are the part of a layout people most often underbuild. A main path should be wide enough for two people to pass or for a wheelbarrow to roll through, which usually means 36 to 48 inches. Secondary paths between beds can be narrower, around 18 to 24 inches, but anything tighter than that tends to get trampled or ignored. If you can’t reach the middle of a bed without stepping in it, the bed is too wide. Four feet is a common maximum for beds you can access from both sides, and about two to three feet for beds against a fence or wall that you can only reach from one side.
Check drainage before you build
Dig a hole roughly a foot deep, fill it with water, let it drain, then fill it again and time how long the second fill takes to disappear. If the water is still standing after many hours, the spot has a drainage problem that will drown roots in wet seasons. Raised beds, berms, or a rain garden will handle that better than a flat in-ground bed. Also look at where roof runoff and downspouts discharge, since a bed placed in the path of concentrated runoff will wash out.
Call before you dig
In the United States, dialing 811 before any significant digging connects you to the free utility locating service, which marks buried gas, electric, water, and communication lines. This matters most for fence posts, pergola footings, trees, and anything deeper than a shovel blade. Local codes may also govern fence height, structures, and retaining walls, so check with your municipality before building anything permanent.
Layout-Driven Designs
1. The Four-Quadrant Kitchen Garden
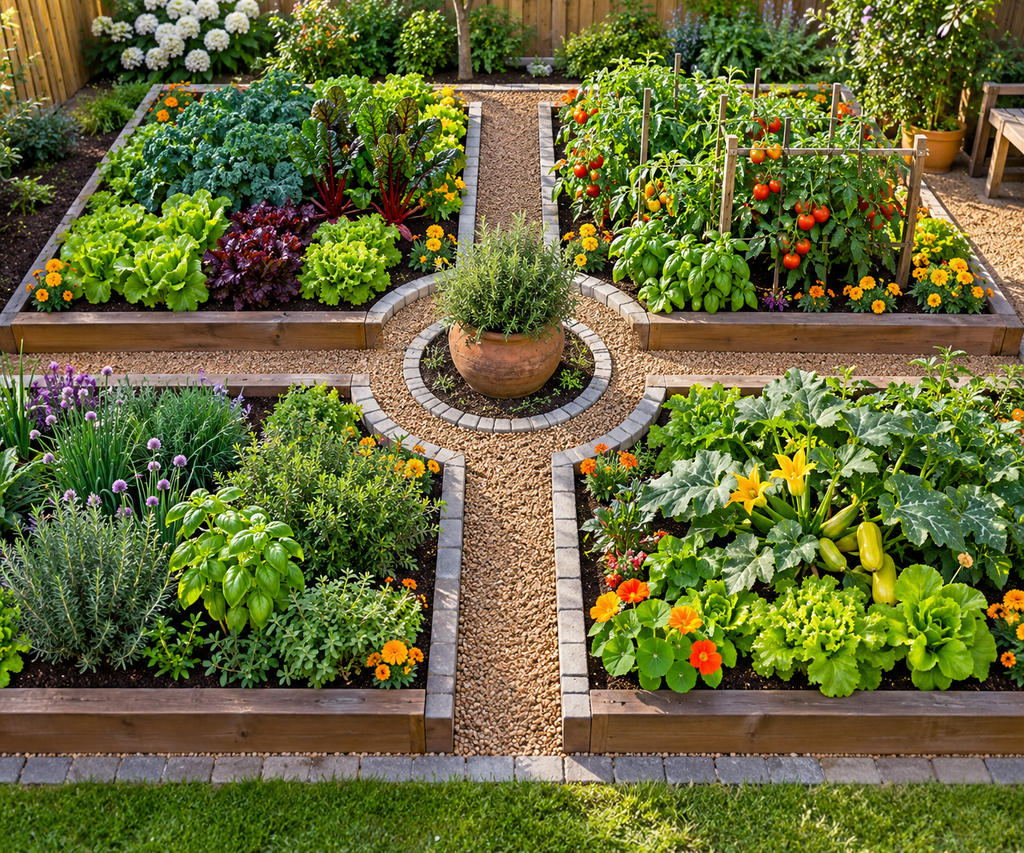
This is the classic formal layout: a square or rectangle divided into four beds by a cross of paths, with a focal point at the center. That focal point might be a sundial, a birdbath, a large pot, or a small tree. The symmetry makes the space feel deliberate even when the plants are simple.
The practical advantage is crop rotation. Growing plant families in different beds from year to year helps interrupt the buildup of soil-borne diseases and pests that specialize in one family. With four quadrants, you can rotate through nightshades (tomatoes, peppers, eggplant), brassicas (cabbage, broccoli, kale), legumes (beans and peas), and a fourth group of roots and alliums on a four-year cycle.
Keep the paths at least 24 inches wide and surface them with something that suppresses weeds, such as gravel over landscape fabric, brick, or a thick layer of wood chips. The weakness of this design is that it wants a fairly level, sunny, open area. On a sloped or shady yard, the geometry fights the site.
2. The Perimeter Border Garden
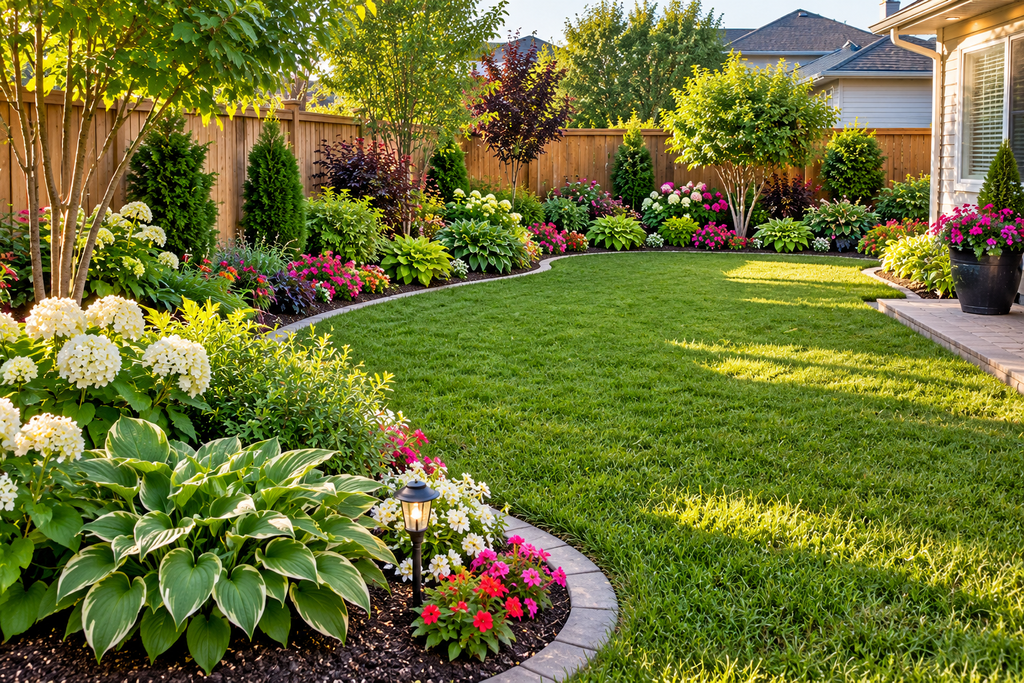
If your lawn is already working well for kids, pets, or entertaining, you may not need to redesign the middle of the yard at all. A deep border around the edges, ideally 4 to 6 feet wide, gives you room for layered planting without giving up open space.
The layering is what makes borders look professional. Taller plants and shrubs go at the back, mid-height perennials in the middle, and low edging plants in front. A border only a foot or two deep forces everything into a single line and tends to look like a hedge with decorations. Curving the inner edge of the border also looks more natural than a straight line and makes mowing easier if you cut the curve in long, gentle sweeps rather than tight bends.
Evergreen shrubs give the border structure through winter. Without them, a perimeter border can look empty for months in cold climates.
3. The Island Bed With Lawn Wrapped Around It
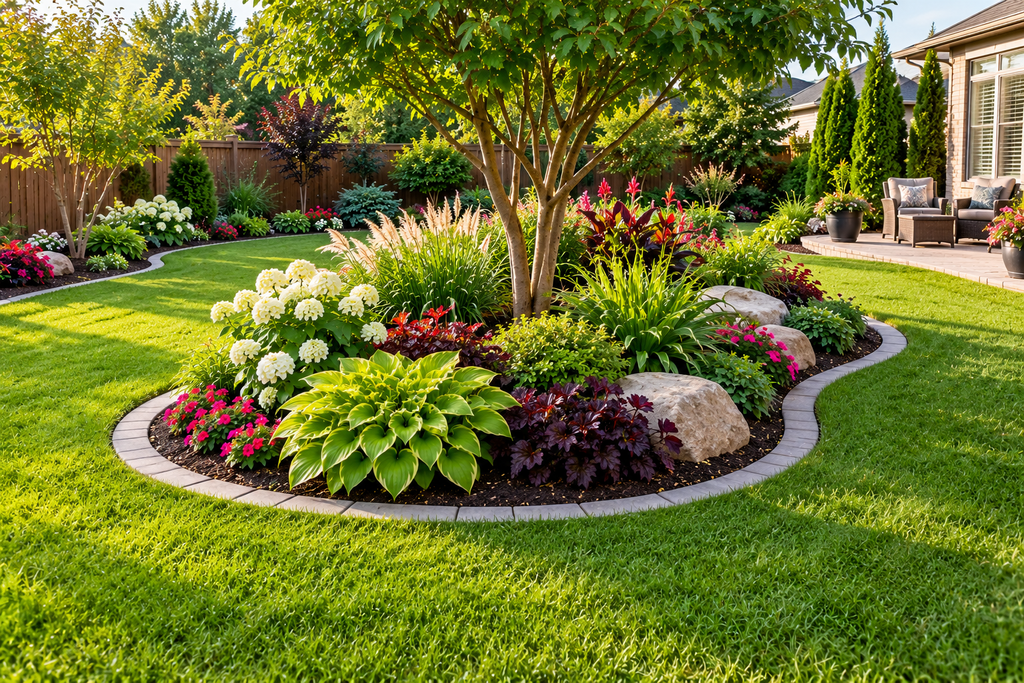
An island bed sits in the lawn with no fence or wall behind it, so it gets viewed from all sides. That changes the planting approach. Tall plants go in the center, shorter ones taper toward the edges, and nothing has a “back.”
Islands work well in large, flat, open yards that feel empty or where the sightline from the house across the lawn is long and featureless. They also break up a big expanse of grass, which cuts mowing time. The common mistake is making the island too small. A bed under about 6 feet across gets lost in a big lawn and looks like a dropped cushion. Think in terms of 8 to 12 feet at the widest point for a yard of average suburban size.
Cut the bed edge with a clean spade line or install steel or plastic edging. Without a defined edge, turf grasses creep into the bed and the bed turns into a maintenance chore.
Designs for Growing Food
4. The Raised Bed Grid
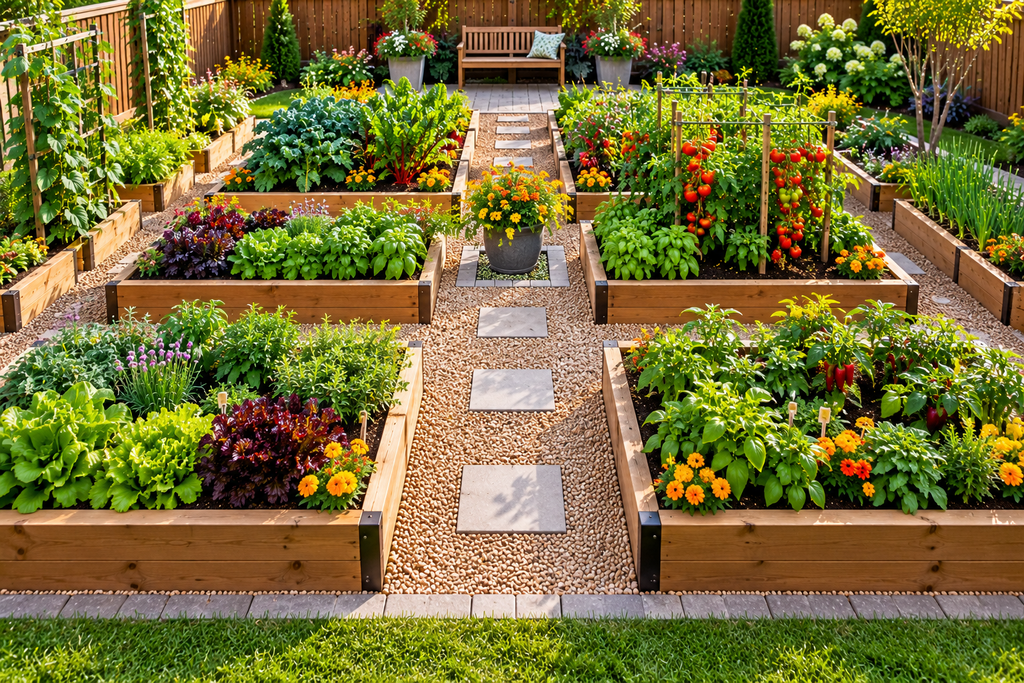
Raised beds are the most common structure for a backyard vegetable garden, and for good reason. They let you control the soil, they drain well, they warm earlier in spring, and they make the garden’s boundaries obvious so nobody walks on planting soil.
A standard setup is a grid of beds, each about 4 feet wide and 8 feet long, separated by paths 2 to 3 feet wide. Height matters more than people expect. Six to twelve inches works for most vegetables. Deeper beds, 18 inches or more, reduce bending and suit gardeners with back or knee problems, though they cost considerably more to fill.
Think carefully about what the beds are made from. Pressure-treated lumber made today for residential use is generally treated with copper-based preservatives rather than the arsenic-containing formulas phased out for residential use in the early 2000s, but some gardeners still prefer untreated cedar, redwood, or other naturally rot-resistant wood, or materials like galvanized steel, concrete blocks, or stone. If you are unsure about older lumber or reclaimed materials such as railroad ties, which may contain creosote, skip them for edible beds.
For the fill, a mix of topsoil and compost is typical. Bagged “raised bed mix” is convenient but can be expensive in volume, and the quality varies, so buying a bulk load from a landscape supplier is often cheaper if you have space for the delivery. A basic calculation: a 4-by-8-foot bed filled to a depth of 12 inches holds roughly 32 cubic feet, or just under 1.2 cubic yards.
5. The Square-Foot Garden
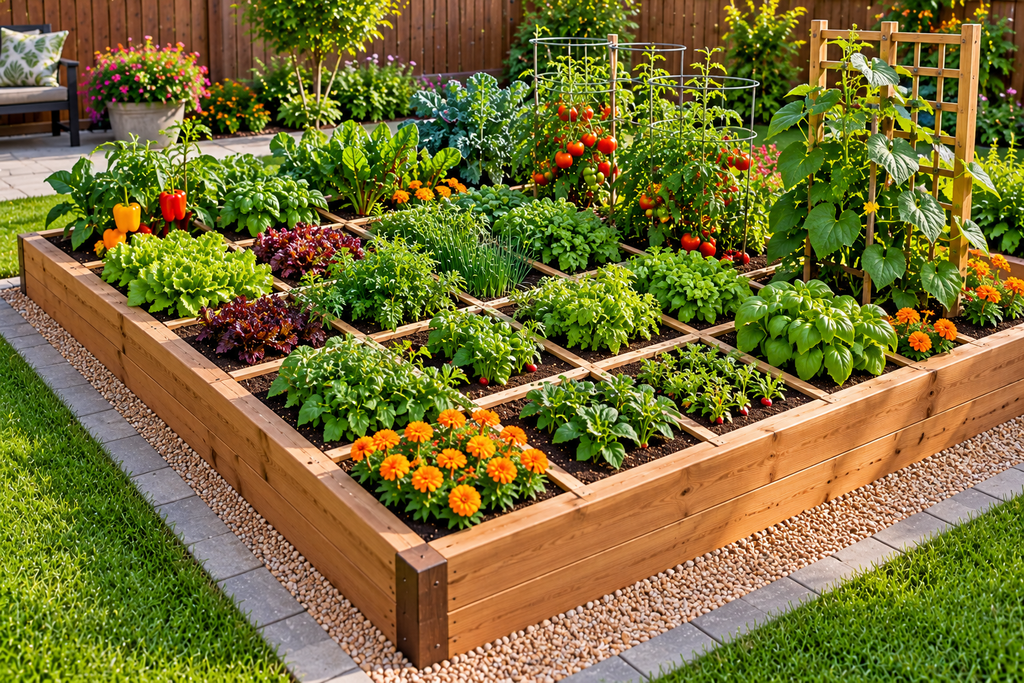
Square-foot gardening is a planting method rather than a layout, but it creates a recognizable design. A raised bed, often 4 by 4 feet, is divided into a grid of one-foot squares with string or thin wood strips. Each square gets a fixed number of plants depending on size: one tomato, four lettuce heads, nine bush beans, sixteen radishes, and so on, following spacing guidelines on seed packets.
The method’s appeal is that it limits waste and makes planning easy. It also suits beginners, because the grid forces you to start small. Its limitation is that dense planting needs consistent watering and feeding, since plants are competing in a tight space, and it doesn’t handle sprawling crops like winter squash or melons well unless you train them up a trellis.
6. The Vertical Vegetable Wall
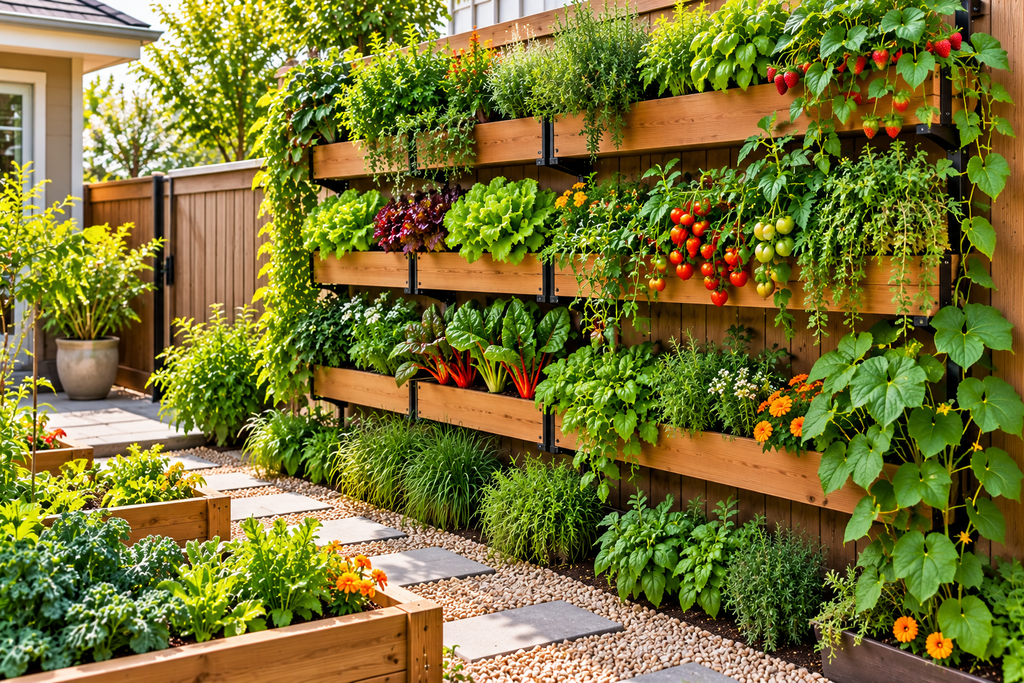
When ground space is tight, grow up. A sturdy trellis, cattle panel arch, or wire grid can support pole beans, cucumbers, small melons, peas, and indeterminate tomatoes, which keep growing taller through the season. Vertical growing also improves air circulation around leaves, which can reduce certain fungal problems, and makes harvesting easier because fruit hangs at eye level.
Two cautions apply. First, a heavy crop load catches wind like a sail, so anchor the structure deep. Posts set in the ground, or a frame bolted to a raised bed, hold up better than a freestanding trellis pushed a few inches into the soil. Second, remember that a tall crop casts shade. Place vertical structures on the north side of the garden in the Northern Hemisphere so they don’t shade shorter plants behind them.
7. The Potager: Vegetables That Double as Ornamental Planting
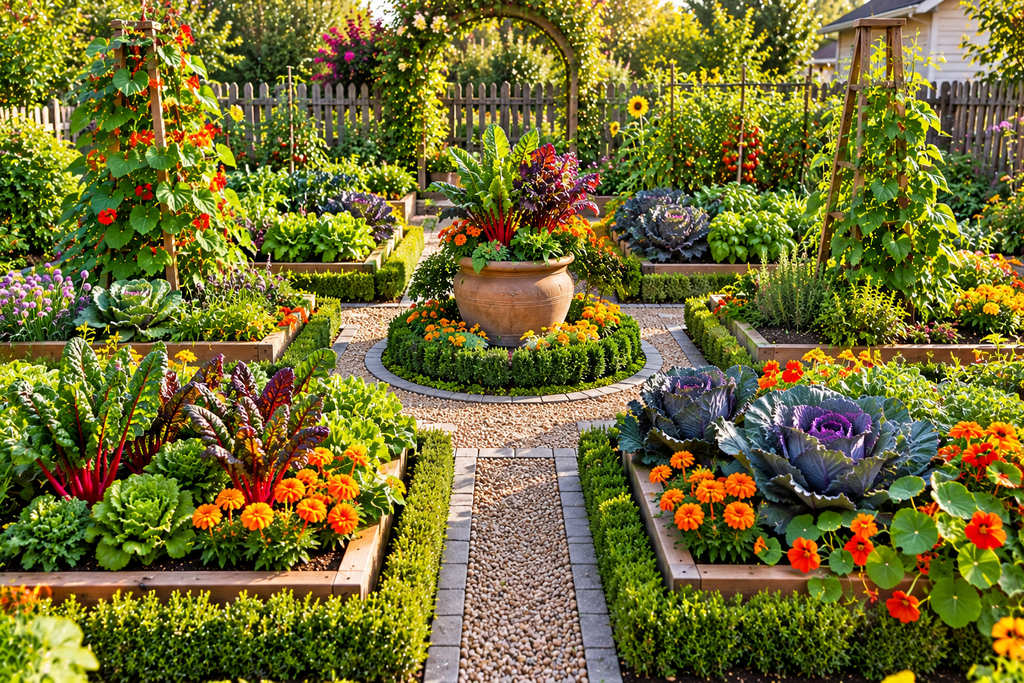
A potager mixes edible plants with flowers, herbs, and sometimes small fruit trees in a deliberately decorative arrangement. The idea has French roots, but the principle is simple: if the garden sits in view of the house, it should look good even when the harvest is thin.
Practical choices make the difference. Rainbow chard, purple kale, red-veined sorrel, and lettuces in contrasting colors give a bed texture and color without any flowers. Edible flowers such as nasturtiums, calendula, and borage pull double duty and bring pollinators into the garden. Edging a vegetable bed with low herbs like thyme, chives, or parsley gives it a finished look.
One honest limitation: a potager asks more of you visually than a plain vegetable plot. Spent crops have to be pulled promptly and replaced so the bed doesn’t look half-abandoned in late summer. If you’re not inclined to replant in succession, keep the design simpler.
Modern Backyard Garden Designs
8. The Minimalist Modern Garden
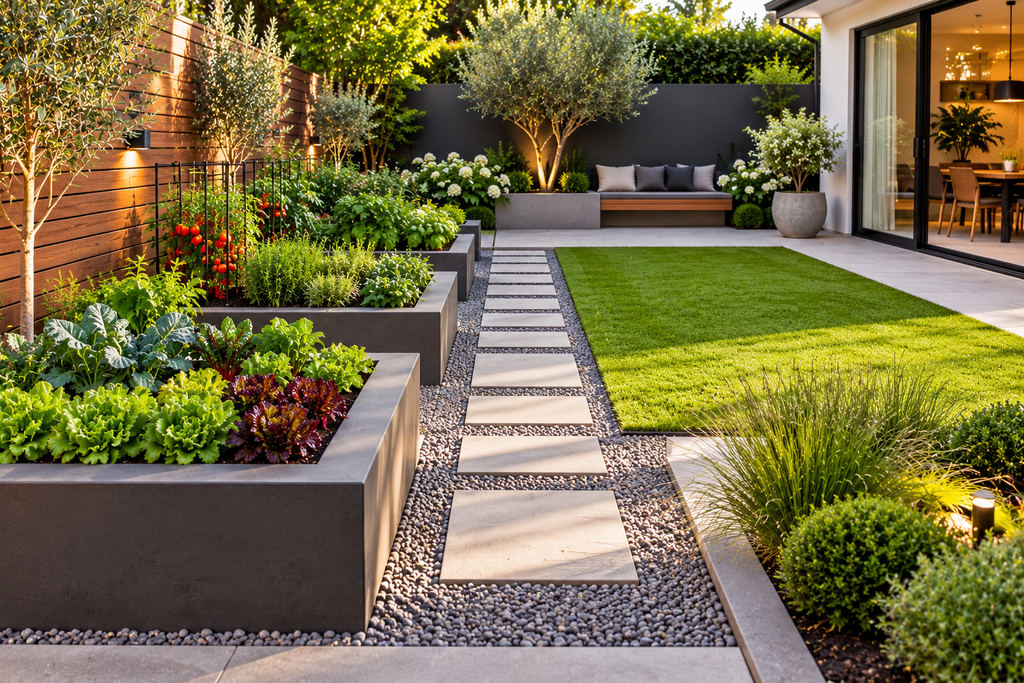
Modern garden design generally relies on clean lines, a limited palette, and restraint. Instead of many different plants, this style uses repetition: one or two grasses, a single groundcover, and a few evergreen shrubs repeated across the space. Hardscape such as large-format pavers, poured concrete, or decking in clean rectangular shapes frames the planting.
The key to this look is discipline. A modern garden loses its effect quickly when too many plant varieties compete. A good rule of thumb is to limit the planting palette to roughly five to seven plant types, and plant each one in groups large enough to read as a mass rather than scattered singles.
Plants with strong shapes work best: ornamental grasses like feather reed grass or switchgrass, boxwood or other clipped evergreens, hostas for shade, and sedum for dry sun. Check which of these suit your hardiness zone before buying, since plant performance varies by region.
9. The Gravel Garden
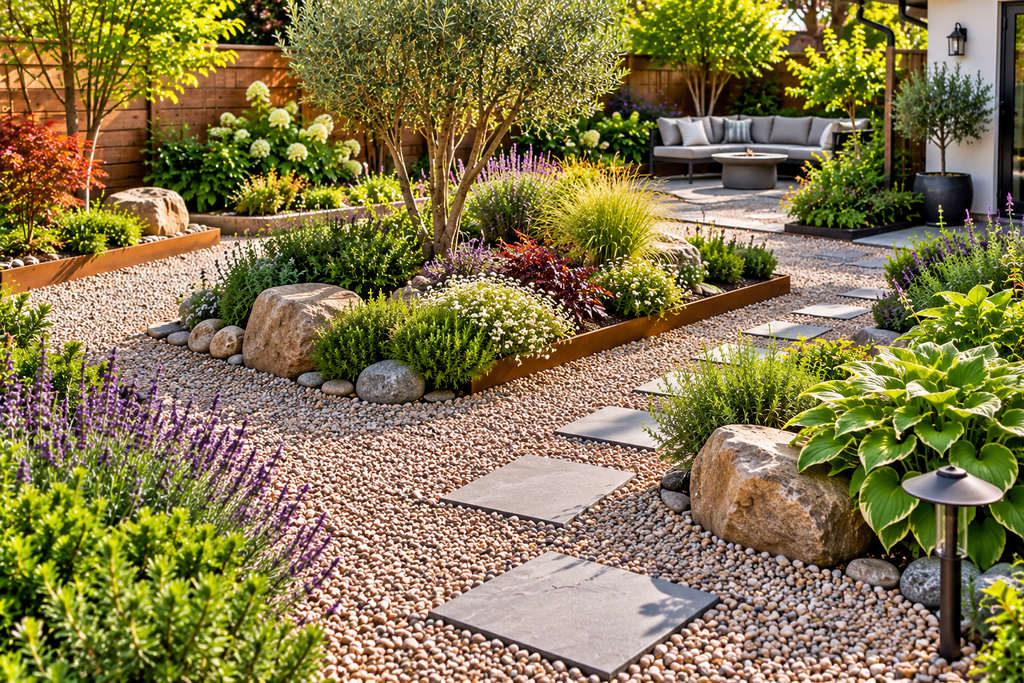
A gravel garden uses a layer of gravel as mulch with drought-tolerant plants growing through it. It looks modern and low-maintenance, and in the right climate it handles dry summers well. Plants suited to this style include lavender, ornamental alliums, sedums, yarrow, salvia, and many ornamental grasses.
Gravel gardens work best where the soil drains well and summers are dry. They tend to perform poorly in wet, heavy clay soil, where roots sit in saturated ground below the gravel. The gravel also holds heat, which stresses some plants in hot climates and can bake roots near the surface.
Install a weed barrier carefully, if you use one. Fabric under gravel tends to clog with debris and silt over several years, and then weeds root in the debris layer on top of the fabric. Some gardeners skip fabric and simply keep the gravel layer deep, around 2 to 3 inches, and pull weeds when they are small.
10. The Outdoor Room Garden
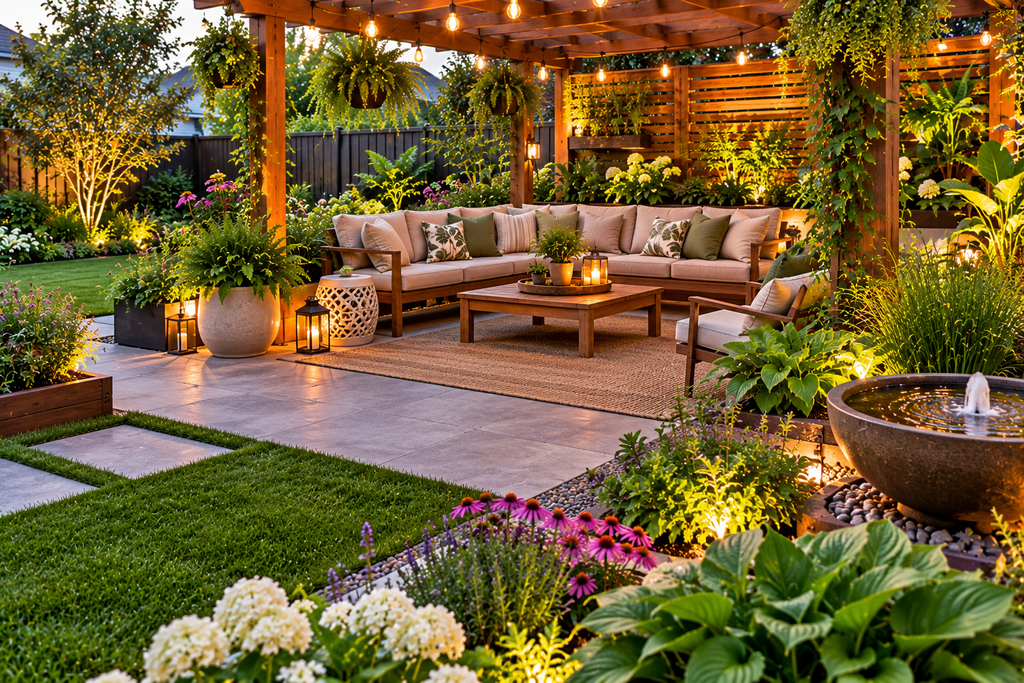
This design treats the backyard as an extension of the house. Instead of one open lawn, you define separate zones: a dining area near the kitchen door, a lounge or fire-pit area farther back, and a planted area that you view from both. Dividers create the sense of rooms. These can be a low wall, a row of tall planters, a pergola, a screen of evergreen shrubs, or a slatted wood or metal panel.
The most important detail is proximity to the house. Dining and cooking spaces get used more when they are close to the kitchen. A fire pit area can sit farther away. Think about sightlines as well: from the dining table, you should be looking at something worth seeing, such as a planted border, a water feature, or a tree, instead of the side of the garage.
Fire features have their own safety requirements. Keep fire pits at a safe distance from structures, overhanging branches, and fences. Local codes and fire regulations often specify minimum clearances and restrict open burning, so check with your municipality or fire department before installing one.
Designs for Difficult Spaces
11. The Small-Yard Garden With Zones
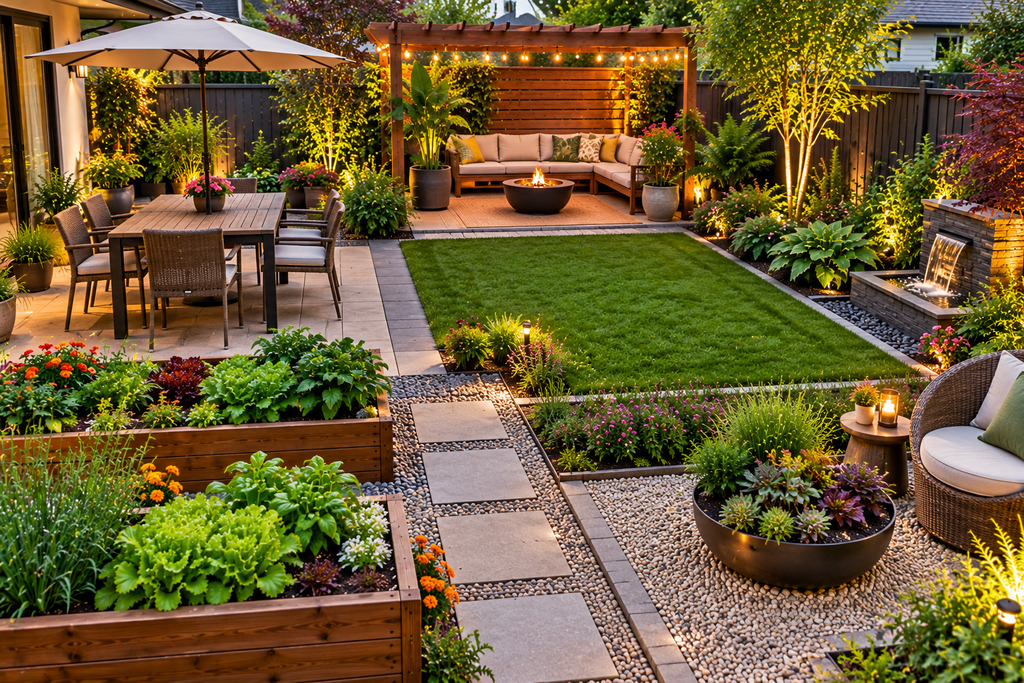
A small yard, say 15 by 20 feet or less, feels bigger when you can’t see all of it at once. Breaking the space into zones with a curved path, a screen of tall grasses, or a trellis with climbing plants creates curiosity and makes the yard feel layered instead of boxy.
In tight spaces, every element should do at least two jobs. A bench with storage underneath gives you seating and a place to put cushions and tools. A raised bed built at seat height doubles as a ledge. A trellis with a flowering vine provides privacy and fragrance. A dwarf fruit tree gives blossoms in spring and fruit in summer.
Use vertical space liberally. Wall-mounted planters, tiered plant stands, and climbers on fences draw the eye upward and free up floor area. Light-colored paving and fences also reflect light and make small yards feel more open.
12. The Sloped Yard Terrace Garden
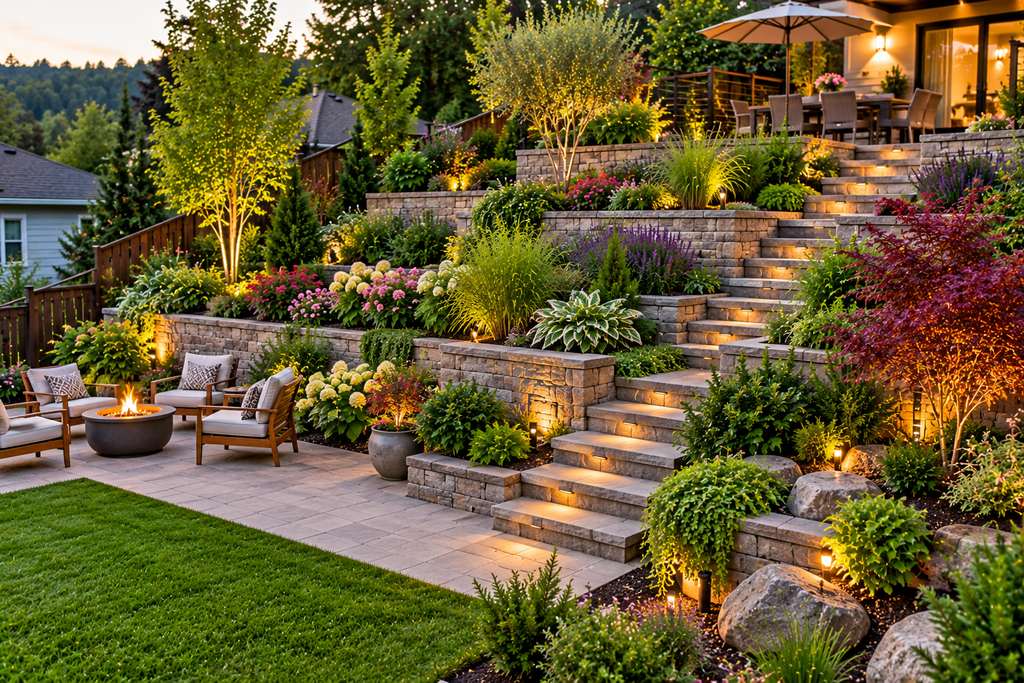
Slopes can be hard to plant and hard to mow, and heavy rain can wash soil downhill. Terracing, which means cutting the slope into a series of level steps held by retaining walls, solves several problems at once. The flat tiers become planting beds, seating areas, or vegetable plots, and the walls slow runoff.
Low walls, under about 2 to 3 feet, are within reach of many DIYers using dry-stacked stone or interlocking concrete blocks. Taller walls, commonly those over 3 to 4 feet depending on local rules, usually need engineering and permits, and failure can cause property damage or injury. Anything that holds back a lot of soil, supports a driveway or structure above it, or sits near a property line is a good case for hiring a licensed landscape contractor or engineer. Retaining wall requirements vary a lot by municipality, so verify local rules.
If terracing isn’t feasible, groundcovers with strong root systems, such as creeping juniper or certain sedums, help hold slopes in place. Planting along contours, rather than straight up and down, slows water.
13. The Shade Garden
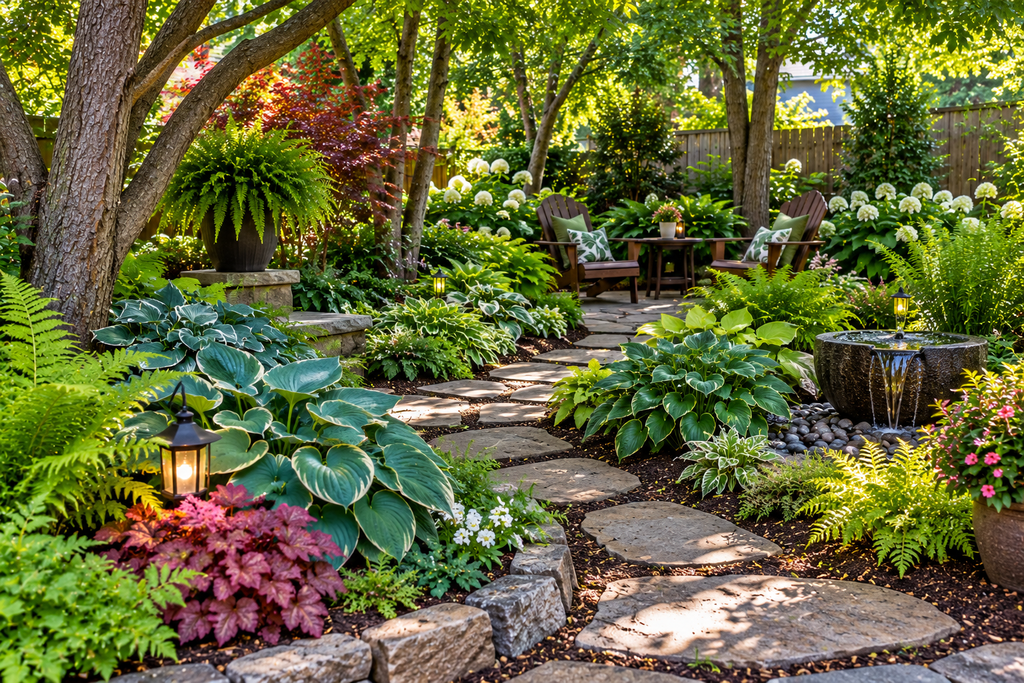
Shade gardening is largely about working with what light you have. Dry shade under mature trees is the most difficult case, since tree roots compete for water and nutrients. Moist shade near a north wall is far more forgiving.
Plants commonly used in shade include hostas, ferns, astilbe, hellebores, bleeding heart, brunnera, and heuchera, though specifics depend on your climate and soil moisture. Foliage does most of the work in shade, so combine different leaf sizes, shapes, and colors. Large, bold leaves next to fine, feathery ones create contrast that makes up for the lack of flowers.
A practical warning: when planting under established trees, avoid piling on thick layers of new soil over the roots and avoid cutting through large roots. Both can harm the tree. A few inches of mulch, with small plants tucked into gaps, is gentler.
Designs Built Around a Feature
14. The Pollinator and Wildlife Garden
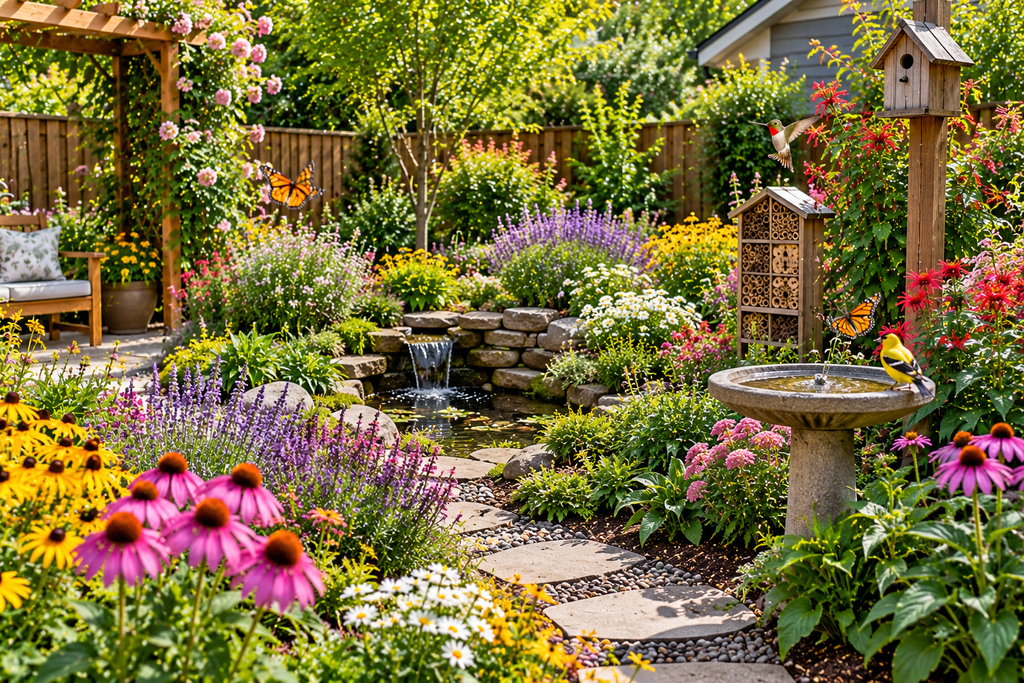
This design uses plants that provide nectar, pollen, and habitat for bees, butterflies, and birds. Native plants are usually the best choice because they evolved alongside local wildlife, though what counts as native depends on where you live. Local native plant societies, state extension services, and the Xerces Society publish regional plant lists.
Aim for continuous bloom from spring through fall, so pollinators always have something to feed on. Group plants of the same species in clumps instead of scattering single plants, since this makes them easier for insects to find. Leave some seed heads and hollow stems standing over winter, because many native bees nest in stems and many birds feed on seeds.
Be careful with pesticides. Even products labeled as natural can harm pollinators, particularly if sprayed on open blooms. If you need to treat a pest problem, read the label, spray in the evening when bees are less active, and avoid blooming plants.
15. The Water Feature Garden
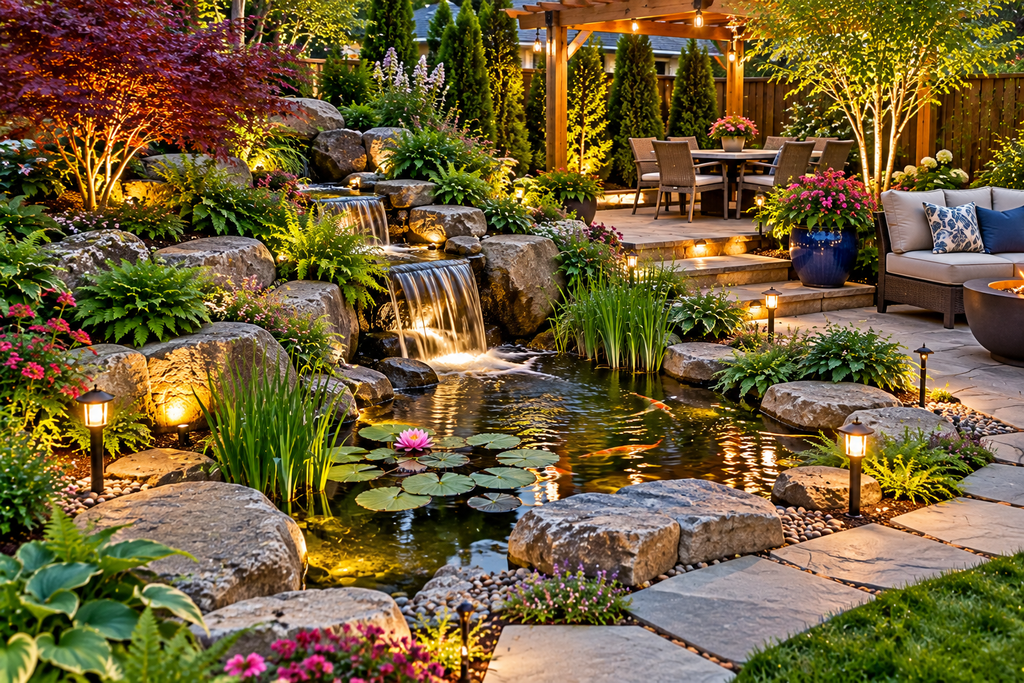
Moving water adds sound, which masks street and neighbor noise, and attracts birds. A small recirculating fountain, bubbling rock, or container water feature needs little space and often just a power outlet or solar panel. A larger pond is a bigger project with more maintenance and more risk.
Safety is the main consideration. Standing water can be a drowning hazard for toddlers and small children, even if only a few inches deep, and many municipalities have rules about fencing or covering ponds and pools. Families with young children often choose pondless features, where water circulates from a hidden reservoir under stones. Any outdoor electrical installation, including pumps and lighting near water, should use GFCI-protected outlets and be installed in line with local electrical codes. For anything beyond a plug-in unit, hire a licensed electrician.
Stagnant water can also breed mosquitoes. Moving water, regular cleaning, and in larger ponds, fish or mosquito dunks containing Bti, a bacterium that targets mosquito larvae, are common approaches. Follow product labels.
Choosing Between Designs: A Practical Decision Guide
The fifteen designs overlap, and most good yards combine two or three of them. These pairings come up often:
- Small yard with a sunny spot: raised bed grid or square-foot garden for food, plus vertical walls and an outdoor room zone for seating.
- Large, flat, open yard: island beds and perimeter borders to break up the lawn, with a four-quadrant kitchen garden near the house.
- Sloped or difficult site: terracing for structure, with a shade or pollinator garden where light and soil allow.
- Modern house: minimalist planting and gravel garden, possibly with a water feature as a focal point.
- Family with young kids: keep open lawn space, put raised beds along the edges, and wait on ponds.
A few ideas are worth steering away from. Avoid putting vegetables far from the house and a water source, because a garden you have to walk across the yard to reach tends to get neglected. Don’t build more bed area than you can weed and water. A smaller well-tended garden beats a large neglected one every time. And don’t plant first and decide on paths later.
Planning, Budgeting, and Phasing the Project
Doing everything in one season is rare and often unwise. A practical sequence is:
- Hardscape and structure first. Paths, patios, retaining walls, and raised bed frames set the layout. These are hardest to change later.
- Soil preparation second. Add compost, correct drainage, and amend problem areas before planting. A soil test through your local cooperative extension office usually costs little and tells you pH and nutrient levels, so you aren’t guessing about lime or fertilizer.
- Trees and large shrubs third. They take the longest to establish, so earlier is better.
- Perennials, then annuals and vegetables last. These are the quickest to change and cheapest to replace.
Costs vary enormously by region, materials, and whether you hire help, so treat any budget figure you find online as a rough guide. Get quotes for big items and price lumber, soil, and stone locally. Building in stages lets you spread costs and adjust the design after you’ve lived with the first phase through a full season.
Common Mistakes That Undermine Good Designs
Planting for the mature size, not the nursery pot. A three-gallon shrub looks tiny in a new bed, so people crowd plants close together. Within a few years, they overgrow the space and need removal. Check the mature height and spread on the plant tag and space accordingly.
Ignoring the maintenance load. A formal potager or a large perennial border looks wonderful but takes weekly attention. If your schedule allows an hour or two a week, choose a design that matches that. Gravel gardens, native plantings, and shrub-heavy designs take less ongoing work.
Skipping the water plan. Hand-watering a large garden is time-consuming. Drip irrigation or soaker hoses on a timer deliver water to roots, reduce evaporation, and keep foliage dry, which helps limit some leaf diseases. A hose bib placed near each garden zone saves a lot of dragging.
Choosing plants not suited to your zone. Check the USDA Plant Hardiness Zone for your location, and also consider heat tolerance, rainfall, and soil. Local nurseries and extension services are the most reliable sources for what grows in your region.
Forgetting winter. Many yards look good in summer and flat from November through March. Evergreen shrubs, ornamental grasses with seed heads, interesting bark, and structural elements like trellises and stone give the garden form when nothing is blooming.
Frequently Asked Questions
How much sun does a vegetable garden really need?
Fruiting crops like tomatoes, peppers, and squash generally want six to eight hours of direct sun. Leafy greens and some root crops tolerate four to five hours. If your sunniest spot gets fewer than four hours, consider growing greens and herbs only, or use containers on a sunnier patio.
Are raised beds better than in-ground beds?
Neither is better in every case. Raised beds help in heavy clay, poorly drained, or contaminated soil and are easier on the back. In-ground beds cost less and hold moisture longer, which suits dry climates. If your native soil is decent, in-ground is perfectly fine.
Can I build a garden on a budget?
Yes, by phasing the work, starting plants from seed, and dividing perennials from friends or neighbors. Compost from your own pile or from a municipal program is often free or cheap. Prioritize spending on structure and soil, and economize on plants.
What’s the easiest style for a beginner?
A few raised beds or a perimeter border with a limited plant list. Both are forgiving, and you can expand after a season or two.
Should I test my soil before building?
It is a good idea, especially for food gardens. In older neighborhoods, soil may contain lead from past paint or other legacy contaminants, and your state’s extension service or a certified lab can advise on testing. If contamination is a concern, raised beds with imported soil are a safer way to grow edibles.
Key Takeaways
Pick a design based on your sun, your drainage, and your realistic maintenance time, not just on what looks good in photos. Decide on paths and structure before plants, and start with one or two zones you can keep up. Combine designs where it makes sense: a raised bed grid in the sunniest spot, a shade garden under the trees, an outdoor room near the house. Check local rules before building walls, fire features, or water features, and call 811 before digging. Then let the garden develop in phases, adjusting as you learn how the space behaves across seasons.

About Syprose Kiche
Syprose Kiche is the creator and writer behind My Besuited Home, a practical home and garden website covering DIY projects, gardening, lawn care, landscaping, home improvement, and outdoor living. She focuses on turning everyday homeowner questions into clear, practical guides backed by careful research and useful real-world considerations.