
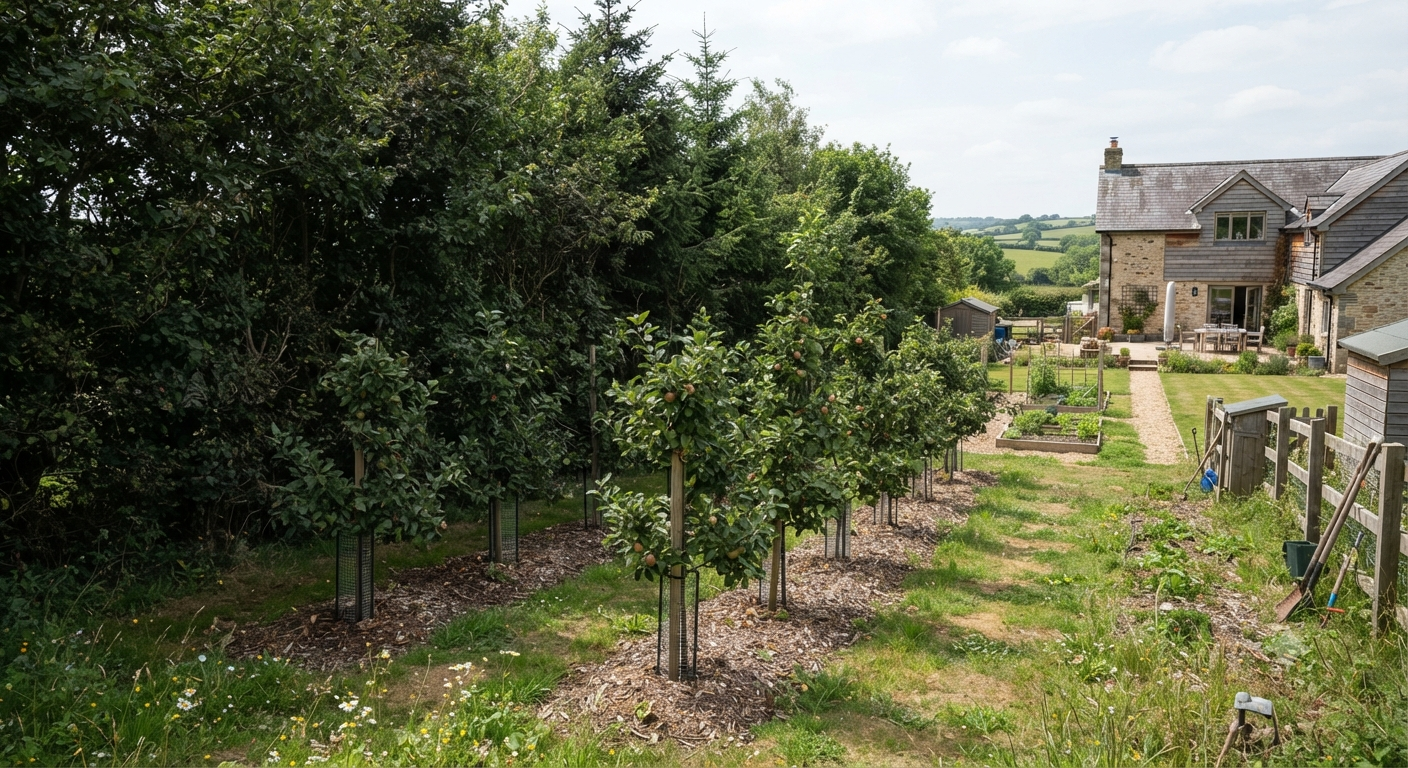
You bought the trees. You picked a sunny spot. And now you’re staring at three bare-root saplings wondering if “orchard” is too generous a word for what’s basically a sad little row of sticks in your backyard.
I get it. Ten years ago, my “orchard” was two Honeycrisp trees planted six feet apart because I didn’t know any better. One of them never fruited right because it couldn’t breathe. The other leaned so hard toward the sun it looked like it was trying to escape.
If you’re planning an apple orchard — whether that’s a quarter acre or just a corner of your yard — the difference between a Pinterest-worthy harvest and a tangled, disease-ridden mess comes down to a handful of smart decisions made early. Here are 11 ideas that turned my own patch of dirt into something I’m actually proud of, plus the mistakes that got me there.
1. Plant in a Fan Pattern Instead of Straight Rows
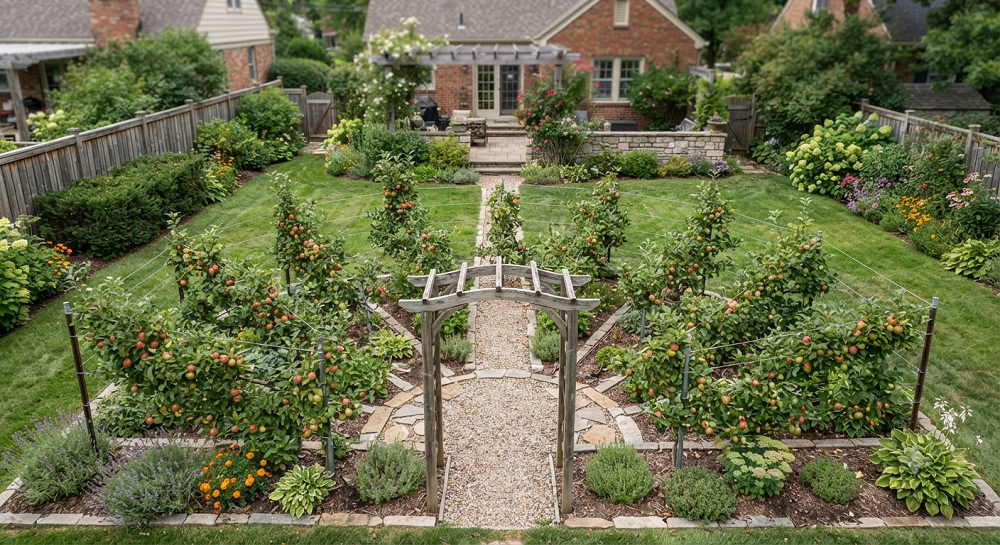
Straight rows are what everyone does, and honestly, they’re boring and often waste space on a home lot. A fan or arc pattern fans your trees out from a central point, which works especially well on corner lots or sloped yards.
This layout also makes air circulation way better than a cramped straight line. Apple trees hate stagnant, humid air pockets — that’s basically an invitation for scab and powdery mildew.
The trick is spacing each tree at least 12 to 15 feet apart at the base of the fan, widening as you go. I redid my own layout this way after year two, and the difference in airflow (and my sanity while pruning) was night and day.
If you’ve got a small yard, even a three-tree fan against a fence line looks intentional instead of accidental, which matters more than people admit when you’re trying to keep the neighbors happy about your “farm.”
One more thing nobody tells beginners: measure your fan’s widest point before you plant, not after. I eyeballed mine and ended up with the outer trees crowding my fence line by year three, which meant an awkward pruning job just to keep branches from poking through to the neighbor’s side.
2. Try Espalier Training Against a Wall or Fence
Espalier is the fancy French word for training a tree flat against a structure, and it’s my favorite trick for tiny yards. You basically turn a 3D tree into a 2D wall of fruit.
It takes patience. You’re tying young, flexible branches to horizontal wires and pruning aggressively to keep the tree flat. Year one looks pathetic — just a stick with two side branches. Year four looks like something out of a French countryside cookbook.
The bonus here isn’t just looks. A south-facing wall radiates heat back onto the tree at night, which can push your harvest a week or two earlier and helps in colder zones where the growing season feels criminally short.
I tried this with a Gala against my garage wall, and my neighbor legitimately thought I’d bought it that way from a nursery. I did not correct her.
Pick a variety known to tolerate hard pruning if you go this route. Not every apple cultivar responds well to the constant shaping espalier demands, and a stubborn variety will just throw out water sprouts in every direction as a form of protest.
3. Mix in a Pollinator Strip Between Rows
Apple trees need cross-pollination from a different variety, and most of that work gets done by bees, not wind. If your yard doesn’t already have a steady bee population, you’re leaving fruit on the table — or rather, not on the tree at all.
Plant a strip of native wildflowers, borage, or clover between your tree rows. It’s cheap, it looks intentional, and it pulls in mason bees and honeybees that do the pollination heavy lifting for free.
This also crowds out weeds that would otherwise compete with your trees for water and nutrients, so you’re solving two problems with one strip of flowers.
The summer I added a borage strip, my fruit set nearly doubled. I’m not exaggerating for effect here — I actually counted, because I’m that person.
Keep the strip at least a couple feet from the trunk itself, though. Flowers planted right up against the base compete with young feeder roots for water, and I learned that the hard way when one of my trees looked stressed for an entire growing season before I figured out why.
4. Build a Living Fence With Espaliered Cordons
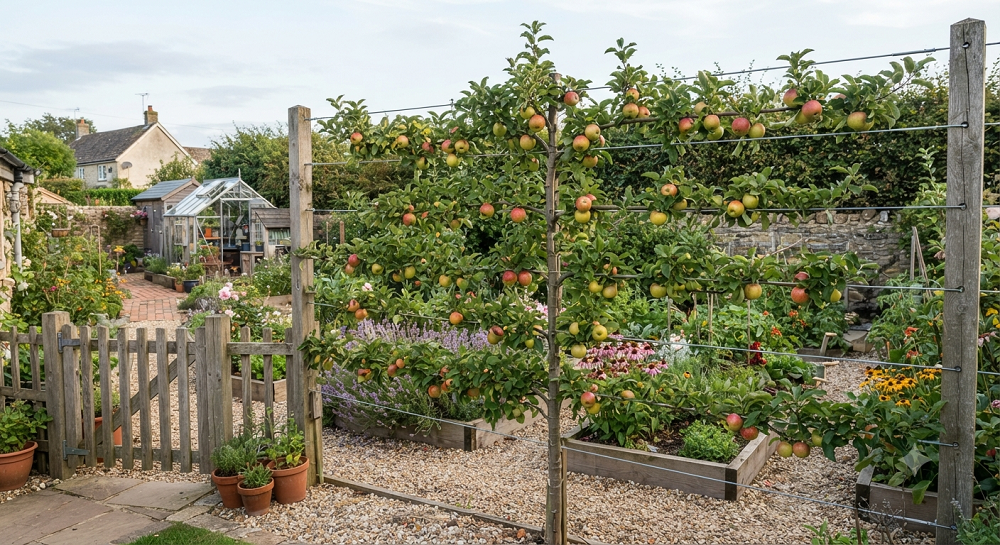
If you want privacy and fruit in the same breath, cordon training creates a low, dense living fence out of apple trees grown at a 45-degree angle. It’s espalier’s scrappier cousin.
Cordons take up almost no horizontal space, which makes them perfect for lining a driveway or property edge. You get a hedge that produces actual apples instead of just blocking your neighbor’s view of your trash cans.
Maintenance is mostly summer pruning to keep the angle and control vigor. It’s more hands-on than a standard tree, so don’t pick this if you’re the “water it twice a year and hope” type of gardener.
I lined my driveway with four cordon apples two years ago, and it’s genuinely the first thing visitors comment on. Not the flowers. Not the porch. The apple fence.
5. Add a Central “Family Tree” With Multiple Grafted Varieties
A family tree, in orchard terms, is one rootstock with three, four, or even five different apple varieties grafted onto its branches. One tree, multiple harvest windows, built-in cross-pollination.
This solves the classic small-yard problem where you don’t have room for the two or three separate trees most apple varieties need for pollination. Everything happens on one trunk.
Harvest gets interesting because different branches ripen at different times, so you’re not drowning in 200 apples on the same weekend like I was with my first single-variety tree.
Buy these from a reputable nursery that specializes in grafting — don’t try this as a first-time DIY project unless you enjoy failure. I tried grafting my own family tree in year three and killed two of the three graft unions. Leave it to the pros your first time around.
One quirk worth knowing: the different varieties on a family tree don’t always grow at the same rate. Prune the more vigorous branches harder each year, or they’ll shade out the slower-growing varieties and eventually choke them off the tree entirely.
6. Design a Keyhole Orchard Bed for Tight Spaces
Keyhole layouts are usually a vegetable garden trick, but they work surprisingly well for dwarf apple trees. You plant in a circular or horseshoe bed with a narrow path cutting to the center, so every tree is reachable without stepping on root zones.
This design is a lifesaver if you’re working with a small suburban lot and want to fit four or five dwarf trees without it looking like a cramped nursery lot.
Compost and mulch access improves dramatically too, since you can walk right up to each trunk instead of reaching over rows.
I built a keyhole bed with five dwarf trees in a space that used to hold exactly two standard-sized ones. Same footprint, more than double the harvest variety.
7. Terrace Your Trees on a Sloped Yard
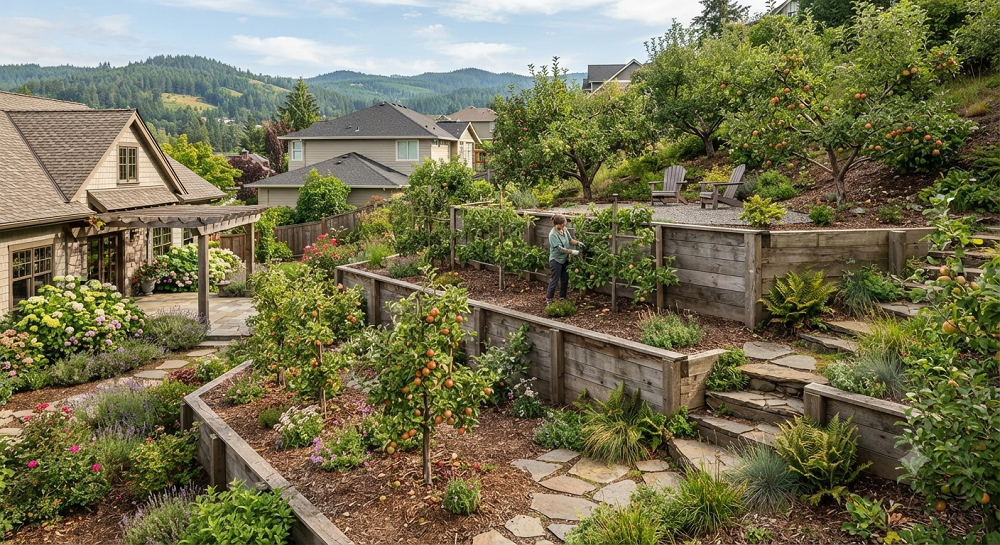
Sloped yards scare people off from planting an orchard, but a slope is actually a gift if you terrace it right. Water drains away from roots instead of pooling, which cuts down on root rot dramatically.
Build simple retaining walls with landscape timbers or stacked stone, then plant one tree per terraced level. Each tree gets its own sun exposure and drainage without competing with the tree above or below it.
This setup also just looks stunning from a distance, almost like a mini vineyard. Visually, tiered orchards read as way more intentional than flat rows.
My in-laws have a steep backyard they assumed was useless for anything but grass. Three terraces and six trees later, they’re now the ones giving me apples every October instead of the other way around.
Check your local frost patterns before deciding which terrace gets which variety. Cold air sinks, so the lowest terrace on a slope is usually the frost pocket — plant your hardiest, most frost-tolerant variety there and save the finicky ones for higher ground.
8. Underplant With Comfrey or Clover as a Living Mulch
Bare soil under an apple tree is a missed opportunity and a weed magnet. Comfrey and clover work as a living mulch — they suppress weeds, hold moisture, and (in comfrey’s case) pull nutrients up from deep in the soil that you can chop and drop right back onto the surface.
Clover has the added job of fixing nitrogen in the soil, which feeds your tree without you buying a single bag of fertilizer.
This isn’t a one-and-done planting either. You’ll chop comfrey back two or three times a season and just let it decompose in place, which builds organic matter over time instead of stripping it.
I resisted this idea for years because it looked “messy” compared to clean mulch rings. My trees have never grown faster than the two seasons since I gave in and underplanted with comfrey.
9. Create a Dwarf Container Orchard on a Patio
No yard? No excuse anymore. Dwarf and columnar apple varieties grow fine in large containers on a patio, balcony, or even a wide driveway strip.
You’ll need at least a 15- to 20-gallon container per tree, and you’re looking at watering far more often than in-ground trees since containers dry out fast in summer heat.
Columnar varieties especially are bred to stay narrow, some maxing out at just 2 feet wide, so you can line up four or five along a fence line or railing without them fighting each other for space.
A friend of mine grows three columnar apples on her apartment balcony in downtown Nairobi, and she gets a legitimate harvest every year. If she can do it 12 stories up, your patio can handle it too.
Feed container trees more often than in-ground ones. All that watering flushes nutrients out of the soil faster, so a monthly balanced fertilizer through the growing season keeps them from stalling out mid-summer, which is the single biggest complaint I hear from first-time container growers.
10. Use a Windbreak Row to Protect Young Trees
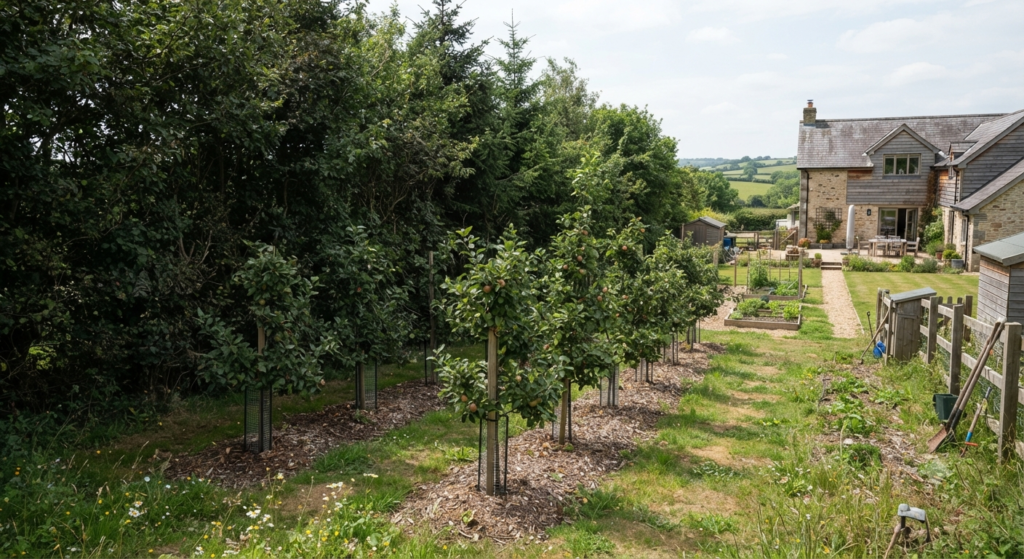
Young apple trees and strong wind do not get along. Wind stress stunts growth, dries out soil faster, and can straight-up snap young branches during a bad storm season.
Plant a windbreak row of fast-growing shrubs or evergreens on the prevailing wind side of your orchard, spaced out a season or two before you plant your apple trees if you can plan that far ahead.
Even a simple slatted fence works in a pinch if you need protection immediately and don’t have years to wait on a living windbreak to fill in.
I lost an entire first-year tree to a spring windstorm because I skipped this step, thinking it was overkill for a “small orchard.” It wasn’t overkill. It was a $40 lesson I didn’t need to learn the hard way.
Quick side note: if you’re in a genuinely windy region, stake your trees for the first two years regardless of whether you’ve got a windbreak. Belt-and-suspenders, but young roots need all the help they can get.
11. Add a Rustic Seating Nook at the Orchard’s Center
This one’s less about yield and more about actually enjoying what you built. Tuck a small bench or a couple of Adirondack chairs somewhere near the middle of your orchard layout, ideally under whichever tree canopy fills in fastest.
It sounds indulgent, but it changes how often you actually walk your orchard and notice problems early — pest damage, drooping branches, early scab spots — instead of only showing up at harvest time.
Gravel or mulch paths leading to the nook also double as functional walkways for hauling tools, ladders, and harvest baskets in and out.
I added a bench under my oldest tree three years in, and I genuinely check my trees twice as often now just because I have a reason to sit out there with coffee. Early detection has saved me from two separate pest outbreaks that I would’ve missed otherwise.
Real Talk: What’s Not Worth the Effort (And What Can Go Wrong)
Not every orchard idea that looks good online actually earns its keep. Here’s where I’ve wasted time, money, or both.
Skip the ultra-decorative espalier shapes. Hearts, spirals, candelabras — they photograph beautifully and take twice the pruning skill of a basic horizontal cordon. Unless you genuinely love the craft of training branches, a simple flat espalier gives you 90% of the visual payoff for a fraction of the headache.
Don’t overplant “for backup.” I planted extra trees my first year assuming some would die. Most didn’t, and I ended up with an overcrowded mess I had to thin out two years later, which stresses the remaining trees and sets back your harvest timeline.
Watch out for rootstock confusion. Dwarf, semi-dwarf, and standard rootstocks all need different spacing, and nurseries don’t always label this clearly. I once planted three “dwarf” trees at dwarf spacing that turned out to be semi-dwarf rootstock, and by year four they were fighting each other for light.
Living mulch isn’t zero-maintenance. Comfrey and clover cut down on weeding but still need managing, or they’ll climb right up your trunk and trap moisture against the bark, inviting rot and pests you didn’t have before.
Terracing costs more than it looks like it should. Retaining wall materials add up fast, especially if your slope is steeper than it looks on a flat photo. Get a rough cost estimate before you commit to a full terraced layout, not after you’ve already dug the first level.
Family trees sound better in theory than they perform in year one. Grafted multi-variety trees take a season or two longer to establish a strong root system compared to a single-variety tree, since the rootstock is doing more work supporting different growth patterns. Don’t expect a full harvest from every branch right away, or you’ll end up disappointed for no good reason.
Final Thoughts
An apple orchard doesn’t need to look like a postcard from Vermont to work well. It needs airflow, sunlight, the right pollination partners, and a layout that fits how you’ll actually use the space — not just how it’ll photograph.
Start small, pick two or three ideas from this list that fit your yard and your patience level, and build from there. You can always add a terrace or a living fence next season once you know your ground.
I’ll leave you with the same advice I wish someone had given me a decade ago: plant fewer trees than you think you want, space them wider than feels necessary, and give yourself permission to redesign in year three once you actually understand how your land behaves. My current layout is nothing like my first one, and it’s better for it.
What’s your yard working with right now — a blank slate, a slope, or a tiny patio corner? Drop your setup in the comments below, and I’ll tell you which of these ideas I’d try first if I were standing in your shoes.

About Syprose Kiche
Syprose Kiche is the creator and writer behind My Besuited Home, a practical home and garden website covering DIY projects, gardening, lawn care, landscaping, home improvement, and outdoor living. She focuses on turning everyday homeowner questions into clear, practical guides backed by careful research and useful real-world considerations.