

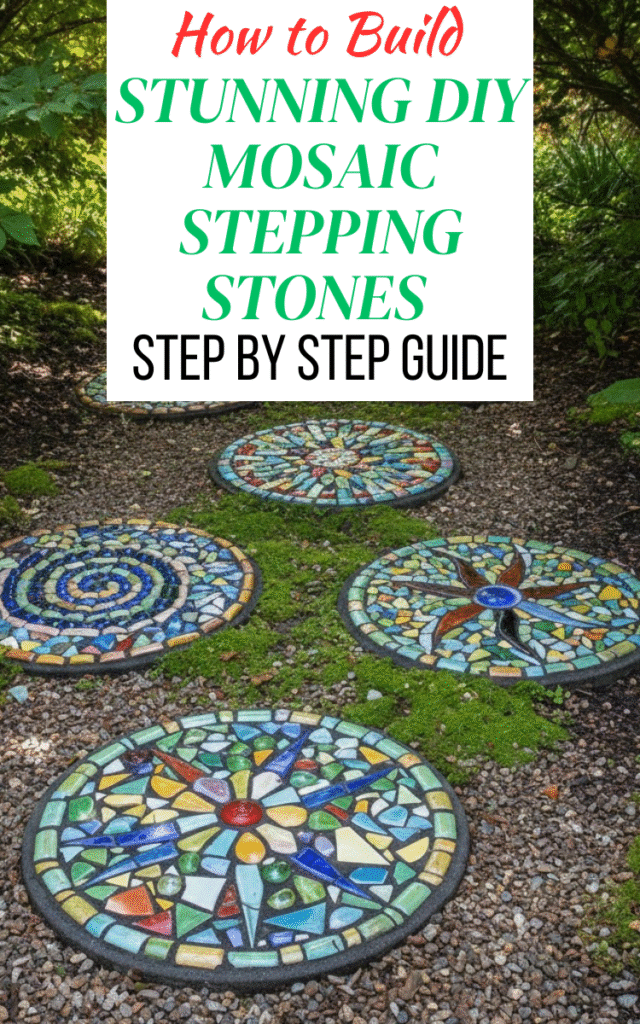
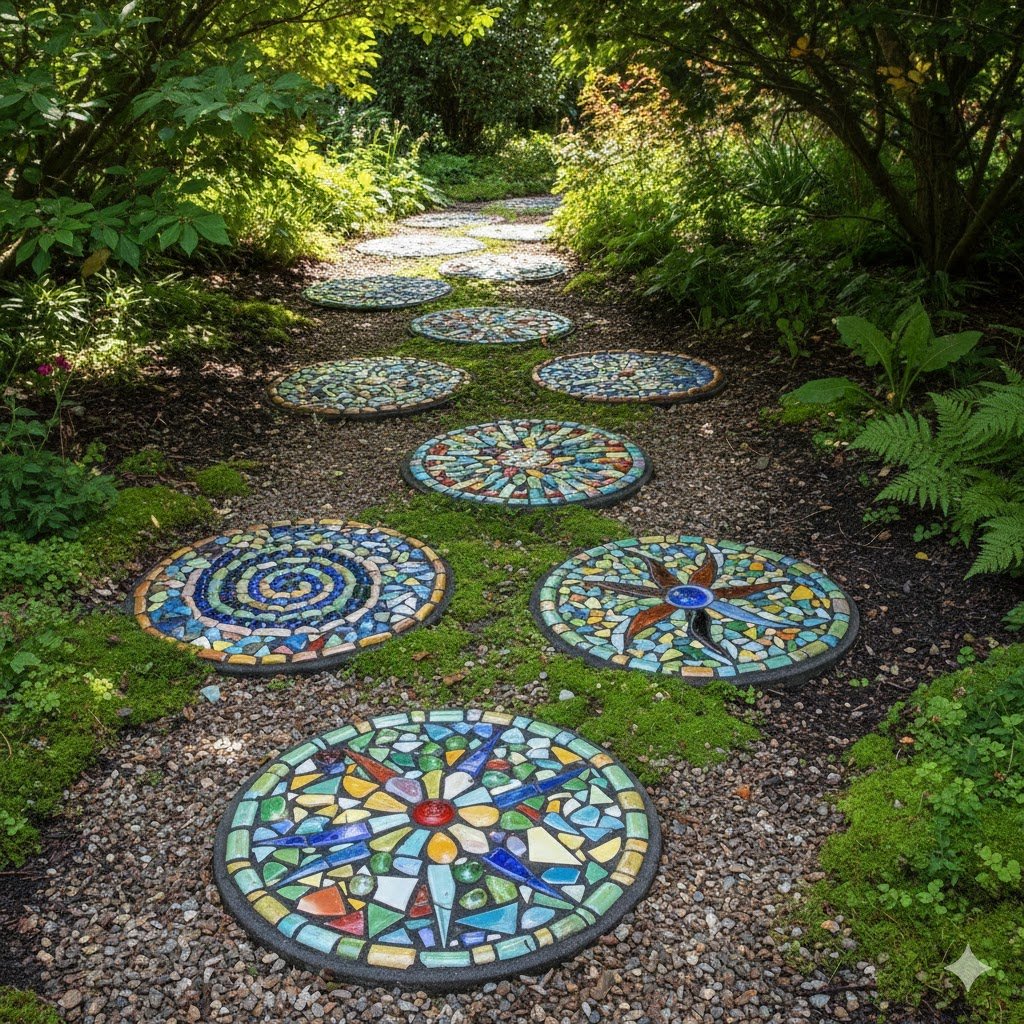
I’ve always felt that a garden is an extension of the home, and the best ones have character—little unexpected touches that reveal the personality of the person who tends them. For years, I struggled to find the perfect stones for my path, the ones that felt artisanal and unique, not just mass-produced concrete slabs. That struggle led me straight to the satisfying world of DIY mosaic stepping stones. I realized that instead of buying a generic garden accent, I could literally embed a piece of myself and my creativity right into the landscape.
This project is truly a blend of rugged outdoor crafting and delicate art. While working with concrete might sound intimidating, I promise you, it’s much simpler than building a deck or pouring a foundation. The real artistry comes in choosing your materials—maybe it’s colorful tiles, discarded beach glass, or even broken china from a beloved but retired set. The process is incredibly meditative once you get started, and the result is a durable, custom piece of garden architecture that will last for years, shrugging off weather and looking fantastic.
Over the next few sections, I’m going to walk you through every single phase of the process, from gathering supplies to the final polish. The main challenge here isn’t the technique; it’s patience. We’ll be waiting on concrete and grout to cure, but believe me, the pause is worth it. By the end of this guide, you’ll be ready to create a beautiful, custom mosaic stone that adds vibrant color and unique texture to your garden path.
Materials & Tools Checklist (The Essentials)
Before we mix a single bag of concrete, let’s make sure our supply station is fully stocked. For the stone’s base, we need quick-setting concrete or mortar mix. I generally prefer the quick-setting variety because it shortens that critical waiting period when the mix is firm enough to tile but not fully set—it helps keep the process moving along. Don’t forget water, of course, and if you want a base color other than standard gray, pick up a concrete coloring agent to mix in now.
The mosaic materials are where the fun really begins. The most classic choice is mosaic tiles, but don’t limit yourself to the craft store! I often hunt for broken pottery pieces or interesting found objects like marbles, river rocks, or colored glass gems. If you opt for broken materials like old dishes, please make a mental note to be extra cautious and double-glove, as those edges can be surprisingly sharp. The key is to gather more than you think you’ll need—it’s terrible to run out of materials when you’re deep into your design.
Finally, you’ll need the crucial equipment: a mold, mixing tools, and safety gear. Disposable aluminum pans work great for small, round stones, but you can also use plastic planter bases or even build a simple square frame out of scrap wood. For mixing, a large bucket and a sturdy trowel or hoe are essential. Crucially, do not skip the safety glasses and gloves; concrete dust is highly alkaline and abrasive, so protecting your hands and eyes is absolutely mandatory. For the finishing touch, grab your grout (unsanded for tiny gaps, sanded for wide ones), a sponge, and a quality concrete sealer—that sealer is your stone’s insurance policy against the elements.
Step-by-Step Tutorial: Making the Stone
Step 1: Prepare Your Workspace and Molds
The very first step is simple but vital: setting up a clean, safe, and stable work area. You’ll be mixing dusty materials and wet concrete, so choose a well-ventilated space, preferably outdoors or in a garage covered with a protective plastic tarp or drop cloth. I once tried this on an unforgiving wooden bench and regretted the resulting gray haze for weeks, so lay down that sheeting! Once the area is ready, immediately put on your gloves and safety glasses—we are now officially in concrete mode.
Next, focus entirely on your mold. Give it a thorough cleaning to ensure no debris gets embedded in the stone’s surface. This next part is non-negotiable for easy demolding: you must apply a release agent. I use a simple coating of petroleum jelly, but cooking spray works too. Apply it liberally to the inside of the mold walls and the bottom; this small step prevents the concrete from sticking and will save you a lot of headache when it’s time to pop the stone out.
Take a moment to inspect your setup. Are your tools organized? Is your water source close by? Because concrete waits for no one! Ensuring your workspace is fully prepared prevents frantic searching mid-mix. This preparation stage is often overlooked, but a well-prepped area allows the creative part—the mosaic tiling—to go smoothly once the concrete is poured.
Step 2: Mix the Concrete
Now we tackle the concrete mix. This is where it’s essential to set aside assumptions and strictly follow the directions on your mix package. Different brands and types of concrete require different water-to-mix ratios, and getting this wrong is the primary cause of weak or crumbling stones. I recommend starting with slightly less water than the package calls for, then adding small amounts until you reach the desired consistency, mixing thoroughly with your trowel or hoe.
What exactly is the desired consistency? We are aiming for something thick, like firm oatmeal—it should hold its shape when scooped but still be pliable. If it’s too watery (soupy), your stone will be weak; if it’s too dry (crumbly), it won’t cure properly or bond the tiles well. If you are adding a coloring agent, introduce it to the water before adding it to the dry mix for the most even distribution of color.
Once the mix is perfect, start filling your prepared mold. Pour it in steadily, aiming for a final depth of at least 1.5 to 2 inches. This thickness ensures structural integrity, making the stone durable enough to handle foot traffic and seasonal freezing/thawing. When the mold is full, use the trowel to level the surface, smoothing the back of the stone so it will sit flat in the garden.
Step 3 & 4: Settling, Curing, and Designing
After pouring and smoothing, the stone needs to settle. Gently tap the sides and bottom of the mold with your rubber mallet or even just a closed fist. This vibration releases trapped air bubbles, ensuring your stone doesn’t have large internal voids that could compromise its strength. This brief settling period is crucial for a dense, durable result.
Next comes the hard part: waiting for the “tiling window.” Let the concrete set for approximately 1 to 2 hours. The exact time depends on the temperature and humidity, but you are looking for a state where the concrete is firm enough that your tiles won’t sink entirely to the bottom, but soft enough that you can still easily press them in. This semi-set state is ideal for the direct method of tiling we are using.
With your creative hat on, start laying out your mosaic design, pressing the pieces directly into the soft concrete. Whether you’re following a sketch or working spontaneously, ensure you press each tile firmly so it is flush with or slightly recessed below the surrounding concrete surface. If a tile sticks up, it will eventually chip off or cause a tripping hazard. Maintain consistent, small gaps between your pieces—these gaps are where the grout will bond everything together later. If any concrete squeezes up onto the face of the tile, wipe it off immediately with a damp rag before it sets permanently.
Step 5: Full Curing (Patience Required)
The work is paused, and the test of patience begins. To ensure the concrete cures correctly, you need to keep it protected and slightly moist for the first couple of days. Lightly cover the stone with a sheet of plastic (ensure the plastic doesn’t actually touch the mosaic surface) and keep it out of direct sunlight and strong winds. The concrete will harden over the next 24 to 48 hours, depending on the mix you used.
After approximately 48 hours, the concrete should be solid and ready for demolding. This is always a nervous moment! Carefully flip the mold over onto a soft surface (like a towel or foam pad) and gently tap the bottom until the stone releases. If you properly greased the mold in Step 1, it should slide right out. If it resists, apply gentle, even pressure—don’t force it or you could crack your newly formed stone.
Once successfully demolded, the stone still needs a final, thorough cure. Concrete reaches its full strength slowly, so allow the demolded stone to dry completely for an additional 5 to 7 days before you even think about grouting or placing it outside. This extended curing time guarantees the stone achieves maximum durability, making it ready to face the weather.
Finishing Steps: Grouting and Sealing
Step 6: Grouting the Stone
The stone is cured, the mosaic is set—time to fill those gaps! Grout binds the mosaic pieces together, reinforces the stone’s surface, and gives it a professional, finished look. Just like with the concrete, mix your grout powder with water according to the package directions, aiming for a thick, creamy consistency—like smooth peanut butter. Too watery, and it will crack upon drying; too thick, and it will be impossible to apply.
Working quickly, use a rubber spatula or a gloved hand to force the grout deep into all the spaces between the mosaic pieces. Don’t be shy; cover the entire surface! You want the grout to penetrate every crevice to create a solid, protective layer. This step feels messy, but the mess is part of the process.
Once the entire mosaic surface is covered, wait about 15 to 20 minutes for the grout to firm up slightly. Then, using a damp (not dripping wet!) sponge, start wiping the excess grout off the face of the tiles. Rinse your sponge frequently in a bucket of clean water. The goal is to remove the grout haze from the tile tops while leaving the grout lines clean and neatly shaped. This initial clean determines how the final mosaic looks, so take your time and be thorough.

Step 7: Final Polish and Sealing
After the initial wet cleaning, let the grout dry for a few hours (usually 2-4 hours). You’ll likely see a white film, or “haze,” remaining on the tile faces. Use a soft, dry cloth—a piece of an old T-shirt works great—to buff away this final haze, making the tiles sparkle. The stone now looks complete, but we have one crucial step left to ensure it survives its outdoor environment.
That step is sealing, and it’s the difference between a stone that lasts one season and one that lasts ten. You must wait until the grout has fully cured, which is typically 48 to 72 hours after grouting. Use a high-quality concrete or tile sealer, following the manufacturer’s directions exactly. I always apply two thin coats, letting the first dry completely before adding the second.
The sealer penetrates the concrete and grout, preventing water absorption, which is critical for surviving winter freeze-thaw cycles and preventing moss and staining. Once the sealer is completely dry, your mosaic stepping stone is truly finished and ready for the garden. I’d still recommend waiting a full week from the day you started before you place it permanently or step on it, just to ensure maximum structural integrity.
Design Tips & Troubleshooting
When planning your mosaic, remember that stepping stones are tactile and visual. I love using geometric patterns because the lines create an immediate focal point, but don’t hesitate to incorporate meaningful elements like family monograms, abstract swirls, or even handprints/footprints (do this carefully with the cement). For a truly natural look, think about scenes—waves for a coastal garden, or leaves and flowers for a woodland setting.
Need inspiration for materials? I’ve had fantastic luck finding unique, affordable glass gems and broken plates at thrift stores—it’s a sustainable way to craft! Sea glass, broken mirror pieces (use caution!), or even colorful pebbles from a craft supply store all make wonderful mosaic elements. The more varied the materials you use, the richer the final texture will be.
As with any DIY project, you might hit a snag, but they are all fixable. If you notice tiles popping out, it usually means the concrete was too dry or you waited too long during the tiling window. Just pull the tile, smear a little fresh cement on the back, and re-embed it firmly. If you spot fine cracks in the grout, it was likely mixed too thin; simply clean out the cracked section and re-grout using a thicker mix. Finally, if your whole stone crumbles, the concrete ratio was off—time to start a new, smaller test batch.
Wrap Up
There’s nothing quite like the feeling of carefully carrying your newly sealed, shimmering mosaic stone out to the garden path for the very first time. You’re not just placing a piece of decor; you’re installing a handcrafted landmark that tells a story. Every tiny piece of glass, tile, or stone you placed will catch the light and add that unique personality I talked about earlier, transforming a simple walkway into an artistic journey.
This is a project that yields beautiful, lasting results, and the learning curve is surprisingly gentle. My hope is that the detailed steps here have demystified the process, giving you the confidence to dive in, get a little messy with the concrete, and get creative with the mosaics. The greatest reward is seeing something beautiful emerge from a pile of simple, raw materials.
Now that you have the knowledge, it’s time to start planning your first masterpiece! Pick a mold, choose your colors, and get mixing. I’d love to see the creative designs you come up with—show us your finished mosaic stepping stones in the comments below! Or, if you’re looking for ideas for your next project, share your favorite design!