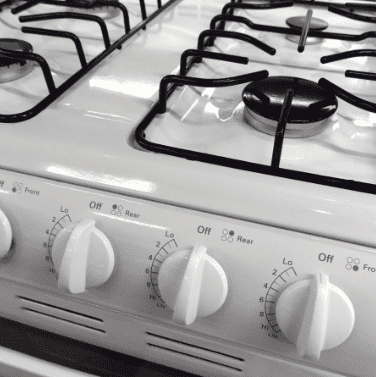
What Temperature Does Simmer 1-10 Correspond to on the Stove?

Cooking has always been a fascinating adventure for me. From experimenting with flavors to creating mouthwatering dishes, there’s an undeniable joy in whipping up something delicious. One of the key techniques that every home cook should master is simmering. Simmering is like the gentle lullaby of cooking – it’s that slow and steady dance that transforms raw ingredients into a harmonious symphony of flavors.

But there’s a catch: simmering isn’t a one-size-fits-all endeavor. The stovetop, our trusty kitchen companion, has its own language, the 1-10 heat setting scale, which it uses to communicate the intensity of heat. In this culinary journey, I’m diving deep into the bubbling cauldron of simmering and deciphering the enigmatic code of the 1-10 scale.

Understanding the 1-10 Simmer Scale

Picture this: you’re standing in front of your stove, ready to embark on a culinary masterpiece. You set your pot to simmer and turn the knob to, say, 3. But what does that number even mean? Is it some secret code that only the stove understands? Well, not exactly. The 1-10 heat setting scale is a common feature on stoves, a visual representation of the intensity of heat. But here’s the tricky part: this scale isn’t universal. It’s like every stove speaks its own dialect of simmer.

Why does this matter? Imagine trying to learn a dance routine in a language you don’t understand. You might get the basic moves, but you’ll struggle to truly master the art. Similarly, knowing the approximate temperature range for each number on the 1-10 scale is like having subtitles for your simmering experience. It helps you get consistent results, which is a game-changer when it comes to cooking.

Simmer Level Breakdown

Let’s get down to the nitty-gritty of simmering – the numbers themselves. Buckle up, because we’re diving into the simmer rabbit hole:

  • Simmer Level 1: This is the gentlest of simmers, akin to a cozy nap for your ingredients. You’ll notice slight movement, but no bubbles. This is perfect for delicate sauces that need a little TLC. The temperature hovers around 165-175°F (74-80°C).
  • Simmer Level 3: At this stage, you’ll start seeing small bubbles occasionally. It’s like the simmer is giving you a friendly wink. It’s ideal for soups and stews that need time to mingle and develop flavors. We’re looking at roughly 205-210°F (96-99°C).
  • Simmer Level 5: Here’s where things get a bit more animated. You’ll see consistent but not aggressive bubbling. This is your go-to for simmering grains like rice and quinoa. Temperature-wise, think around 220-225°F (104-107°C).
  • Simmer Level 7: The simmer has turned into a quiet simmering symphony, with more pronounced bubbling. This level is perfect for heartier dishes that need a longer cooking time, like chili or braised meats. We’re now in the neighborhood of 230-235°F (110-113°C).
  • Simmer Level 10: This is the grand finale of the simmering spectrum. It’s not boiling, but the bubbles are large and active. This is your secret weapon for reducing sauces and achieving that perfect consistency. The thermometer reads approximately 240-250°F (116-121°C).

Factors Influencing Simmer Temperatures

Now that we’re simmering with knowledge, let’s talk about the wild cards that can affect simmering temperatures. Your pot’s material, size, and shape can all have a say in the simmer’s dance routine. Think of it like different dancers performing the same choreography – they’ll each bring their own style to the stage. Oh, and don’t forget about altitude. If you’re high up in the mountains, your simmering experience might be a bit more laid-back due to the lower boiling point at higher elevations. So, when in doubt, trust your instincts and be ready to adjust that dial.

Tips for Successful Simmering

Mastering the art of simmering isn’t just about understanding numbers – it’s about tapping into your inner kitchen maestro. Here are a few tips to help you keep the simmer alive:

  • Visual Cues: Use the simmering performance as your visual cue. Bubbling and the occasional wisp of steam are like the simmer’s way of saying, “I’m still here!”
  • Check and Adjust: Just like you wouldn’t leave a toddler unattended, don’t abandon your simmer. Check the heat periodically and adjust as needed to avoid boiling over.

Using Thermometers for Precision

Ah, the trusty kitchen thermometer – your culinary compass. When you’re aiming for precision, a thermometer is your BFF. For simmering, inserting the thermometer into the liquid gives you an accurate reading of the temperature. Generally, aim for a range of 180-205°F (82-96°C) for a gentle simmer, and 200-212°F (93-100°C) for a more active one.

Converting Simmer Levels Across Stoves

So, you’ve become a simmering virtuoso on your stove, but then you’re faced with a new kitchen, a new stove, and that dreaded unfamiliar 1-10 scale. Fear not! I’ve got a little hack for you. While each stove speaks its own simmer language, there’s a way to make them understand each other. Think of it as the universal translator for simmering: you can roughly estimate the corresponding numbers by multiplying or dividing. For example, if you’re a pro at simmer level 3, it might translate to about level 6 on a different stove. It’s not a perfect science, but it’ll keep you simmering smoothly.

Conclusion

Simmering isn’t just a cooking technique – it’s a culinary journey filled with mystery, magic, and a touch of science. Understanding the 1-10 scale on your stove is like deciphering the secret code to the simmering universe. Armed with this knowledge, you’re now equipped to whip up sauces, stews, and soups that would make any chef proud.

So, go forth and simmer with confidence. Embrace the bubbles, relish the aromas, and dance your way to culinary perfection. And remember, the kitchen is your playground – keep experimenting, keep learning, and keep delighting in the symphony of flavors you create. If you’re hungry for more culinary wisdom, don’t hesitate to explore other cooking-related articles. Happy simmering!

Leave a Comment