
Spring has sprung! With the arrival of warmer weather and blooming flowers, there’s a natural desire to bring the vibrant energy of the outdoors into our homes. One of the simplest ways to achieve this is by creating a beautiful spring centerpiece for your table.
Centerpieces not only add a festive touch to your gatherings but also help set the tone for a meal. The best part? You don’t need to be a floral arranging expert to create stunning centerpieces. Here are 21 easy and lovely spring centerpiece ideas that are perfect for any occasion:
1. Blooming Bulb Garden: Witness the Magic of Gradual Growth
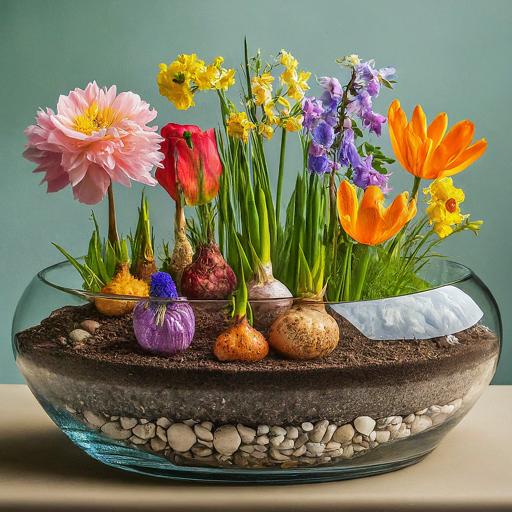
This centerpiece is a gift that keeps on giving.
Materials:
- A clear glass bowl (choose a size that complements your table)
- Potting soil
- A selection of spring-flowering bulbs like hyacinths, tulips, or daffodils (choose colors that suit your taste)
- Moss or decorative pebbles (optional)
Step-by-Step Instructions:
- Fill the glass bowl about halfway with potting soil.
- Gently plant your chosen spring bulbs according to their recommended depth (refer to the bulb packaging for specific instructions).
- Once all the bulbs are planted, add a layer of moss or decorative pebbles to the top of the soil for a finished look.
- Place your blooming bulb garden in a well-lit location and water it regularly according to the needs of the bulbs.
The beauty of this centerpiece lies in witnessing the gradual growth process. Within a few weeks, you’ll be rewarded with stunning blooms emerging from the soil, adding a touch of springtime magic to your table.
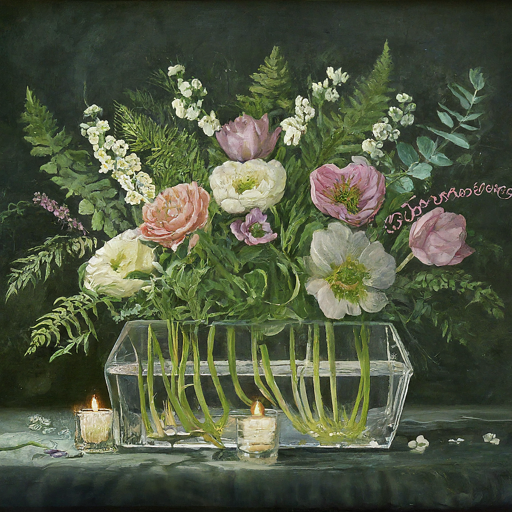
2. Mason Jar Magic: Simple Elegance in a Rustic Vessel
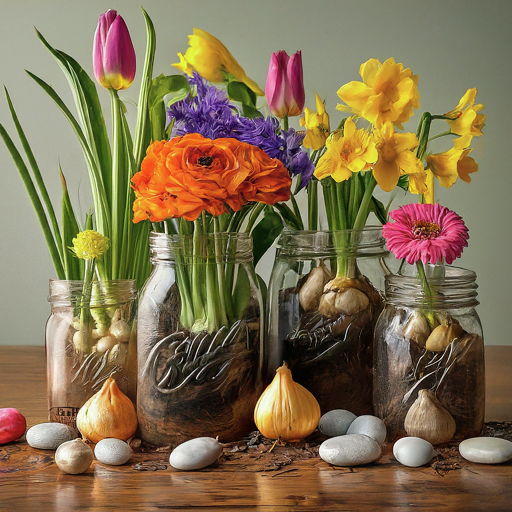
Mason jars are a versatile and budget-friendly option for creating a charming centerpiece.
Materials:
- Several mason jars in different sizes (or all the same size, depending on your preference)
- A variety of spring flowers like daffodils, ranunculus, or freesias (choose colors that complement each other)
- Fresh water
- Decorative ribbon (optional)
Step-by-Step Instructions:
- Fill each mason jar with clean water.
- Arrange your chosen flowers in the mason jars, ensuring the stems are submerged in the water. You can get creative with the arrangement, using a single flower per jar or creating a more clustered look.
- For an extra touch, tie a decorative ribbon around the neck of each mason jar.
This centerpiece is incredibly easy to customize. Use different colored mason jars or wildflowers from your garden for a unique touch. The beauty of mason jars lies in their simplicity and elegance, making them a perfect vessel for showcasing the delicate beauty of spring flowers.
3. Rustic Wreath Centerpiece: A Touch of Nature’s Charm
Embrace the natural beauty of spring with this rustic wreath centerpiece.
Materials:
- A grapevine wreath (you can find these at craft stores or garden centers)
- A selection of spring flowers like lilies of the valley, violets, or pansies
- Floral wire
- Decorative accents like small bird nests, butterflies, or artificial eggs (optional)
Step-by-Step Instructions:
- Secure your chosen flowers to the grapevine wreath using floral wire. For a more natural look, tuck the stems into the crevices of the wreath.
- Once you’ve arranged the flowers to your liking, you can add decorative accents like bird nests, butterflies, or artificial eggs to further enhance the rustic charm.
4. The Citrus Celebration: A Burst of Color and Refreshment
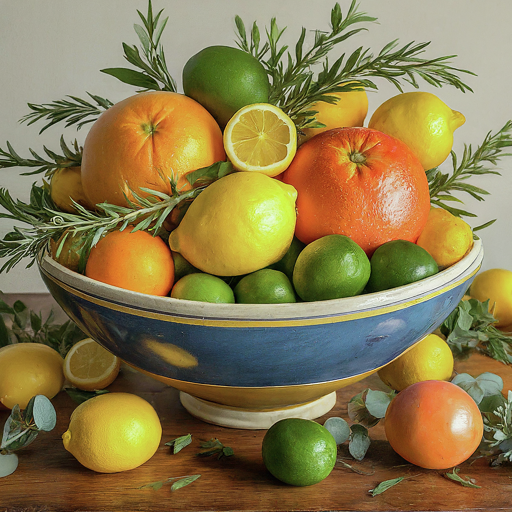
This centerpiece is perfect for a light and airy spring brunch.
Materials:
- A selection of floating candles (choose various heights and colors for visual interest)
- Lemons, limes, and oranges (choose a mix or use just one type of citrus)
- A shallow bowl filled with clean water
Step-by-Step Instructions:
- Fill the shallow bowl with clean water.
- Gently float the candles in the water, arranging them for a balanced look.
- Slice the citrus fruits into thin rounds. You can use a knife or a mandoline for even slices.
- Float the citrus slices in the water around the candles, creating a colorful and refreshing display.
This centerpiece is not only visually appealing but also adds a delightful citrusy aroma to your table. The vibrant colors of the citrus fruits are sure to brighten up your space and add a touch of spring cheer.
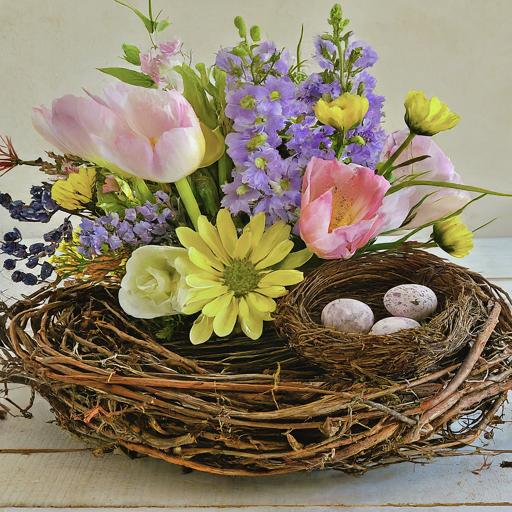
5. Nest & Egg Extravaganza: A Playful Easter-Themed Centerpiece
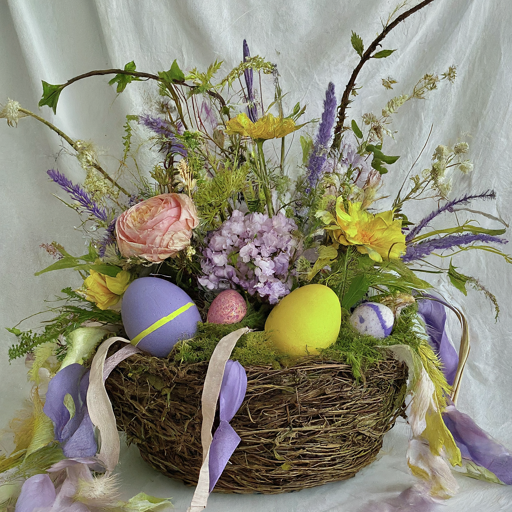
Celebrate the springtime tradition of Easter with this adorable centerpiece.
Materials:
- A bird’s nest (you can use an artificial nest from a craft store or a real nest if following local regulations regarding bird habitats)
- Colorful Easter eggs (dyed or decorated according to your preference)
- Feathers in various colors and sizes
Step-by-Step Instructions:
- Place the bird’s nest in a shallow dish or decorative plate.
- Arrange the Easter eggs around the nest, creating a colorful cluster.
- Tuck a few feathers into the nest and scatter some around the base of the dish for added texture and visual interest.
This playful centerpiece is perfect for an Easter brunch or any spring gathering. It’s a fun way to incorporate traditional Easter elements into your table decor and is sure to be a conversation starter among your guests.
6. The Candlelit Garden: A Romantic and Elegant Ambiance
Create a soft and romantic atmosphere with this candlelit garden centerpiece.
Materials:
- Pillar candles in various heights and colors (choose colors that complement your table setting)
- A decorative tray
- Moss (real or artificial)
- A selection of spring flowers like roses, tulips, or hyacinths
Step-by-Step Instructions:
- Arrange a layer of moss on the decorative tray, creating a bed for the candles and flowers.
- Place the pillar candles on the moss, ensuring they are spaced evenly and securely.
- Arrange the spring flowers around the candles, filling in any gaps in the moss and creating a visually pleasing composition.
The combination of flickering candlelight, lush greenery, and delicate flowers creates a truly enchanting centerpiece. This is a perfect choice for an intimate spring dinner or a special occasion.
7. The Succulent Symphony: Modern Simplicity with Low Maintenance
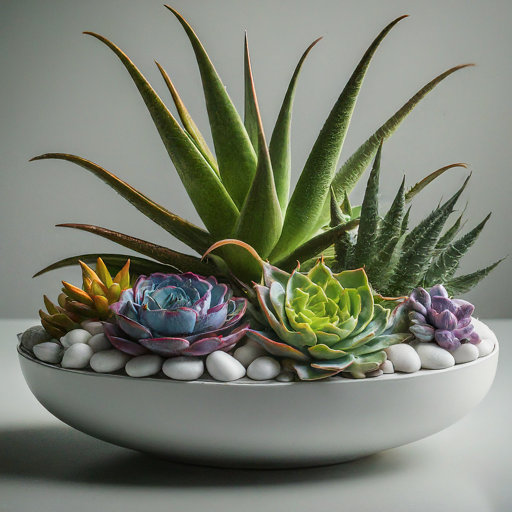
For a modern and low-maintenance centerpiece, consider the beauty of succulents.
Materials:
- A shallow dish or decorative plate
- A variety of succulent plants in different shapes and sizes
- Decorative rocks (optional)
Step-by-Step Instructions:
- Arrange the succulent plants in the shallow dish, ensuring they have enough space for growth. You can mix and match different succulent varieties for a visually interesting display.
- To add texture and visual interest, consider adding decorative rocks around the base of the succulents.
Succulents are a popular choice for centerpieces due to their unique beauty and low-maintenance requirements. They require minimal watering and can thrive indoors for extended periods. This centerpiece is a perfect choice for busy individuals who still want to enjoy the beauty of a living centerpiece on their table.
8. The Butterfly Bonanza: A Whimsical Flight of Fancy
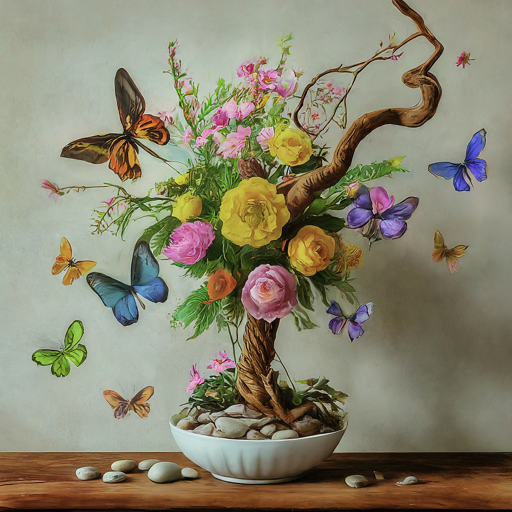
This centerpiece is perfect for a baby shower, children’s birthday party, or any occasion that calls for a touch of whimsy.
Materials:
- A decorative branch with interesting twists and turns (you can find these at craft stores or collect one from your yard)
- Artificial butterflies in various colors and sizes
- Floral wire
- Silk flowers in spring colors (optional)
Step-by-Step Instructions:
- Secure the artificial butterflies to the decorative branch using floral wire. Position the butterflies as if they are fluttering or resting on the branch.
- For added color and texture, you can weave in a few sprigs of silk flowers in spring colors like pink, yellow, or lavender.
- Place the decorated branch in a sturdy vase or decorative container filled with pebbles or sand for stability.
This whimsical centerpiece will surely capture the hearts of your guests, young and old alike.
9. The Birdhouse Bonanza: A Touch of Country Charm
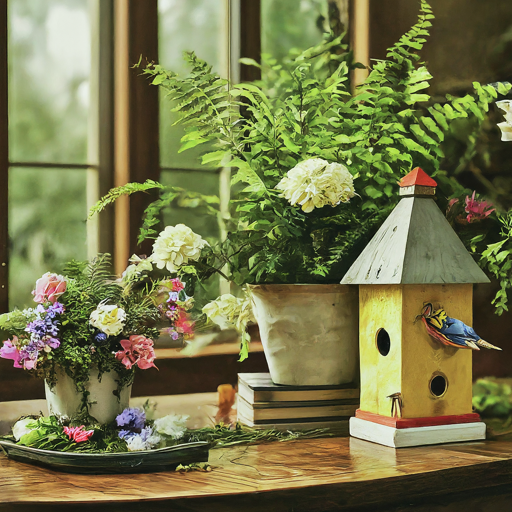
Embrace the spirit of spring with a charming birdhouse centerpiece.
Materials:
- A decorative birdhouse (you can find these at craft stores or garden centers, or even decorate a plain wooden birdhouse yourself)
- Moss (real or artificial)
- Spring flowers like pansies, violas, or forget-me-nots
- Decorative Easter eggs (optional)
Step-by-Step Instructions:
- Line the base of the birdhouse with a layer of moss, creating a bed for the flowers.
- Arrange the spring flowers around the base of the birdhouse, spilling out slightly for a natural look.
- Tuck a few decorative Easter eggs amongst the flowers for a festive touch (especially appropriate for Easter gatherings).
- Place the decorated birdhouse on a decorative plate or tray.
This charming centerpiece is a delightful way to bring a touch of the outdoors to your table.
10. The Rustic Chandelier: Recycled Elegance with a Spring Twist
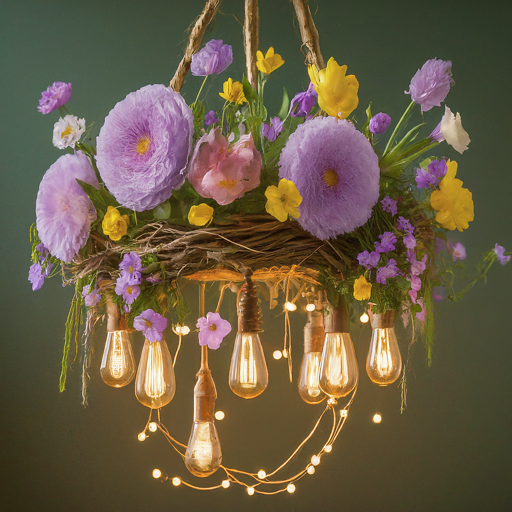
Turn recycled materials into a unique and eye-catching centerpiece.
Materials:
- A small chandelier frame (you can find these at thrift stores or flea markets)
- Twine or string
- Mason jars in various sizes (optional)
- Spring flowers like tulips, daffodils, or hyacinths
- Decorative moss (optional)
Step-by-Step Instructions:
- Clean and refurbish the chandelier frame if necessary.
- Cut twine or string into various lengths and tie them to the arms of the chandelier frame, creating a hanging effect.
- You can attach mason jars to the ends of the twine for a more rustic look, or simply tie the flowers directly to the twine.
- Arrange spring flowers in the mason jars (if using) or tie them directly to the twine, ensuring a balanced and visually pleasing arrangement.
- For an extra touch, line the base of the chandelier frame with decorative moss.
This unique centerpiece is a conversation starter and a great way to showcase your creativity.
11. The Citrus & Herb Garden: A Fragrant and Refreshing Symphony
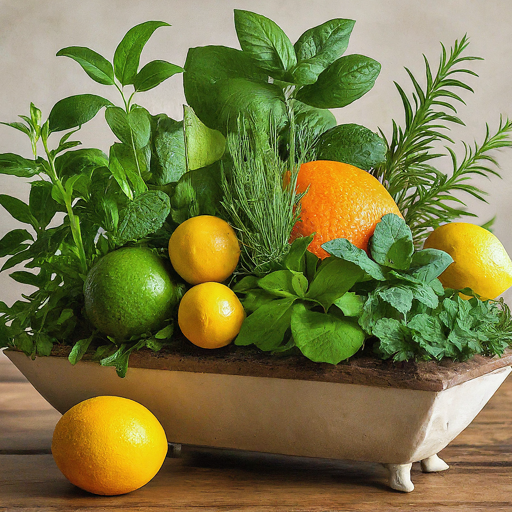
Indulge your senses with a centerpiece that combines the beauty of flowers with the refreshing aroma of herbs.
Materials:
- A shallow wooden box or decorative planter
- Potting soil
- A selection of herbs like rosemary, thyme, and mint
- Spring flowers like pansies, violets, or violas
- Decorative pebbles (optional)
Step-by-Step Instructions:
- Fill the wooden box or planter with potting soil.
- Plant a selection of herbs in the planter, ensuring they have adequate space for growth.
- Plant or arrange spring flowers in between the herbs, creating a colorful and fragrant display.
- Add a layer of decorative pebbles around the base of the plants for a polished look.
This centerpiece is not only visually appealing but also provides a source of fresh herbs for your culinary creations.
12. The Teacup Trio: A Vintage Touch with Spring Flair

Embrace vintage charm with a whimsical teacup centerpiece.
Materials:
- Three vintage teacups in various sizes and patterns (mix and match for a more eclectic look)
- Floral foam (cut to fit inside the teacups)
- Spring flowers like roses, violets, or pansies
- Decorative moss (optional)
Step-by-Step Instructions:
- Cut floral foam to fit snugly inside each teacup. Soak the floral foam in water according to the manufacturer’s instructions.
- Arrange the floral foam inside each teacup.
- Create miniature flower arrangements within each teacup using a variety of spring flowers. You can keep it simple with a single flower per teacup or create more elaborate arrangements.
- For added texture and visual interest, tuck in small pieces of decorative moss around the base of the flowers in each teacup.
- Place the decorated teacups on a decorative tray or plate, arranging them for a balanced look.
This vintage-inspired centerpiece is perfect for an afternoon tea party or a baby shower.
13. The Upcycled Basket Bonanza: A Sustainable and Charming Centerpiece
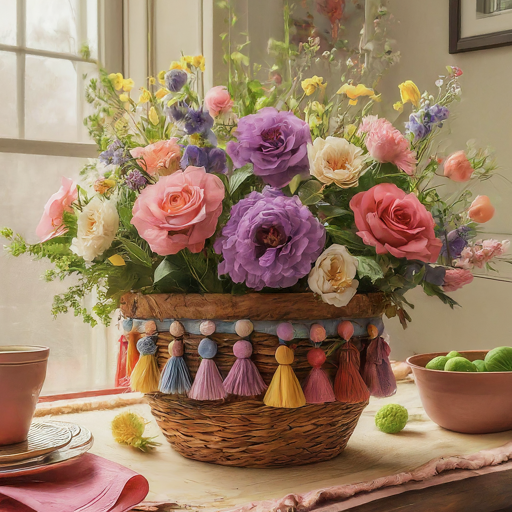
Give new life to a pre-loved basket with this creative centerpiece idea.
Materials:
- A wicker basket (thrift stores or flea markets are great places to find unique baskets)
- Decorative fabric liner (optional)
- Floral foam (cut to fit the base of the basket)
- Spring flowers in various colors and textures
- Decorative elements like ribbons, buttons, or artificial butterflies (optional)
Step-by-Step Instructions:
- Cut floral foam to fit snugly inside the base of the basket. Soak the floral foam in water according to the manufacturer’s instructions.
- Line the basket with a decorative fabric liner if desired. This will add a pop of color and prevent the floral foam from showing.
- Place the soaked floral foam inside the lined basket.
- Arrange a variety of spring flowers in the floral foam, creating a full and colorful display.
- You can add decorative elements like ribbons tied around the handle of the basket, buttons tucked amongst the flowers, or artificial butterflies fluttering around the arrangement.
This upcycled centerpiece is a fun way to showcase your eco-conscious style and creativity.
14. The Bookworm’s Delight: A Literary Springtime Escape
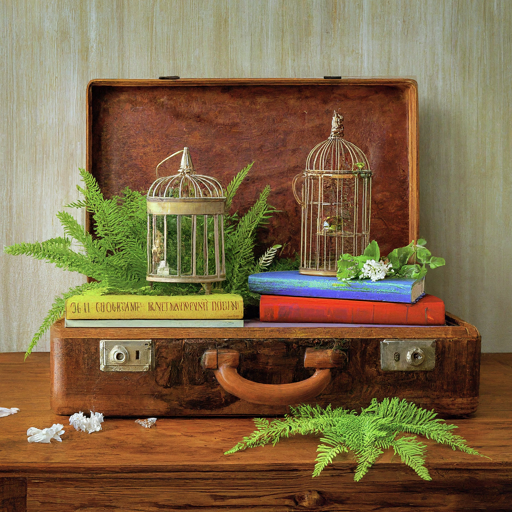
Incorporate your love of literature into a unique centerpiece.
Materials:
- Three hardcover books in similar or complementary colors (choose books that are past their prime or no longer read)
- A decorative plate or tray
- Spring flowers like lilies, roses, or tulips
- Floral foam (cut to fit the tops of the books)
- Decorative elements like vintage keys, bookends, or a miniature globe (optional)
Step-by-Step Instructions:
- Cut floral foam to fit snugly on top of each hardcover book. Soak the floral foam in water according to the manufacturer’s instructions.
- Arrange the floral foam on top of each book.
- Create miniature flower arrangements on top of each book using spring flowers.
- Place the decorated books on a decorative plate or tray, arranging them for a balanced look.
- Add decorative elements like vintage keys tucked between the books, bookends flanking the arrangement, or a miniature globe positioned beside the books for a literary touch.
This unique centerpiece is perfect for a book club gathering or a celebration of spring.
15. The Honeycomb Haven: A Buzzing with Springtime Delight
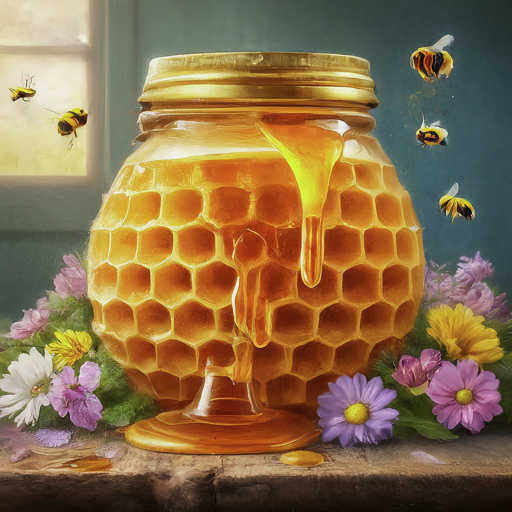
This centerpiece offers a touch of rustic sweetness.
Materials:
- A decorative beehive (real or artificial)
- A bed of shredded wood chips or decorative moss
- Spring flowers in shades of yellow, orange, and purple (mimicking the colors of wildflowers)
- Faux bees or butterflies (optional)
Step-by-Step Instructions:
- Create a bed of shredded wood chips or decorative moss on a decorative plate or tray.
- Place the beehive (real or artificial) on the bed of wood chips or moss.
- Arrange spring flowers in shades of yellow, orange, and purple around the base of the beehive, creating a colorful and natural look.
- For an extra touch, add a few faux bees or butterflies hovering around the flowers and the beehive.
This whimsical centerpiece is perfect for a spring brunch or a celebration focused on the beauty of pollinators.
16. The Rainbow Wreath: A Burst of Colorful Cheer
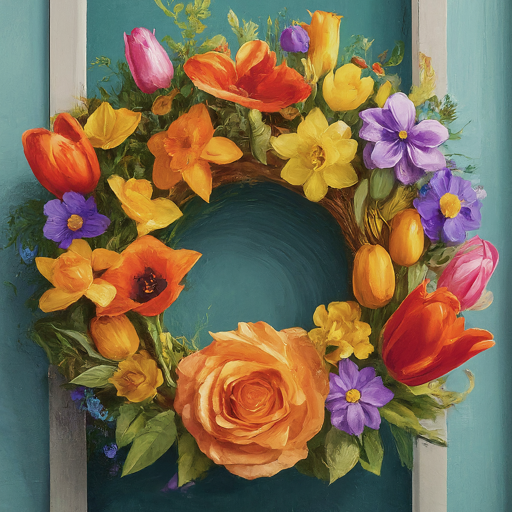
Embrace the vibrancy of spring with a rainbow-hued wreath.
Materials:
- A grapevine wreath or a foam wreath form
- Colorful yarn in various spring shades (pink, yellow, green, orange, blue, purple)
- Silk flowers in complementary colors (optional)
- Decorative ribbon (optional)
Step-by-by Instructions:
- Wrap the grapevine wreath or foam wreath form with yarn in various colors, creating a rainbow effect. You can secure the yarn with hot glue or pins.
- Once the wreath is completely covered in yarn, weave in a few sprigs of silk flowers in complementary colors for added texture and dimension.
- Tie a decorative ribbon around the top of the wreath for a finishing touch.
This cheerful centerpiece is sure to brighten up your table and add a playful touch to any spring gathering.
17. The Floating Candle Oasis: A Serene and Elegant Display
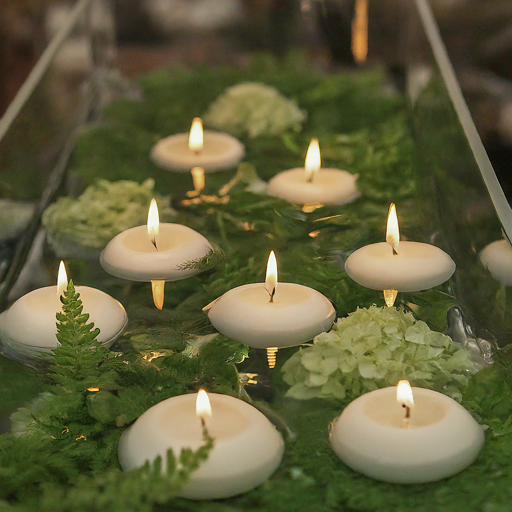
Create a calming and elegant atmosphere with a floating candle centerpiece.
Materials:
- A large glass bowl or shallow dish
- Clean water
- Floating candles in various sizes and colors
- Spring flowers with delicate stems like hydrangeas or lilies
- Decorative pebbles or glass beads (optional)
Step-by-Step Instructions:
- Fill the glass bowl or shallow dish with clean water.
- Place the floating candles in the water, arranging them for a balanced look.
- Carefully add spring flowers with delicate stems into the water, ensuring the blooms float near the surface.
- For an extra touch, scatter decorative pebbles or glass beads around the base of the floating candles and flowers.
This serene centerpiece creates a beautiful reflection of flickering candlelight and delicate flowers, perfect for an intimate dinner or a relaxing evening gathering.
18. The Spring Vegetable Patch: A Whimsical and Functional Centerpiece
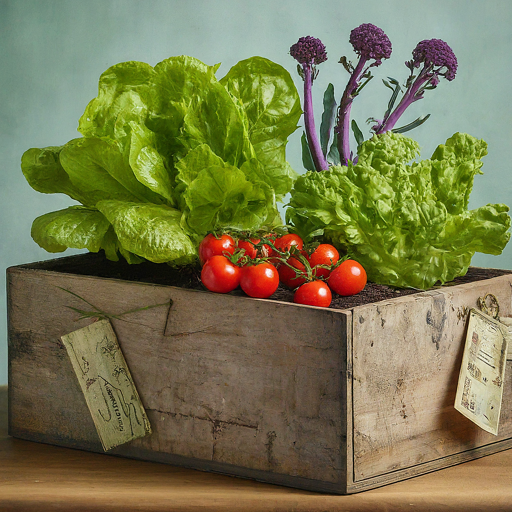
Embrace the spirit of spring with a vegetable garden-inspired centerpiece.
Materials:
- A shallow wooden box or decorative planter
- Potting soil
- A selection of spring vegetables like baby carrots, radishes, or lettuce (choose vegetables that are safe for indoor display)
- Spring flowers in complementary colors
- Decorative elements like miniature watering cans or garden tools (optional)
Step-by-Step Instructions:
- Fill the wooden box or planter with potting soil.
- Plant a selection of spring vegetables in the planter, ensuring they have adequate space for growth. You can also use pre-grown vegetables from the grocery store.
- Plant or arrange spring flowers in between the vegetables, creating a colorful and whimsical display.
- Add decorative elements like miniature watering cans or garden tools for a touch of whimsy.
This unique centerpiece not only adds a touch of springtime charm but also provides a conversation starter and a reminder of the beauty of fresh produce.
19. The Rustic Lantern Light: A Warm and Inviting Glow
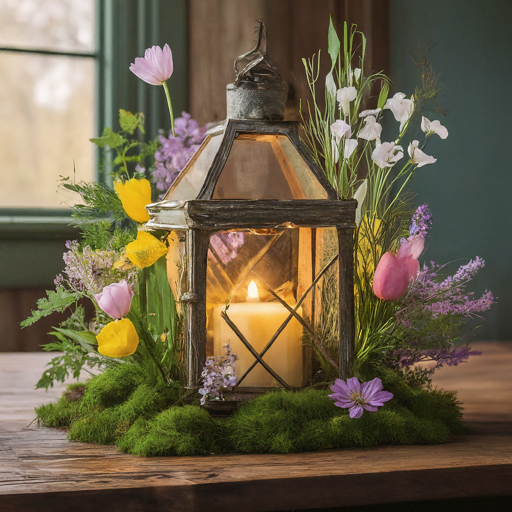
Create a warm and inviting atmosphere with a rustic lantern centerpiece.
Materials:
- A decorative lantern (metal or wood)
- A bed of shredded wood chips or decorative moss
- Pillar candles in various heights and colors
- Spring flowers like tulips, daffodils, or hyacinths
- Decorative fairy lights (optional)
Step-by-Step Instructions:
- Create a bed of shredded wood chips or decorative moss inside the base of the lantern.
- Place pillar candles in various heights and colors on the bed of wood chips or moss, arranging them for a balanced look.
- Arrange spring flowers like tulips, daffodils, or hyacinths around the base of the candles inside the lantern, adding a touch of color and fragrance.
- Light the pillar candles for a warm glow.
- For an extra touch of ambiance, weave a strand of decorative fairy lights around the base of the lantern or amongst the flowers (ensure the fairy lights are battery-operated and safe for indoor use).
This rustic centerpiece creates a warm and inviting atmosphere, perfect for an evening gathering or a romantic dinner.
20. The Feathered Nest Fantasia: A Touch of Natural Elegance
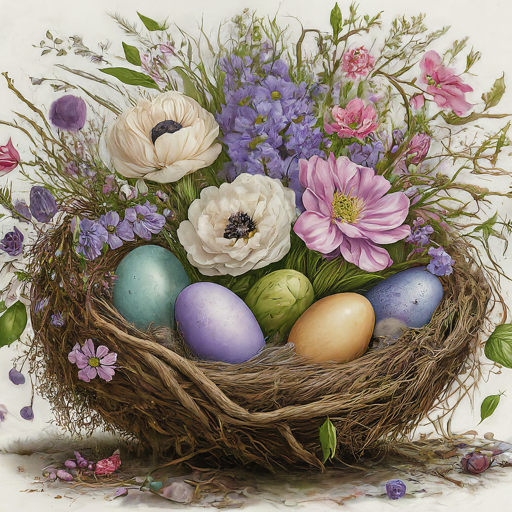
Embrace the beauty of nature with a feathered nest centerpiece.
Materials:
- A real or artificial bird’s nest
- Decorative eggs in various colors and patterns
- Twigs and branches in various sizes
- Spring flowers in soft pastel shades
- Feathers in various colors and textures
Step-by-Step Instructions:
- Place the bird’s nest on a decorative plate or tray.
- Arrange decorative eggs in various colors and patterns around the base of the nest.
- Layer twigs and branches of various sizes around the nest and eggs, creating a natural and textured base.
- Tuck spring flowers in soft pastel shades amongst the twigs and branches, adding a touch of color and softness.
- Arrange feathers in various colors and textures around the nest and throughout the arrangement, creating a whimsical and elegant display.
This centerpiece celebrates the beauty of nature and adds a touch of elegance to your spring table.
21. The Succulent & Candle Soiree: Modern Minimalism with Warmth
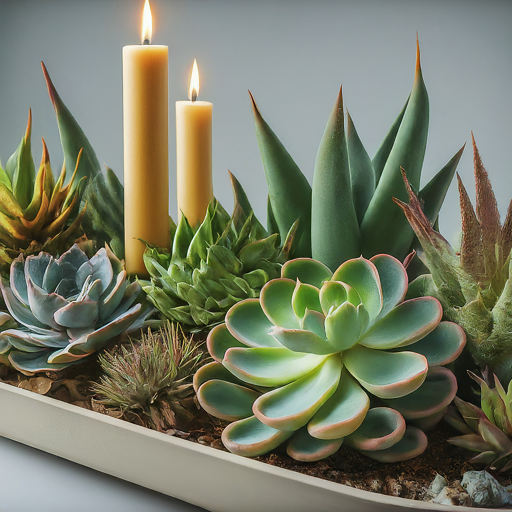
Combine the clean lines of succulents with the warm glow of candles for a modern centerpiece.
Materials:
- A shallow ceramic dish or tray
- A selection of succulent plants in various shapes and sizes
- Pillar candles in geometric shapes (cylindrical, square, etc.) and neutral colors
- Decorative sand or pebbles (optional)
Step-by-Step Instructions:
- Fill the shallow ceramic dish or tray with decorative sand or pebbles (optional). This will help anchor the succulents and candles.
- Arrange the succulent plants in the dish, ensuring they have enough space for growth.
- Place pillar candles in geometric shapes and neutral colors amongst the succulents, creating a balanced and visually interesting composition.
This modern minimalist centerpiece is perfect for those who appreciate clean lines and a touch of warmth. It requires minimal maintenance and adds a touch of sophistication to your spring table.
Wrapping Up
These 21 easy and lovely spring centerpiece ideas offer a variety of styles to suit your taste and budget. Remember, the key is to embrace your creativity and personalize these ideas to create a centerpiece that reflects your unique style. Don’t be afraid to experiment with different flower combinations, decorative elements, and container choices. You can even combine elements from various centerpieces to create a one-of-a-kind centerpiece for your spring table.
So, gather your supplies, unleash your creativity, and bring the beauty of spring to your table with one of these lovely centerpieces!