

Transforming your backyard into a beautiful and functional oasis doesn’t have to break the bank. In recent years, DIY outdoor projects have surged in popularity, with homeowners embracing creative and cost-effective solutions. One such trend involves utilizing a readily available and versatile material: pallets.
Pallets offer a plethora of benefits for building fences. They are incredibly affordable, often free or available for a minimal cost. They are also eco-friendly, giving new life to discarded materials. Additionally, pallets provide a sturdy base for constructing fences, and their natural wood aesthetic adds a touch of rustic charm to any outdoor space.
But the true magic of pallet fences lies in their incredible versatility. With a little creativity and some basic DIY skills, you can create a fence that perfectly complements your style and fulfills your backyard needs. This blog showcases 11 amazing pallet fence ideas guaranteed to inspire you and transform your yard.
1. The Classic Vertical Pallet Fence: Simple Elegance
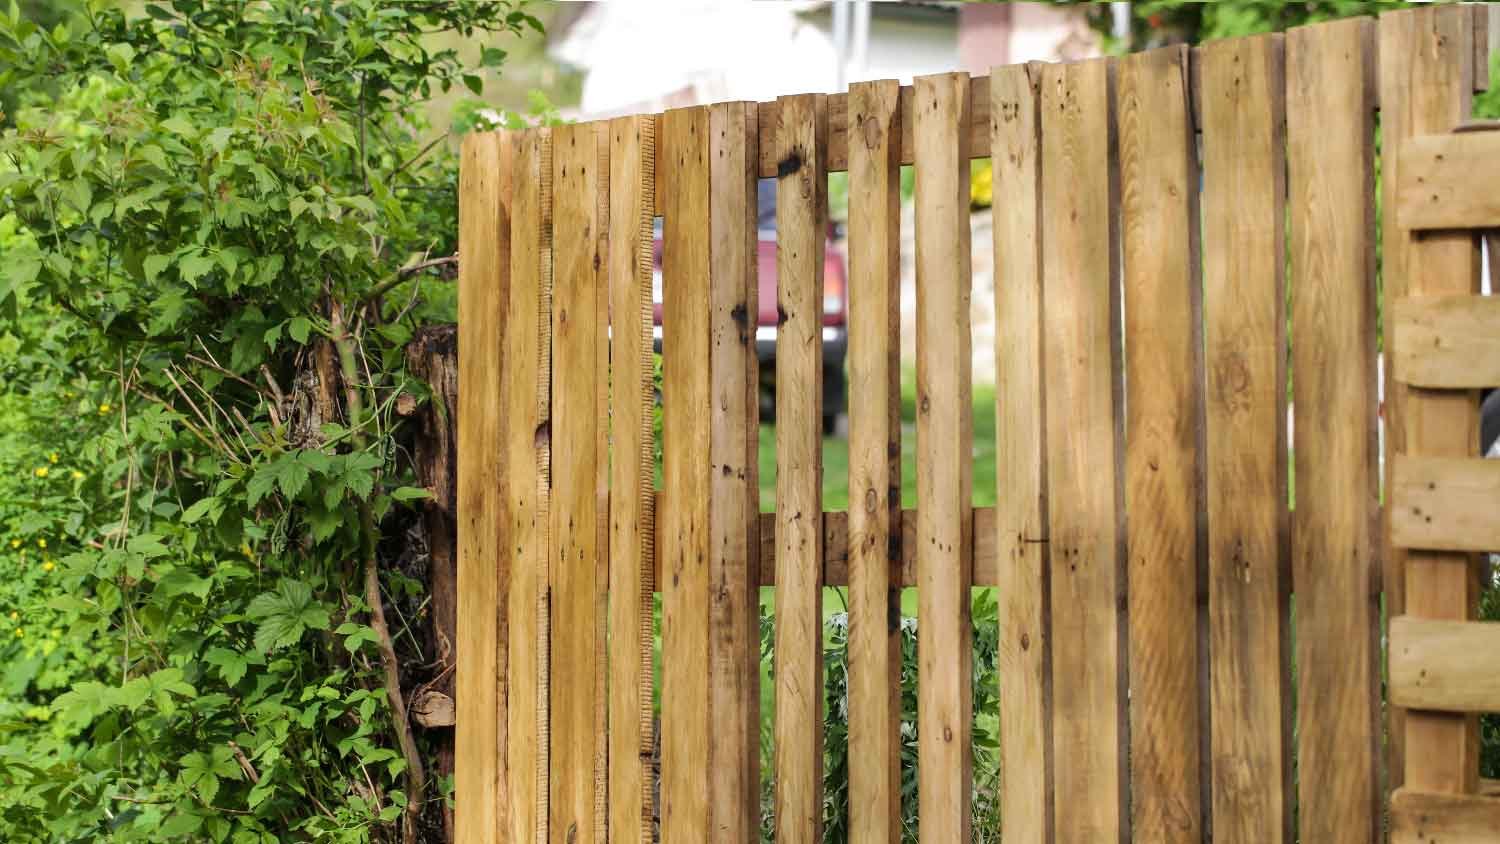
The classic vertical pallet fence is a timeless choice for anyone seeking a simple yet stylish addition to their yard. Its straightforward construction makes it a perfect project for beginners.
Materials:
- Pallets (number will depend on the desired fence length and height)
- Nails or screws
- Hammer or drill
- Saw (optional)
- Posts (optional, for added stability)
Steps:
- Preparation: Begin by inspecting your pallets. Remove any loose nails or protruding staples for safety reasons. You may also want to sand down any rough edges for a smoother finish.
- Sizing: Decide on the desired height of your fence. If some pallets are taller than needed, you can use a saw to cut them to the appropriate size.
- Assembly: Stack the pallets vertically, ensuring they are level and aligned. Secure them together with nails or screws.
- Stability: For added stability, especially for taller fences, consider attaching the pallets to wooden posts buried securely in the ground.
Customization Tips:
- Staining or Painting: Give your fence a personal touch with a coat of stain or paint. Choose a color that complements your existing outdoor furniture or creates a pop of color in your yard.
- Decorative Elements: Let your creativity shine! Climbing plants like ivy or clematis can soften the look of the fence and add a touch of greenery. String fairy lights along the fence for a magical nighttime ambiance. Add decorative signs or wind chimes for a personalized touch.
2. The Horizontal Pallet Privacy Fence: Secluded Sanctuary
If you crave a bit more privacy in your backyard oasis, the horizontal pallet fence is a fantastic option. It offers a solid barrier, blocking unwanted views and creating a secluded haven.
Materials:
- Similar materials as the vertical fence (may require more pallets depending on the desired level of privacy)
Steps:
- Frame Construction: Begin by creating a frame using the sturdier boards from the pallets. You can secure them together with nails or screws to create a rectangular structure.
- Slats Attachment: Disassemble some of the pallets, separating the individual slats. Attach these slats horizontally to the frame you built, creating a solid and visually appealing fence.
Customization Tips:
- Staggered Placement: For a unique visual effect, try staggering the placement of the slats on the frame. This adds visual interest and creates a more dynamic look.
- Decorative Toppers: Top off your fence with decorative elements. You can use cutouts from leftover pallet boards to create unique toppers, or add store-bought decorative fence posts for a finished look.
3. The Garden Pallet Fence with Planters: Functional Beauty
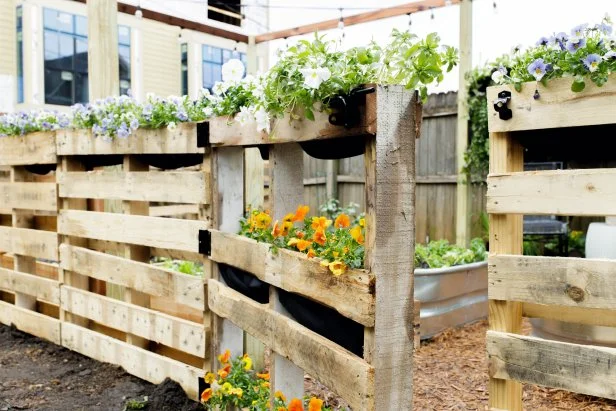
This innovative fence design combines functionality with aesthetics. By incorporating planters directly into the fence structure, you can create a space-saving vertical garden perfect for growing herbs, flowers, or even vegetables.
Materials:
- Pallets
- Liner for planters (optional, depending on chosen plants)
- Soil
- Plants
Steps:
- Planter Pockets: Decide on the placement of your planters. You can create pockets by attaching fabric liner to designated areas within the fence structure. Alternatively, utilize the natural gaps between the pallet slats for smaller plants.
- Fence Construction: Build your fence using the vertical or horizontal method outlined previously, incorporating the planter pockets into the design.
Customization Tips:
- Plant Choice: Select plants that thrive in vertical gardens. Herbs like rosemary, thyme, and basil are excellent choices. For a splash of color, consider flowering plants like petunias or pansies. If opting for vegetables, choose compact varieties that grow well in containers.
- Color Coordination: Paint your fence a color that complements the vibrant hues of your chosen plants.
4. The Pallet Herb Garden Fence: A Fragrant Oasis
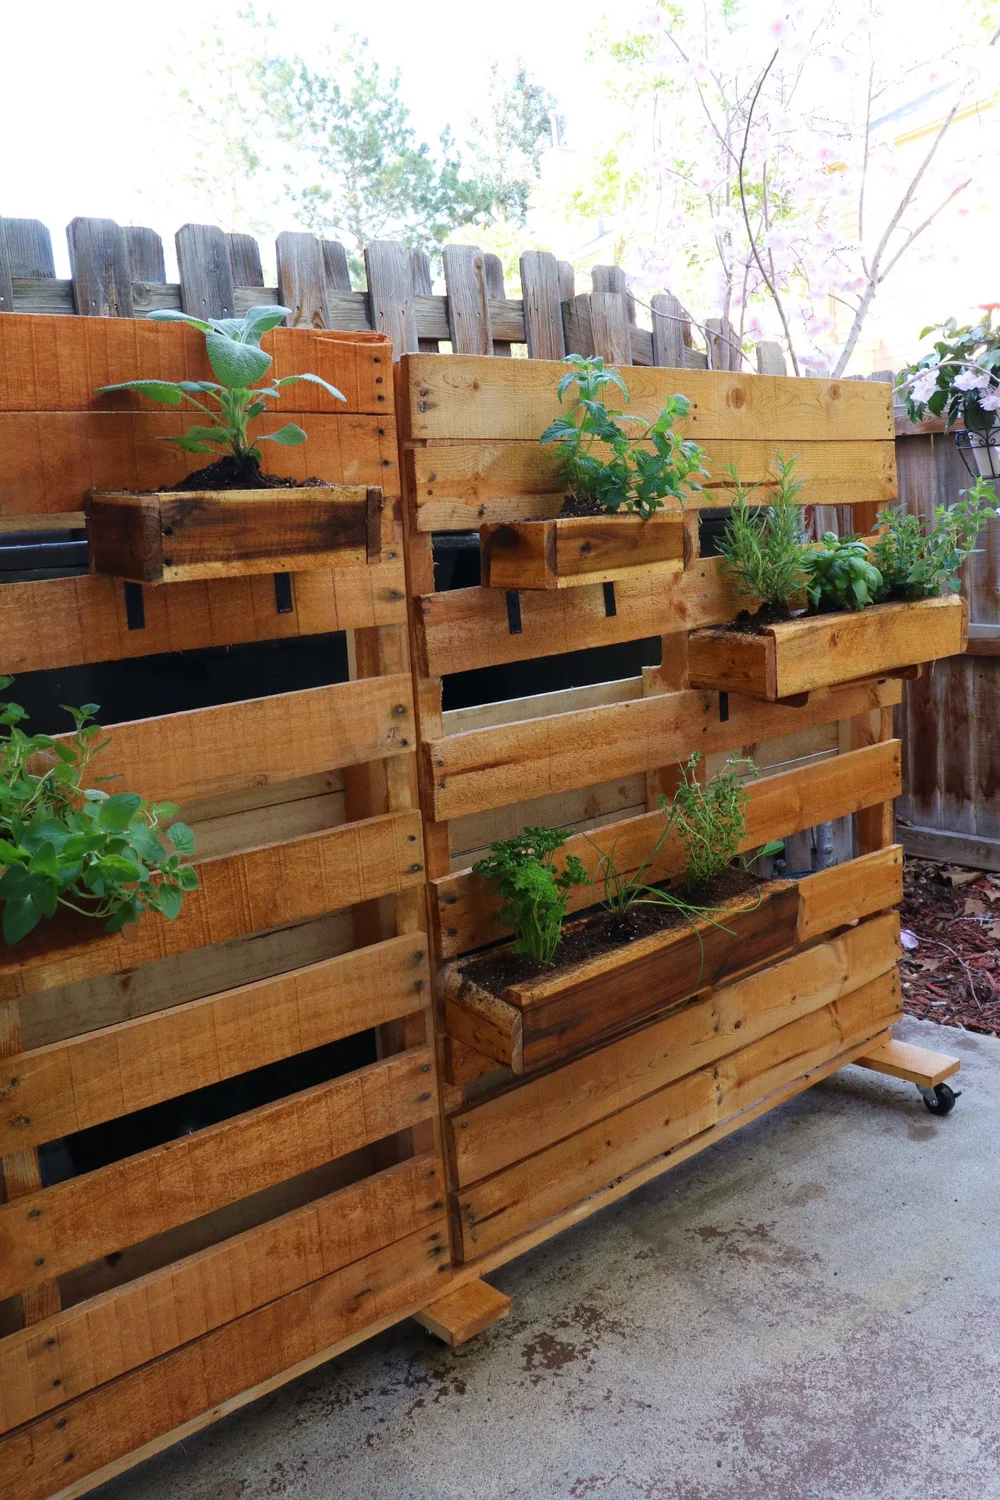
Small on space but big on flavor? The pallet herb garden fence is a space-saving solution for growing your favorite culinary herbs.
Materials:
- Pallets
- Drill
- Screws
- Containers (pots, tins, recycled containers)
- Herbs
Steps:
- Disassemble and Sanitize: Disassemble a few pallets, separating the individual boards. Sand down any rough edges and ensure all wood is clean and free of debris.
- Container Selection: Choose appropriate containers for your herbs. Recycled tins, small pots, or repurposed containers can all add a unique charm. Ensure they have drainage holes to prevent waterlogging.
- Herb Placement: Decide on the layout of your herb garden. You can create a single row of containers attached directly to the pallet boards, or stagger them for a more visually interesting design.
- Attachment: Securely attach the containers to the pallet boards using screws. Ensure they are positioned sturdily and won’t tip over with wind or watering.
Customization Tips:
- Fragrant Herbs: Select a variety of fragrant herbs to create a sensory experience in your outdoor space. Rosemary, lavender, mint, and oregano are all excellent choices for both culinary use and their delightful aromas.
- Rustic Charm: Stain the pallets with a natural wood stain to enhance the rustic aesthetic. Alternatively, paint them in a bright color to add a pop of personality to your herb garden.
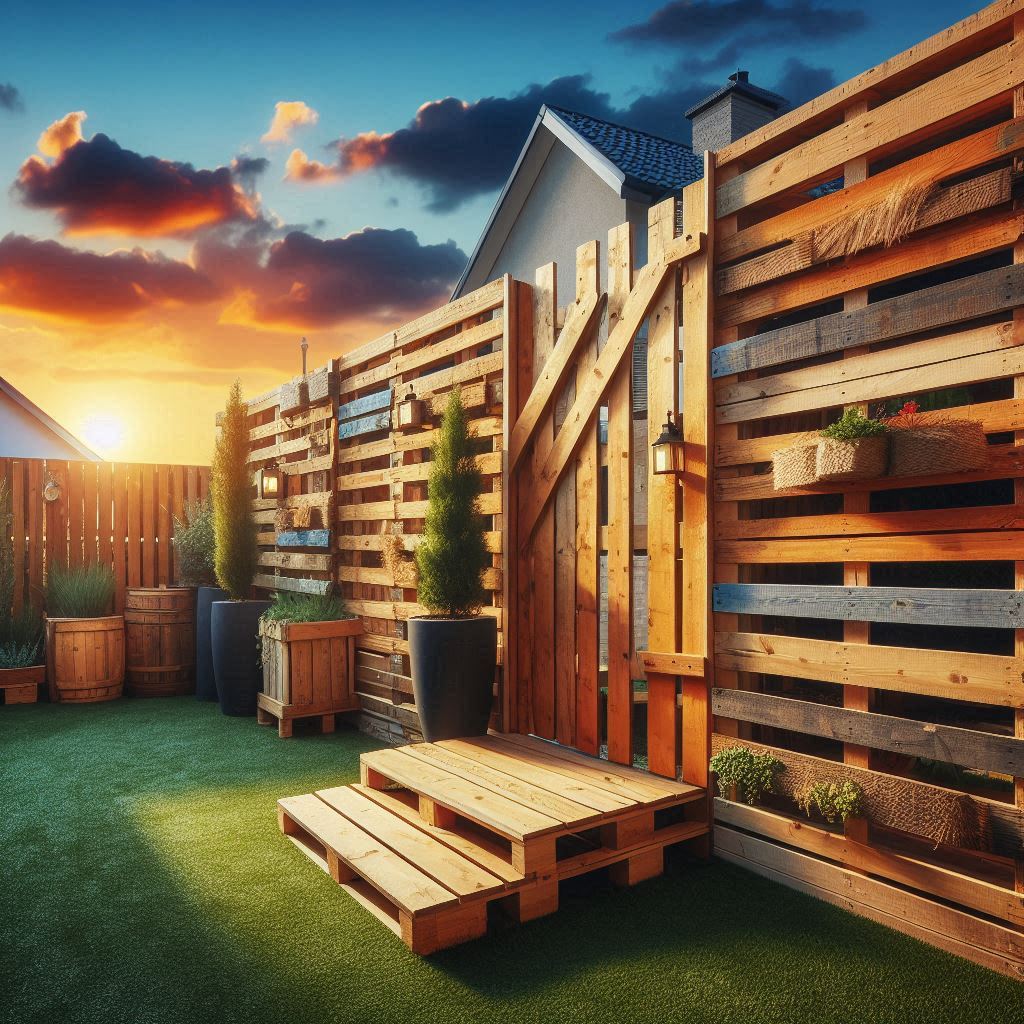
5. The Pallet Seating Fence: Multifunctionality at its Finest
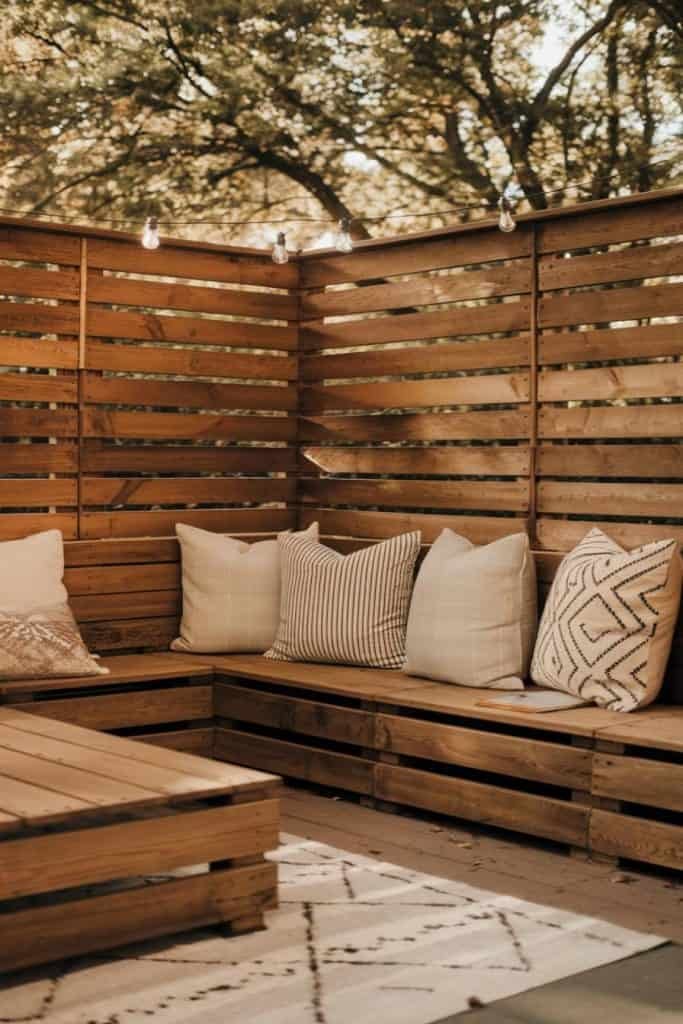
This ingenious design combines a sturdy fence with comfortable outdoor seating, maximizing space and functionality in your backyard.
Materials:
- Pallets (enough for desired fence length and seating height)
- L-brackets
- Screws
- Cushions (optional)
Steps:
- Stack and Secure: Stack the pallets on top of each other to create the desired height for your seating area. Secure them together using L-brackets at all connection points for added stability.
- Fence Extension: Continue stacking pallets to create the fence section that extends from the seating area. Ensure the fence structure is level and securely attached to the seating base.
Customization Tips:
- Comfortable Seating: Add comfort to your seating area with outdoor cushions. Choose weather-resistant cushions that complement your outdoor decor.
- Backrest Creation: For additional comfort, consider building a backrest using leftover pallet boards. Secure them vertically to the back of the seating area, creating a supportive and stylish addition.
6. The Pallet Playhouse Fence: A Whimsical Escape for Kids
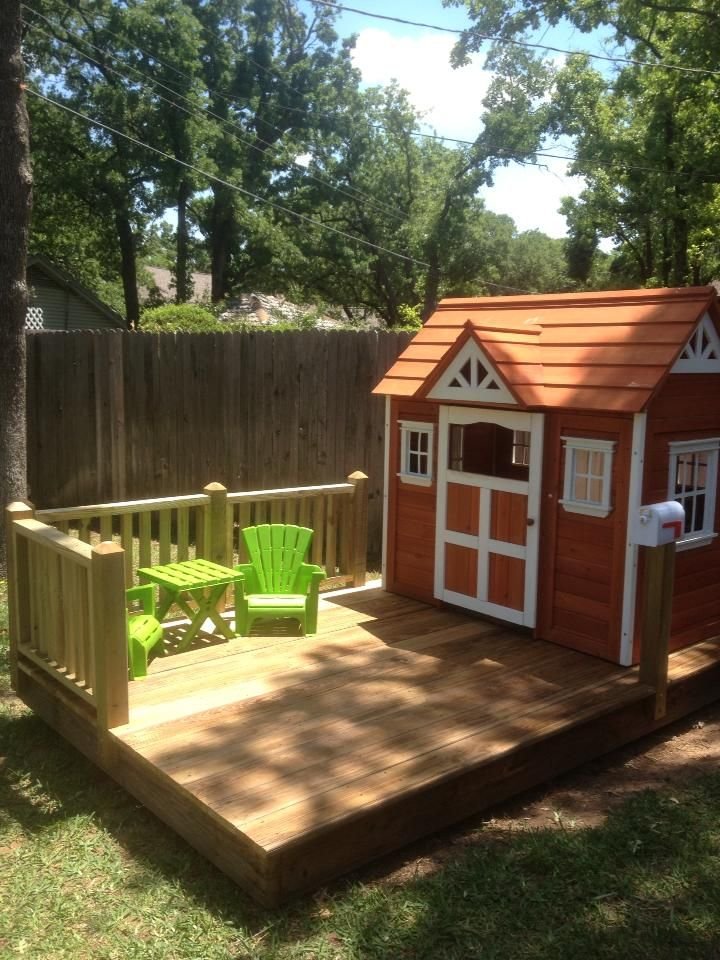
Looking to create a magical play area for your children? The pallet playhouse fence is a fun and safe DIY project that encourages imaginative play.
Materials:
- Several pallets (quantity depends on desired playhouse size)
- Nails or screws
- Hammer or drill
- Saw
Steps:
- Planning and Safety: Before construction, plan the size and layout of the playhouse. Safety is paramount. Ensure all structures are sturdy and free of splinters. Adult supervision is always necessary when children are using the playhouse.
- Basic Structure: Begin by creating a basic frame using the sturdier boards from the pallets. Secure them together to form the walls and roof of the playhouse.
- Windows and Doors: Use a saw to cut out window and door openings. Ensure the openings are large enough for children to comfortably enter and exit. Sand down any rough edges around the openings.
Customization Tips:
- Painting Fun: Let your children unleash their creativity by painting the playhouse in bright and vibrant colors. This adds a personal touch and makes the playhouse even more inviting.
- Roof Construction: For the roof, you can utilize leftover pallet boards or opt for a more weather-resistant option like a tarp or corrugated plastic sheeting.
7. The Pallet Pathway Edging: A Defined and Charming Touch
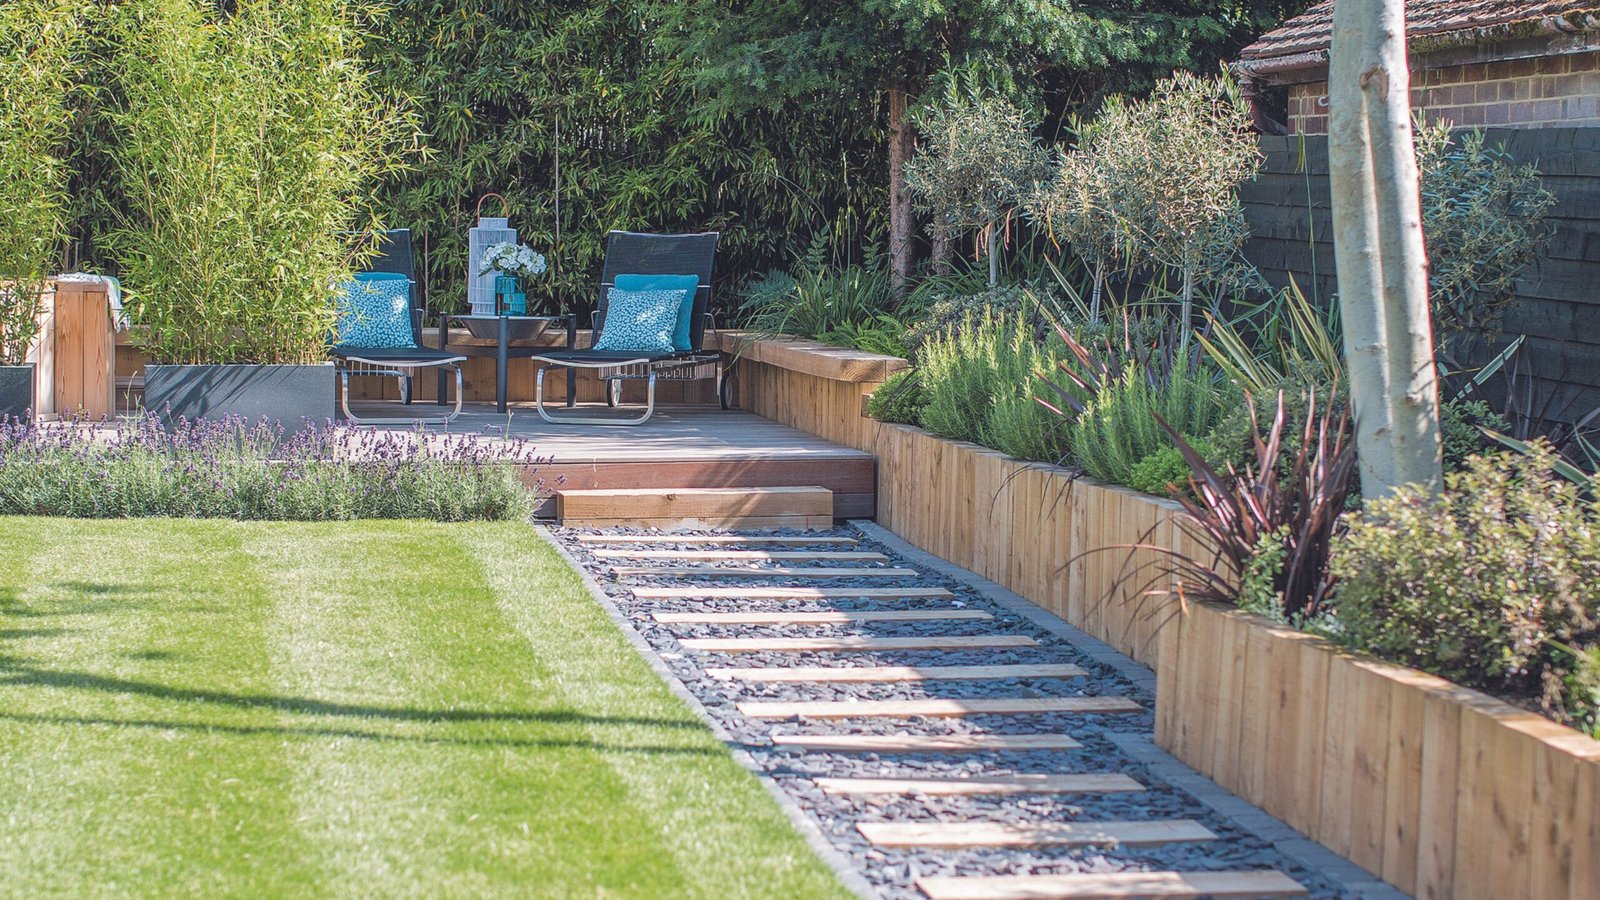
Elevate your garden paths and walkways with this simple yet effective pallet pathway edging.
Materials:
- Short pallet sections (cut to desired length)
- Weed barrier (optional)
- Gravel (optional)
Steps:
- Preparation: Cut the pallets into sections of the desired length for your pathway edging. Ensure all pieces are level and free of debris.
- Weed Barrier (Optional): If desired, lay down a weed barrier along the pathway before installing the pallet edging. This helps prevent weeds from popping up through the gaps in the pallets.
- Installation: Secure the pallet sections along the edges of your pathway. You can bury them partially into the ground for a more integrated look, or simply lay them flat on the surface.
Customization Tips:
- Integrated Look: For a seamless look, bury the pallet sections partially into the ground. Ensure the tops of the edging are level with the surrounding pathway surface.
- Drainage Enhancement (Optional): If your pathway experiences water pooling, consider adding a layer of gravel between the weed barrier (if used) and the pallet edging. This allows for better drainage and prevents the wood from rotting.
- Lighting Accents: For an extra touch of charm and nighttime visibility, consider adding solar-powered pathway lights along the top of the pallet edging.
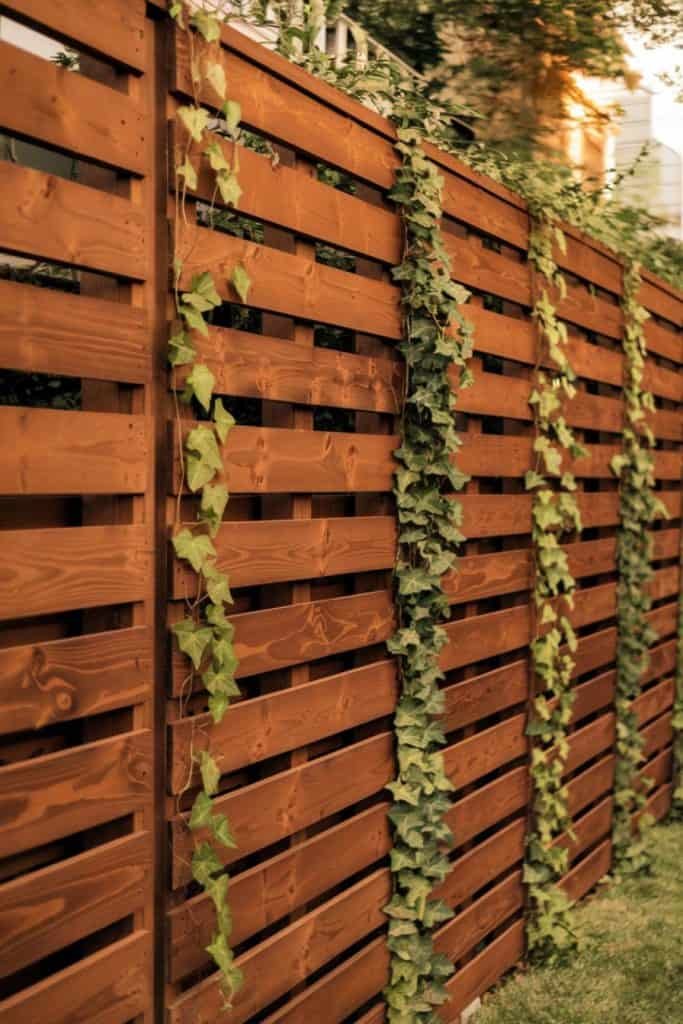
8. The Pallet Privacy Screen with Climbing Plants: A Living Wall Oasis
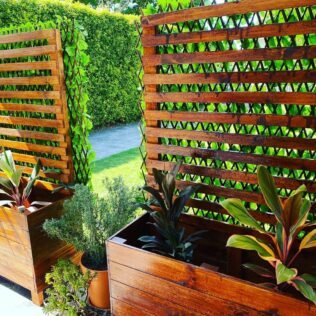
Craving privacy and a touch of nature? This innovative design combines a pallet privacy screen with climbing plants, creating a living wall that’s both beautiful and functional.
Materials:
- Pallets (enough for desired screen size)
- Landscaping fabric (optional)
- Staples (optional)
- Soil
- Climbing plants (vines, ivy, clematis)
Steps:
- Screen Construction: Build your privacy screen using the horizontal pallet fence method outlined earlier. Ensure the frame is sturdy and securely anchored to the ground (if desired) for added stability.
- Landscaping Fabric (Optional): For better weed control and moisture retention, consider attaching landscaping fabric to the backside of the screen before planting. Secure it with staples.
- Planting Pockets: Create pockets for planting by strategically cutting openings in the landscaping fabric (if used) and/or utilizing the natural gaps between the pallet slats.
- Plant Selection: Choose fast-growing climbing plants that can thrive in your climate. Vines like clematis, wisteria, or morning glories are excellent choices.
Customization Tips:
- Plant Variety: For a vibrant display, consider planting a variety of climbing plants with different flower colors and textures.
- Support Structures (Optional): Depending on the chosen climbing plants, you might need to add additional support structures like wires or trellis to guide their growth.
9. The Pallet Fire Pit Patio: A Cozy Gathering Spot
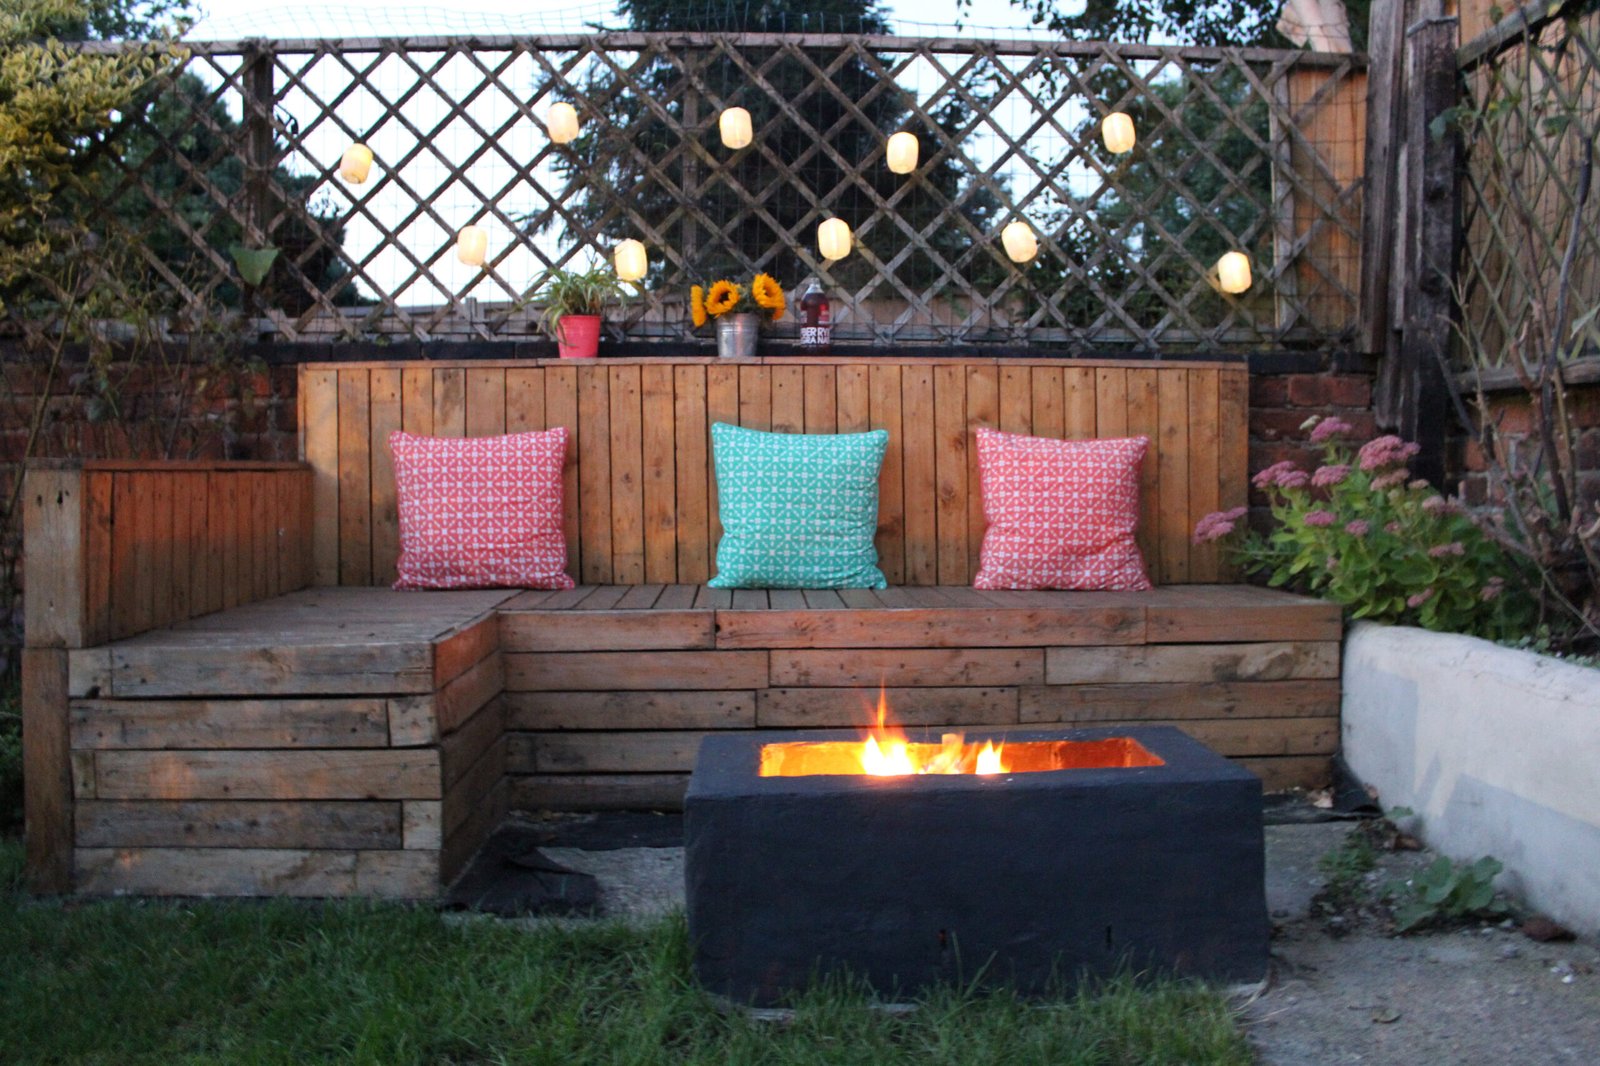
Transform your backyard into a perfect spot for cozy evenings under the stars with a rustic pallet fire pit patio.
Materials:
- Pallets (enough for desired patio size and seating)
- Fire pit (pre-made or DIY)
- Gravel (optional)
- Sand (optional)
- Patio furniture (optional)
Steps:
- Patio Base: Create the base of your patio by laying down a layer of gravel (optional) for better drainage. Ensure the area is level and clear of debris.
- Pallet Arrangement: Arrange the pallets on top of the gravel base (or directly on the ground) to create the desired patio layout. Secure them together with nails or screws for added stability.
- Seating Area: Designate a section of the pallet patio for seating. You can stack pallets to create benches or use them as a base for outdoor furniture.
- Fire Pit Placement: Position your fire pit in a safe and designated area within the patio, following all fire safety regulations.
Customization Tips:
- Sand Base (Optional): For a more comfortable walking surface, consider adding a layer of sand between the gravel base and the pallets.
- Decorative Touches: Add decorative elements like throw pillows, outdoor rugs, and lanterns to create a warm and inviting atmosphere.
10. The Pallet Sun Shade Sail Structure: Relaxing in the Shade
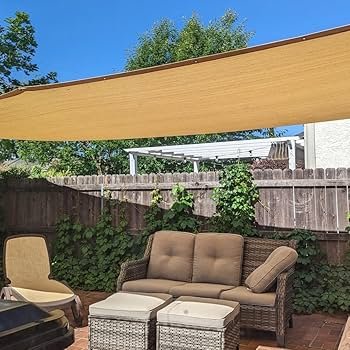
Escape the summer heat and create a cool and relaxing spot in your backyard with a pallet sun shade sail structure.
Materials:
- Pallets (enough for desired structure size)
- Shade sail fabric
- Rope or cables
- Eye bolts or hooks
- Drill
Steps:
- Post Construction: Build four sturdy posts from the sturdier boards of the pallets. Secure them firmly into the ground for stability.
- Sail Attachment Points: Attach eye bolts or hooks to the tops of the posts to create anchor points for the shade sail fabric.
- Shade Sail Installation: Secure the shade sail fabric to the anchor points on the posts using strong rope or cables. Ensure the fabric is taut and creates a comfortable shade area.
Customization Tips:
- Sail Shape and Size: Choose a shade sail shape and size that best suits your desired shade coverage and aesthetic preference. Triangle and square sails are popular options.
- Color Selection: Opt for a shade sail fabric in a color that complements your existing outdoor furniture and creates a calming ambiance.
Bonus Tip: For added functionality and visual interest, consider incorporating climbing plants like morning glories or wisteria around the base of the pallet posts. As the plants grow, they’ll twine around the structure, creating a natural and vibrant shade screen.
11. The Pallet Garden Gate: A Welcoming Entryway
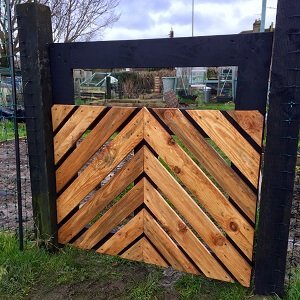
Add a touch of rustic charm and functionality to your garden entrance with a beautiful pallet garden gate.
Materials:
- Pallets (2-3, depending on desired gate size)
- Hinges
- Screws or nails
- Hardware cloth (optional)
- Gate latch
- Saw (optional)
Steps:
- Gate Design: Disassemble one or two pallets to create the frame for your gate. You can adjust the size by cutting boards with a saw if needed.
- Slats or Hardware Cloth: Choose between attaching vertical slats from another pallet to create a solid gate or using hardware cloth for a more open design that allows for some visibility.
- Gate Assembly: Secure the frame, slats (or hardware cloth), and any decorative elements together with screws or nails.
- Hinge and Latch Installation: Attach hinges to the gate and the fence post to allow for smooth opening and closing. Install a sturdy gate latch for added security.
Customization Tips:
- Decorative Touches: Personalize your gate by adding decorative elements like carved wooden signs, painted designs, or hanging planters.
- Arched Top (Optional): For a more whimsical look, consider creating an arched top for your gate by sawing the top board of the frame into a curved shape.
Finding Free or Affordable Pallets
Now that you’re brimming with ideas for your pallet fence project, you might be wondering where to find these versatile materials. Here are a few tips:
- Local Businesses: Many businesses that receive products on pallets are happy to give them away or sell them for a minimal cost. Contact local stores, warehouses, or factories to inquire about their pallet disposal practices.
- Online Marketplaces: Websites like Craigslist or Facebook Marketplace often have listings for free or cheap pallets. Be sure to check the condition of the pallets before arranging pickup.
- Construction Sites: With permission, you might be able to salvage pallets from construction sites. Ensure the pallets are structurally sound and free of hazardous materials.
Safety Considerations When Working with Pallets
While pallets offer a fantastic material for DIY projects, it’s important to prioritize safety:
- Splinters: Pallets can have rough edges and splinters. Wear gloves when handling pallets to avoid cuts and punctures.
- Sanding: Before construction, sand down any rough edges on the pallets to minimize the risk of splinters.
- Sturdy Construction: Ensure your fence project is built sturdily, especially for taller structures. Use appropriate fasteners and secure all connections to prevent the fence from collapsing.
Wrapping Up
Pallet fences offer a wealth of possibilities for transforming your backyard into a beautiful and functional space. From classic vertical fences to whimsical playhouses and space-saving herb gardens, there’s a pallet fence design to suit any need and style. With a little creativity and these inspiring ideas, you can create a unique and budget-friendly addition to your outdoor oasis. Remember, safety comes first when working with pallets. So, grab your tools, find some free pallets, and get ready to transform your backyard!
We’d also love to see your amazing pallet fence creations! Share pictures of your finished projects in the comments below and inspire other DIY enthusiasts.